
 100% Security Verified | No Subscription Required | No Malware

If you've ever scrolled social media on mute with a video in the background, you already understand how powerful captions can be. They do more than make your content accessible to more people. They convey your message more accurately, grab attention faster, and have viewers watch longer.
Canva is mostly known for its graphic design magic and social media templates, but there's so much more to it. It also comes with basic video editing tools, including a simple way to add Canva captions and subtitles to your videos.
In this article, you'll learn how to create and customize captions in Canva to enhance your video content without needing complex software or advanced editing skills.

In this article
Part 1. How to Add a Caption in Canva Manually
Canva is a browser-based tool and a mobile app for iOS and Android. The good news is that how to add subtitles in Canva is quite simple on both platforms, although the exact steps may look slightly different depending on the device you're using.
How to add subtitles to a video in Canva (Mobile)
This method is great for beginners or users already familiar with Canva's interface. It's straightforward, doesn't require any plugins, and gives you full control over how your captions look and where they appear on the screen.
Here's how to add captions to a video in the Canva mobile app:
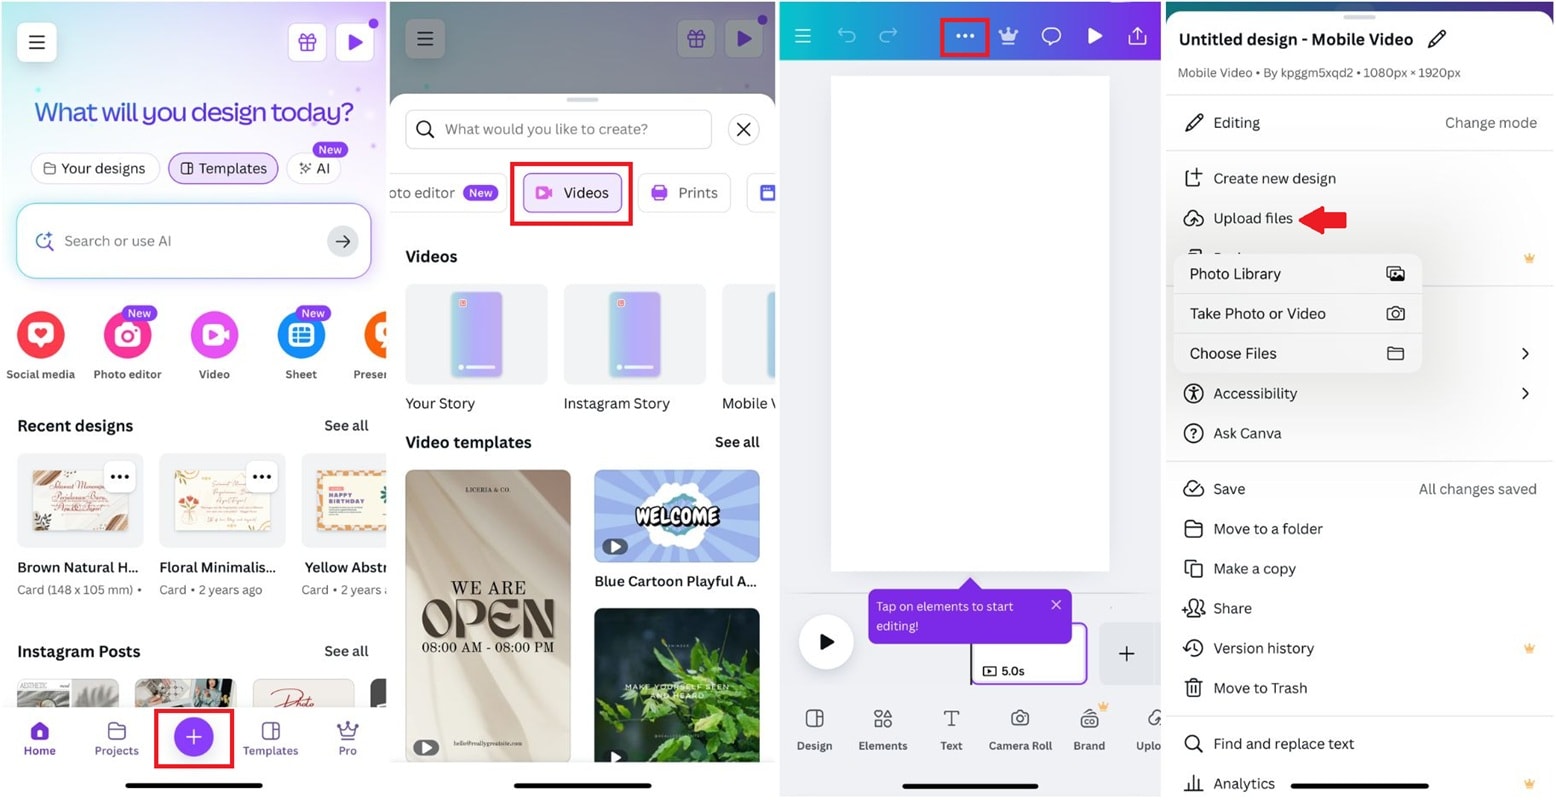
Step 1. Open the Canva app and start a new video project or open an existing one. Tap the "+" button to select the format you want.
Step 2. Click the three dots for more options, and then select "Upload Files" to import your video.
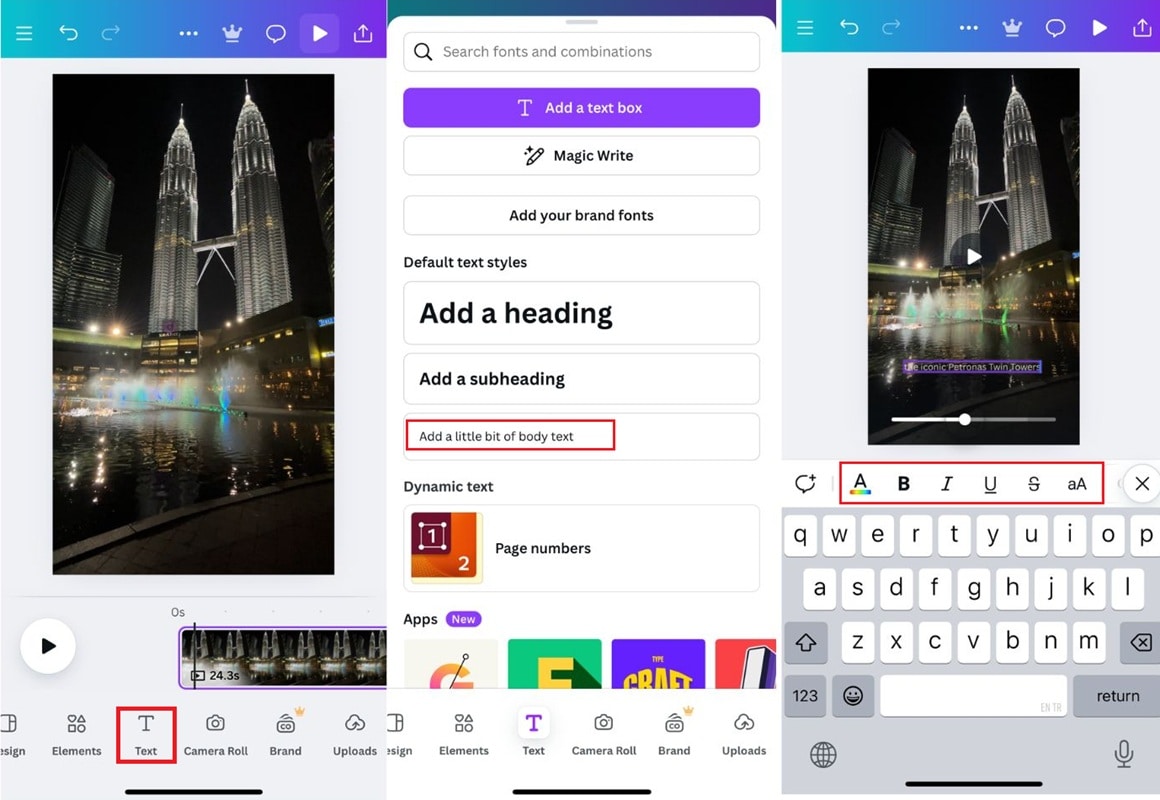
Step 3. Tap on the video in the timeline, then tap "Text" at the bottom toolbar. Choose a text style (or "Add a little bit of body text" for a simple caption) and type in your caption.
Step 4. Adjust font, color, and size as needed to ensure readability.
Step 5. Drag the caption on the timeline to match when the caption should appear and disappear.
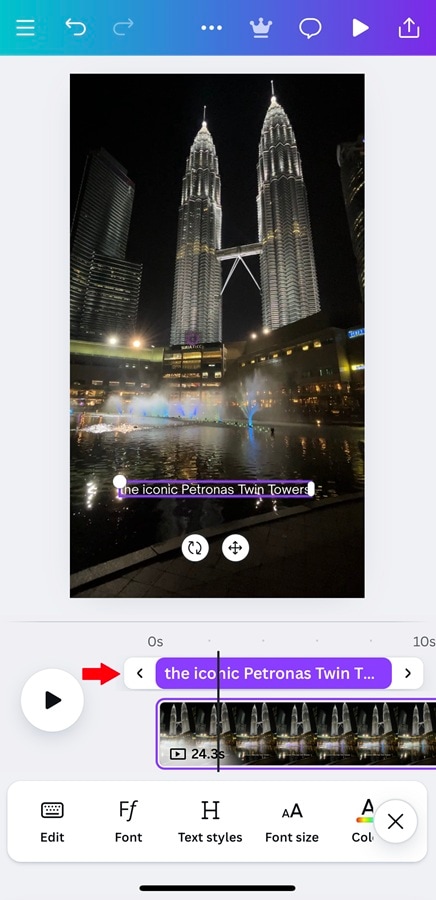
Repeat the process for each line of dialogue or section of speech in your video.
Part 2. How to Use Canva Auto Caption for Longer Videos
For users looking to speed up their editing workflow or subtitle longer videos more efficiently, Canva captions can now be generated automatically through a built-in tool on the online platform.
This feature uses AI to analyze your video's audio and create subtitles, saving you from typing everything out manually.
Currently, this auto caption tool is only available on the Canva web version, not the mobile app. But if you're editing on a desktop or laptop, it's a huge time-saver.
How to Use Auto Caption in Canva
Step 1. Go to Canva's Add Subtitles to Video feature page.
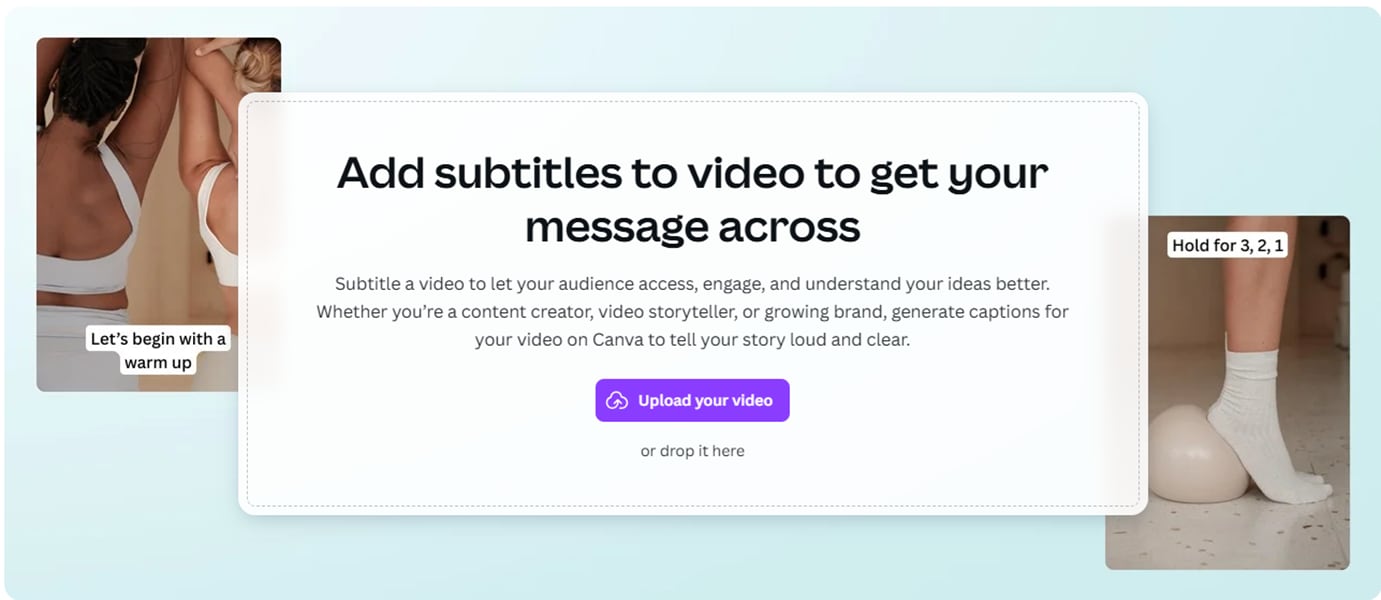
Step 2. Upload your video or select one from your existing projects. Wait a few moments to open it on the Canva desktop.
Step 3. Once your video is on the timeline, click the "Captions" tab on the left sidebar.
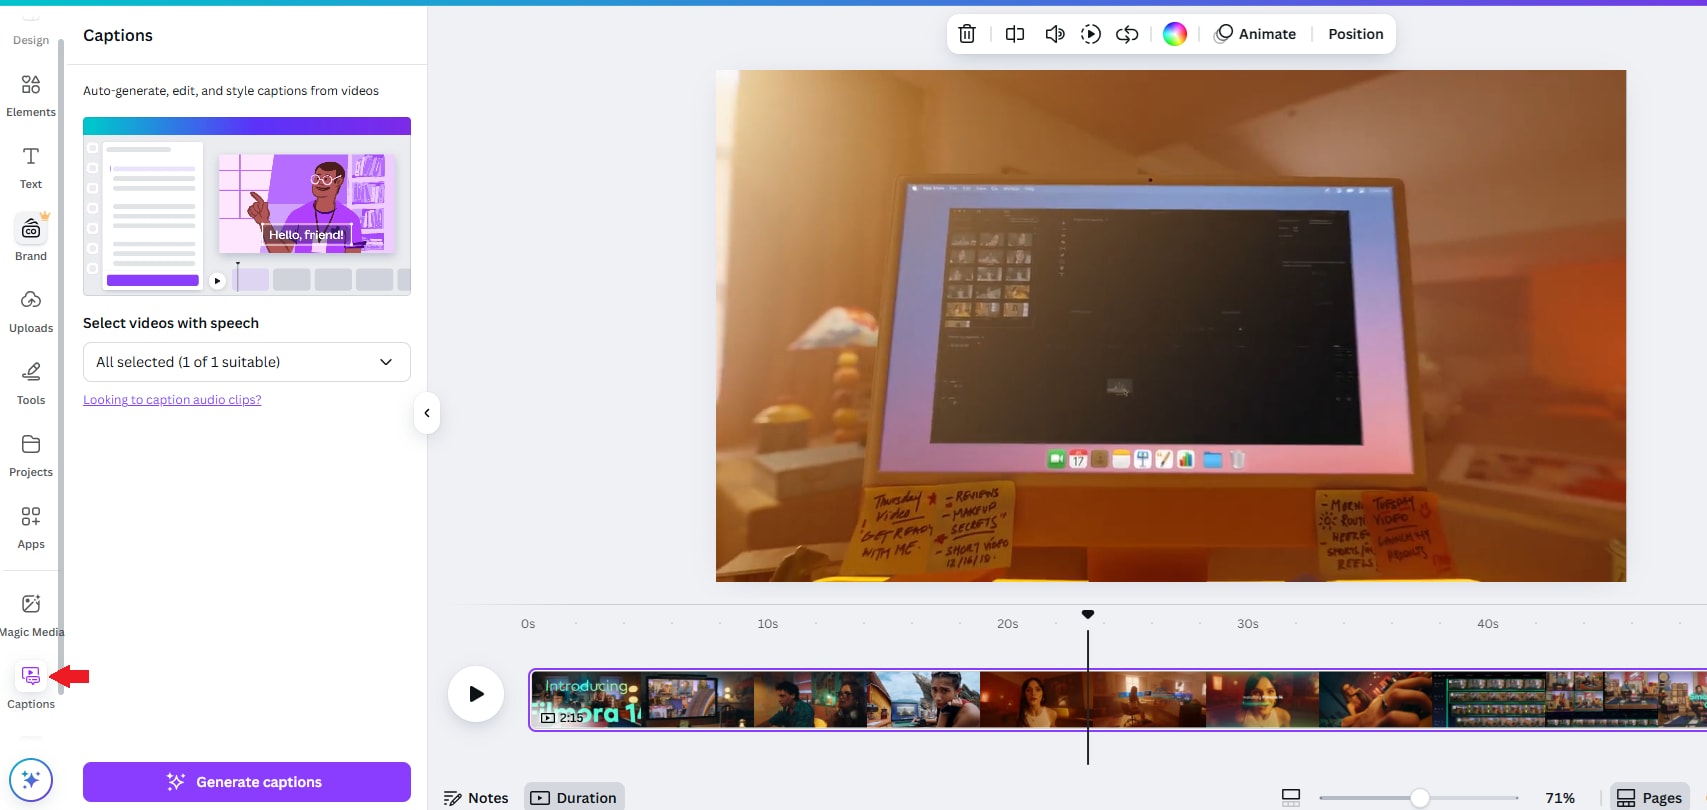
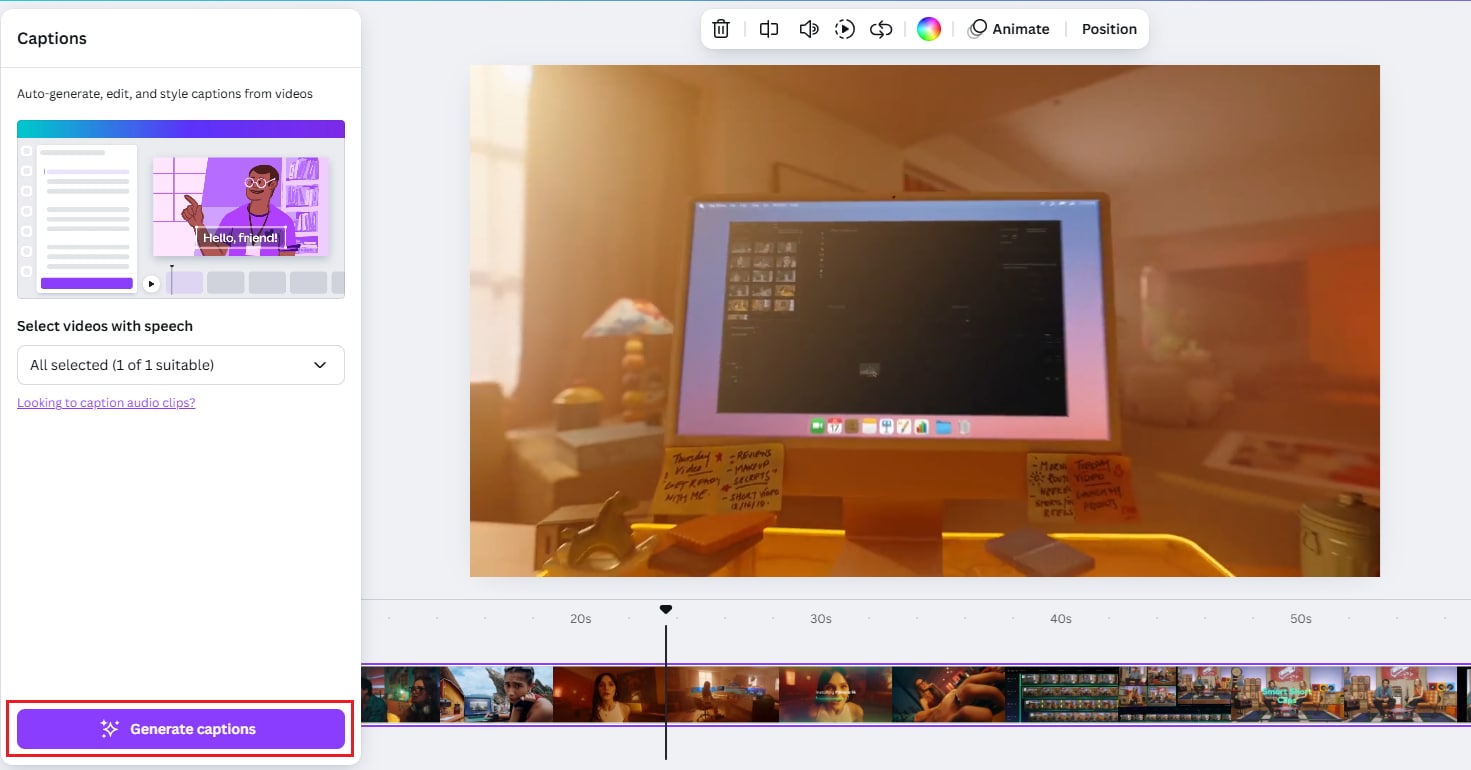
Step 4. Click "Generate Captions", and Canva will automatically transcribe the audio and place the captions on your timeline.
Step 5. Review the auto-generated text. You can edit mistakes, adjust timing, or customize the font and style.

Once you're happy with the result, export your video with subtitles included.
This option is useful for content creators, educators, and marketers who regularly work with longer videos and want to maintain accuracy while saving editing time.
Part 3. Need More Caption Power? A Better Alternative for You
As you know, Canva captions are a great starting point, especially for quick projects or social media videos, but they come with their limits. If you want more flexibility, advanced styling options, or multilingual support, you may need a tool built specifically for video editing.
Here's where Wondershare Filmora steps in as a stronger alternative. Available on both desktop and mobile, Filmora offers a full set of features designed to make captions faster, smarter, and more dynamic.
 secure download

Unlike Canva, which keeps things fairly basic, Filmora gives you:
- Auto-generate captions or subtitles accurately in 20+ languages.
- Built-in translation tools to help you reach a global audience.
- Dynamic and standard subtitle styles to match your content's tone.
- More AI features, such as AI Highlights and AI Emojis, are available on Mobile.
Filmora lets you add captions to videos in three ways:
- Using Speech to Text to automatically transcribe your voice into captions.
- Using Auto Captions (Dynamic Caption) for quick and customizable subtitle generation.
- Using AI Translation to convert your captions into multiple languages easily.
You can also choose to add captions manually using the Titles tool. The step-by-step guide below will show you how to add captions using Speech to Text on desktop and AI Captions in Filmora mobile.
How to Add Caption to Video in Filmora
Step 1Upload your clips
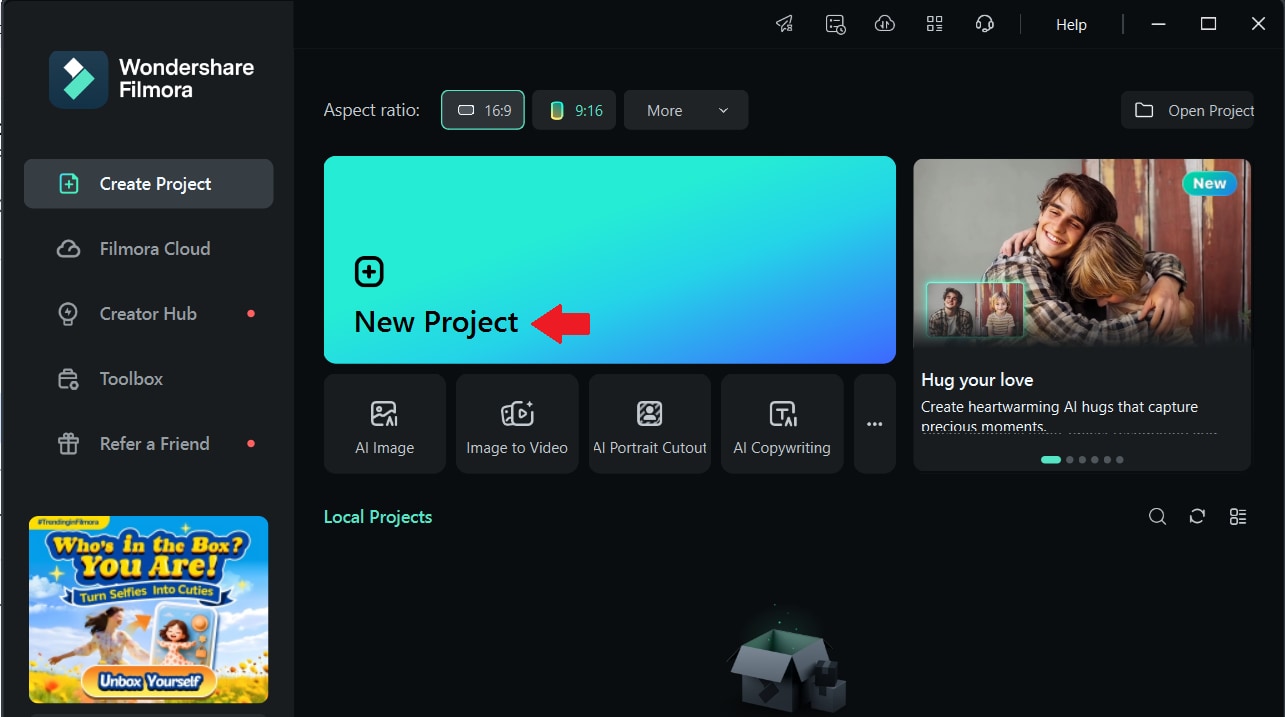
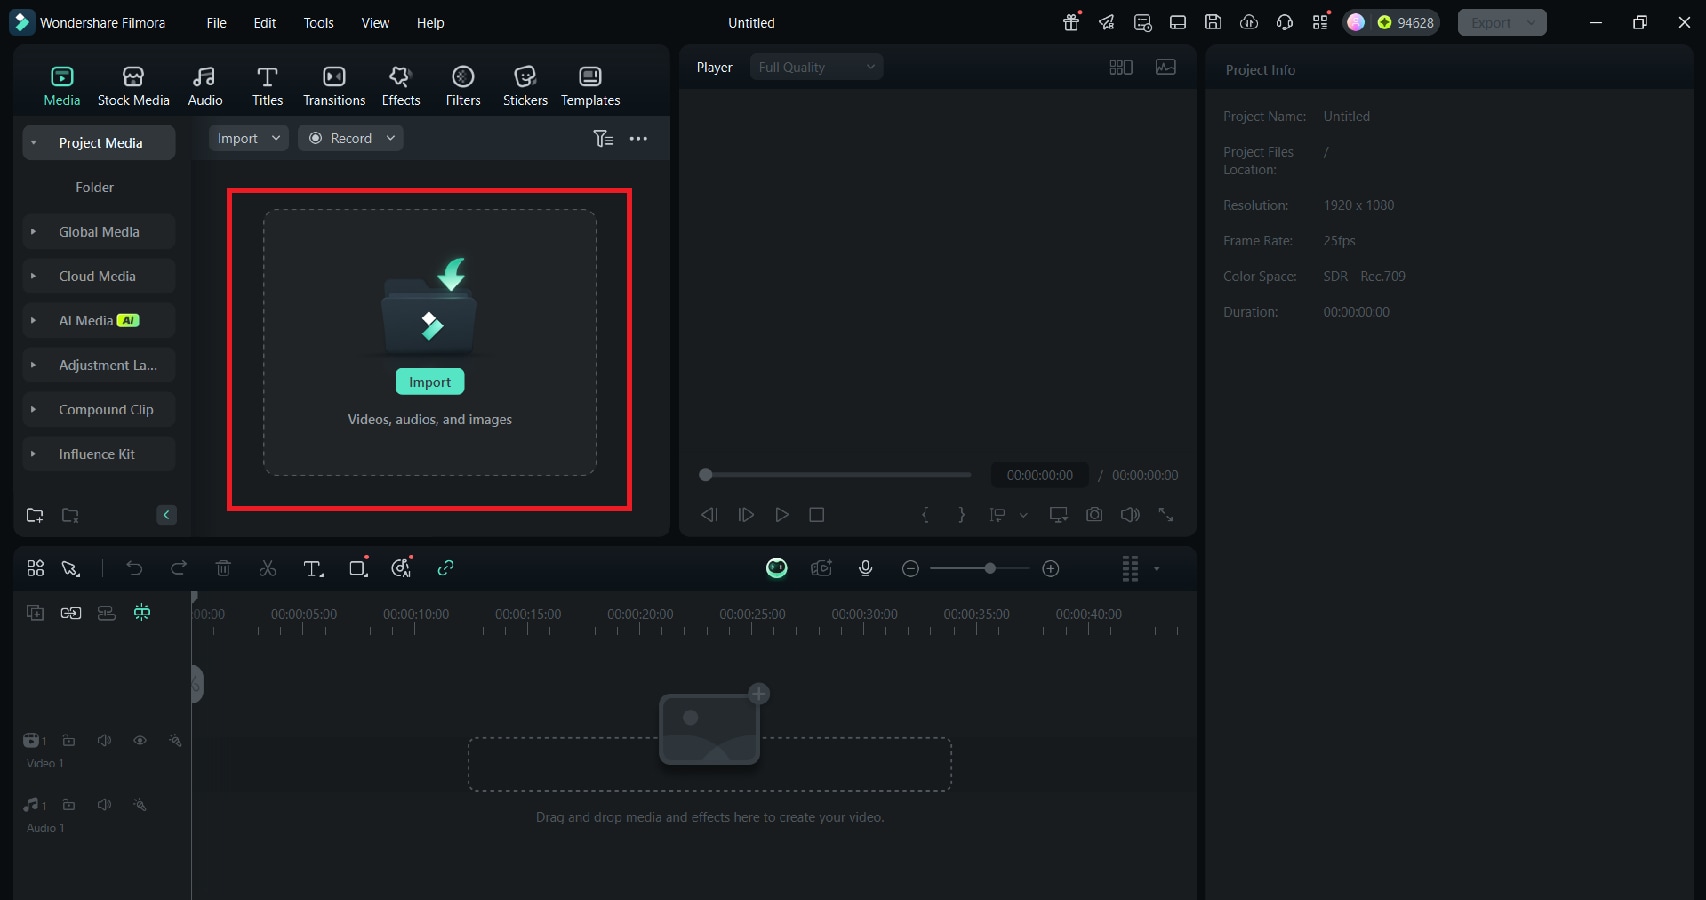
Download and open Filmora on your desktop to get started. On the main screen, click "Create New Project" to open a new editing window.
Then, upload your video to the Project Media section to begin working on it.
Step 2Select the Speech-to-Text feature
After uploading your video, drag it to the timeline. Then, click Tools to access the "Speech-to-Text" feature.
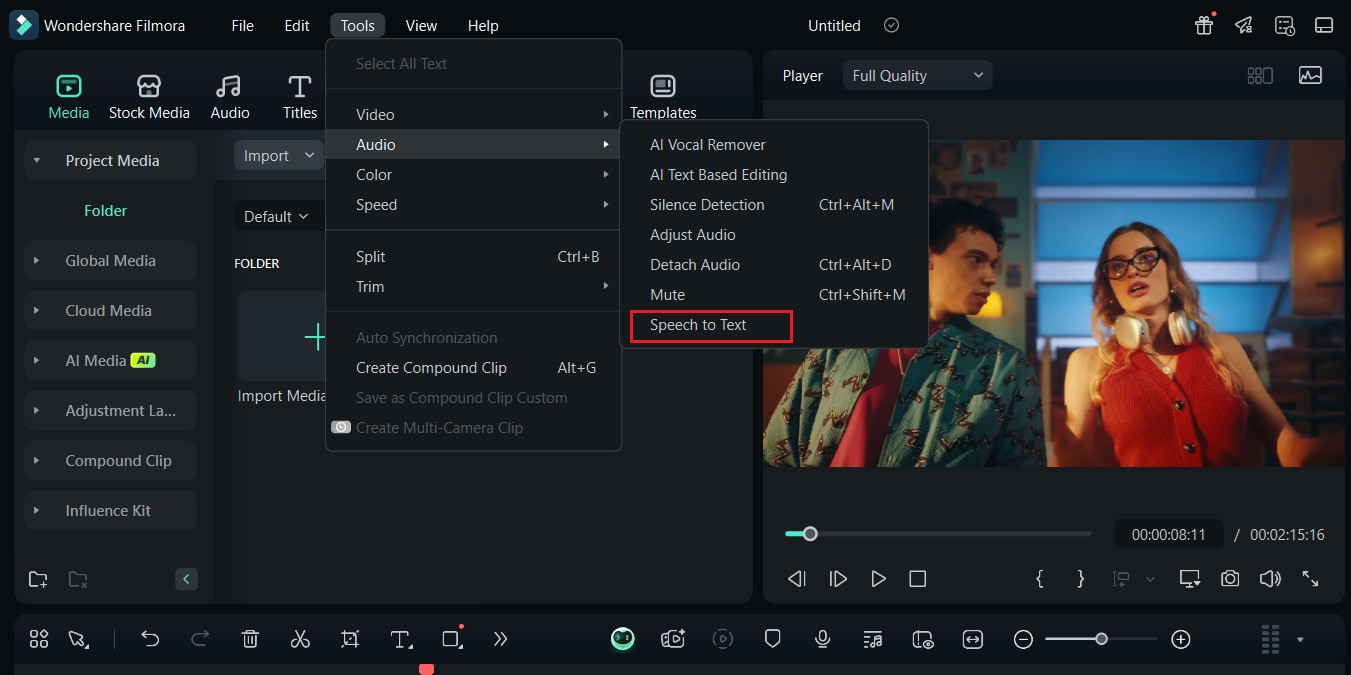
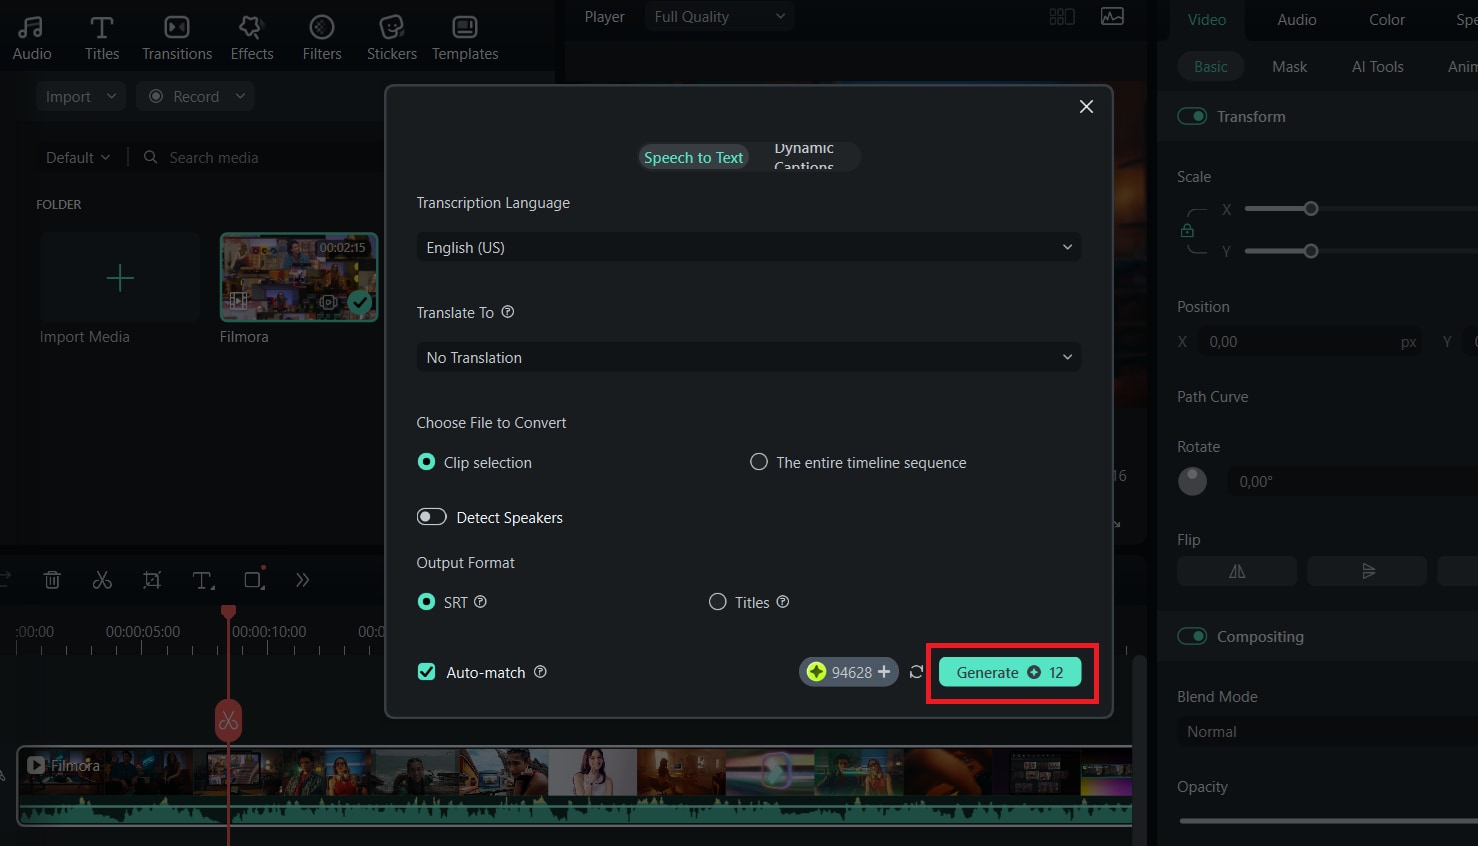
Select your preferred language, and click "Generate." Within a few seconds, subtitles will be automatically generated and added to the timeline.
Step 3Edit the Subtitles
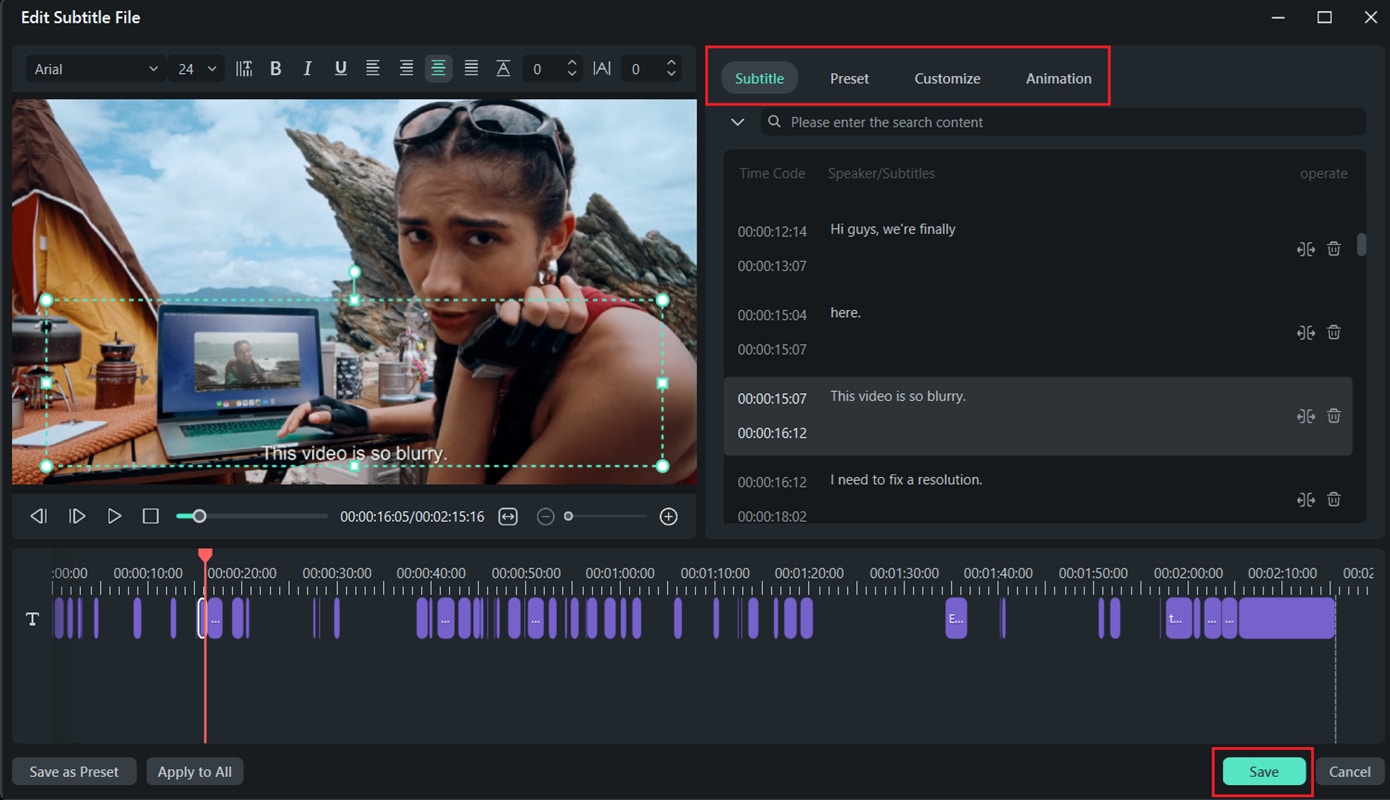
Double-click the subtitles on the timeline to open the editing options. Choose a style from the Presets tab or go to the Custom tab to change the font, color, size, and more. When you're done, click "Save" to save your changes.
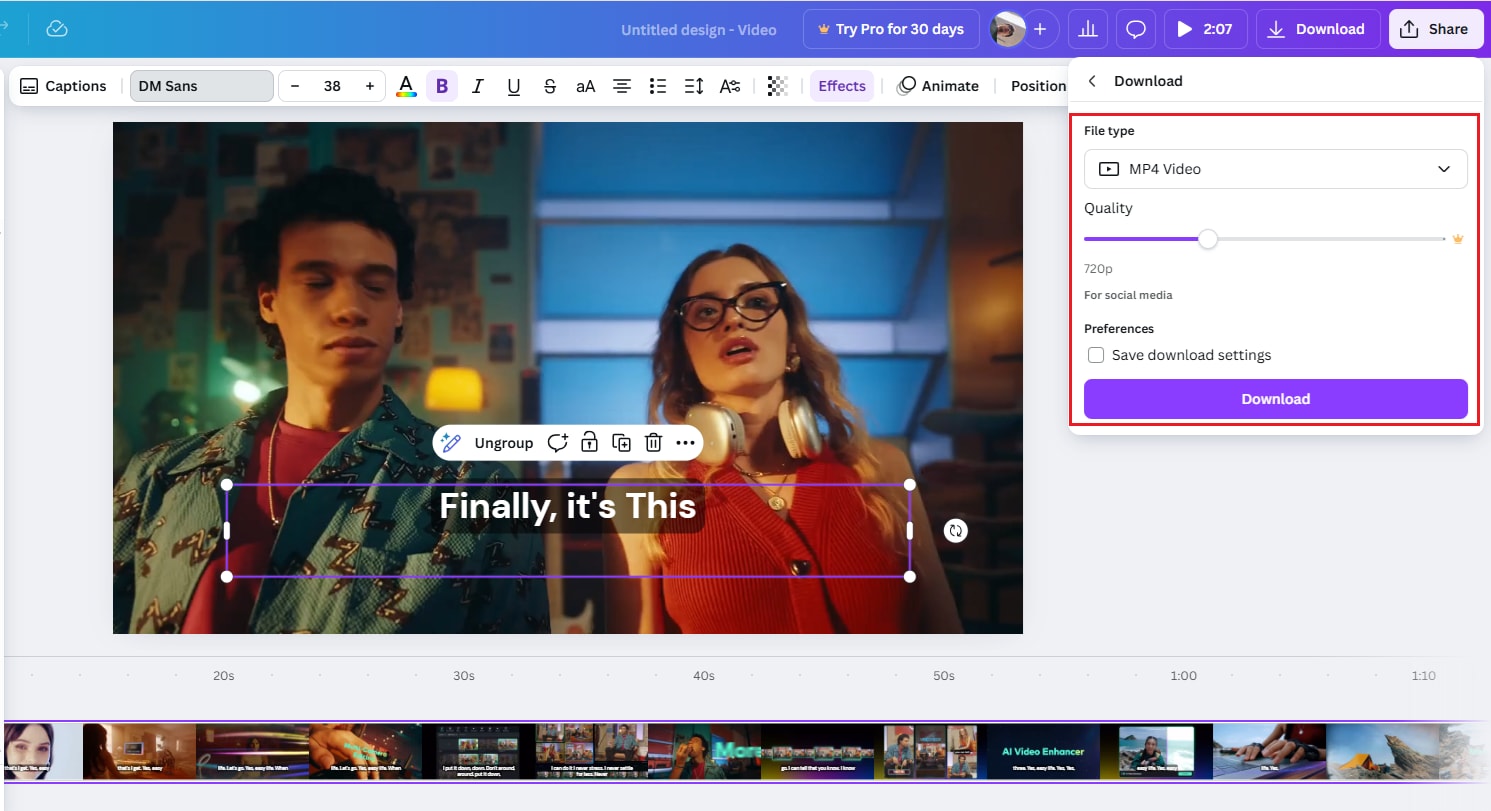
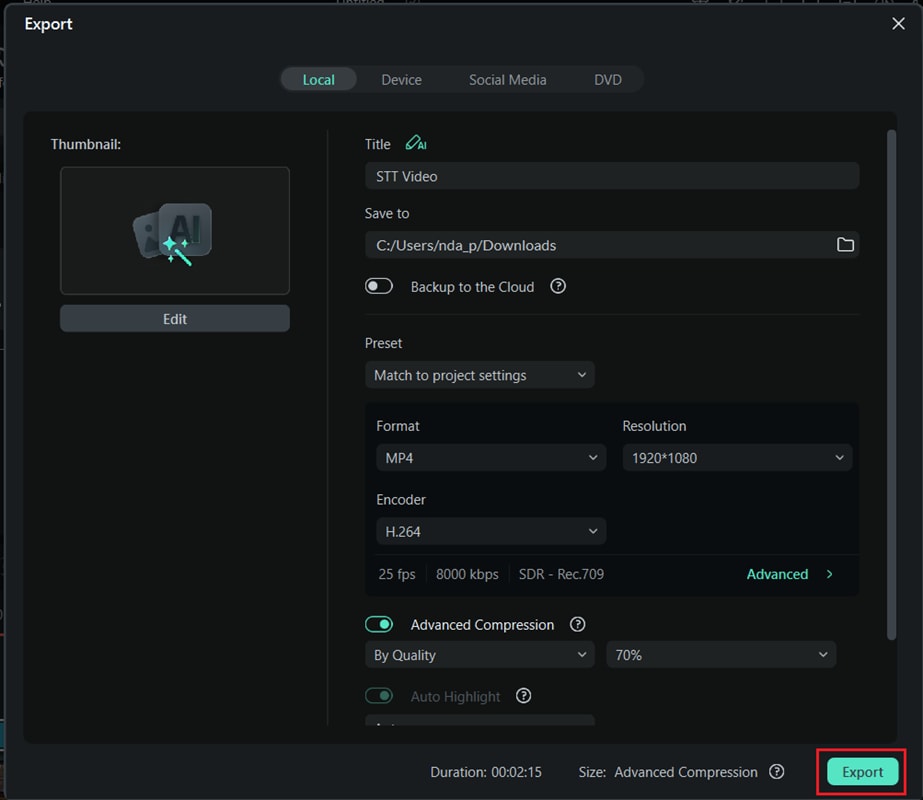
Step 4Export Your Video
When you're finished editing the subtitles, click the "Export" button. Filmora lets you choose from different resolutions and file formats. You can also share your video directly to platforms like YouTube, Vimeo, or TikTok.
How to Add Caption to Video in Filmora (Mobile)
Step 1. To start adding AI captions, tap the "New Project" button, then import your video into the Filmora app.
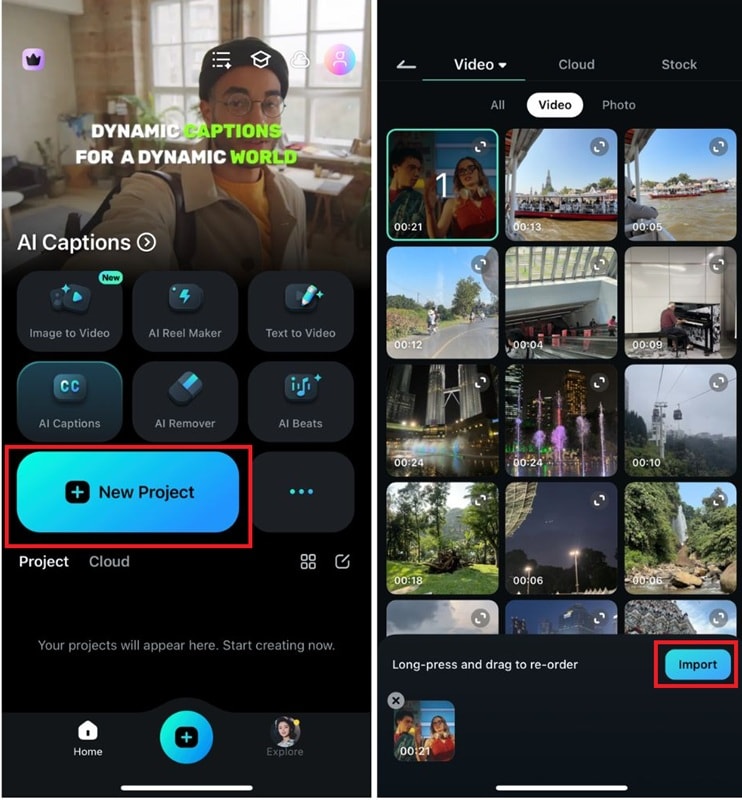
secure download
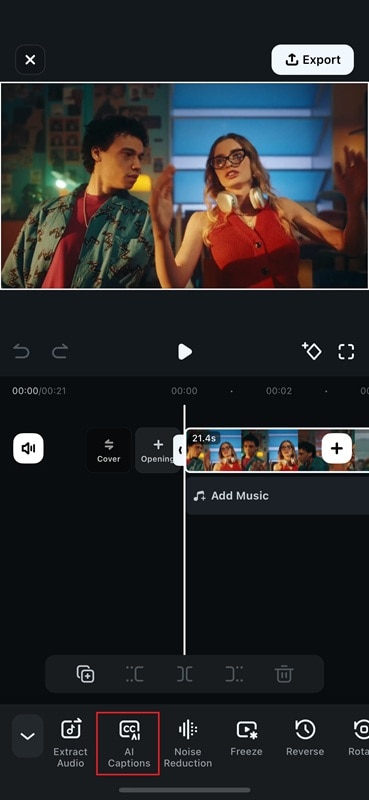
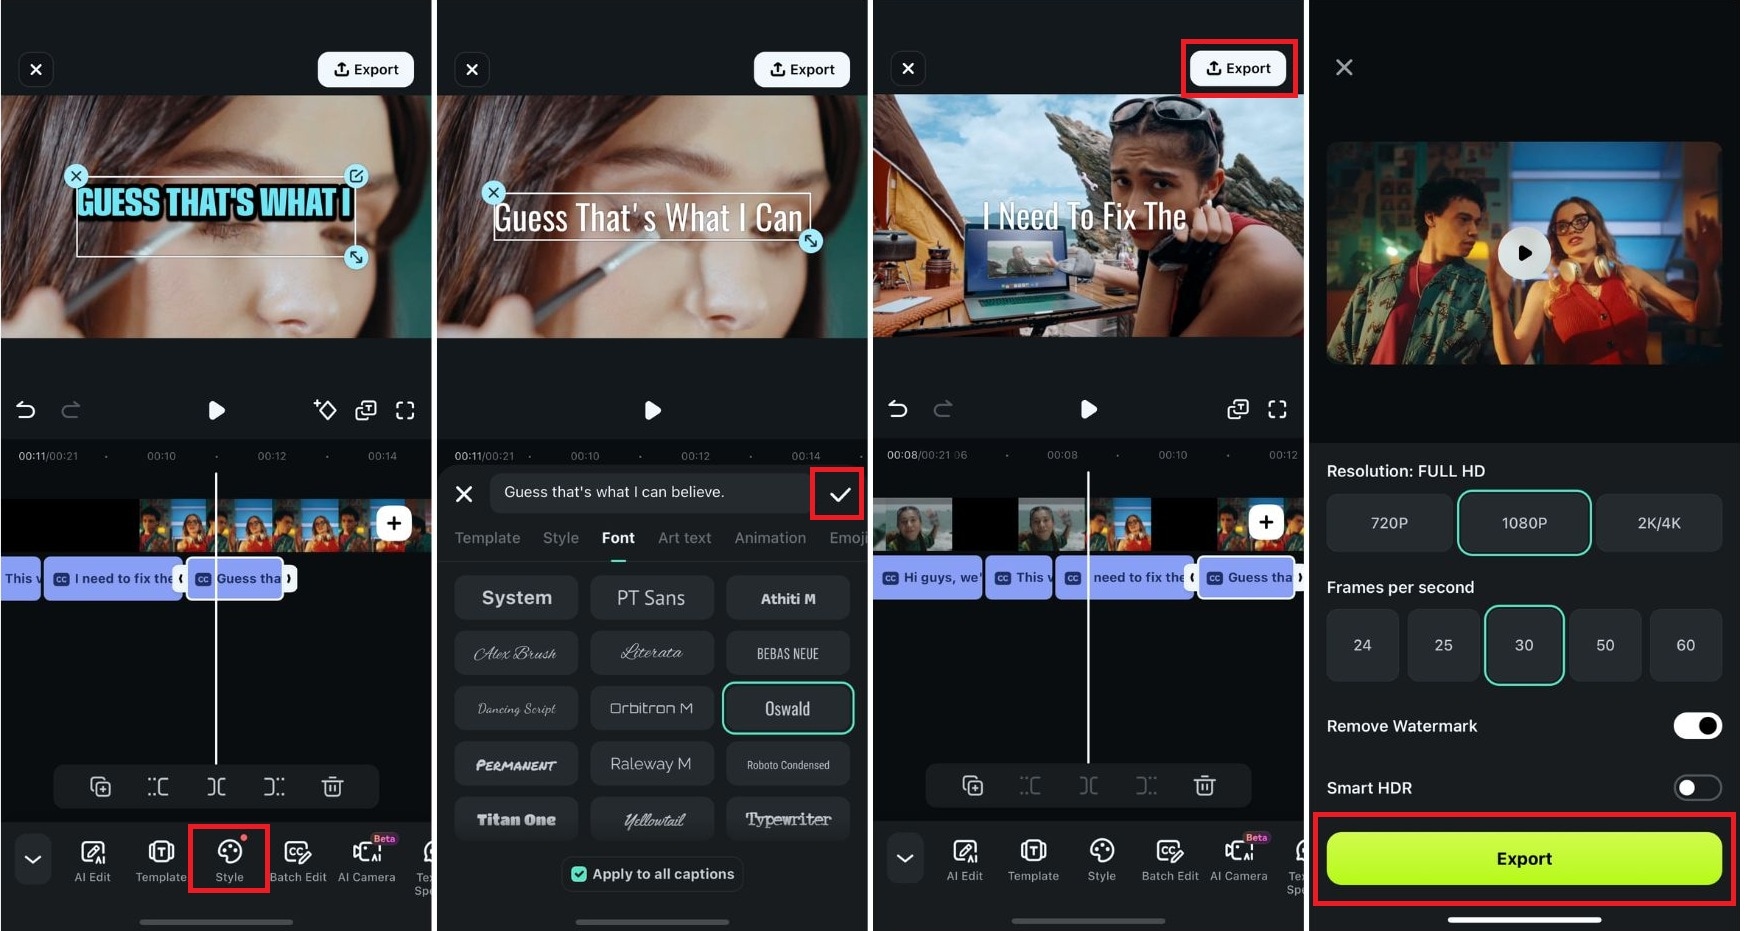
Step 2. On the main screen, click the AI Caption tool at the bottom of the workspace.
Step 3. Tap the Bilingual Captions button to add AI captions to your video. Then, choose your preferred language from the Language section. Once done, click the Add Captions button at the bottom of the screen.
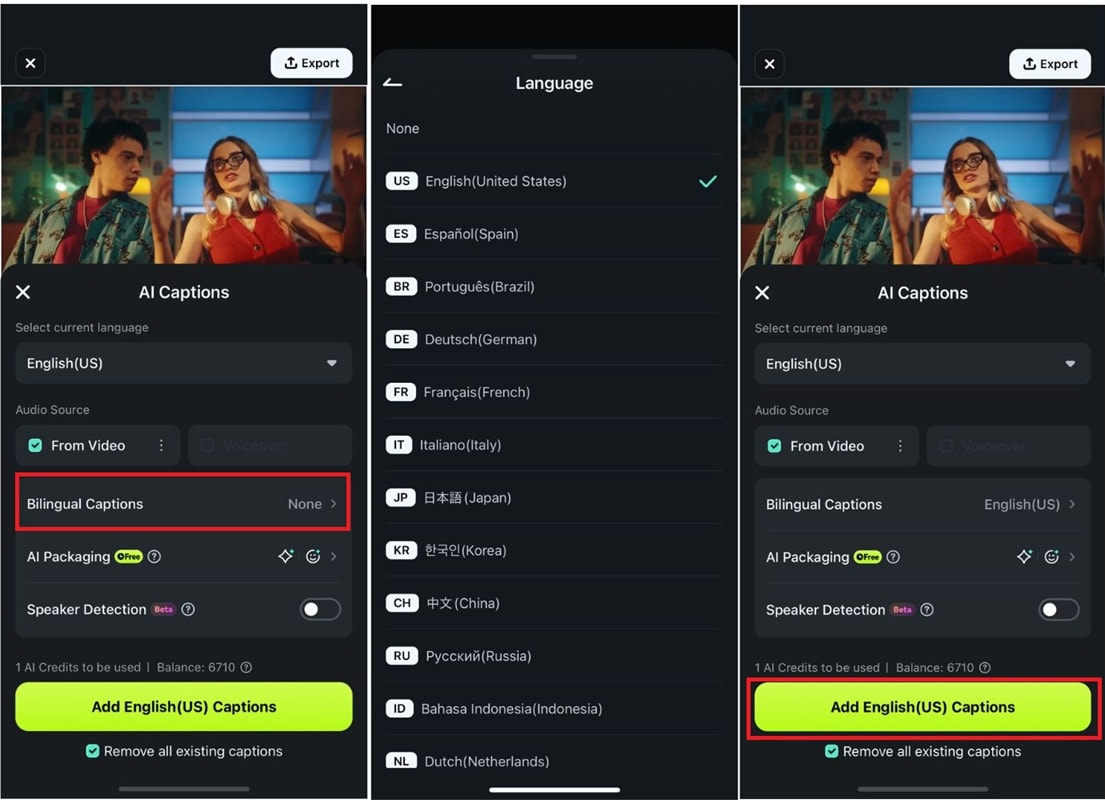
Step 4. Wait for Filmora to process the captions. Drag the text to where you want it, choose a font style, and click the Tick icon to save. Then, click Export to download the video.
Conclusion
To wrap things up, Canva captions are a fantastic option for quick and simple edits, especially when working on social media videos. However, if you're looking for more flexibility and advanced features, Filmora takes video captioning to the next level.
From learning how to add subtitles in Canva or exploring Filmora's advanced Speech to Text and AI Captions, choose based on your needs. Filmora offers a faster and smarter way to add dynamic, multilingual captions, making it the perfect tool for creators looking to save time and enhance their video content.
