If you're new to video editing or looking to upgrade your tools, chances are you've come across Wondershare Filmora and Apple's Final Cut Pro. Both are powerful in their own way, but they're built for very different types of creators.
In this article, we'll look at Filmora vs Final Cut Pro side by side, from pricing and performance to features and ease of use. By the end, you'll have a clear picture of which one fits your editing style and goals.
Part 1. What is Filmora?
Wondershare Filmora is a user-friendly video editor designed to simplify the editing process without compromising creativity. It runs on Windows, macOS, iOS, and Android, so you can work on your projects on your computer and on a mobile device.
Unlike heavier professional tools, Filmora has relatively light system requirements, which means you don't need high-end devices to get started.
What sets Filmora apart is its collection of AI-powered tools and automation features. With Filmora, you can:
- Turn text into video
- Cut scenes automatically
- Generate voiceovers with AI voice cloning
- Create dynamic captions in just a few clicks
On top of that, Filmora includes a wide range of templates, effects, and stock assets that help beginners and experienced users produce high-quality videos quickly.
In short, Filmora is built for creators who want professional results without the steep learning curve or expensive hardware often required by advanced editors.
Part 2. What is Final Cut Pro?
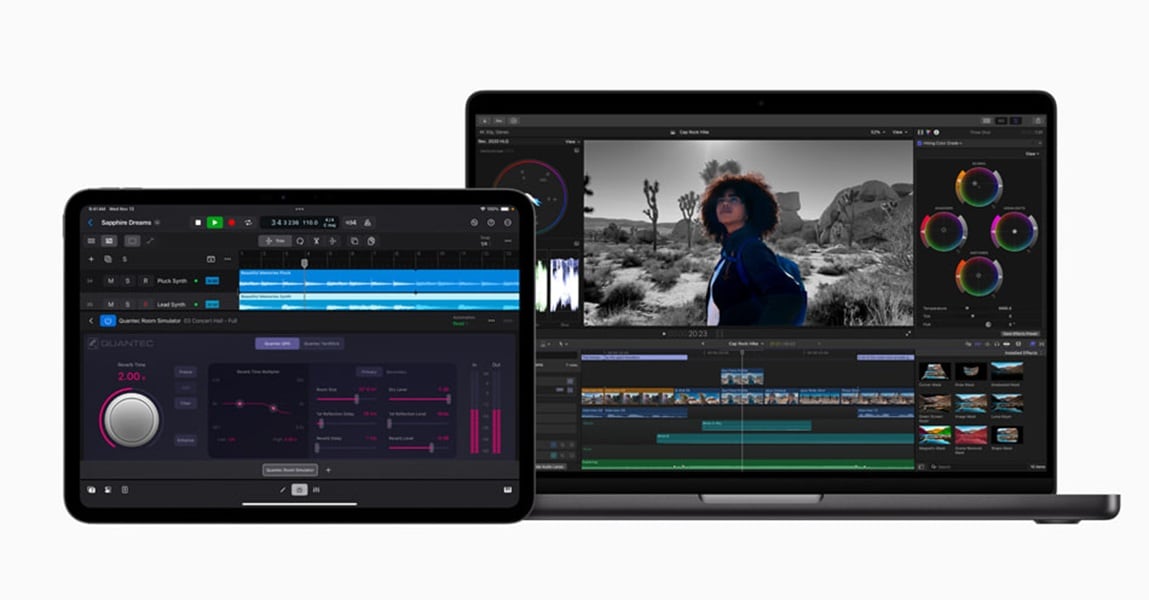
Final Cut Pro is professional video editing software from Apple, built exclusively for macOS. It is known for its powerful performance, especially when paired with Apple's M1, M2, and the latest generation chips, which allow editors to handle demanding projects with ease.
The software supports advanced media formats, including 4K, 6K, and even 8K, along with 360° video, making it a go-to choice for filmmakers and content creators who need top-level quality.

Some of its standout features include:
- Multicam editing
- The signature magnetic timeline for smoother project organization
- Advanced color grading tools for precise visual adjustments
Apple has also introduced AI-powered functions such as Magnetic Mask for intelligent masking and Transcribe to Captions to speed up subtitle creation.
Final Cut Pro is built for professionals who want complete creative control and reliable performance on large and complex projects, making it a strong choice for editors working in film, television, or high-quality digital production.
Part 3. Feature-by-Feature Comparison: Filmora vs Final Cut Pro
Now that we've looked at each editor individually, it's time to put them side by side. This feature-by-feature analysis highlights the main differences between Filmora vs Final Cut Pro, making it easier to see which one matches your editing needs.
| Feature | Filmora | Final Cut Pro |
| Target User | Beginners, educators, social media creators, small businesses, and anyone who values speed and simplicity | Professional editors, filmmakers, and Mac users who need advanced control and industry-level tools |
| Pricing | Free version with watermark, affordable monthly and annual plans, and a perpetual license option | One-time purchase of $299.99 with a free trial available |
| Platform | Windows, macOS, iOS, and Android | macOS only, optimized for Apple Silicon chips |
| Learning Curve | Easy to learn with drag-and-drop editing, templates, and automation features | Steeper learning curve, designed for users with editing experience |
| AI Features | A complete set of AI tools | Limited AI features |
| Editing Style | Template-based with automation for quick and polished results. | Precision-based with advanced tools for complex projects and detailed workflows |
| Performance | Lightweight and runs well on mid-range devices | Highly optimized for macOS with fast rendering and smooth playback |
| 4K/8K Support | ✅ | ✅ |
| Supported Formats | Popular video formats, such as MP4, MOV, AVI, and more, are suitable for social and casual projects | Extensive support for professional formats, including ProRes, RAW, and HEVC |
Part 4. Feature Deep Dive: Filmora vs. Final Cut Pro

Let's move over the basic specs and see how Filmora vs Final Cut Pro perform in real-world use. This section breaks down the experience of using each tool when it comes to ease of use, editing power, and AI-powered automation.
Ease of Use & Learning Curve
Filmora
Filmora is designed with accessibility in mind. Its clean drag-and-drop interface, combined with a vast library of built-in templates, effects, and transitions, makes it beginner-friendly. Even those without prior editing experience can quickly create professional-looking videos. The short learning curve allows creators to focus more on the narrative and less on technical hurdles.
Final Cut Pro
Apple's Final Cut Pro is built for professionals, so the initial learning curve is steep. The Magnetic Timeline and event-based organizational system can feel intimidating at first. However, once users adapt, these features significantly speed up complex editing tasks, offering an efficient and structured workflow for larger projects.
Editing Tools & Capabilities
Filmora
While Filmora doesn't aim to replace a full studio suite, it includes an impressive set of editing tools for its target audience. Features like AI Smart Cutout (for background removal), green screen compositing, and keyframing give creators the ability to perform advanced editing without complicated workflows. These tools are simplified to help everyday creators achieve results that traditionally required professional software.
Final Cut Pro
This editor excels in depth and precision. With multicam editing, editors can easily sync and switch between multiple camera angles. Advanced color grading tools allow for cinematic looks, while proxy workflows ensure smooth playback and editing, even with large 8K files. Final Cut Pro is clearly aimed at professional video production, where control over detail is an essential requirement.
AI Features & Automation
AI is becoming a key part of modern video editing, helping creators save time and focus more on creativity. Both Filmora and Final Cut Pro include AI-based tools, but they serve different purposes depending on the type of projects you're working on.
- AI Text-to-Video: Quickly turn scripts or prompts into ready-to-edit video drafts.
- Dynamic Captions: Auto-generate stylish captions that sync with spoken audio.
- AI Smart Cutout: Remove backgrounds or isolate subjects without green screens.
- Voice Cloning & Auto Dubbing: Repurpose content for different audiences with localized voiceovers.
- AI Music & Sound Effects: Generate background audio that matches the video's mood.
- Object Tracker: Automatically follow people or objects in a scene for text, effects, or color adjustments.
- Voice Isolation: Clean up noisy audio tracks with one click.
- AI Magnetic Mask: Select and adjust subjects within footage without complex masking.
- Transcribe to Captions: Convert spoken dialogue into accurate subtitles for accessibility and editing.
Part 5. Performance & Platform Compatibility
When it comes to performance, the difference between Filmora vs Final Cut Pro largely depends on the platforms they are built for

Final Cut Pro
Final Cut Pro is designed exclusively for macOS and is tightly integrated with Apple hardware. This optimization means faster rendering, smoother playback, and efficient handling of large projects, even when working with 4K or 8K footage. Its reliance on Apple's Metal engine ensures professional-level speed and stability that experienced editors often rely on.
Filmora
Filmora, on the other hand, is available across Windows, macOS, iOS, and Android. Its lightweight design makes it accessible to a wider audience, including those with mid-range laptops or mobile devices.
While it handles everyday editing with ease, its performance may decrease when managing projects with very high resolutions or heavier timelines. However, its availability on multiple platforms gives creators more flexibility to edit anywhere.
Part 6. Pros and Cons Analysis

Every video editor has its strengths and limitations. Understanding the pros and cons of Filmora and Final Cut Pro will help you decide which one fits your workflow best.
Filmora
- Beginner-friendly interface with drag-and-drop editing
- Affordable pricing plans compared to pro-level tools
- Cross-platform support (Windows, macOS, iOS, Android)
- AI-powered features like Text-to-Video, Voice Cloning, and Dynamic Captions for faster content creation
- Wide range of built-in effects, transitions, and templates
- Performance may be slow on projects with a large scale
- Less flexible for complex workflows like advanced color grading
Final Cut Pro
- Professional-grade tools built for filmmakers and advanced editors
- Optimized for macOS with fast rendering and stable performance
- Advanced features like multicam editing, 360° video support, and color grading
- AI-driven features like Object Tracking and Voice Isolation for precision editing
- Handles high-resolution projects (up to 8K) with ease
- Mac-only, limiting accessibility for Windows and mobile users
- Steeper learning curve, especially for beginners
- Higher upfront cost compared to subscription-based editors like Filmora
- Fewer built-in templates and effects, requiring more manual creativity
Part 7. Final Recommendation: Which Editor is Right for You?

Filmora and Final Cut Pro are both excellent video editing tools, but they are aimed at very different types of creators. Your choice depends on your goals, skill level, and platform preferences.
Choose Filmora if you are...
- A beginner, casual editor, or social media content creator who values simplicity.
- Looking for an affordable, all-in-one editor with plenty of ready-made effects and AI-powered tools.
- A Windows user or someone who needs cross-platform flexibility (macOS, iOS, Android, Windows).
Choose Final Cut Pro if you are...
- A professional video editor, filmmaker, or someone working on high-end productions.
- A dedicated Mac user who wants the best performance optimized for Apple hardware.
- Handling large-scale, high-resolution (4K–8K) or complex projects that require precision tools.
In short, Filmora is the best choice for fast, creative, and beginner-friendly editing, while Final Cut Pro stands out in professional workflows that require advanced control and power.
Conclusion
Choosing between Filmora and Final Cut Pro ultimately depends on your approach to video editing. If your priority is speed, creativity, and an editor that won't overwhelm you, Filmora offers a simple experience packed with modern AI tools. It's perfect for beginners, social media creators, or anyone who wants polished videos with a minimal learning curve.
On the other hand, Final Cut Pro is built for professionals who demand absolute control, precision, and performance. With its deep integration into the Apple ecosystem and advanced editing capabilities, it's the favorite choice for filmmakers and experienced editors working on complex projects.
Both tools are powerful in their own way. The real question isn't which one is “better,” but which one fits your editing style, platform, and creative goals.
Frequently Asked Questions
-
Does Final Cut Pro work on Windows?
No. Final Cut Pro is exclusively available for macOS and cannot be installed on Windows systems. If you are a Windows user, you may want to consider using Filmora. -
Which software is better for beginners, Filmora or Final Cut Pro?
Filmora is more beginner-friendly thanks to its drag-and-drop interface and built-in templates. Final Cut Pro is more advanced, suited for those willing to invest time in mastering professional tools. -
Is Final Cut Pro worth it for the price?
If you're a professional editor or filmmaker who needs advanced capabilities and seamless integration with macOS, then yes. For casual creators, however, the investment may be more than necessary.


