


 100% Security Verified | No Subscription Required | No Malware

Ever seen a video where the person or object appears to be floating in a different setting, perfectly mixed into a new backdrop? Maybe you've watched a product demo where the items seem to be hanging in the air without any messy background behind them. These cool visual tricks are done using a method called background removal, which is really useful for people who make videos and content.
When it comes to editing videos, Adobe Premiere Pro is one of the most well-known and flexible software choices out there. Even though it's famous for its strong editing features, some people ask if Premiere Pro can take out backgrounds from videos. The answer is definitely yes!
Whether you want to remove the white background in Premiere Pro, fix Adobe Premiere Pro's transparent background, or even take out a background without using a green screen, this guide on how to remove the background from video Premiere Pro with/without a green screen will show you how to do it step by step.
In this article

Method 1: Using the Ultra Key Effect with a Green Screen
Various methods can be used to remove backgrounds in Premiere Pro, depending on your specific needs and the complexity of your footage.
Let's explore a step-by-step approach to removing background from video Premiere Pro by making the most of its powerful built-in tools. Here’s how to remove video background Premiere Pro:
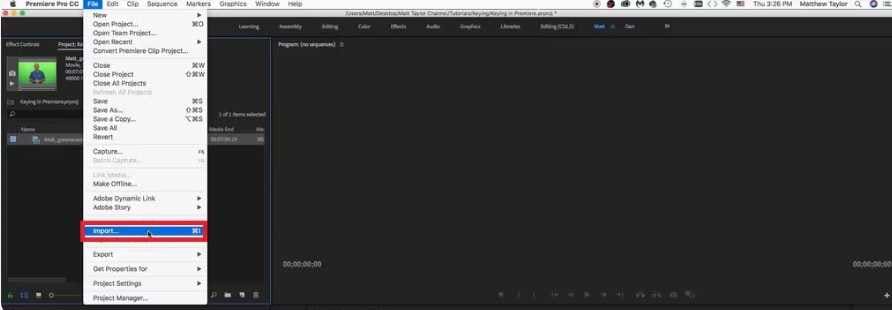
Step 1: Launch Adobe Premiere Pro on your Windows or Mac device. Go to File > Import or use the shortcut Ctrl+I (Windows) or Cmd+I (Mac). Click "Import" and select your video. Drag your imported clip from the Project panel to the Timeline.

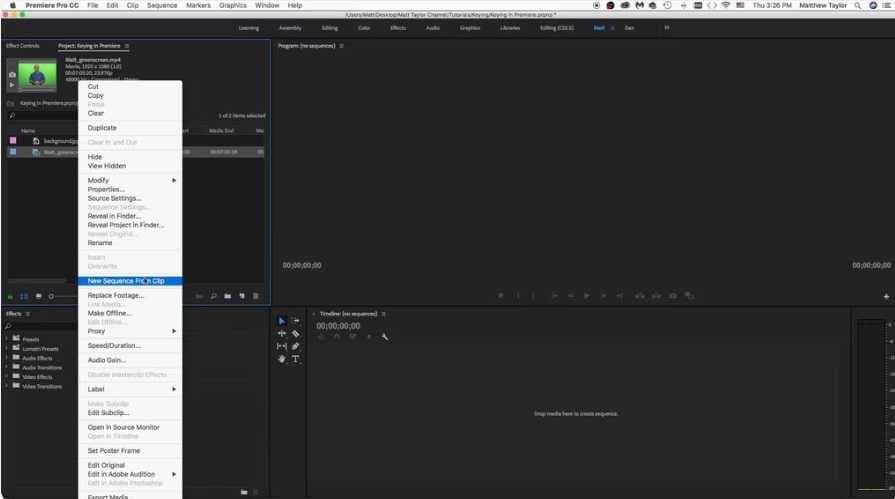
Step 2: Pick your video clip, right-click, and choose "New Sequence From Clip."
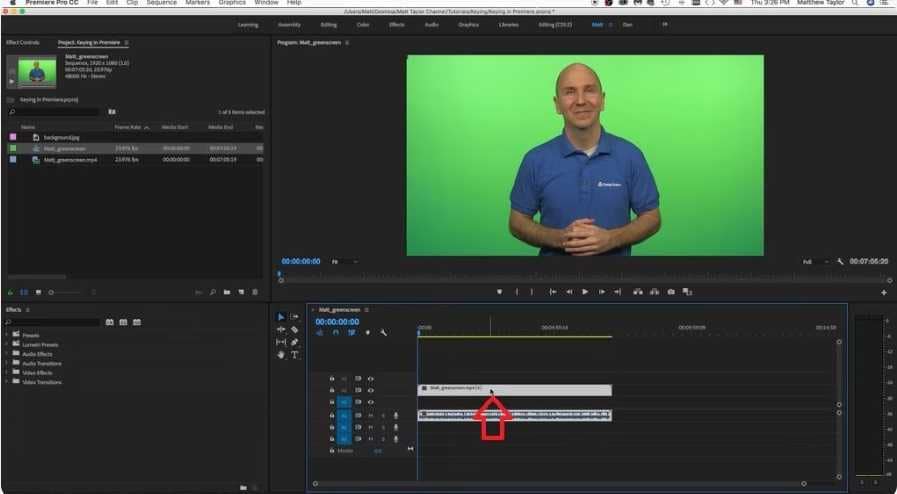
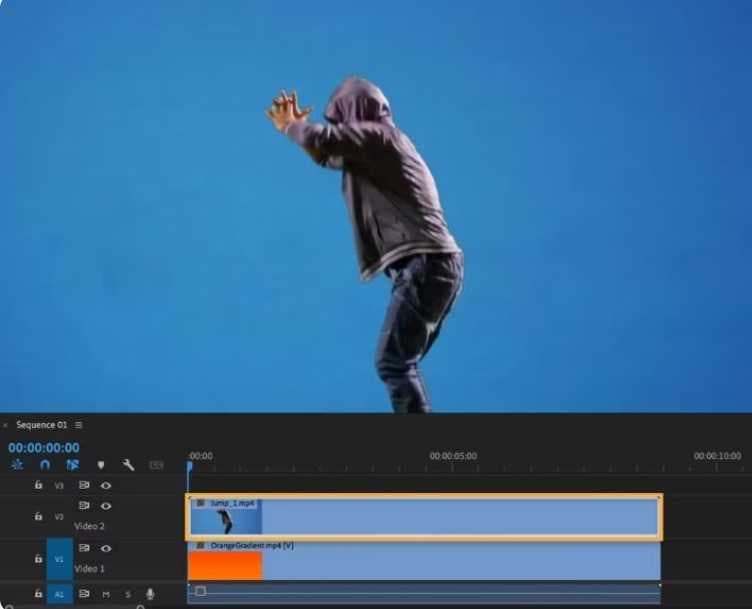
Step 3: Move your main video to the second layer (v2).
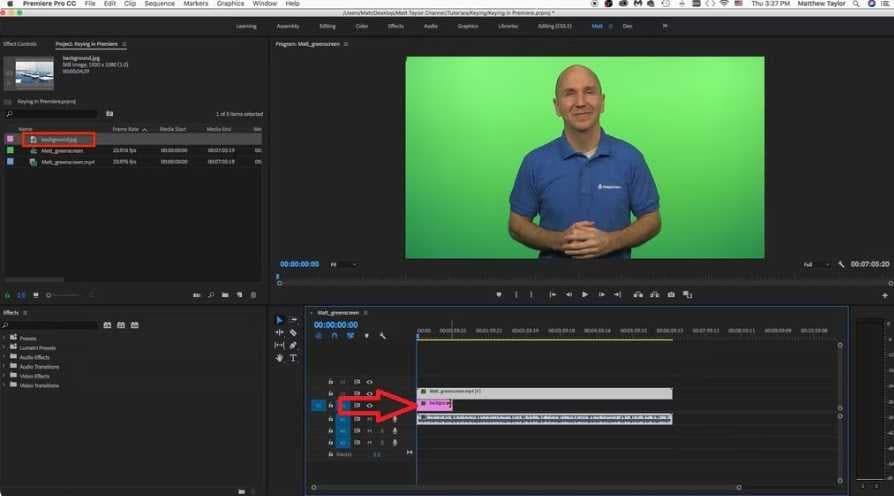
Step 4: Put your new background on the bottom layer. Make it as long as your main video.
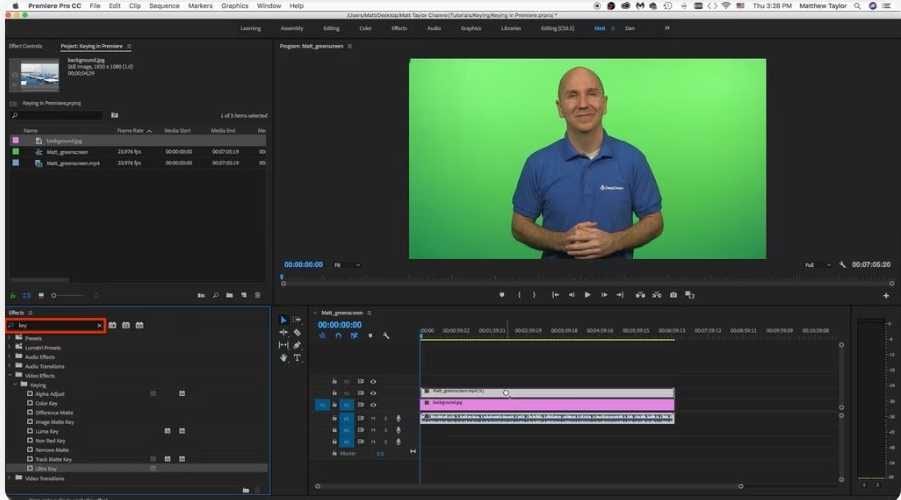
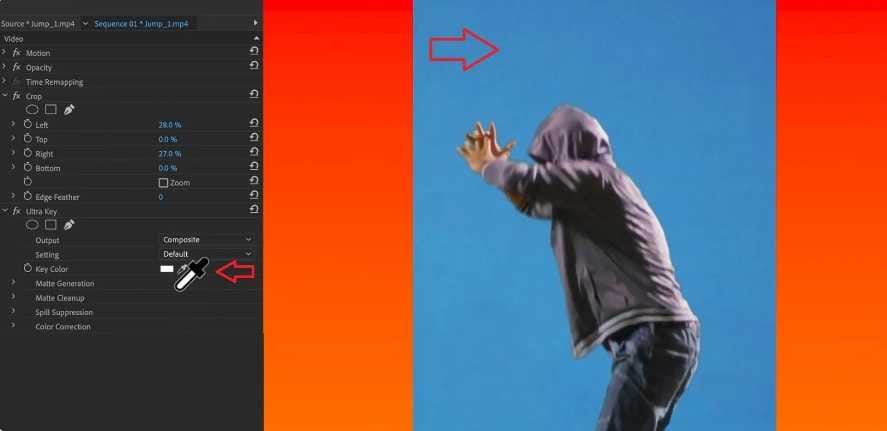
Step 5: In the effects panel, look for "key." Find "Ultra Key" and put it on your main video.
Step 6: Click on your main video. Find the Ultra Key effect. Use the eyedropper tool to pick the background color you want to remove.

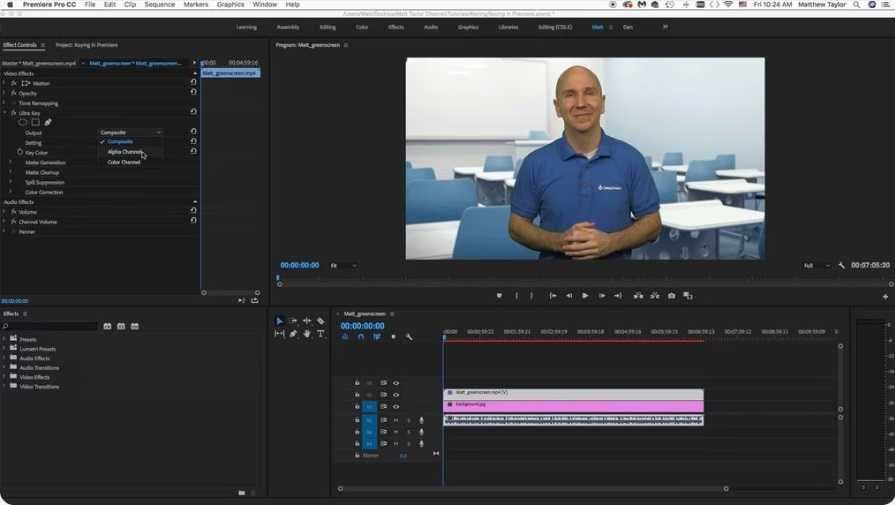
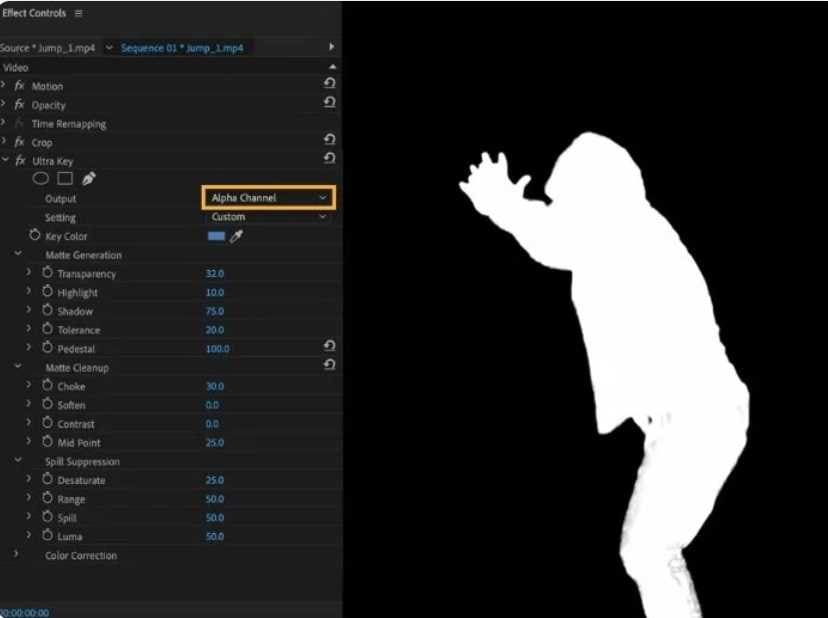
Step 7: Right-click in the video effects area. Change from "Composite" to "Alpha Channel" view.
Step 8: Open "Matte Generation". Adjust the settings to make your video look clean.

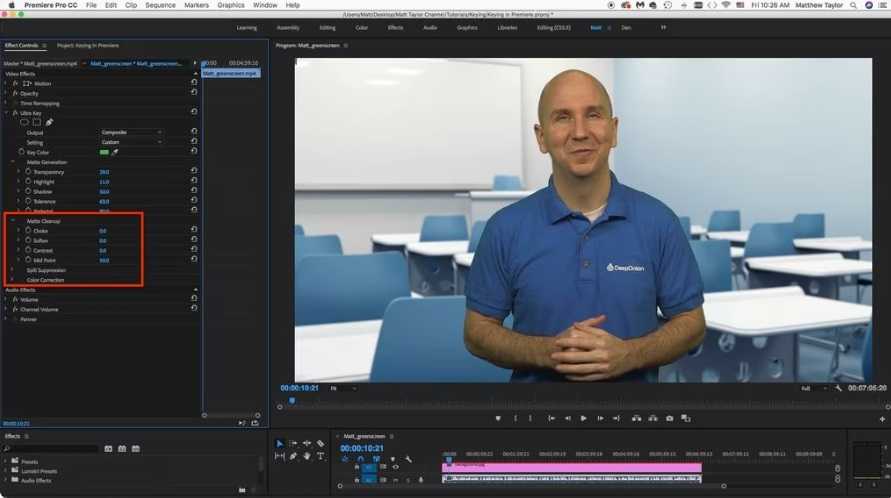
Step 9: Open "Matte Cleanup". Adjust "Choke" and other options to improve the edges.
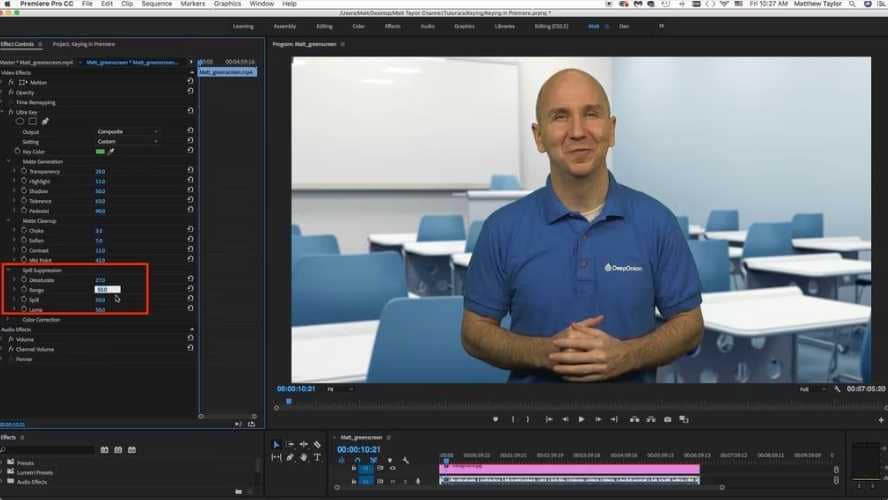
Step 10: If you still see some background color, use "Spill Suppression" to fix it.
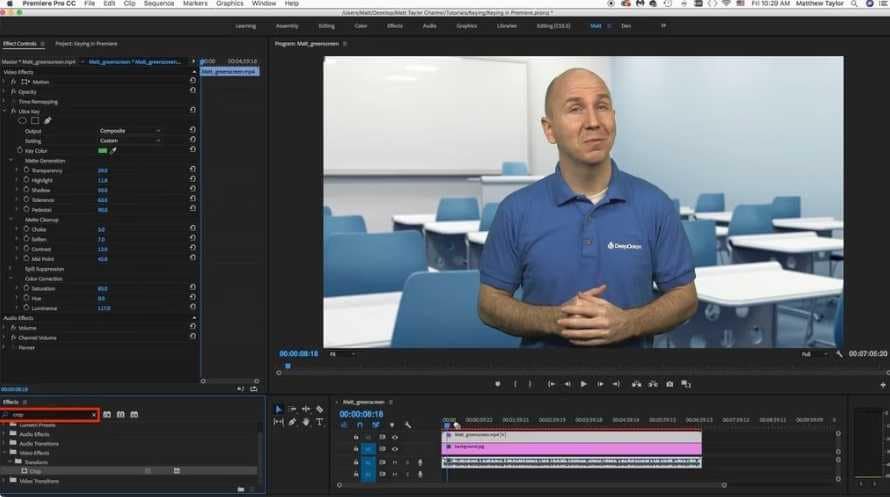
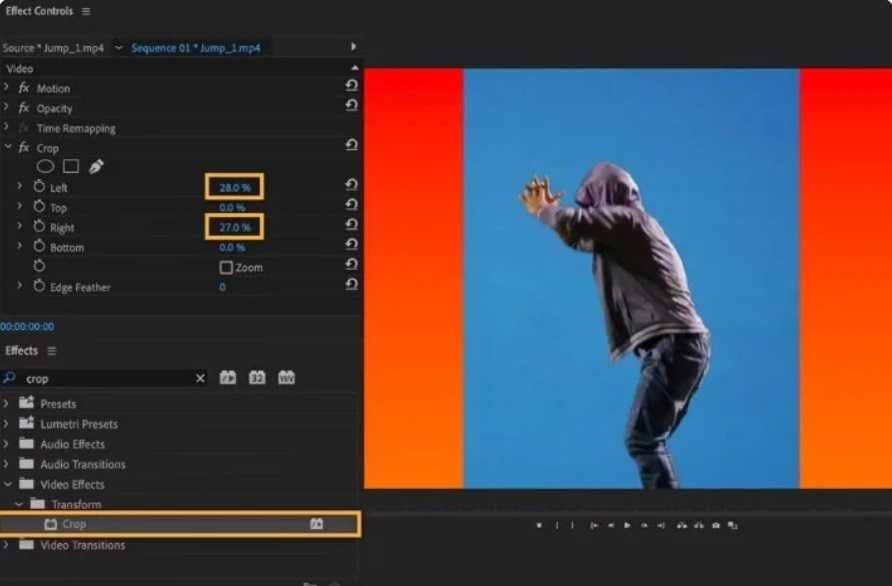
Step 11: Search for "crop" in the effects panel. Add the Crop effect to your video and adjust as needed.
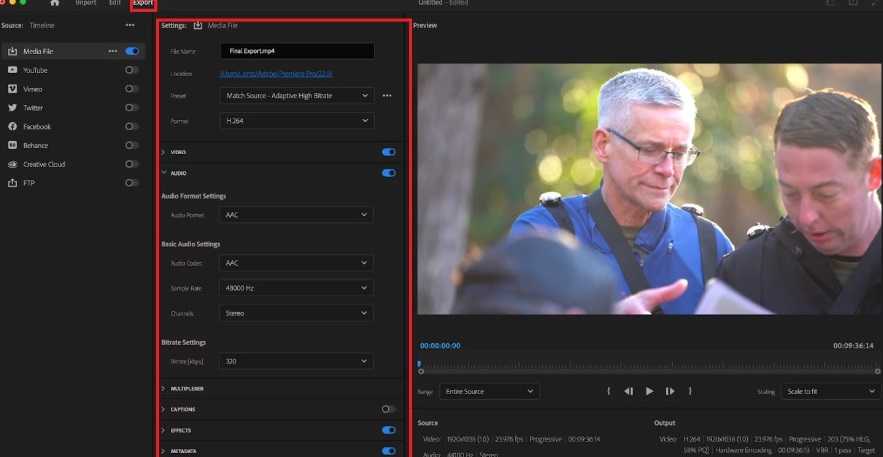
Step 12: When you're happy with the results, click "Export" at the top. Choose your settings and click Export again.
By following these steps, you can effectively remove background in Premiere Pro for a wide range of footage.
However, it's important to note that the success of background removal often depends on the quality of your original footage and the contrast between your subject and the background.
For more complex scenarios or when dealing with challenging footage, you might need to employ additional techniques or use Premiere Pro's remove background without green screen capabilities.
Method 2: How to Remove Background Without a Green Screen
While having a green screen can make background removal easier, it's not always necessary or practical. Premiere Pro offers several tools and techniques to remove backgrounds without relying on a green screen.
Here’s how to remove background in Premiere Pro for videos without a green screen:
Using the Crop and Ultra Key Effects for Simple Backgrounds
Step 1: Open Adobe Premier. Click "File" then "Import" to add your main video and background.
Step 2: Put your main video on the second layer (v2). Make your background as long as your main video.
Step 3: Click on your main video. In the effects panel, search for "crop". Add the Crop effect to your video. Use it to cut out any extra background you don't want.
Step 4: In the effects panel, search for "ultra". Add the Ultra Key effect to your video.
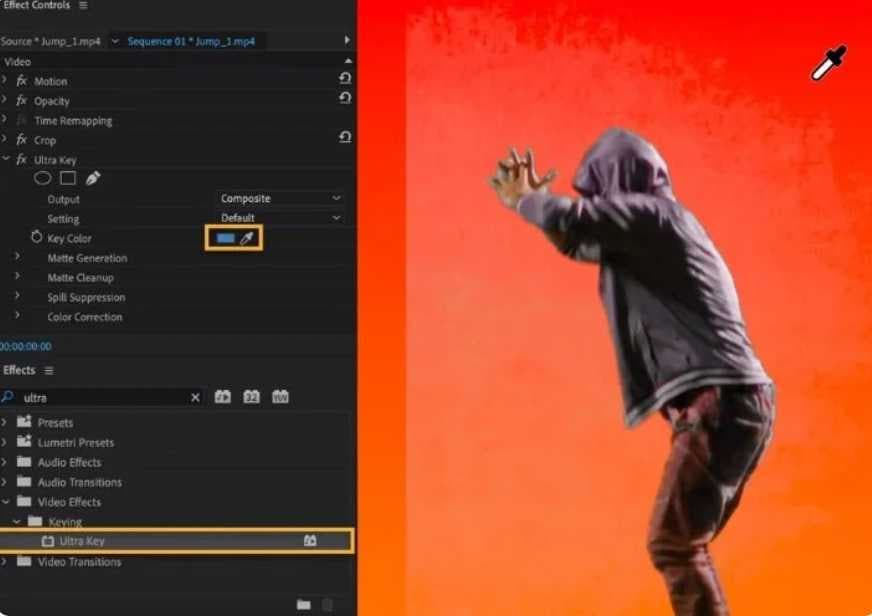
Step 5: Click the eyedropper tool in Ultra Key. Use it to pick the background color you want to remove.
Step 6: Change the view to "Alpha Channel" to see how it's working.
Step 7: Adjust the settings in "Matte Generation," "Matte Cleanup," and "Spill Suppression" until your video looks good.

Step 8: Finally, click "Export" at the top. Choose your settings and click Export again.
Pro Tip: Removing a White Background from a Logo/Image
Sometimes you don't need to remove the background from a whole video, but just from a static image or logo (like a .jpeg with a white background) that you want to overlay. Premiere Pro has a quick way to handle this using the Luma Key effect.
Step 1: Place your logo or image file on the video track above your main footage in the timeline.
Step 2: Go to the "Effects" panel and search for "Luma Key". Drag the Luma Key effect onto your image clip.
Step 3: In the "Effect Controls" panel, find the Luma Key settings. Adjust the "Threshold" slider. As you increase it, you will see the whitest parts of the image (your background) become transparent.
Step 4: Fine-tune with the "Cutoff" slider to clean up the edges and ensure only the white background is removed, leaving your logo crisp and clean over your video.
A Quicker Alternative: AI Background Removal in Filmora
Adobe Premiere Pro is a powerful, feature-packed tool for taking out backgrounds, but it might not be the perfect choice for everyone, particularly for beginners or people who prefer a simpler interface.
That's where Wondershare Filmora steps in as a great option for removing backgrounds.
Wondershare Filmora provides a variety of features that make it a very attractive choice:
- Easy-to-Use Design: Filmora has a simple layout that helps new users move around and use the program without difficulty.
- Smart AI Technology: Filmora uses artificial intelligence to make challenging tasks, such as erasing backgrounds, simpler.
- Large Media Collection: Filmora gives users a big selection of stock videos, pictures, and sound files that can be used as new backgrounds.
- Frequent Updates: Wondershare regularly updates Filmora with new features and enhancements, keeping users up-to-date with the newest video editing tools.
- Works on Multiple Systems: Filmora can be used on both Windows and Mac computers.
- Budget-Friendly Options: Unlike Adobe Premiere Pro's subscription plan, Filmora offers more flexible pricing, including the option to buy it once.
To remove a background using Filmora:
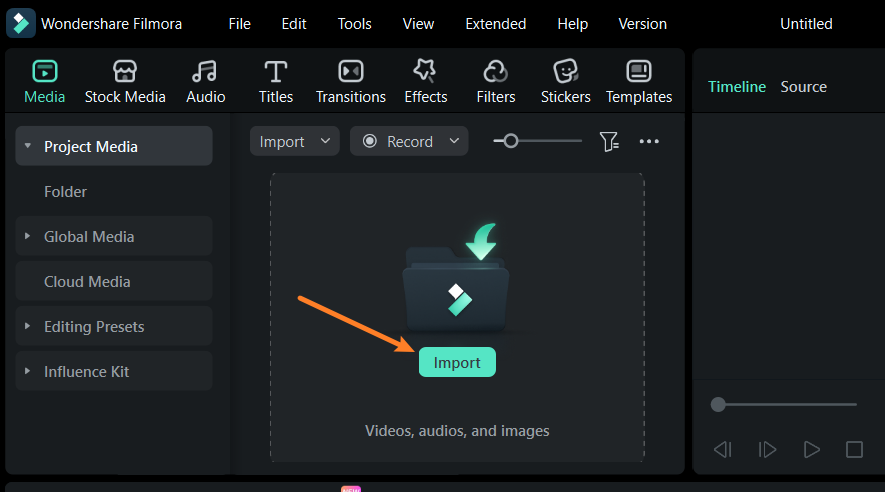
Step 1: Open Filmora and click "Create New Project". Find your video on your computer or in the cloud and bring it into Filmora. Put your video on the timeline.
Create a New Project or Open an Existing Project
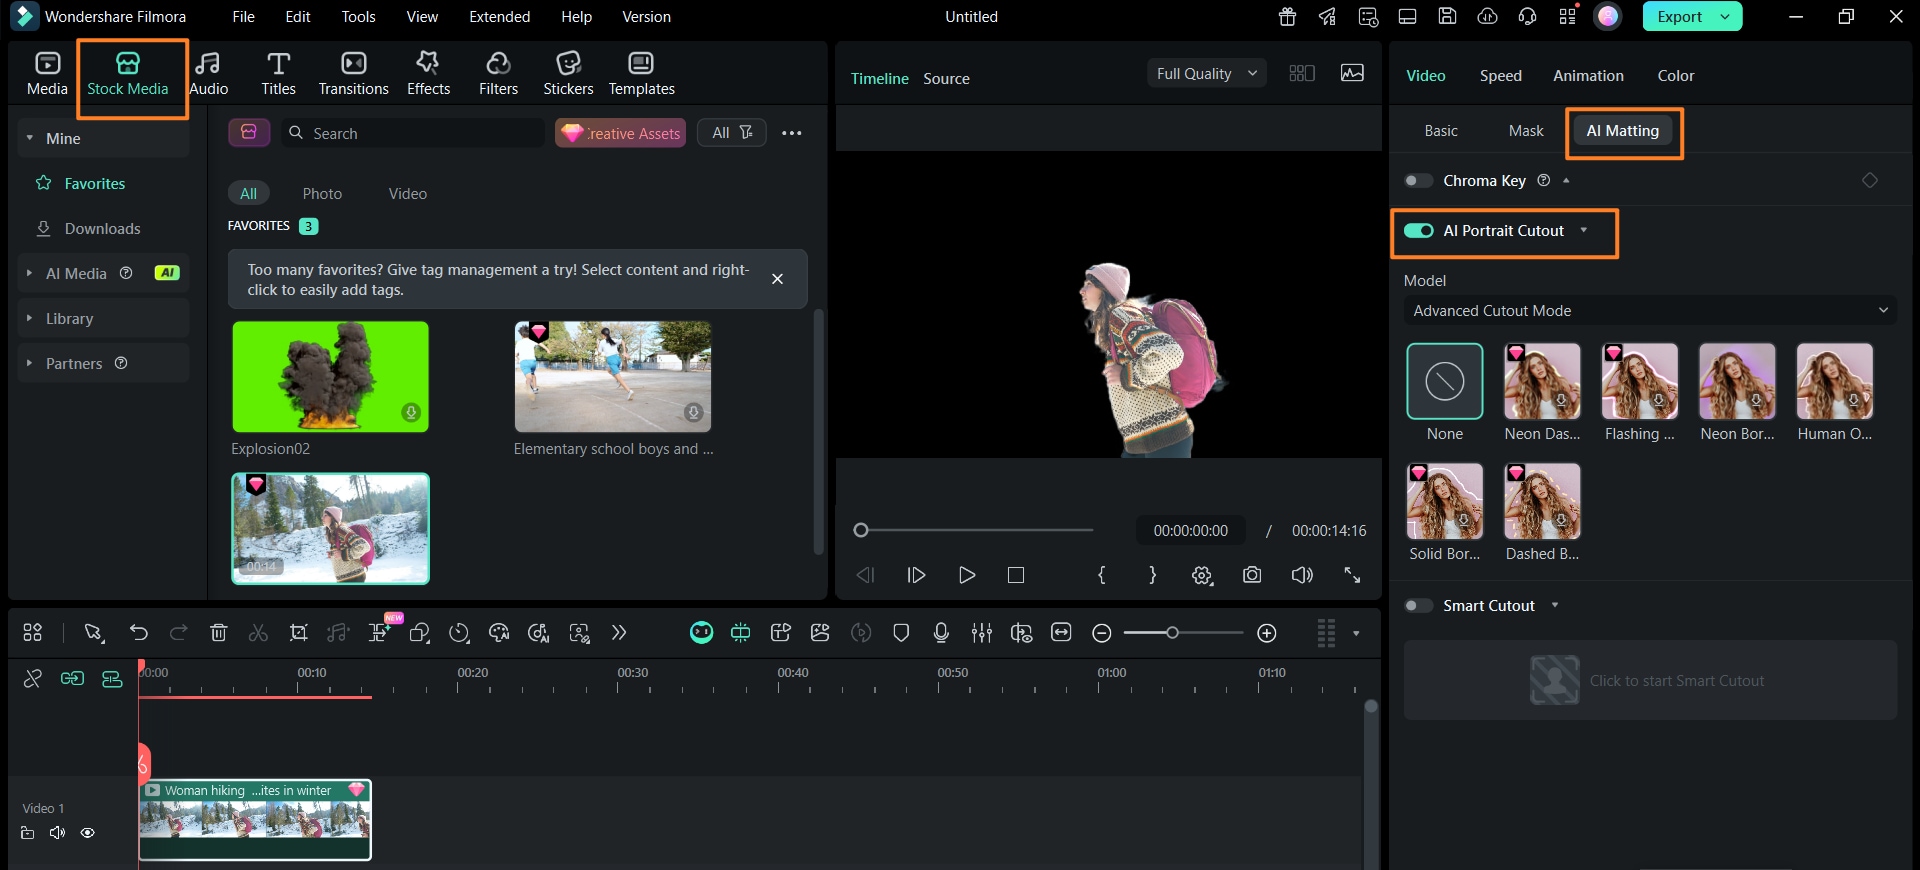
Step 2: Now, double-click your video and look for "AI Portrait Cutout" under "AI Matting." Filmora will remove the background for you. You can then add a new background if you want.
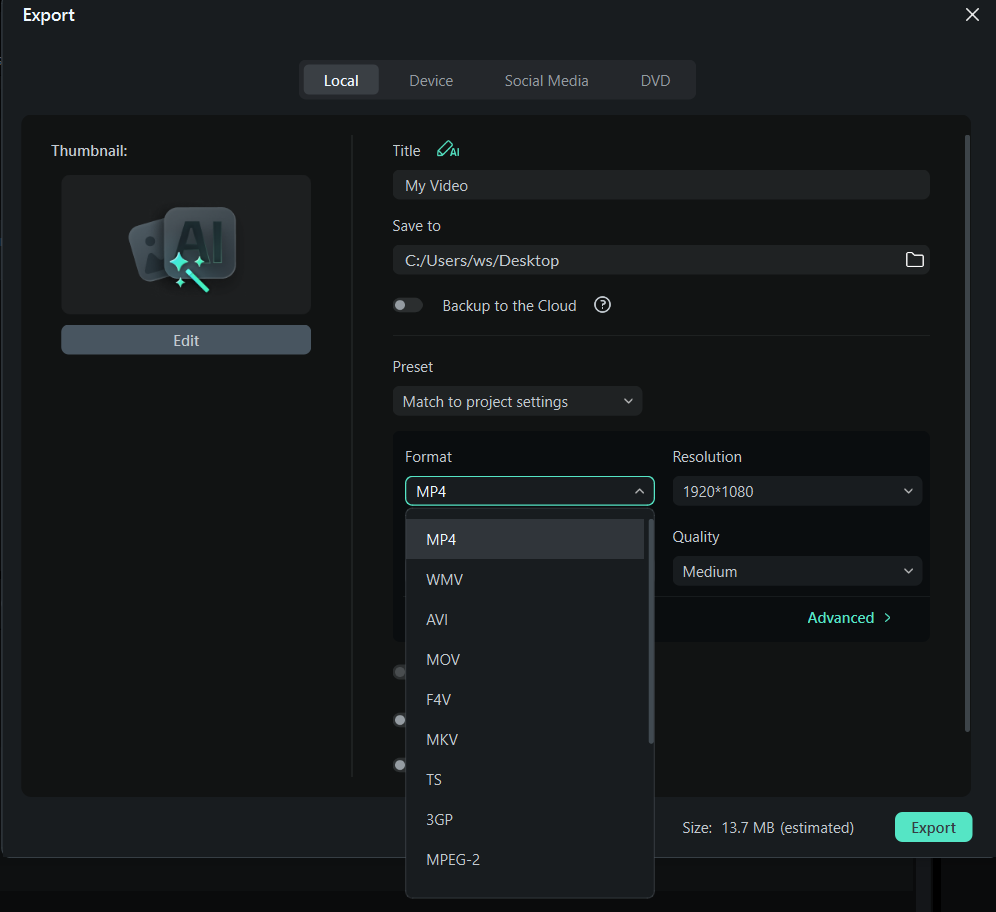
Step 3: When you're done, click "Export". Pick how you want to save your video. You can also share it straight to social media if you like.
Wonderahare Filmora is simpler to use than Adobe Premiere Pro for taking backgrounds out of YouTube videos. It has a more straightforward interface and special features like AI Portrait that can erase backgrounds with just one click. This makes the process quicker and easier, especially for beginners or people who don't need all the complex features of Premiere Pro.
Although Premiere Pro is more powerful overall, Filmora's easy-to-use design and fast background removal tools are perfect for YouTubers who want to make high-quality videos without a difficult learning process.
Part 4: Tips and Tricks for Premiere Pro Background Removal
To enhance your background removal skills in Premiere Pro, consider these additional tips and tricks:
- Aim for Success: When you're not using a green screen, try to film your subject in front of a plain background that is different in color. This will make it easier to take out the background later.
- Combine Different Techniques: Use a mix of techniques like Ultra Key, Luma Key, and Color Key to handle difficult video clips.
- Use Adjustment Layers: Instead of putting effects directly on your video, use adjustment layers. This gives you more freedom to change your settings.
- Make Custom Masks: Use masks to select specific parts of your video for more accurate background removal.
- Try Different Blend Modes: Different ways of blending can help make the change between your subject and the new background look smoother.
- Match Colors Properly: After taking out the background, use color tools to make sure your subject looks natural with the new background.
- Use Keyframes for Movement: If your subject is moving, use keyframes to adjust your masks or effects as the video plays.
- Don't Forget About Audio: When removing backgrounds, consider how this might affect the audio. Use audio effects to maintain realism.
- Practice Patience: Background removal can be a time-consuming process. Take breaks and approach challenging sections with fresh eyes.
Hot Topics on Instagram
Conclusion
Learning how to remove backgrounds in Adobe Premiere Pro can greatly expand the creative options for video editors and content makers. Whether you're using the Ultra Key effect that comes with the software, trying out more complex methods to remove backgrounds without needing a green screen, or looking at other options like Wondershare Filmora, being able to change backgrounds can significantly improve how your videos look.
Keep in mind that while having the right tools and knowing how to use them is important, the real secret to successfully removing backgrounds is through practice and patience. Every project will have its own set of challenges, and with more experience, you'll start to understand which techniques work best in various situations.
Stay interested, keep trying new things, and don't hesitate to explore new creative ideas. With these skills, you'll be well-prepared to make impressive videos.
