
 100% Security Verified | No Subscription Required | No Malware


 ChatGPT
 Perplexity
 Gemini
 Claude
 Grok
Grok
Be it a casual hobby or full-scale professional production, the ultimate goal is to create videos of the highest quality. Everyone exhibits different editing techniques to achieve such high-caliber results. In this regard, the primary element that most video editors consider is video stabilization. Of course. Nobody wants to produce content filled with shaky and headache-triggering footage. Don't worry. You can use the Google Video Stabilizer to fix minor issues in a snap. On the other hand, the Mocha-powered stabilizer of Wondershare Filmora is there to assist you with more complicated cases. Indeed, generating stunning video content nowadays is no longer rocket science.
In this article, we will provide some tips and tutorials on how to stabilize a video in Google Photos. We will also suggest an alternative stabilization technique that utilizes more advanced tools like Wondershare Filmora. Continue reading below to learn more.
Can You Stabilize a Video in Google Photos?
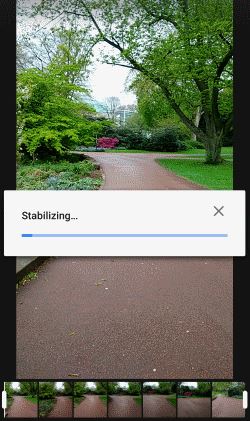
As previously indicated, Google Photos can stabilize video content. It has a built-in feature that allows you to apply such effects to your project. Basically, all it takes to stabilize the video in Google Photos is a couple of taps. After that, the video will be enhanced instantly.
While this tool is very helpful for non-complex scenarios, you might find it quite limited in certain circumstances. That's why you should assess your specific needs very well and take the necessary actions. To get to know the advantages and drawbacks of using the Google video stabilizer, read the list written below.
Pros
Here are the main advantages of using Google Photos to stabilize video content.
- It can automatically stabilize short video clips in a snap.
- It runs over the internet. No need to download and install an external application.
- It offers quick stabilization fixes, especially for content creators on the go.
- You can easily import and export videos within the Google Workspace.
- It can be accessed easily on mobile, desktop, or the web.
Cons
Here are some drawbacks of relying heavily on Google Photos to stabilize video content.
- The options for manual control are quite minimal.
- The video quality might be affected if the automated configurations go too aggressively.
- Due to the lack of the motion tracking feature, you might struggle to stabilize videos with rapid or multi-directional movements.
- You might need to resort to other tools if you're stabilizing videos in 4K resolution.
- The stabilization process might get interrupted if your internet connection is poor and unstable.
When to Upgrade From Google Video Stabilizer?
To be fair, we cannot disregard the fact that the Google Photos video stabilizer is very useful. It's just that certain stabilization issues need a different approach. If using Google Photos to stabilize your video content is no longer effective, don't hesitate to explore other alternatives. Here are some situations where you might need to upgrade from Google video stabilizer and opt for more advanced solutions.

- You're working on a professional video project.
- You wish to preserve the original quality of your footage.
- Your video clips are filled with complex actions and extreme camera shakes.
- You're in need of wide customization controls.
Wondershare Filmora: Your Professional Stabilization Solution
If the Google video stabilizer needs an extra helping hand, your best choice is Wondershare Filmora. This all-in video editing software is equipped with a planar tracking feature that lets you track movements and optimize frame effects. Of course. It can help you fix shaky clips, whether it's minor or major stabilization issues. Do you want to give it a try? If so, then check out the list of features below to learn further.
AI-Powered Stabilization
It has an AI-powered stabilization feature that allows you to correct the camera shake in one click. No complicated steps. Just select a preset level and enable it on your video project. You can make good use of this amazing feature if you're working on casual vlogs or videos with talking heads.
Advanced Mocha Integration
The Mocha-inspired stabilization feature of Wondershare Filmora is here to assist you very well. It provides access to different tools you can use to track planar objects, add imported elements, or simply enhance stabilization. But aside from that, there is definitely more to explore. Check them out from the list below.
- Create custom paths to track multiple surfaces more easily.
- Correct camera shakes caused by the roller shutter and keep the footage undistorted.
- Analyze movements in the video with the aid of artificial intelligence to ensure accuracy.
- Preserve up to 95 per cent of the original video quality.
Advanced Stabilization Tools
Using Google Photos to stabilize video content offers limited customization options. That said, you can opt for Wondershare Filmora to access advanced stabilization tools. Here are some of them that you should put to good use.
- The customizable intensity of the stabilization enhancement.
- The ability to specify the object that needs further stabilization.
- Proper levelling of the horizon line.
- The option to stabilize multiple clips at a time.
Additional Features
Being able to access and use different tools in one platform improves your regular workflow. Therefore, you should take Wondershare Filmora to your advantage and make the most of the following features.
- It allows you to stabilize and process video footage even without an internet connection.
- It is capable of running video clips in 4K or 8K resolution.
- After the stabilization, you can further edit the videos within the platform. No need to switch to another application.
- It enables you to configure the export settings according to your preferences.
How to Stabilize Videos Using Wondershare Filmora?
If you're planning to move from Google video stabilizer to Wondershare Filmora, you'll not have a hard time. That is definitely for certain. Why so? Let's just say that the latter has a very responsive and intuitive interface that is very easy to navigate. Do you want to give it a try on your end? If that is so, then check out the tutorial below and follow the indicated steps accordingly.
 secure download

01of 10Download and Install
Download Wondershare Filmora from its official website and install it on your computer.
02of 10Create New Project
On the main dashboard, click New Project to start editing or scroll down to the Local Projects section and open an existing session if there is any available.
03of 10Import Media Files
After that, navigate to the Elements Panel and click Import under the Media tab. Select all the files you are going to use and upload them to the platform. Once the assets are ready, grab and drag them one by one to the Editor Timeline for further customization.
04of 10Select Video Clip
Now, it's time to stabilize the video clips. To get started, double-click on the footage you wish to enhance.
05of 10Access AI Tools
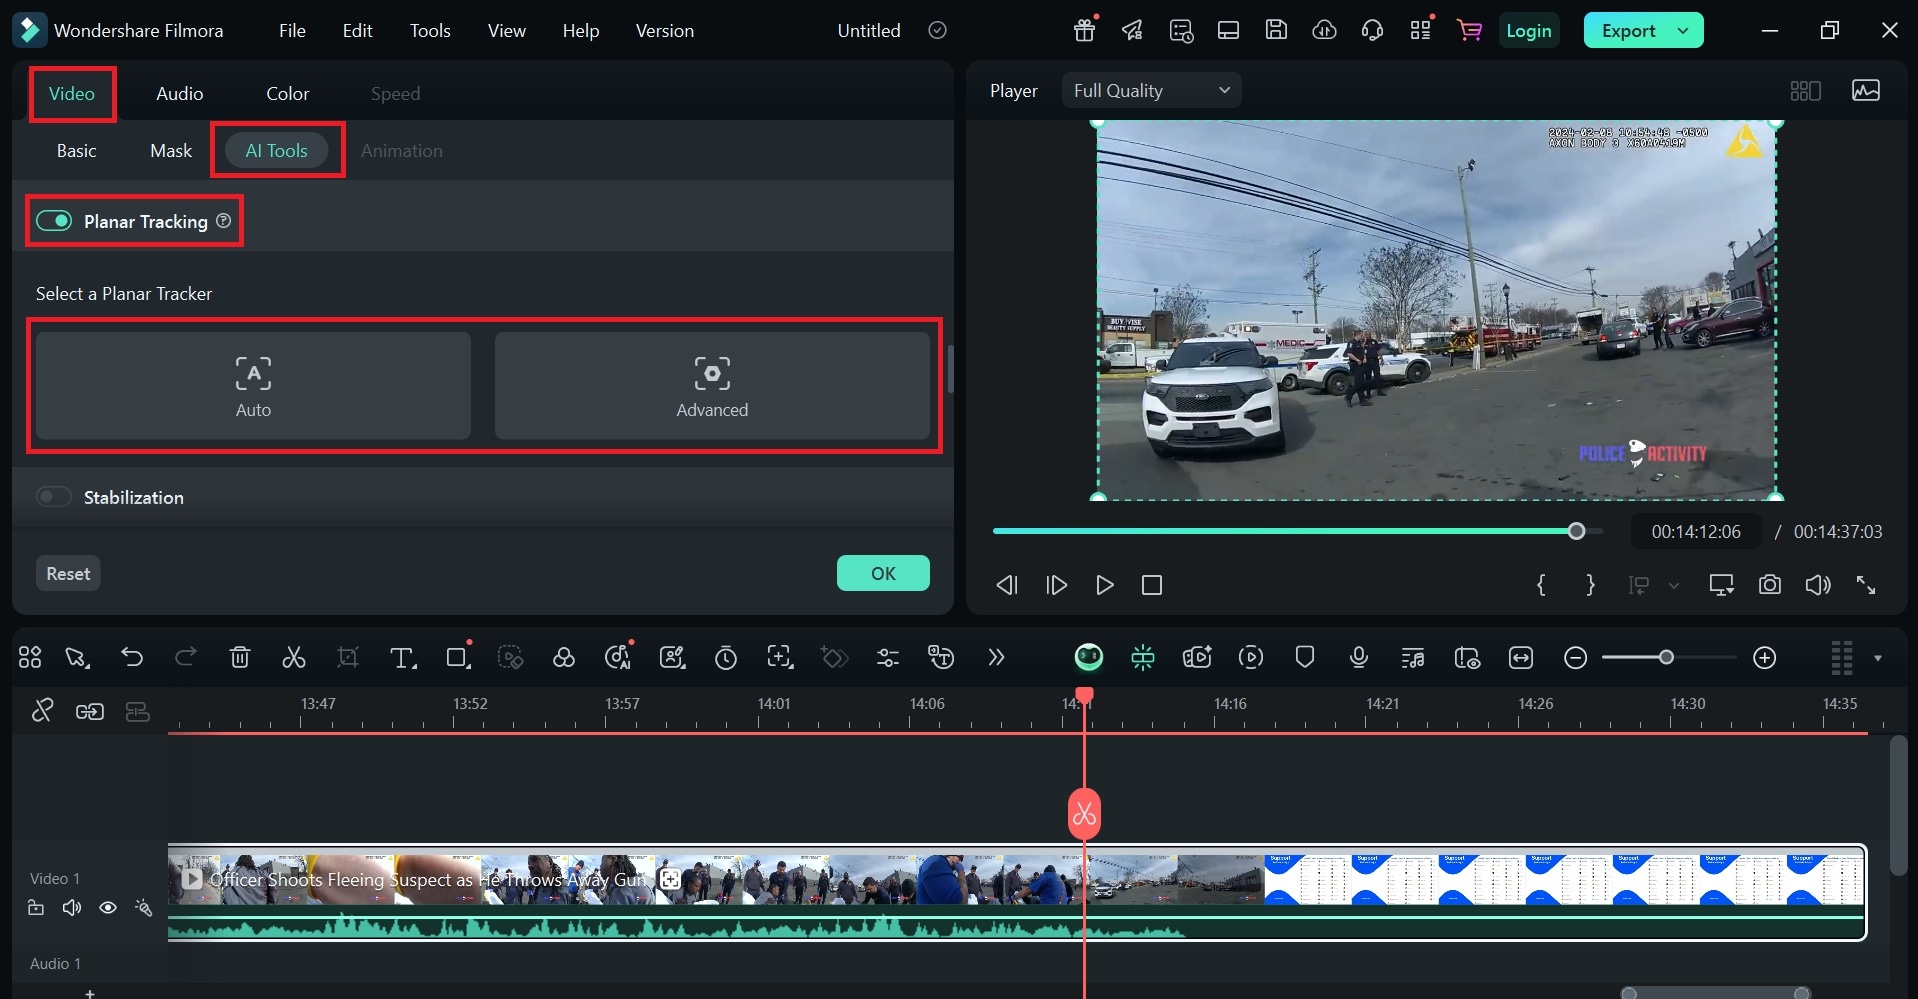
A new panel will then open on the Elements Panel tab. From there, click the Video tab and choose AI Tools.
06of 10Enable Planar Tracking
Browse the given options and find Planar Tracking. To proceed and enable this feature, simply switch on the toggle button beside it.
07of 10Choose Tracking Mode
Specify the specific mode you prefer to use in this regard. Choose Auto or Advanced.
08of 10Select Tracking Area
Subsequently, head over to the Preview Panel and pick the specific object you want to track. To do that, just grab the four tracking points one by one and drag them accordingly. Since your goal is to stabilize shaky videos, make sure that you select the sections that need such improvements.
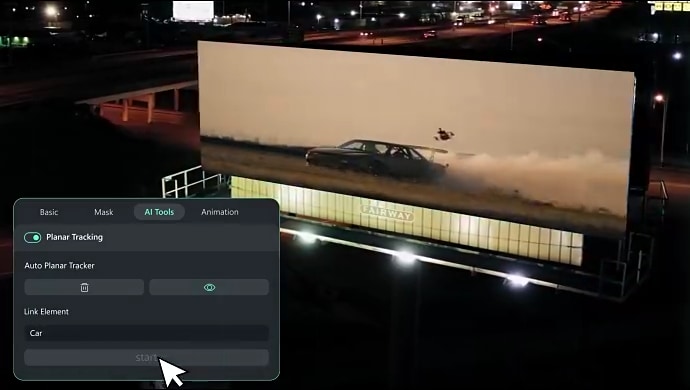
09of 10Configure Advanced Settings
If you choose the Advanced mode, don't forget to configure the corresponding settings. Start by choosing your desired accuracy level. After that, tap the Link Element and replace the selected object with the new media file of your choice.
10of 10Start Tracking and Export
Once done, click Start and review the final output. Check the stabilization applied and make sure that it matches the quality you wish to achieve. If further adjustments are needed, go over the same series of steps and repeat them accordingly. Otherwise, tap Export to render the video and save a copy to your computer.
Conclusion
For simple and quick stabilization remedies, Google Photos stabilization can already do much. Using Google Photos to stabilize video content has long been a reliable solution in this regard. On the one hand, Wondershare Filmora is here to help you fix unsteady videos with complex requirements. It has a Mocha-powered planar tracker that enables you to enhance the frame effects in a snap. Are you a content creator who values video quality above anything else? Then, Wondershare Filmora is your perfect companion. Download this potent video editing software on your computer. As you go along, enjoy the perfect blend of performance and ease of use.
secure download 