Audio in a video greatly affects the comfort of the audience. Unclear audio can make the audience uncomfortable when watching your video. Therefore, you need to use the Auto Ducking feature so that your audio sounds clearer.
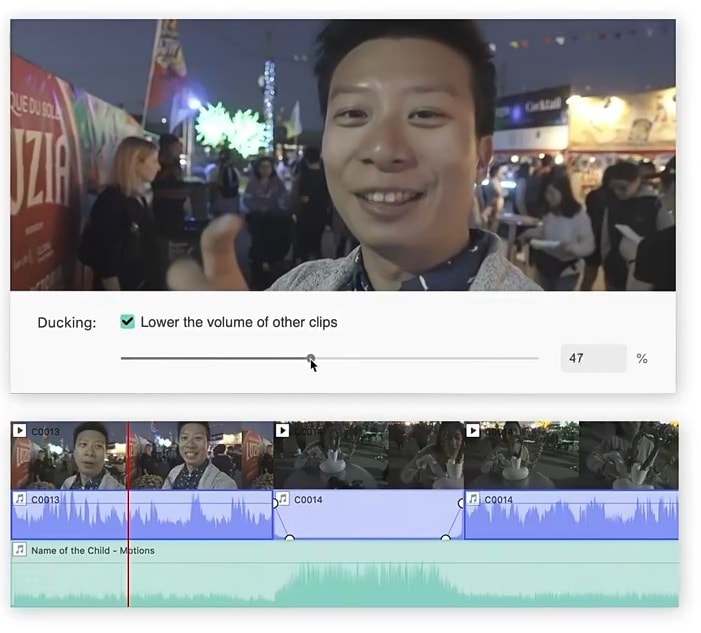
Auto Ducking is a tool to reduce the volume on one track so that the volume of the other track is more apparent. This tool can be used to record voiceovers, subtitles, narration, and edit YouTube content videos or podcasts.
To help you learn what Auto Ducking is and how to use this feature, this article will show you how to use audio ducking on a PC. Keep reading and follow the steps!
In this article
Part 1. How Audio Ducking Feature Makes Your Voice Clear
When recording sound, clear audio is super important. For example, imagine you're a content creator adding a voiceover and background music to your "A Day in My Life" video. If the background music is louder than your voiceover, it will make viewers uncomfortable. That's why you need auto ducking to adjust the volume of each track to make sure the background music or noise is softer, so your voice is easy to hear.
So, the Audio Ducking feature works simply. If there are two or more audio tracks in a video, it reduces the background noise and makes the main sound clearer, so it stands out better. And from the example above, it is clear that audio ducking is important and can bring many benefits to the video editing process. Here are some of them:
- Helps your voice stand out: Audio ducking can improve the clarity of your main voice.
- Improves focus: Audio ducking can reduce background noise so that your main voice can still be heard, keeping viewers focused on the important things in your recording.
- Makes your recording look more professional: Audio ducking can add a professional touch and maintain the quality of your recording.
- Prevents conflicting sound sources: Audio ducking can balance one audio track with another to produce professional-quality audio.
Automatically lower the volume of one track to make another track clearer when you're recording voiceovers.

Part 2. How to Edit Videos Using Auto Ducking Feature on PC
Now that you know what Auto Ducking is as well as the many benefits that you can get with the feature, let's explore it more in video editing software. Although some video editing tools have Auto Ducking, we recommend Wondershare Filmora.
Auto Ducking in Filmora automatically lowers background music or sounds when someone is talking and raises it back up when they stop. It's perfect for voiceovers, narrations, podcasts, and more. This makes your videos sound clear and professional, which helps keep your audience engaged and makes your content stand out!
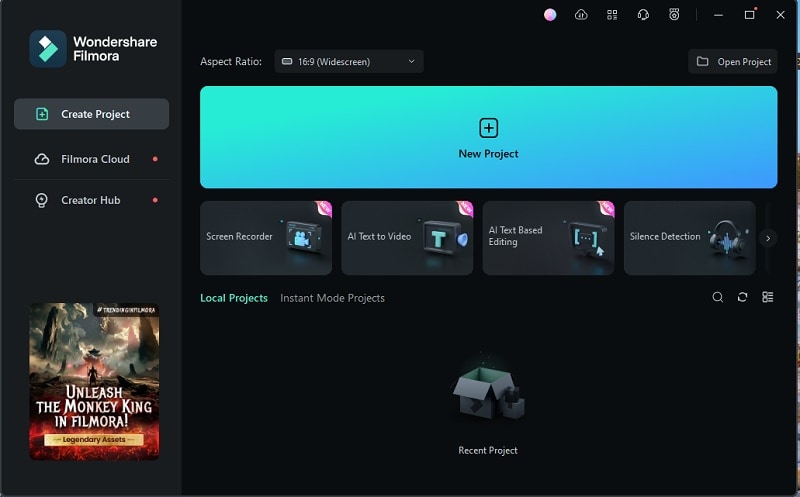
Filmora is also affordable and offers various plans to fit your needs. You can even try it out for free with a trial version. Follow the steps below to learn how to edit audio using auto ducking on PC for Windows or Mac users using Filmora:
Step 1: Download and Install Wondershare Filmora.
Step 2: Launch Wondershare Filmora, then click New Project to open the editing timeline.
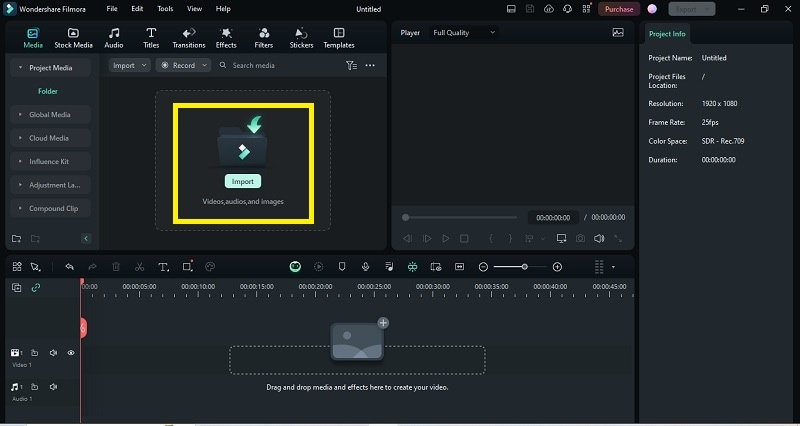
Step 3. Import the video/audio, or you can drag and drop the video files. After that, drag the files to the timeline at the bottom to work on them.
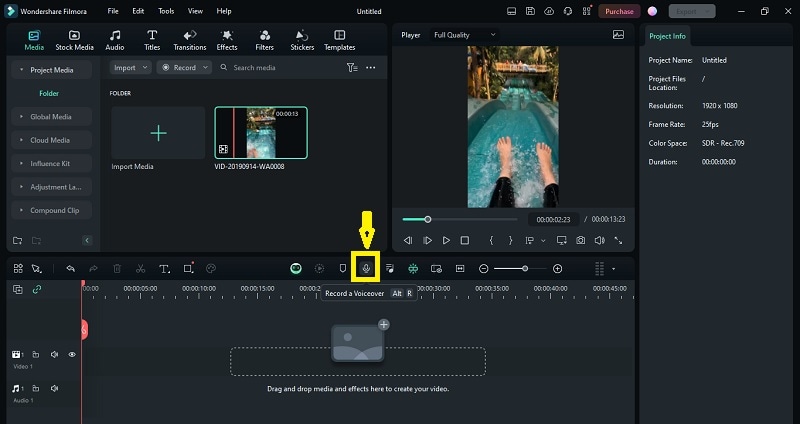
Step 4: On the Filmora interface, you can record a voiceover. To do this, click on the voiceover icon and start recording your voice.
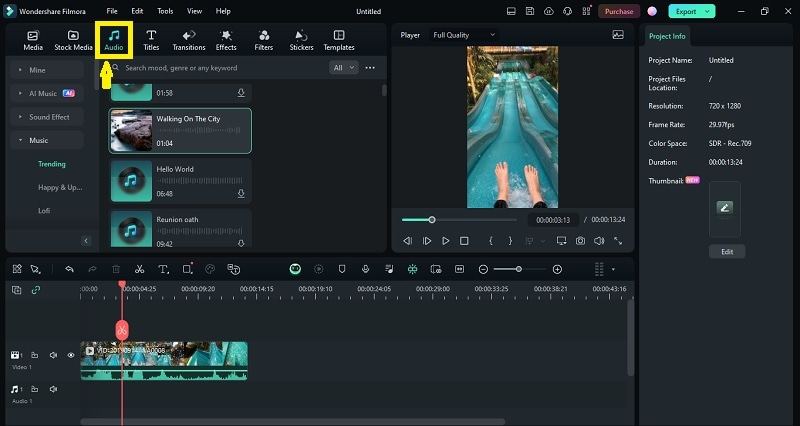
Step 5: In addition, you can also add various royalty-free music that can be used without any copyright issues. Click Audio and then select the music you want.
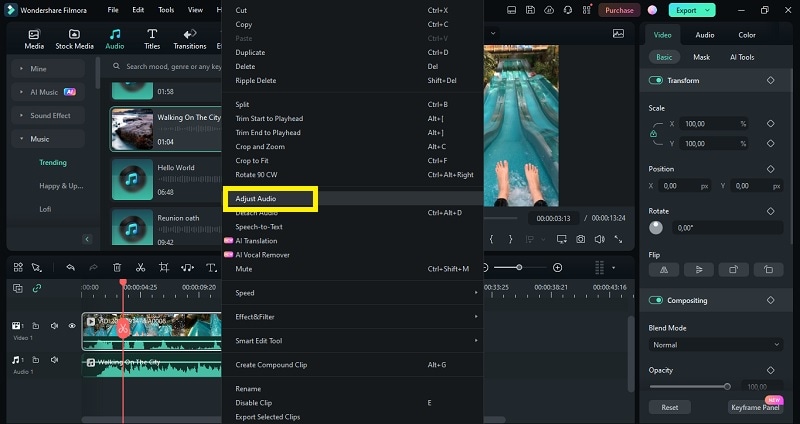
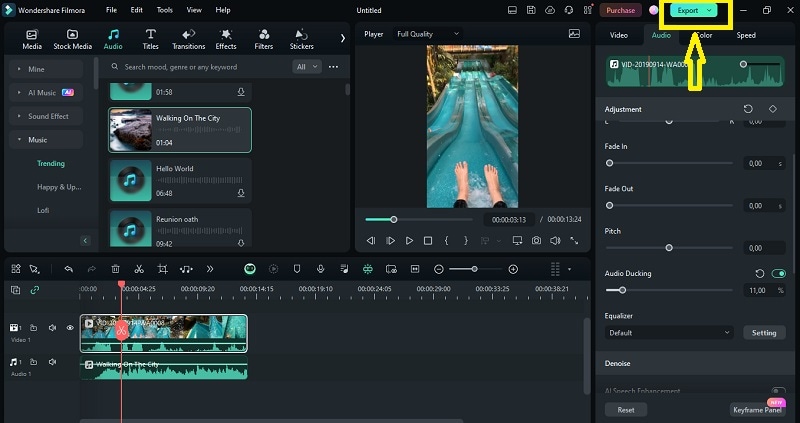
Step 6: Once you have added the video and audio track to the Filmora timeline. Right-click on the video in the timeline and then click on "Adjust Audio".
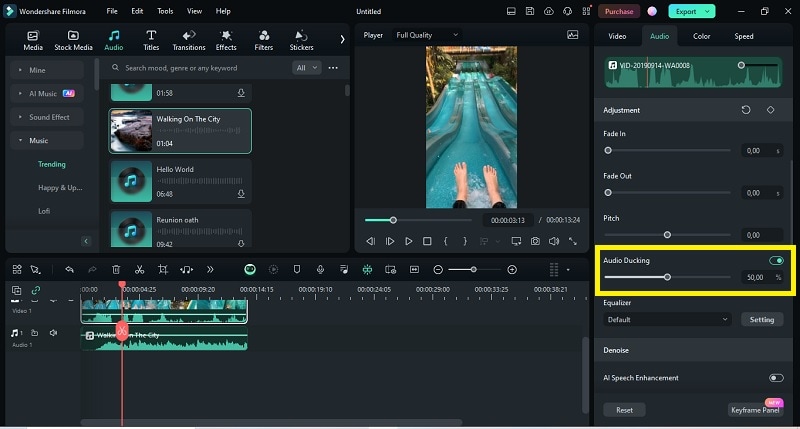
Step 7: Once the adjust audio menu opens, click on the "Audio Ducking" option at the bottom and enable the audio ducking feature. Then, choose a level to lower the volume of other background clips in a video.
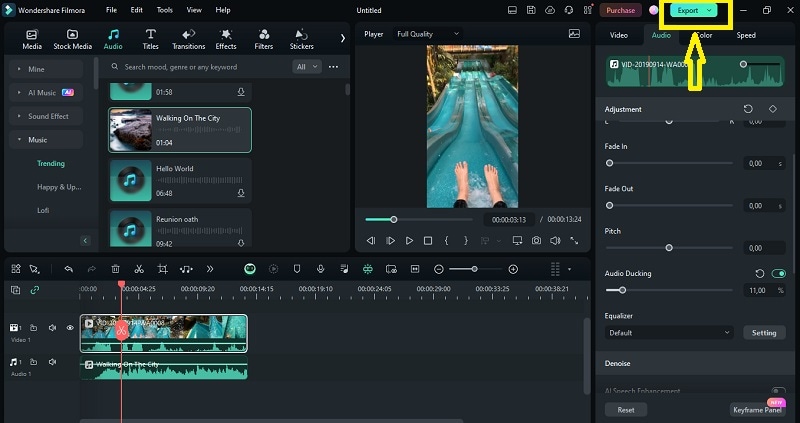
Step 8: After enabling the audio ducking feature and choosing a level to lower the volume of other background clips in the video. Then click the "OK" button then Filmora will automatically adjust the volume of other clips. If you are satisfied with the result, click export to save it.
Part 3. Other Video Editors with Auto Ducking Feature
In addition to the methods explained above, we will introduce other video editing tools with auto ducking features, namely Premiere Pro and Auto-Duck software. Here is an explanation of these tools and how to use auto-ducking.
1. Premiere Pro
Premiere Pro is a renowned video editing software used by professionals in the film, television, and content creation industries due to its comprehensive suite of tools and seamless integration with other Adobe products. This tool is not only great at video editing but also can do audio editing well.
One of its audio editing features is the ability to duck audio. Ducking audio using Adobe Premiere Pro's Auto Ducking feature requires a basic setup in the Essential Sound panel. Here's how to use auto ducking in Premiere Pro:
Step 1: Set up a video with two or more audio tracks (background music or voiceover) in your timeline.
Step 2: Open the Essential Sound Panel by clicking the Audio menu at the top of the audio workspace window.

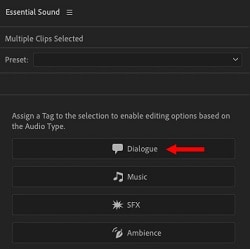
Step 3: Once the Essential Sound panel appears, select all the dialogue clips to adjust the volume of the other clips. Then click the Dialog option in the Essential Sound panel to "label" the selected clips.
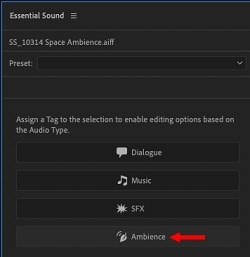
Step 4: Once all clips are selected, open the Essential Sound panel again and select the Ambience button to label the clips.
Step 5: Then, in the Ducking section, make sure that the dialogue icon in the Duck Against category is selected.
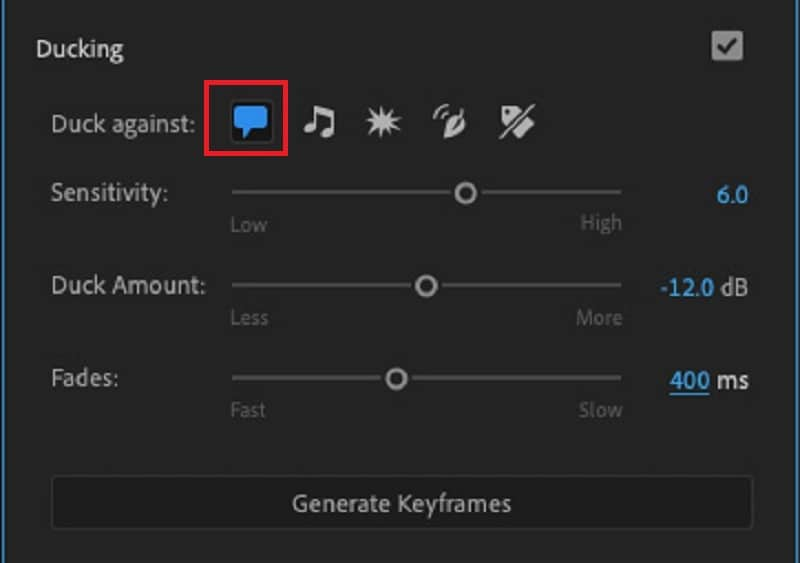
Step 6: Next, adjust the settings for each category, including:
- Sensitivity: Determines how long to pause between clips before setting a keyframe.
- Duck Amount: The amount, in decibels (dB), to lower the ambient volume.
- Fades: To make the duck sound more or less natural in milliseconds, from the fade down and fade up.
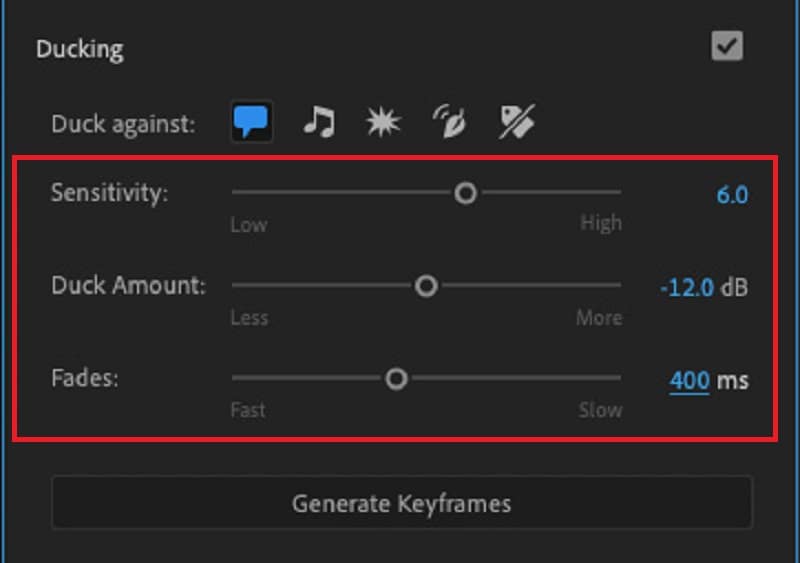
Once you have adjusted the settings, listen to the playback on the project you have adjusted. If you want to change the adjustments again, you can return to the Essential Sound panel and then click Generate Keyframes once again.
Automatically lower the volume of one track to make another track clearer when you're recording voiceovers.

2. Auto-Duck
Auto-Duck is a software commonly used by streamers, podcasters, and YouTubers to lower the volume of music when someone is talking. Follow how to use auto-ducking in Auto-Duck:
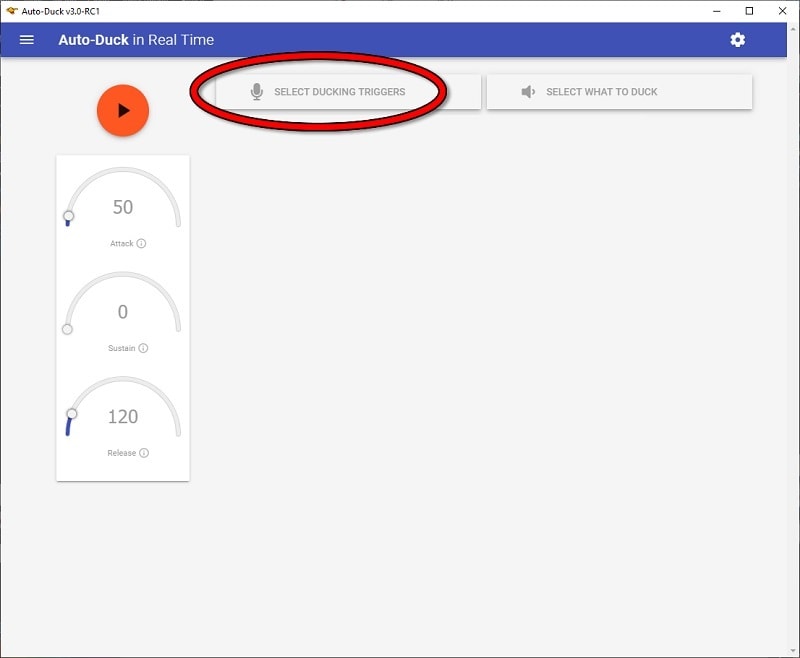
Step 1: Select the channel to be used as a ducking trigger (usually a microphone).
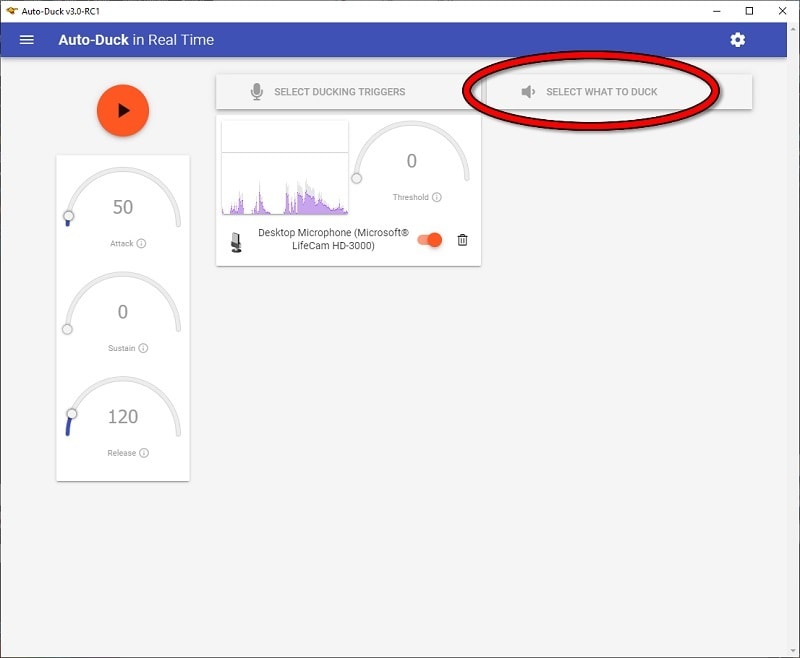
Step 2: Select the channel to duck (usually a game or music player).
Step 3: Press the Start button and set all parameters as needed.
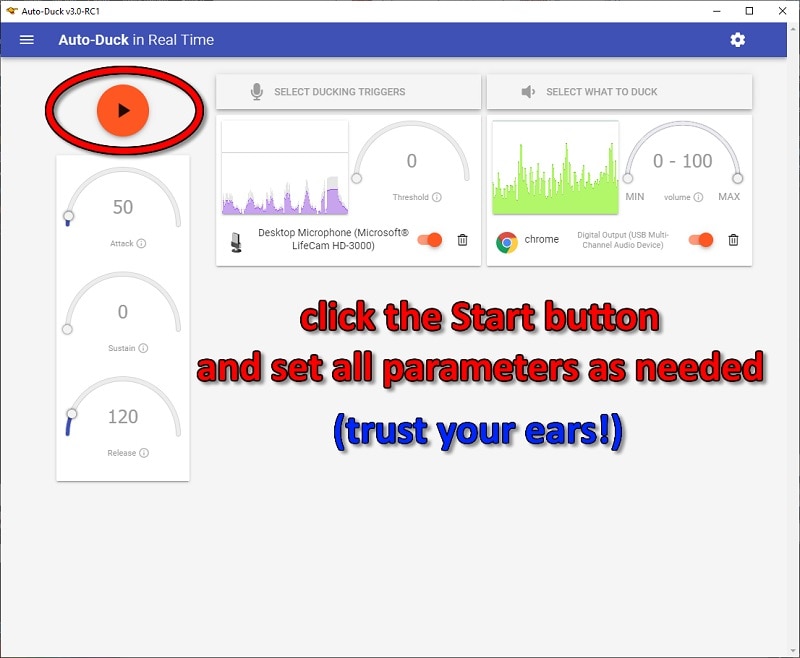
Step 4: Set the volume parameters on the channel to duck.
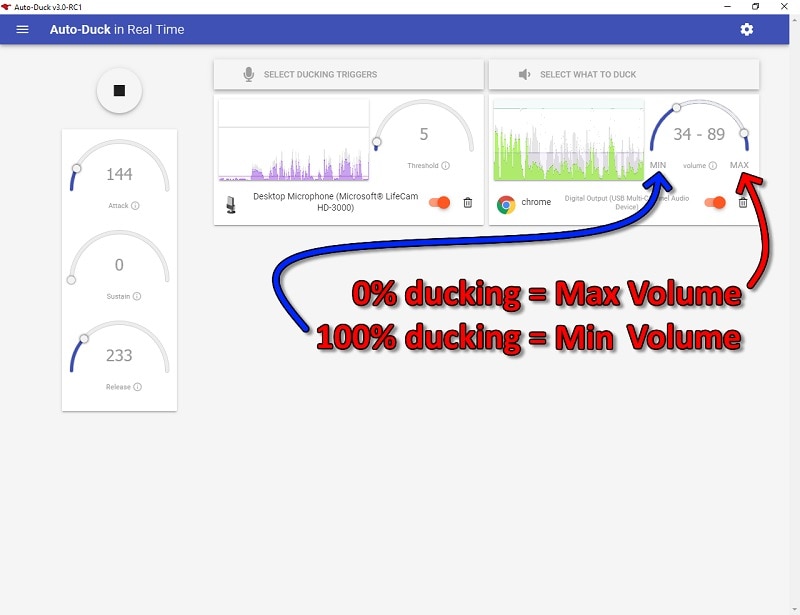
Listen carefully to the playback on the project you have adjusted. If it is still not right, you can adjust it again.
Conclusion
It is annoying when a video has two sound sources, but the background sound is too noisy, making your main sound unclear. Thankfully, you can solve this issue with auto ducking.
After learning what auto ducking is about and the important role of audio for the comfort of the audience, you no longer need to worry and wonder how to make the main sound in the video stand out and clear.
While some video editing programs offer this feature, Wondershare Filmora is a standout choice. Its easy-to-use Auto Ducking automatically adjusts background music and sounds, so your voiceovers and key audio come through loud and clear. With Filmora, your videos will sound great and keep your viewers interested.

