

 ChatGPT
 Perplexity
 Gemini
 Claude
 Grok
Grok
Do you recall sitting for hours just to edit that perfect video, only to re-export your video to fit the aspect ratio of different social media apps? Same here, buddy. The dread of having to resize and re-render a work of art is not an imaginary thing. But what if I told you that you could stop wasting your hours and start having more of them to spare?
Yes, this is true! Let me introduce you to auto-reframe in Capcut, the feature that can change how you edit your videos. This means that, once you’ve resized it, you can easily post the video on different platforms without having to stress yourself. Without further ado, let’s get started and find out how to use auto-reframe in Capcut.
In this article
Part 1. Overview of Auto Reframe in Capcut
First of all, you need to go through what auto-reframe in CapCut is. Capcut is an easy-to-use yet effective video editing tool that lets users create amazing videos. It has a unique auto-reframing feature that will enable you to easily change the size of the frame and aspect ratio of the videos.

How does auto-reframe work?
Auto-reframe in Capcut is such a lifesaver and the savior for making your video look aesthetic and professional. Auto Reframe functions based on artificial intelligence that analyzes each frame and determines which part of the video makes it stand out from the rest. It then remasters it to bring all the displayed aspects back to alignment and center them, regardless of the chosen aspect ratio.
In which situations do users utilize the auto-reframe feature?
The auto-reframe feature comes in handy when one is editing content to be posted on various social media platforms. This feature is ideal for:
- Facebook and Instagram, as well as projection-oriented or squared videos, are more frequently uploaded.
- TikTok, where a key component is the brief content that is contained in the vertical videos.
- YouTube is another case of a site that mixes square, landscape, and portrait orientations.
Auto-reframe in CapCut brings the content to the proportions that are ideal for the particular platform and thus gives viewers the best experience.

Wondershare Filmora - Auto Resize Video


Part 2. How to Use Auto Reframe in CapCut?
After going through Part 1, you must be curious about how to use auto-reframe in CapCut. Just check out this part to get it all.
Method 1: How to use CapCut auto-reframe on Windows/Mac
Windows users can easily auto-frame their videos using CapCut. The following are the steps given to change the aspect ratio using the auto-reframe:
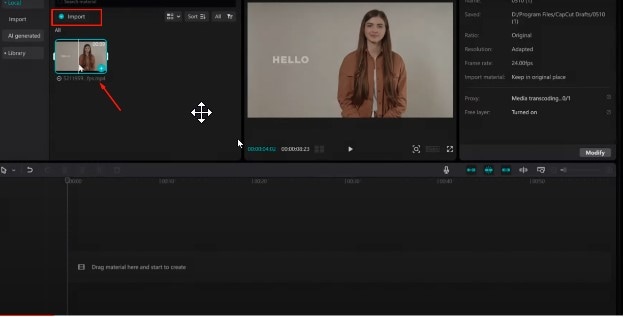
Step 1: Download CapCut > Open the video.
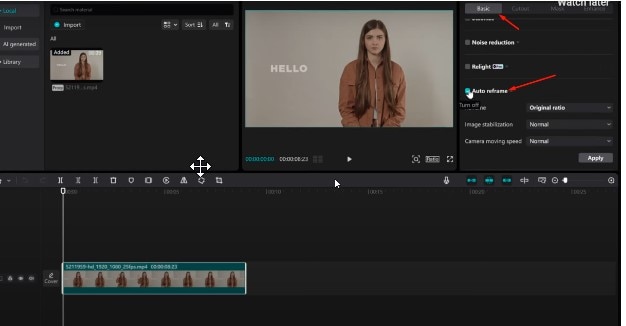
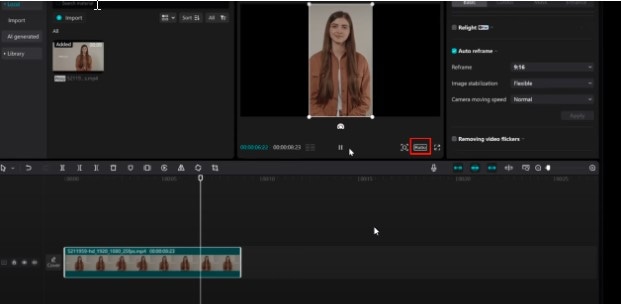
Step 2: Choose video in the timeline menu > Basic tab.
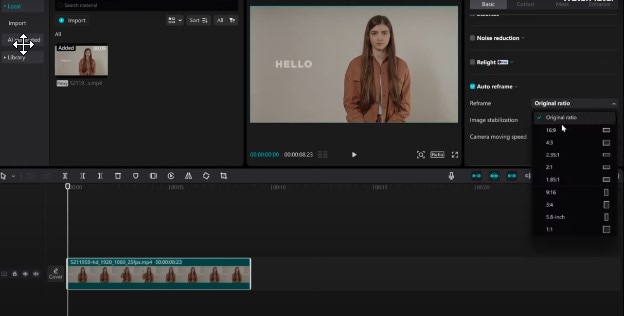
Step 3: Select the desired aspect ratio.
Step 4: Choose the ratio choice that is situated above the timeline, then choose the same ratio once more.
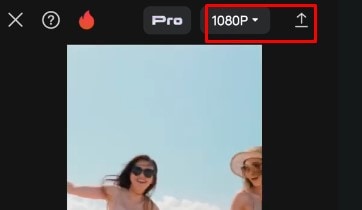
Step 5: Click the Export Tab.
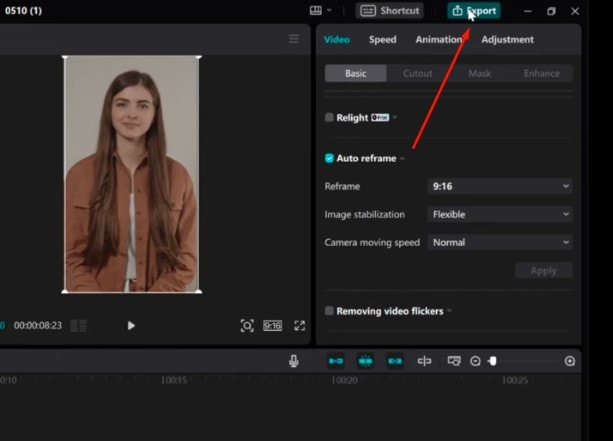
In this way, you can easily auto-reframe your video in CapCut on a Windows device.
Method 2: How to use auto-reframe on an iPhone/Android
You will be glad to know that you can use the auto-reframe feature on Android as well as the iPhone. Follow the general steps to use this feature:
Step 1: On your iPhone or Android device, open the CapCut app>New Project to import the video >tap on the video clip in the timeline.
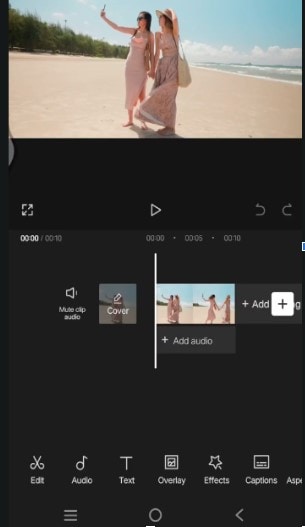
Step 2: It will bring up the editing tools. The auto-reframe option will be visible.
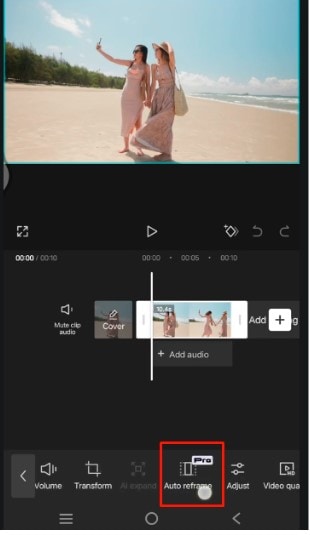
Step 3: You will see the various aspect ratios. Pick the one you want.
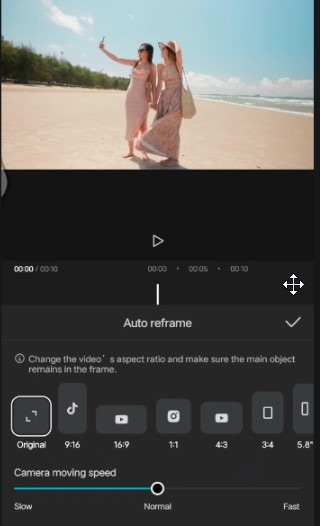
Step 4: select the export option by tapping on it, as indicated below.
In this way, you can apply auto-reframe on Android or iPhone.
.[a]
Part 3: Best Alternative to Capcut Using Auto Reframe—Wondershare Filmora
It is now time to provide Wondershare Filmora, the greatest substitute for CapCut. This tool has several advantages over CapCut. For instance, you can use CapCut’s auto-reframe feature in specific regions only. However, the users of Wondershare Filmora can use auto-reframes in any region without worrying about regions.
Moreover, Wondershare Filmora contains more professional features than CapCut.
Look at other amazing features of Wondershare Filmora:
Automatic Focal Point Detection: Over the duration of the video, Filmora's AI helps to concentrate on the main subject.
Aspect Ratio Flexibility: There is a list of available aspect ratios that include 16:9, 9:16, 1:1, and a lot more, depending on the social media to be used.
Motion Speed Control: Determine the speed being used by the video as much as the movement of the subject in order not to come up with a herky-jerky video.
Preview and Refinement: It is also very possible to go back and watch the reframed video and edit whatever one feels like changing.
How to use Filmora to adjust the video aspect ratio:
Method 1: How to Use Auto Reframe in Filmora
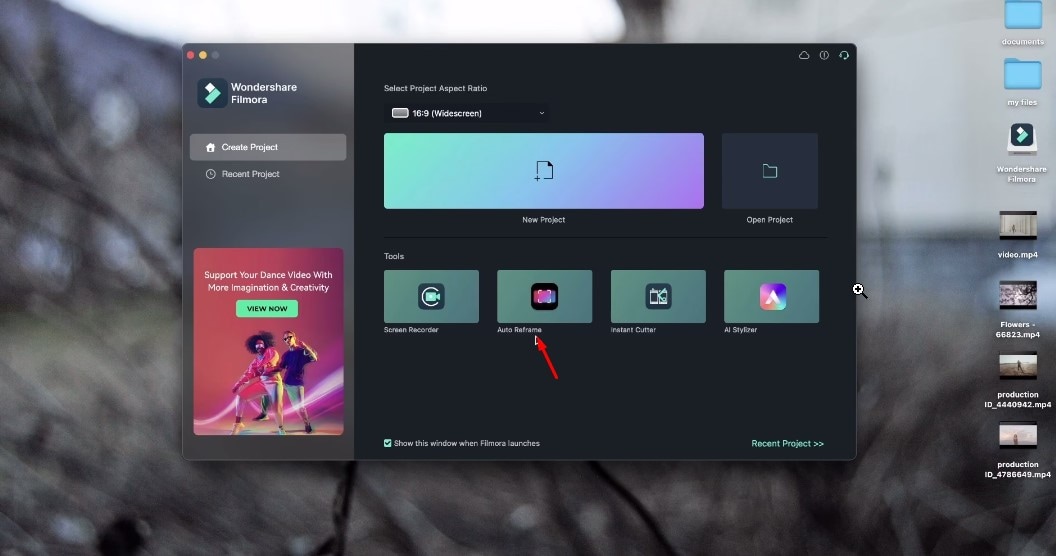
Step 1: Start running the Wondershare Filmora application on your device. When you launch Filmora, you will see Filmora’s main screen. It will highlight the auto-reframe feature on the UI. This will take the visitor directly to the reframing option without having to scroll through the entire application.
Step 2: When you’ve chosen auto-reframe, you will be presented with yet another dialog window. Several aspect ratios contain a template, including square, vertical, standard, widescreen, and cinematic aspects like 1:1, 9:16, 4:3, 16:9, and 21:9 respectively. Select an aspect ratio regarding your choice and the website on which you intend to upload your video. There are multiple options to adjust the speed of your video: To vary its speed and tone, keep it on auto and make it fast or slow.
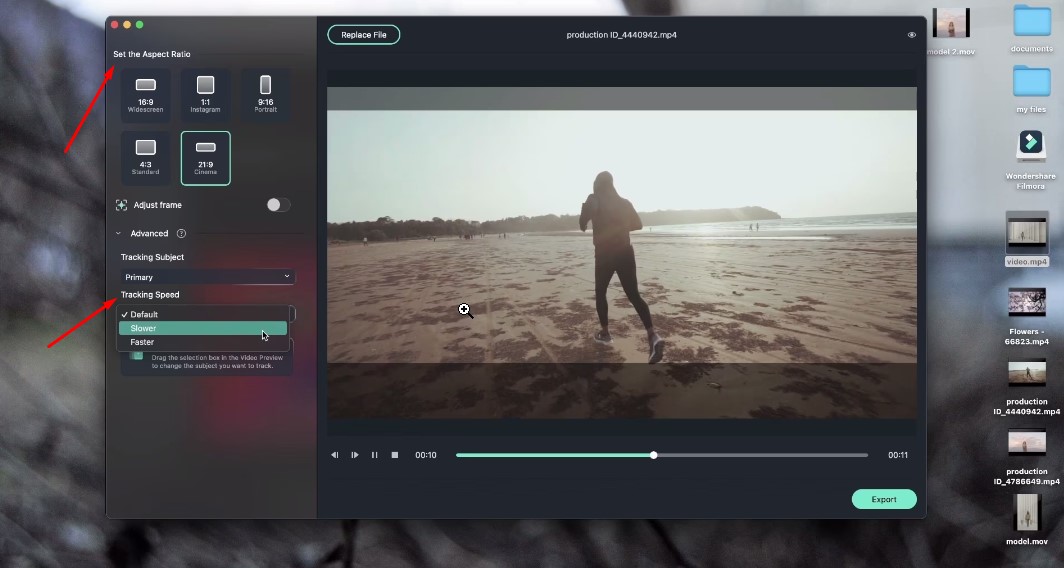
Step 3: Now watch the reframed video in the preview panel and then export your video in your preferred format.

Method 2: How to Adjust Filmora's Project Aspect Ratio
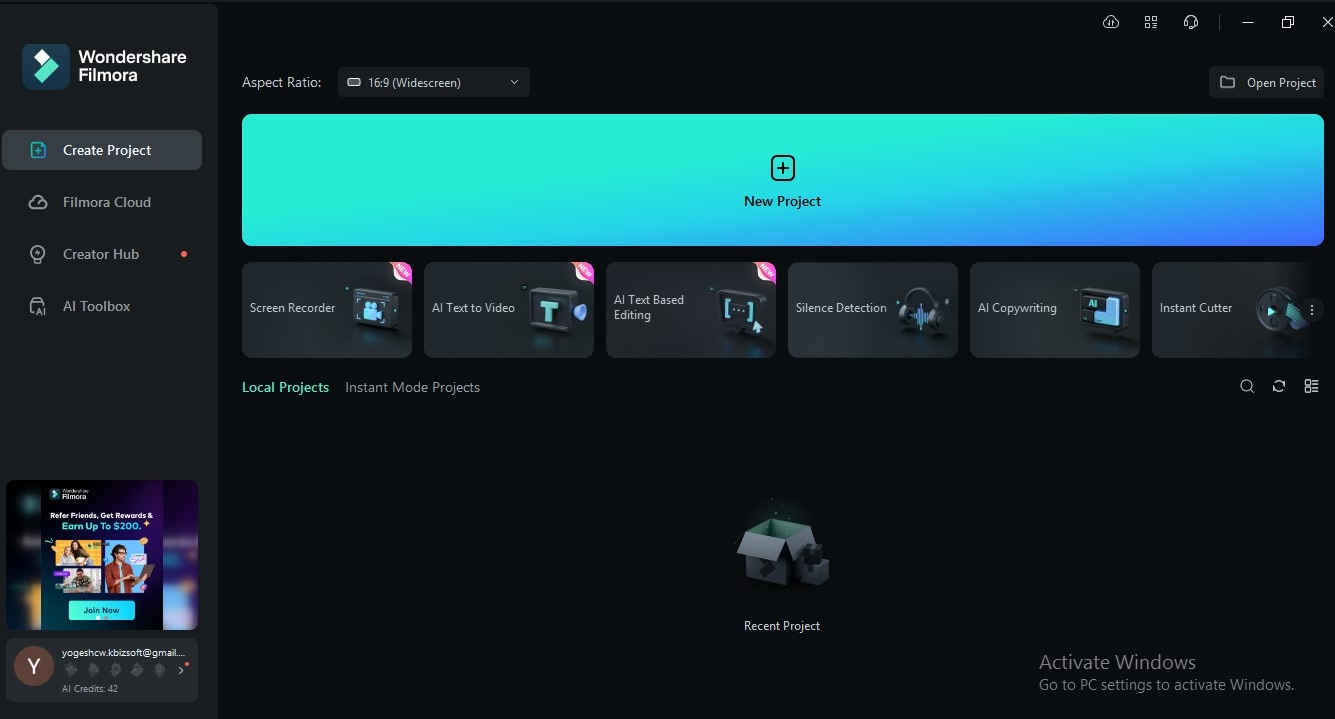
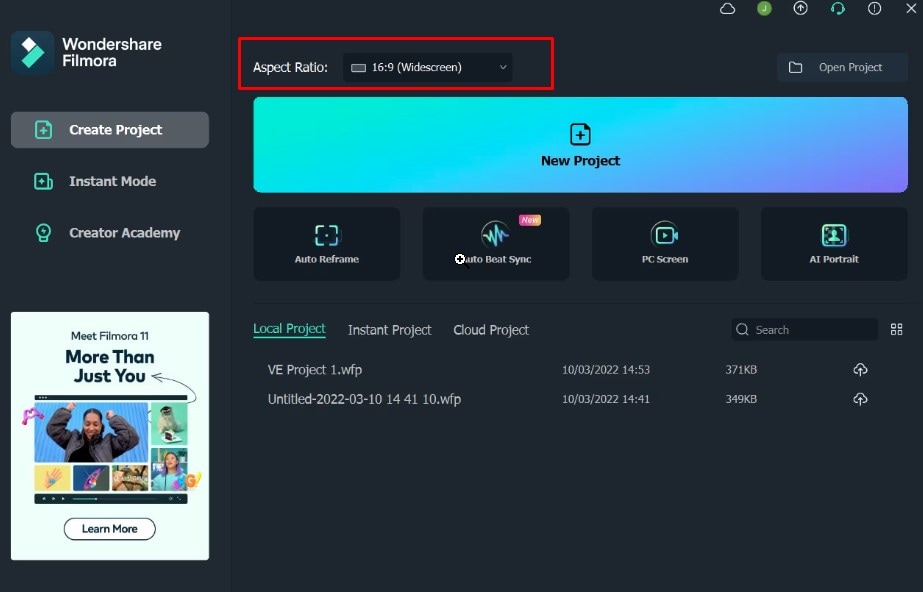
Step 1: When you open Filmora from the Start interface, you are free to set up the project aspect ratio. Common options are 16:9 (widescreen), 4:3 (standard), 1:1 (Instagram), and 9:16 (portrait). Pick your preferred one, then select "New Project" from the menu.
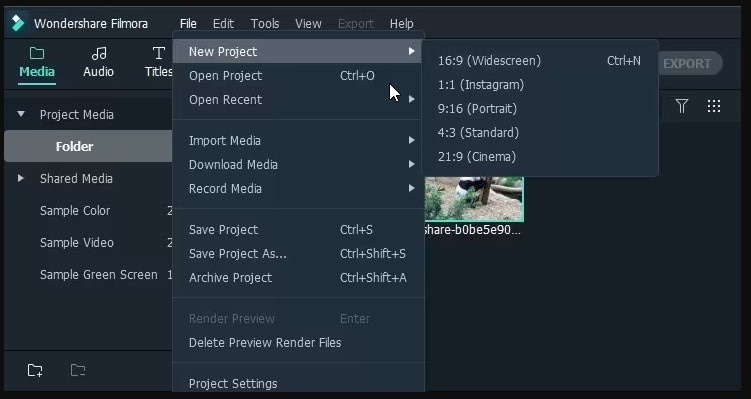
Step 2: If you are already in the editing panel, then you can simply change the aspect ratio of any project by going to File New Project. Choose an aspect ratio.
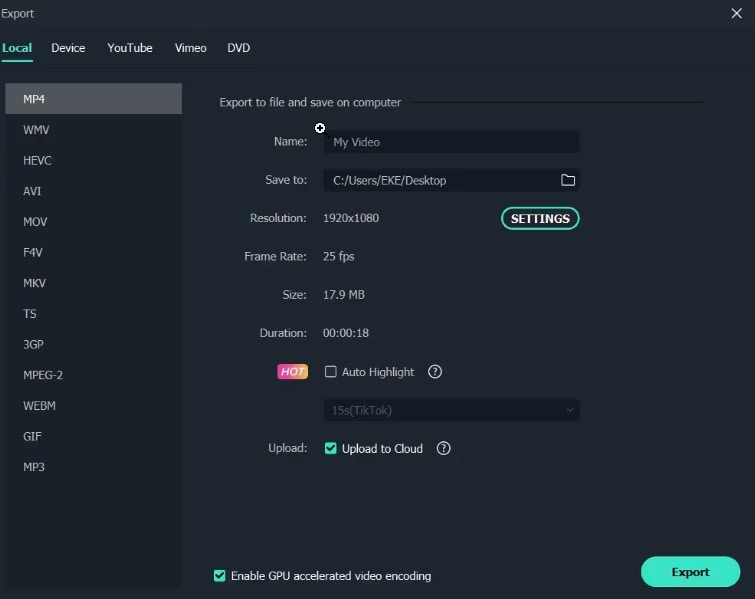
Step 3: After that, press ‘Export’ in case you want to go with the export of your video to the necessary folder. Here you can find the “Format” tab, where you are able to save your video with the help of the different formats.
Method 3: How to Crop and Zoom in Filmora
It is possible to set the desired aspect ratio for the video clip and when playing, it will appear only in the chosen area, not the whole screen. Instead, with the pan and zoom on the tape, the audience will have the feeling as if the camera is zooming in or out of the part.
Step 1: Select "Video," then "Crop and Zoom," from the context menu by performing a right-click on the timeline clip.
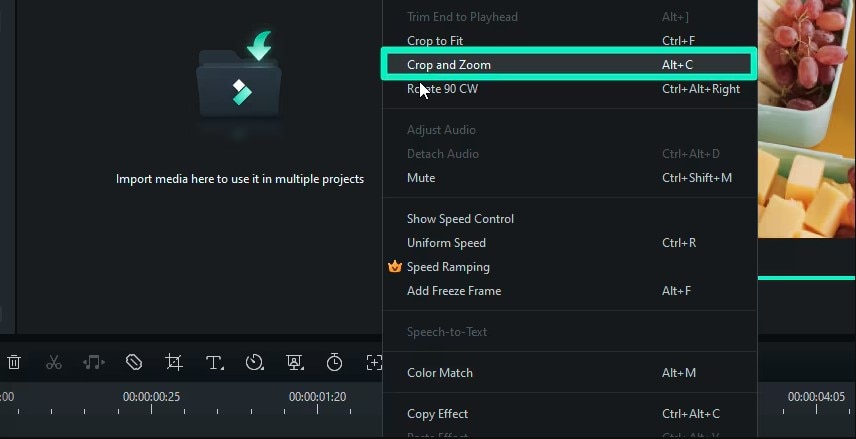
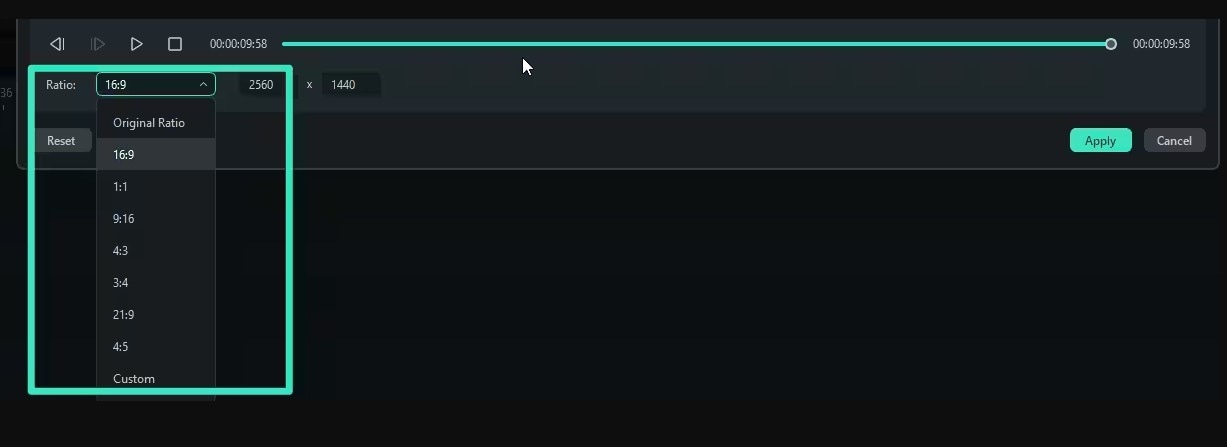
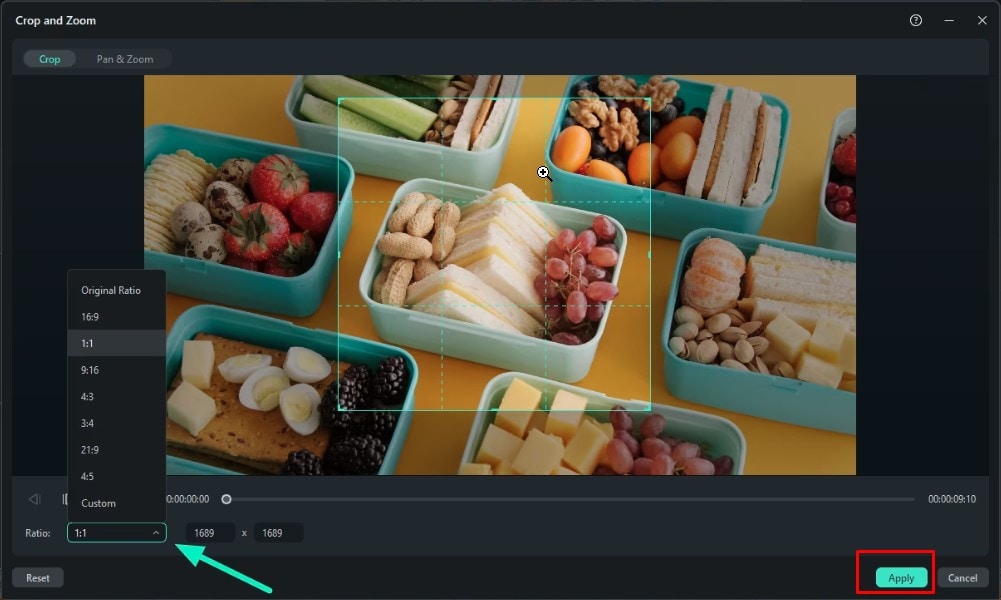
Step 2: The Crop and Zoom panel has the option the choose the ratio of the crop area as well as the option of choosing the ratio presets.
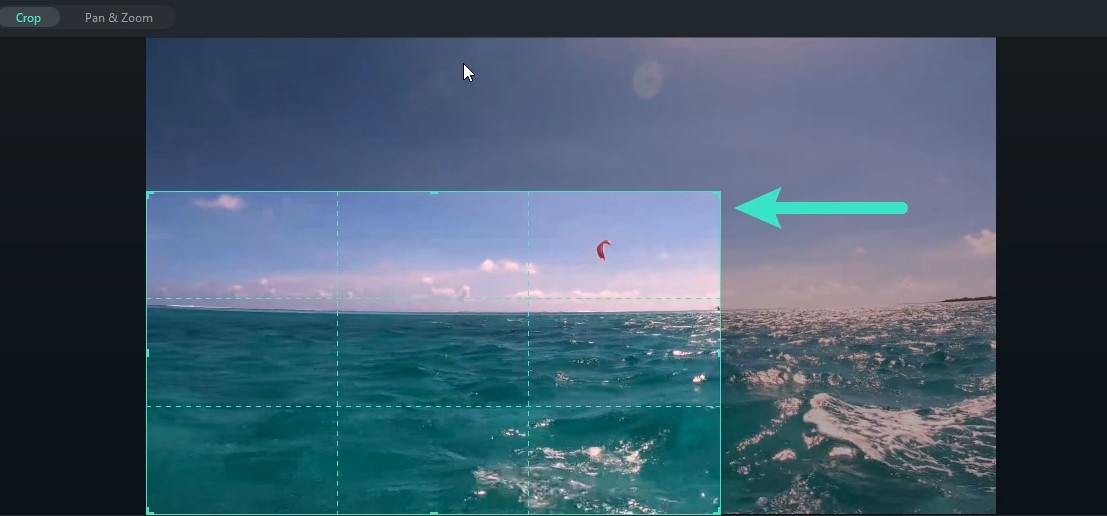
Step 3: To adjust the crop area's position or size, drag the corner handles into the rectangle region and try to move the rectangle box.
Step 4: To crop the video and save the settings, click Apply.
In this way, you can easily change the frame size of your video using Wondershare Filmora. All three methods are very practical. No doubt, CapCut is also a good tool for this purpose, but Wondershare Filmora provides advanced features, so you don’t need to worry about where you are sitting while using this tool, as there are no regional limitations like CapCut.
Conclusion
That’s it—the definitive guide on how to level up your video editing game! Auto-reframe makes you wonder how easily it becomes possible to adjust your content to any platform you like, be it Instagram or YouTube. Switching to an average editor will not do—explore the auto-reframe in CapCut and embrace a whole new level of creativity.
Additionally, if you are looking for something more professional, then you have a great option in the form of Wondershare Filmora. Let’s boost the video editing experience; it’s time to soar to heights!
CapCut vs. Filmora
While CapCut is known for its simplicity, Filmora offers advanced features like AI Text-to-Video, multi-cam editing, and more precise control over editing options. Filmora supports more formats and provides a wider range of creative tools, making it ideal for both beginners and professionals.
For CapCut users transitioning to Filmora, simply download the software and explore its intuitive interface. Filmora’s built-in tutorials will guide you through the features, and you can easily import your existing projects to continue editing with enhanced tools and flexibility. Filmora ensures a smooth and efficient transition, unlocking more creative possibilities.
FAQ
-
Q1: What does auto-reframe on Capcut do?
Here in CapCut, auto-reframe is one of the features that will be useful in switching various aspect ratios of the targeted video without compromising the focus area on the subject. -
Q2: How do I turn off auto-reframe on Capcut?
Choose the clip that has the autoframe on. Select the video in the timeline and right-click; in the context menu, select "Transform." As for the “Transform” panel, let’s comment that if “Auto-reframe” is checked, then it should be unchecked. -
Q3: Can Capcut be used for professional editing?
CapCut can be used for simple video editing. Wondershare Filmora is your friend when it comes to professional video editing because of its feature-rich interface and user-friendly design. -
Q4: Can I customize the auto-reframe settings?
CapCut enables you to edit image stabilization and camera moving speed for a better outcome. -
Q5: Does auto-reframe work on all types of videos?
It is suitable for most videos, but its efficiency will slightly vary based on both the content present in the video and the motion of the subject in the frame. -
Q6:How to Remove Auto Reframe in CapCut?
You can easily remove the auto reframe by simply open project > Select Clip > Access Editing option > Locate auto reframe and tap to disable it.
