Video is a nice way to connect with your audience. Whether you're a YouTube creator or a small business owner who has to create content, making a video for YouTube with pictures and music is a simple yet powerful way to tell a story, share a memory, and deliver creative content to your audience.

But here's the thing: it's not just about taking a picture with your camera, adding soundtracks, and posting it on YouTube. You need the right photos, the perfect image-to-video theme to tell a unique story, background music with just the right rhythm and volume, and a creative tool like Wondershare Filmora to get things done with a professional touch.
Filmora's image-to-video tool brings life to your pictures. With just the right prompt, it uses AI to convert static images into fun, creative videos that stand out. This article will show you how to make a YouTube music video with pictures and grow your YouTube channel using just one tool—Filmora.
In this article
Part 1: How to Create a YouTube Video with Pictures

The traditional approach of creating a YouTube video with pictures and music involves photo slideshows that transition through a series of images. However, Filmora takes this to another level; this tool uses pictures to create videos that can go viral and get more likes or views on YouTube. Its Image to Video feature simplifies the process of converting photos to videos. This tool is available on desktop Filmora. However, you can also use it on Filmora's mobile version.
- Vast video/audio effects and creative assets.
- Powerful AI for effortless content creation.
- Intuitive, professional yet beginner-friendly.
- Works on Mac, Windows, iOS, and Android.

Here's how to create a YouTube video with pictures using this tool on your computer.
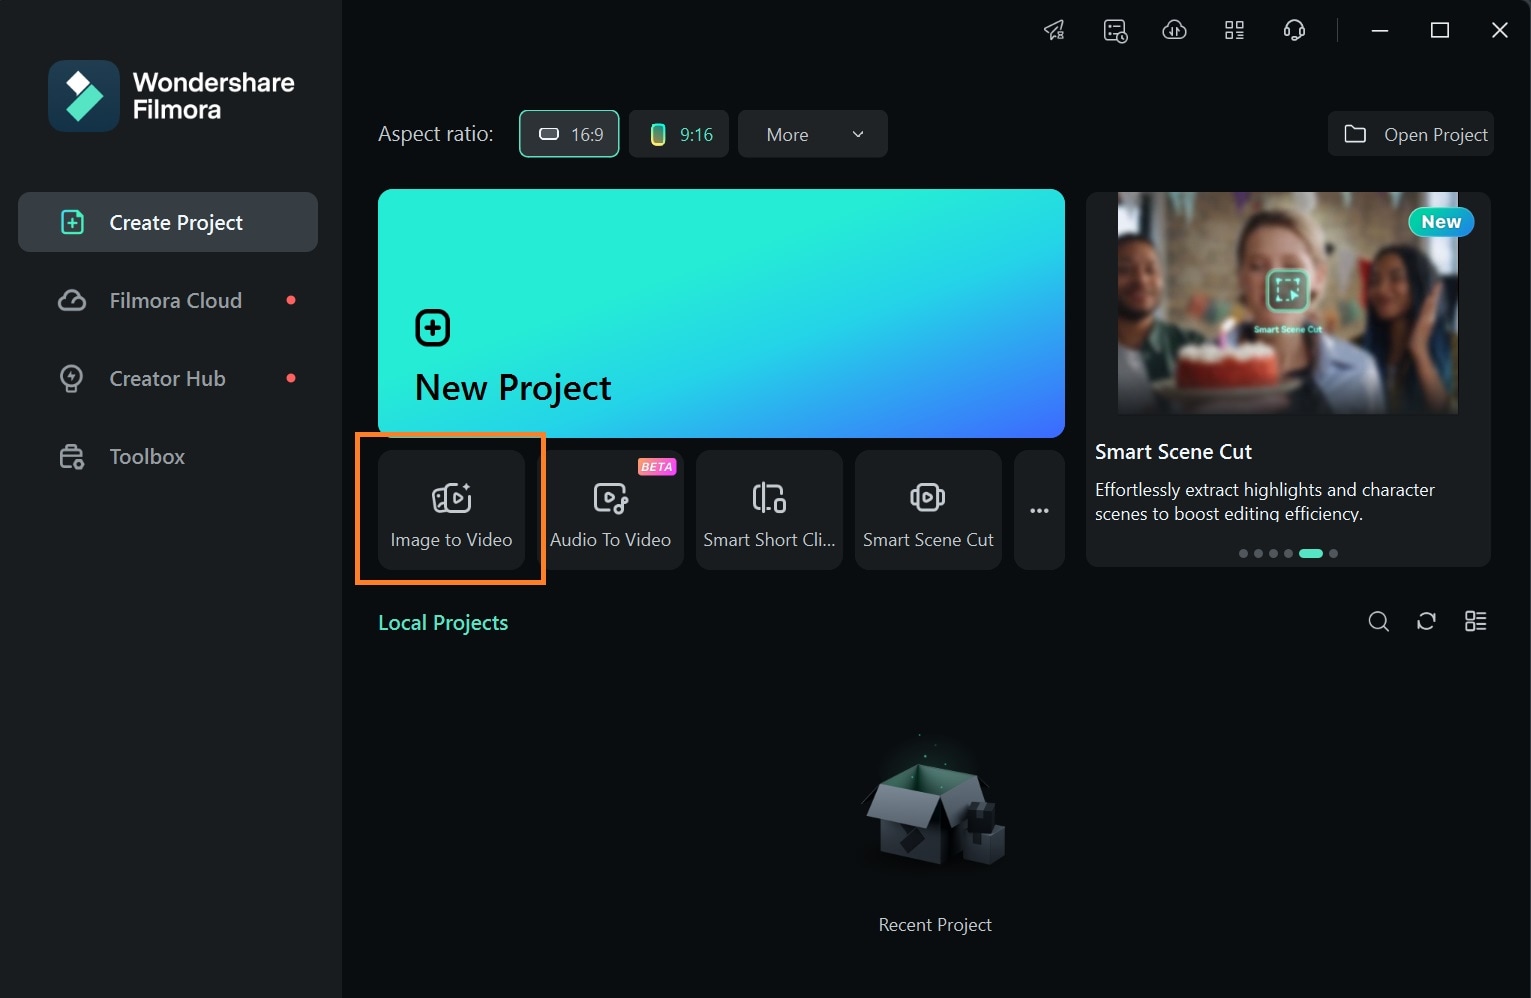
Step 1: Launch Filmora and select the Image to Video tool on the home screen.
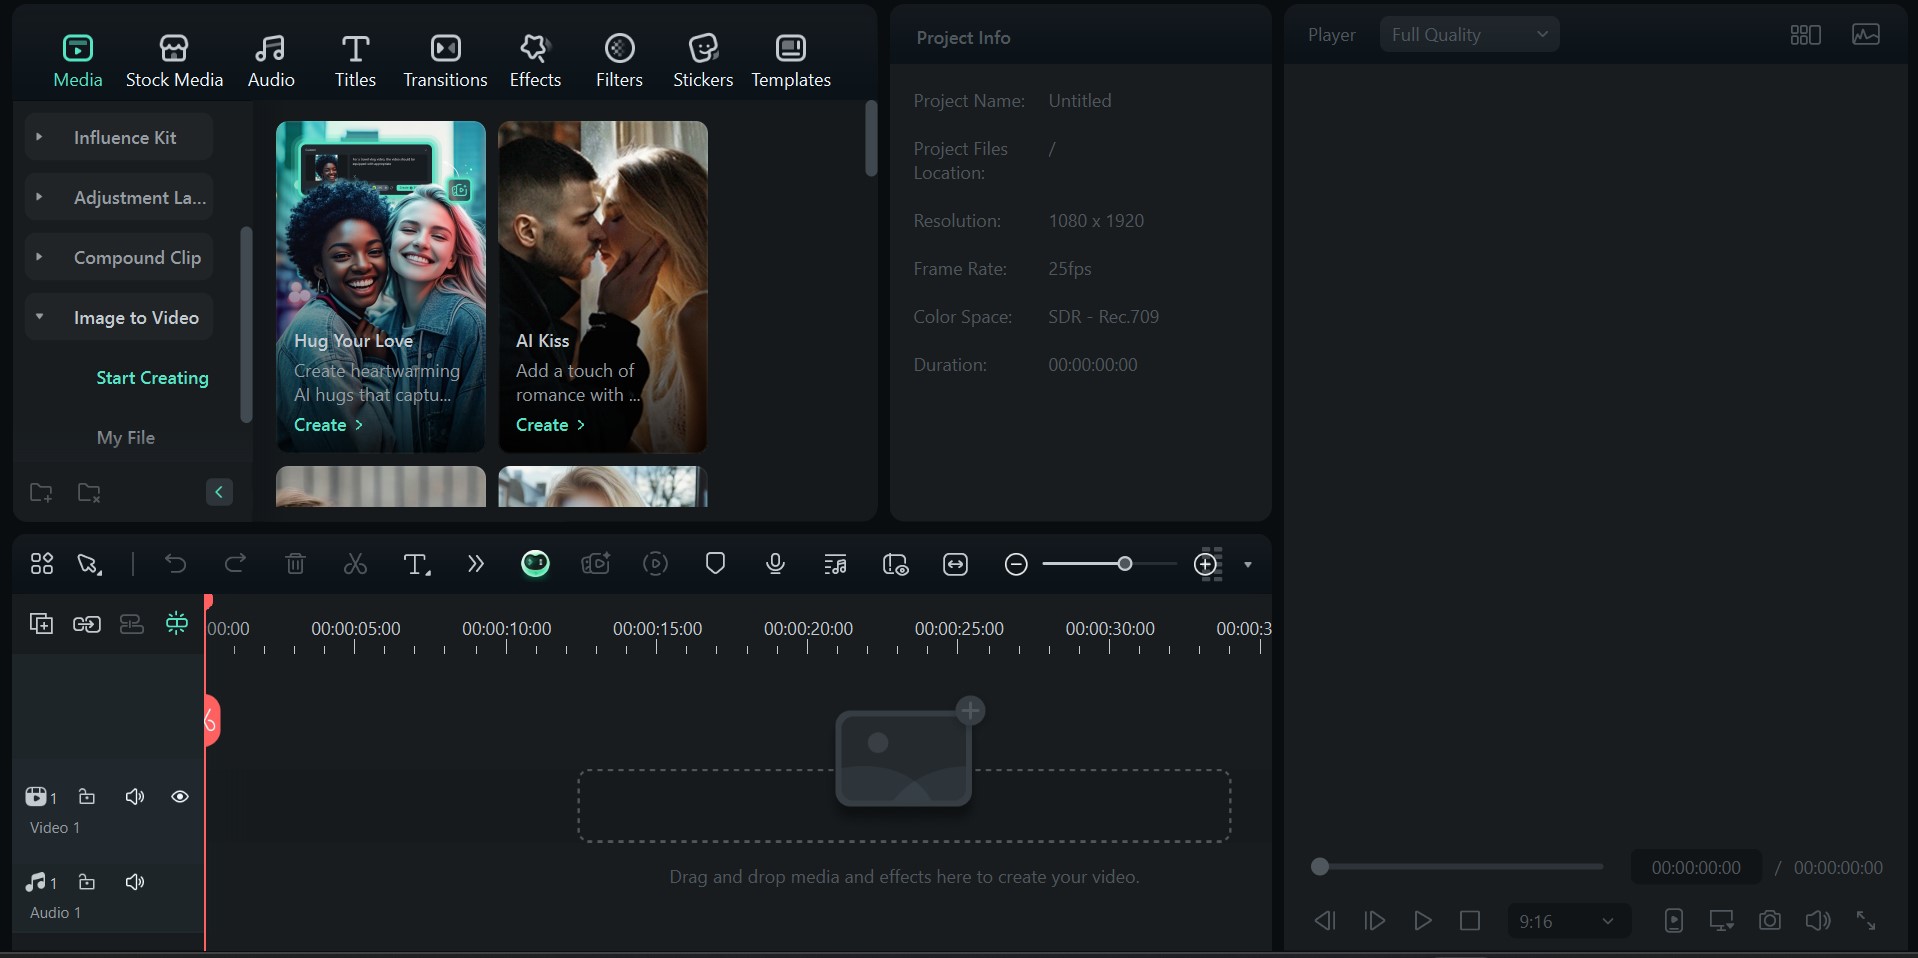
Step 2: Select the image-to-video template you want to use. You have many options, from turning daytime photos into nighttime photos to hugging your loved ones or creating smoke scenes.
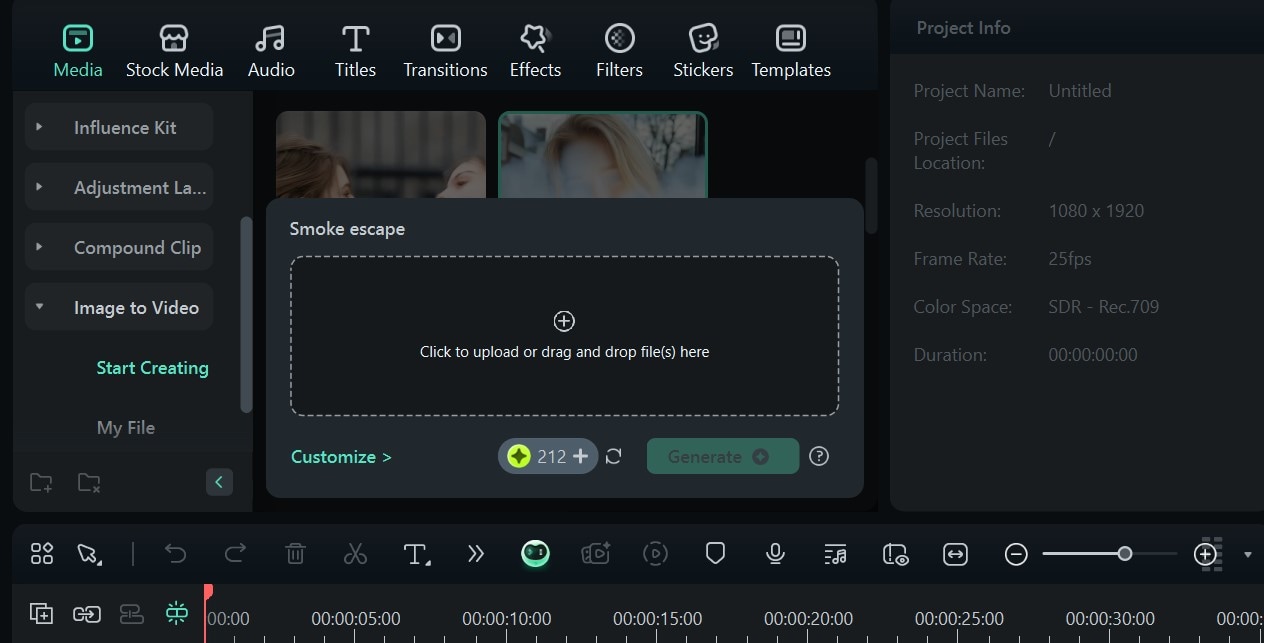
Step 3: Upload your image and select your desired aspect ratio and picture mode. Ensure you use high-quality photos, as this will ultimately affect the quality of your output video. Then click Generate.
Part 2: Customizing your YouTube Video with Music and Text
After creating your videos with Filmora, customize them with music, texts, or sound effects that capture your audience's attention.
How to Add Music to a YouTube Video Made with Pictures
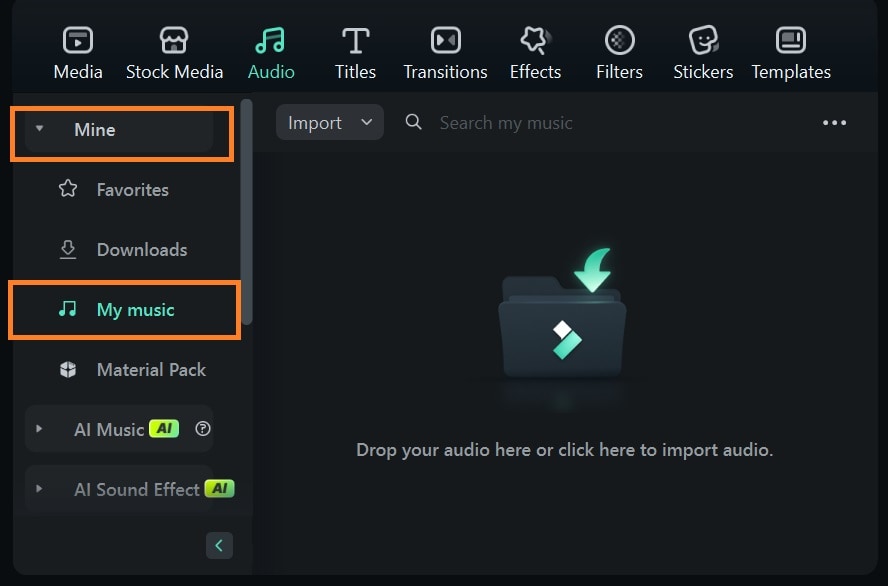
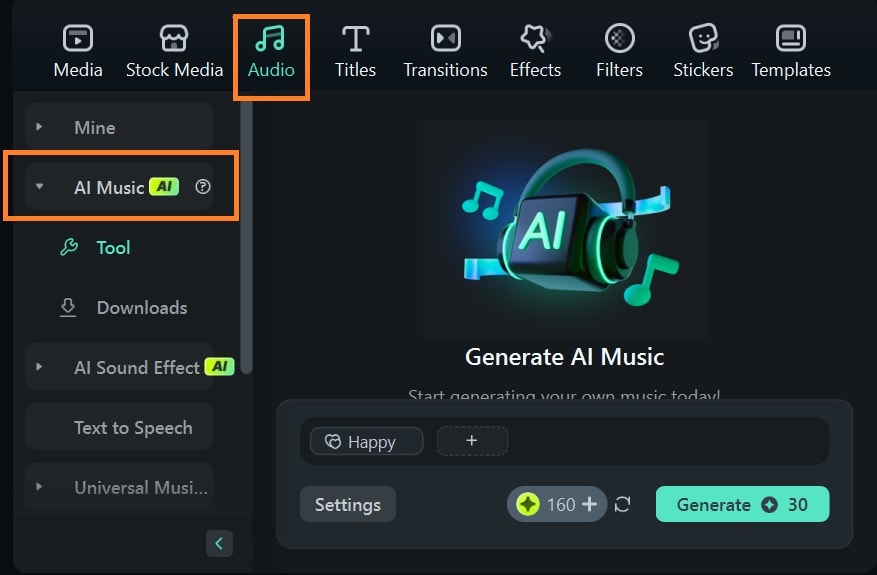
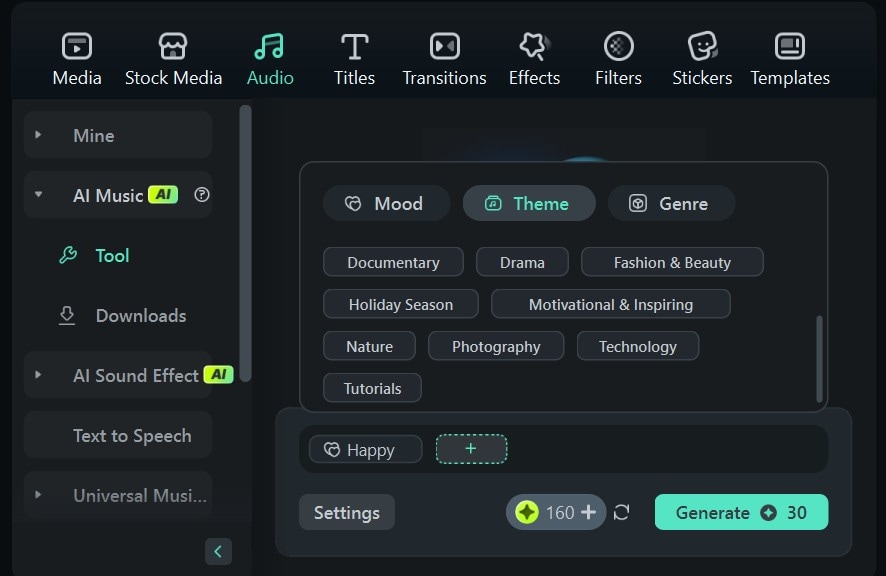
Background music sets the tone for your video, so picking the perfect one is important. Choose sounds that match your video's theme. You can upload your preferred soundtrack or explore Filmora's audio library. Follow these steps to learn how to make a YouTube video with pictures and music.
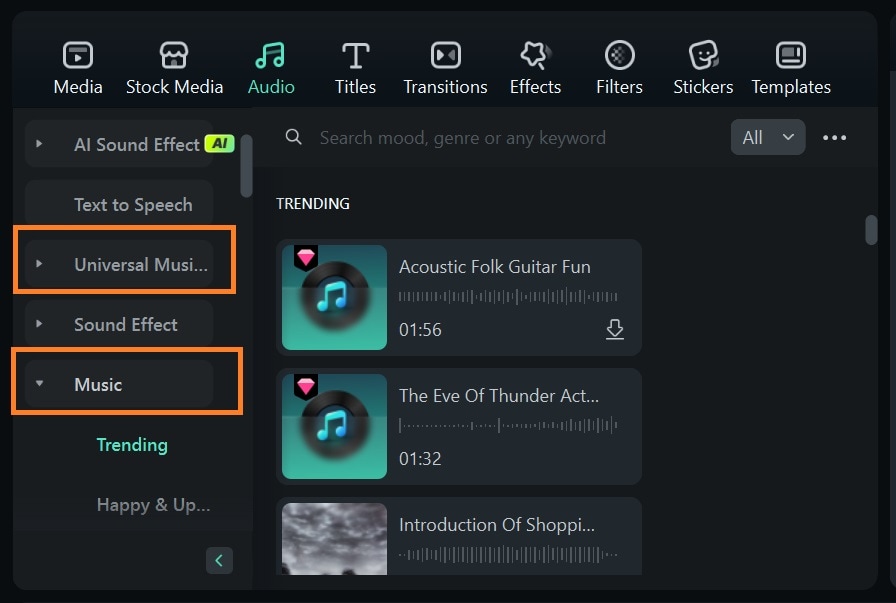
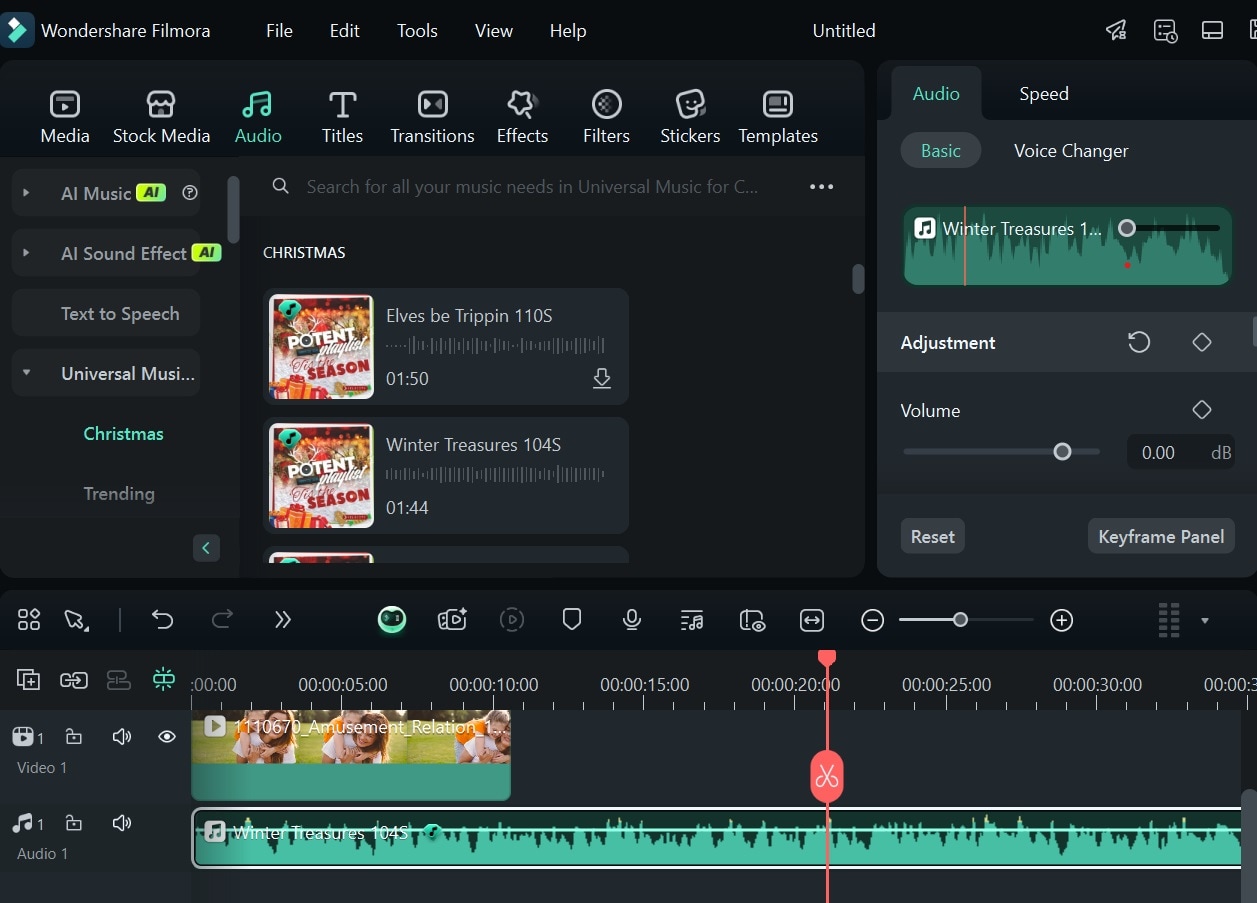
Step 1: Select Audio on Filmora's toolbar.

Step 2: Select a suitable soundtrack for Univeral Music or Music. Search for a particular soundtrack in the search bar if you have one in mind.
Adding Sound Effects to Picture Videos on YouTube
Depending on the kind of media you use to make a video for YouTube with pictures and music, you may need to add sound effects for the thrill it has on viewers watching and the exaggerated effects it adds to your video.
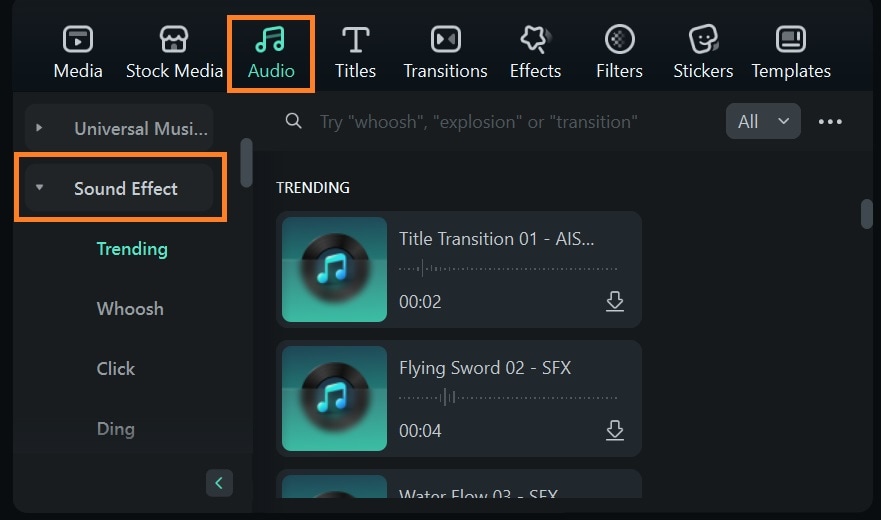
Go to Audio > Sound Effects and select a suitable sound effect for your videos. Use effects like whooshes, camera clicks, fire cackling, or thunder transition sounds, as they complement your video.
Drag your selected sound effect to the timeline and position it above or below your video clip on the timeline and where you want it applied in your video.
Using Voiceovers with Music in Picture-Based YouTube Videos
Now, if you're explaining, telling a story, or adding a personal touch to your video, you can add voiceovers with or without background music.
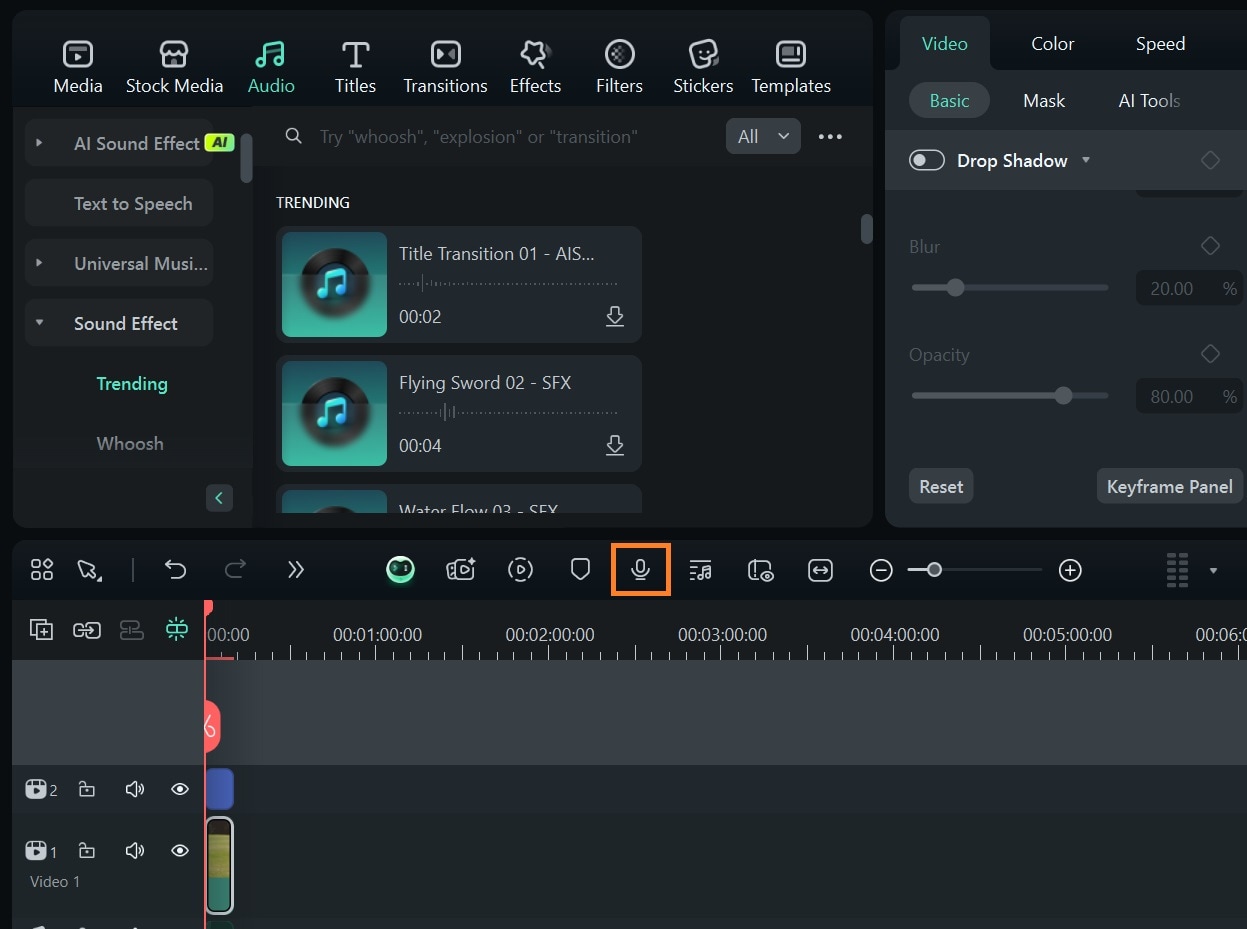
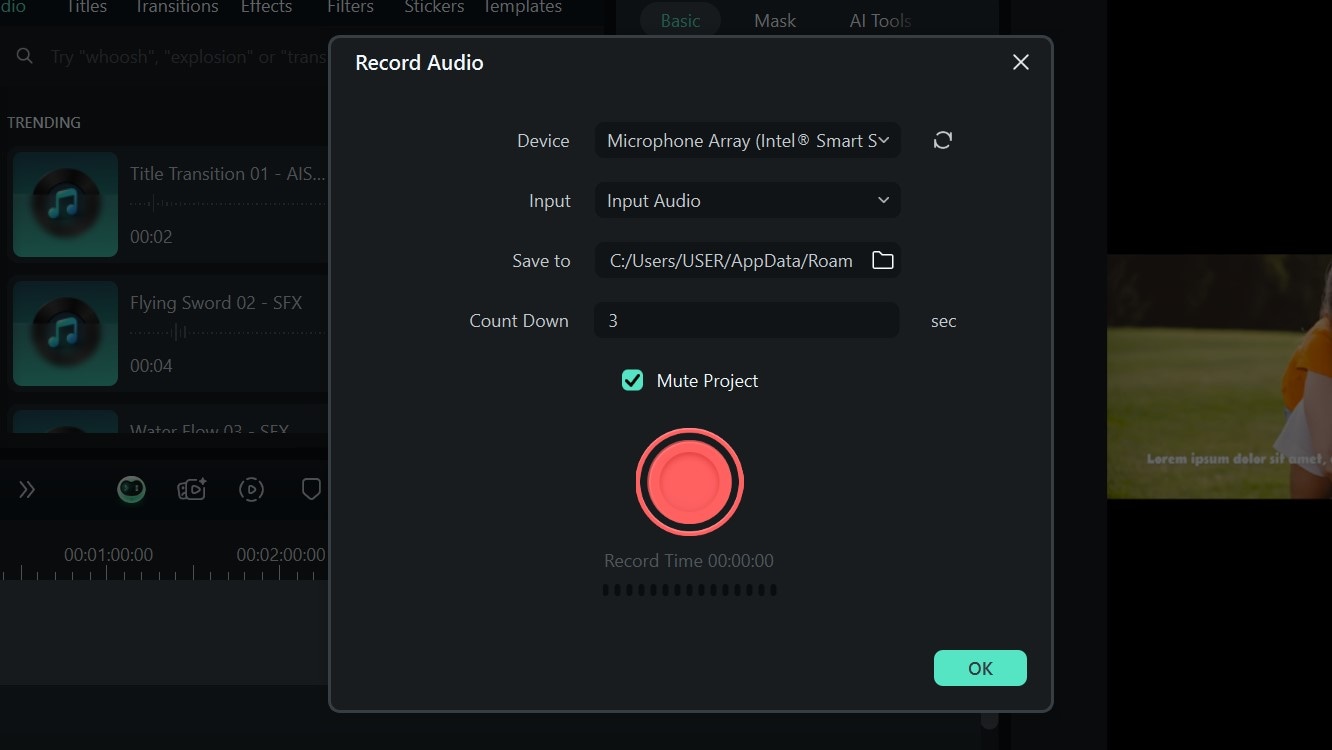
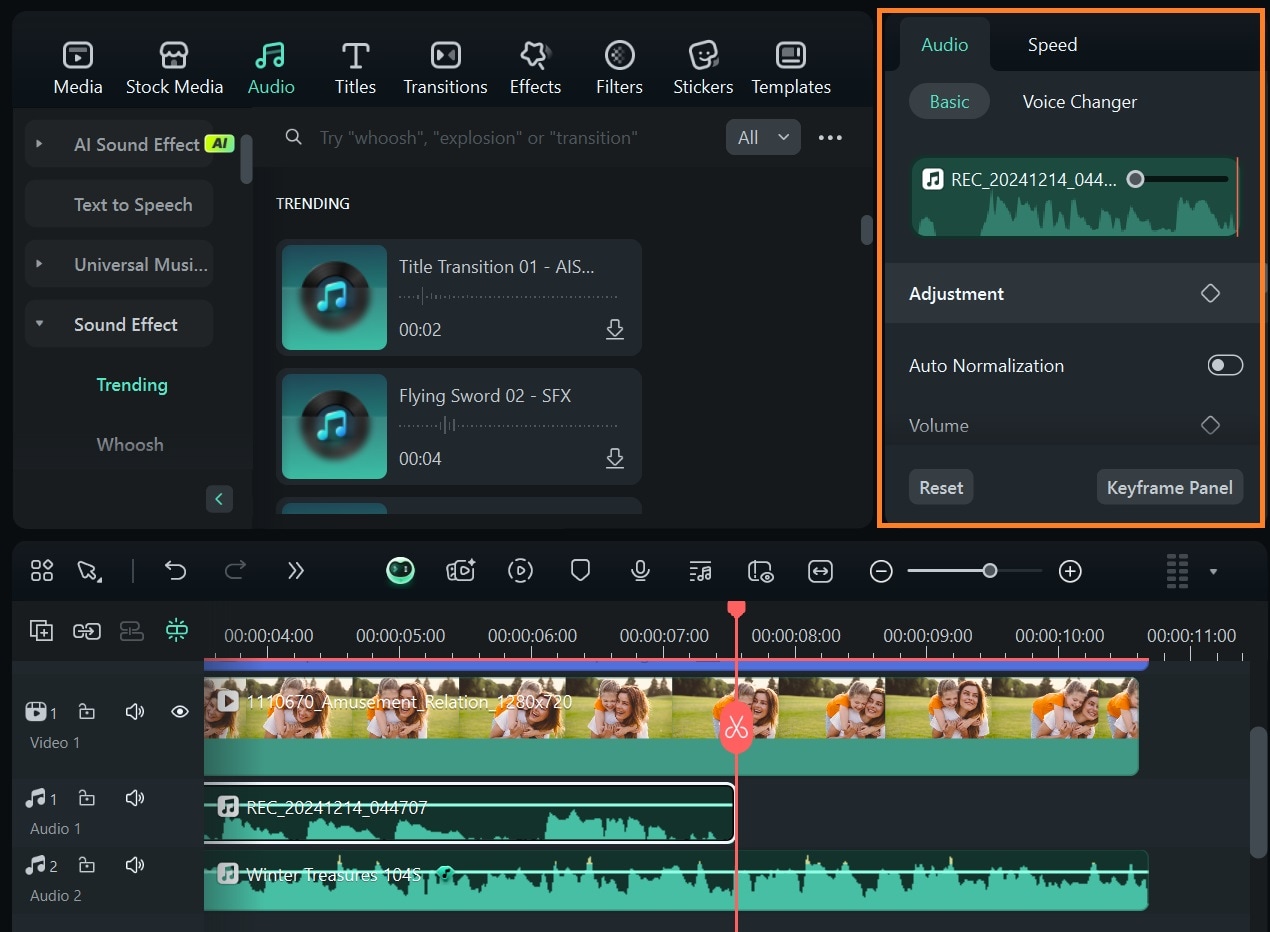
Step 1: Click on the mic on the timeline toolbar to record a voiceover.Click the red record icon to start recording, then click Ok.
Step 2: The recorded voiceover will automatically be added to the timeline. Select it to open up the audio editor settings. You can improve your audio by enabling Auto Normalization or Filmora's AI Voice Enhancer.
To layer your voiceover with music, simply adjust the volume of each video element. Remember to keep your voiceovers clear and audible to maintain viewer engagement.
How to Add Text Over Pictures in a YouTube Video with Music
As you know how to make a YouTube music video with pictures now, you can add text, especially if your video has a voiceover. Essentially, if your YouTube video will have a caption, it's better to write it out correctly using text overlays. Here's how to do it:
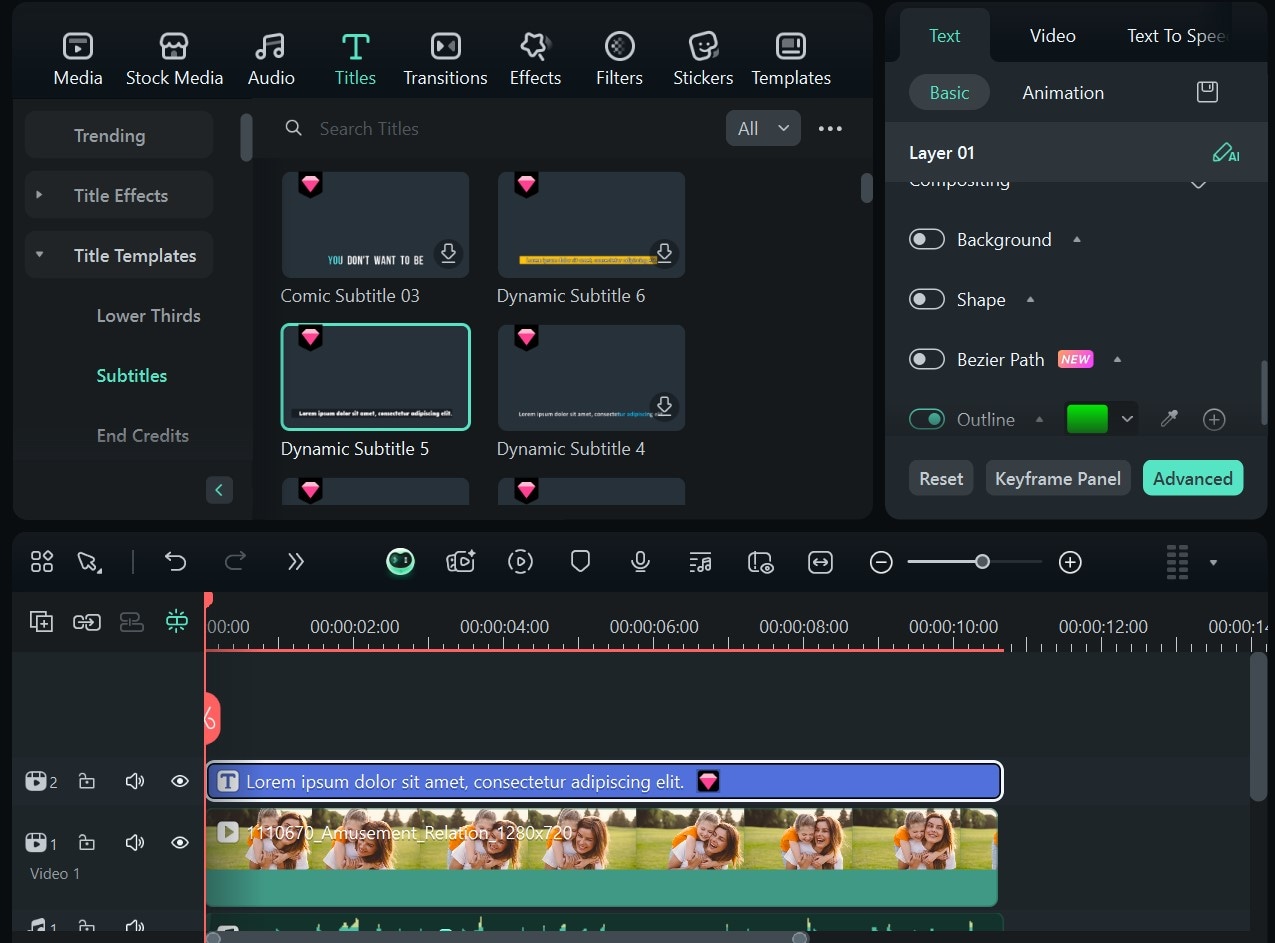
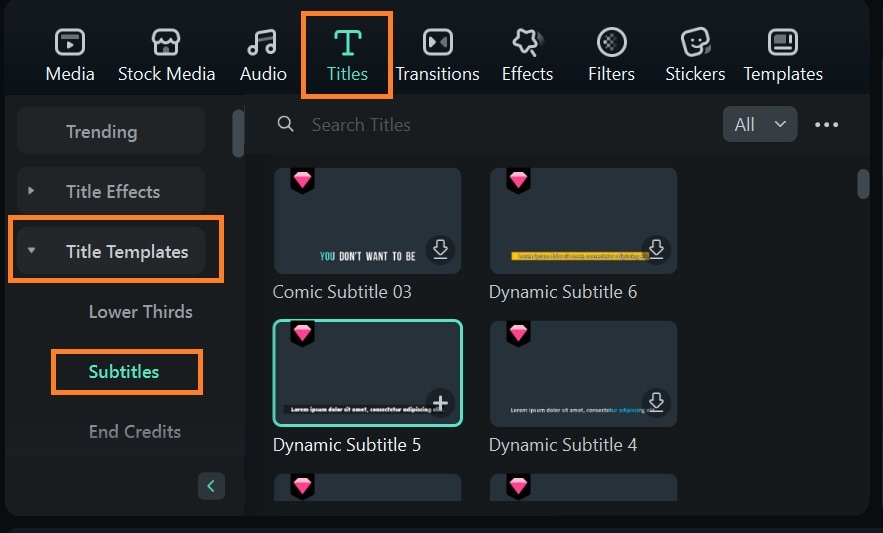
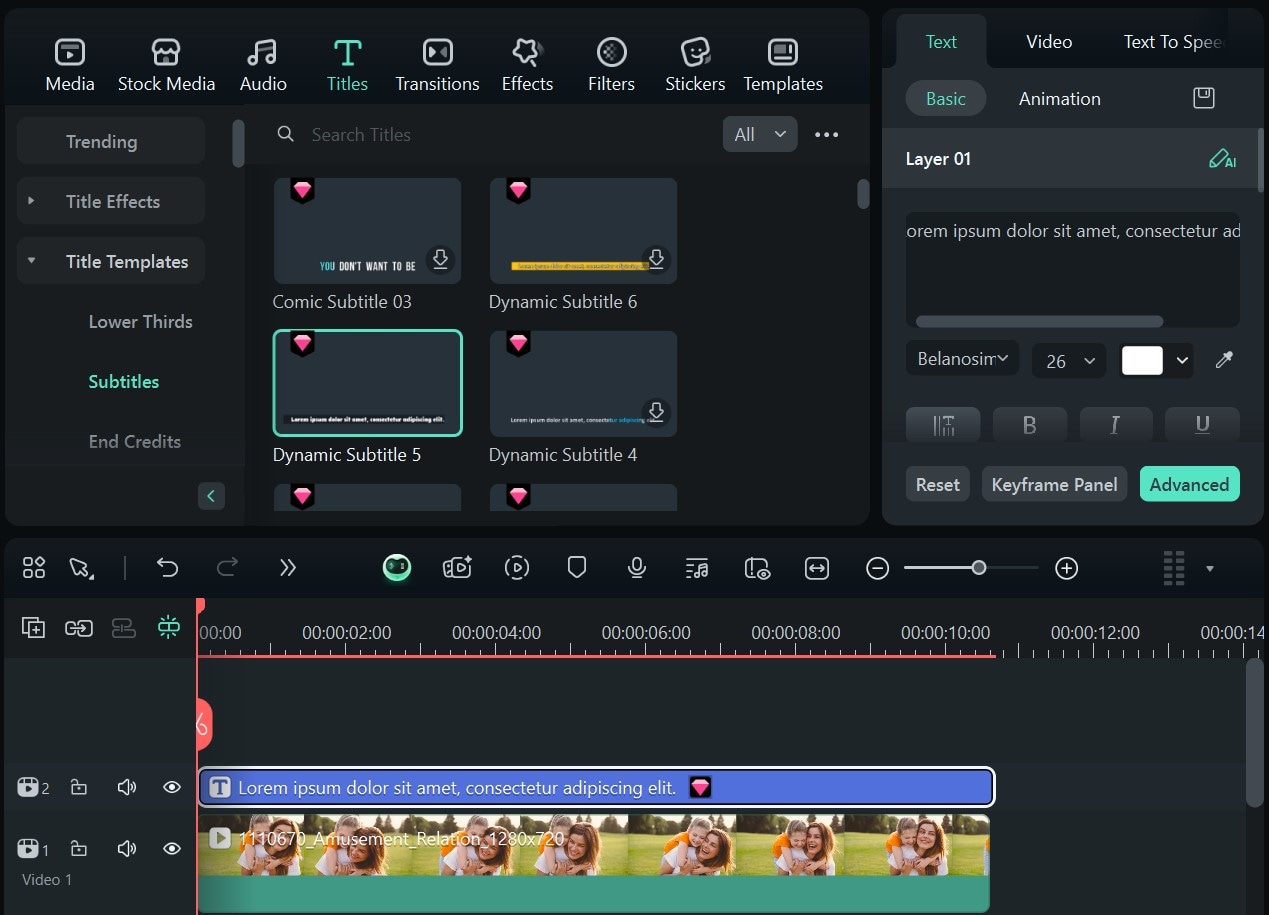
Step 1: Go to Titles > Title Templates > Subtitles to select your caption template.
Step 2: Drag your chosen text template to the timeline. Select the text clip on the timeline to edit, change font color and alignment, and try out text transition effects.
While editing, ensure your text is legible by choosing a contrasting text color to the video background or enabling text Background and limiting the amount of text per frame.
How to Create an Engaging Picture and Music Video for YouTube Shorts
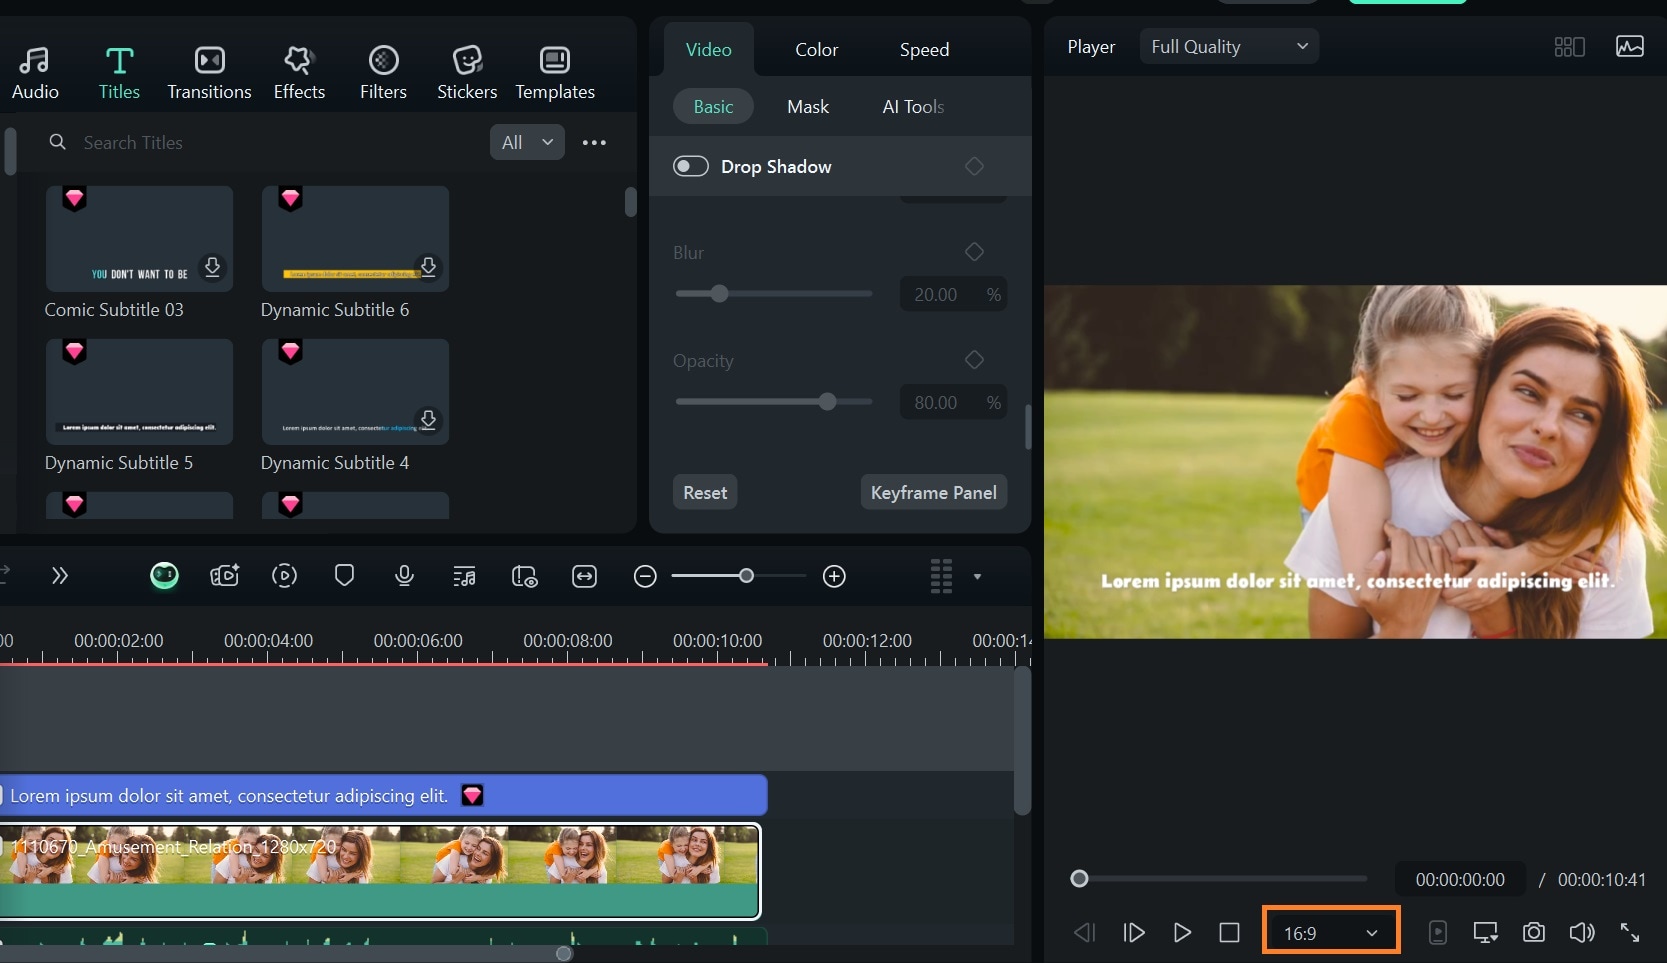
It is common to neglect it when discussing how to make a YouTube video using pictures. To optimize your video for YouTube shorts, change the aspect ratio on Filmora while editing. If you have texts on your video, do this before adding texts or other overlays to ensure they are correctly sized for your screen. Also, ensure your video stays within the 60-second limit to increase views and watch time.
Step 1: Select the aspect ratio below the video preview screen. The aspect ratio for YouTube shorts is 9:16.
Step 2: Your video's aspect ratio will change to fit a mobile phone screen for YouTube shorts.
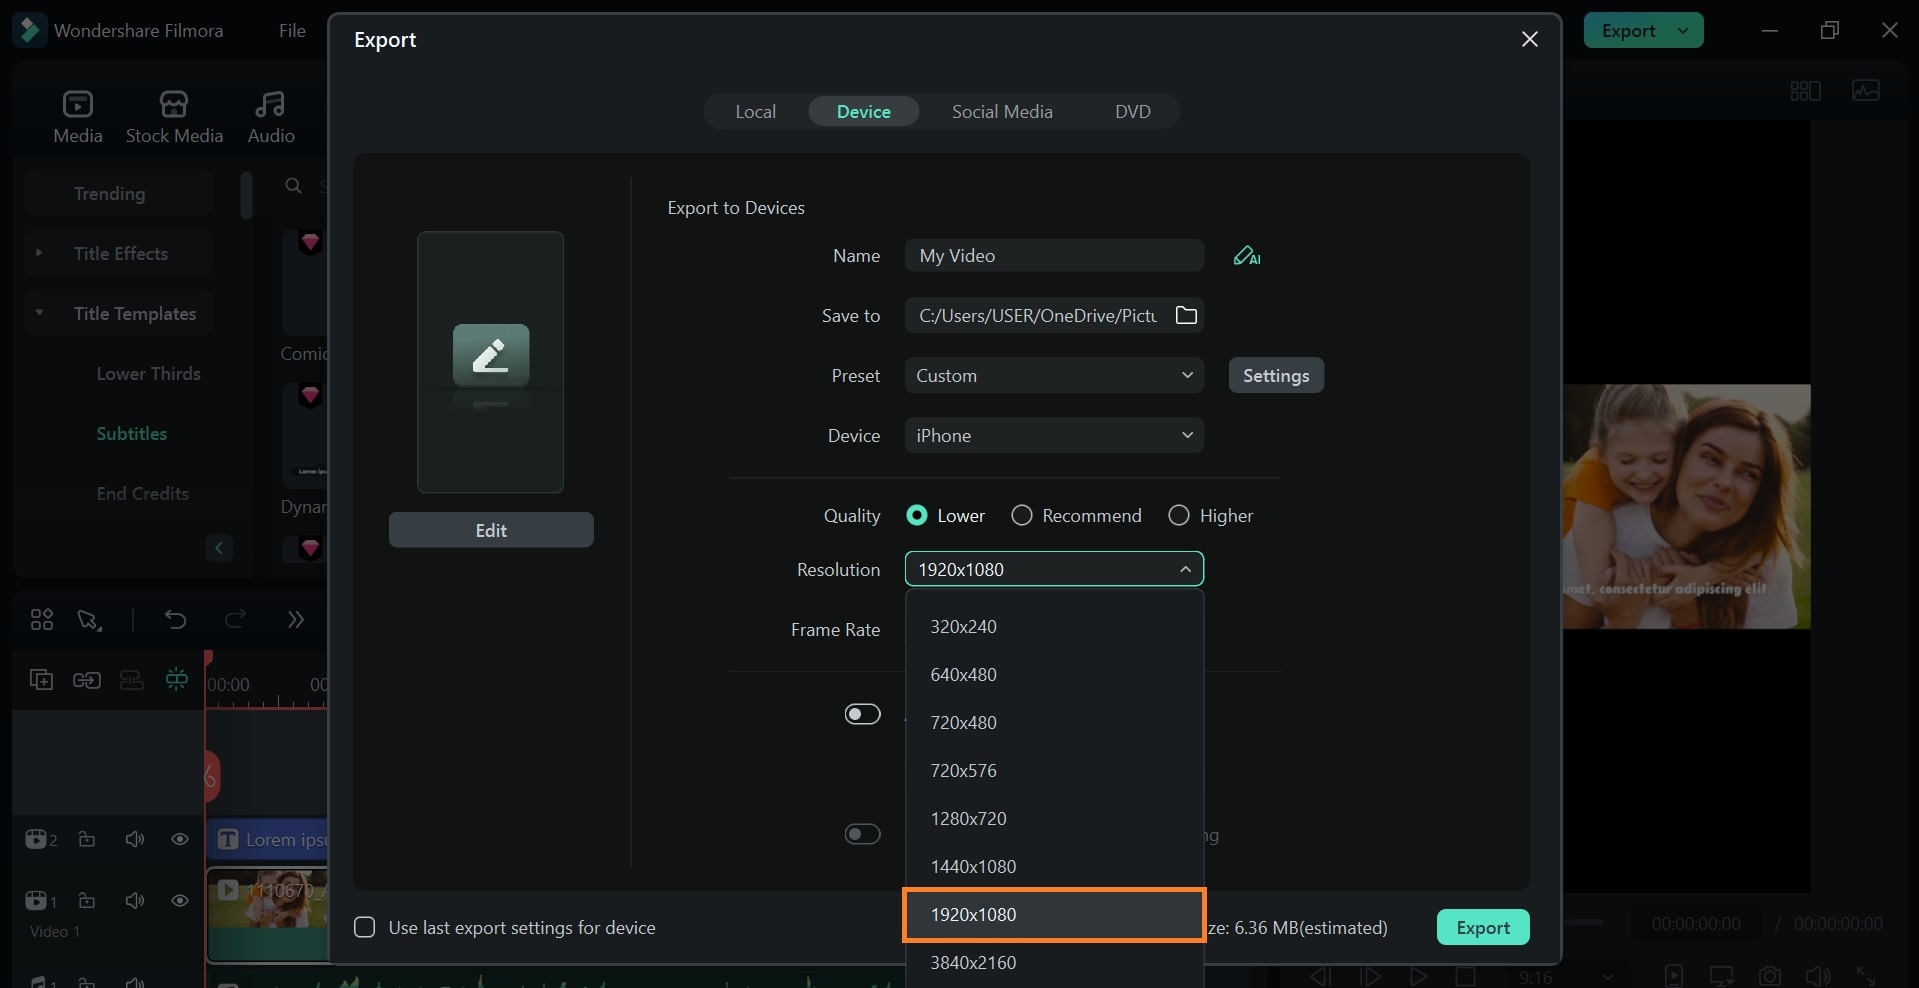
Step 3: Export your video at the proper resolution. For YouTube shorts, set the export resolution to 192.1080.
Part 3: Making Your Picture and Music Videos Stand Out on YouTube
As a YouTube creator, the first step to growing your channel is learning the different content types that keep your views coming and your viewers subscribed. This includes learning to create a YouTube video with pictures and music .
The next step is to make content stand out and increase your visibility. This includes getting found on YouTube search results, having your videos reach the right audience, adhering to YouTube community policies, picking the right thumbnails that attract your viewers and increase your CTR, and organizing your channel structure for easy navigation.
How to Optimize Picture and Music Videos for YouTube SEO
- Write clear titles and video descriptions. Your title immediately tells users what your video is about, while your description gives details.
- Avoid saying too much in your title. Keep it clear and stay under the 60-character limit to prevent getting cut off in search results.
- Incorporate relevant keywords in your title and description to help you get discovered.
- Use action words, numbers, and target phrases that resonate with your audience.
- Include your brand name or niche keyword for consistency and SEO.
- Include timestamps and resource links to add value with details to your video description.
- Add CTAs like liking or subscribing to your YouTube channel, commenting or sharing the video, or adding your website link for viewers to visit.
- Use Filmora's AI Copywriting tool to write a proper YouTube title and description.
How to Write YouTube Descriptions and Titles with Filmora
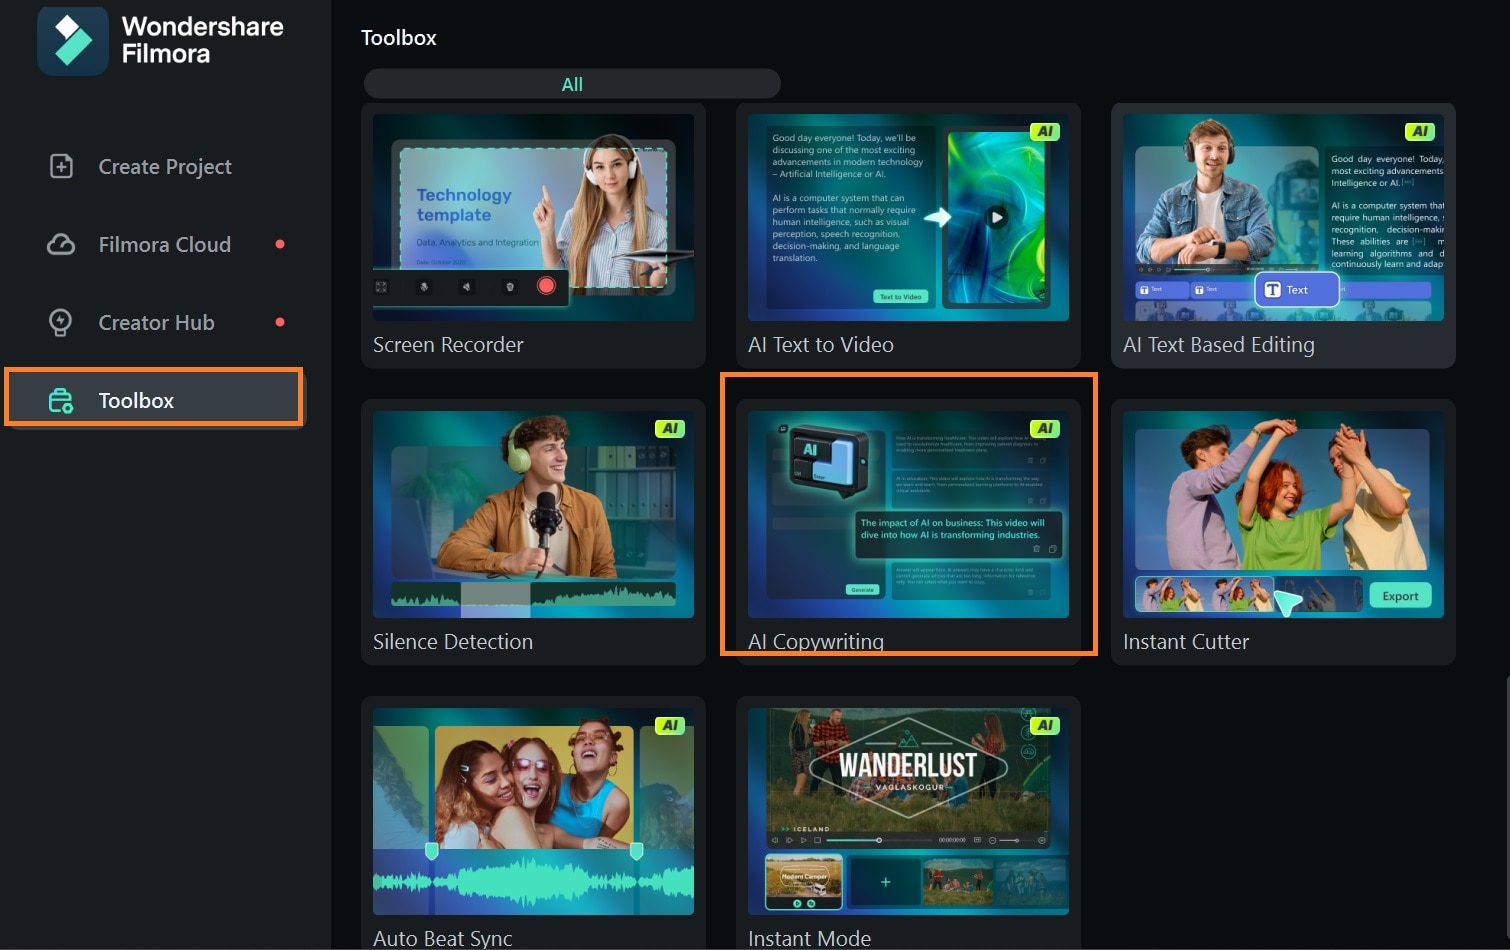
Step 1: Open Filmora on your computer. On the home screen, go to Toolbox. Scroll through the list of Filmora tools and select AI Copywriting Tool.
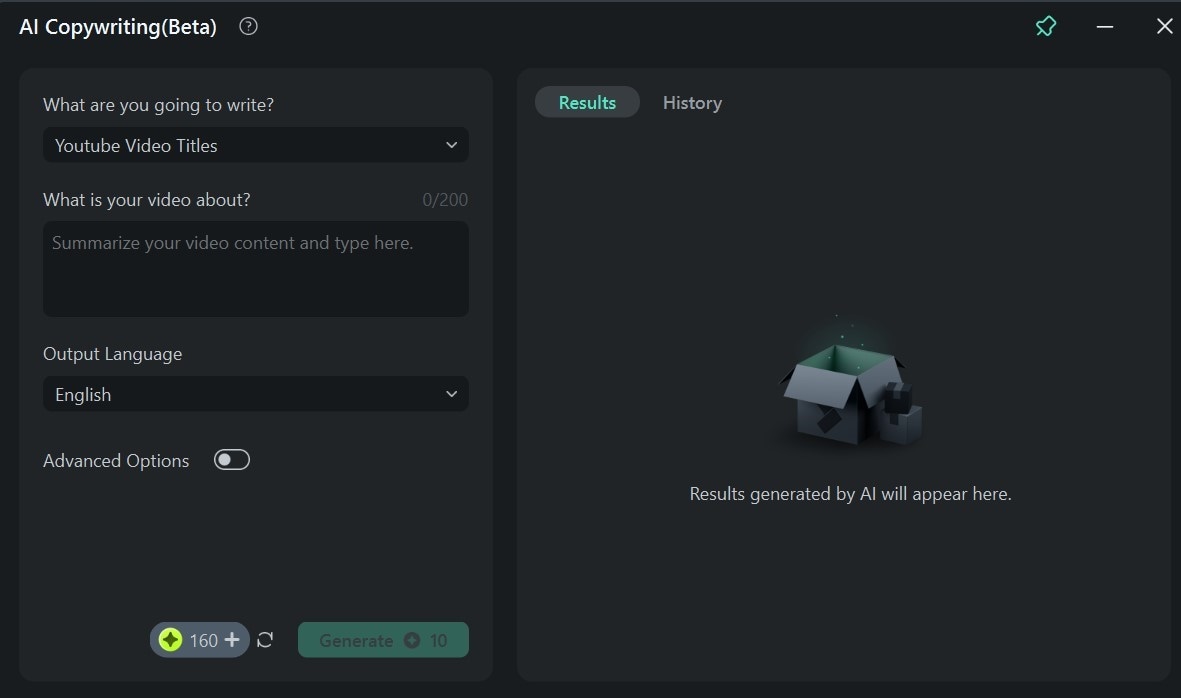
Step 2: Select YouTube Video Titles, describe what your YouTube video is about, and select the language. For video description, choose Video YouTube Description. You can set the number of suggestions from Filmora by enabling Advanced Options.
Understanding YouTube Music Policies When Making Videos with Pictures
Background music is a great idea to keep your video fun and engaging; however, copyright infringement can remove your content and demonetize your channel. Hence, to be successful on YouTube, it is essential to understand YouTube policies.
YouTube prohibits creators from uploading videos or music they did not make or ones they do not own copyrights to. Aside from being penalized for violating YouTube policies, YouTube may redirect ad revenue to whoever owns rights to the music.
Here's how to include music in your videos without copyright infringements.
- Use Filmora's audio library to access free tracks and sound effects
- If you are to use music that does not belong to you, include its attributions in the description to avoid having your content removed.
Creating Thumbnails for Picture and Music YouTube Videos
Thumbnails are the first thing your viewers notice when they come across your video—hence, they directly impact your video's click-through rate (CTR). A good thumbnail increases the chances of viewers clicking on your video. It should be visually engaging and convey your video's theme.
Filmora makes it easy to create custom thumbnails for free. Here's how to do it.
Step 1: You can access your thumbnail in this section of your editing dashboard or on the export settings tab. Click on the Edit button highlighted.
Step 2: Filmora will give you different thumbnail template ideas. You can choose a template based on the type of video content you're working with.
Step 3: Customize your chosen thumbnail—add text layers images, crop your thumbnail background image, and hit Save.
Continue editing your video and export. The saved thumbnail will export with the video.

Conclusion
You can use Filmora to convert images to videos on your computer and mobile phone. If you want to grow your YouTube channel as a new creator, get a creative tool like Filmora to handle your video and photo editing tasks. Install Filmora on your computer and master how to make a youtube music video with pictures.


