
 100% Security Verified | No Subscription Required | No Malware


 ChatGPT
 Perplexity
 Gemini
 Claude
 Grok
Grok
GIMP is often referred to as the free Photoshop alternative, so it’s no wonder people try to be as creative as they can, including learning face swap with GIMP. That said, many users spend hours experimenting with layers, masks, and color tools just to make a single edit look natural.
With a little guidance, though, mastering a face swap in GIMP can turn tedious trial and error into a fun and rewarding editing skill. That's why this guide is here to make that process simple by breaking down how to do a clean face swap in GIMP step-by-step.

In this article
Part 1. Meet GIMP: The Free Photoshop Alternative Everyone Loves
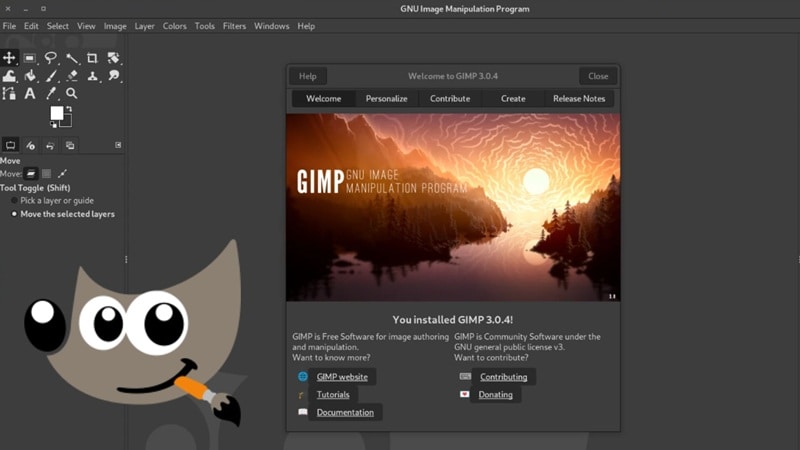
The GNU Image Manipulation Program, better known as GIMP, has become one of the most trusted free editing tools for creators everywhere. Since it’s open-source, photographers, designers, and developers around the world have shaped it into a truly community-driven project.
What makes it even better is that GIMP works seamlessly on Windows, macOS, and Linux, offering the same powerful editing experience no matter what system you use.
Cool Features That Help With Face Swap:
GIMP is perfect for everything from quick photo touch-ups to creative projects like a face swap in GIMP, giving both beginners and pros the tools they need to edit with confidence. Here are some standout features that make the process easier:
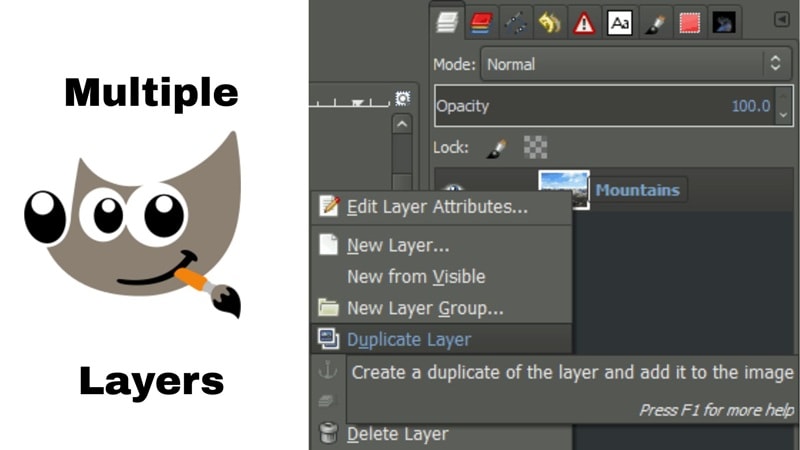
- Layers That Keep Your Edits Safe: GIMP uses layers so you can work on a photo without damaging the original image. This makes a face swap in GIMP easier because you can move parts around, adjust them, and experiment freely.
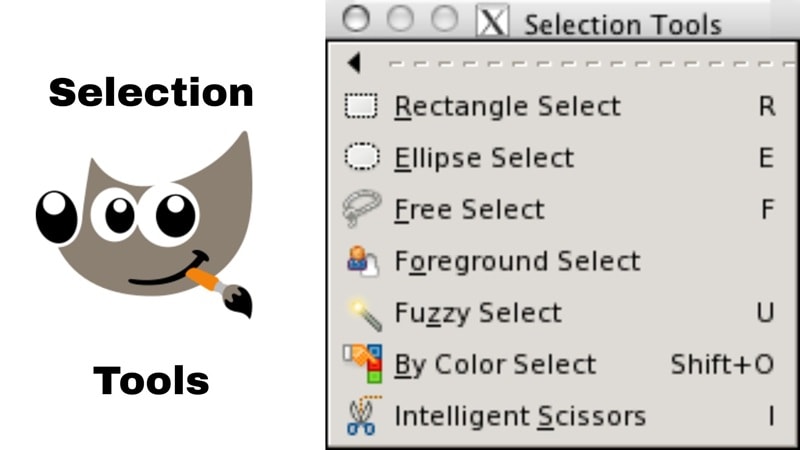
- Tools For Spot-On Selections: From the Free Select tool to advanced paths, GIMP gives you the accuracy needed to cut and swap faces cleanly. These tools help you get a natural look without rough edges.
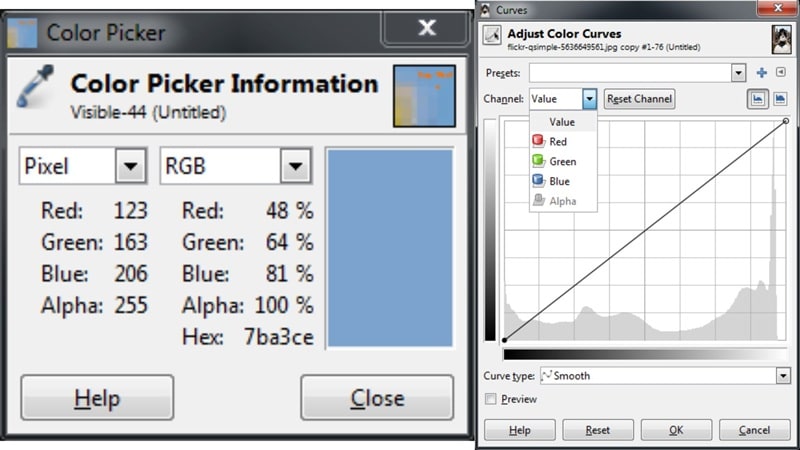
- Colors That Match Perfectly: Matching skin tones and lighting is simple with GIMP’s color adjustment tools. Features like Curves and Levels make your GIMP swap faces project look seamless and realistic.
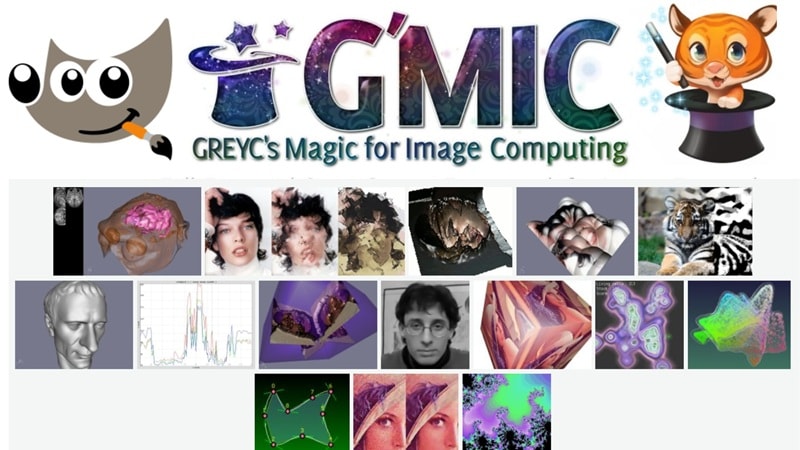
- Plugins That Add Extra Power: You can boost your editing with GIMP plugins such as G’MIC, which offers filters and face blending effects. This makes any face swap with GIMP faster and more polished.
Part 2. GIMP Face Swap Tutorial: A Beginner-Friendly Walkthrough
Now that you know what makes GIMP a favorite among creators, it is time to put those features into action. In this section, you will learn two simple ways to pull off a clean face swap GIMP.
We will start with a hands-on method for full control and then move to using a GIMP face swap plugin that makes the process faster. By the end, you will feel confident swapping faces and blending edits like a pro, no matter which approach you choose.
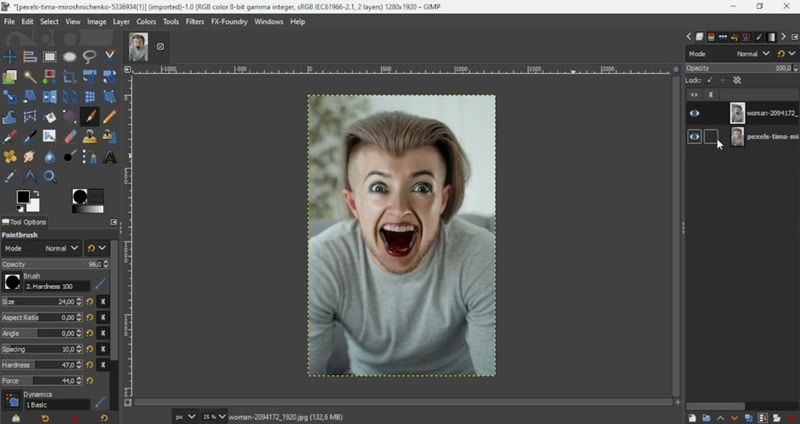
Method 1: Manual Face Swap with GIMP (roughly)
With the help of Logos By Nick video on YouTube, here are some simple steps to follow to learn how to face swap in GIMP manually:
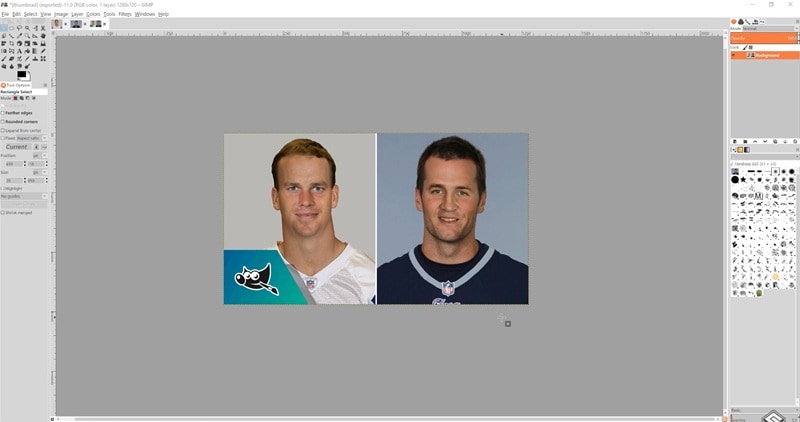
- Step 1. Open GIMP and upload both images
After you download and install GIMP on your device, begin by opening the photo with the face you want to use and the image where you will place it. Choose photos with similar angles, matching lighting, and clear details to make the swap look natural.
- Step 2. Select the face
Make sure to open the two photos in separate tabs so you can switch between them easily. Then, click the “Free Select Tool” on the left side of your screen to start tracing around the face you want to use.
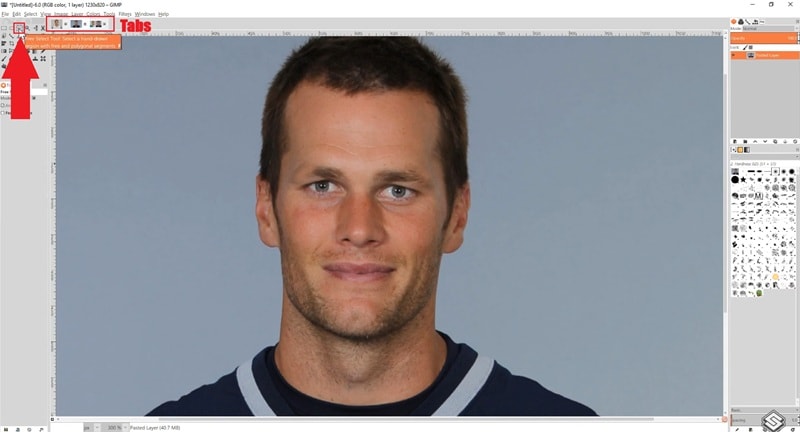
Now, draw the selection around the face. Make sure it’s precise so the cutout looks clean and natural.

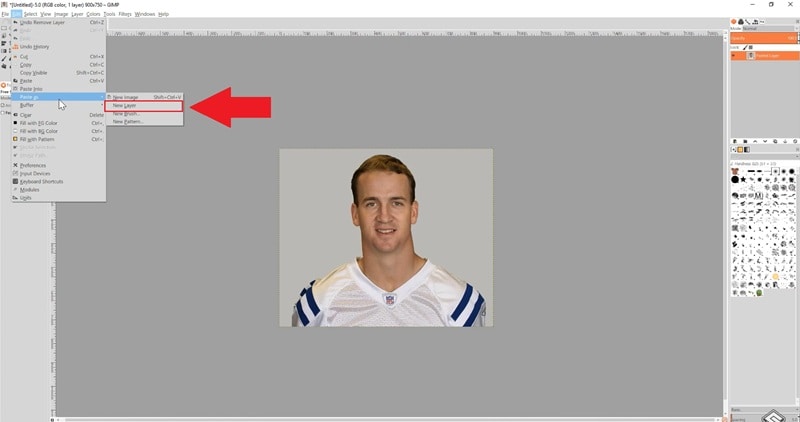
- Step 3. Copy and paste as a layer
Copy the selection and paste it onto your target image as a new layer. This gives you flexibility to move and adjust it easily.
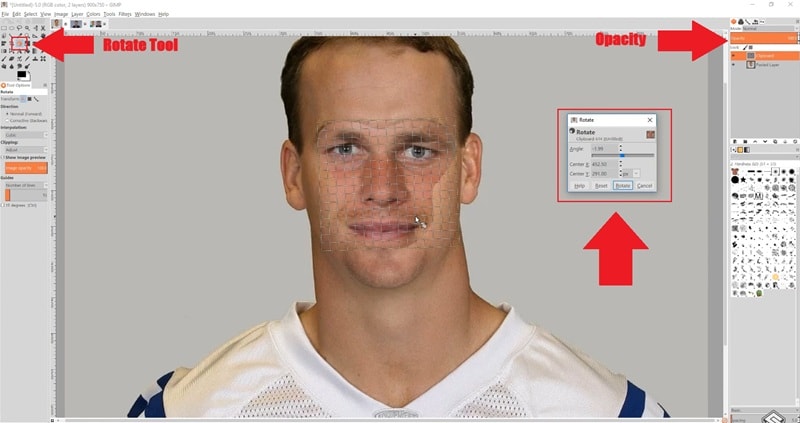
- Step 4. Match the face perfectly
Use the “Opacity” setting to see both images clearly and adjust the placement, then use the “Rotate” tool to align the new face perfectly. Be patient with this step because getting the proportions right is essential for a realistic GIMP swap face result.
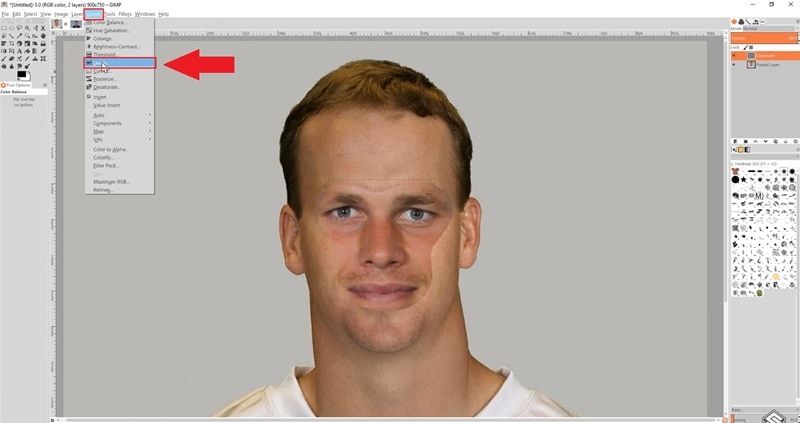
- Step 5. Match the skin tones
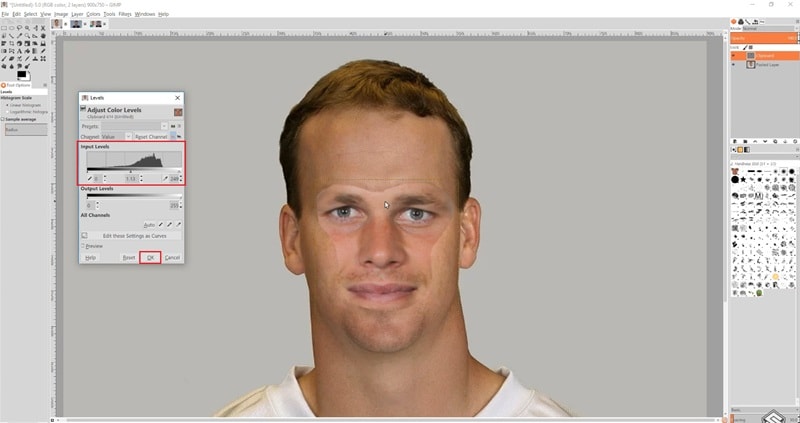
Go to "Colors" and use "Levels" to match skin tones and lighting. This ensures your face swap with GIMP looks seamless.
Feel free to adjust the input levels until everything looks just right. When you are satisfied with the result, click “OK” to apply the changes.
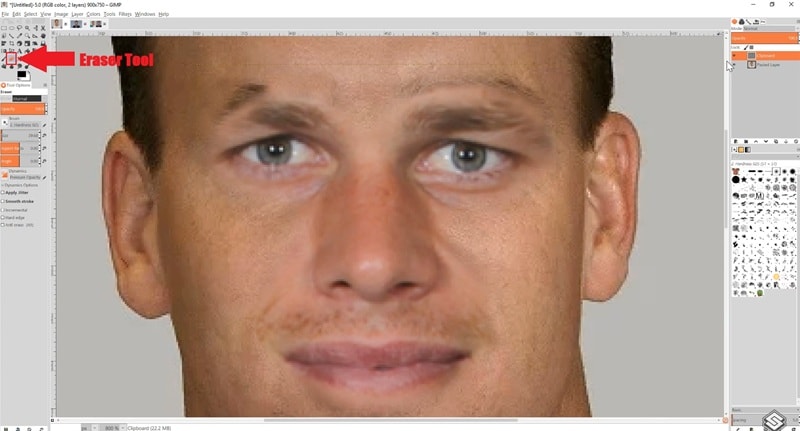
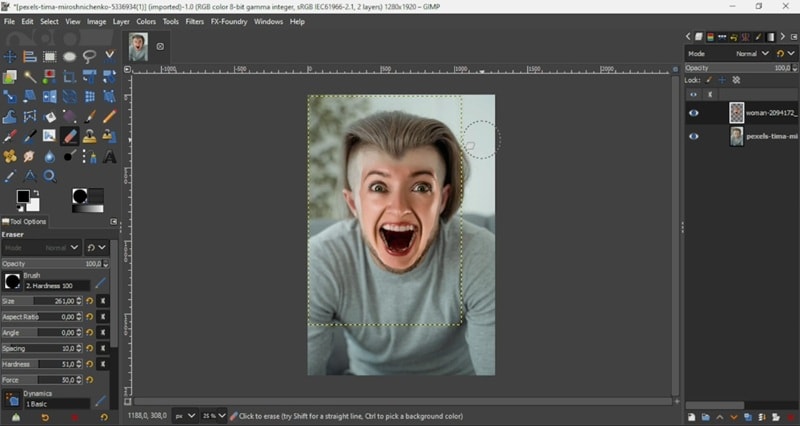
- Step 6. Blend the edges
Clean up the edges so the edit looks natural and make the transition smooth by using the “Eraser” tool. Adjust the brush size and zoom in on the face so you can refine the details carefully.
- Step 7. Preview the result
When you’re confident with the details you’ve corrected, zoom out and view the result of your creation. You’ll see that the face has now been seamlessly swapped.
Method 2: Use a GIMP Face Swap Plugin (G’MIC)
The steps above cover only the first method of a face swap in GIMP, and while it works, it can take a lot of time and patience. Fortunately, there is another approach that makes the process easier.
With guidance from Rafik Graphics’ YouTube tutorial, here are simple steps to achieve a clean and natural swap using a GIMP face swap plugin.
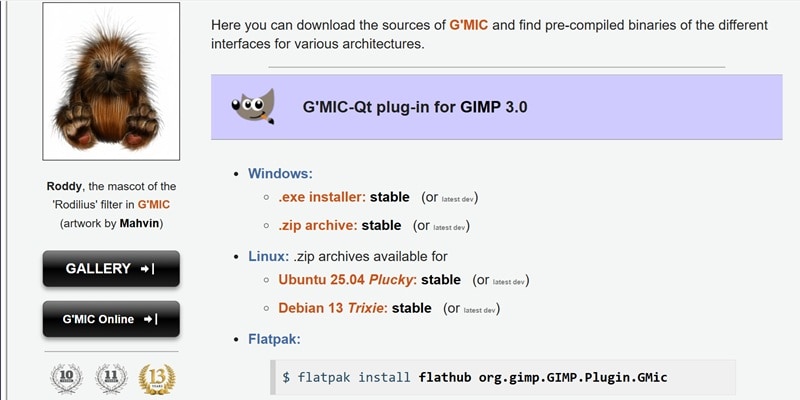
- Step 1. Install G’MIC
Start by downloading G’MIC from its official website and installing it on your device. This powerful plugin adds advanced filters and effects that make face swaps in GIMP easier and more polished.
- Step 2. Position the face layer
Basically, you will follow similar steps as the manual method by making a face layer like mentioned above. Then, place the face layer over the target image and align it carefully.
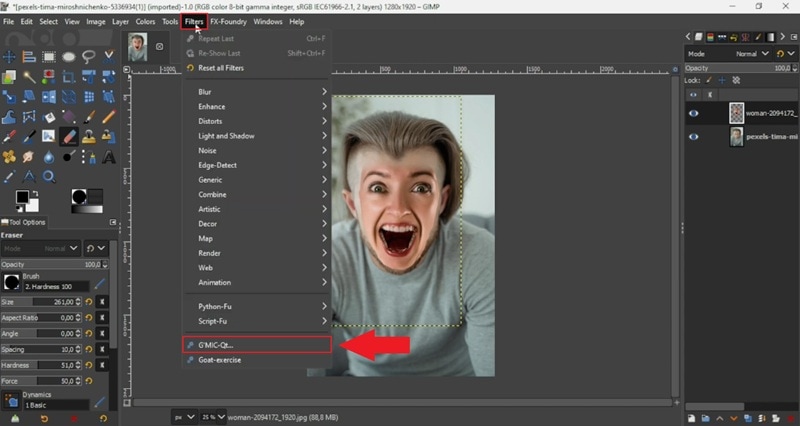
- Step 3. Access the G’MIC plugins
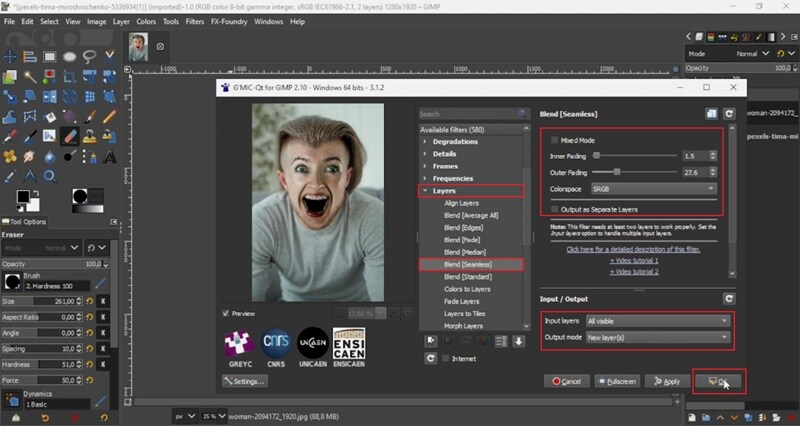
Now, open the “Filters” menu and choose the “G’MIC” option.
In the G’MIC window, scroll through the available filters, select “Layers”, and choose the “Blend [seamless]” feature. Adjust the settings on the right until it looks the way you want. Make sure the input layers are set to “All Visible” and the output mode is set to “New Layer”. When you are satisfied with the result, click “OK” to create the new layer.
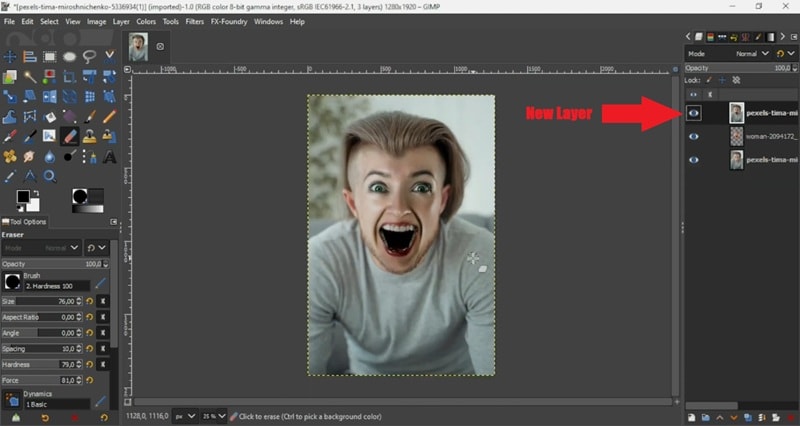
- Step 4. Refine with manual touches
Now you have a new layer created by the G’MIC plugin, and the process is already much simpler. However, you might notice areas like the inside of the mouth still look too dark or unnatural. To fix this, take a few moments to make manual adjustments for a cleaner result.
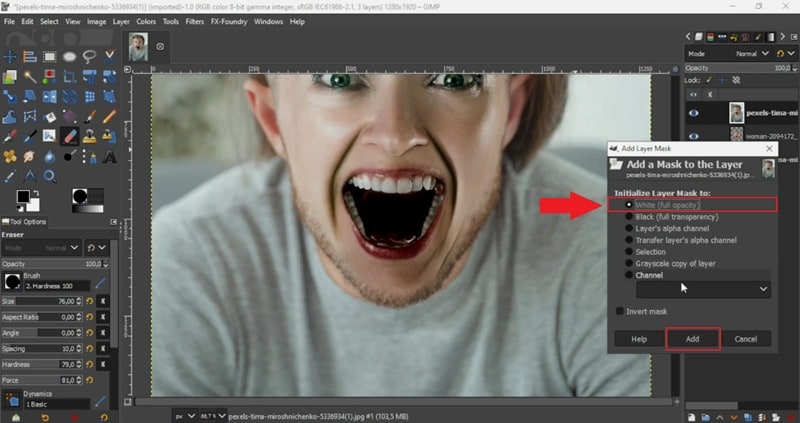
For starters, add a mask to your face layer and paint with “White” to fix the inside of the mouth. Then, click “Add".
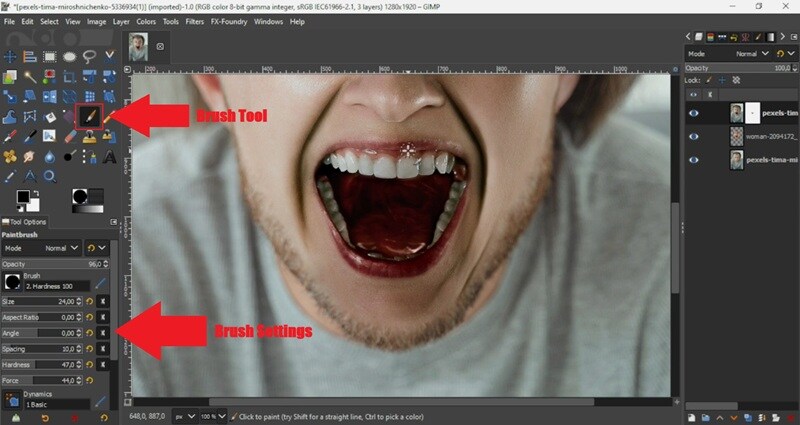
Next, use the “Brush” tool and adjust its size and other settings from the panel below. Paint over the inside of the mouth and near the lips to lighten and blend those areas so the edit looks natural.
- Step 5. Preview the result
Once you’re happy with the adjustments, zoom out to view the final result of your work. Just like that, your GIMP face swap tutorial is complete with a clean and natural finish. As you can see, using the plugin is much faster and simpler than doing everything manually.
Part 3. An Easier Way to Swap Faces: Try Filmora Instead
After going through the face swap GIMP tutorial above, you might feel that it's the only solution we have to offer for face swapping. But that’s not true! After all, learning every step for a clean face swap in GIMP can feel like a big task. Even with a GIMP face swap plugin, you still need time to master selections, masks, and color adjustments.
Not to mention, GIMP is only possible for photo editing, not videos. If you want a simpler way to get professional results, Wondershare Filmora streamlines the entire process so you can focus on creativity and wrap up your edits quickly.
Here’s why Filmora makes face swapping much easier:
- AI Image-To-Video With Element Swap: Filmora makes a face swap quick and seamless with the element swap capabilities in its AI Image to VideoAI Image-to-Video You can replace faces or objects in just a few clicks without spending hours on manual editing.
- Built In Templates And Effects: There is no need to search for extra plugins. Filmora includes ready-to-use templates, filters, and effects to help you complete your edits faster.
- AI Features That Save Time: Tools like Smart Cutout for precise isolation, AI Portrait for background removal, and automatic color matching make your face swap project polished and professional.
- Versatile Editing Tools: With Filmora you can go beyond a simple face swap. You can create full videos, slideshows, or even memes with the same easy-to-use editor.
With all these capabilities, swapping faces becomes practical and fun. Follow the simple guide below to see exactly how it’s done:
 secure download

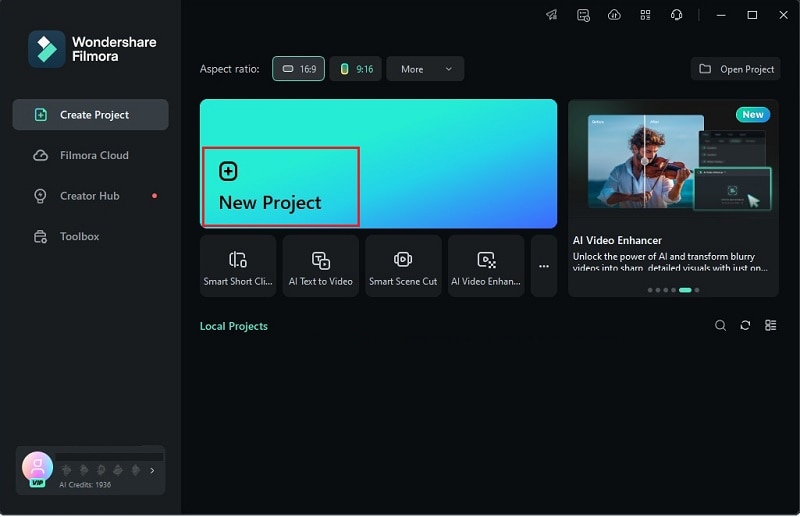
- Step 1. Open Filmora and start a new project
Begin by installing the latest version of Filmora on your device. Once it is ready, launch the software and select “New Project” to work on a fresh editing canvas.
 secure download
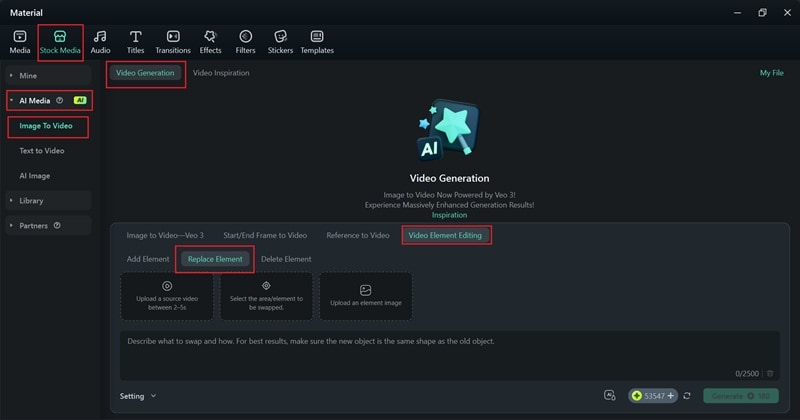
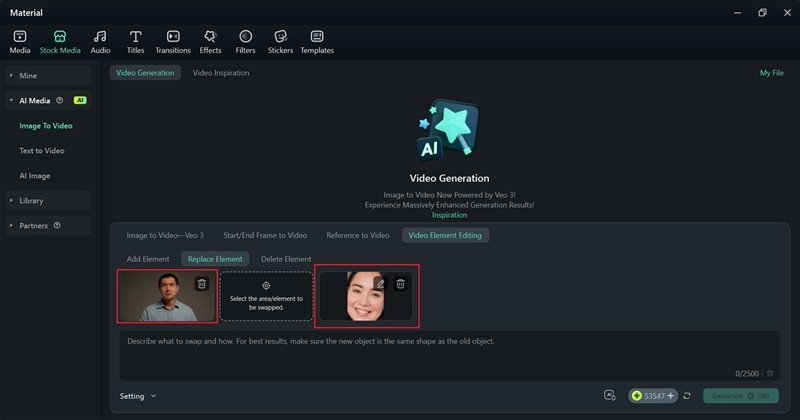
- Step 2. Access the Replace Element feature
Go to the “Stock Media” tab and open the “AI Media” menu. Next, select “Image to Video” and choose the “Video Element” method. From there, click on the “Replace Element” option.
- Step 3. Upload video and photos and generate video
This feature lets you replace an object in the video with the photo you provide. So, start by uploading both the video and the image you want to use for the swap.
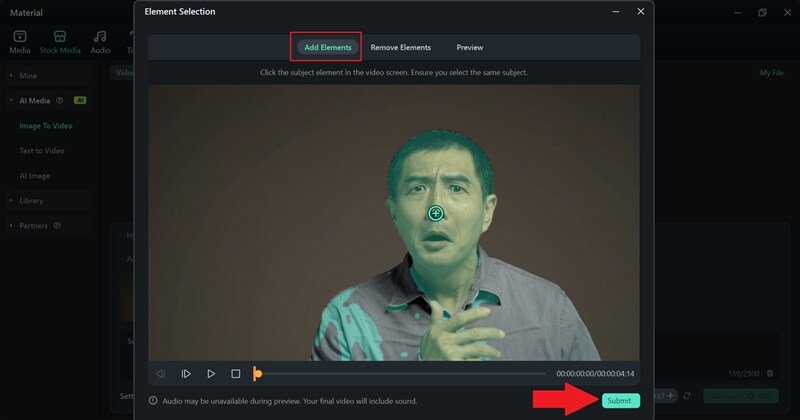
Next, click the middle section to select the object in the video you want to replace. Choose “Add Element” and click directly on the subject’s face in the video. Be as precise as possible to get accurate results, then click “Submit”.
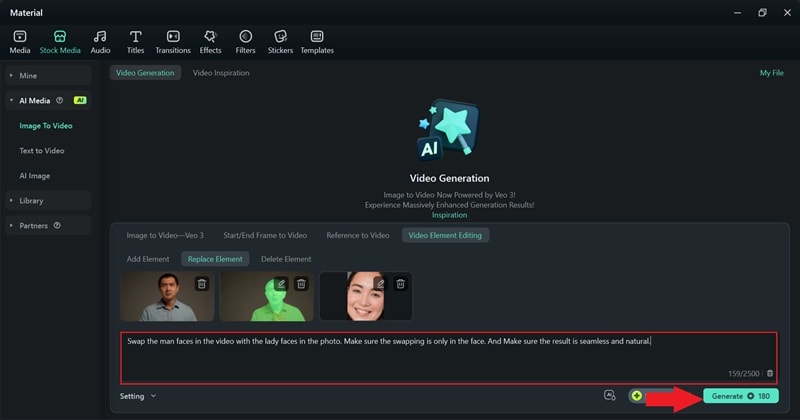
Then, type your prompt in the description box, explaining which part you want to swap and adding details to ensure the best results. Click “Generate” and wait a few seconds for Filmora to process your request.
- Step 4. See the result and make edits if necessary
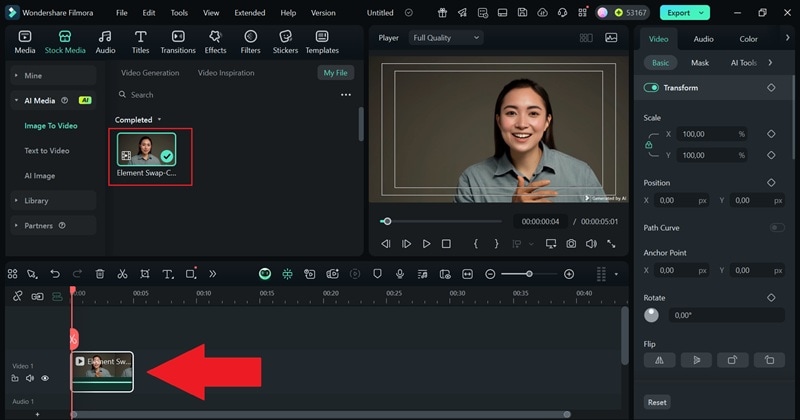
Once Filmora finishes generating, play the video to review it and drag it onto the editing timeline. The result should already look seamless, but you can explore Filmora’s features and libraries to enhance it further.
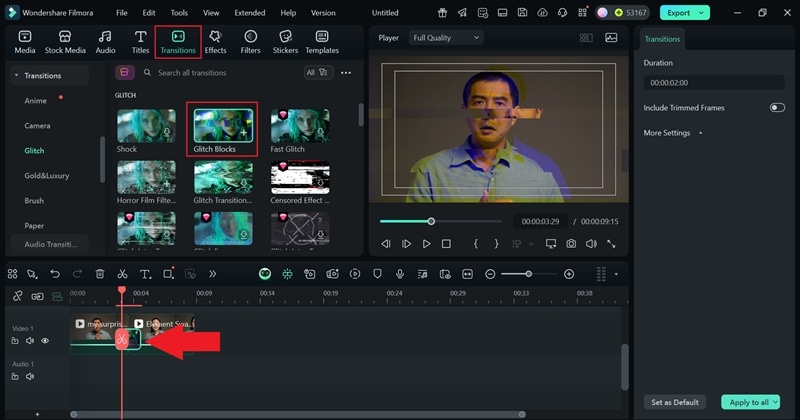
For example, if you want to create a before-and-after face swap video, simply upload the original clip, place it on the timeline, and add a transition between the two videos for a smooth comparison.
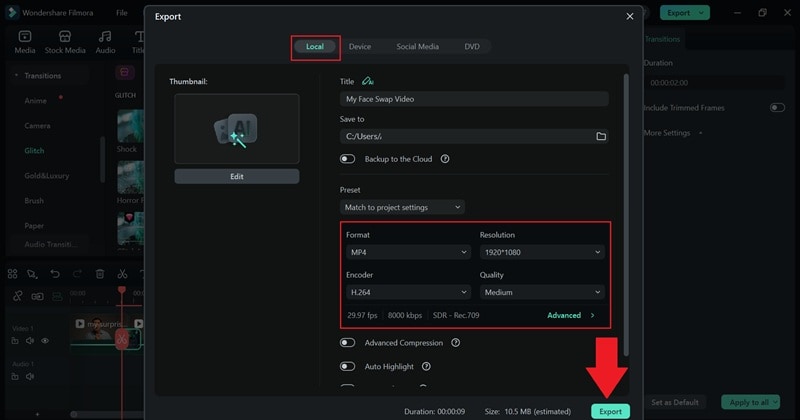
- Step 5. Export and save the video
Once you are satisfied with your edit, click “Export”. Choose “Local” to save the file on your device or “Social Media” to upload it directly online. Add a title to your video, pick the format and resolution, set the destination folder, and click “Export” again to finalize everything.
And that’s pretty much it! As you can see, face swapping with Filmora is much simpler and a lot more enjoyable. The AI handles most of the work, so there’s no need for tedious adjustments after it generates the result. Now, take a look at your finished creation below.
Conclusion
GIMP is a powerful free editor that works well for creative projects like face swapping. So, this guide walked you through a complete GIMP face swap tutorial using both manual steps and a GIMP face swap plugin to make the process easier. While a face swap with GIMP is possible, it can feel overwhelming for beginners and is limited to editing photos only.
For a smoother experience, an all-in-one editor like Filmora is a much better choice. Filmora makes it easy to face swap in videos and create polished content with its AI-powered tools and built-in effects. It gives you the freedom to edit quickly and focus on creativity, making it perfect for both casual users and advanced creators.
