Some moments deserve more than a static photo snapshot. Envision capturing joyous moments at a wedding or family reunion not as a normal video but as a photo by switching to the live photo mode on your iPhone. While you have captured the best moments for 1.5 seconds after the shot, you can take these motion pictures to another level of beauty by turning them into videos.
But why would you want to convert them to a video since it embeds sound and motion? The need to convert live photos to video arises when your family member or friend using a different device (Android) needs you to share these special photos with them. And since live photos work only on Apple devices, you cannot share the live photos with these Android users.
At this point, the solution is to turn the live photos into video, and you even get the chance to add more refreshing effects. So, if you don’t know how to go about it, this guide will walk you through how to turn a live photo into a video.
In this article
Part 1: Ways to Convert Live Photo to Video on an iPhone
At first, learning how to make a video from live photos might look daunting, but then with the best technique, you can get this done easily. So, if you are ready to make live photos into video on your iPhone, there are two ways to get this done. They are:
1. The Built-In iOS Method
iOS devices come with a built-in feature that lets you turn a live photo into a video without downloading any additional apps. This option is quick, reliable, and seamlessly integrates with your Photos app. It’s perfect if you want a simple solution that doesn’t require extra tools.
2. Using Third-Party Applications
If you want more flexibility, third-party apps provide excellent alternatives. These apps often include features like video customization, combining multiple live photos, or exporting in higher resolutions.
Method 1: How to Make a Live Picture a Video on your iPhone
Before you start the process, ensure you have a live photo saved in your phone gallery. If you are not sure you have a live photo in your photo gallery, switch to your camera to take a few shots. If you do not know how to switch your camera to live photos, look at the marked part in the image below. Click on the live photo sign to switch your camera mode.
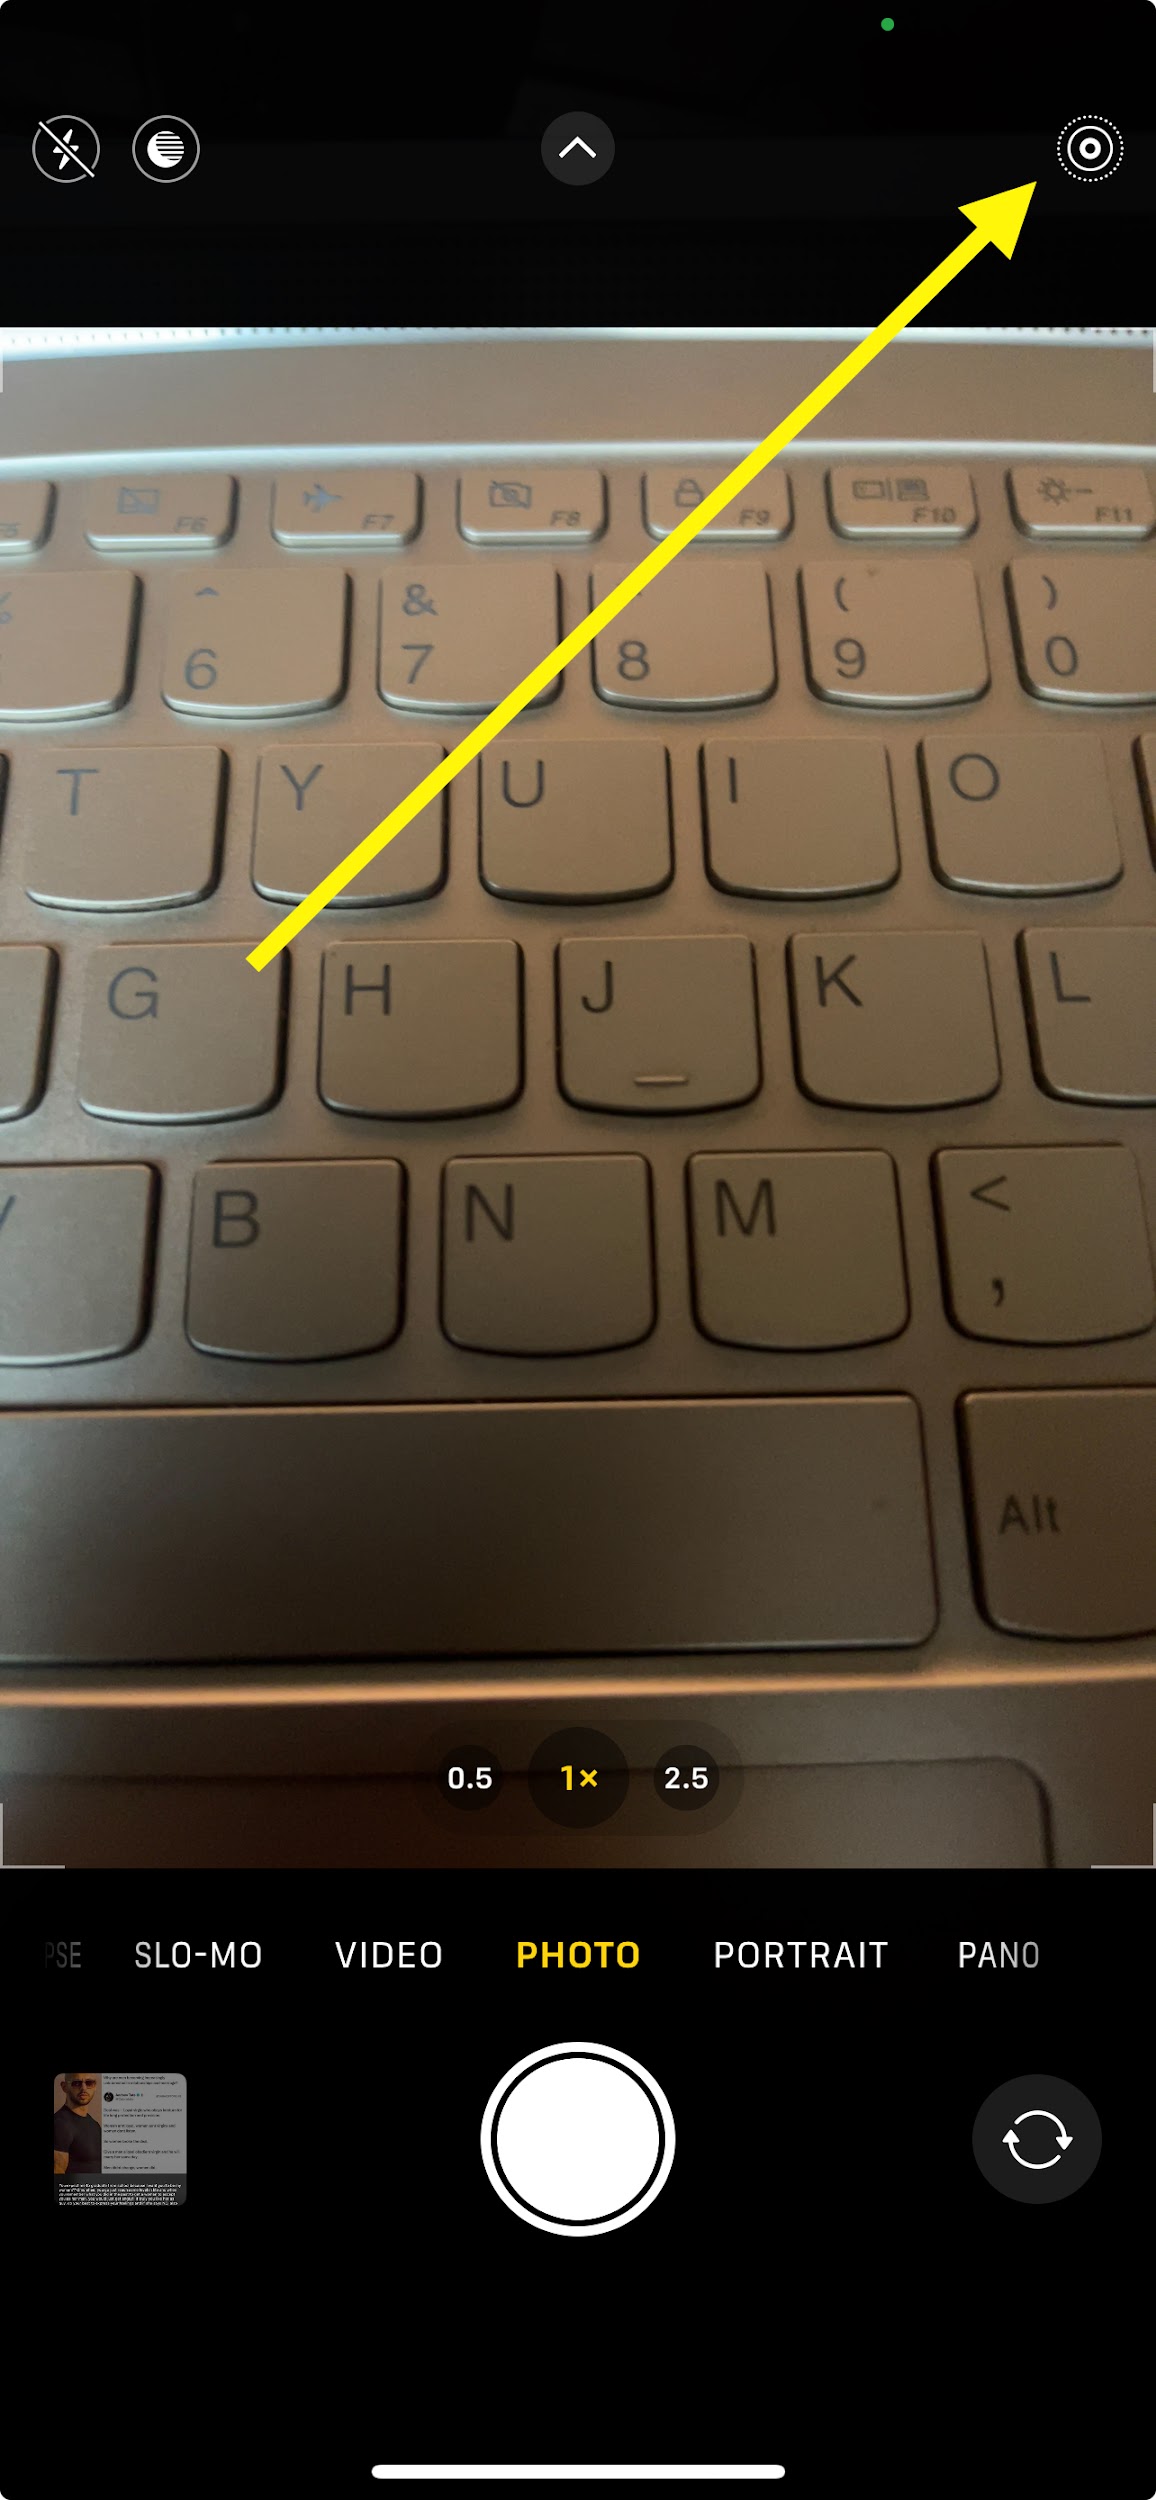
So, if you are done capturing some live photos, follow the steps to turn a live photo into a video.
Step 1: Launch the Photos gallery on your iPhone or iPad
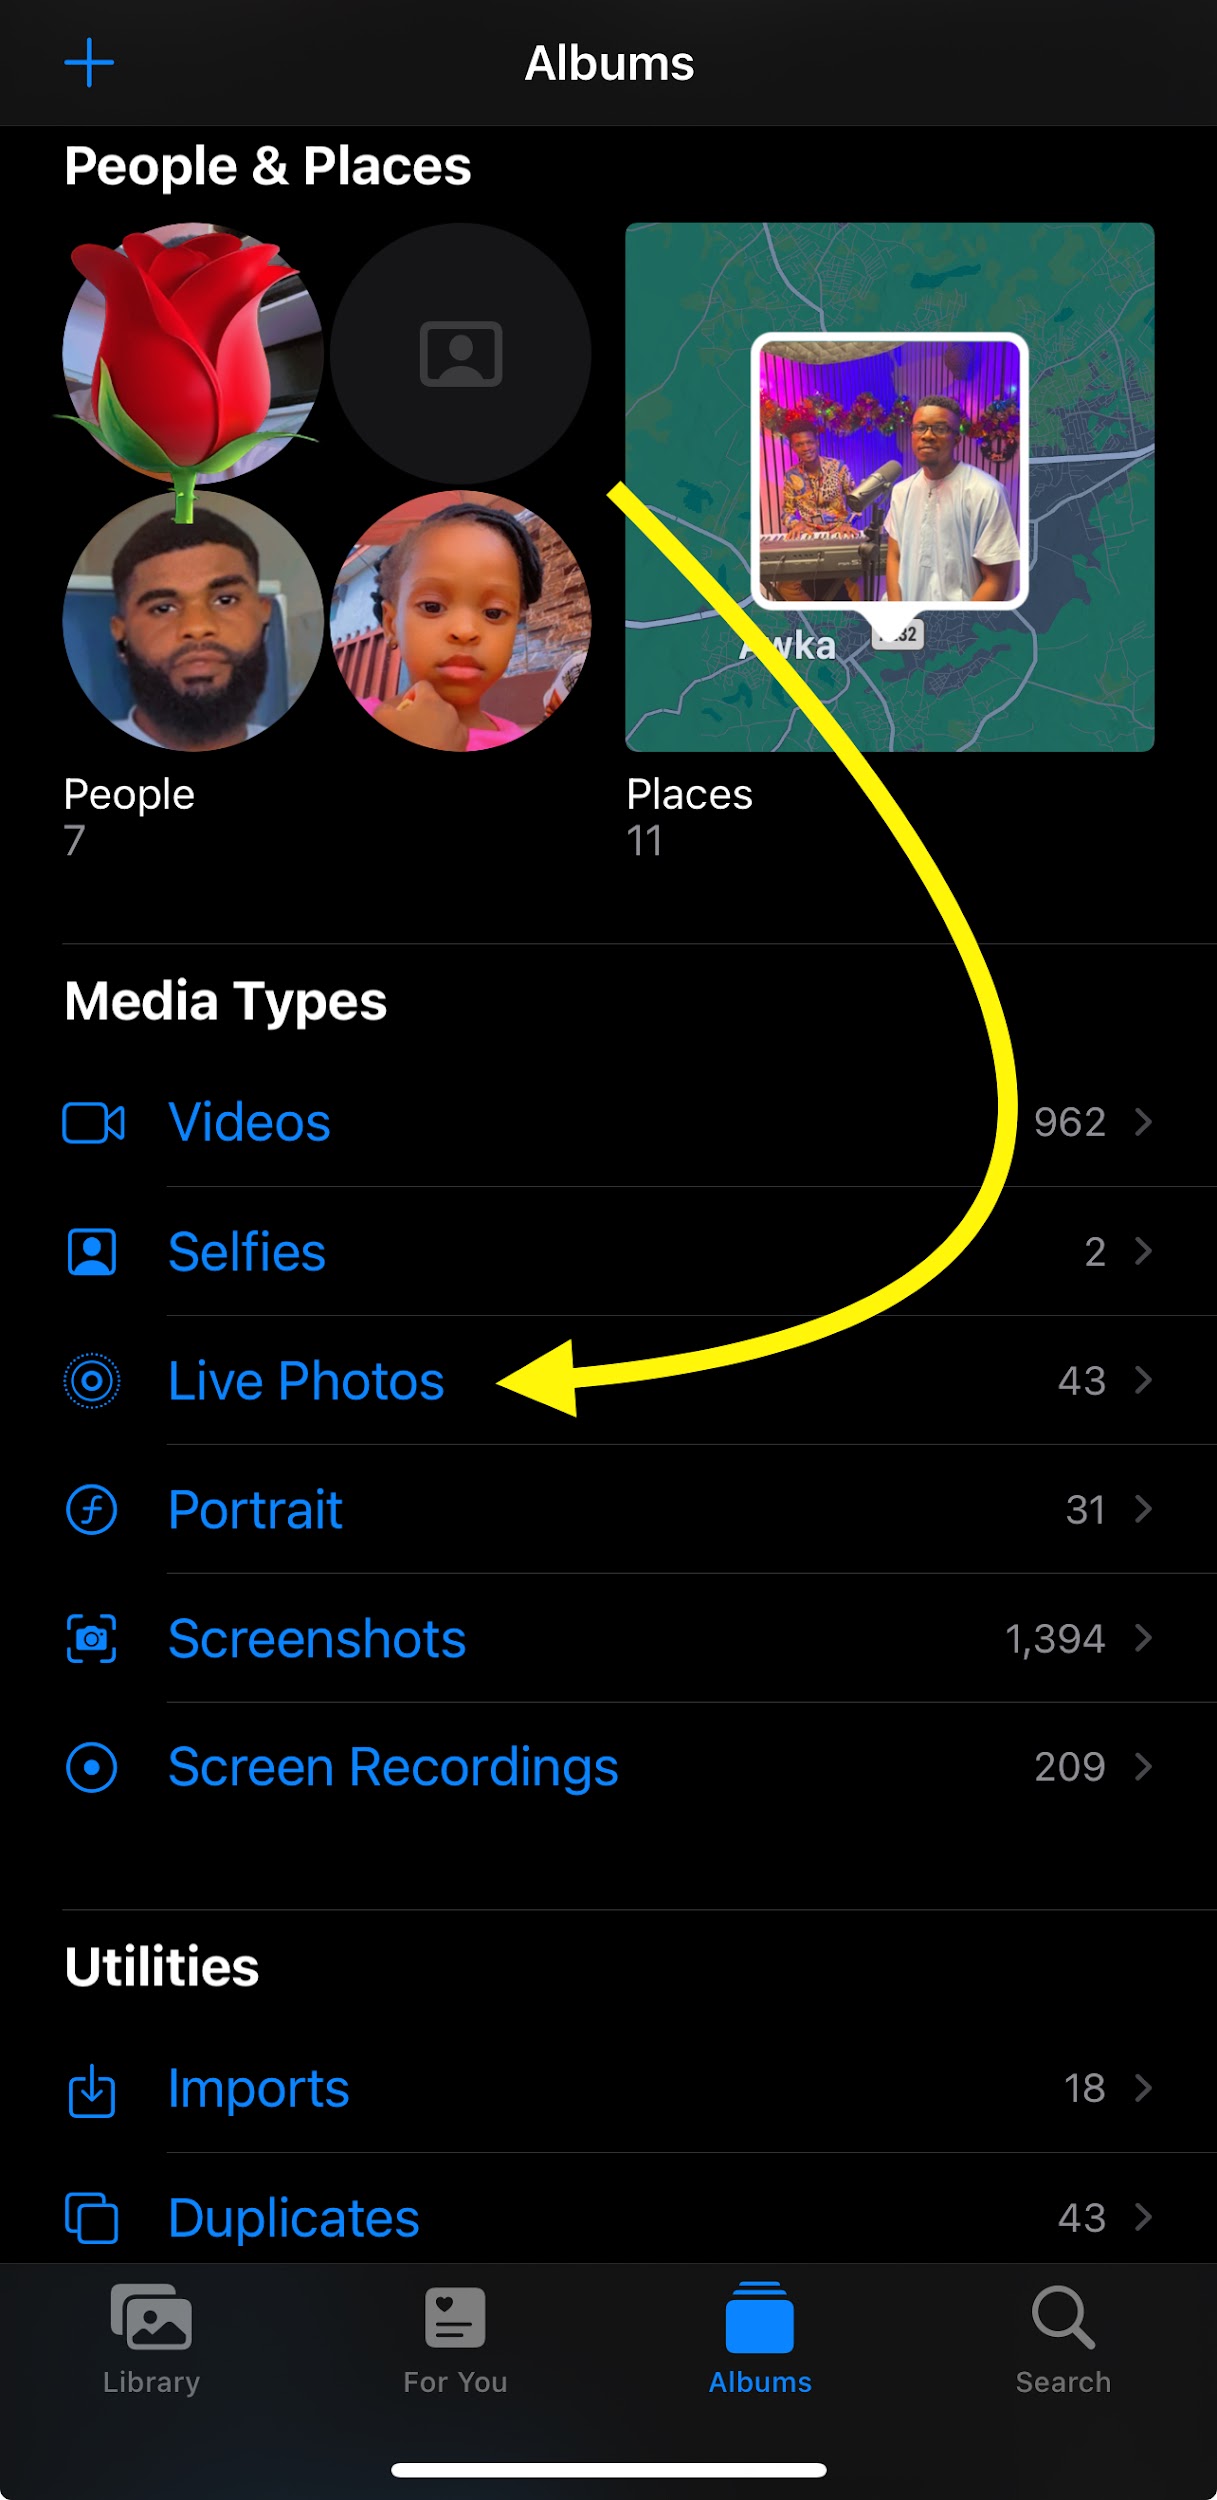
Step 2: Tap the Albums tab at the bottom. Scroll down to the Media Types section and tap Live Photos.
Step 3: Browse through your live photos and select the one you want to convert. Tap the More button (a circle with three dots in the upper-right corner). From the menu, select Save as Video.
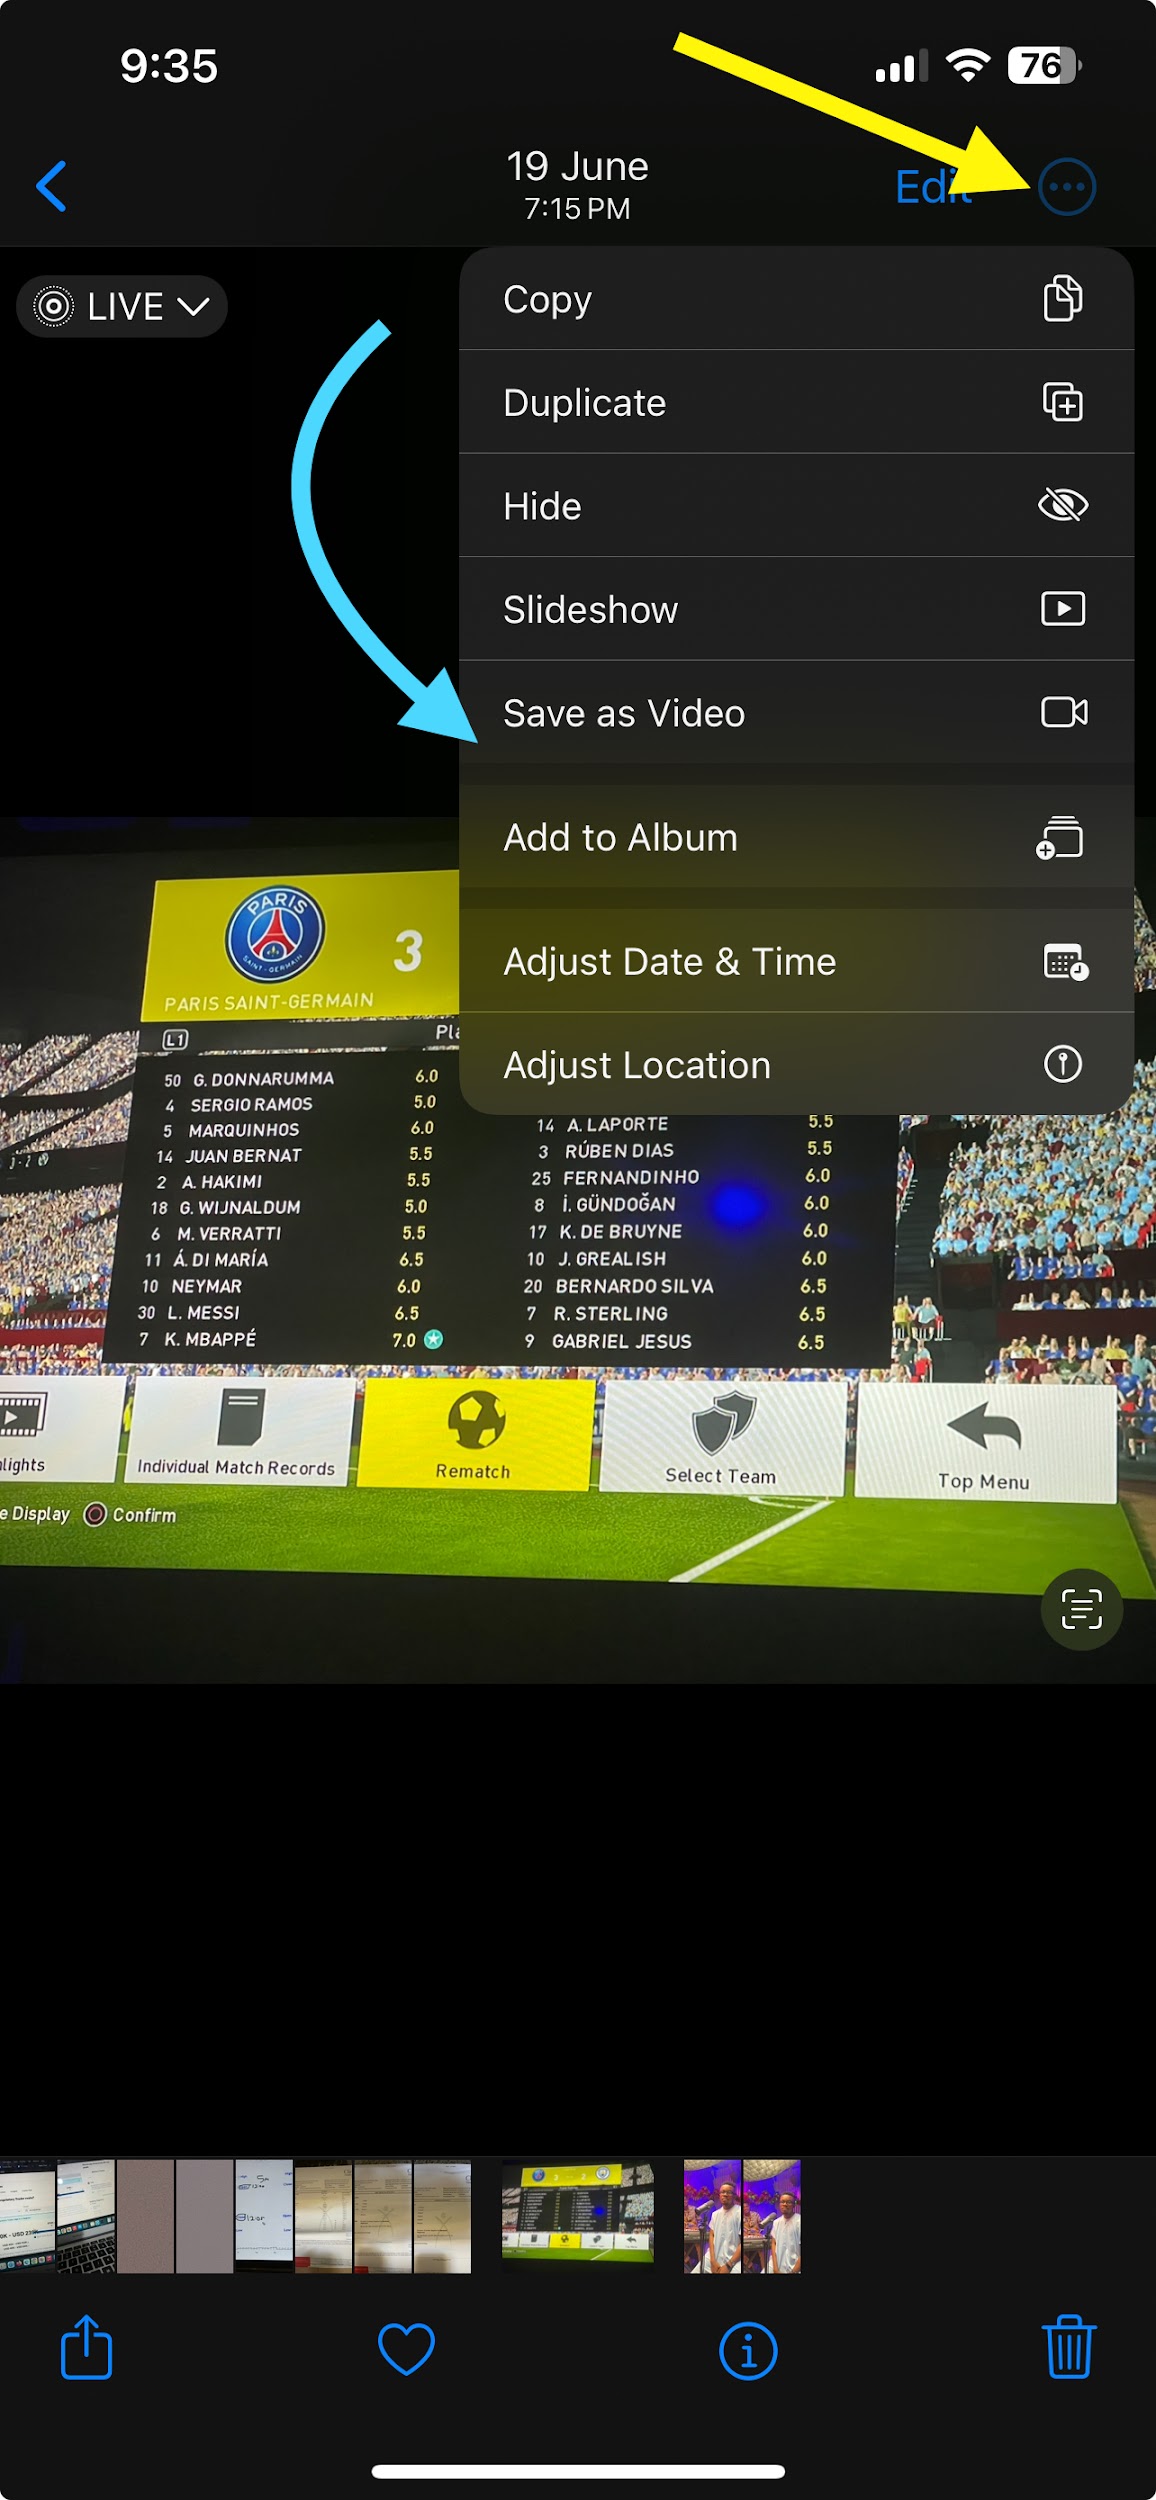
Step 4: Your new video will appear in the recent album and your original Live Photo will still be in the Live Photos album.
Method 2: How to turn Live Picture into video on your iPhone Using a Third-party App
Turning a Live Photo into a video on your iPhone using Wondershare Filmora is straightforward and fun. If you're new to this, don't worry—I'll guide you step-by-step. Filmora simplifies the process while offering creative tools to make your video stand out.
Step 1: Download and Install Filmora.
Step 2: Open Filmora and tap New Project. Tap the + icon to access your photo library. Select all to ensure all your files are available in one folder. Scroll to your Live Photos and select the one you want to convert.
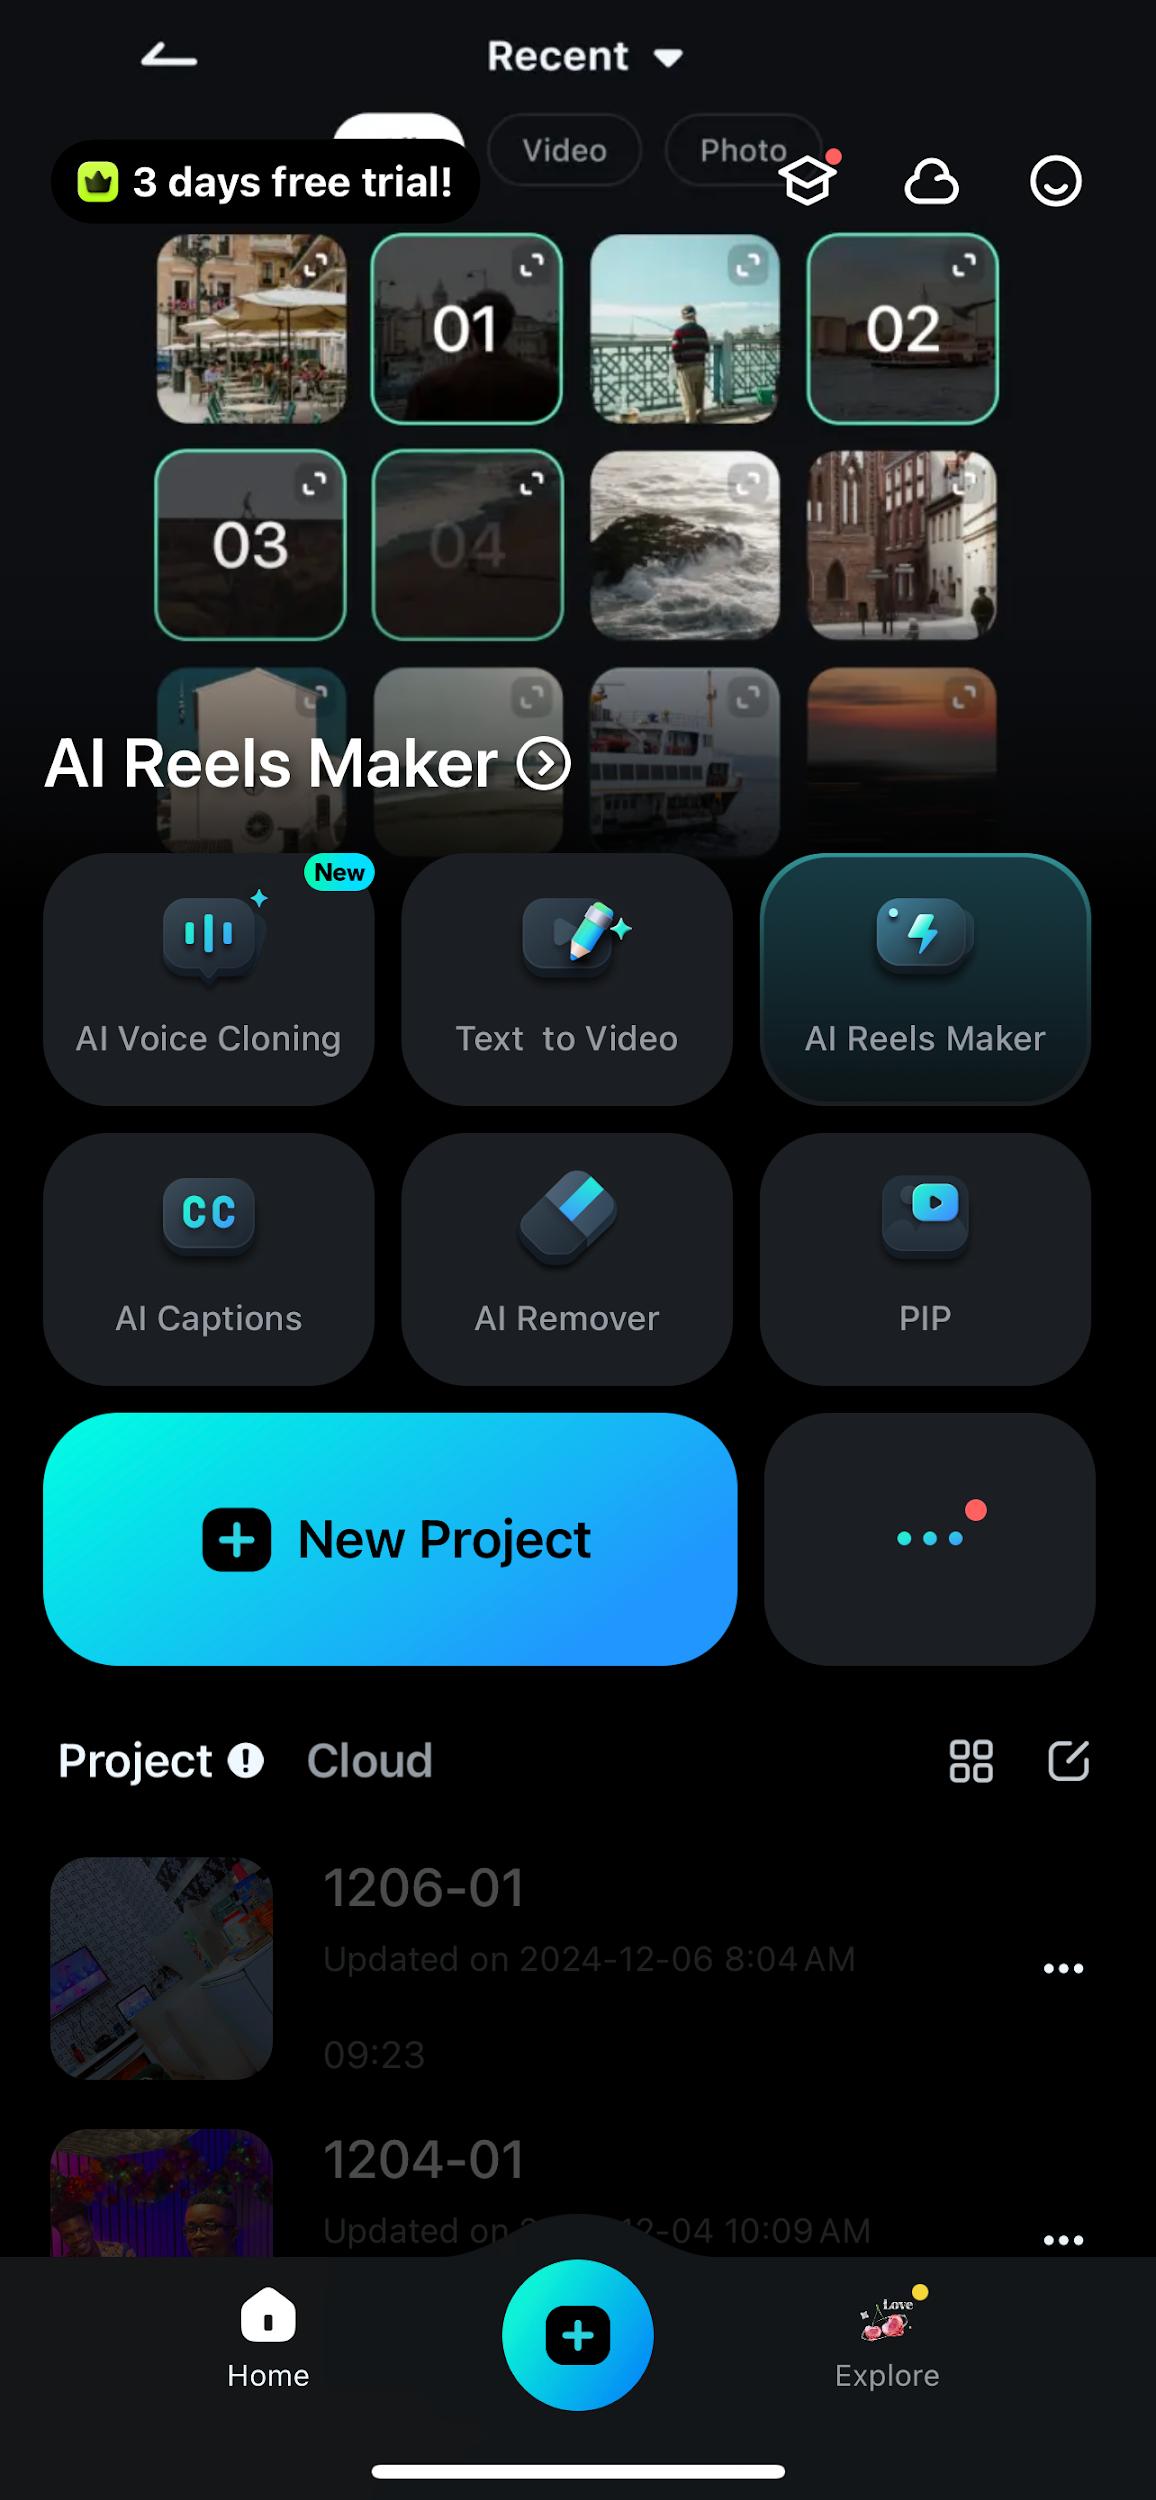
You can differentiate your live images from the rest of the files by the live photo symbol on each live photo. Filmora will automatically recognize it as a live photo and import both the photo and motion data.
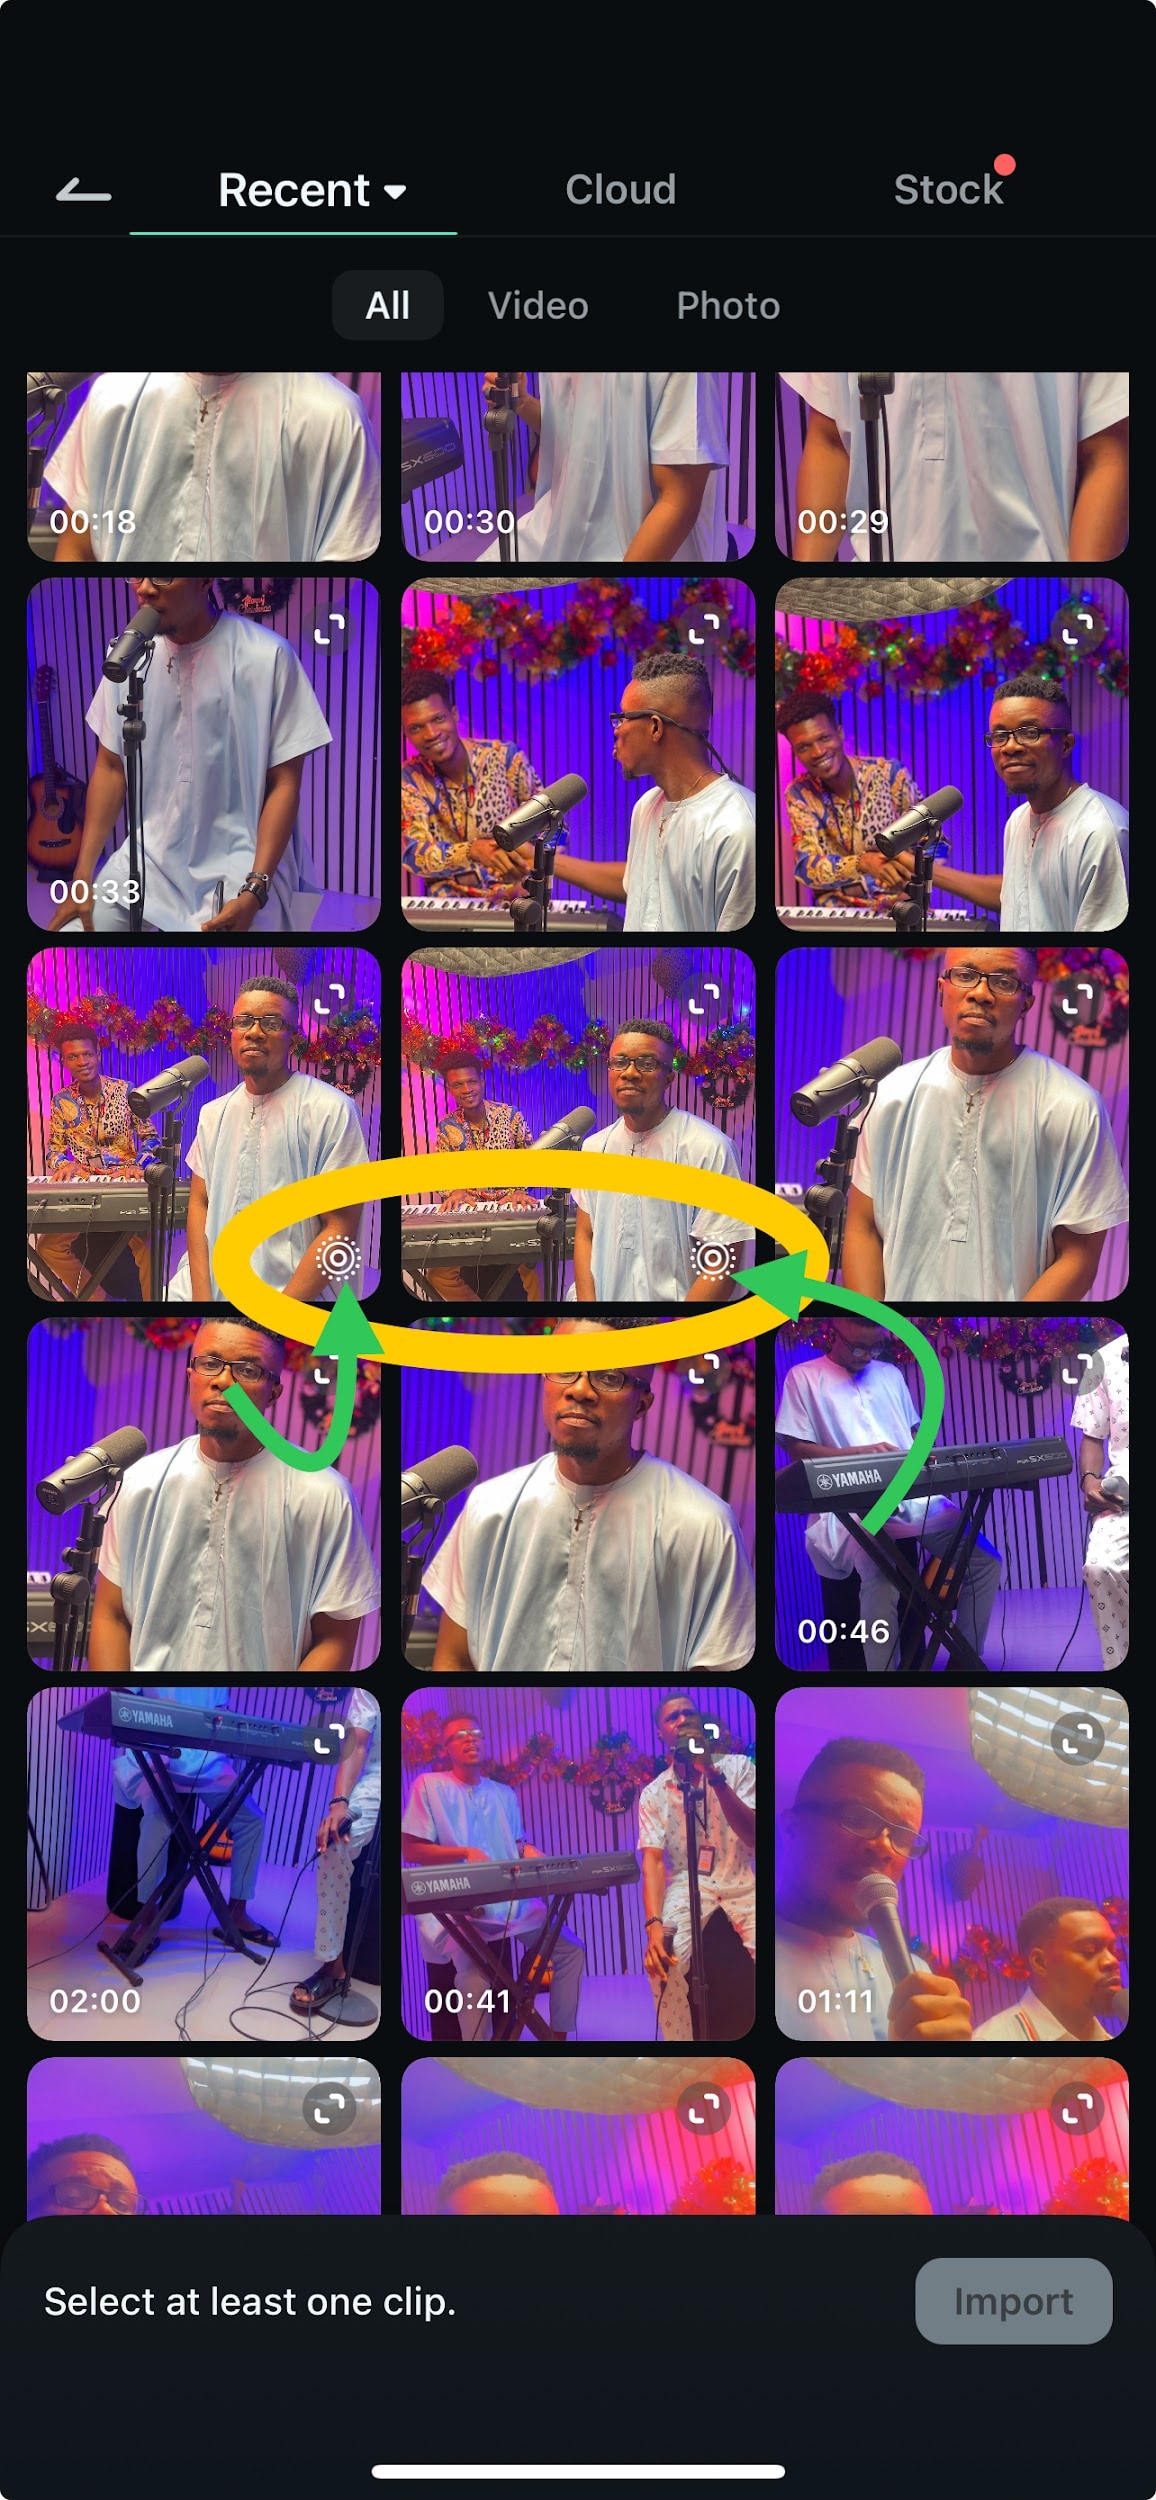
Step 3: After importing, your live photo appears on the timeline. By default, it already behaves like a short video in Filmora. However, you can adjust the duration by dragging the edges of the clip on the timeline or adding background music if you want a professional touch.
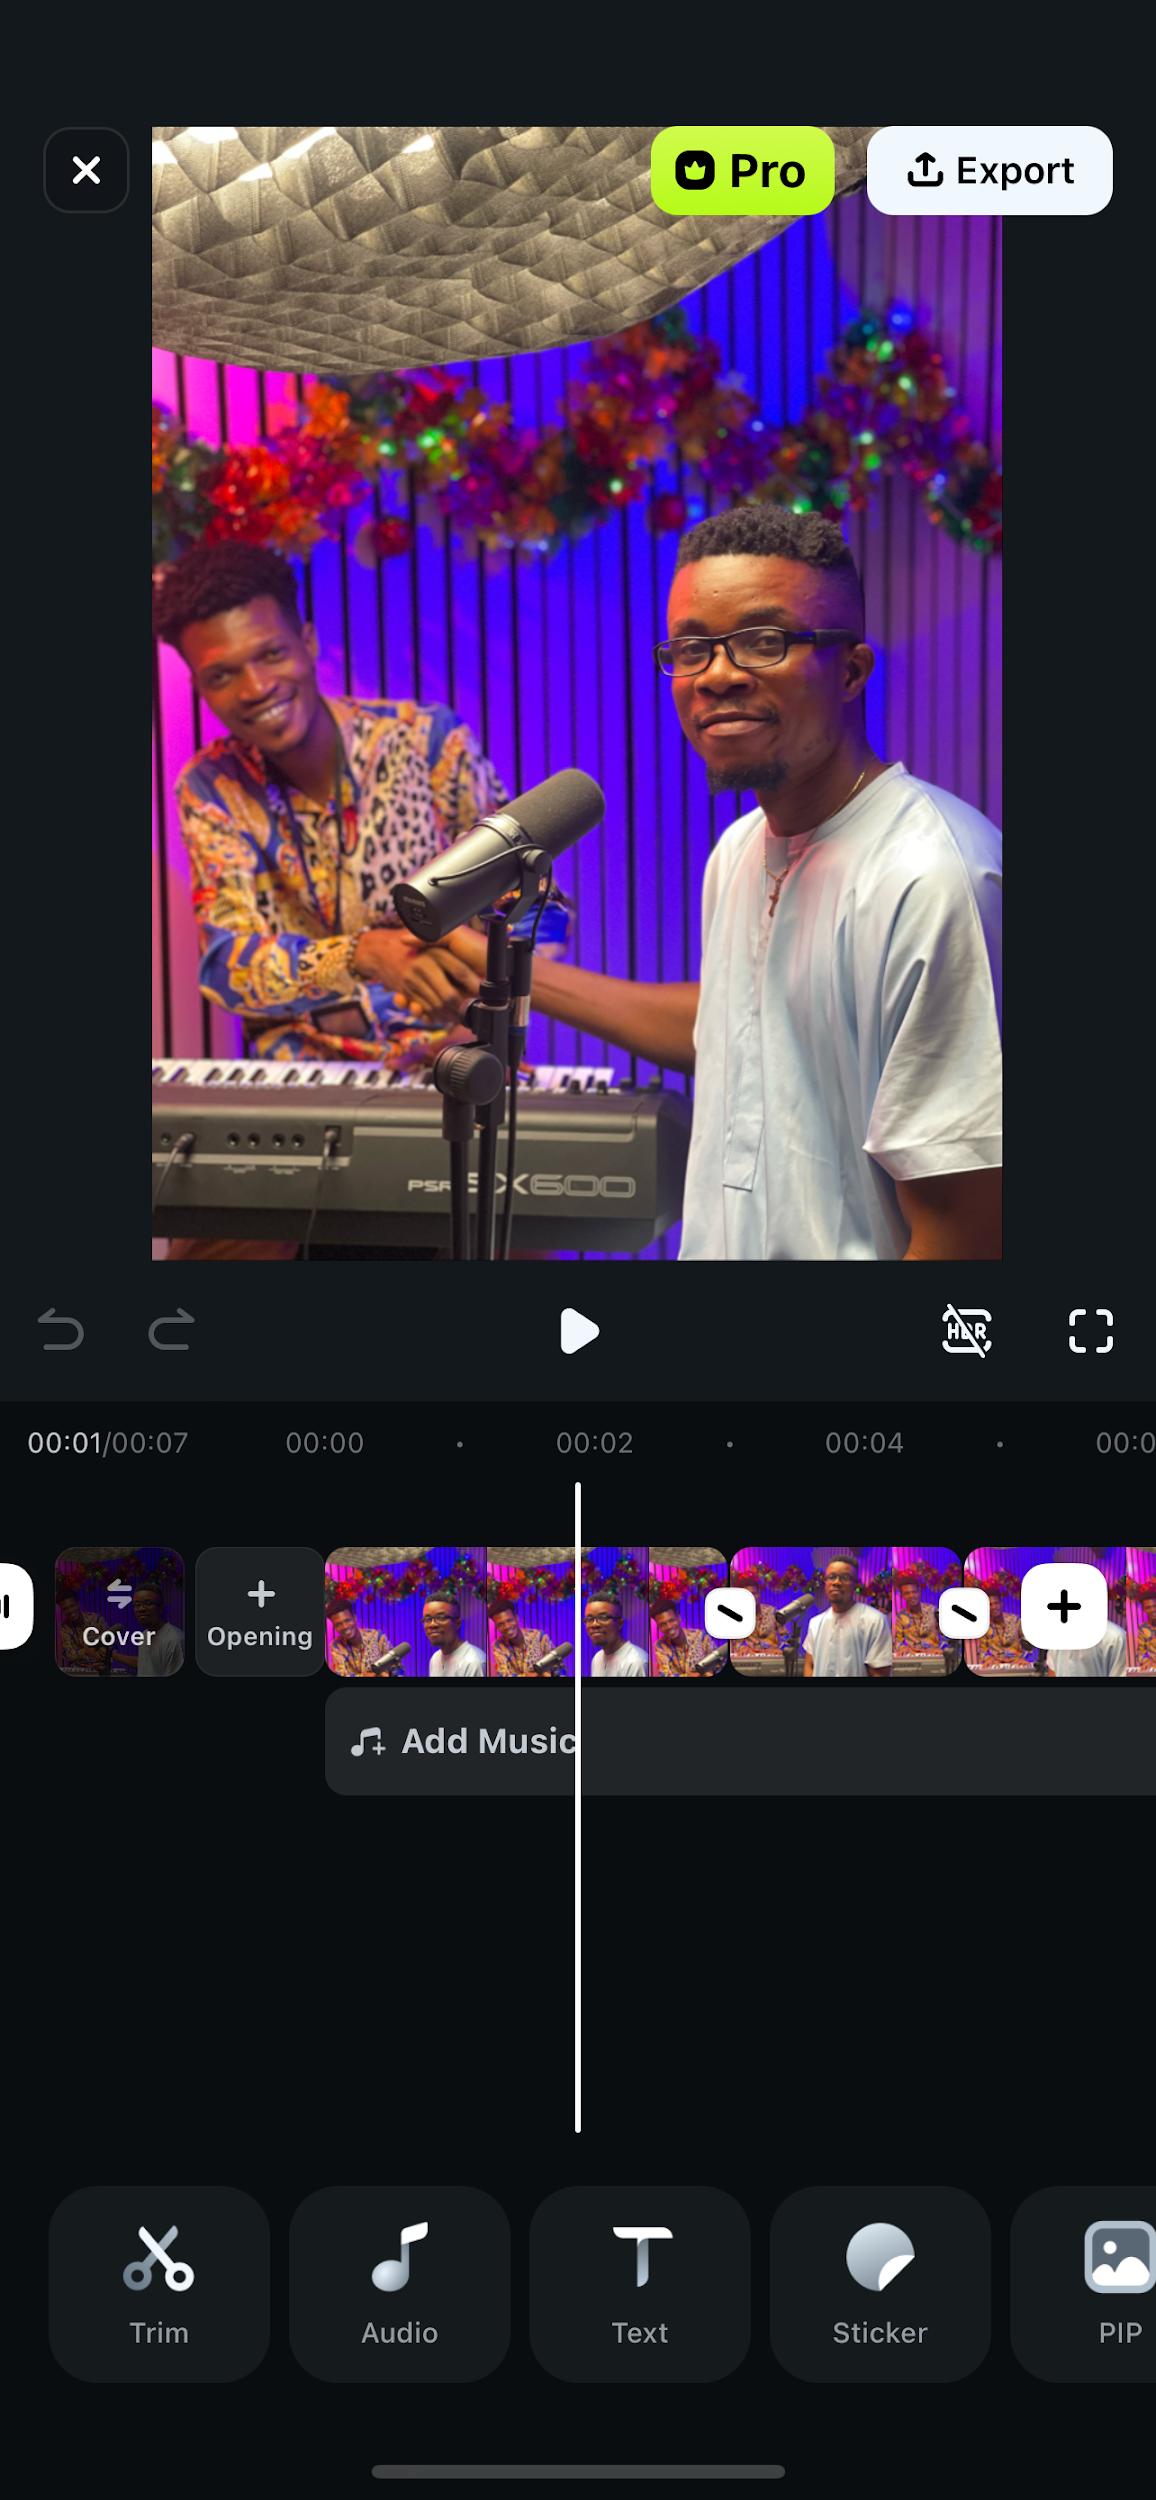
Step 4: Add Transitions and Effects. You can use the fade-in/out transition to make the start and end smoother. Just drag and drop any effect or transition onto your live photo clip.
how-to-make-a-video-with-live-photos-9
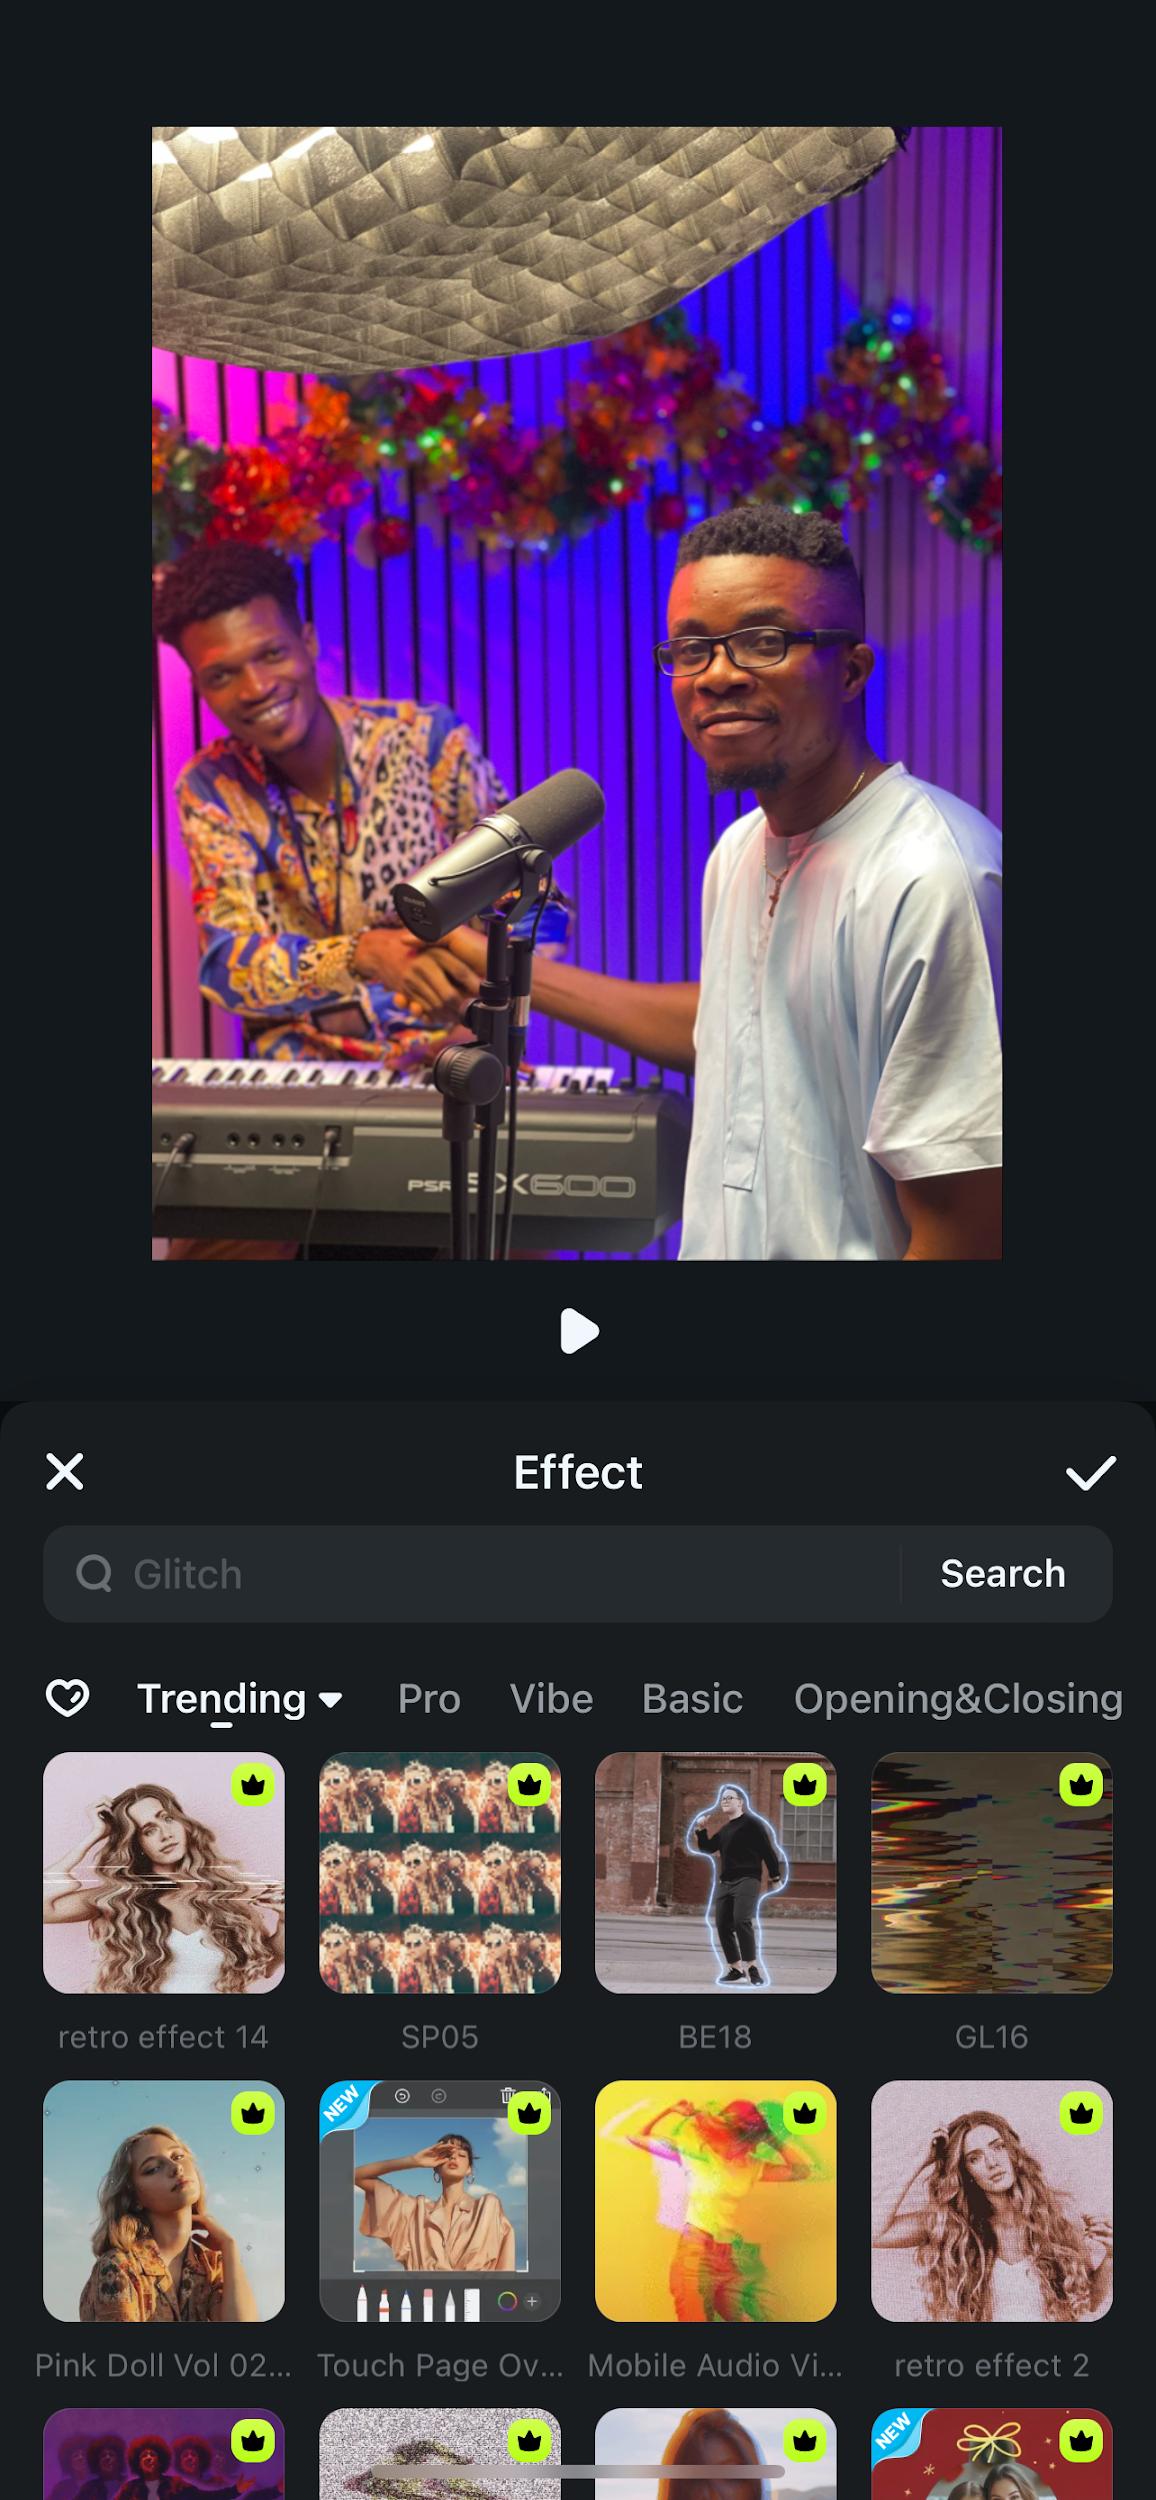
Step 5: Once satisfied with your edits, tap the Export button (usually on the top-right corner), select Video Format, and adjust the resolution or frame rate if needed. Save it to your camera roll or directly share it on social media.
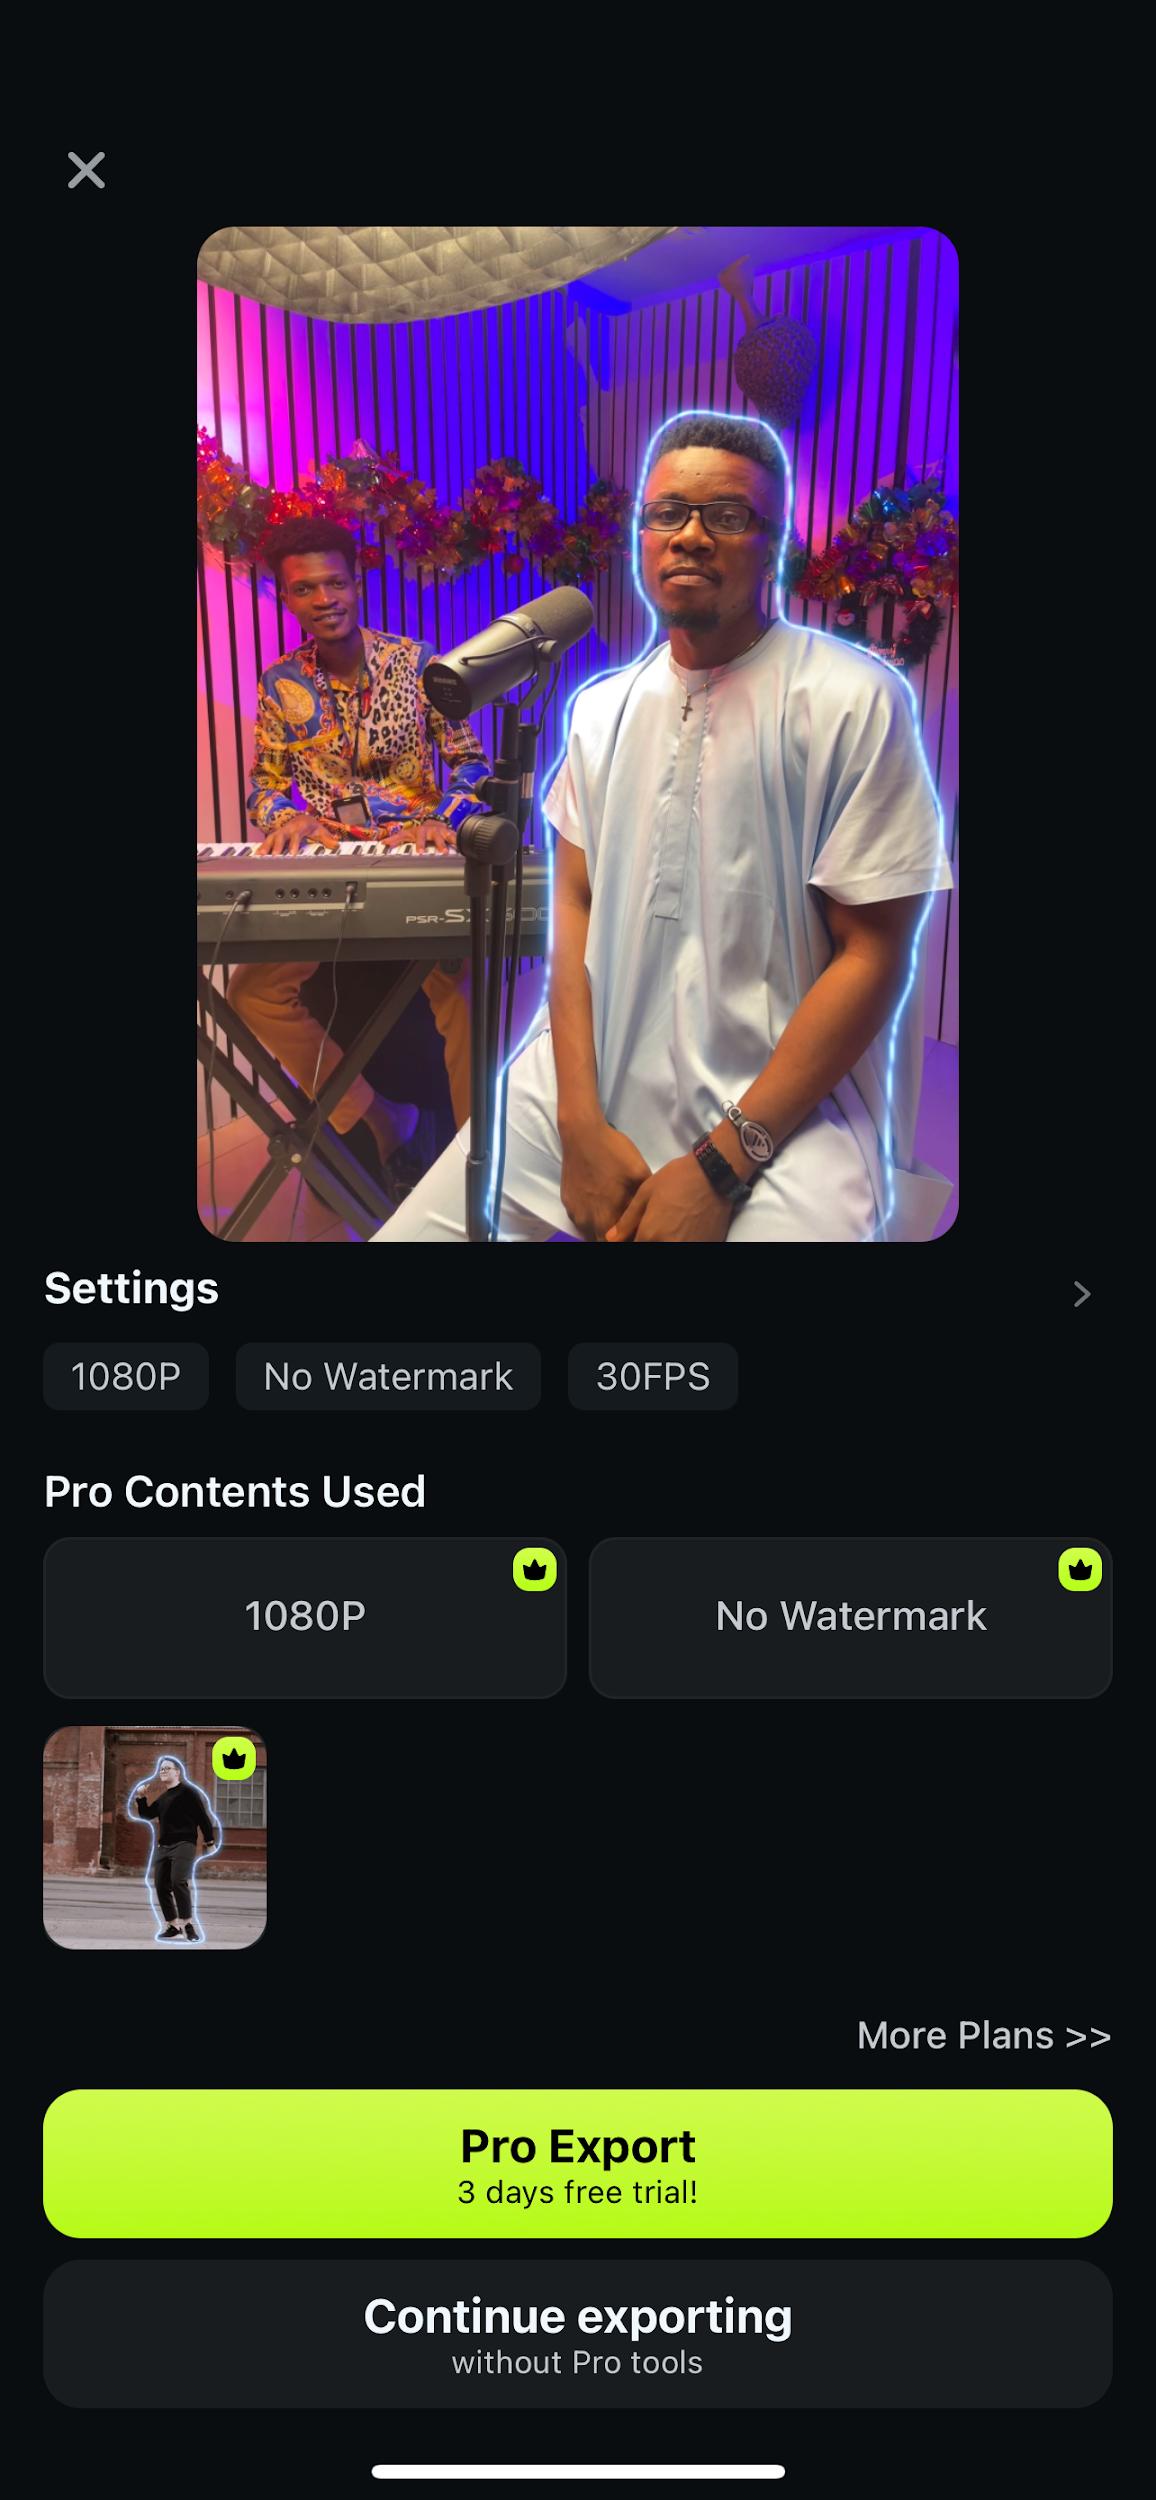
Animate Static Images into Dynamic Videos with Filmora AI Image-to-Videos Feature
Unlike the previous example, this image is designed to move or perform specific actions. The Filmora AI image-to-video feature animates one two or three still pictures, making them perform actions such as:


How to use Filmora image-to-video feature on your mobile phone
Step 1: Launch the Filmora mobile application and select the image-to-video feature
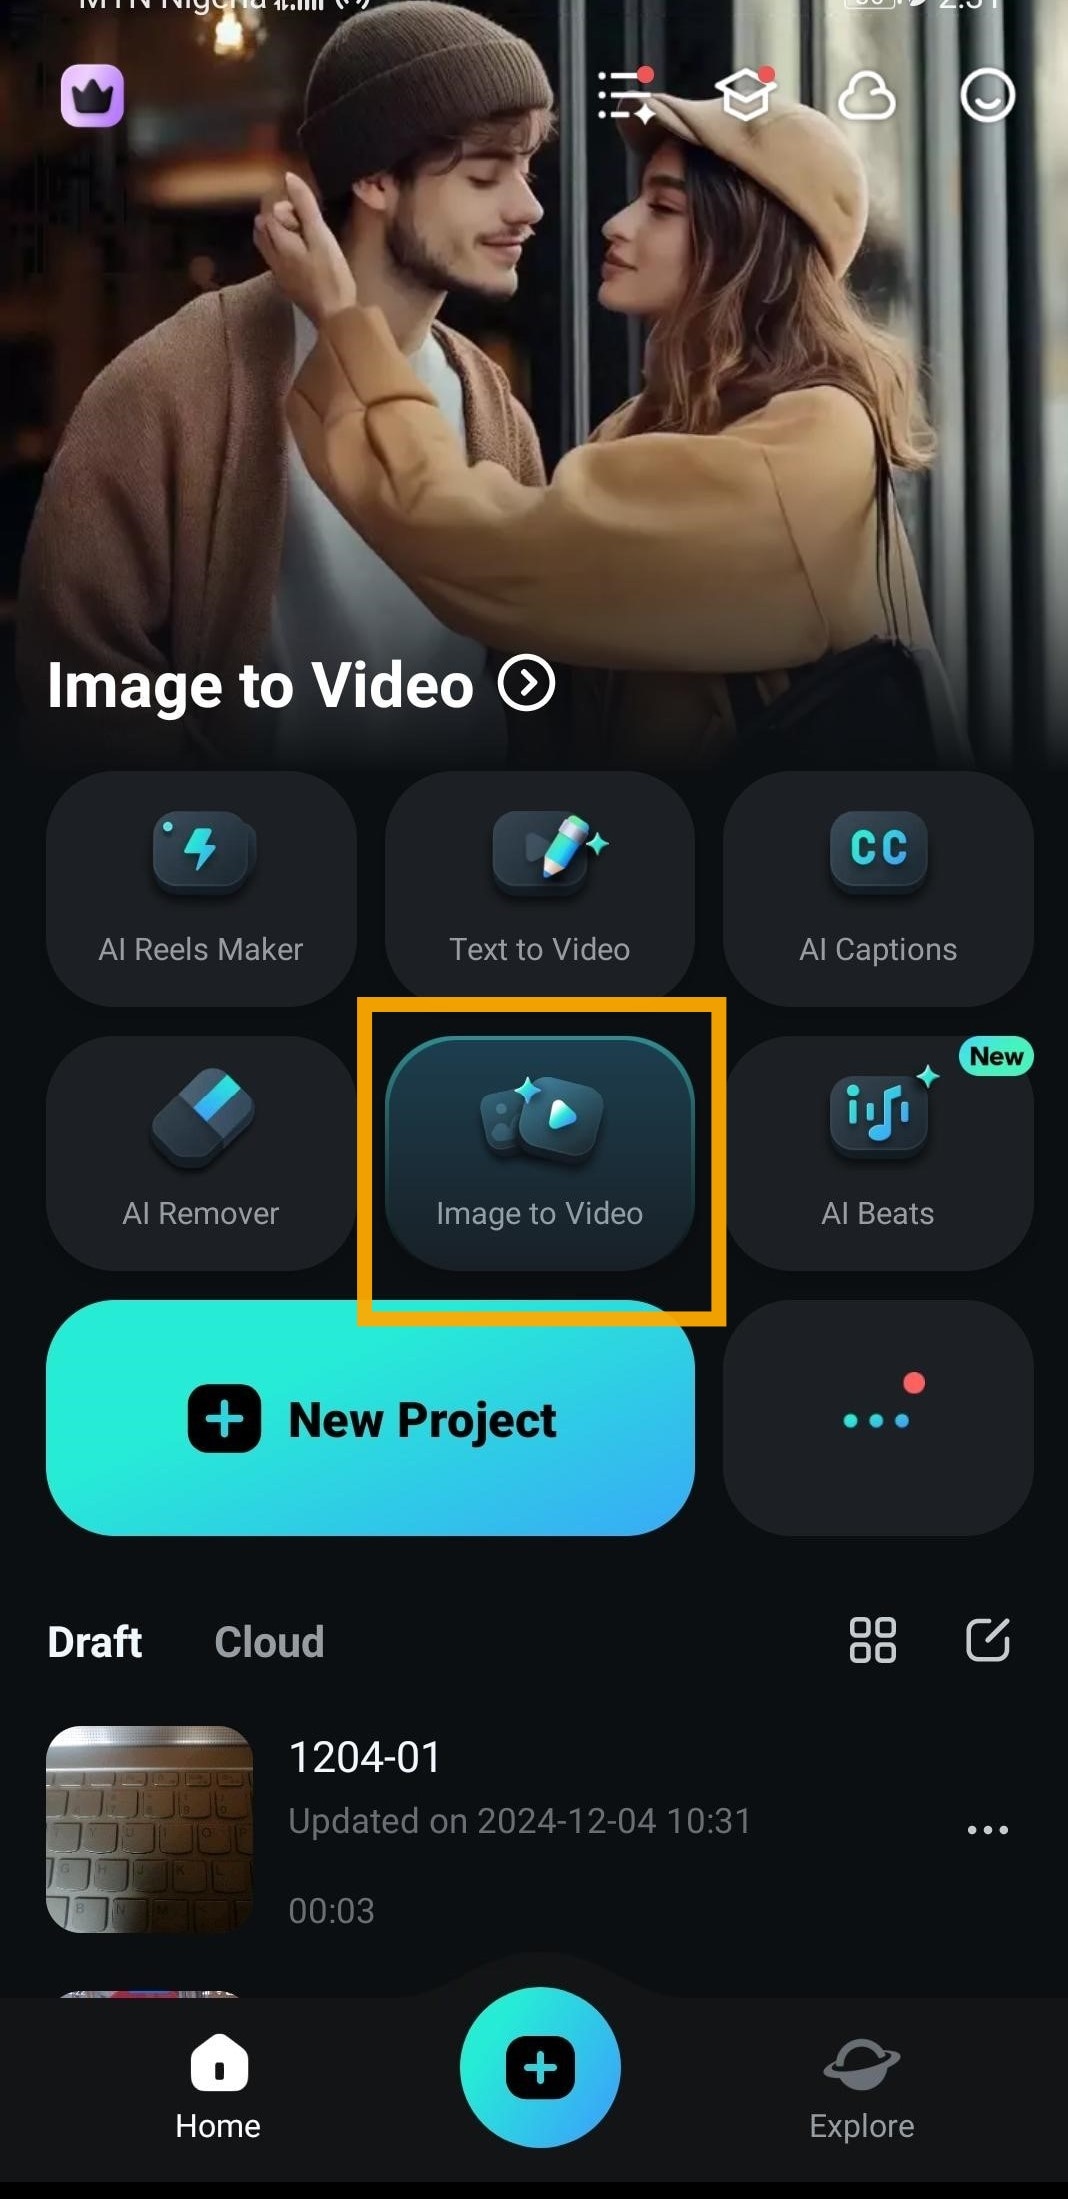
Step 2: Select the AI template and proceed to add images

Step 3: Select one or two images depending on the AI template you want to use
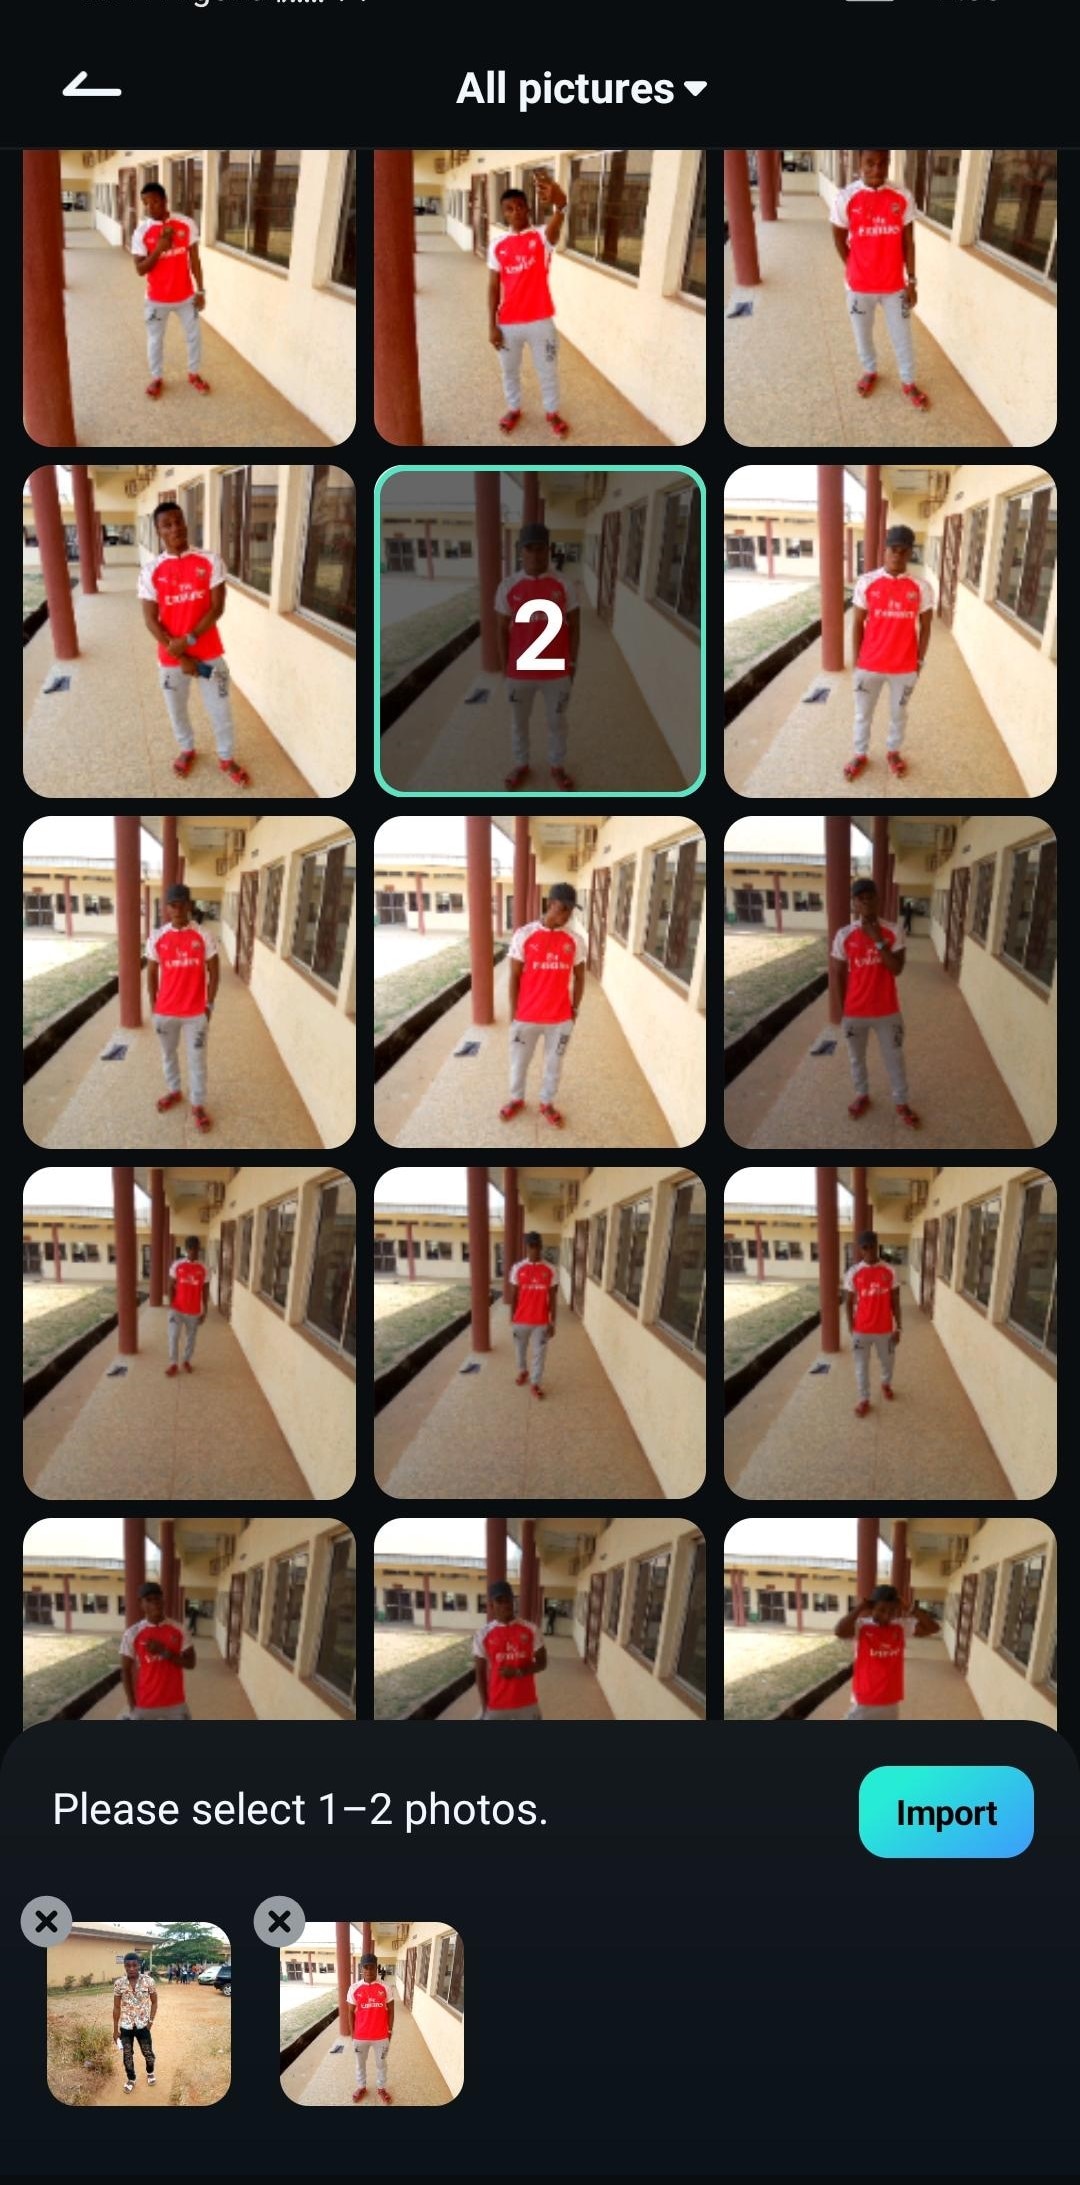
Step 4: Click Generate, and in a few minutes, you will see your picture acting as your chosen template.

Part 2: Are There Live Photo Options For Android Devices?
Android phones offer similar features to the iPhone's Live Photos, often referred to as “motion photos.” While the name and functionality might vary slightly between manufacturers, the concept remains the same—capturing a short video clip alongside your photo.
Several Android devices come with this feature pre-installed. For example:
- Samsung Galaxy phones include Motion Photos in their native camera app.
- Google Pixel devices have a similar feature called Top Shot, which also selects the best moment from the motion clip.
- Huawei and Xiaomi models offer variations, often named differently (e.g., Moving Picture, Dynamic Photo).
How to Enable and Use Motion Photos
The steps may differ slightly depending on your device. Here’s a guide using Huawei
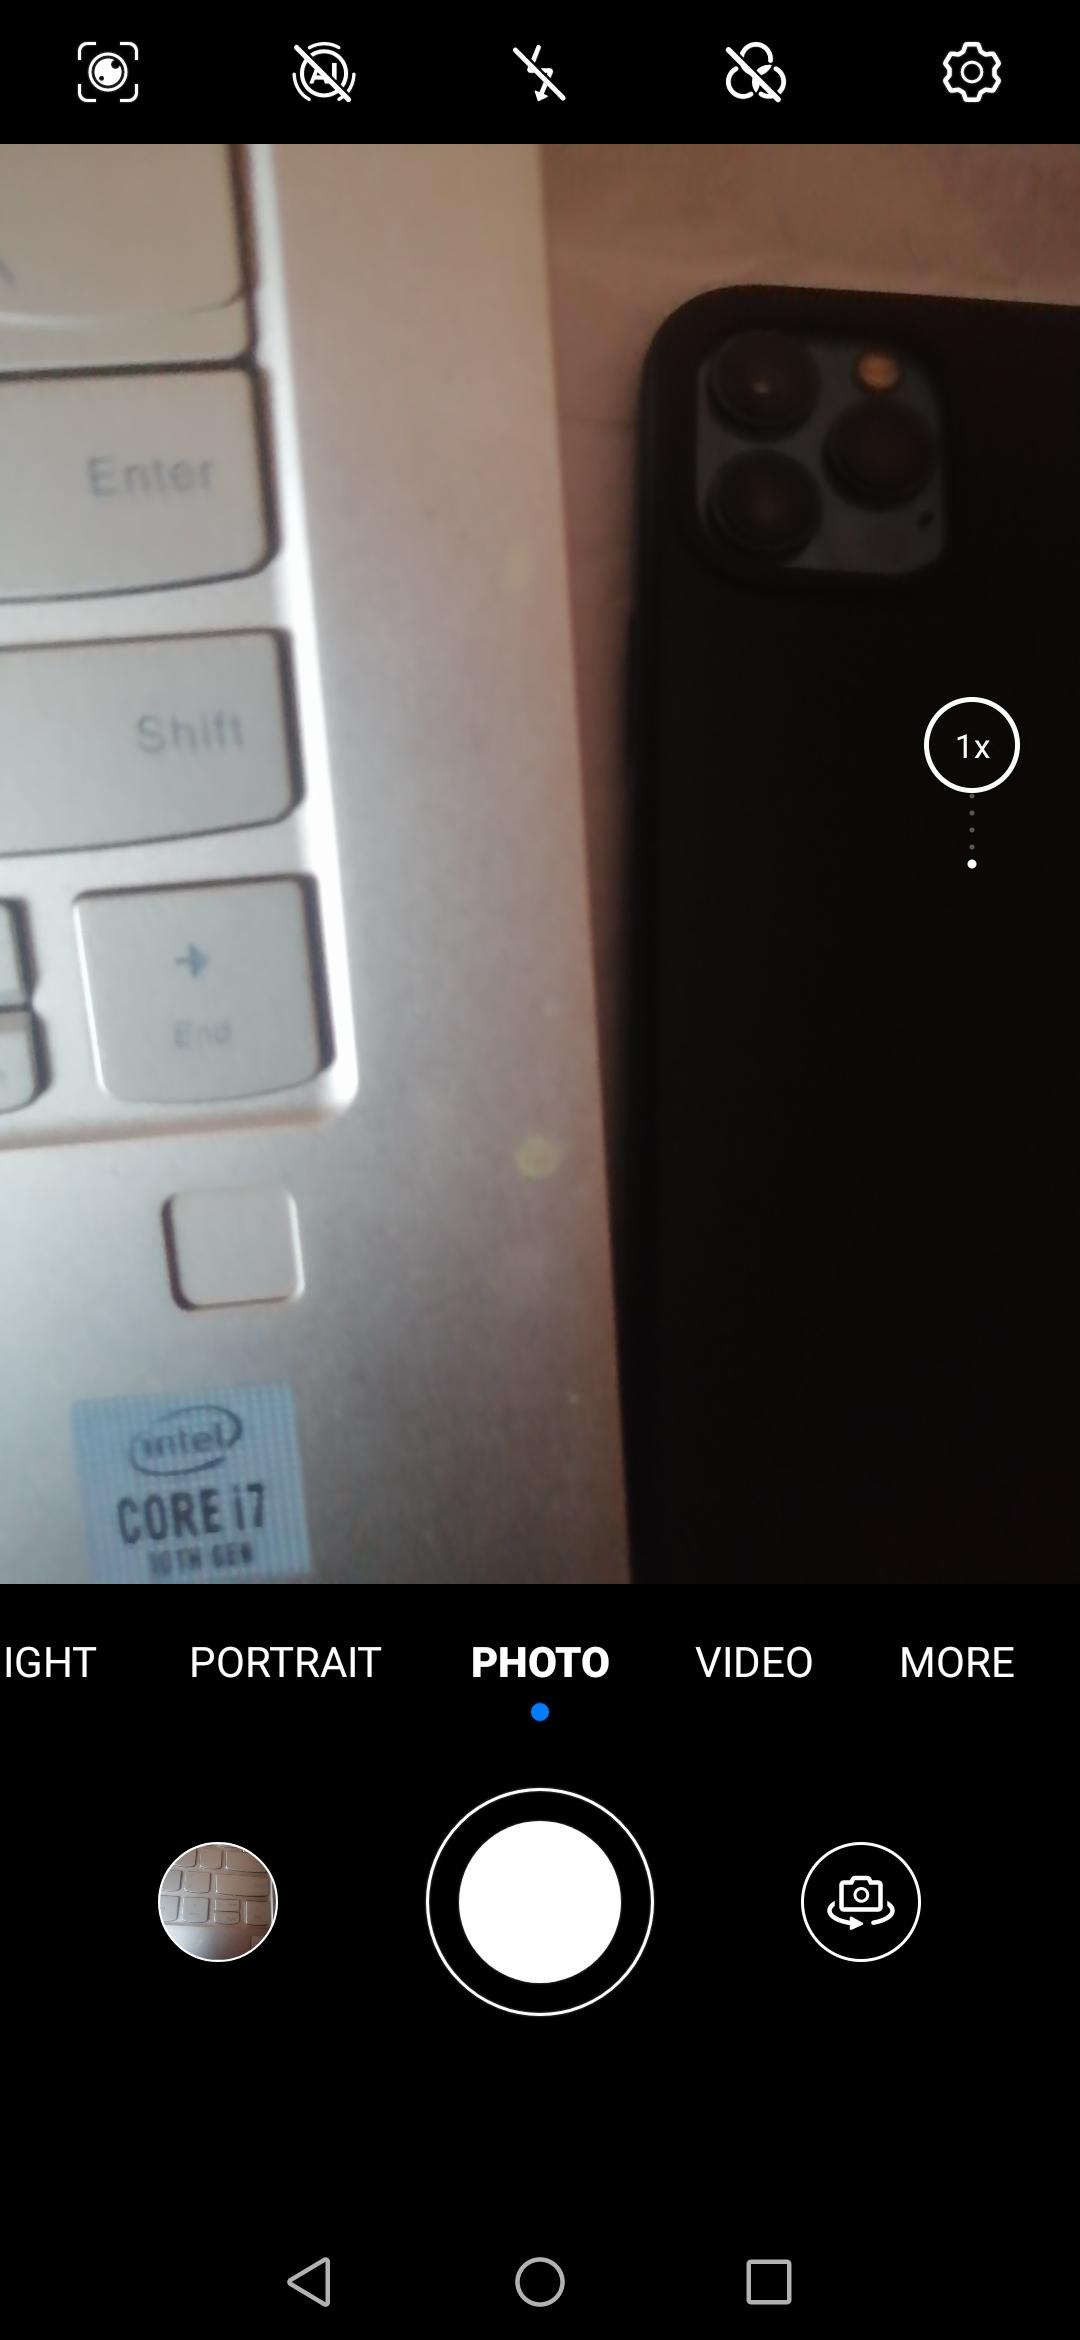
Step 1: Launch your native camera app.
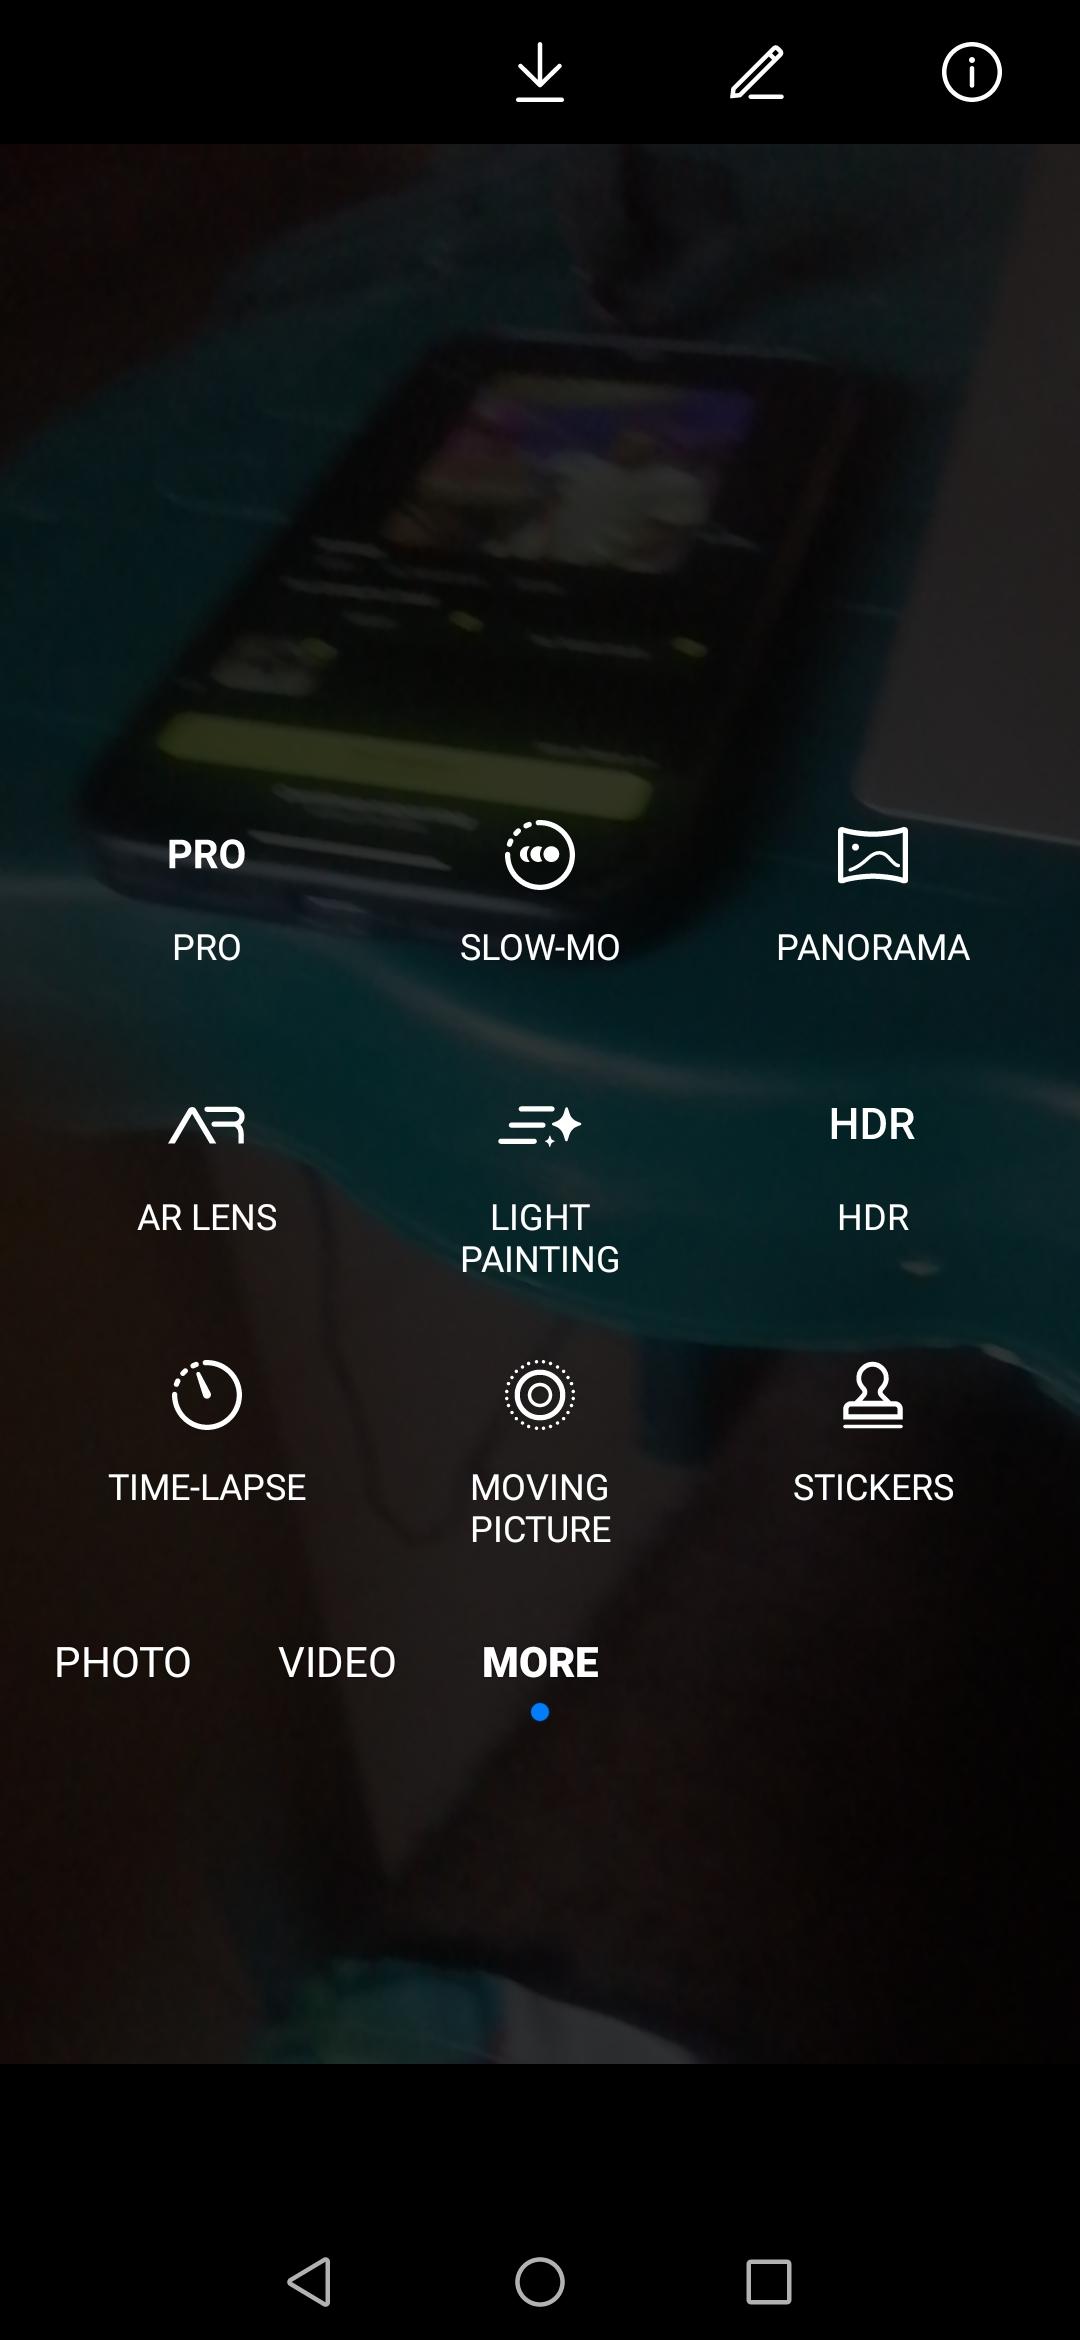
Step 2: Look for the Motion Photo Option (moving picture) by clicking on more. Click on the moving photo option.
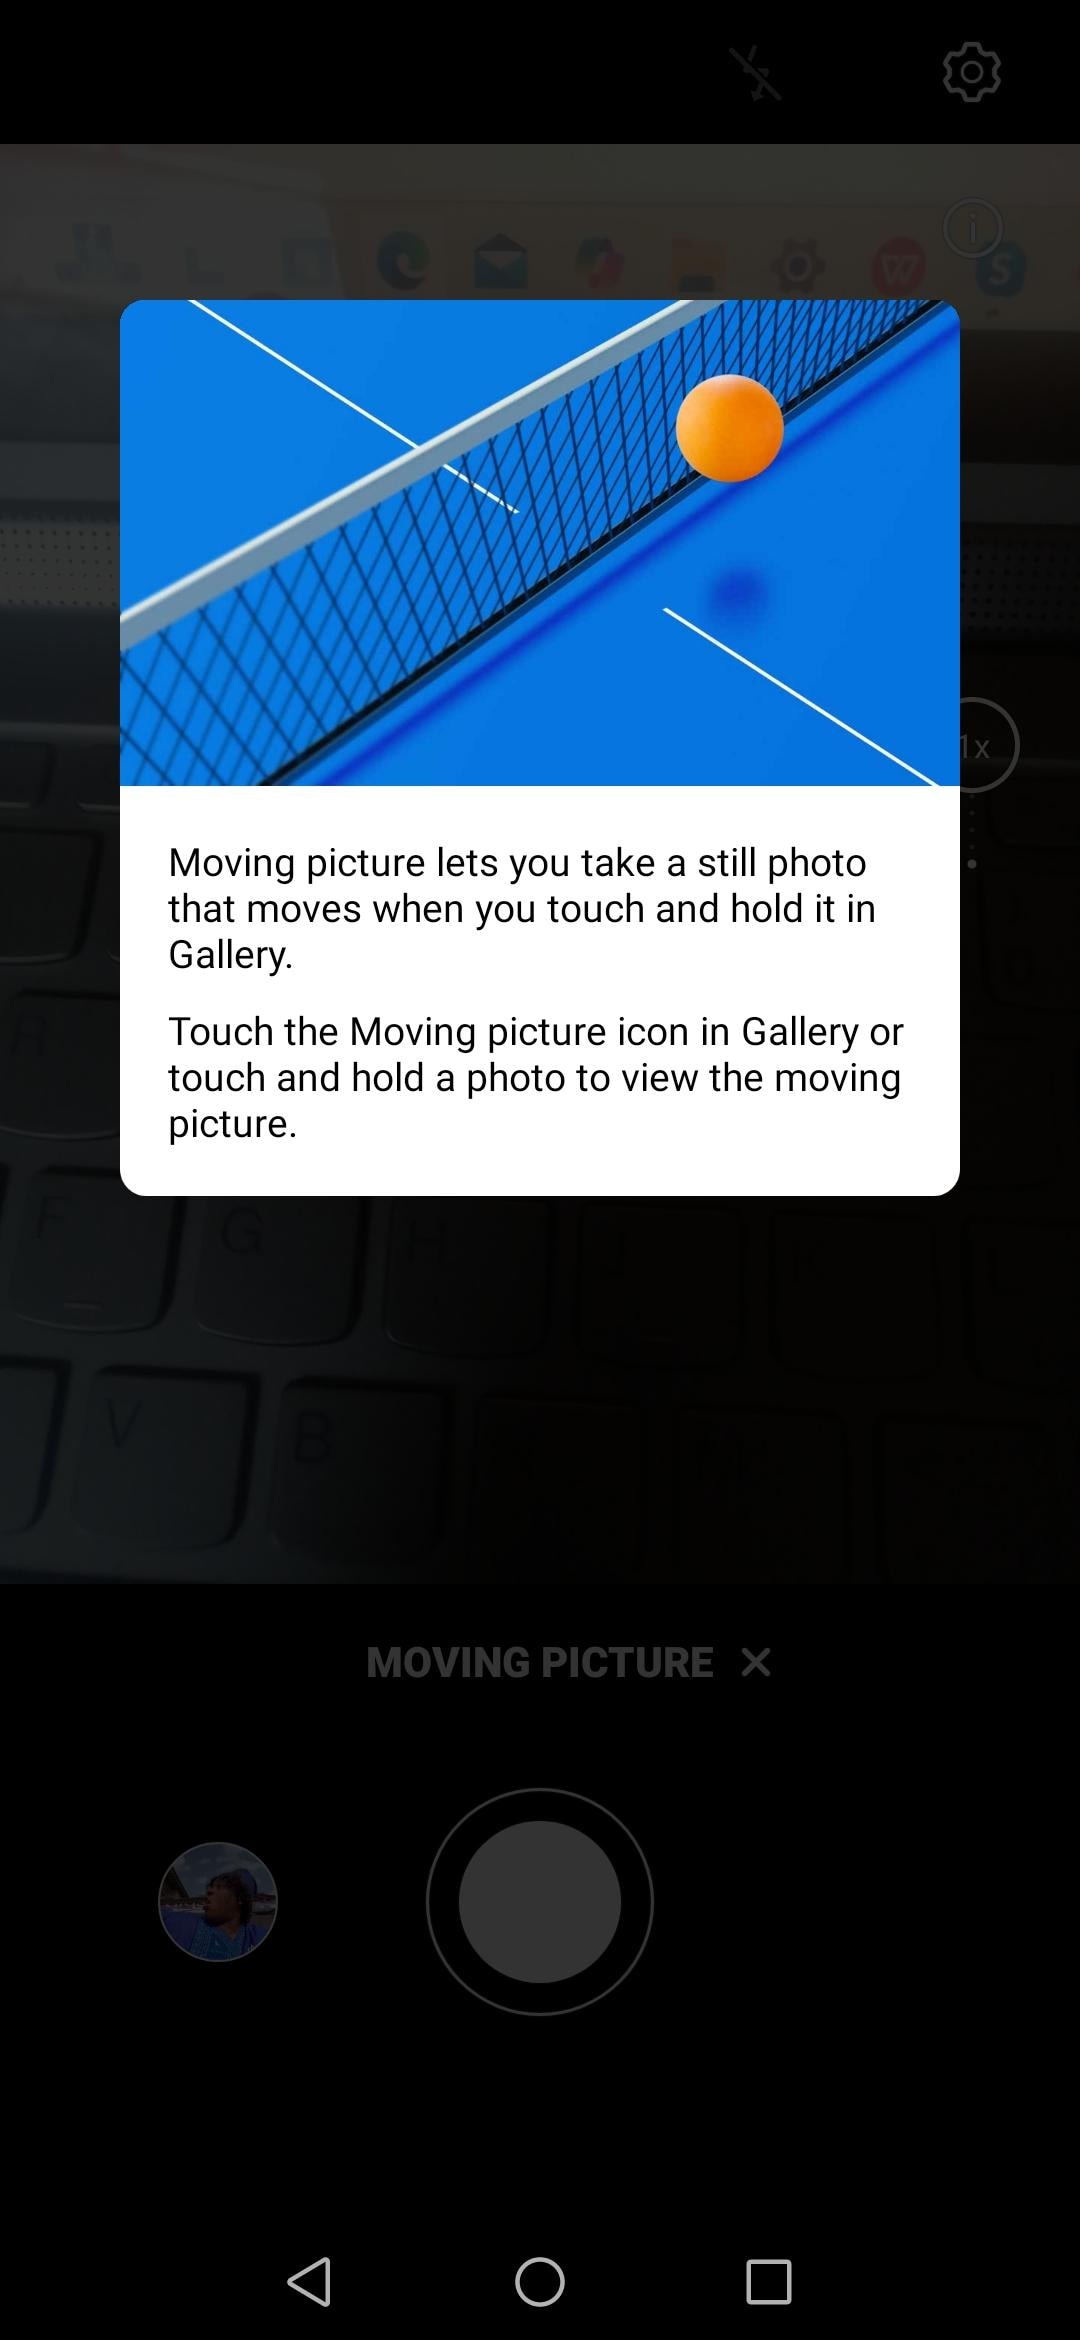
Step 3: Take photos as usual. When you view them in the gallery, you’ll notice they’re animated when tapped.
Can you turn a live photo into a video on an Android device?
Many Android devices let you save motion photos as videos or GIFs. For example, to do this on Huawei phones, open your photo in your gallery, tap the three-dot menu, and select "Save Video." On the other hand, you can also use third-party apps to convert live photos to videos. Filmora is one of the best apps you can use for this endeavor.
The process is the same as we did for the iPhone above. Just download and install Filmora, open Filmora, tap “new project” to import your live photo, add effects, and export video.
Can iPhone Live Photos be Shared on Android?
Before learning how to convert live photos to video, some users debate the possibility of sending live images from an iPhone to an Android device.
Yes, but Android doesn’t natively support Live Photos, so they’ll appear as still images unless converted. Here’s how to share them properly.
The Best Ways to Share Live Photos with Android
- Convert Live Photos to Videos or GIFs: The easiest method. Turn the Live Photo into a video or GIF to preserve motion and sound.
- Use Data Transfer Software: Apps like DroidKit help transfer Live Photos directly from iPhone to Android.
- Transfer via the Photos App: Sending through Messages or Mail may work, but the Live Photo often converts to a still image unless the Android app supports animations.
Conclusion
Make a video with a video with live photos on your iPhone is straightforward, especially if you use a third-party app. While using the built-in iOS feature is quick, you have few editing options. However, using a third-party tool like Filmora allows you to add more features that make this video exceptional.
Filmora image-to-video AI features on mobile phones help it to automatically detect and make photos perform certain actions. You can even merge multiple photos seamlessly to create a complete story. This feature simplifies the process, saving you time while letting your creativity flow.
AI image to video feature is available on iPhone as well. you can adjust it in the filmora part above. no need to repeat the same thing for Android. rather, you can mention users can use this feature on android too.


