A lot of users expect Midjourney to deliver camera-quality results right out of the box. But without the right prompt, the results often fall into the uncanny valley, such as glossy skin, stiff poses, and lighting that doesn't belong. That initial excitement quickly turns into disappointment.
But do not worry. This guide will fix that.
You'll get working Midjourney prompts for realistic photos. Plus, we'll show you how to go one step further: turning those still images into dynamic videos using tools like Wondershare Filmora's AI Image Generator and Veo 3's cinematic engine.
In this article
Part 1: How to Write Effective Midjourney Prompts for Realistic Photos
What you put into the system determines the quality of what you will get out of it. Midjourney can be astonishingly realistic, as long as you are speaking the language of visuals to it accurately.
What Makes a Prompt Effective?
Here are some attributes of an effective midjourney photorealistic prompt.
Camera Specifications
- Include camera specifications like lens type, focal length, and aperture to guide image realism.
- Example: DSLR-like depth and bokeh can be attained using an 85mm f/1.4 lens.
Lighting Details
- Describing specific lighting setups allows you to control tone and texture. Whether it's a golden sunset, soft indoor daylight, or a dramatic flash, lighting sets the emotional temperature of the shot.
- Example: Backlit in sunset, diffused window lights, hard flash lights.
Sensor or Film Type
- Film types and sensor styles carry visual identity. Referencing them gives the AI clues about tone, color palette, and grain. It's like choosing the atmosphere of the image before it's even built.
- Example: Mentioning Portra 400 or Fujifilm Classic Chrome can help you get the effect of real film photography.
Depth & Texture
- You can achieve optical realism by using cues such as bokeh, shallow depth of field, blurring of background, or lens flare.
Emotion & Motion
- Still images come alive when you add traces of movement or raw emotion. So, throw in a bit of motion or atmosphere.
- Example: A Candid lady laughing in the wind, a man walking in an alley in the
Common Errors in Photorealistic Prompting — And How to Avoid Them
| Error | Why It Happens | How to Correct |
| Prompt too vague | "A man smiling" gives no visual context | Be specific: "35-year-old man, side profile, soft lighting, 85mm lens, f/1.8, candid smile" |
| Style conflicts | Mixing too many visual elements confuses Midjourney | Stick to one aesthetic per prompt (e.g., "natural light portrait with bokeh" vs. "studio flash + harsh shadow") |
| Aspect ratio mismatch | Realistic images often need specific ratios | Add --ar 3:2 or --ar 16:9 to match DSLR output or video requirements |
| Ignored depth or blur | Makes images feel flat and fake | Use optical terms: shallow DOF, soft focus, lens compression, foreground blur |
Part 2: Best High-Converting Midjourney Prompts to Get Realistic Images
Below are working prompts across genres. You'll also find the reason why they work—visually, technically, and contextually.
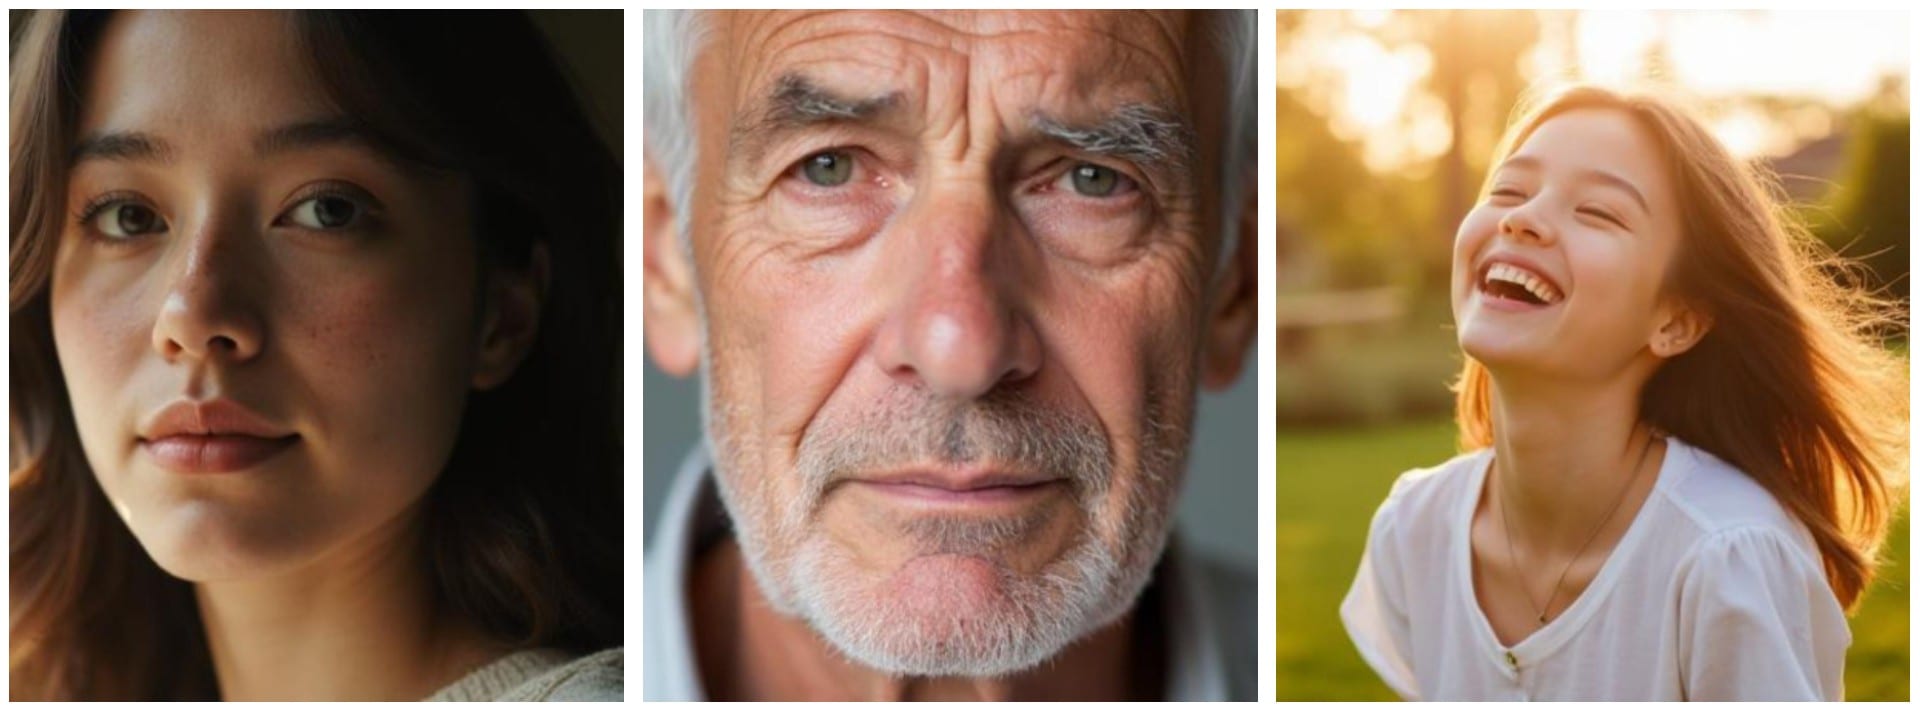
- Realistic Portrait Prompt (Natural Skin, DSLR Look)
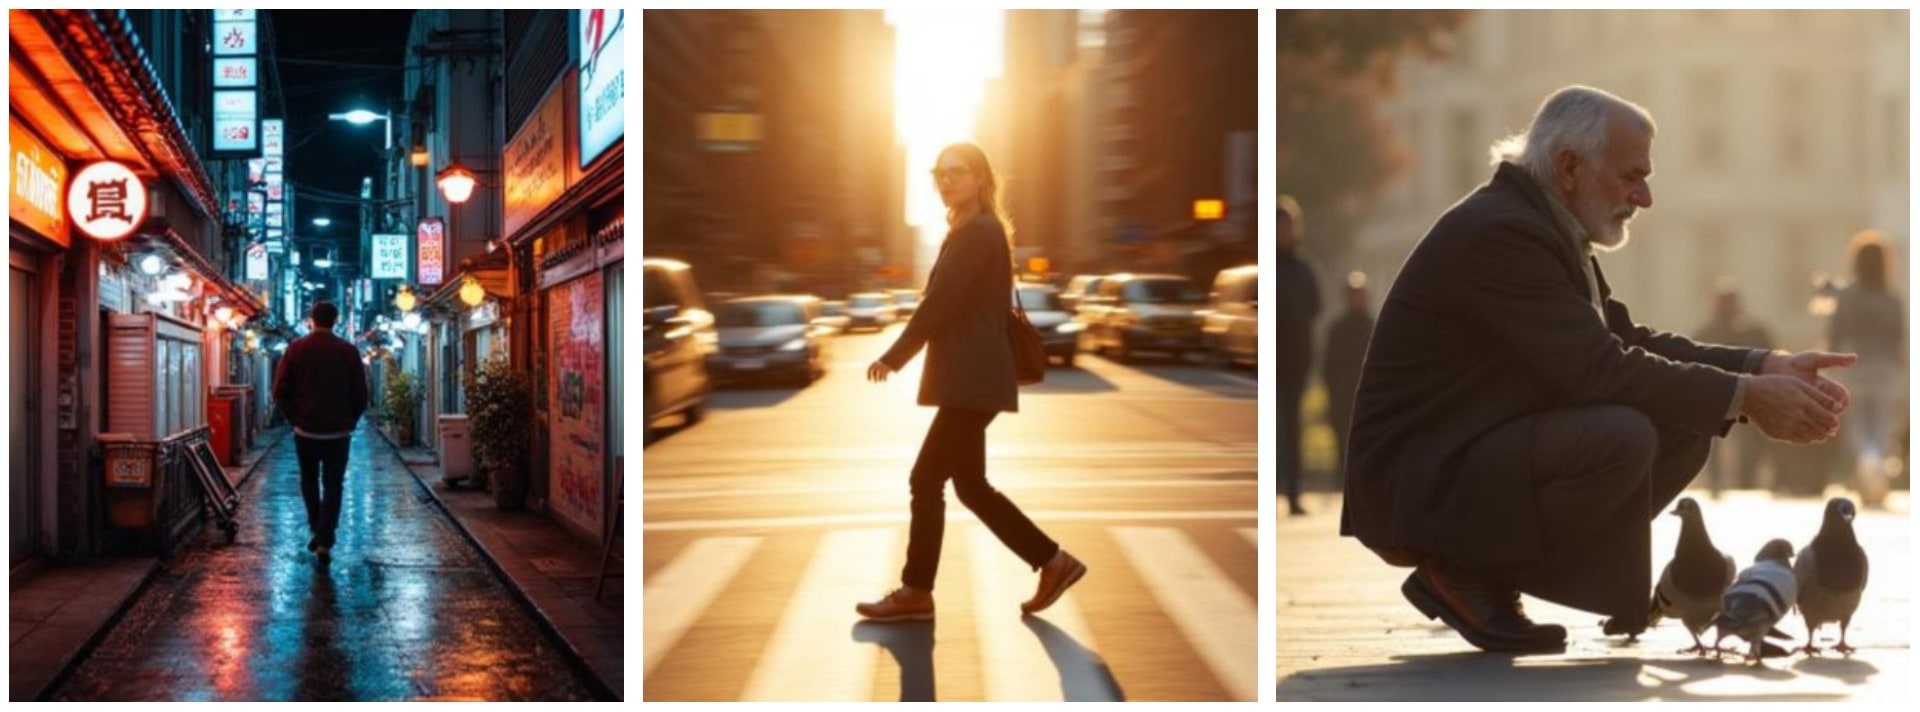
- Candid Street Photography Prompt (Urban Depth)
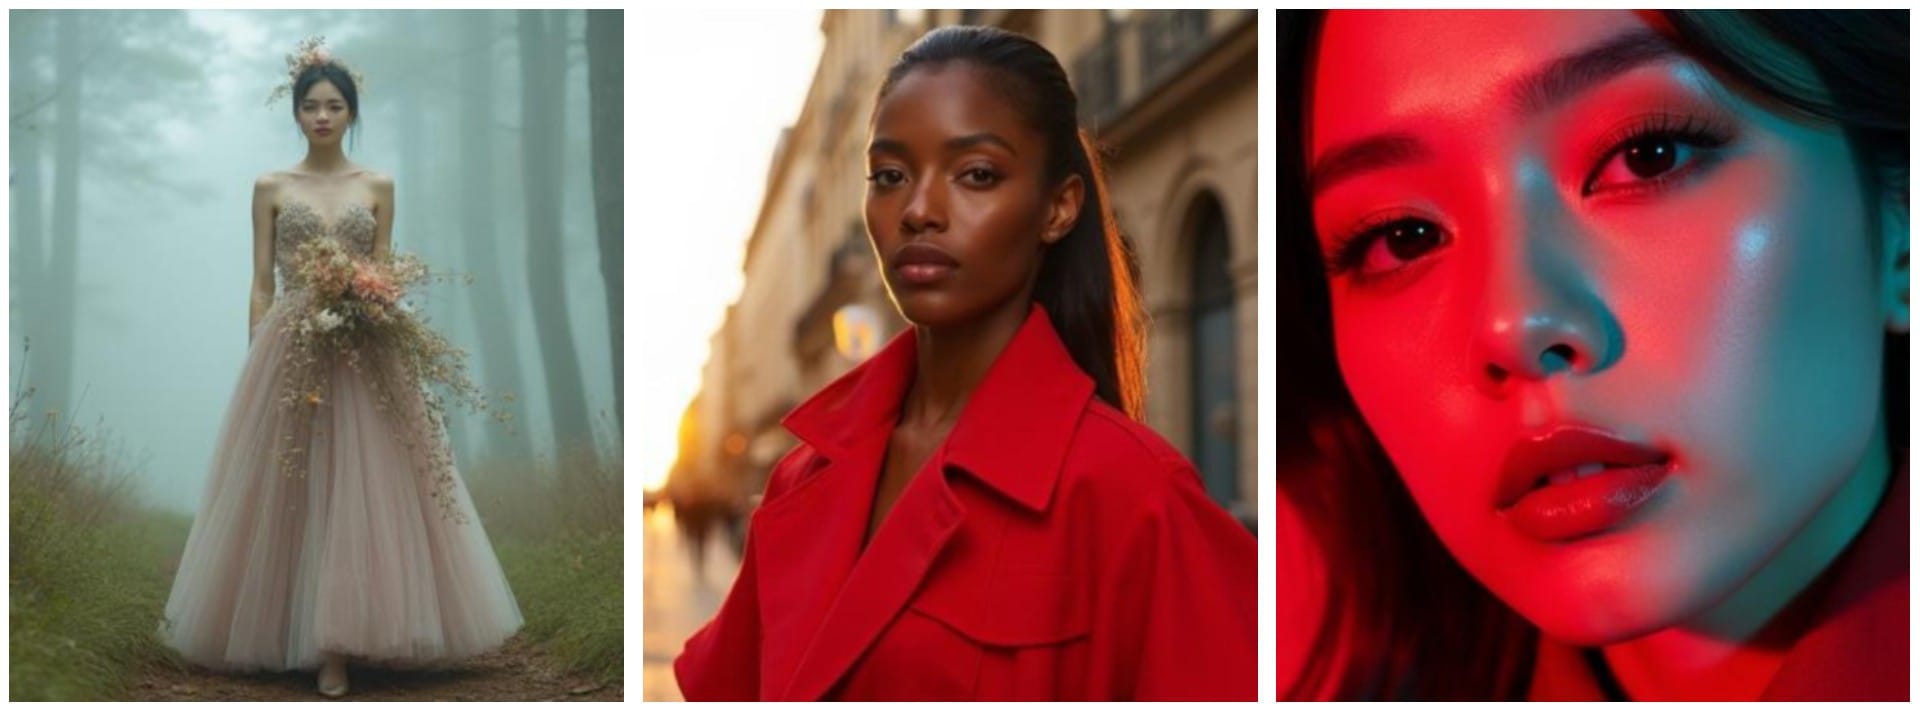
- Photorealistic Fashion Prompt (Editorial Magazine Style)
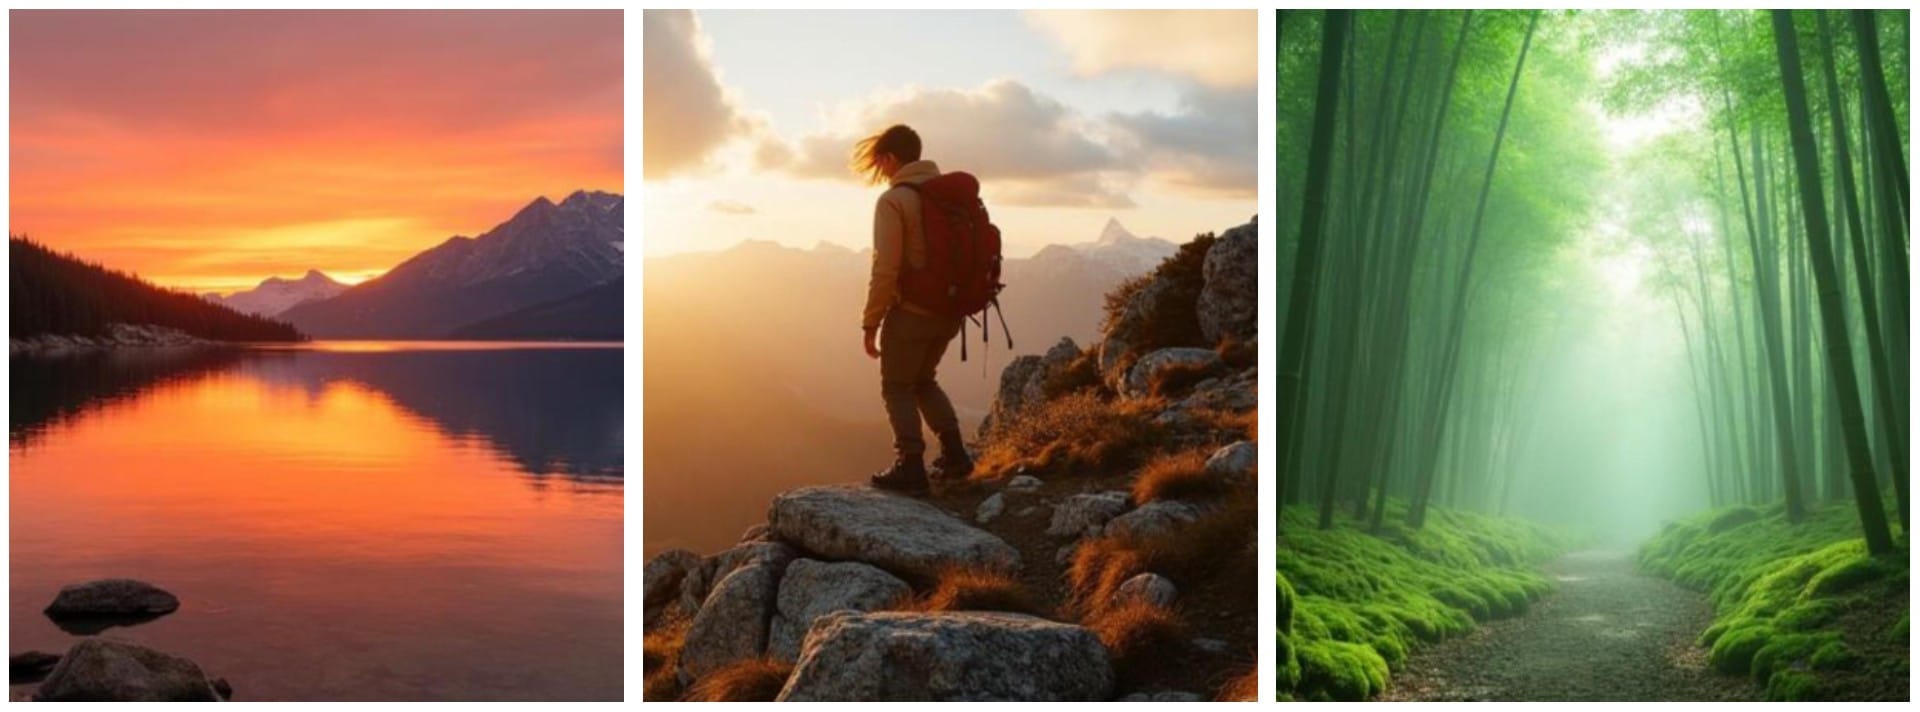
- Realistic Nature and Landscape Prompt (Golden Hour, Travel Style)
Prompt 1
Cinematic portrait of a 30-year-old woman, 85mm f/1.4, soft window light, Kodak Portra 400 tone, natural freckles, DSLR sharpness, bokeh background —v 6 --ar 3:2
Prompt 2
Close-up of elderly man, neutral background, Canon EF 85mm lens, f/2.0, diffused daylight, lifelike wrinkles, real skin detail —v 6 --ar 3:2
Prompt 3
Teen girl laughing in a sunlit garden, wind in hair, 50mm f/1.8, golden hour glow, Fujifilm film look, shallow depth of field —v 6 --ar 3:2
Prompt 1
Man walking past neon-lit alley, Tokyo, night, wet pavement, reflected lights, Leica 35mm f/1.4, candid street photo style —v 6 --ar 16:9
Prompt 2
Woman crossing busy crosswalk, New York, golden hour, motion blur, captured mid-step, soft edge lighting, DSLR photo realism —v 6 --ar 3:2
Prompt 3
Old man feeding pigeons in city square, candid moment, 50mm lens, early morning haze, scattered birds in motion, Sony Alpha tone --ar 3:2
Prompt 1
Full-body editorial-style fashion shot of an East Asian female model walking through a misty forest runway, wearing a couture gown made of layered tulle and dried flowers, natural makeup, one-point softbox lighting, f/5.6, editorial sharpness, Vogue cover look, skin texture preserved —v 6 --ar 3:2
Prompt 2
Photorealistic editorial fashion portrait of a confident Black female model standing in an urban Parisian street at golden hour, wearing a high-fashion red trench coat, sleek ponytail, bold makeup, soft shadows, 70mm lens, crisp edge focus, Nikon D850 rendering —v 6 --ar 4:5
Prompt 3
Close-up editorial portrait, bold makeup, vibrant shadows, white cyclorama, Canon L glass tone, stylized realism —v 6-- ar 4:5
Prompt 1
Sunset over alpine lake, glowing orange sky, crisp mountain reflections, captured with 16mm wide-angle lens, f/11, golden hour light, DSLR realism —v 6 --ar 3:2
Prompt 2
Hiker caught mid-step on rocky mountain ridge, golden hour sunlight casting long shadows, wind lifting hair, dramatic clouds rolling over distant peaks, shot on Leica SL2 with 35mm Summicron lens —v 6 --ar 16:9
Prompt 3
Ancient bamboo forest shrouded in morning mist, light rays slicing through dense green canopy, soft moss-covered ground, ambient fog glow, blurred depth with sharp bamboo stalks, captured on Leica M11 + Summilux 35mm, dreamy yet photo-realistic —v 6 --ar 9:16
Part 3: Step-by-Step Guide: How to Use Midjourney to Generate Realistic Photos
Before you dive in, let's get something straight. Midjourney isn't a typical app you download and launch. Here are some ways you can access it:
- Through Midjourney's official Discord server
- Through your own private Discord server (if you link the Midjourney bot)
Most users stick to the first option, especially when starting out. But you must have a Discord account and a paid Midjourney plan since free trials are no longer available.
Once you're in, here's how to generate images:
Step 1: Join Midjourney on Discord.
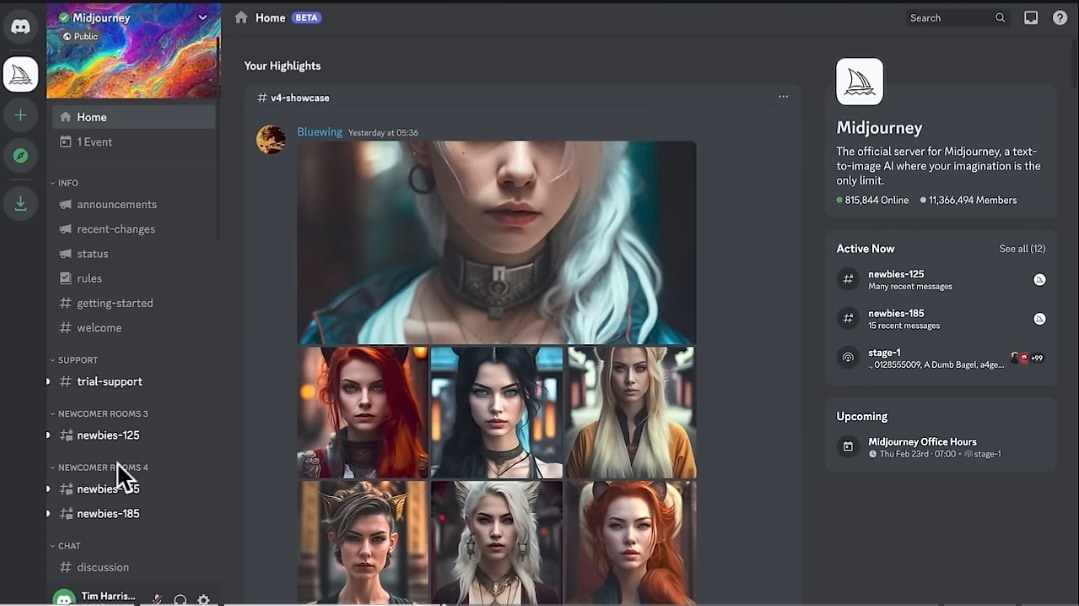
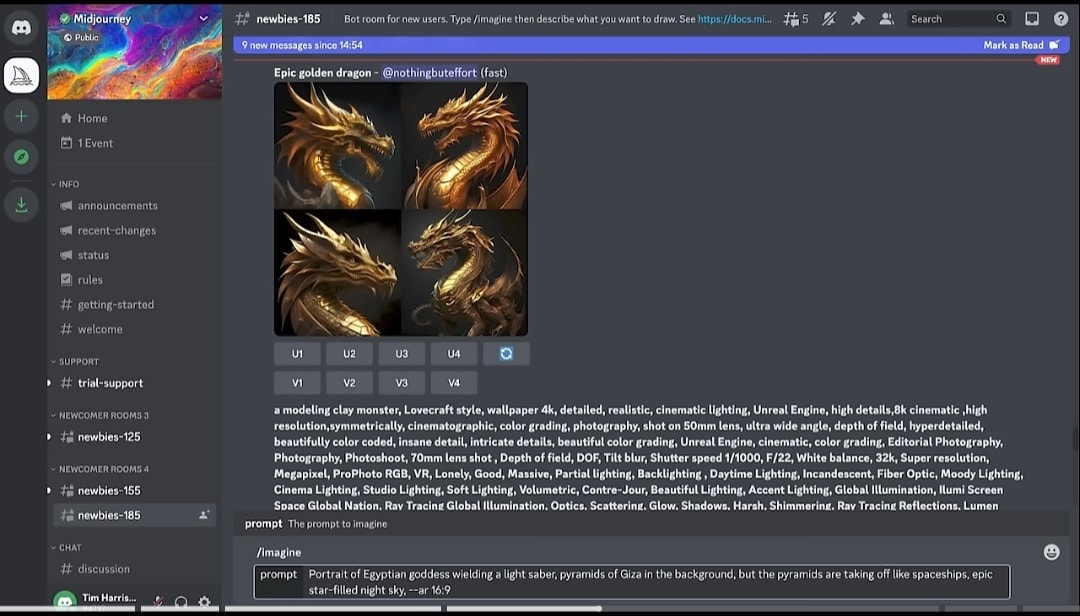
Step 2: Type Your Prompt
- In the message box, type /imagine and hit space. Then, write your Midjourney prompts to get realistic photos in the prompt that pops up.
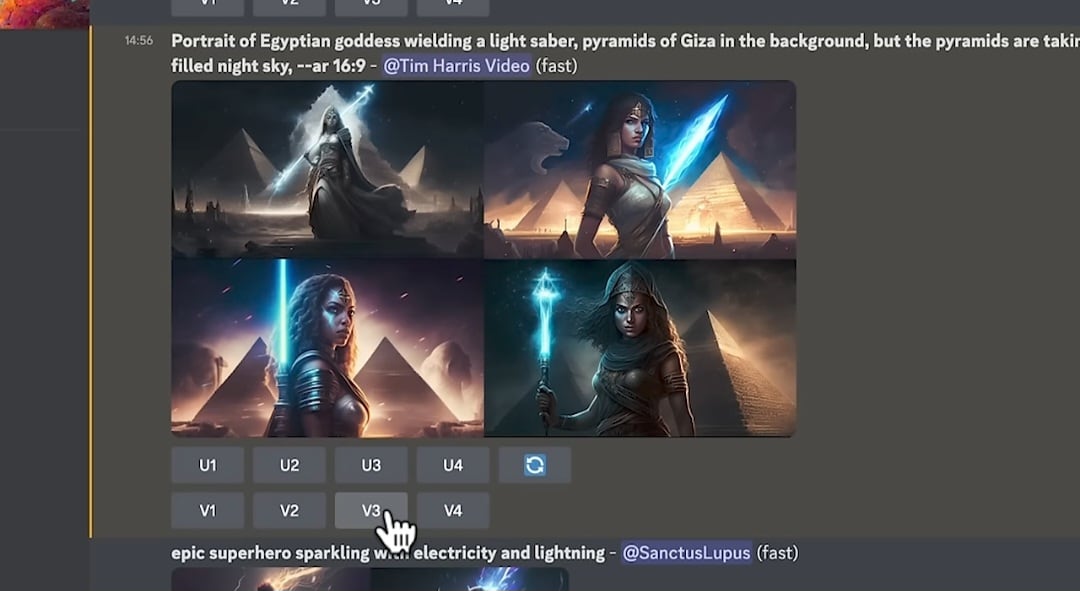
Step 3: Upscale and Save the Image
- Upscale or create variations of the chosen image by hitting the U and V buttons.
- Once it's done, right-click or tap-hold the image and save it to your device.
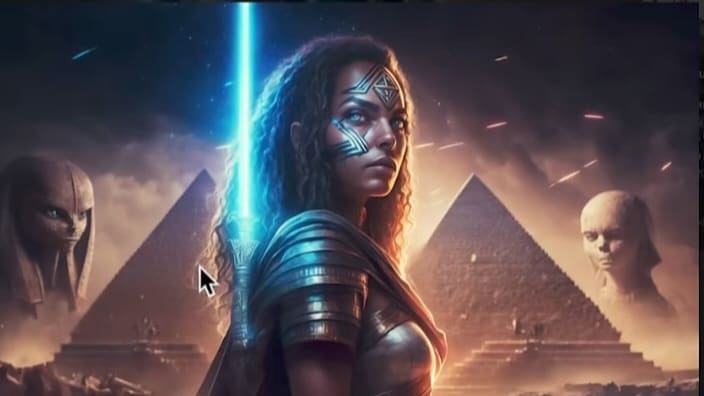
Part 4: An Easier Way to Create Realistic Images for Video Editing
You already know how Midjourney operates—powerful, but not exactly streamlined. If navigating Discord, typing commands, and picking from four variations feels like a chore, there's a more direct alternative.
Wondershare Filmora offers an integrated AI Image Generator, built for creators and editors. You input a prompt, and Filmora delivers a clean image.
Once you have your image, turning it into video is effortless. The entire process stays within Filmora, allowing you to animate, edit, and enhance without leaving the platform. It's a streamlined workflow built for speed and creative focus.
Why Filmora AI Works Better for Some Users
- One platform that lets you write, generate, edit—all inside Filmora.
- No /imagine or Discord commands.
- The tool is tailored for video-ready visuals, not just pretty stills.
- Ideal for social content, storyboards, and intro sequences.
Steps: Generate Images Using Filmora AI
Here is how you can create an image with text using the text-to-image tool.
Step 1: Open Filmora and click New Project.
- Go to the Stock Media panel to access AI Image.
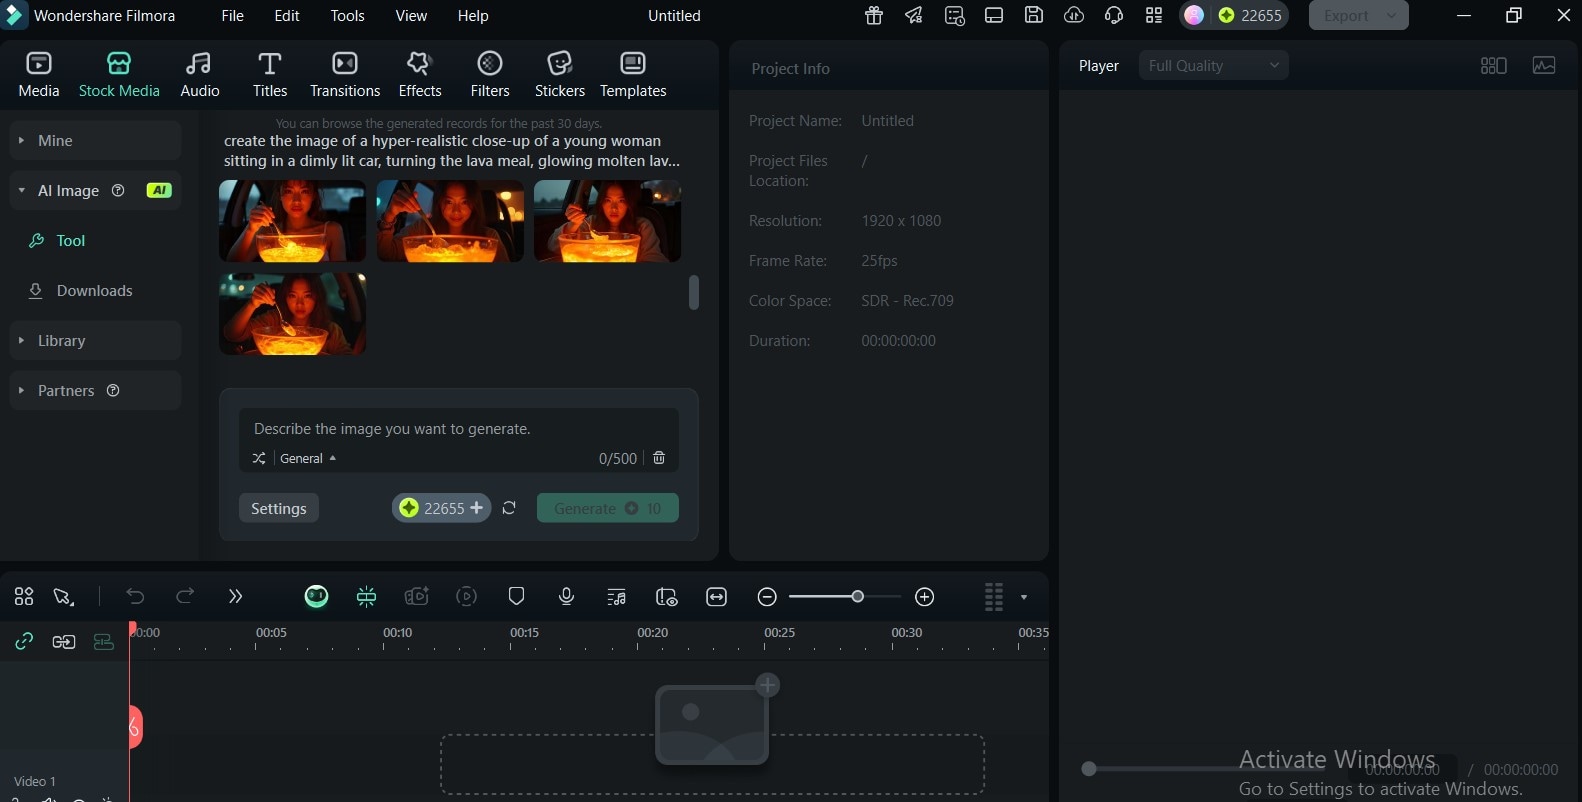
Step 2: Type the detailed prompt in the text prompt box.
- Choose the image style and aspect ratio you want.
- Click the Generate
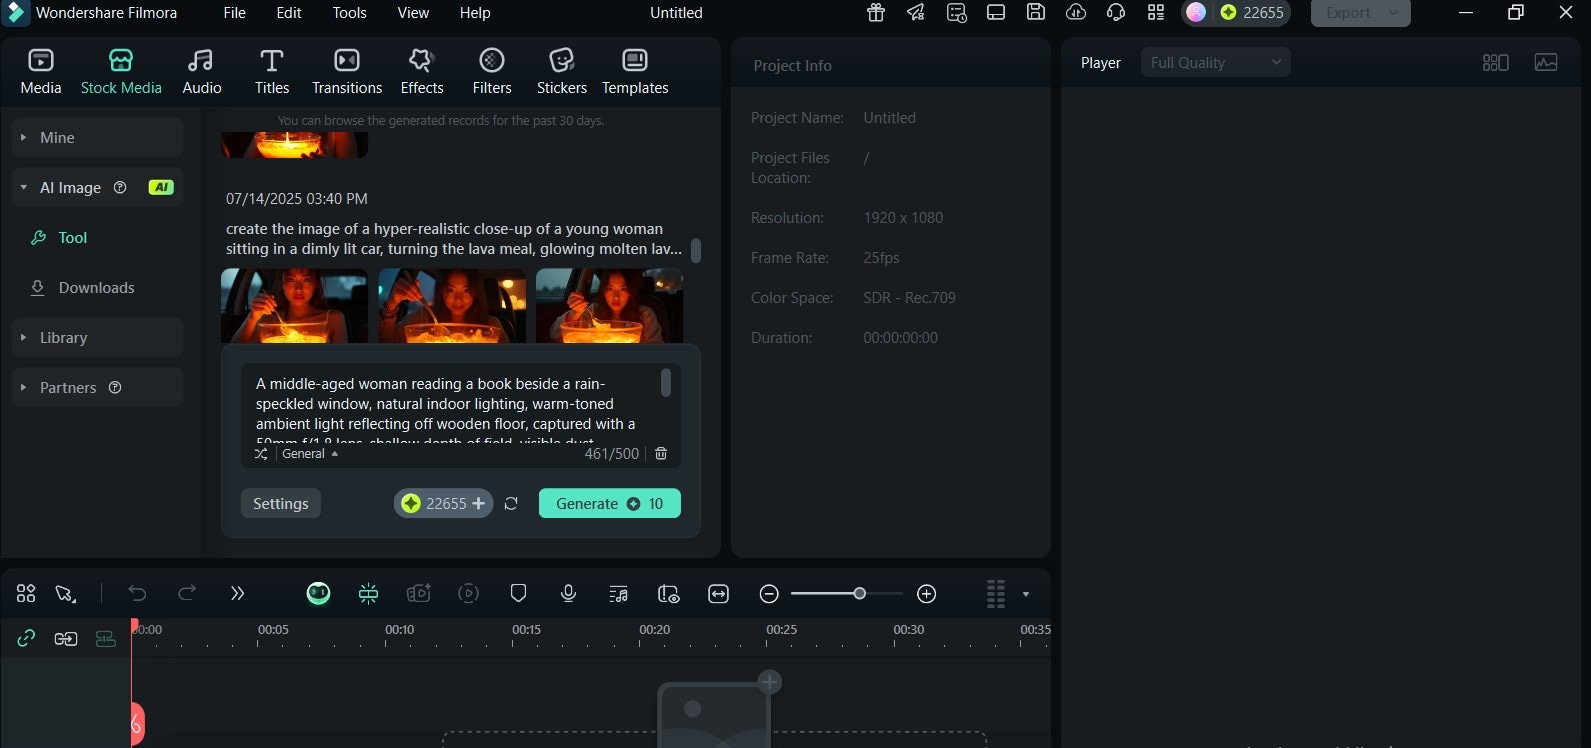
Step 3: Download the Generated Image.
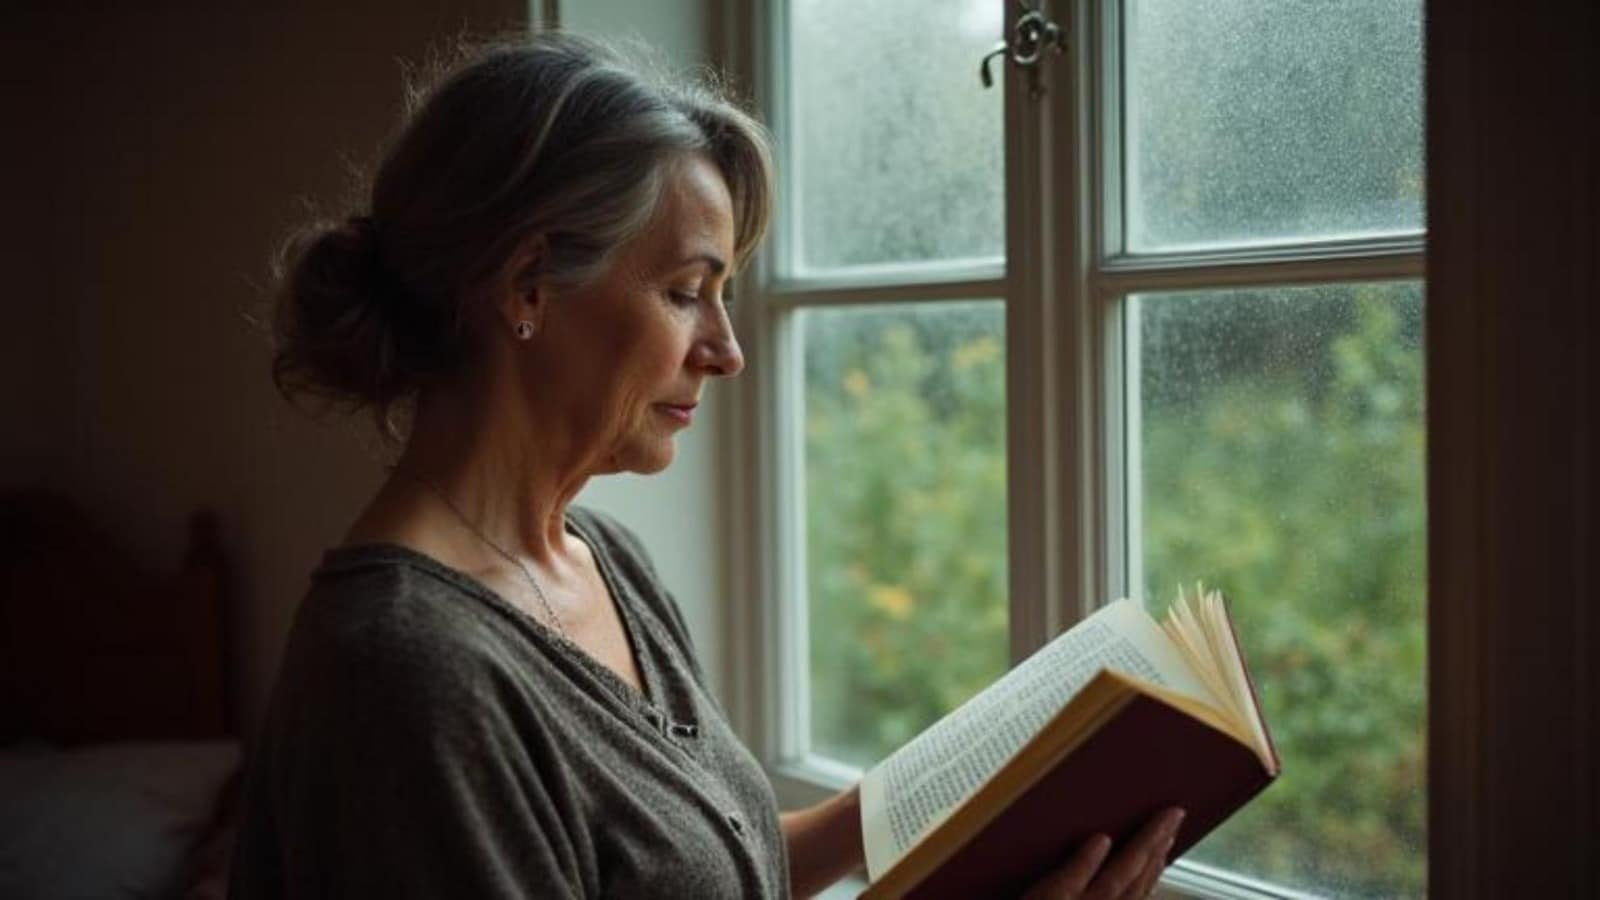
Turn Your Still AI Images into Cinematic Videos Using Filmora's Veo 3 Integration
Filmora's Image to Video tool now has a Veo 3 integration, powered by Google DeepMind's video model. This feature converts your image into motion videos seamlessly—with sound, dialogue sync, and cinematic camera movement.
Here's how to convert your generated image to video using Filmora.
Step 1: Drag your AI-generated image to the timeline.
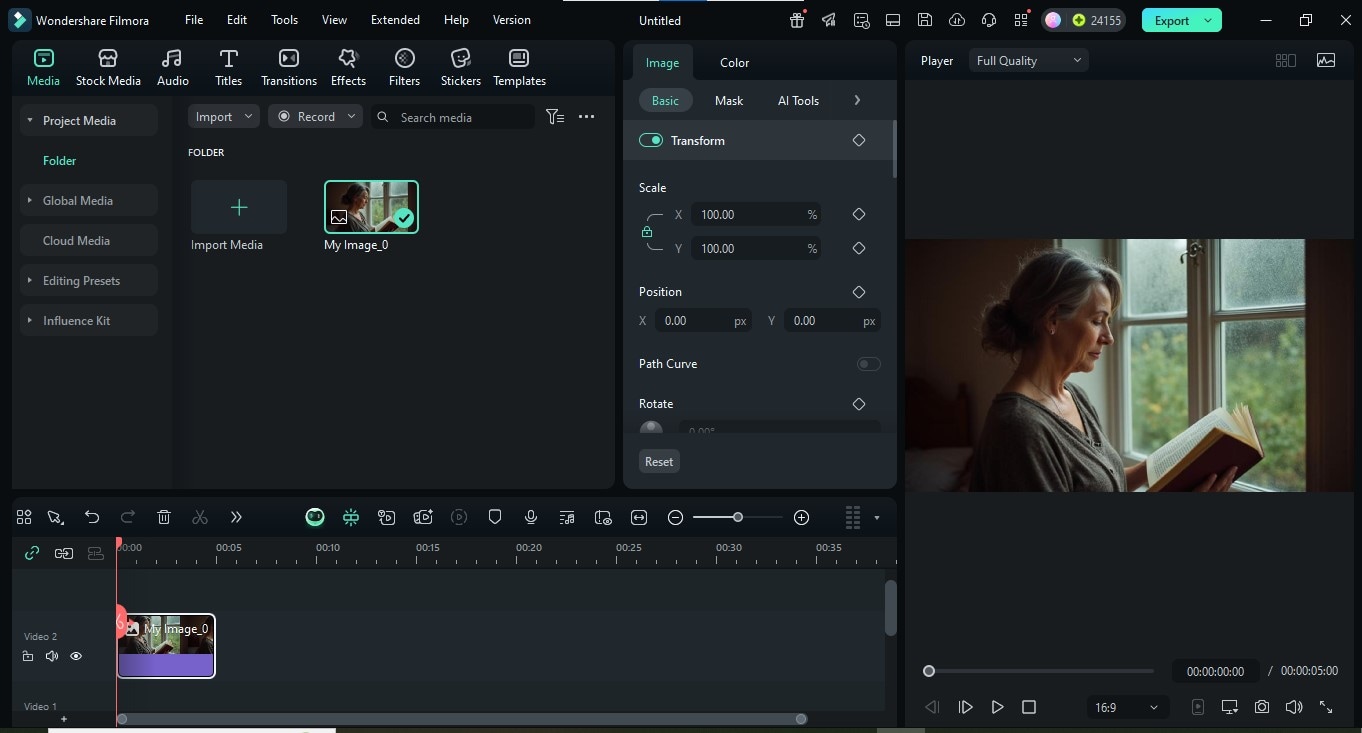
Step 2: Go to Stock Media > AI Media > Image to Video to open the Image-to-Video (Veo 3) tool inside Filmora.
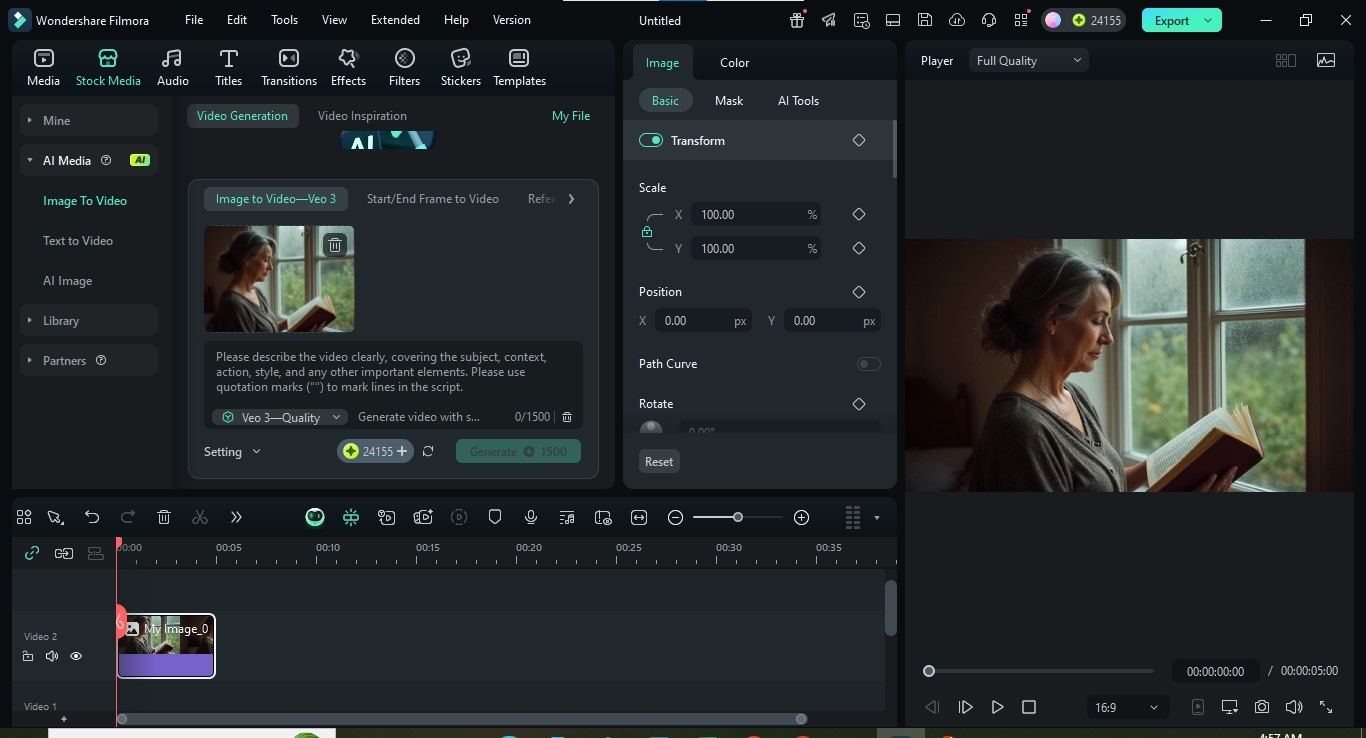
Step 3: Type a short scene description. For example: "Turn the page of the book while giving a smile. Also, close the book."
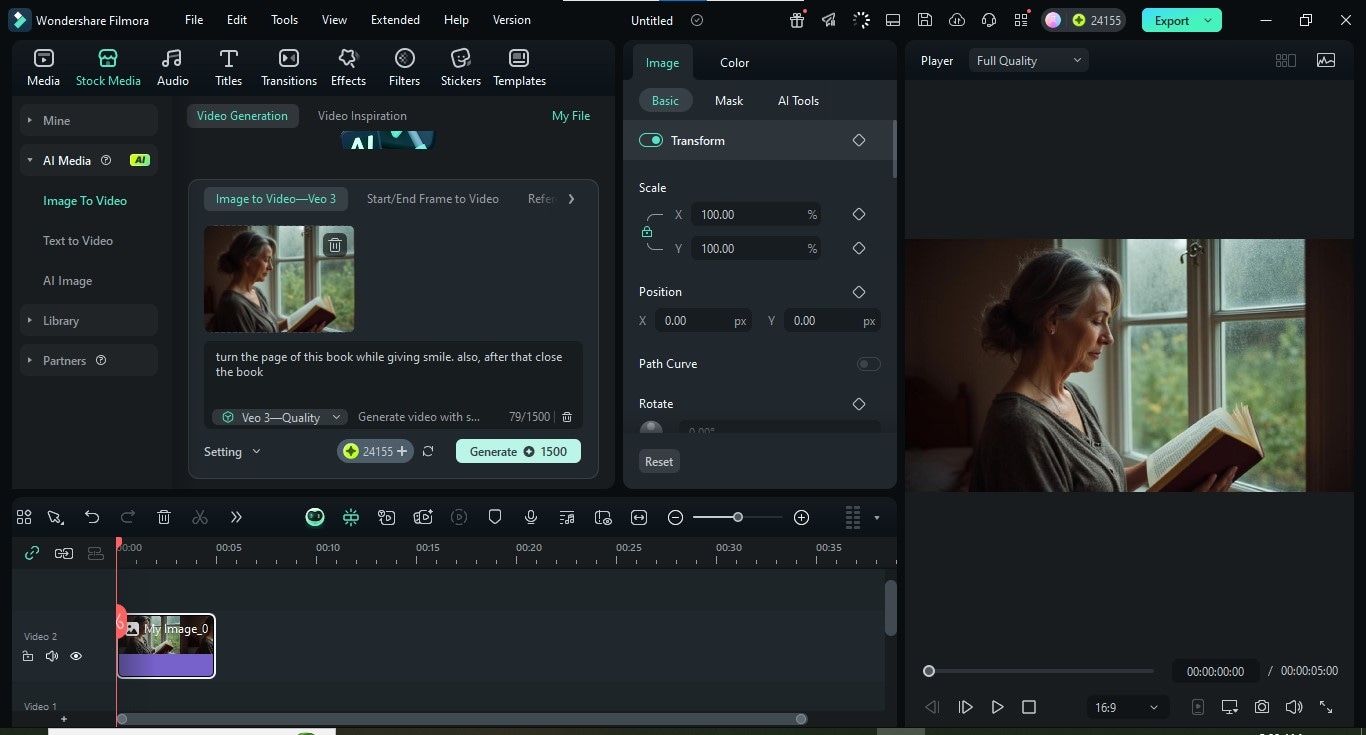
Step 4: Hit Generate Clip.
Conclusion
Creating realistic AI photos isn't about luck—it's about precision. With the effective Midjourney photorealistic prompts you can create an ideal image. For instance, when you prompt with real camera terms, light conditions, and emotional detail, Midjourney delivers lifelike results.
With Filmora's AI tools, you can take it further—turning still images into cinematic videos in minutes. Whether you're a content creator or a visual storyteller, this workflow gives you control. The guesswork is gone. Now you know exactly how to create, refine, and bring your images to life.
So, try it out now.


 100% Security Verified | No Subscription Required | No Malware


