
 100% Security Verified | No Subscription Required | No Malware

Many videos feature background music and dialogue, but the speech often becomes inaudible under the instruments. With an audio effect called audio ducking Premiere Pro, this problem can be remedied. Though many audio editing tools offer this feature, Premiere Pro is among the most prominent options. Automatic audio ducking Premiere Pro creates a balanced mix where dialogue always takes center stage.
This blog is all about the audio ducking feature of this software and how to use it. Moreover, we will explore an editor that is a better alternative to Premiere Pro. Here, you will also learn how to duck audio in Premiere Pro efficiently using its AI-assisted workflow.

In this article
Part 1. How to Use Audio Ducking in Adobe Premiere Pro on Windows
Being among the leading audio and video editors, Premiere Pro offers extensive audio ducking Premiere features. It enables you to set a sensitivity level, which defines the threshold at which ducking is triggered. A higher sensitivity makes the music dip more frequently, even at softer speech levels, while a lower sensitivity minimizes adjustments and keeps the track more consistent.
Moreover, audio ducking Premiere Pro offers a fade-in option that controls the speed of volume changes after ducking is applied. You can choose between slow and rapid fade-in and fade-out, depending on your audio type. This platform also enables users to decide where the fade occurs in relation to the spoken audio. If you want to know more about how to duck audio in Premiere Pro, follow the guide below:
- Step 1. To start the process, select the dialogue audio track and access the right panel to select the "Dialogue" button. This will help the system identify your track as a dialogue track, which is essential for automatic audio ducking Premiere Pro to work effectively.

- Step 2. A new panel on the right side will automatically appear, where you will select the "Loudness" check box to click "Auto Match." This ensures that the dialogue track is normalized for audio ducking Premiere Pro processing.
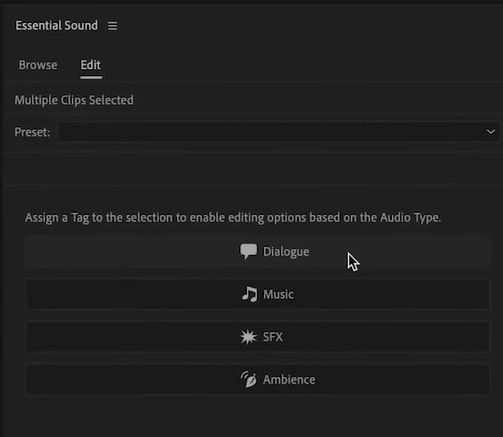
- Step 3. Next, select the music audio track and access the right panel to select "Music" to identify the track as music, enabling automatic audio ducking Premiere Pro to detect and adjust levels intelligently.
- Step 4. Using the panel on the right, which opens automatically, check the "Loudness" box and select the "Auto Match" button. This step helps you perform audio ducking Premiere Pro efficiently without manual keyframe adjustments.
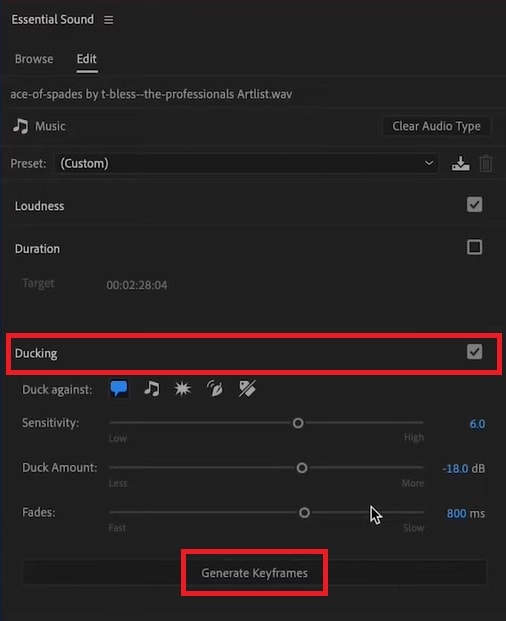
- Step 5. Afterward, scroll down the panel to check the "Ducking" box. Using the "Duck Against" menu, click the "Dialogue" icon and adjust the "Sensitivity" of ducking using its relevant slider. Moreover, you can also use the "Reduced By" and "Fades" sliders to customize the settings for how to duck audio in Premiere Pro.
Lastly, click the "Generate Key Frames" button to create automatic key frames in the timeline. This will prevent you from going through the hassle of creating manual key frames. However, you can make manual tweaking in the key frames using the audio track.
Part 2. Alternative Ways to Use Audio Ducking with Wondershare Filmora
Although useful, the auto duck Premiere Pro feature can be a little hard to access and complex in functionality. If you are a video editor seeking an intuitive interface alongside a range of AI audio editing features, Filmora is the ideal choice. With extensive audio tweaking features, this platform allows you to refine your audio files in just a few steps, serving as a better alternative to audio ducking Premiere Pro.
It provides a combination of AI and manual editing that can be used for customization or one-click adjustments. Whether it's audio denoising or enhancement, Filmora ensures a refined audio file with advanced functionality. Using its audio detachment feature, pay attention to the audio track exclusively for advanced editing. Moreover, you can also generate AI music and use it as the background of your video if you don't have background music already.
 secure download

Seeing How Wondershare Filmora Works for Audio Ducking
As a better alternative to Adobe Premiere Pro audio ducking, this tool offers easy workflow and more diverse features. Check out the following guide for detailed steps of audio ducking with Filmora:
- Step 1. Start with a New Project. Start the process by clicking the "New Project" button and importing a video.
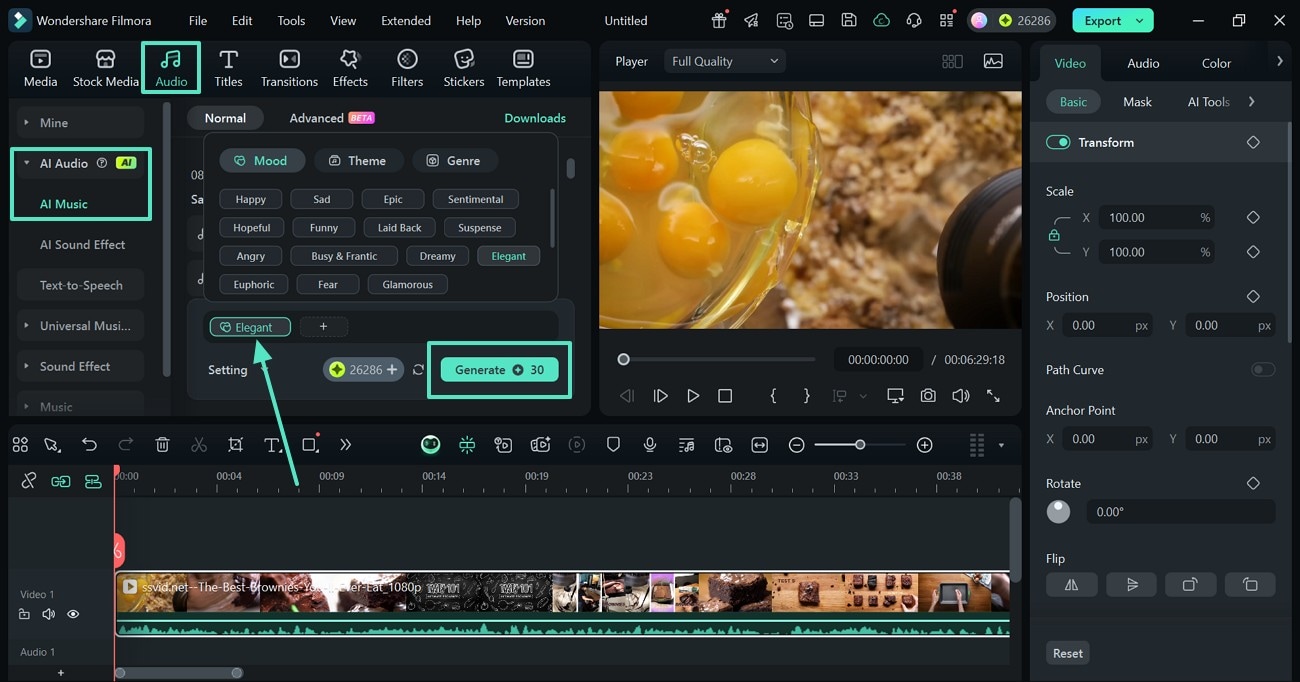
- Step 2. Generate AI Music in the Video. After dropping the imported video to the timeline, access the "Audio" tab from the top bar and enter the "AI Audio" panel to select "AI Music." Using the AI Music window, enter your preferences and click the "Generate" button.
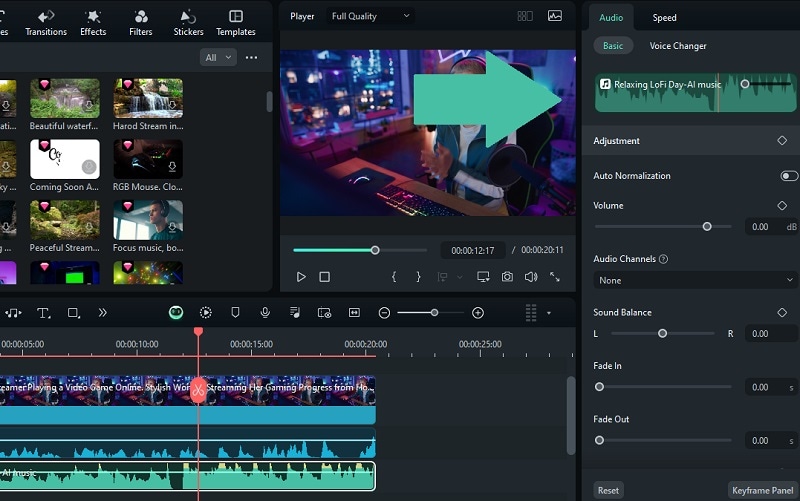
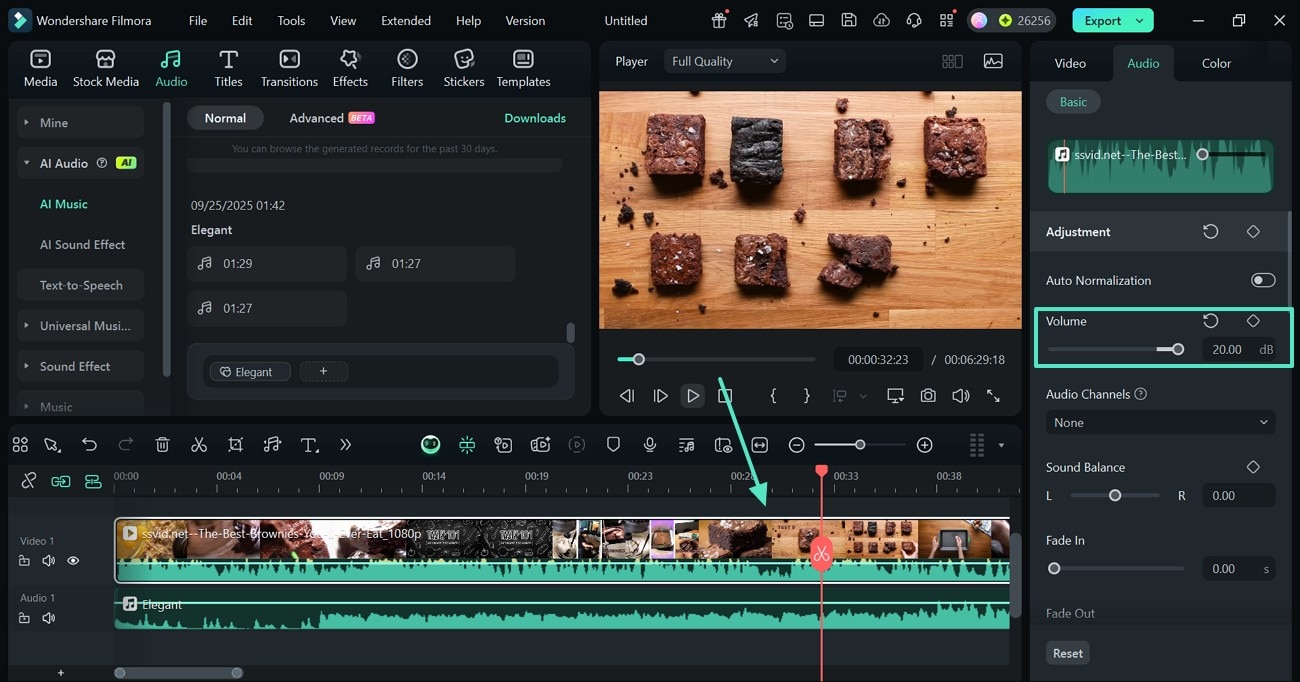
- Step 3. Adjust the Volume of the Dialogue Track. As the AI music track is generated, drag it to the timeline. Select the dialogue audio track from the timeline and access the "Basic" audio editing panel on the right. Here, use the designated slider to increase the "Volume" of the dialogue, similar to audio ducking Premiere Pro functionality.
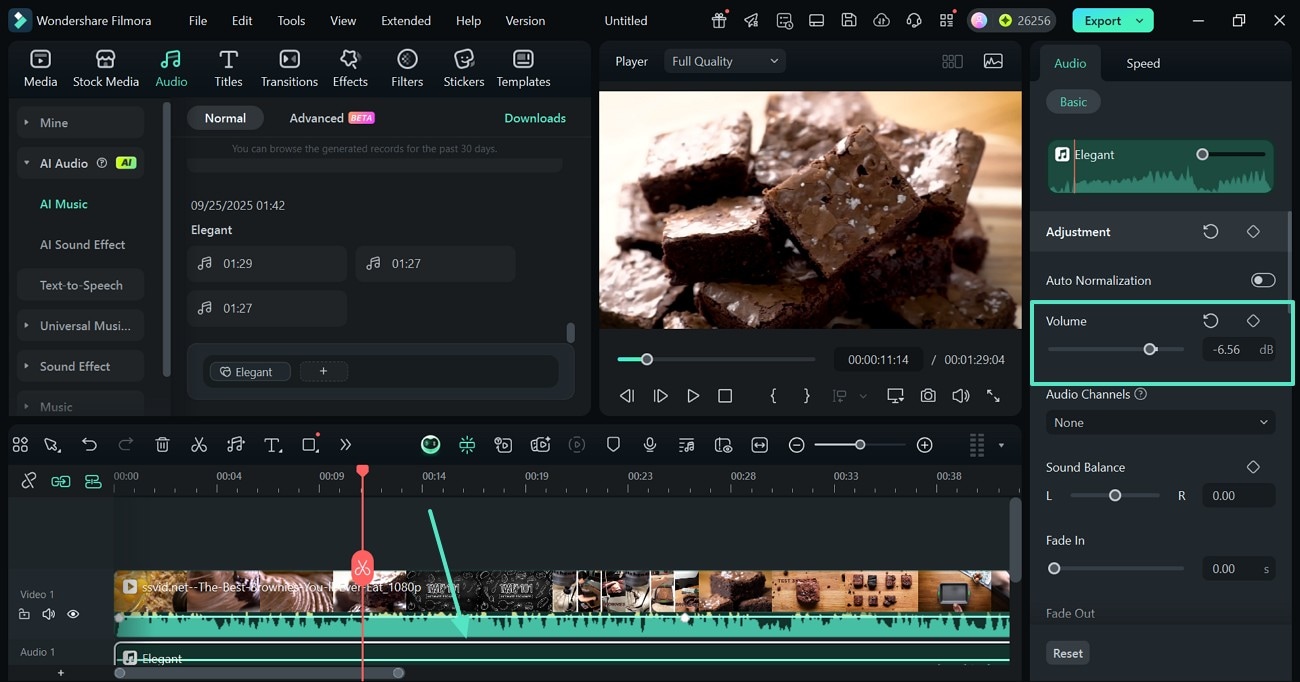
- Step 4. Decrease the Volume of the Music. Next, select the music audio track from the timeline and use the right panel to decrease the "Volume" of the music. This step replicates automatic audio ducking Premiere Pro behavior in Filmora.
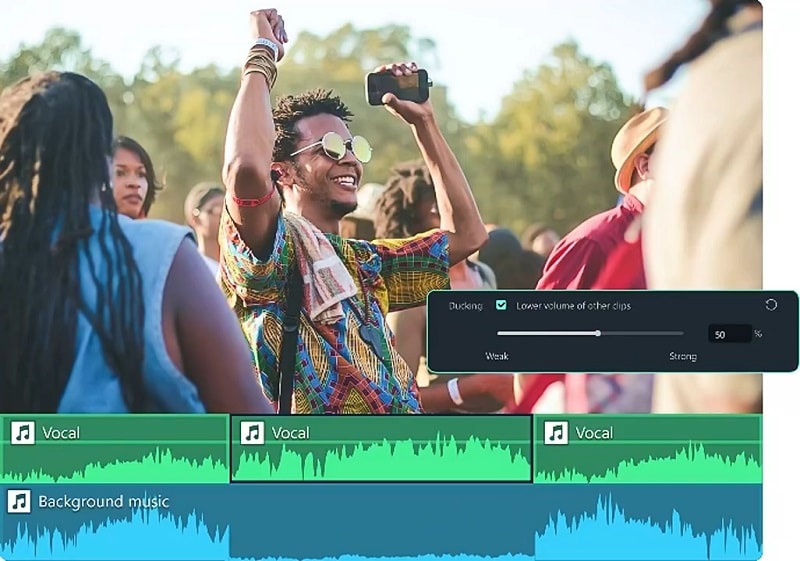
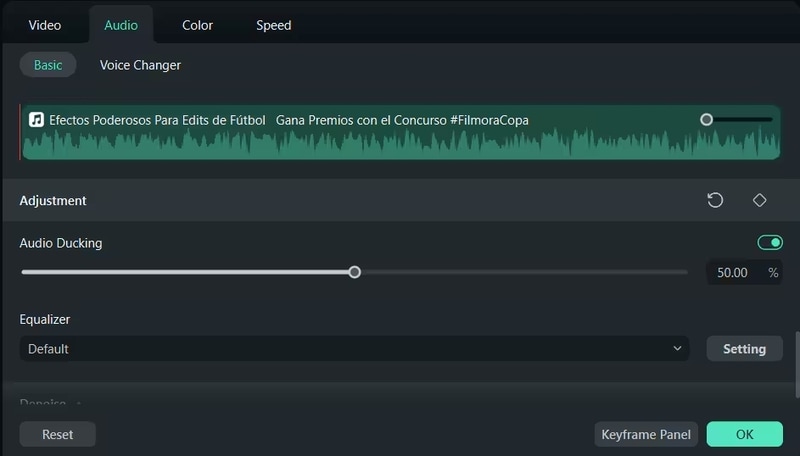
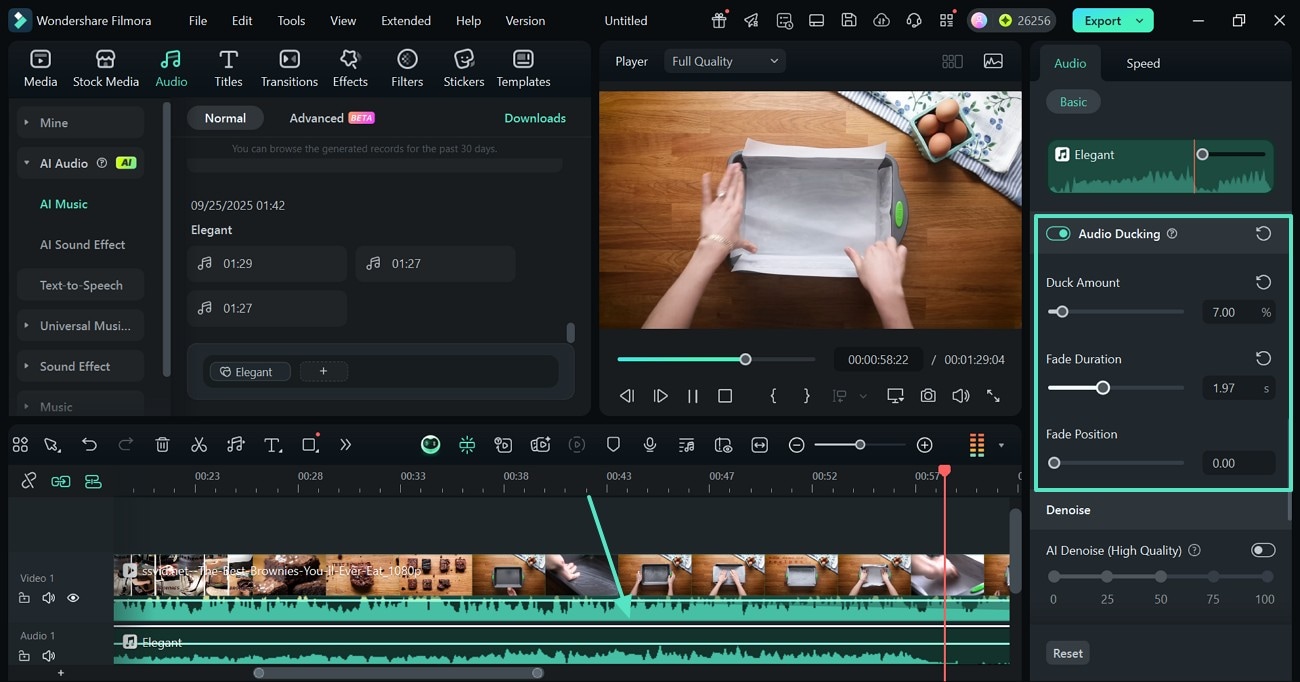
- Step 5. Apply the Audio Ducking Effect to the Dialogue Track. Afterward, select the dialogue track from the timeline and enable the "Audio Ducking" toggle from the right panel. Using the sliders underneath, you can adjust the "Amount," "Duration," and "Position" of fading audio, making how to duck audio in Premiere Pro easier to understand.
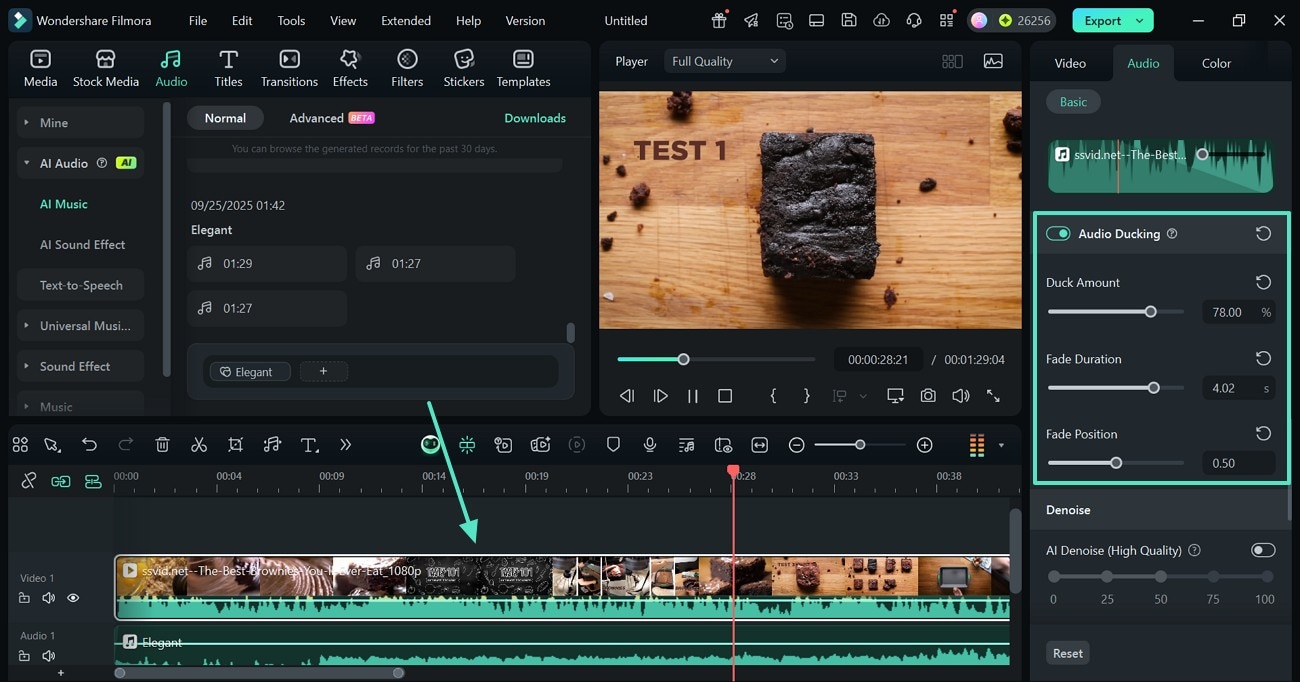
- Step 6. Adjust the Music Audibility. To adjust the music track, enable the "Audio Ducking" feature from the right panel. Using the sliders, customize the intensity of ducking, the duration of voice suppression, and the fade position, similar to audio ducking Premiere Pro workflow.
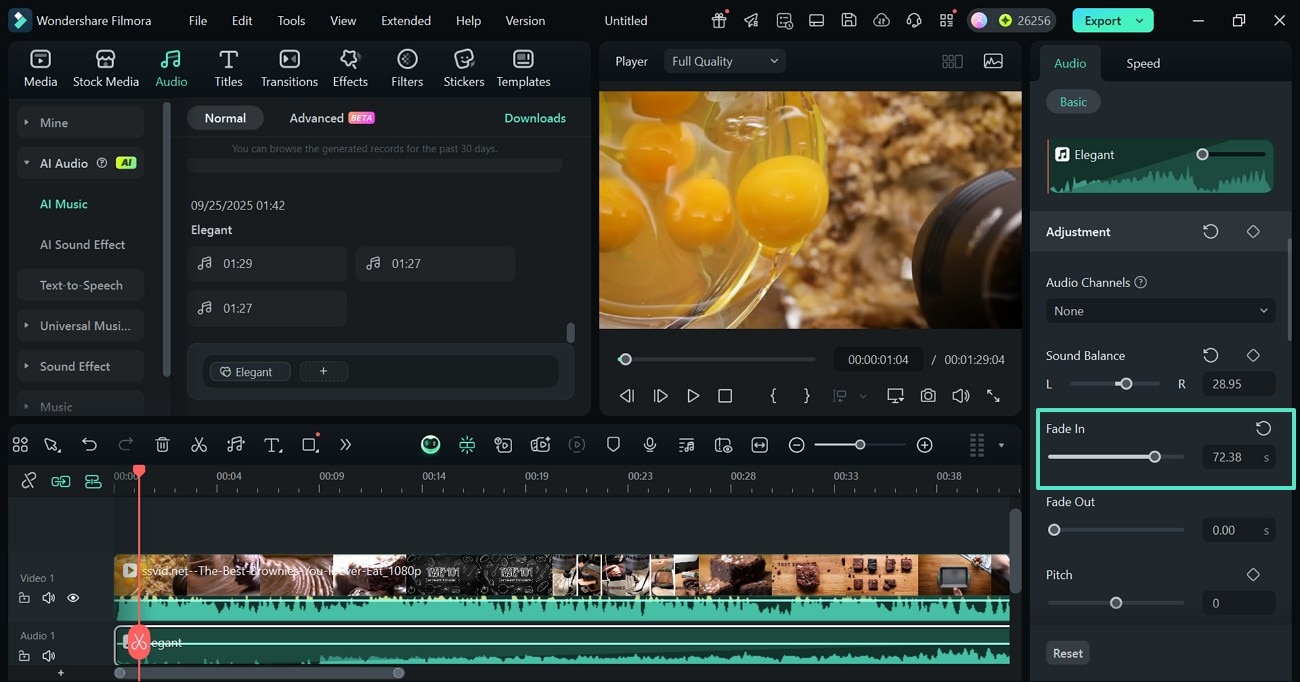
- Step 7. Apply a Fade-in Effect for a Subtle Start. Use the "Fade-in" slider to refine the start of the music track for smooth transitions.
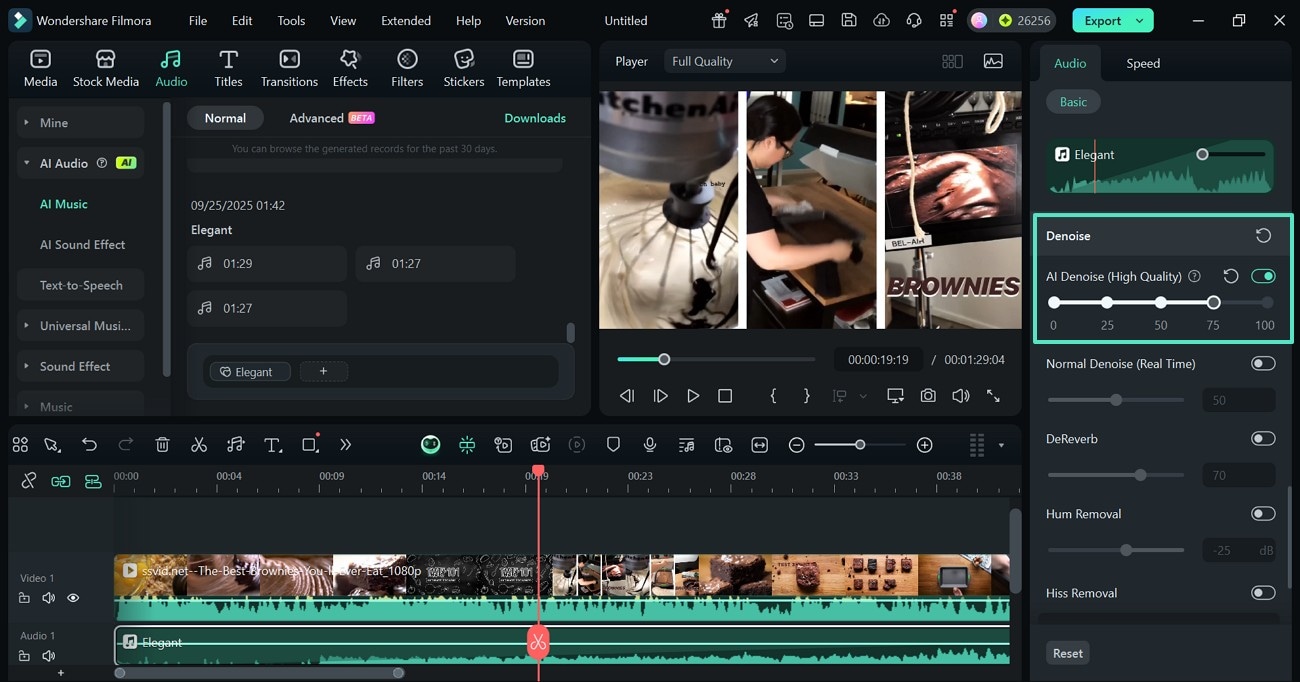
- Step 8. Remove the Unneeded Noise from the Audio. Scroll down the right panel to enable "AI Denoise" and select the level of noise reduction. This ensures clean audio, complementing automatic audio ducking Premiere Pro practices.
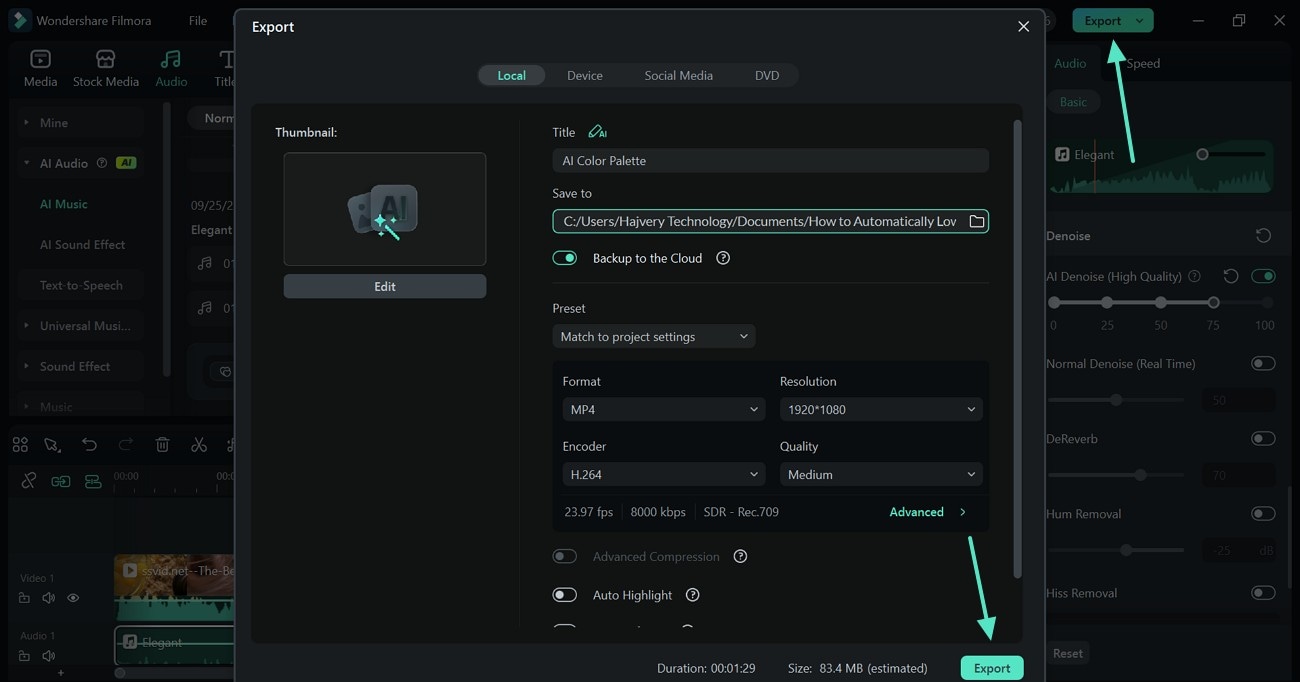
- Step 9. Save the Results to Your Device. Once editing is complete, click "Export" to save the video.
secure download
Part 3. Best Practices for Audio Ducking
Now that we understand the functionality of audio ducking in Premiere Pro and Filmora, there are certain practices that you need to follow. Read into the following tips before adjusting your audio files:
- Always Prioritize Dialogue: Set your ducking against dialogue tracks first, since they carry the story. This keeps your message clear and ensures background sounds never overpower speech, following the principles of audio ducking Premiere Pro.
- Adjust Duck Amount Carefully: Ducking too much can make your background music vanish completely, while too little can still cover dialogue. Moderate reduction creates space without losing energy, similar to how to duck audio in Premiere Pro recommendations.
- Use Fade Duration for Smoothness: Adjust the fade duration for professional, smooth volume dips, replicating automatic audio ducking Premiere Pro effects.
- Position Fades Thoughtfully: The fade position slider decides whether the background lowers before, during, or after dialogue begins. Experiment with different positions until the timing feels natural and invisible to the audience.
Conclusion
In essence, audio ducking Premiere Pro is an essential tool for balancing dialogue and music. While this platform is effective, Wondershare Filmora offers easier working, diverse features, and AI-assisted audio editing. Using its intuitive interface, users can perform automatic audio ducking Premiere Pro-like adjustments with more flexibility, making it a strong alternative for video editors seeking simplicity and control.
