

 100% Security Verified | No Subscription Required | No Malware

Switching a Premiere Pro project to a different editor actually doesn't always have to mean rebuilding the whole timeline from zero. If the editor supports XML, you can export your Premiere Pro timeline as an XML file and import it into another compatible editing program.
Premiere Pro XML export may sound unfamiliar if you’ve never transferred a project between editing programs, but the process is actually simple. We’ll walk through exporting the XML out of Premiere Pro and what to watch for along the way.
In this article
Part 1. What is an XML File?
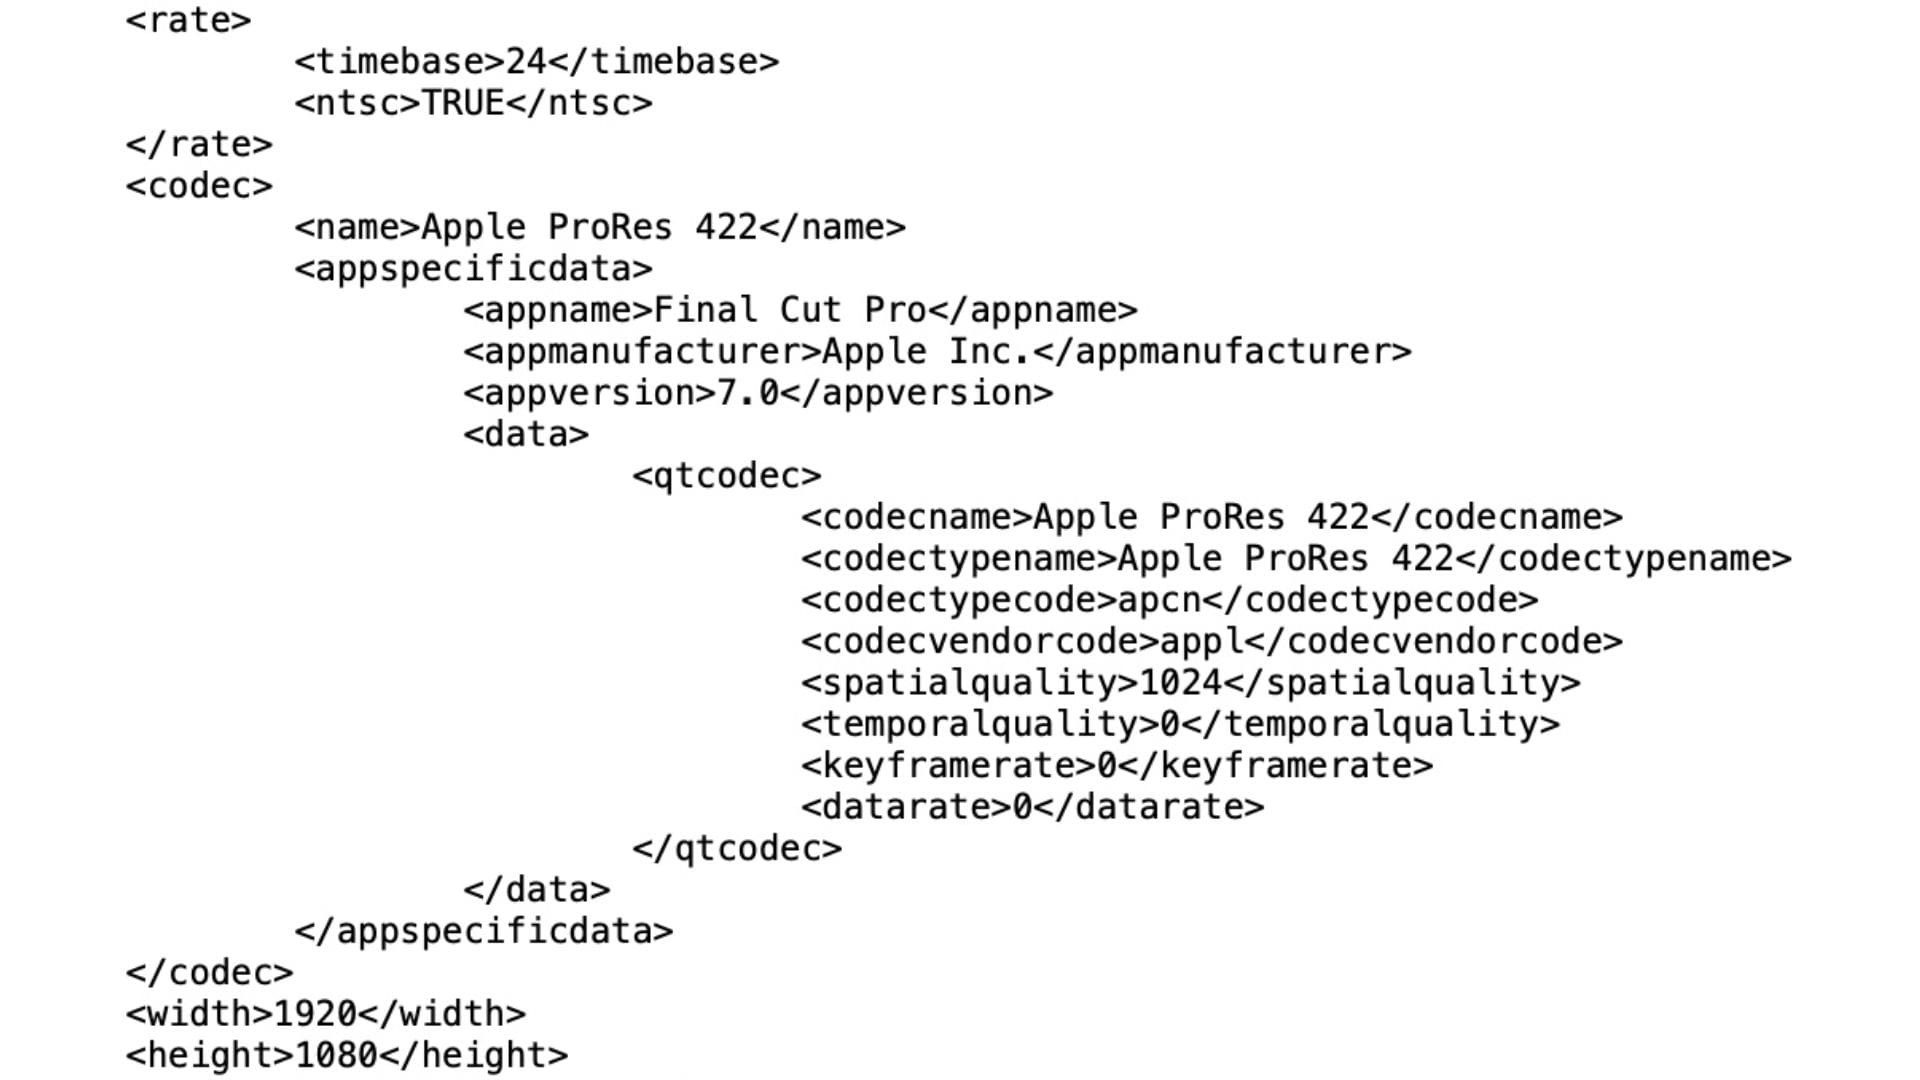
In video editing, XML (Extensible Markup Language) is a common file format for transferring project data between different editing applications. It can store structured information about an edit, such as which clips are used, where they appear in the timeline, and how the sequence is arranged.
For Premiere Pro, the relevant export is a Final Cut Pro XML file. It’s designed for exchanging editing information with Final Cut Pro and other compatible tools, so it’s not a universal project format that every video editor can open.
XML Export vs. Regular Video Export
Although the process is called an export, what comes out isn’t a finished video. Inside the XML export from Premiere Pro is a record of your edit, not the footage itself, so it behaves very differently from a regular export once you open it up in another program.
|
XML Export |
Regular Video Export |
|
Transfers editing and sequence information |
Creates a finished video file |
|
Editable after transfer |
Not meant for further editing |
|
Requires the original media to be relinked in the new app |
Self-contained, plays on its own |
|
Small file size (just data, no video) |
Large file size (contains actual footage) |
|
Used to continue editing elsewhere |
Used to share or publish a finished piece |
When you export XML from Premiere Pro, it can generally carry information such as:
- Clips and their arrangement
- Sequence structure
- Edit points
- Timeline information
- Basic clip properties and some effects or settings
Adobe notes that not every effect, transition, or audio adjustment survives the trip.
Part 2. How to Export XML from Premiere Pro
Before you start, make sure your project is saved, and all media is linked. Missing or offline media is one of the most common causes of a messy XML export. Then, follow the tutorial below.
How to Export XML from Premiere Pro
Step 1. Open your project in Premiere Pro and select the sequence you want to export.
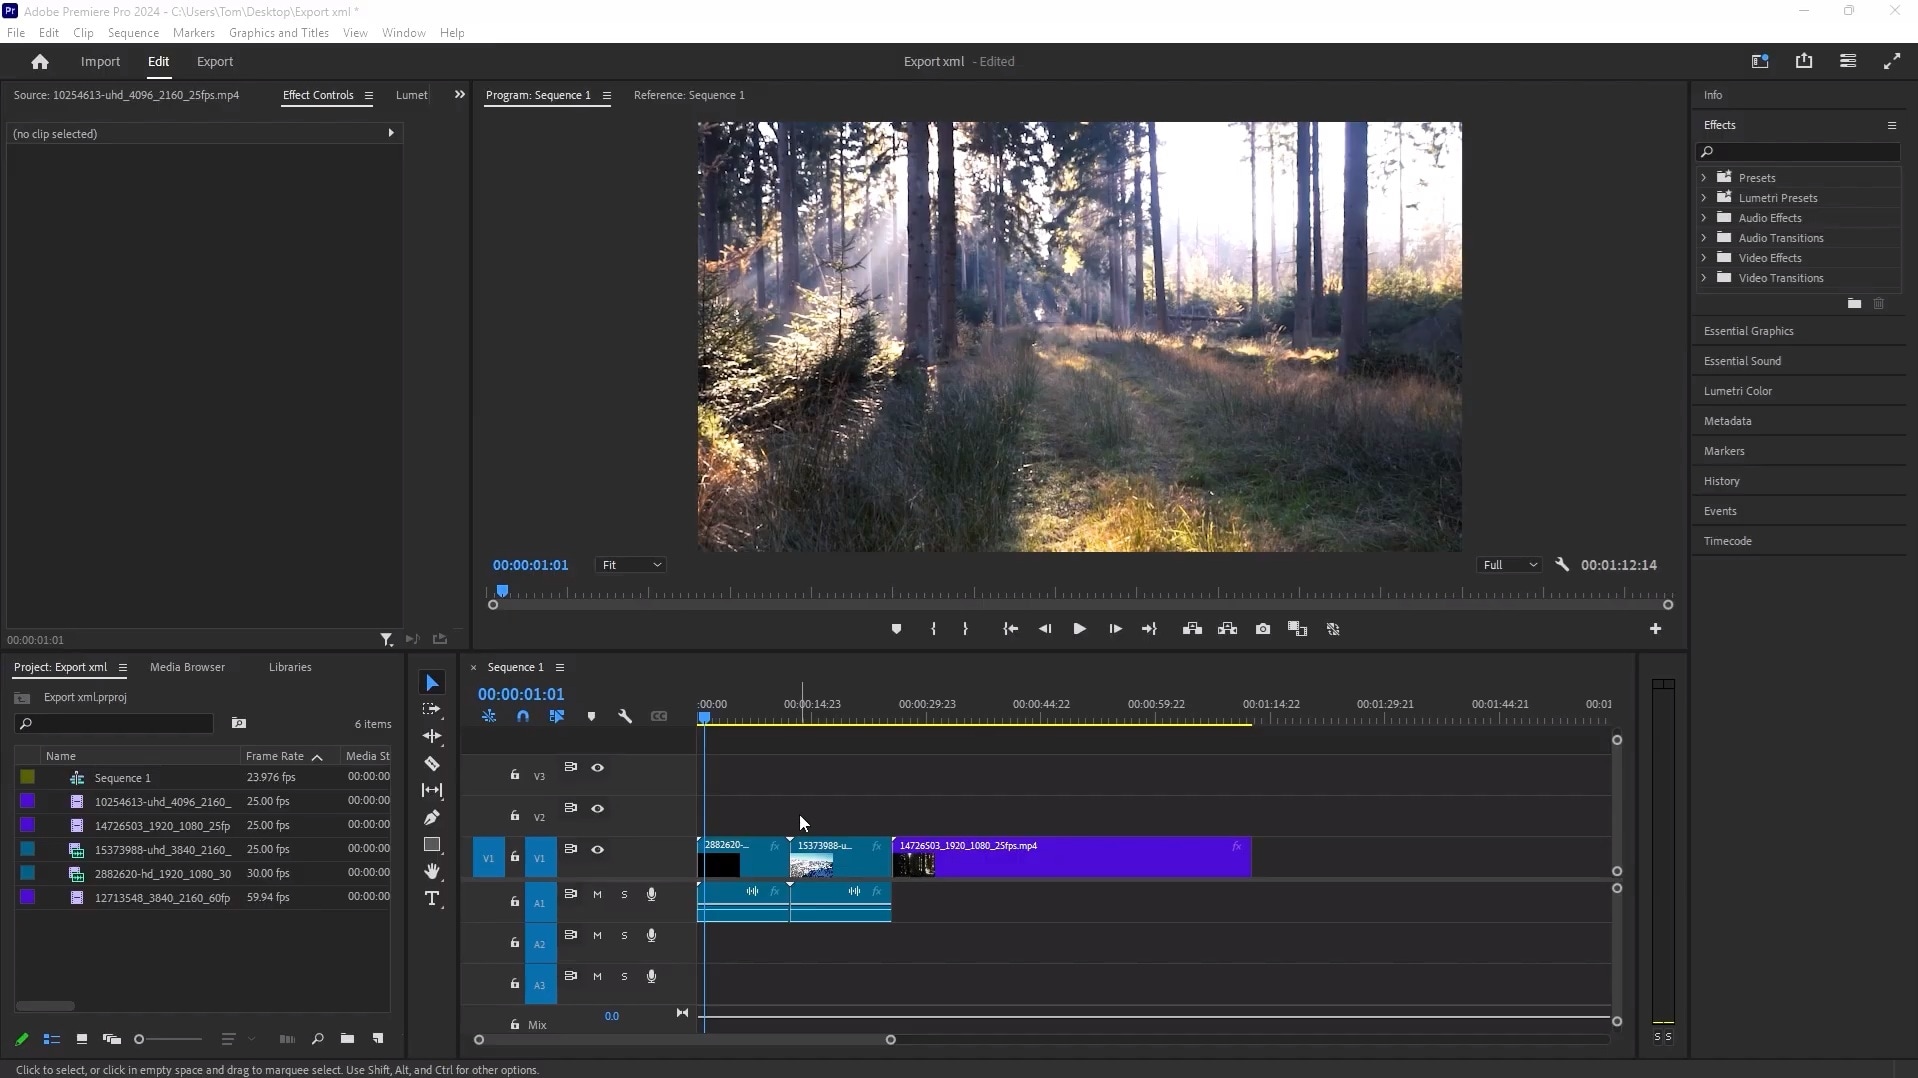
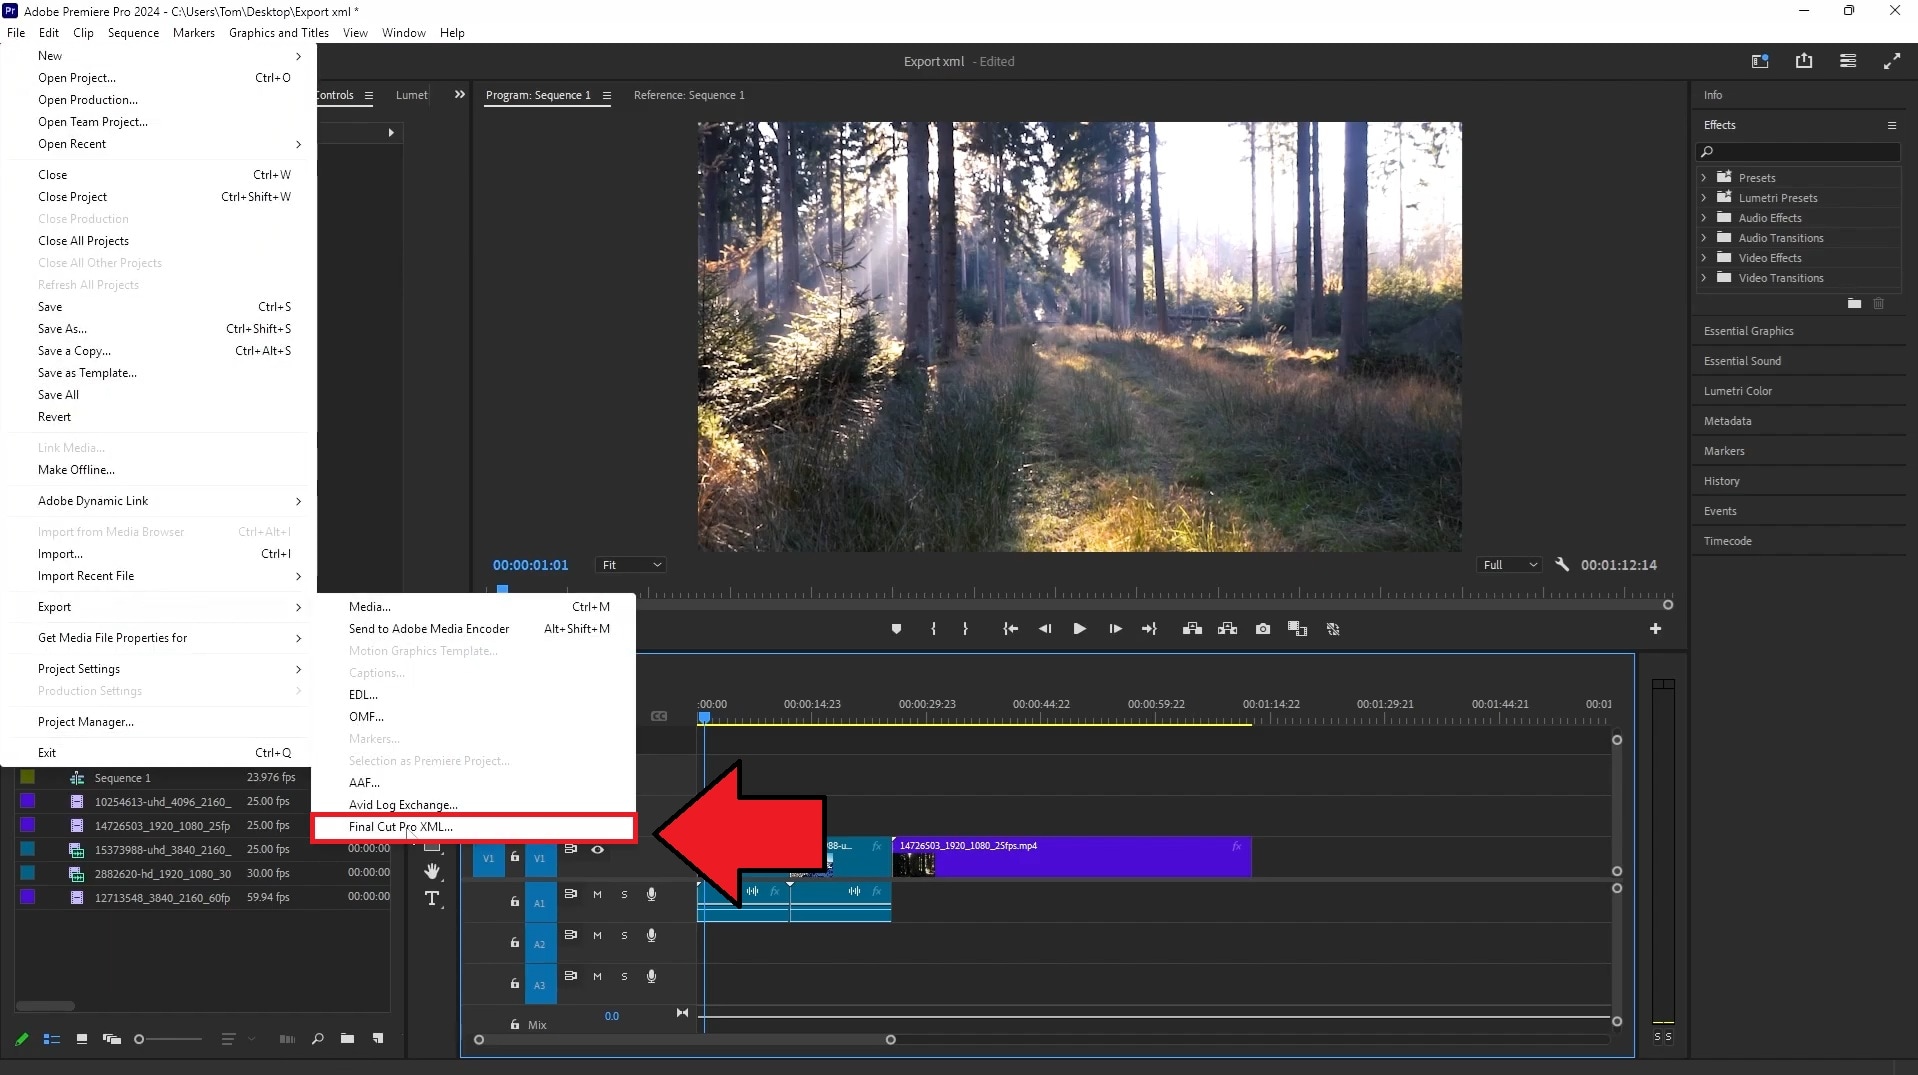
Step 2. Go to File > Export > Final Cut Pro XML. In the Save Converted Sequence As window, choose a location and filename for the XML file, then click Save.
Premiere Pro generates the XML file, along with an FCP Translation Results log in the same location. Open that log if anything looks off after the transfer. It lists any conversion issues Premiere ran into during the export.
Part 3. Compatible Application for Premiere Pro XML Export
Premiere's XML export is built around the Final Cut Pro XML format, so it's most reliably read by applications that support that same format. However, FCP is not the only option, especially if you are not a Mac user thinking of continuing your Premiere Pro project elsewhere.
A more beginner-friendly video editor like Wondershare Filmora has now added support for XML import. It reads Final Cut Pro 7 XML, XMEML, and .xml files, which covers what Premiere Pro exports. You’re not limited to professional NLEs if you want to keep working on the same sequence.
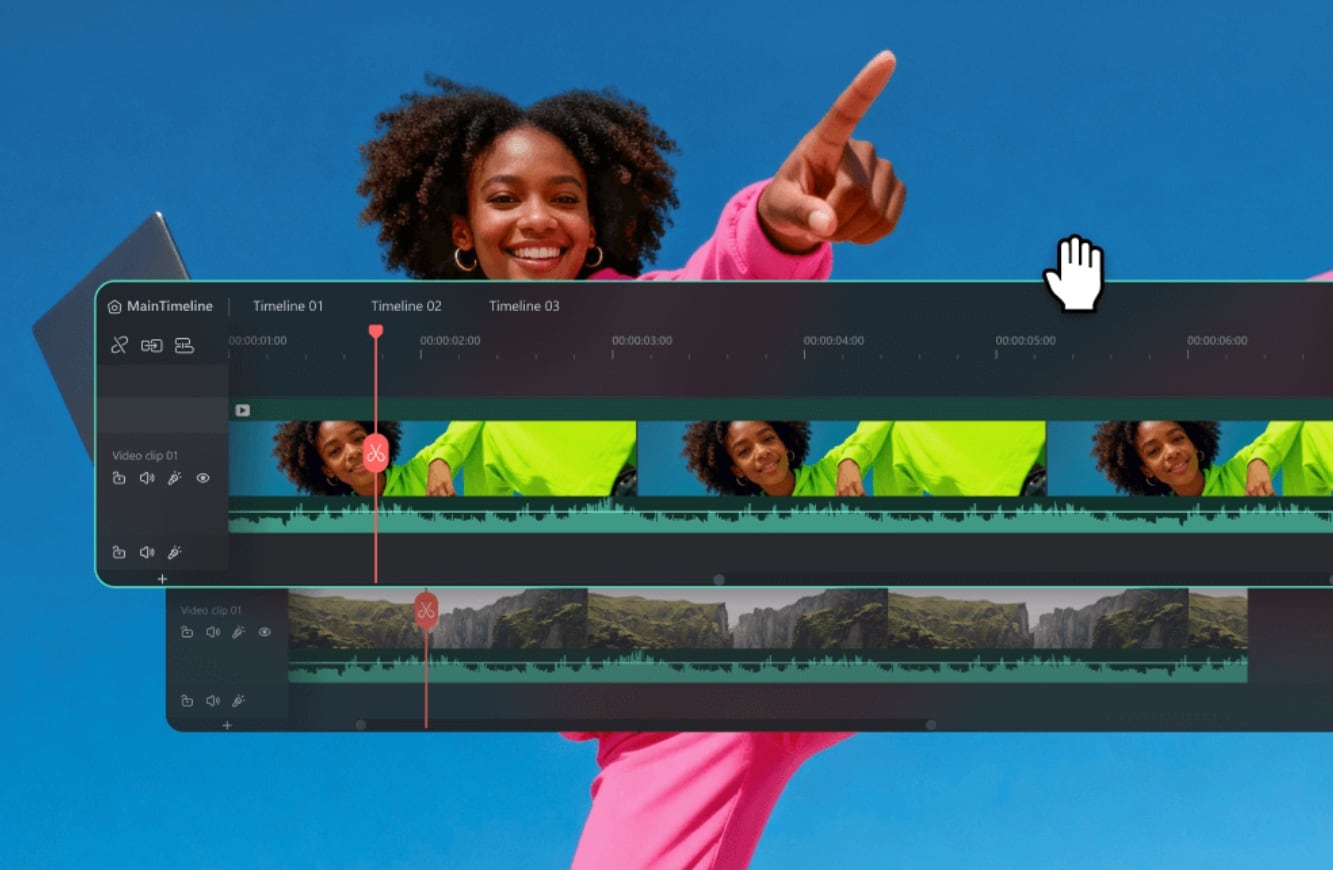
Why Edit in Filmora?
Continuing in Filmora just makes finishing the video easier. A few reasons it's worth sticking with are:
- Access to more AI features that speed up the process. Auto captions, AI-assisted color matching, background noise removal, and text-based editing handle work that would otherwise eat up manual editing time.
- Easier to handle and manage. Filmora's interface is built around a shorter learning curve, so switching over doesn't mean relearning how to do basic tasks you already know from Premiere.
- Lighter on system resources. Filmora tends to run smoother on mid-range hardware, which matters if your machine struggles to keep up with Premiere Pro on longer or heavier timelines.
- Built-in templates and effects library. A large stock of ready-made transitions, titles, and filters means less time building things from scratch once your timeline is rebuilt.
- Vast video/audio effects and creative assets.
- Powerful AI for effortless content creation.
- Intuitive, professional yet beginner-friendly.
- Works on Mac, Windows, iOS, and Android.



How to Import an XML File from Premiere Pro to Filmora
Step 1. Open Filmora and click Import. Or, you can also double-click the blank area of the timeline.
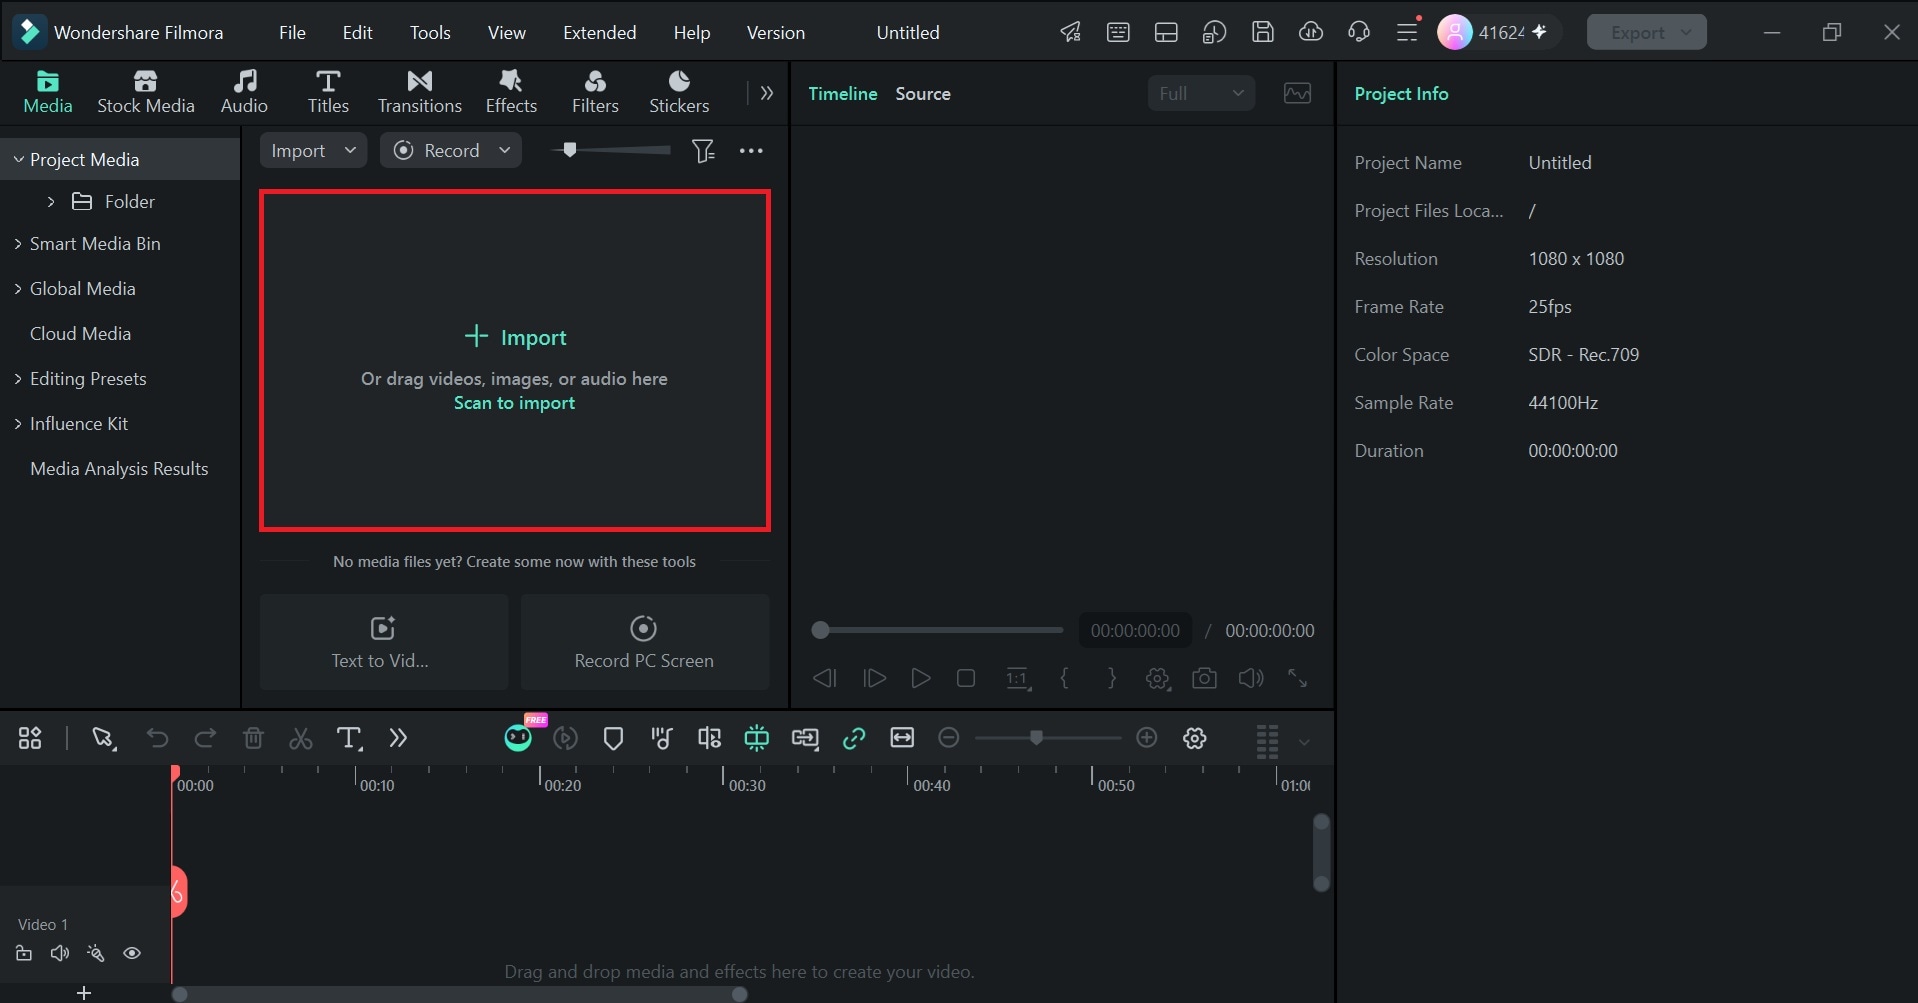
 secure download
 Step 2. Select Timeline Exchange Format XML. and choose your exported .xml or .fcpxml file. Let Filmora run its compatibility check, then relink any media it flags as missing.
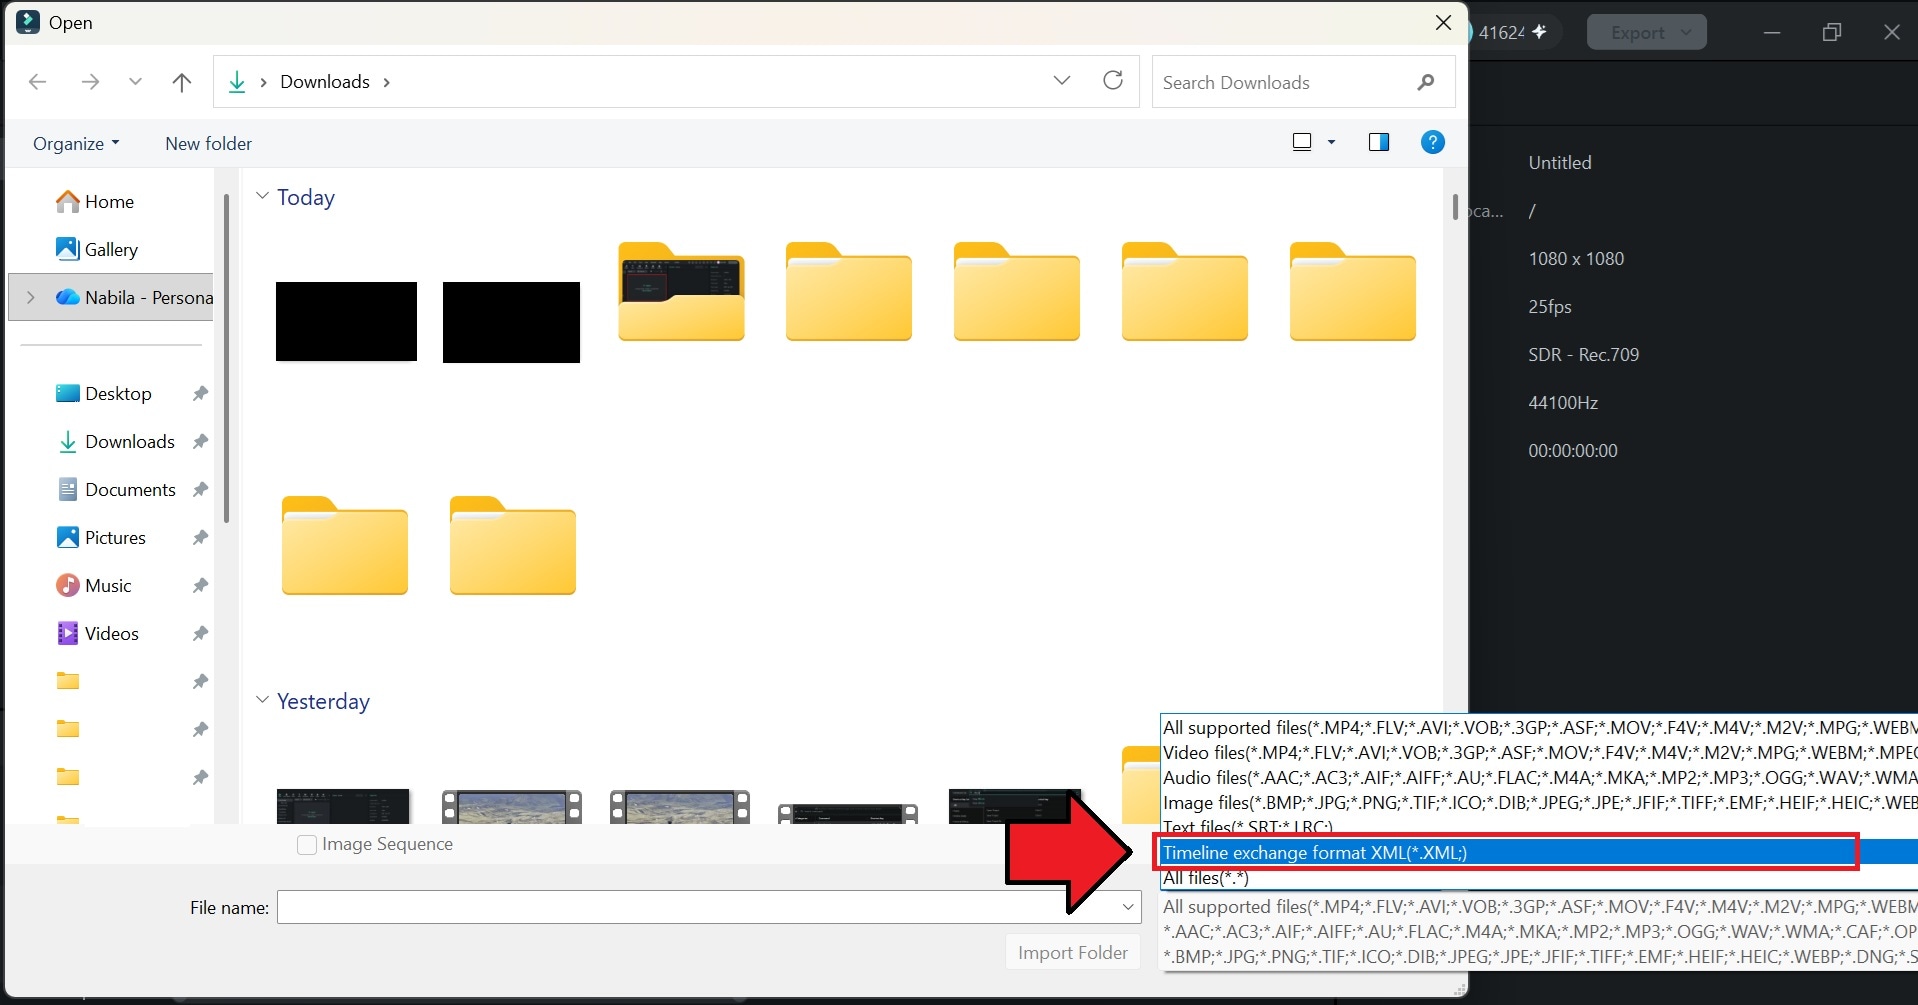
Part 4. Premiere Pro XML Export Limitations You Should Know
Since XML is a cross-application format designed to transfer editing information between different tools, you can expect a bit of loss along the way. It's not a perfect copy of your project, more like a translation, and translations don't always carry every detail over cleanly.
The following is what tends to go sideways:
- Effects and transitions may not transfer. Anything beyond basic cuts and dissolves, especially third-party plugins, usually gets dropped or needs to be rebuilt by hand.
- Audio settings may change. Pan, gain, and volume tweaks can shift or reset once the sequence opens in a different app.
- Media still needs to be available. The XML file only points to where your footage lives. It doesn't carry the actual files. If the new app can't find them at that location, you’ll be relinking manually.
- Some workflows may require additional tools. Merged clips, for instance, turn into nested sequences instead of staying merged, which usually means extra cleanup before you can keep editing normally.
Part 5. Common Problems When Exporting XML from Premiere Pro
Having trouble exporting XML from Premiere Pro? Check some of the most common export issues below and see if one of these solutions can help you get your project transferred successfully.
1. Can't find the XML export option
Make sure you’re going to File > Export > Final Cut Pro XML. This option is separate from the regular media export options. Before exporting, save your Premiere Pro project and make sure the media used by your sequence is linked.
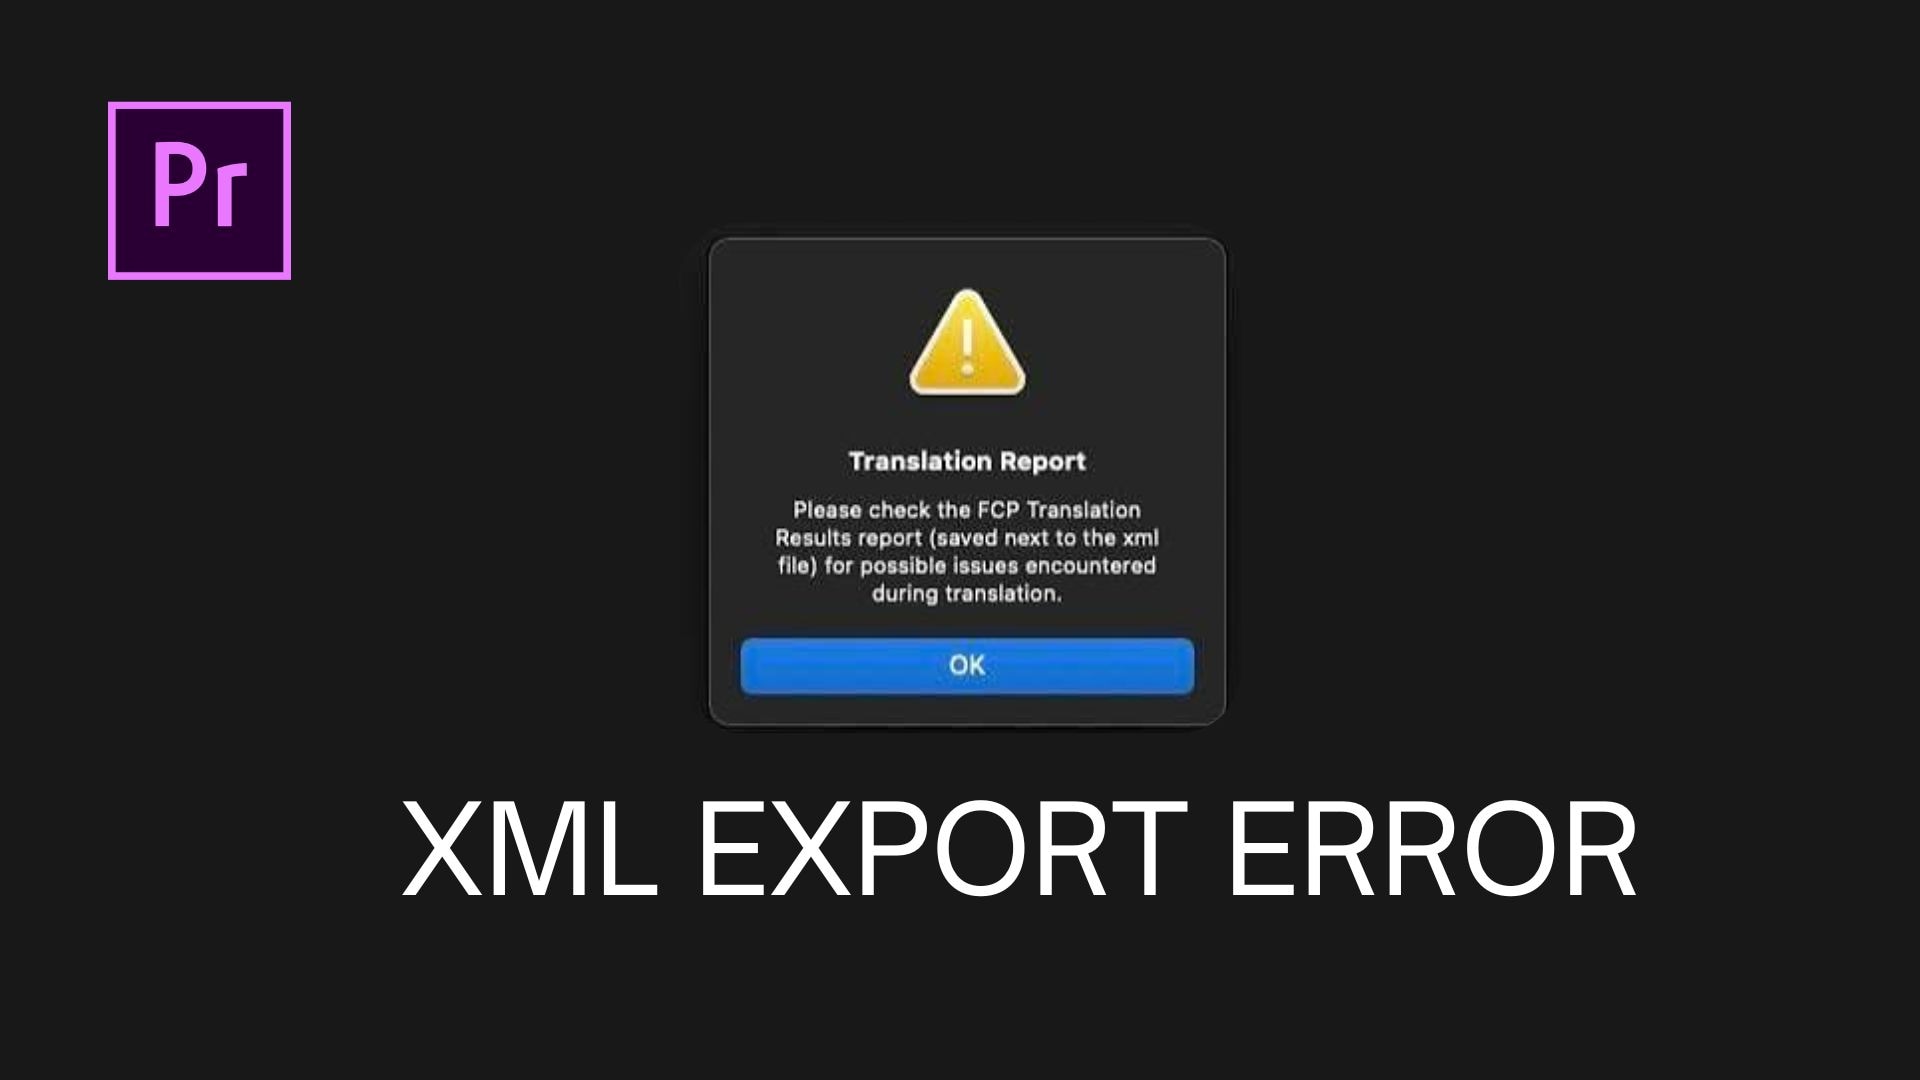
2. Premiere Pro shows XML Translation Report error
You can check the log file saved alongside your XML and see if it names specific effects or settings Premiere couldn't translate cleanly. The report itself isn’t a failure notice, but a record of what didn't carry over. You can rebuild those flagged items manually once you’re in the receiving application.
3. “The imported timeline has offline media”
You can check the file paths referenced in your XML and see if they still match where your source files actually live. If they don't, relink the media manually and confirm filenames haven’t changed since the export.
4. Can’t Export the XML from Premiere Pro
You can check your Project panel and see if any clips show up as red or offline, since an unsaved project or missing media can silently block the export. Also confirm you're exporting a full sequence, not a raw clip or an empty timeline.
Conclusion
Premiere Pro XML export has saved a lot of editors from having to rebuild their projects when moving to another editing program. The file transfers the basic structure of a sequence, including clips, cuts, and timeline information, although some effects and settings may need to be recreated manually.
After exporting the XML file from Premiere Pro, you can import it into a compatible video editor like Filmora and continue working on your project there. Make sure your source media is linked and available, then review the imported timeline to check that your clips, cuts, and other supported elements transferred correctly.
