


Those cinematic travel clips your friends post online probably aren’t 100% natural straight from the camera. Chances are, they’ve had some auto color correction or other color adjustments to make the footage look brighter, cleaner, and more balanced.
That’s totally normal, but if you’re a beginner, terms like exposure, LUTs, and HSL can already sound like a headache. Luckily, automatic color correction can handle much of the work in just one click, and in this guide, we’ll look at how it works and how to use Auto Color in Filmora.
Part 1. Auto Color Explained: What It Does to Your Video
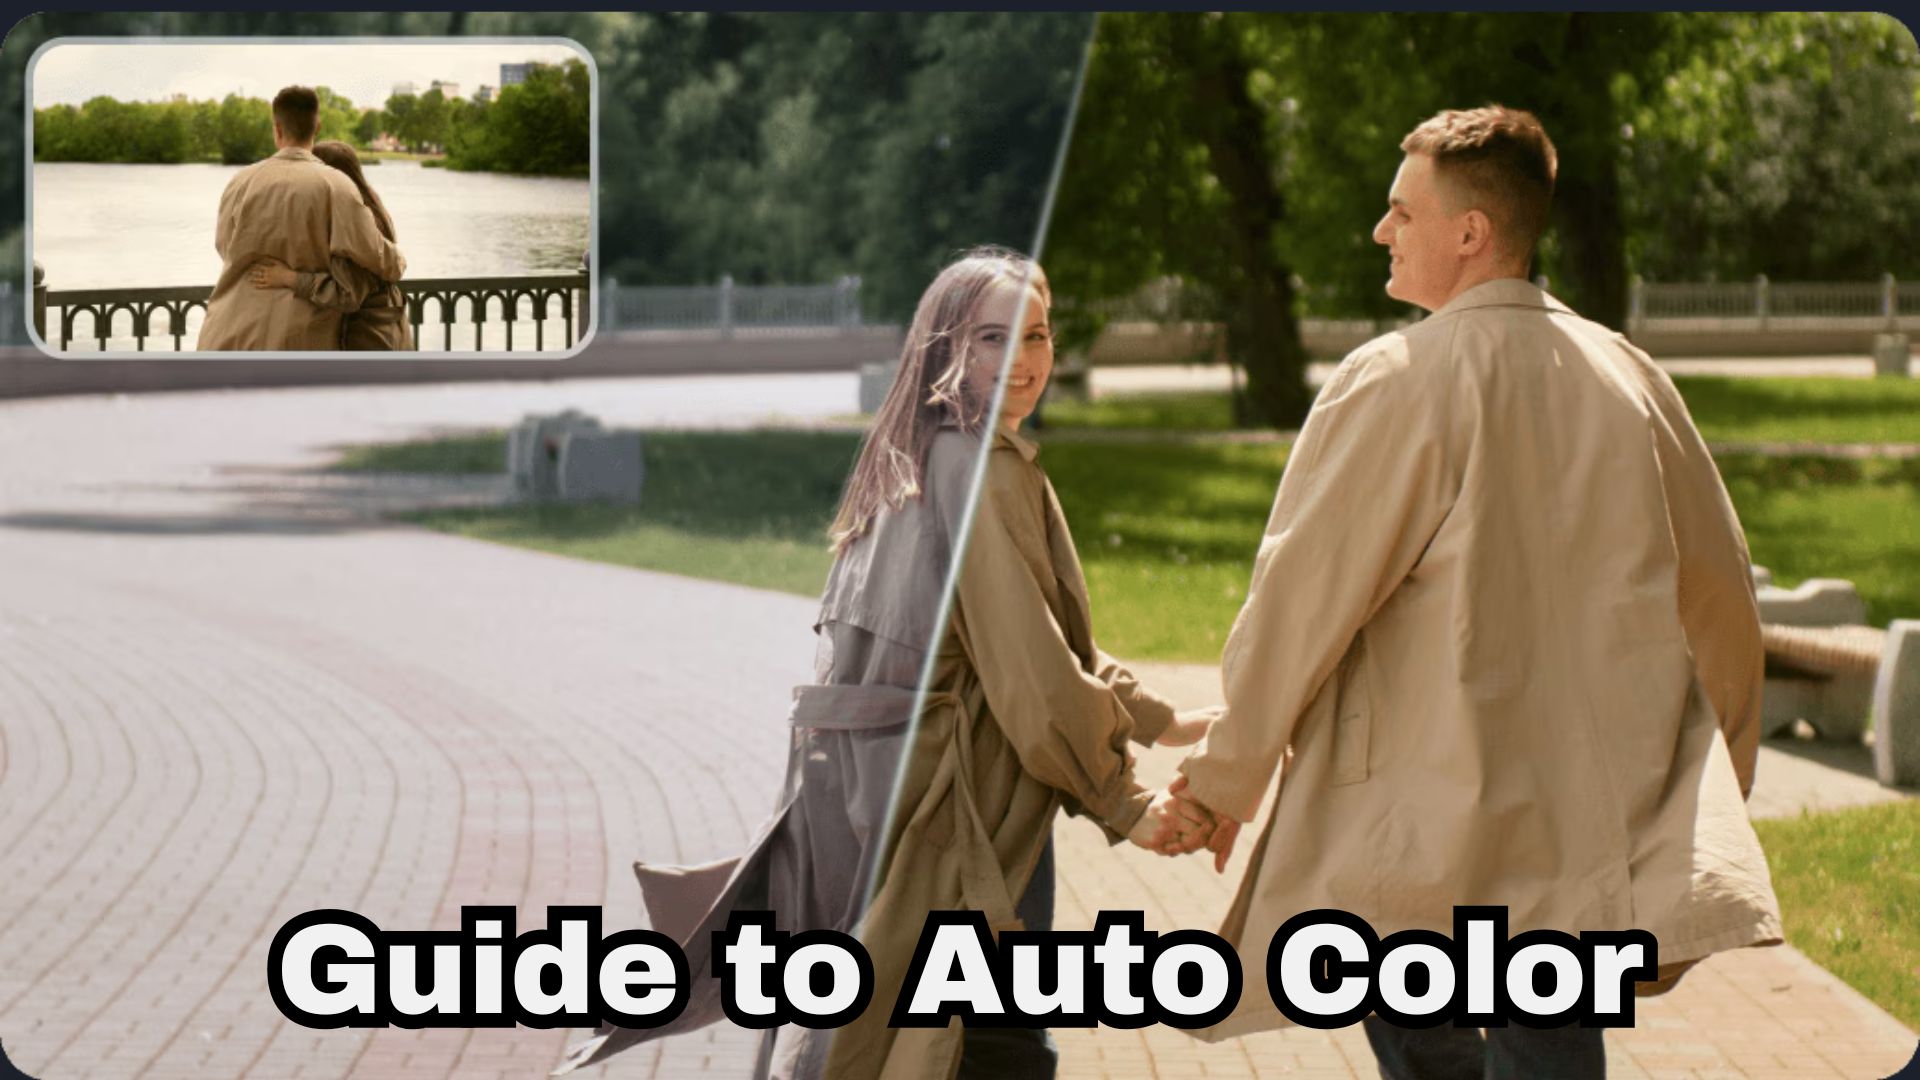
The truth is, footage straight off a camera almost never looks the way it did in your head when you were filming it. Lighting is unpredictable, so your shot can come out too dark, too bright, washed out, or just a little off in color once you see it on a bigger display.
That's exactly the gap Auto Color is built to close. It looks at your clip and makes those baseline corrections for you, automatically, without you having to touch a single slider.
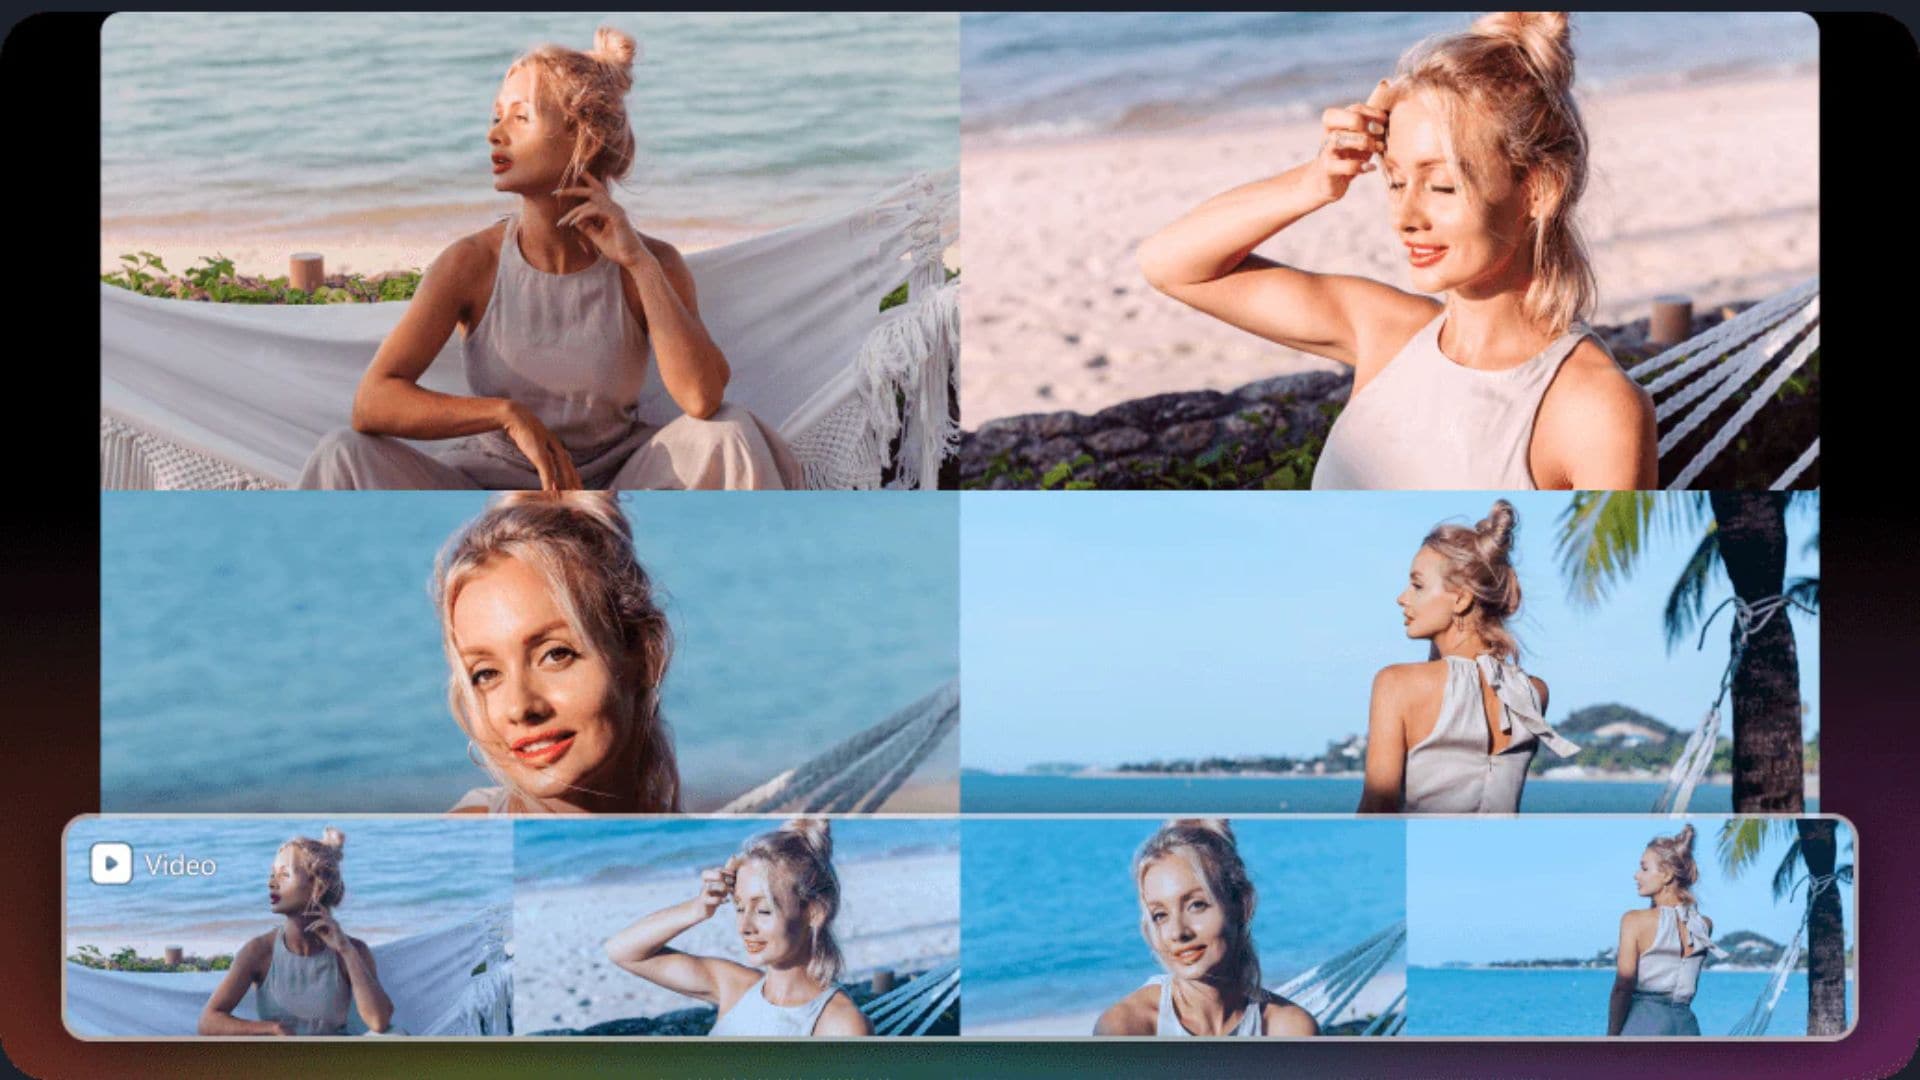
Why Video Editors Rely on Auto Color Tools
You might wonder why so many creators rely on quick fixes instead of hand-crafting every shot. It's not laziness. It’s just practical. Here are a few everyday headaches that make auto color grading for video such a lifesaver:
- Dark or Washed-Out Lighting: Shooting outdoors under cloudy skies or harsh sunlight often leaves your footage looking way too dark or blindingly bright.
- Low Contrast & Flat Colors: Raw video out of smartphones or action cameras frequently looks muddy and lacks that sharp visual pop.
- Awkward Skin Tones: Indoor tungsten bulbs or neon lights can turn natural skin tones alien-green or bright orange.
- Time-Draining Edits: Manually tweaking exposure and white balance on fifty different travel clips will eat up your entire weekend.
- Confusing Color Panels: If you don't know the difference between vector scopes and RGB curves, traditional color wheels just feel intimidating.
 Secure Download
Part 2. Auto Color vs. Color Grading: What's the Difference?
The terms auto color correction or color grade for video are often mixed together. However, they serve two totally different parts of the editing process.
Auto color correction for video fixes mistakes, restores natural lighting, and makes sure your clip looks real. Color grading, on the other hand, is like applying an artistic paint layer over that clean canvas. It helps you build a specific mood, like a moody blue sci-fi tone or a warm, golden-hour retro vibe. See the table below to understand better.
| Feature | Auto Color | Color Grading |
| Main Purpose | Quickly fix technical issues like exposure, contrast, and color casts | Create a specific visual style, mood, or tone |
| How It Works | Software scans the footage and applies a corrective adjustment automatically | You manually adjust HSL, curves, LUTs, and other tools by eye |
| Skill Level | Beginner-friendly | Takes practice and a bit of color theory knowledge |
| Speed | Instant, one click | Can take anywhere from minutes to hours per clip |
| Control | Limited, mostly handled automatically | Full creative control over every single parameter |
| Best For | Quick fixes, batch corrections, tight deadlines | Building a signature look, cinematic style, brand consistency |
|
Show More
Show Less
|
||
This is also why automatic color grading isn't quite the same thing as pressing an Auto Color button. A lot of editors actually use both, running auto color correction first to clean things up, then layering a creative grade on top once the technical stuff is out of the way.
Part 3. The Best Tool to Auto Color Your Videos: Wondershare Filmora
If the idea of learning every single color parameter before you can fix a clip sounds exhausting, Wondershare Filmora is built to skip that whole learning curve.
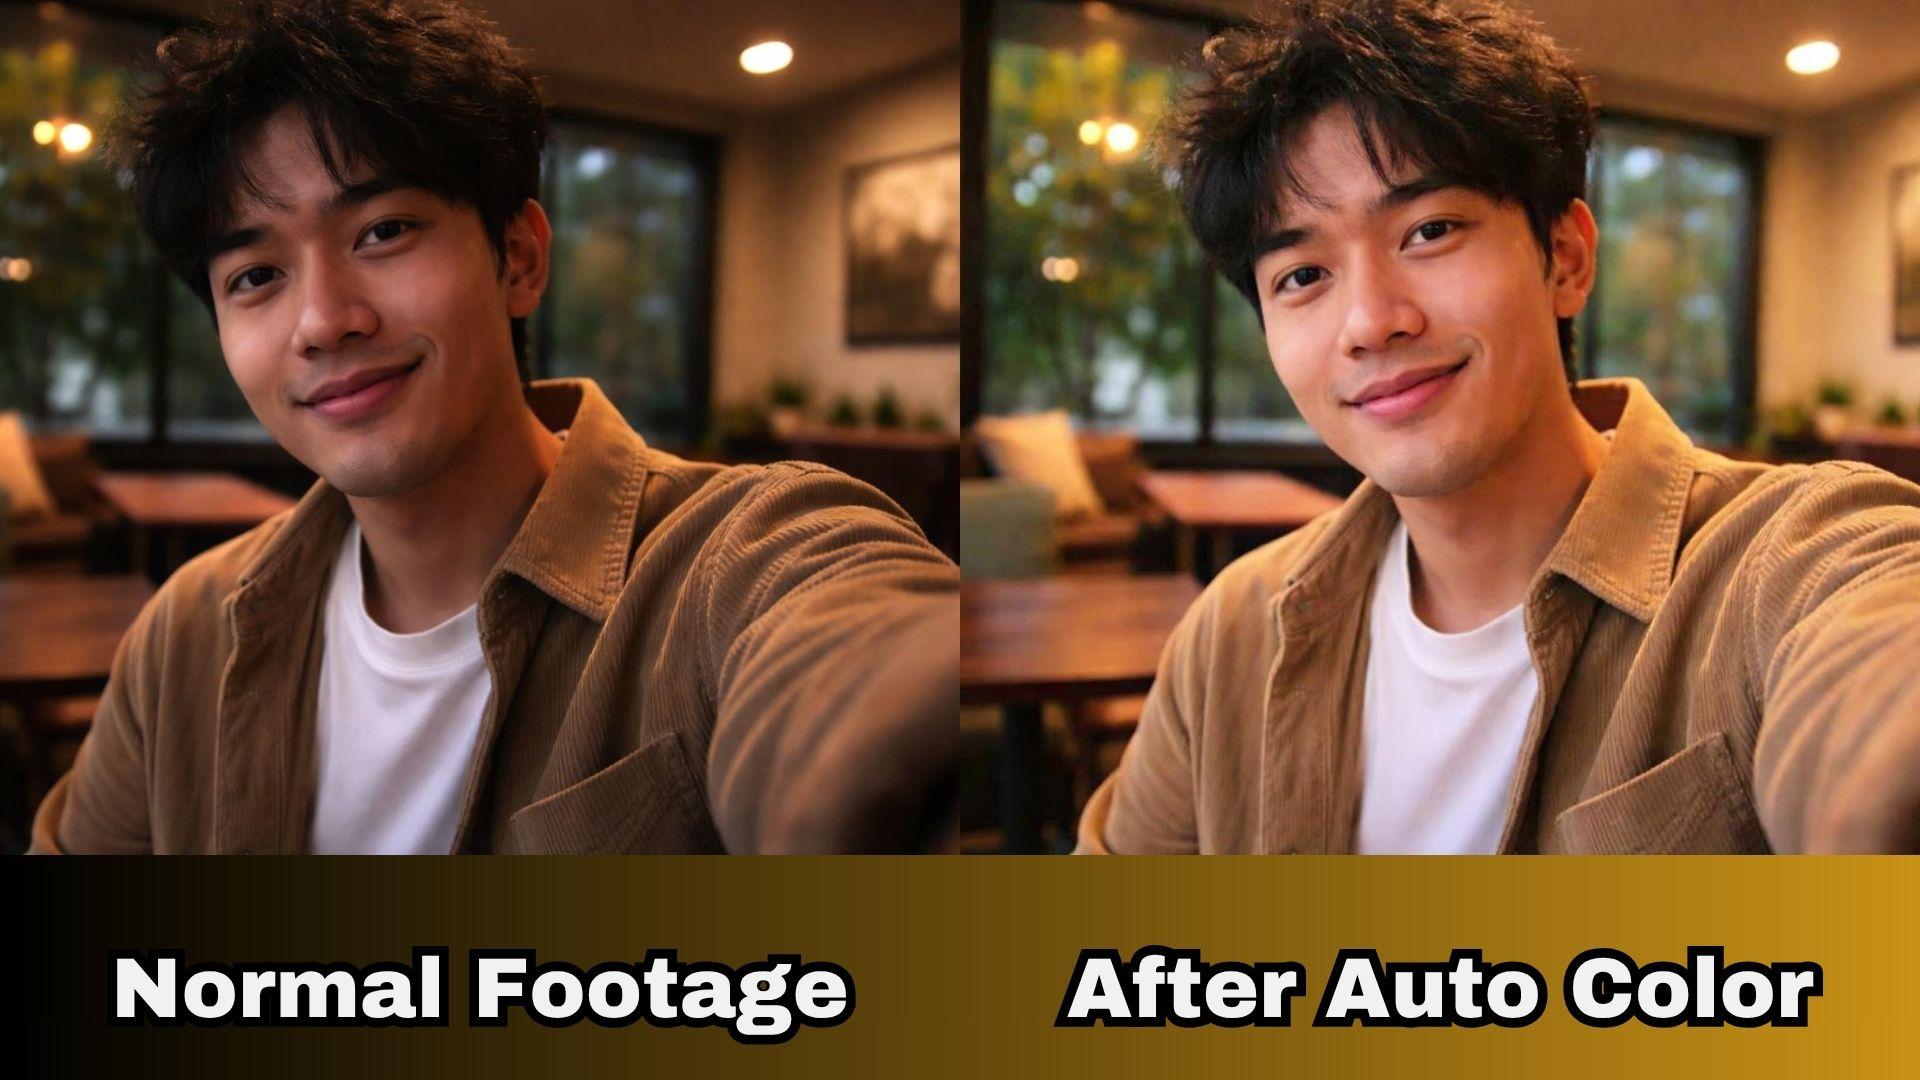
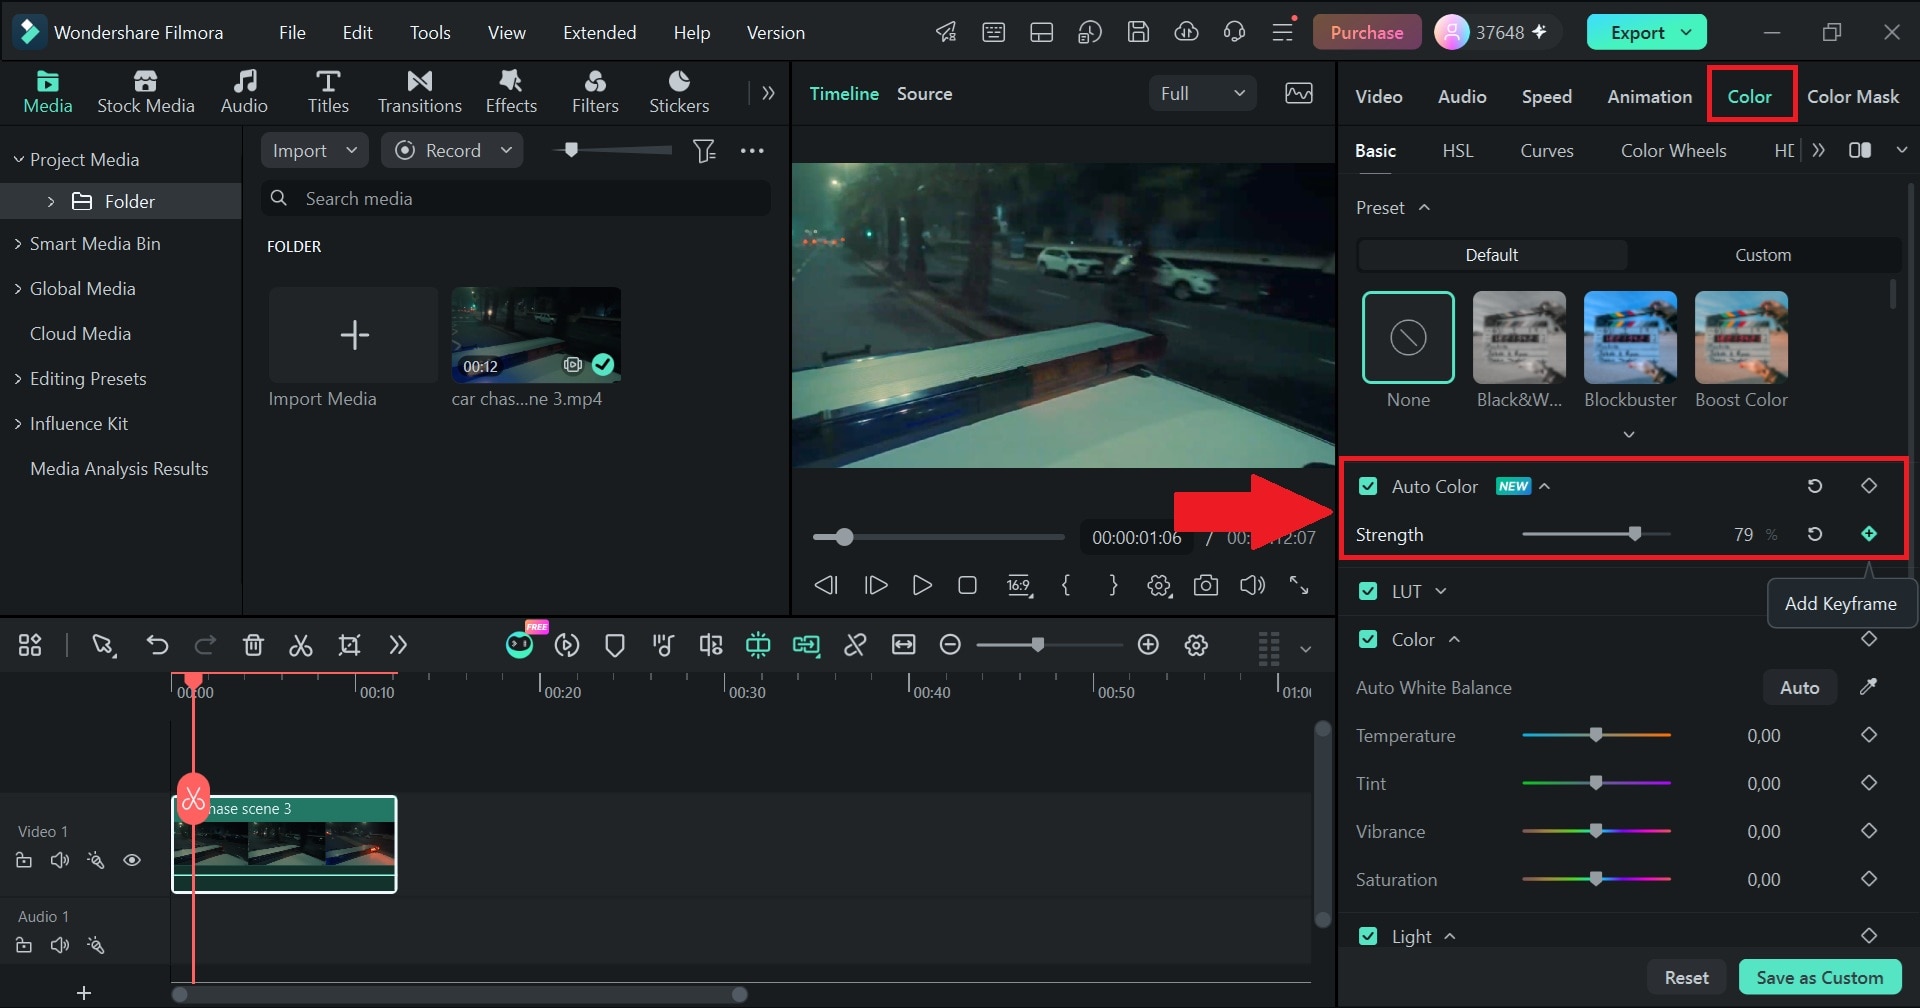
With the launch of Filmora v16, there is a dedicated Auto Color module built directly into the main Color panel right between Presets and Color Match. This feature auto-color corrects your video by scanning your clip's balance in real time to clean up exposure, elevate contrast, clear out bad color casts, and bring back natural skin tones instantly.
Why Filmora Is a Good Choice for Auto Color
A lot of editors offer some flavor of an auto-fix button, but here's what pushes Filmora's version a bit further:
- 1-Click Instant Enhancement: One click automatically fixes underexposed shadows, blown-out highlights, and muddy contrast without manual tweaking.
- Full Intensity Control (0–100 Scale): You get a simple dial set at 80 by default. If the correction looks a bit too punchy, just roll it back to fit your taste.
- Keyframe-Enabled Dynamic Adjustment: Lighting changes constantly when you walk from indoors to outdoors. You can set keyframes on the intensity slider to fade the auto color effect smoothly across a single shot.
- Preset Saving for Quick Reuse: Once you find the perfect intensity level for a location, save it as a custom preset and apply it to your entire batch of clips in seconds.
- Universal Timeline Compatibility: It works natively across all media formats and clips sitting on your editing timeline without lag.
Part 4. How to Use Auto Color in Filmora
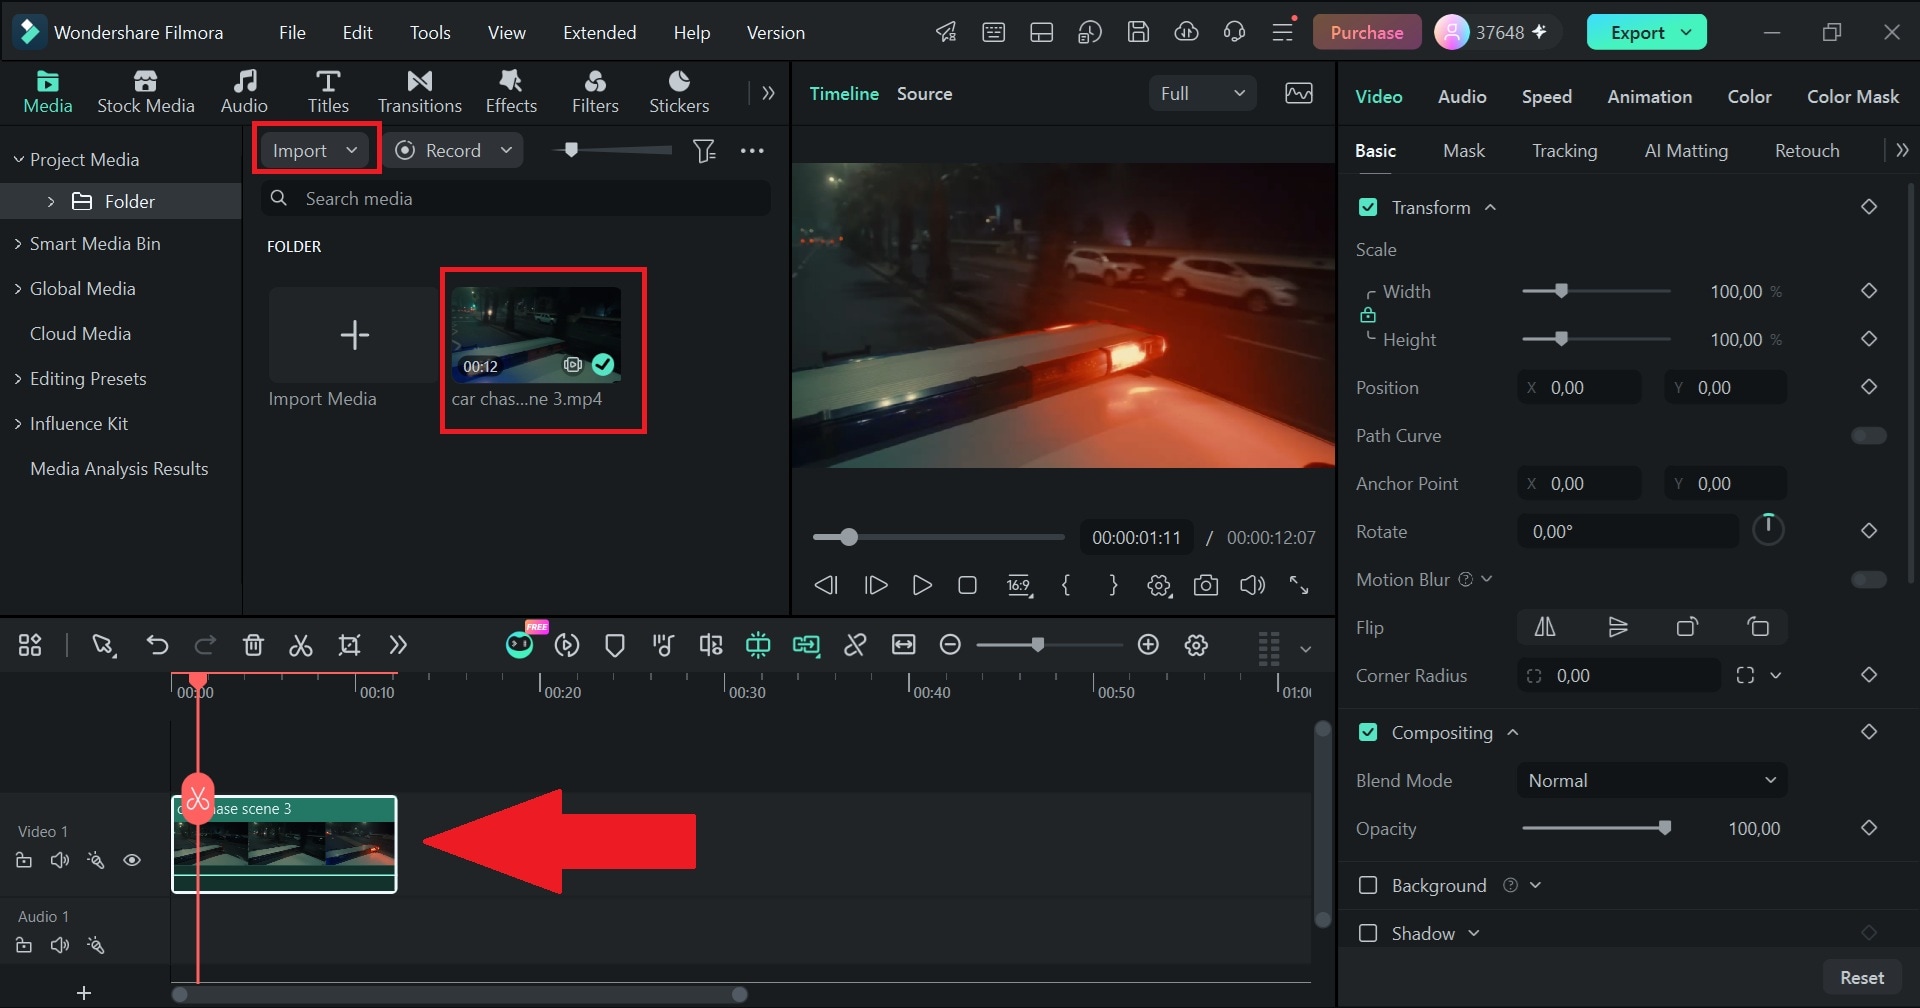
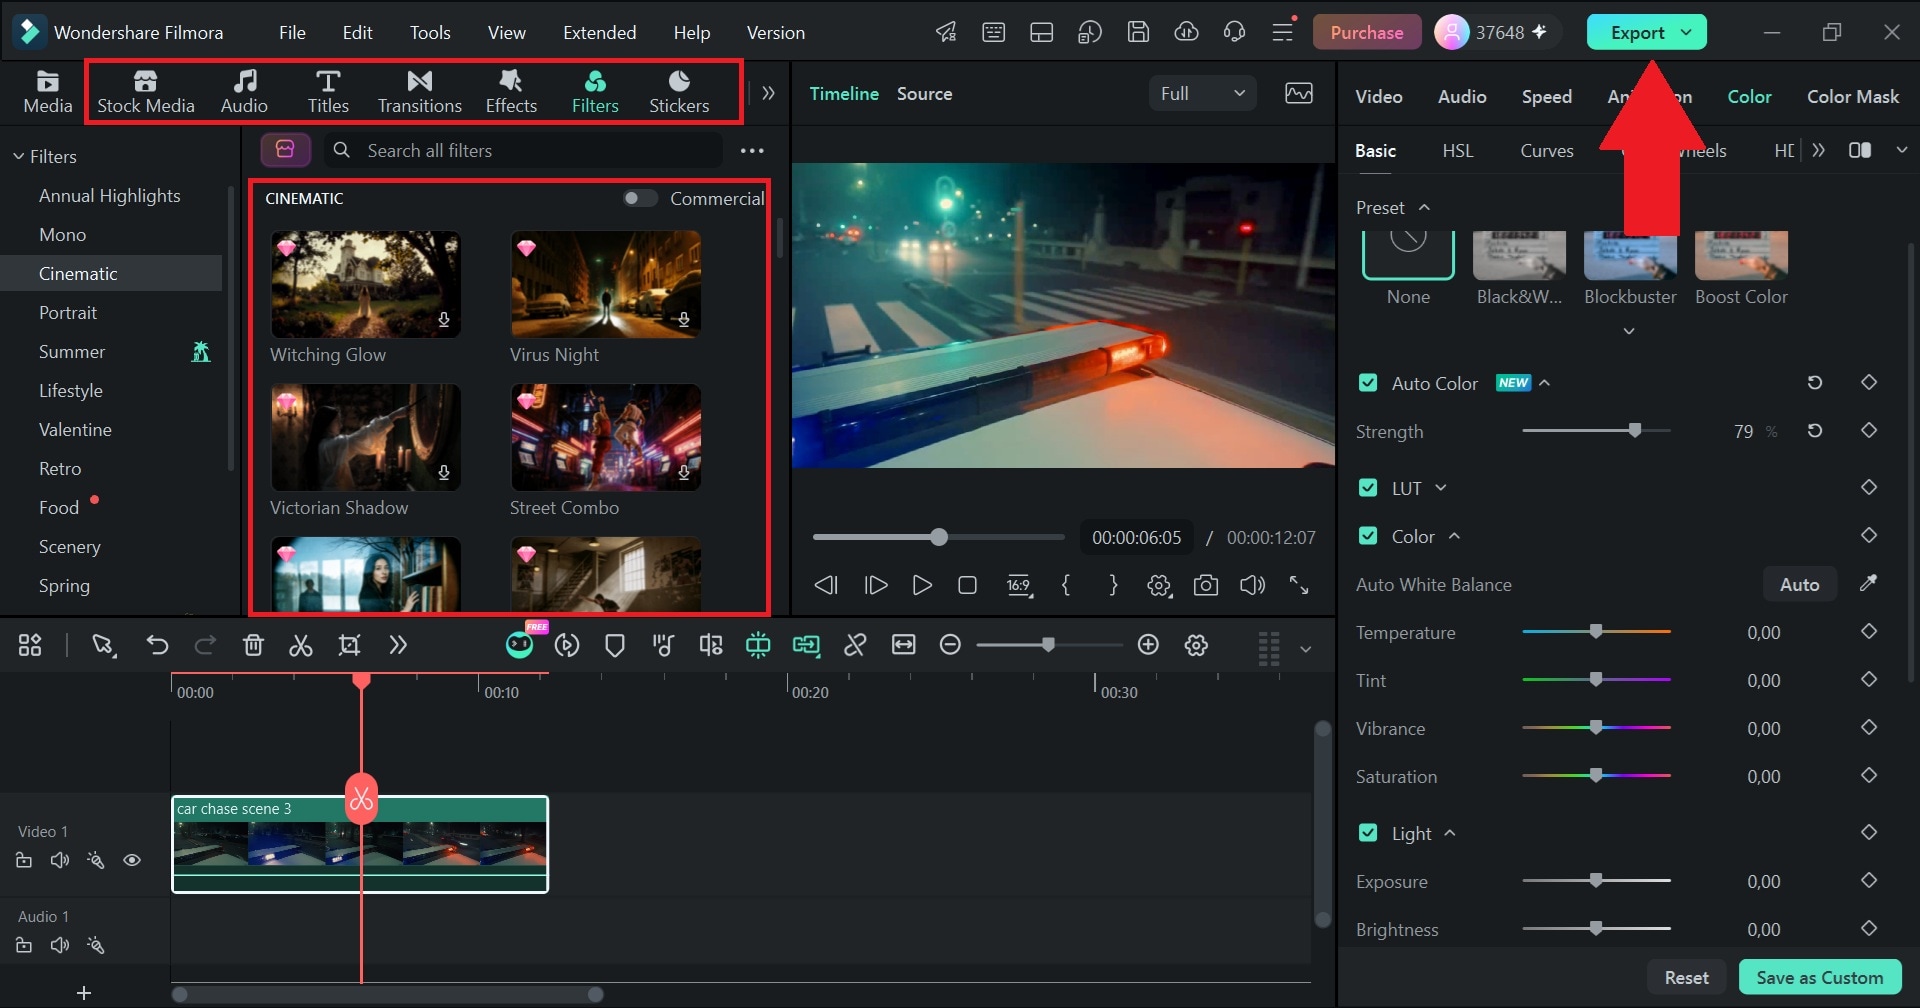
The whole process of auto color in Filmora was designed to be simple enough that you could use it on your very first project, even if you've never corrected a video's color in your life. Follow the simple steps below to learn how to use the Auto Color feature in Filmora:
 Secure Download
Bonus: More Ways to Improve Video Colors in Filmora
As you can see, the Auto Color feature in Filmora is a fantastic option when you need an instant automatic color correction. Even better, it's not the only trick Filmora has up its sleeve. If you're ready to go beyond a quick correction and actually get creative, here's where to look next:
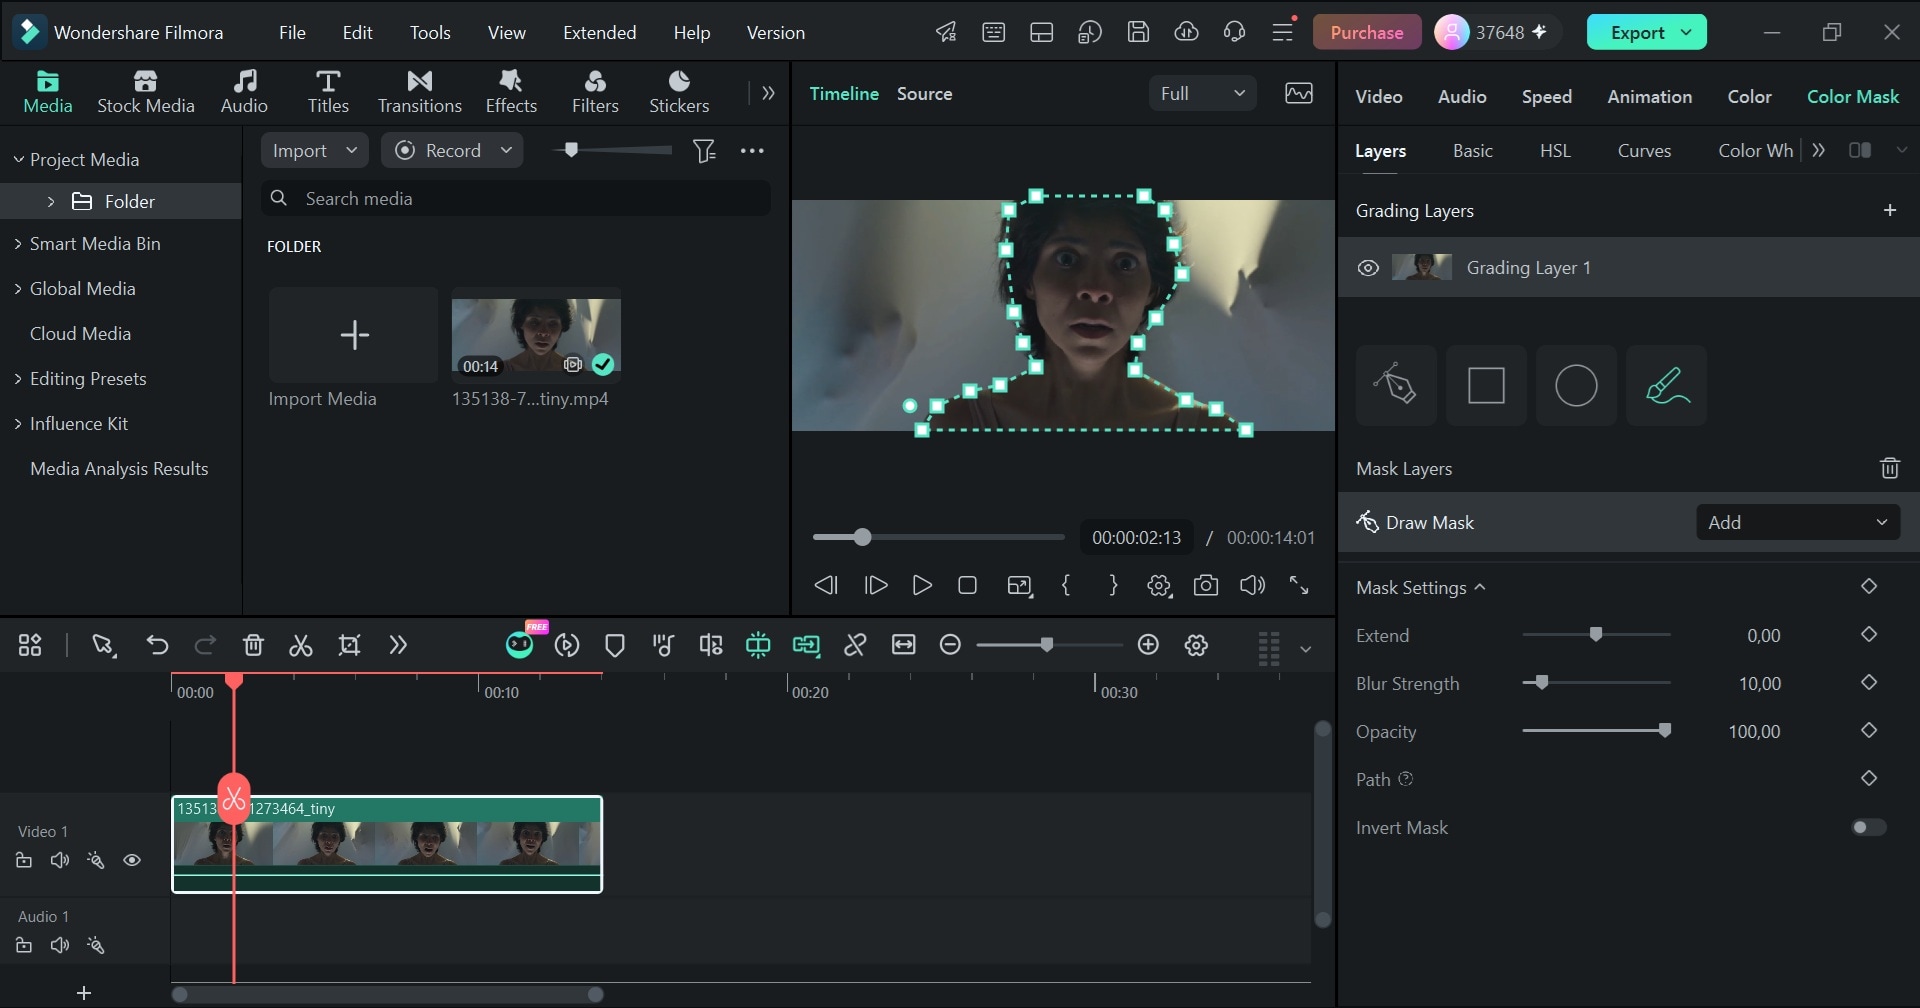
1. Color Mask: Change Just the Part You Want
Sometimes changing the whole frame is the wrong approach. Luckily, Filmora now also supports mask-based color adjustments, so you can work on a particular part of the frame instead of applying the same correction everywhere.
2. AI Color Palette: Match a Look You Already Like
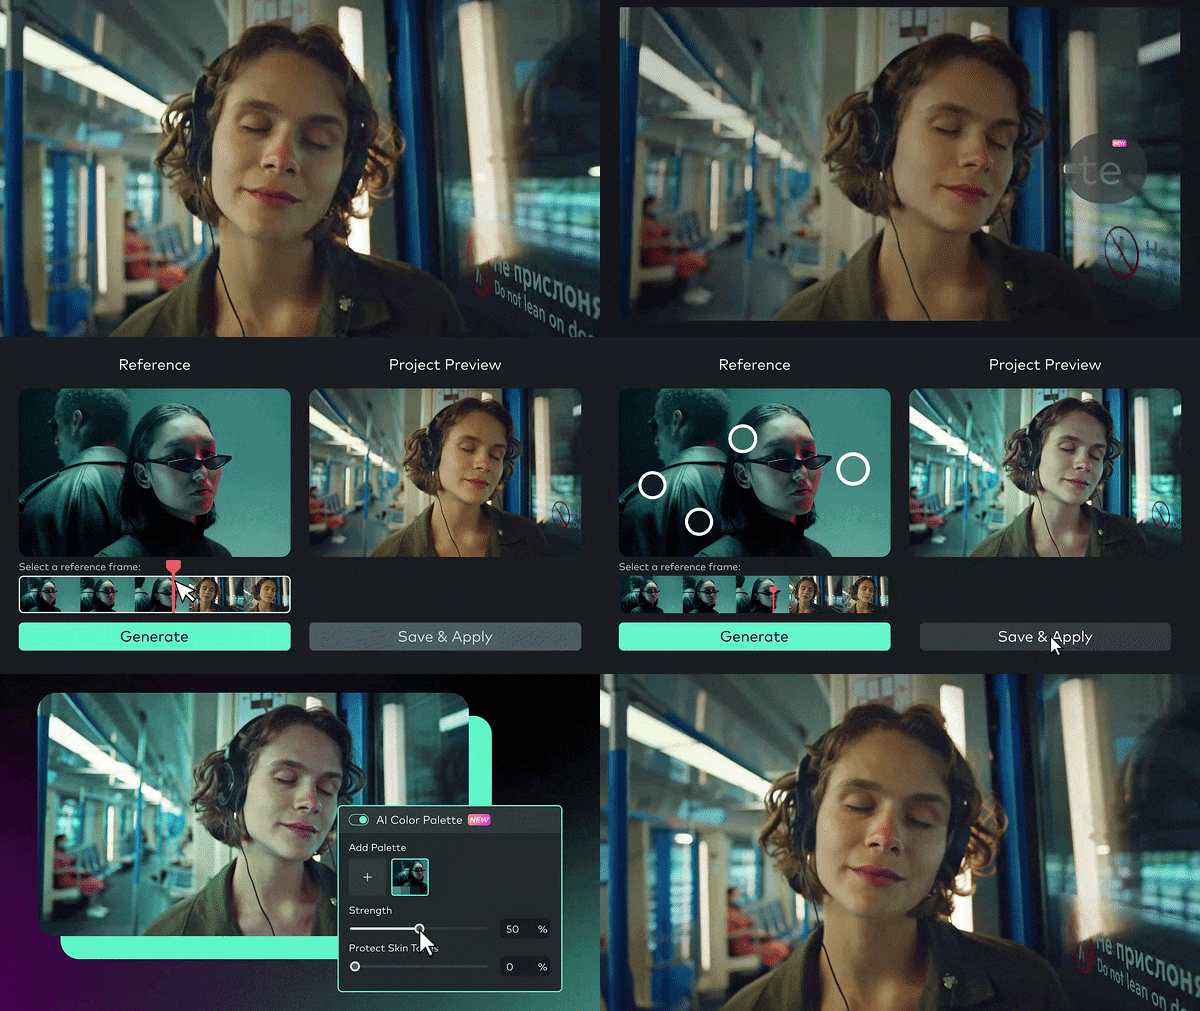
Filmora's AI Color Palette can extract colors from a reference image or video and apply the resulting palette to your footage. You can also adjust the strength of the match, which gives you more room to decide how noticeable the effect should be.
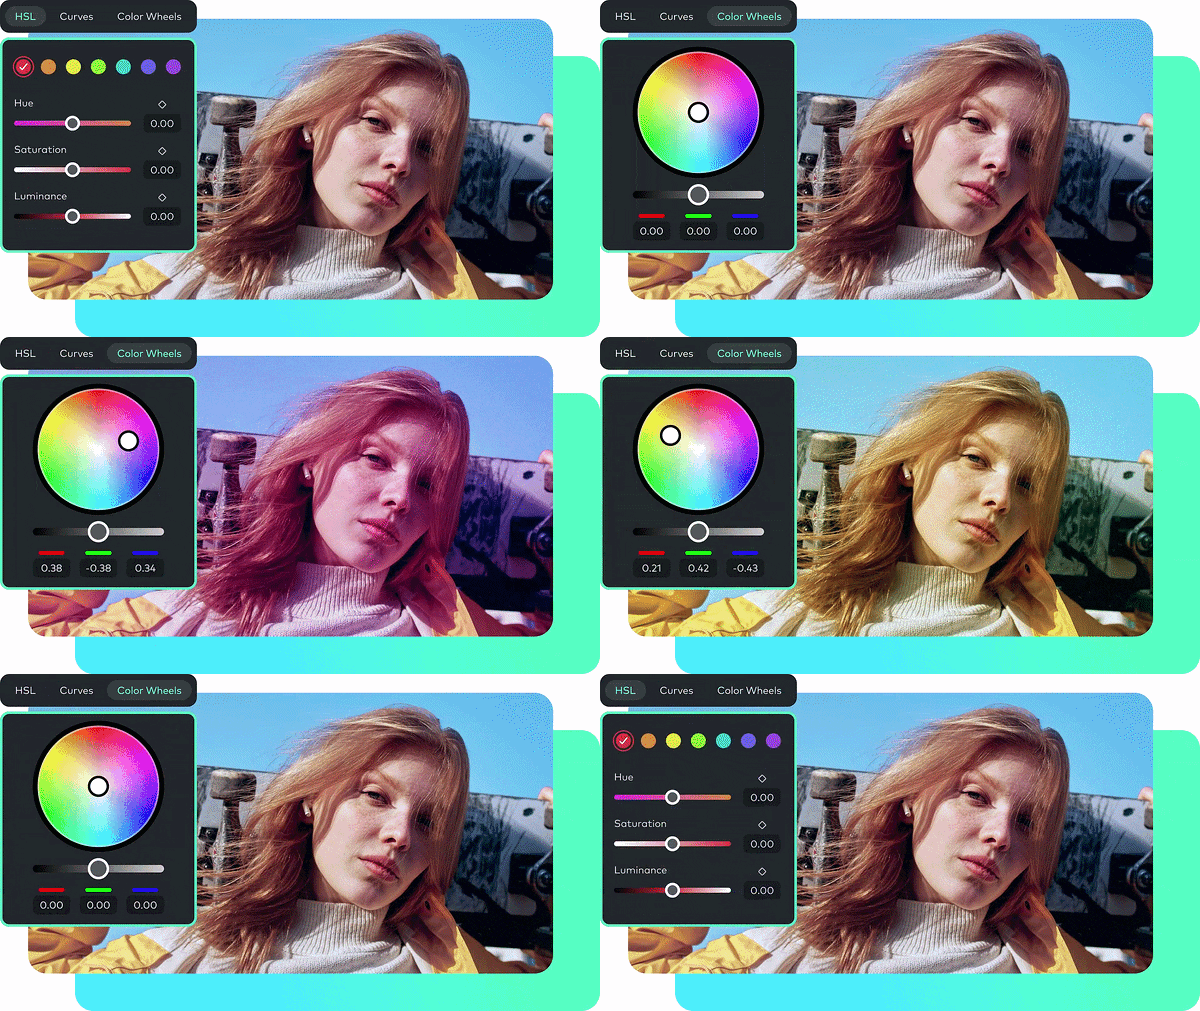
3. Manual Color Adjustments: When You Want Full Control
Filmora also gives you manual controls for adjusting things such as brightness, contrast, saturation, temperature, tint, HSL, curves, and 3D LUTs. This is the route to take when you want to fine-tune a particular color or build a more deliberate look rather than auto color grading for your video.
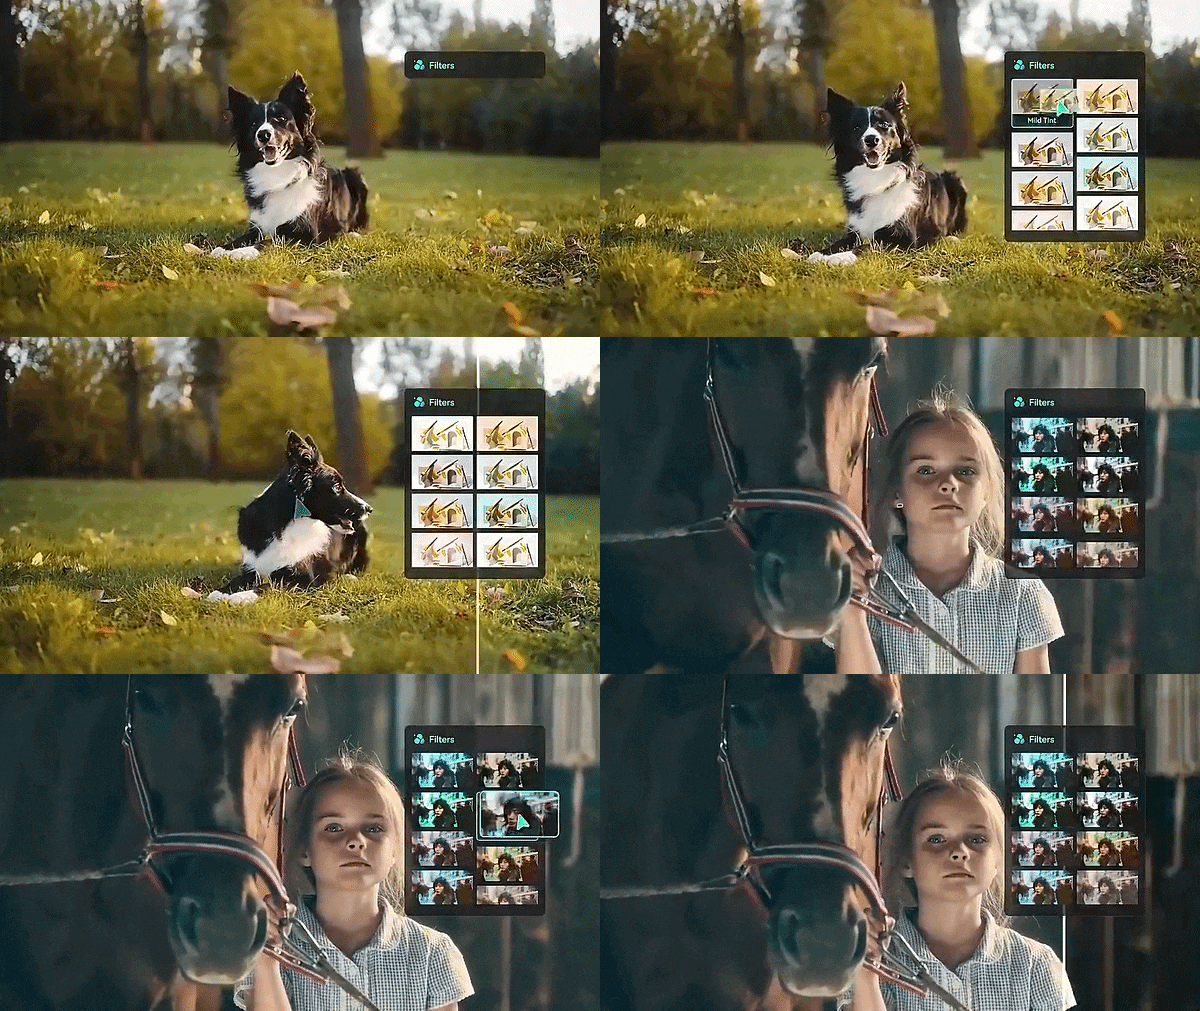
4. Preset Filters: Give a Clip a New Look Quickly
Not every video needs a detailed color grade. If you're making a quick social post or want to test different visual styles, Filmora's preset filters offer a faster way to change the overall appearance of a clip. On top of that, Filmora also provides LUT-based options for more specific looks.
Conclusion
Tools designed to auto color correct video footage give you a massive shortcut, turning raw, washed-out clips into clear, vibrant videos with minimal effort. Auto Color won't replace true color grading when you're chasing a specific cinematic look, but as a fast, reliable way to fix dark, flat, or off-toned footage, it genuinely delivers.
If you want to try it yourself, Wondershare Filmora makes the whole process approachable. With its intuitive Auto Color feature, full intensity controls, and massive creative toolkit, you can produce clean, cinematic videos with ease. One click gets your footage looking clean, and from there, the creative side is entirely up to you.
FAQs
-
Can I apply Auto Color to multiple clips on the Filmora timeline at the same time?
Auto Color itself is applied per clip, but that doesn't mean you're stuck repeating every step manually. Once you land on settings you like, save them as a preset, then drop that same preset onto every other clip that needs the same fix.
-
Does using Auto Color lower the original export resolution or quality of my video?
Nope. Auto Color is a color adjustment, not a re-encode or compression step, so it doesn't touch your resolution or overall quality. What actually determines your final quality is whatever export settings (resolution, bitrate, format) you choose when you render the video.
-
Does Auto Color work on every type of video?
It works across standard clips on the Filmora timeline regardless of format, so most everyday footage is fair game. However, if you shoot in hyper-specialized raw Log formats (like Sony S-Log or Canon C-Log), you will usually want to apply a basic conversion LUT first so the Auto Color tool can accurately evaluate your scene's exposure.
