


 100% Security Verified | No Subscription Required | No Malware

Videos are sometimes sideways or upside-down when shot on a phone or camera. That's why searches like vlc rotate video, flip video on VLC, or "orientation fixes" are so common.
VLC Media Player is free and very light. It can rotate and flip a video, but the tools are limited if you want permanent fixes or more advanced edits. Often, rotating a clip is not enough. After rotation, many users also need to cut, crop, stabilize, or adjust colors to make the video look right.
This guide explains how to rotate video in VLC player, flip or mirror clips, and save changes. Then, we will also introduce a desktop editor alternative that offers a complete workflow for rotation and creative editing.
In this article
Part 1. How to Rotate/Flip a Video in VLC Media Player on Windows and Mac
VLC Media Player is not just a multimedia player. It can convert files, stream stuff online, and rotate your clips. A lot of users want to know how to rotate video in the VLC player, and among all the options available, the good news is that it is easy! You can rotate by preset angles, set a custom degree, or flip for mirror effects.
1. How to Rotate a Video in VLC on Windows
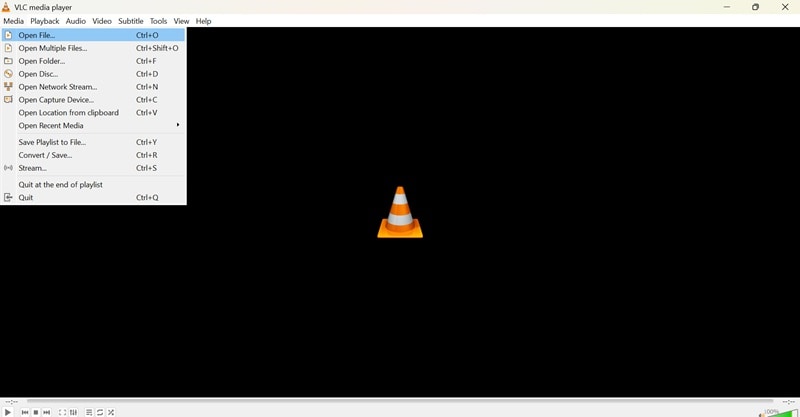
Step1Open VLC Media Player on your Windows PC. Click Media > Open File and find your video.
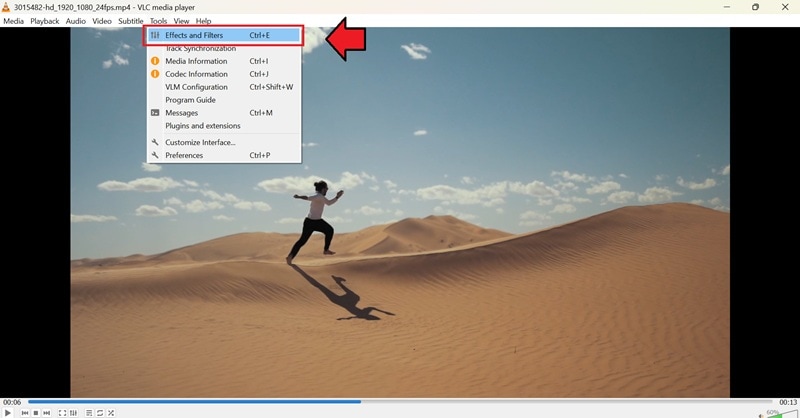
Step2Press Tools > Effects and Filters.
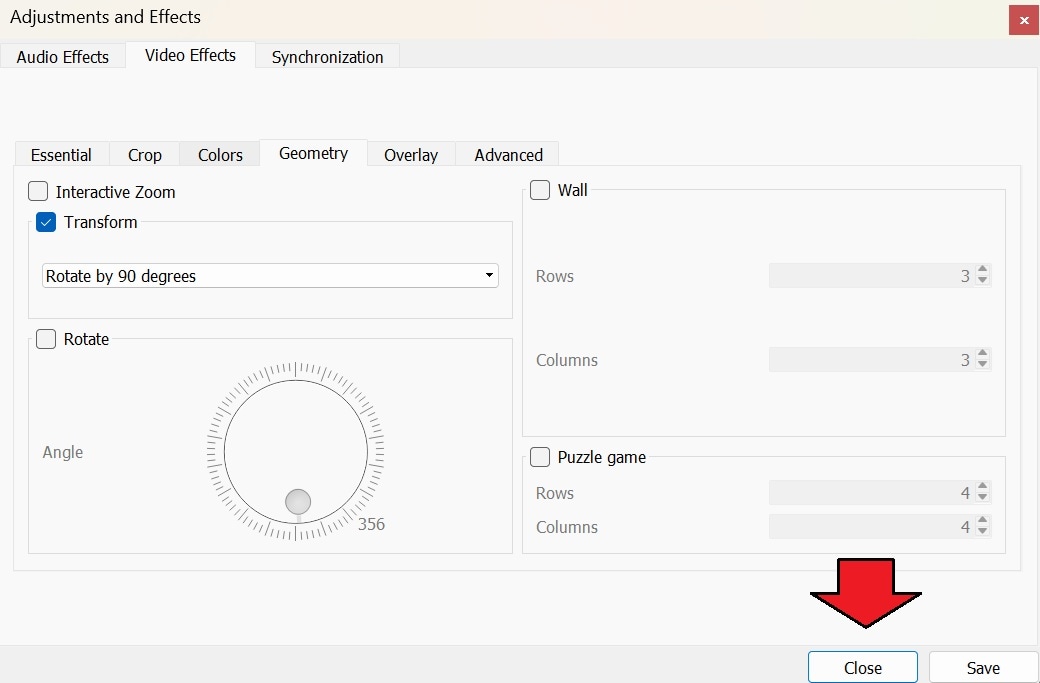
Step3Open the Video Effects tab and select Geometry from the drop-down window. From there, you can flip your video in different ways, depending on your goal.
1. Rotate by Fixed Angles
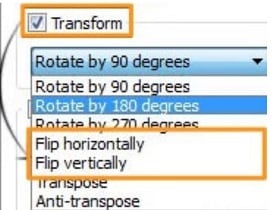
From the dropdown, choose Rotate 90°, 180°, or 270°. This is the simplest way to fix a sideways video.

2. Flip Horizontally or Vertically
The same menu also lets you flip a video in VLC. Pick Flip Horizontally to mirror left-to-right, or Flip Vertically to turn it upside down.
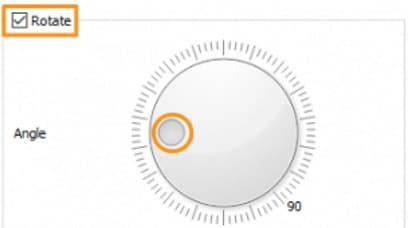
3. Rotate by a Custom Angle
For more control, tick the Rotate box instead. Use the round dial to set any degree you like. This lets you adjust clips by angles such as 15° or 45° for precise correction.
Step4After rotating your video in VLC, just click Close if you don’t want to save the changes. The rotation will only apply while the video is playing in VLC, and your original file will stay the same.
If you click Save, the settings will remain. Every time you open a video in VLC, it will automatically play back with that rotation. To disable it, you will need to go back to the Geometry settings and disable the Rotate/Transform option.
How to Save the Rotated Video Permanently
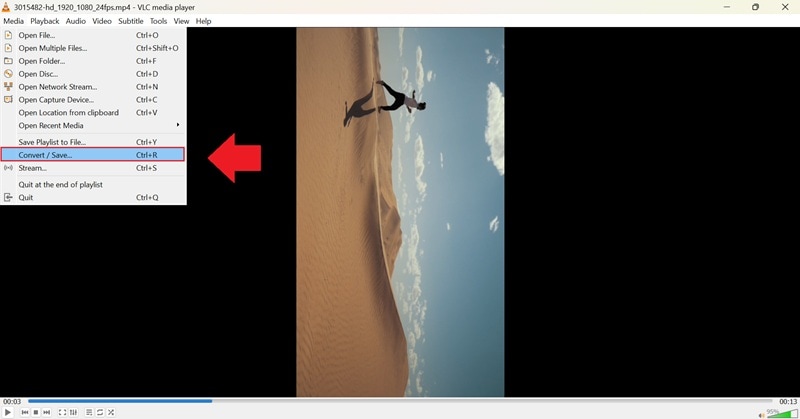
Step1Click Media > Convert/Save.
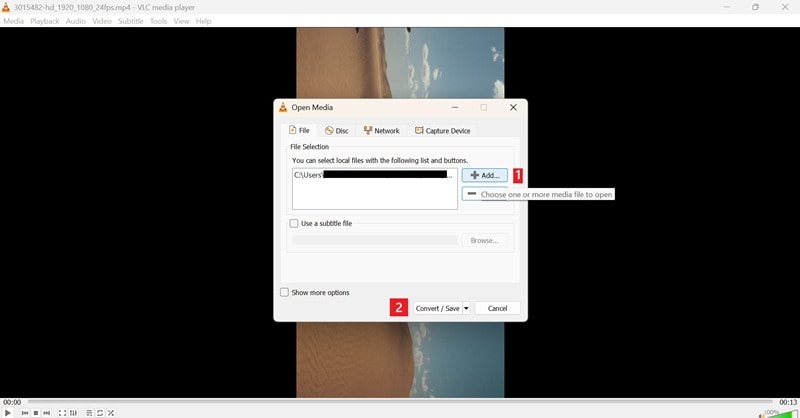
Step2Click “Add” and select the video file. Then select Convert/Save again.
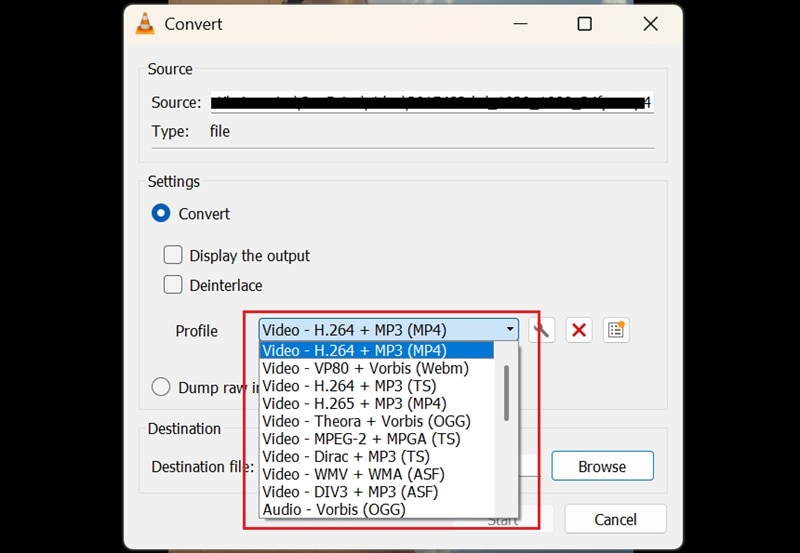
Step3From here, choose the profile settings you prefer (e.g., Video - H.264 + MP3 (MP4)).
Step4Then, click the wrench icon to open the Profile Edition window. Select Video Codec > Filters and enable Video Transformation Filter (or Rotate Video Filter). Confirm by clicking Save.

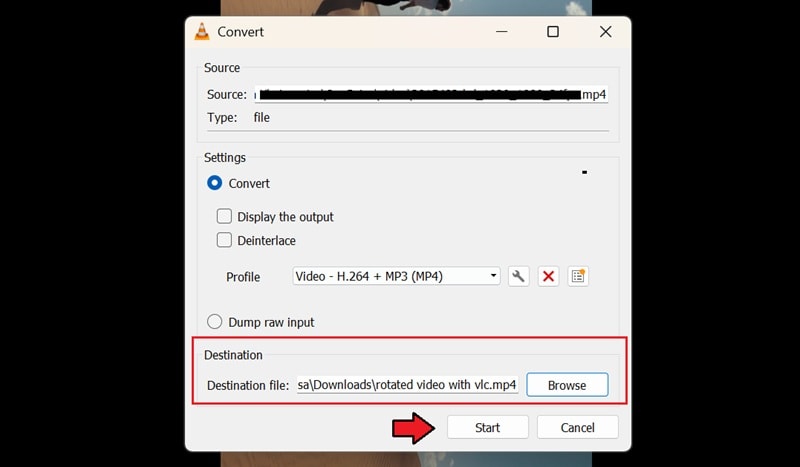
Step5Back in the Convert screen, hit Browse to set the destination folder and file name. Click start to begin the conversion and save your rotated video as a new file.
2. How to Rotate a Video in VLC on Mac
The Mac version works in a similar way but has a slightly different layout.
Step1Open VLC Media Player on Mac. Go to File > Open File and load the video.
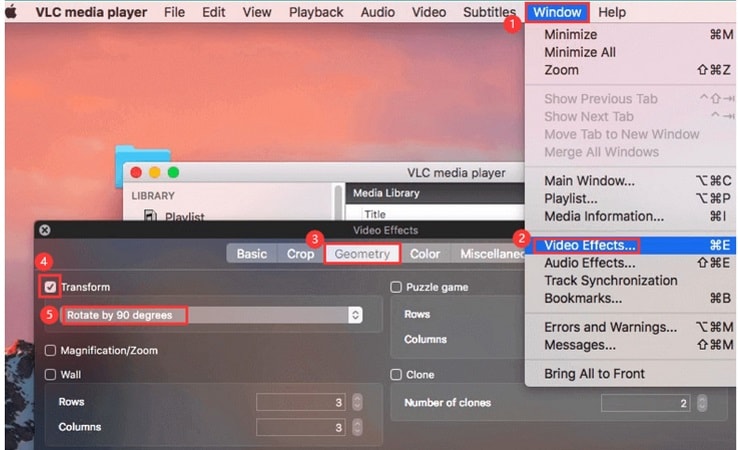
Step2From the main menu, select Window > Video Effects.
Step3In the pop-up, click the Geometry tab. Check the Transform box and type your preferred angle. You can choose 90°, 180°, or 270°. You will also find the options to flip your video if needed.
Limitations of Rotating in VLC
While VLC is free and versatile, rotation tools have clear limits:
- Rotation is temporary unless re-encoded (extra steps needed).
- No live preview when adjusting angles.
- No editing beyond rotation (no trimming, cropping, or stabilization).
- Not ideal for batch rotation or larger projects.
This is why many users look for a complete solution beyond just VLC video flip.
Part 2. A Complete Desktop Workflow for Rotation and Editing Videos
Rotating or flipping a clip in VLC can fix quick orientation issues. But it is not enough for many. A video after rotating will usually need some time trimming, cropping, stabilizing, or scaling.
If you need more than rotation, like flipping, mirroring, and total post-production control, a desktop video editor is clearly your better option. Wondershare Filmora is one of the best tools for this.
You can also use Filmora to rotate video and export it easily, even if you are using Mac. Filmora is available for download on Windows and macOS.
Why Opt for Filmora to Rotate and Flip Your Videos
Filmora is built to help creators work smarter, not harder. It goes beyond simple playback fixes and gives you both basic and advanced editing features in one place. Here's why it stands out:
- Precise Rotation & Flip: Rotate or flip videos with a single click. Enter an exact degree for perfect alignment or use quick preset angles. You can also mirror clips instantly.
- Complete Editing Tools: Besides rotation, you can crop, trim, or split your videos easily. You can also color-correct, add LUTs, and stabilize shaky footage.
- Advanced Features: Make your video look as pro as possible by using tools like keyframing, speed ramping, and motion tracking to turn out an even more polished video.
- AI-Powered Editing: There are more than 30 tools that can help automate work. Auto highlight, smart cutouts, and AI stickers are just a few editing options available to quickly and creatively create with Filmora.
- Creative Enhancements: Select from over 200+ effects from animated titles and video transitions, to animated article effects and doodle animation to make your rotated videos slick and more engaging.
- Flexible Exporting: Multiple format support and export options make sure your video is ready to share with the world.
- Preset Aspect Ratios: Plug-and-play for YouTube, TikTok, or Instagram, with built-in ratios including 16:9, 9:16, 4:5, and 1:1. This ensures rotated or mirrored videos look perfect everywhere.
How to Rotate Videos in Wondershare Filmora
Step1Launch the Filmora Video Editor
Begin by opening the Filmora application on your computer and creating a project. Drop your video files into the editor and drag it to the timeline.
Step2Rotate Your Clip Around
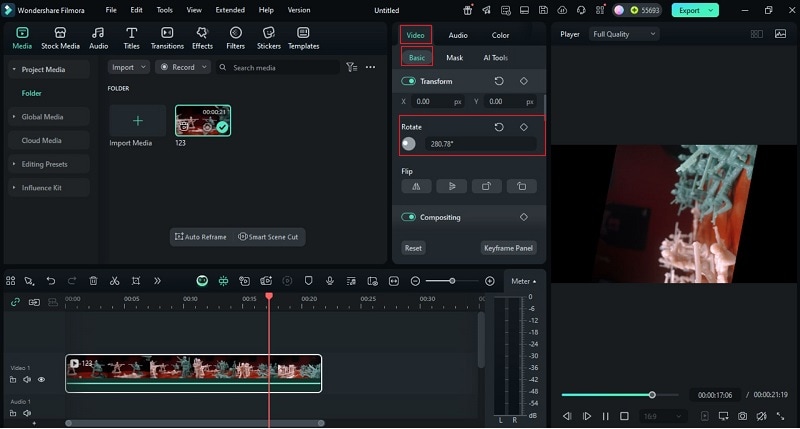
Select your clip on the timeline and navigate to Video > Basic, and enable the Transform option. In the Rotate section, type in the angle you want, such as 90, 180, or 270 degrees, to match the rotation you need.
You can also use the rotation buttons to quickly turn it left or right.
Step3Export the File
When the video looks right, save it by exporting in your preferred format.
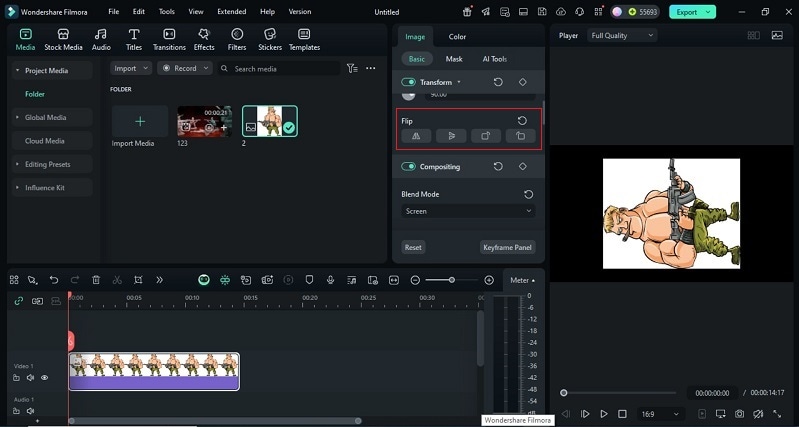
How to Flip Videos in Wondershare Filmora
Flipping a video uses the same Transform settings.
Step1Pick and Flip the Video
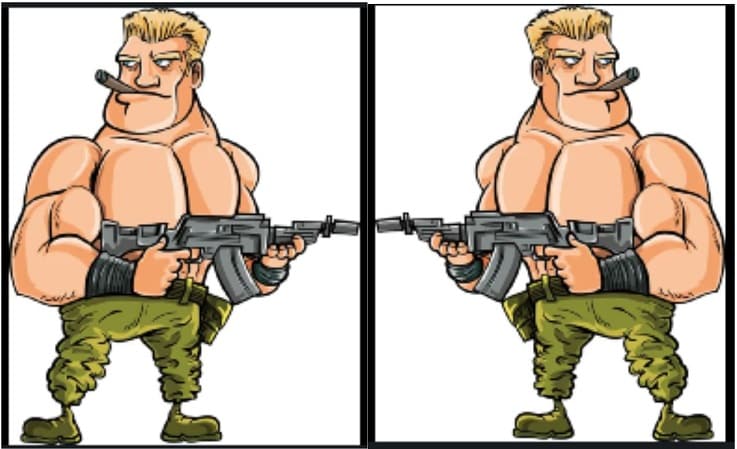
Click the video on the timeline so its editing tools appear. In the Flip section, choose Horizontal to mirror the video from side to side or Vertical to turn it upside down.
Step2Save the Video
When finished, export the flipped version in the format you want.
Part 3. Extra Tips for Perfectly Oriented Videos
So after you've rotated and flipped your videos with Filmora, what's next? You will now need to tweak them to make your clips look not just the right way, but also great.
- Crop after rotation: Sometimes rotation leaves black borders; use crop to fix.
- Stabilize shaky videos: Filmora includes a stabilization tool.
- Use Auto Reframe: Perfect for social media formats (portrait, square).
- Color correction: Adjust brightness and tones after flipping.
- Batch editing: Rotate or flip multiple clips at once.
Conclusion
Correcting orientation is often the first step in making a video watchable. VLC Media Player is free and does the job when you need a quick VLC rotate video or a simple flip. Still, many videos need more than the basic tools inside Rotate Video in VLC Media Player. Cropping, stabilizing, color correction, and reframing often come next.
Filmora provides that extended workflow. It combines the rotation with full creative editing so your end video will look real, balanced and professional. What you end up with isn't just a corrected angle, it's a finished piece ready to be shared with whatever audience you have.
