
 100% Security Verified | No Subscription Required | No Malware


 ChatGPT
 Perplexity
 Gemini
 Claude
 Grok
Grok
Videos that have a distinct visual appeal get the most views on different social media platforms. For example, if your transitions feel flat or outdated, your audience will scroll away before the good part even starts. While there are different ways to hold attention, one of the best options is to integrate a paper rip transition.
Many content creators use the paper transition due to the dynamic way it helps usher in the next scene while keeping them hooked. The paper transition looks just like a page being ripped open, and it is one of the boldest, most eye-catching ways to reveal your next clip. It is taking over TikTok, Reels, and YouTube Shorts.
In this guide, we will show you exactly how to start using paper tear transitions in your edits. You will find out how the effect works, where to get it, and how to apply it step by step. So, if you are making a vlog, aesthetic reel, or journal-style edit, this is the transition your content needs right now. Keep reading.

In this article
Part 1: Paper Rip Transition: The Visual And Audio Effect
The paper rip transition is a popular video effect that looks like you’re tearing one scene to reveal another. Just like ripping a sheet of paper in half, this effect mimics a real paper tear, showing jagged edges as one scene rips away and another appears.
Visually, it starts with a tear line and rough edge, revealing the next frame. Audibly, it comes with a ripping sound that makes the transition feel even more real and satisfying. This transition is all over TikTok, Instagram Reels, and aesthetic edits on YouTube. It’s perfect for:
- Journaling videos
- Scrapbooking edits
- Personal vlogs
- Aesthetic montages
- Storytelling or memory-based content
Part 2: Top Software For Paper Tear Transitions
So, where can you find the paper rip transitions? Wondershare Filmora stands out as one of the most flexible video editors for creators, with one of the slickest and most realistic paper rip transition effects. Filmora includes built-in paper-torn transition templates, layered timelines, masking tools, and support for custom overlays, making it a great choice for aesthetic edits, vlogs, journaling videos, and digital scrapbooks.
Some features include
- Blending modes to integrate paper overlays into footage.
- Sound effect libraries that include tear, scratch, and crumple sound to match visuals.
- Color grading presets that enhance vintage or handmade aesthetics.
- Chroma key support, in case your tear overlays have green screen backgrounds.
- Frame-by-frame previewing, so you can fine-tune every moment of the transition.
Together, these features make Filmora not just a convenient option but a powerful tool for anyone looking to master creative, paper-styled transitions without needing advanced editing experience.
Here are examples of built-in paper tear transition templates in Filmora:
Built-in Paper Rip Transition Sample 1

Built-in Paper Tear Transition Sample 2
Built-in Paper Rip Transition Sample 3

Built-in Paper Tear Transition Sample 4

Built-in Paper Torn Transition Sample 5

It also supports 4K/8K editing and 120 fps clips. That means your ripped paper transition looks smooth even at high quality.
 secure download

2 Easy Ways to Add Paper Torn Transitions Using Filmora
Below are 2 ways to add paper-torn transitions using Filmora. Each method gives your video a distinct style, from pre-made speed to handcrafted flair.
Option 1: Use Built-In Transitions
Filmora's built-in paper rip transitions are perfect if you want quick results without any manual adjustments. However, you can tweak the duration and style to fit your video.
Option 2: Import a Ripped Paper Overlay (PNG/MP4)
You can download or design ripped paper overlay clips, either as transparent PNGs or animated MP4s, and layer them over your footage. You place it over your video to create a textured, realistic tear effect.
There is another method, but it is the most advanced and most customizable method. This method requires expert editing expertise, uses masks and keyframes snd requires careful timing and precision. However, it allows for complete control over the shape, speed, and direction of the paper tear.
Part 3: How to Add a Paper Rip Transition to Your Videos (Step-by-Step)

Adding paper rip transitions to your video using Filmora is straightforward, especially if you are using the built-in templates. Use any of these methods to add built-in paper transitions to your videos.
Method 1: Built-in Paper Tear Transition
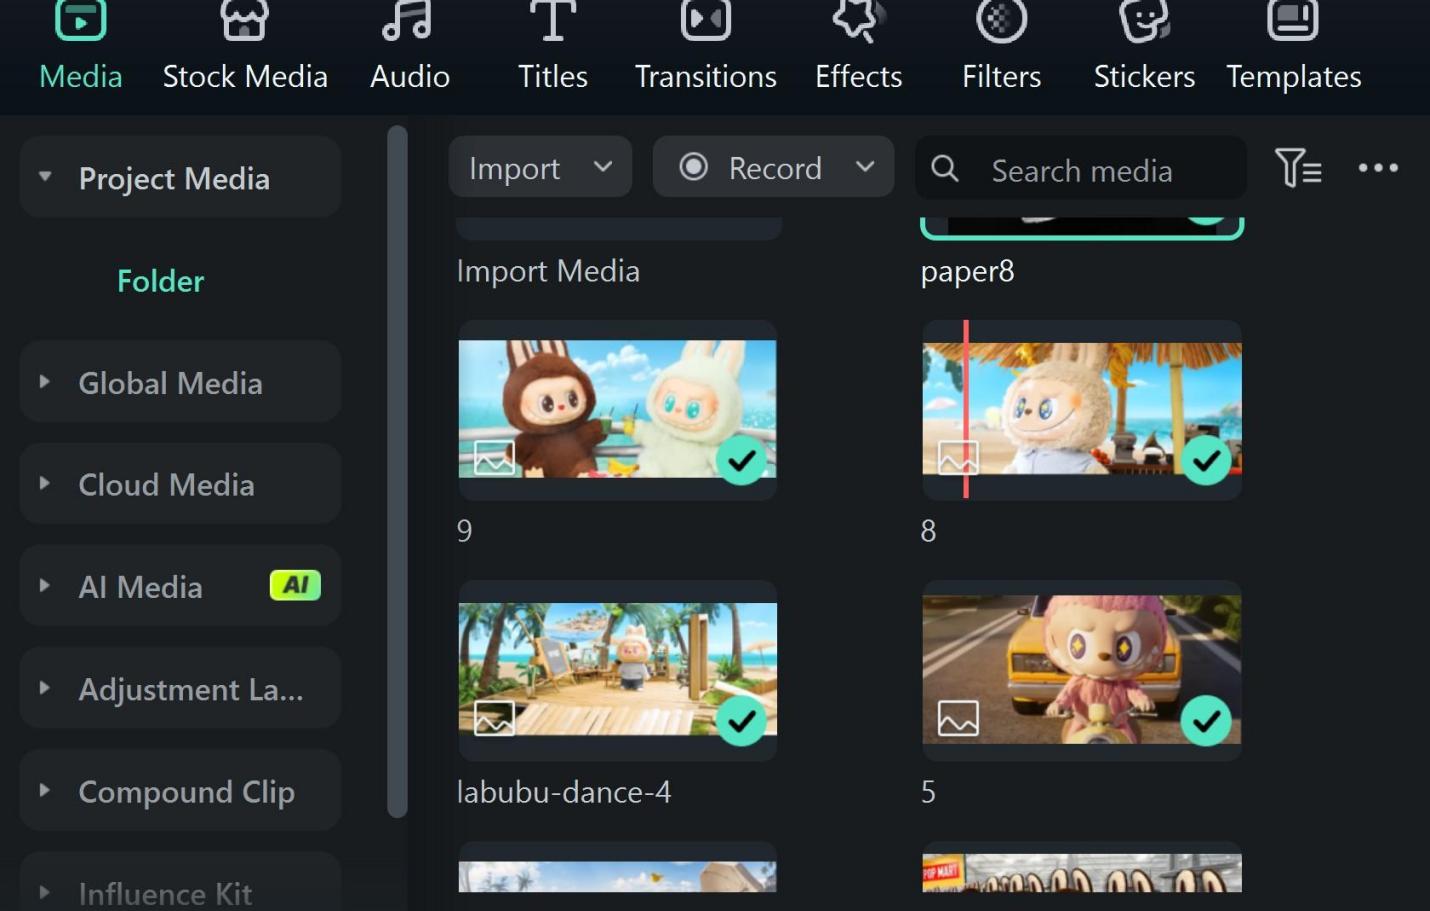
Step 1: Launch the Filmora software
- Import your clips into Filmora’s media library.
- Drag them onto the timeline side by side.
 secure download
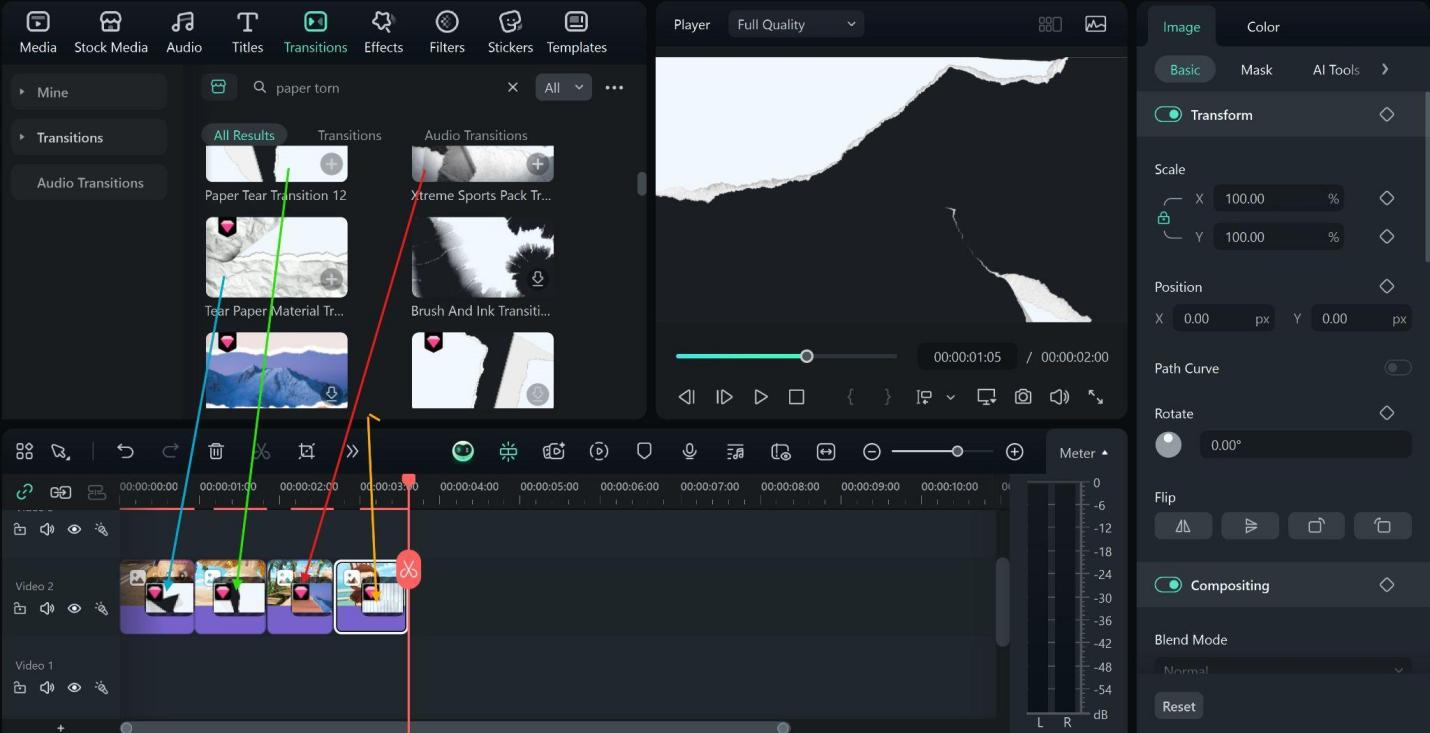
 Step 2: Open the Transitions tab and type “Torn Paper Transition” to locate the different templates.
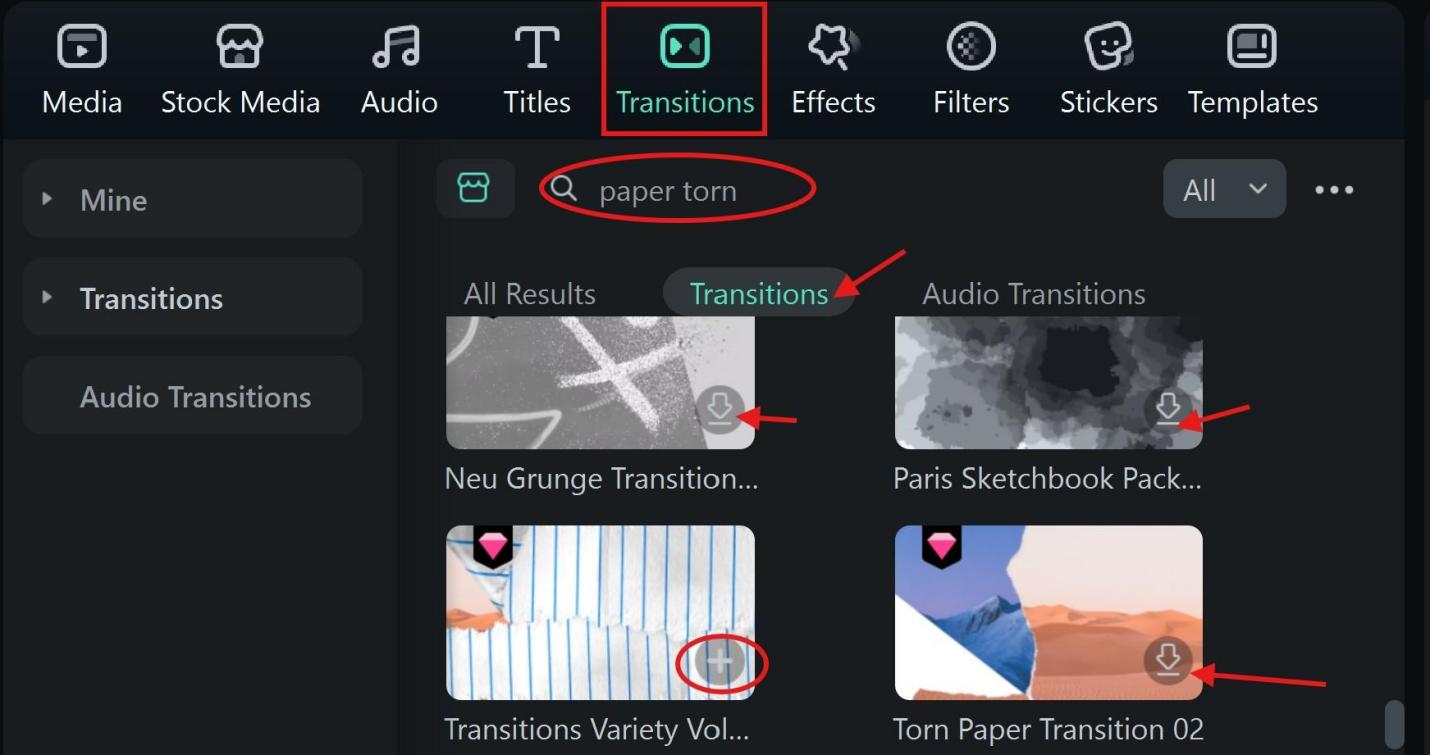
Step 3: Choose your ideal paper tear transition, click to download, import, and place between your clips.
- Double-click it to adjust duration and style. You’ll see the ripped paper transition flow smoothly.
- You can add more videos, but you will need to import an adjoining transition template just as we did in the image below.
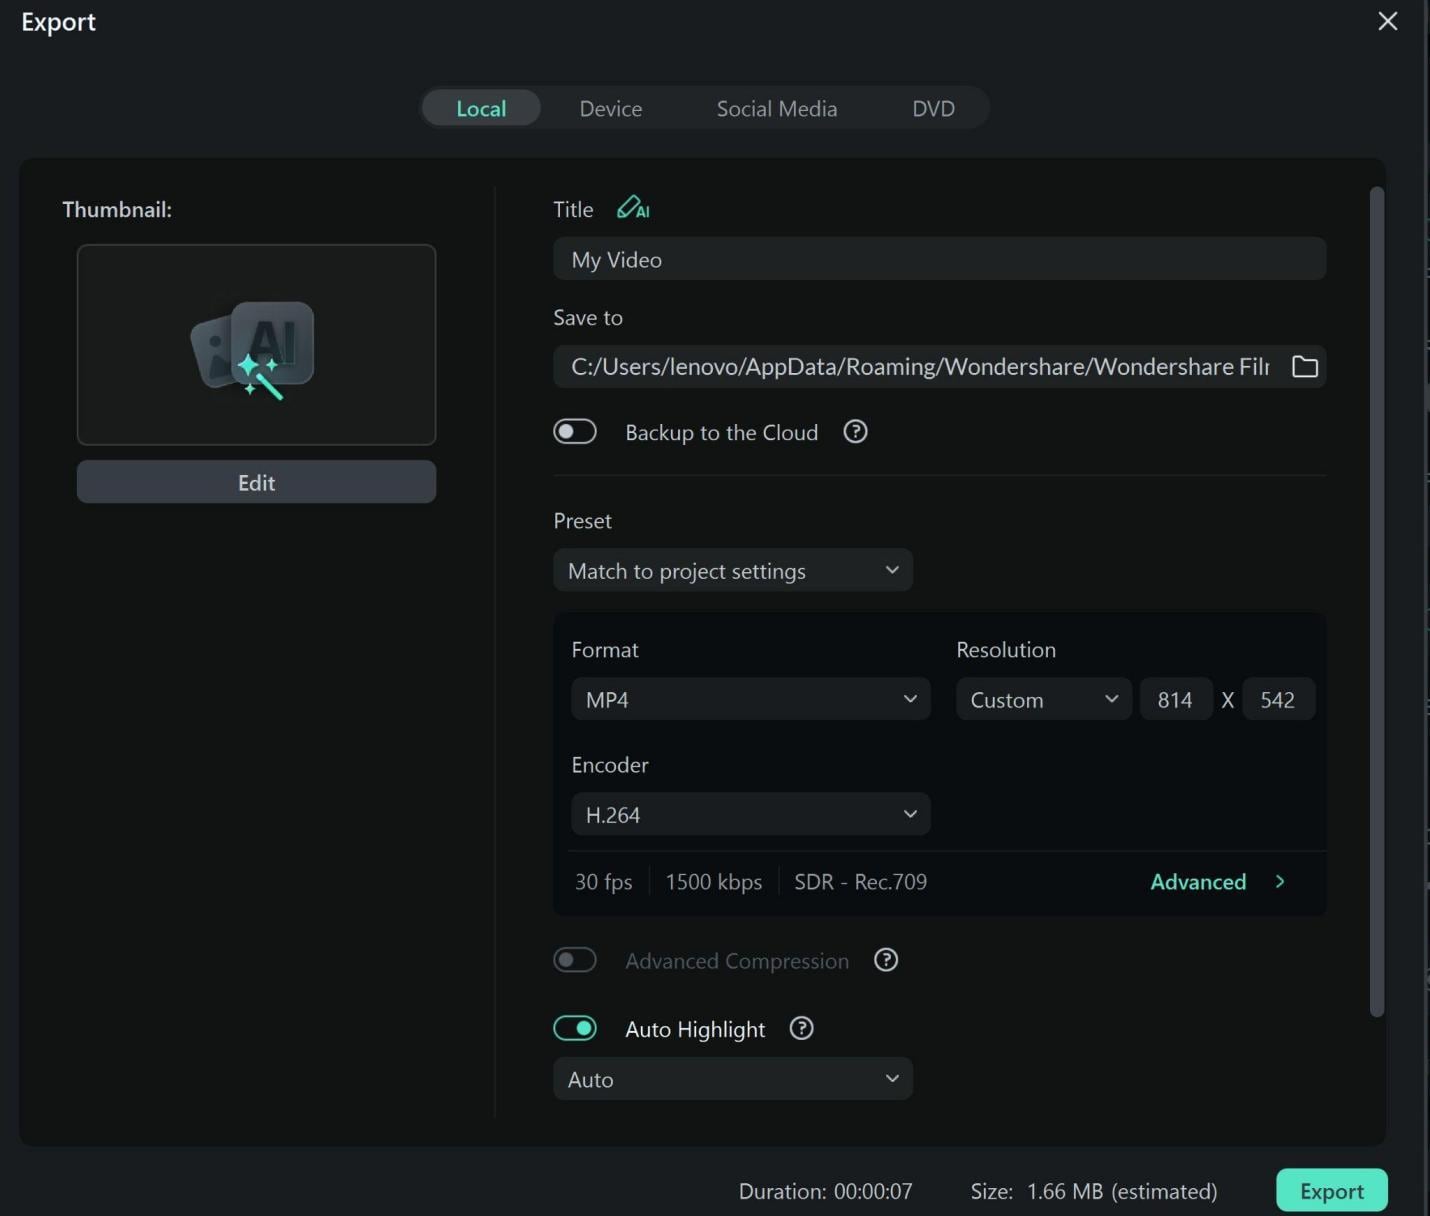
Step 4: Export and Save.
Preview of the Above Steps
Method 2: Overlay Import For Paper Rip Transition
Step 1: Download a rip overlay PNG or MP4 from free stock media sites like Vectors .

Step 2: Import your clips into the timeline.
- Import your video clips, and the downloaded paper rip transition clip.
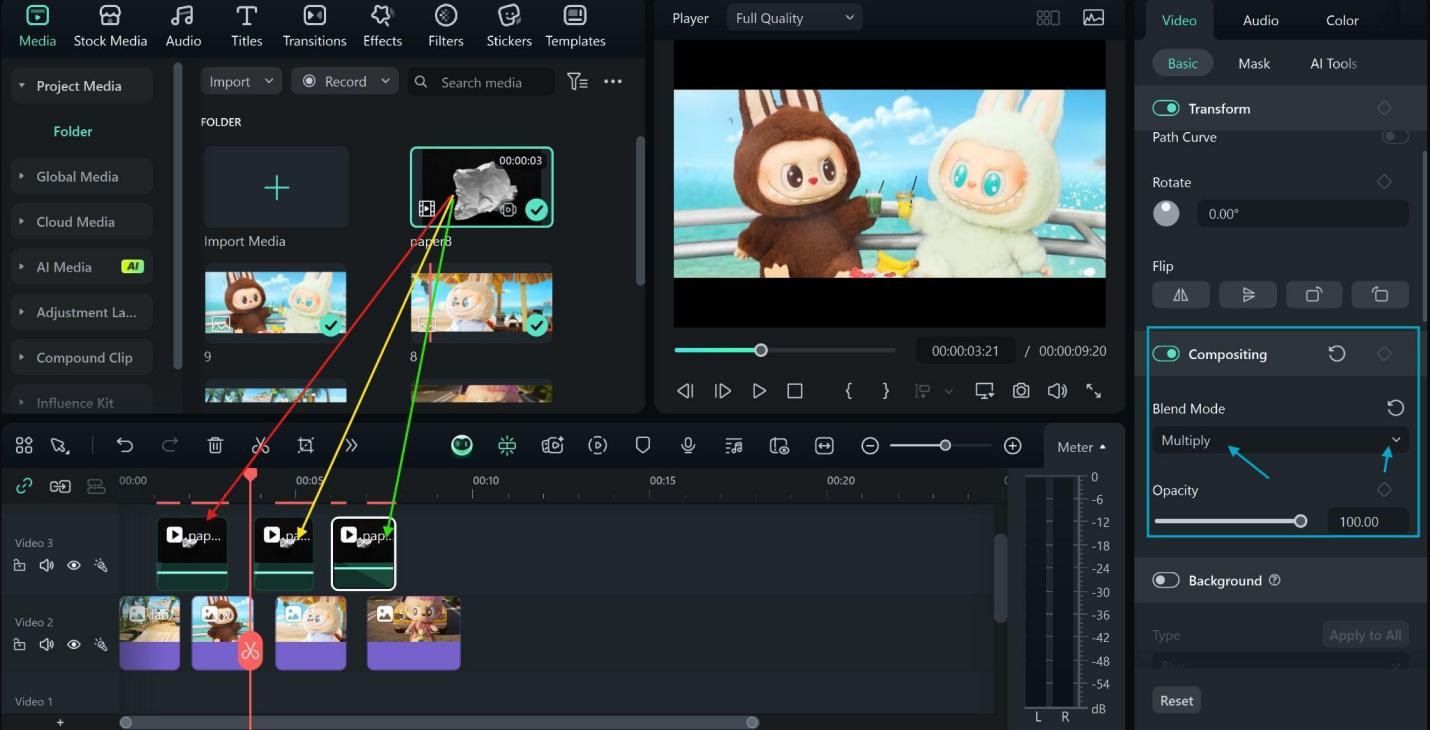
Step 3: Add overlay clips and composite.
- Place the downloaded transition as an overlay clip above your initial clips.
- Select the overlay, go to Compositing on the editor panel, and change the blend mode to “Multiply.”
- Trim overlay to match tear timing.
- Preview and export your video.
Preview of the above example

Conclusion
Now that you’ve seen how the paper rip transition combines raw visuals and sound to grab attention, it’s clear why it’s a favorite online. Filmora makes it even easier with built-in paper tear templates, smart overlays, and masking tools, all ready to match any editing style.
With several ripped paper transitions in Filmora’s template library, you can drag and drop the perfect rip effect straight into your video in seconds. With regular updates on its AI tools, advanced keyframing, and full 4K/8K support, your edits won’t just look modern; they’ll feel premium.
secure download 