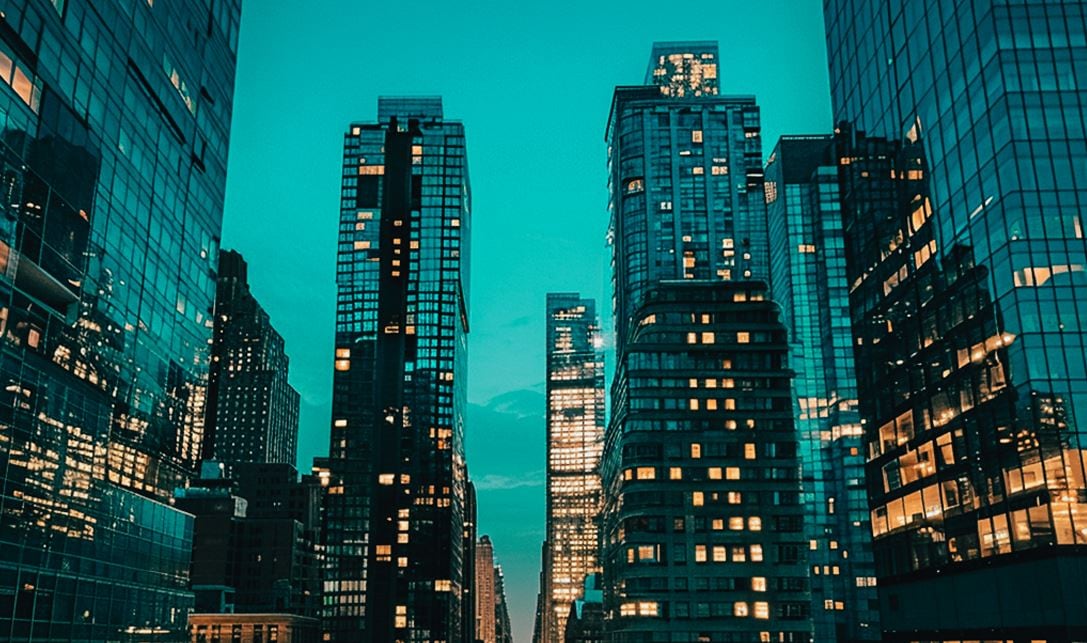
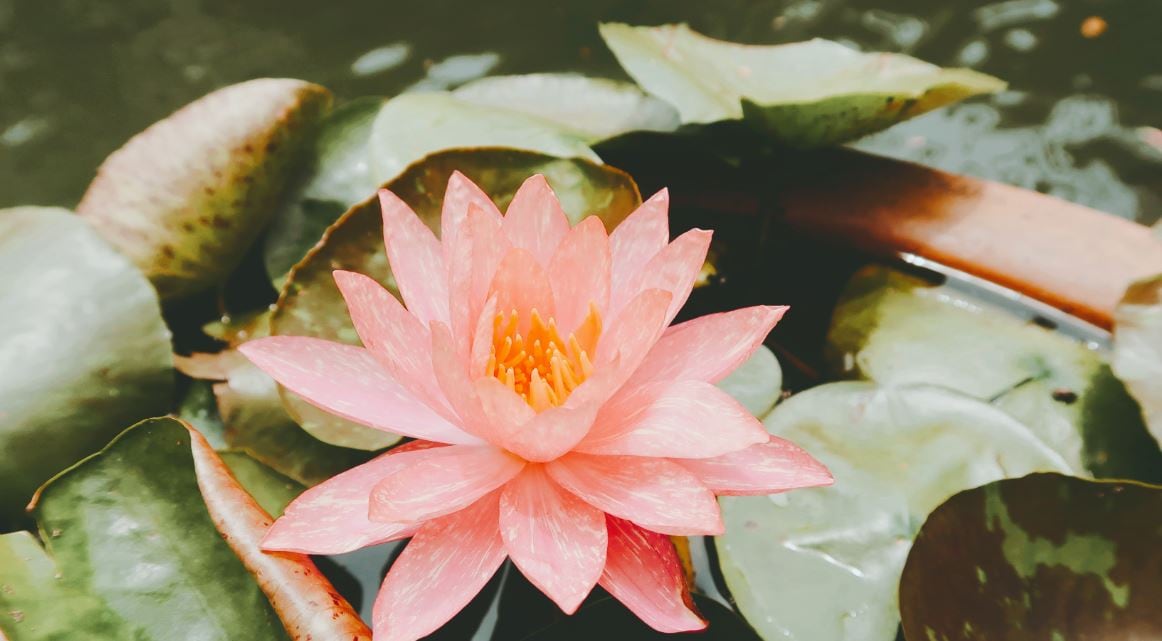
Teal and orange are among the most common options when it comes to video color grading. Content creators and filmmakers consider this combination for its striking contrast and cinematic attributes. Sure. You may edit the color settings manually until you achieve the perfect blend for teal and orange. However, this process may take a while to complete. If you want to finish quickly and maintain your preferred quality, you may apply a ready-made teal and orange filter. Yes. All it takes is a click or two to transform your clips into stunning video content. Don’t worry. Wondershare Filmora offers a huge library of resources that you can access and explore until you find your desired filter.
In this article, we will delve into the best teal and orange filter selections in Wondershare Filmora. We will also provide a short guide on how to apply one. Lastly, we will talk about the orange and teal Lightroom preset in case you wish to explore it, too. Continue reading below to learn more.
Part 1. 10 Stunning Teal and Orange Filter Selections of Wondershare Filmora
Wondershare Filmora can indeed help you achieve a cinematic look for your video using a teal and orange filter. It offers various options that suit specific themes and categories. Do you want to give it a try? If that is so, then go over the list written below. Check out each provided option and find the one that perfectly matches your needs in this regard.
1
Teal Orange
The first on the list is Teal Orange. It has modified midtones and shadows leaning toward teal, while highlights and skin tones are warmed to achieve a glowing orange tint. Great when you want to slightly brighten and saturate your footage.
2
Light Teal
Light Teal keeps warm highlights and subtle teal shadows but dials back contrast and vibrance for a more dramatic, nostalgic, retro vibe.
3
London Riverside
An intense teal–orange grade with boosted contrast and clarity to amplify details. Skin tones are warmed while shadows are tinted pure teal—ideal for adding depth.
4
Urban Shine
Perfect for low-light scenes, nightlife, or cityscapes. Features elevated contrast, clarity, and vibrance via HSL tweaks for a crisp, punchy look.
5
Lost in the Jungle
A variant of London Riverside with more dominant green–magenta split tones. Slightly pulled-back contrast for a cinematic, dramatic feel with greener bias.
6
Oriental Orange Green
A velvet teal–orange look with intense contrast and lifted highlights for a clear, professional finish. HSL distribution shifts toward teal and orange.
7
Cinnamon Red
Highlights lean orange–brown for a reddish cast, while shadows tilt teal–blue. Saturation is restrained; contrast is boosted—great for dramatic, moody projects.
8
Green Field
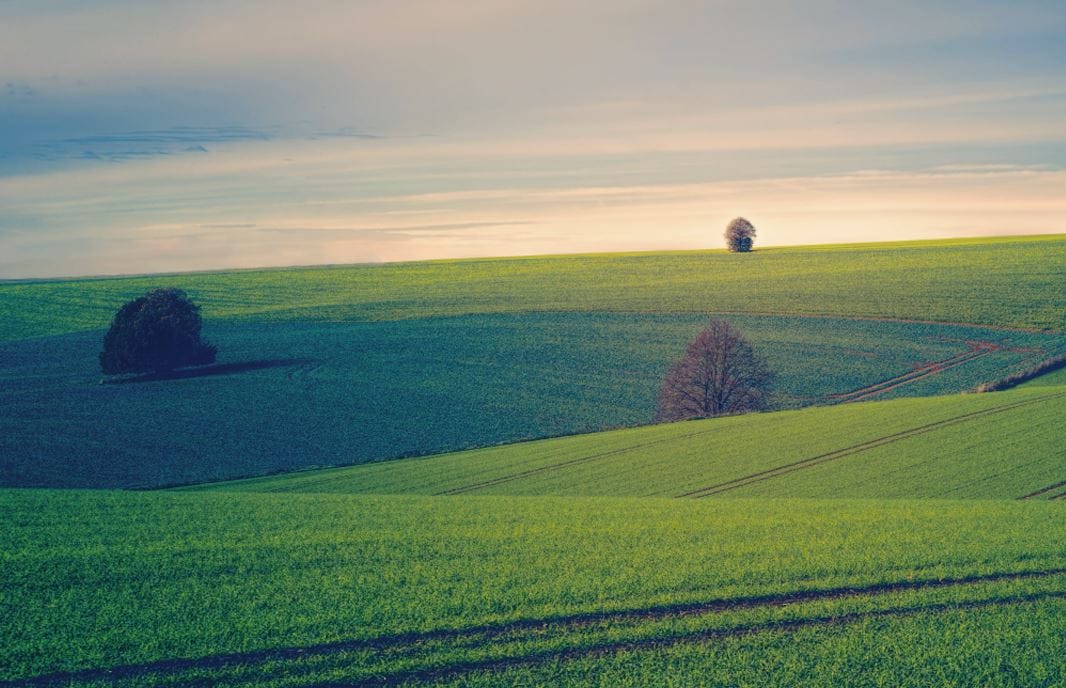
A mild teal–orange treatment. Highlights lean orange; shadows, teal. Reduced midtone contrast gives a cinematic appeal without heavy color manipulation.
9
Green Orange
Vintage-style with warm temperature and reduced saturation. Velvet teal shadows and sun-faded orange highlights—ideal for bright content needing a gentle tone-down.
10
Sage
A greenish overlay with very low contrast. Warm, saturated temperature boosts orange vibrance; muted highlights and flattened midtones add a surreal atmosphere.
Part 2. How to Add a Teal and Orange Filter to Videos Using Wondershare Filmora
Filmora’s library makes picking a teal and orange look straightforward. Follow the steps below to apply and fine-tune your chosen preset.
1
Open Filmora and Find Filters
On Filmora’s main dashboard, go to the Elements panel and click Filter.
2
Browse or Search
On the left side, select a category containing teal–orange options, or search by theme/keywords to locate your preferred preset quickly.
3
Download and Add to Timeline
Preview and click the Download button to save the preset. Then drag it to the Editor Timeline for further editing.
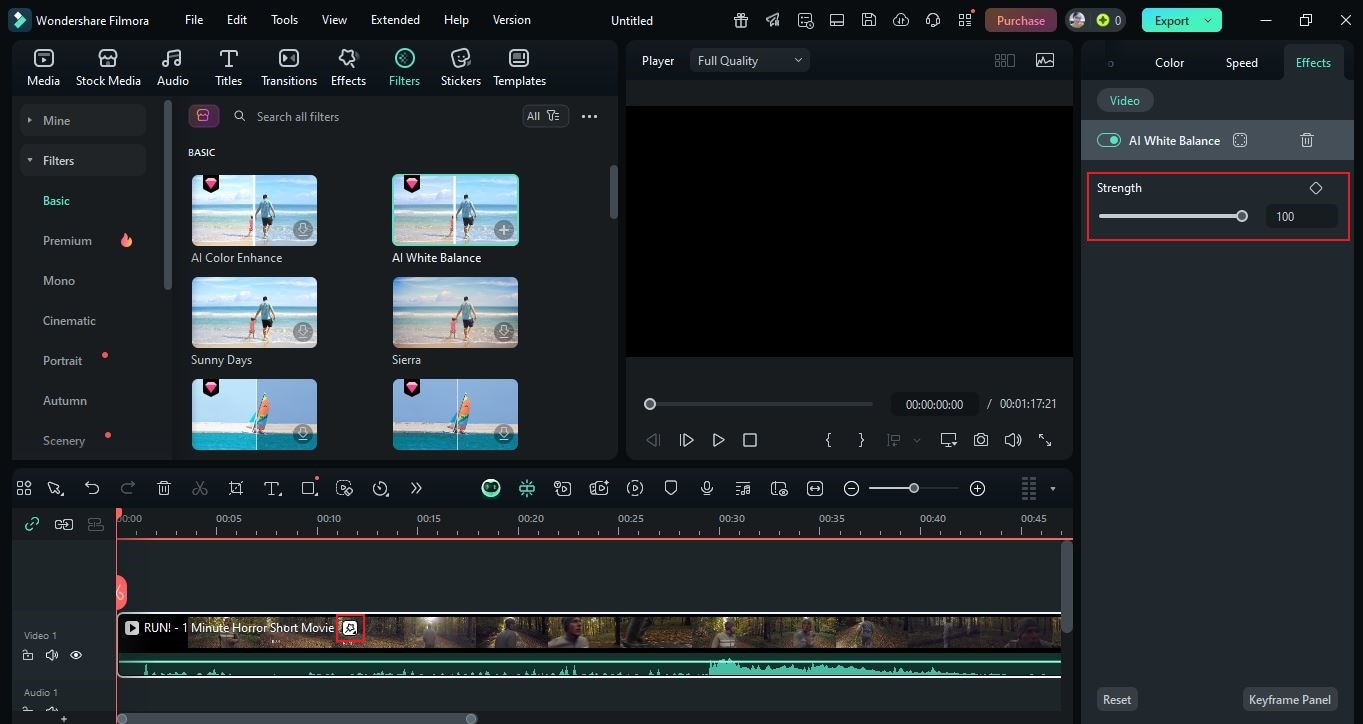
4
Apply and Customize
Drop the filter onto a specific clip or place it on a track above to cover a larger range. Select the filter on the timeline and adjust options in the right panel—move the Strength slider or input an exact value.
5
Review and Export
Play back to confirm the look. If satisfied, click Export above the Preview Panel, set Resolution, Aspect Ratio, and other settings, then click Export again to render and save.
Part 3. Should You Try the Orange and Teal Lightroom Preset?
Apart from Filmora, Adobe Lightroom also offers a variety of presets—including teal and orange styles—that you can apply to your content. Lightroom’s presets are stunning and can elevate your visuals, but keep in mind the platform focuses more on images and has limited options for video. If you’re working primarily on video projects, Wondershare Filmora remains the better all-in-one choice for applying teal–orange looks quickly and consistently.
Conclusion
The teal and orange filter is a powerful tool for cinematic color grading. In an instant, it can give video content a lively and professional look. Browse Filmora’s rich library to find a teal–orange style that fits your project, and consider Lightroom presets for images when needed. Ready to upgrade your content and achieve your desired cinematic feel? Download Wondershare Filmora and get started.


 100% Security Verified | No Subscription Required | No Malware


 ChatGPT
 Perplexity
 Gemini
 Claude
 Grok
Grok