100% Security Verified | No Subscription Required | No Malware


 ChatGPT
 Perplexity
 Gemini
 Claude
 Grok
Grok
Filters can make your videos look more polished and eye-catching. In this guide, you'll learn how to add video filters for iPhone and how tools like Filmora can help streamline your editing process for more professional results.
Built-in Ways To Add Filters to iPhone Videos
The iPhone is known for its simplicity. However, it still offers a way to enhance your videos without third-party apps. These built-in options can be a great starting point if you want to apply filters quickly for social media or casual content. Below are three easy ways to add filters using features already available on your iPhone.
Filters in the Photos App
You might not know that with iPhones, you can easily add filters straight after taking or shooting a video. It's often overlooked because people usually look towards editing tools to add filters to iPhone videos.
To access this, you must tap on a saved video, then hit Edit, followed by the Filters icon. You'll find a small set of filters like Vivid, Dramatic, and Noir. These change the video's color tone and lighting to suit different moods.
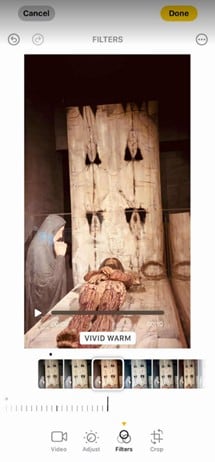
Another good thing about adding filters for iPhone videos through this method is that it gives you a real-time view of the edits. You can add a Noir filter, for example, and you'll see how it looks throughout the video right away. This is ideal for quick touch-ups, especially if you plan to post the video later on.
Filters via iMovie for iPhone
If you don't want to install anything new, iMovie is a solid pick. It's already on most iPhones and comes with 14 built-in filters. They're clean, not too flashy. It's enough to give your video a nice, polished feel or a more cinematic vibe.
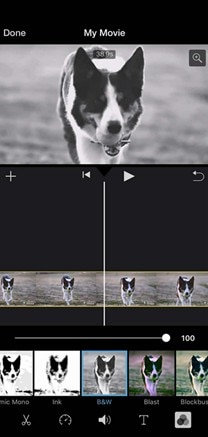
It's also really easy to use. Just drag a filter onto your clip, see how it looks immediately, and then tap a few buttons to export. Similarly, this built-in iPhone tool is great for quick edits, primarily if you aim for that Instagram look with more controls over the video.
Filmora for iOS: Basic to Advanced Filters and Video Editing
iPhone's built-in tools are fine for quick edits, but a dedicated app can do so much more if you make videos often or like editing on your phone. Filmora for iOS gives you more control and helps you work on more complicated projects. And, of course, it also has beauty filters for iPhone videos.
Filmora is simple to use, packed with features, and available on iPhone and desktop. But this section will stick to what the mobile version can do. It's built for editing on the go, so there is no need to open your laptop.
Everything runs smoothly, even on smaller screens. The interface is clean and easy to navigate. If you want a powerful but simple editor on your phone, Filmora for iOS has you covered.
 secure download

Filters
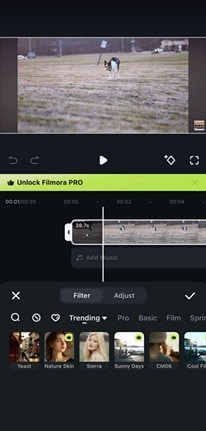
Filmora offers a broader range of video filters than the default iPhone tools. You'll find everything from soft vintage tones to bold cinematic color grading. Each filter is fully adjustable. You can then understand that it's perfect for vlogs, travel videos, and some product shots. Anything that needs an extra touch of style.
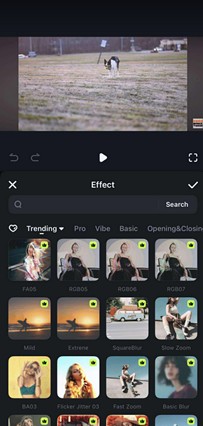
Effects
Aside from filters, Filmora also includes video effects like overlays, transitions, and motion elements. These are easy to apply with a few taps and can help add visual interest to your content. You can even combine effects and filters to create a unique editing style that fits your brand or personality.
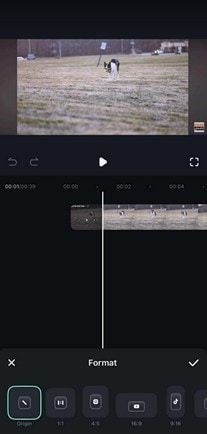
Built-in Aspect Ratio Formats
Creating content for different platforms? Filmora has you covered with built-in aspect ratio presets for Instagram (1:1), TikTok (9:16), YouTube (16:9), and more. You don't have to crop or adjust your videos manually. Just select a format, and Filmora takes care of the rest. This saves time and helps ensure your videos look their best wherever you post them.
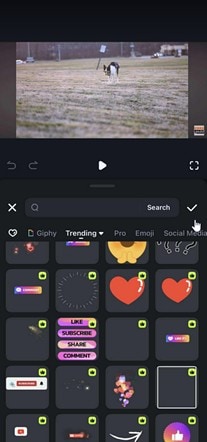
Text and Stickers
Filmora also offers a variety of text tools and stickers. Using animated text templates, you can add custom titles, subtitles, or captions. Stickers range from fun emojis to stylish icons that boost engagement or highlight certain parts of your video. These are useful when creating tutorials, announcements, or even casual clips for social media.
Full Filter Workflow for iPhone Creators
A structured editing workflow makes your videos stand out, especially when shooting with an iPhone. Follow the proper steps and use a mobile editor like Filmora to streamline your process and create polished, eye-catching content.
Here's a workflow for iPhone creators that combines built-in tools with Filmora to produce clean, professional content for Instagram, TikTok, or YouTube Shorts. It's a neat way to use filters for your iPhone videos.
Step 1: Capture Phase
How you shoot your video matters more than any filter or effect you add later. Poor original footage won't improve much in post-production. Thus, you have to make sure that the video you're editing is well-captured in the first place. There's also room for some mistakes, and the following extend on how to deal with some of them later. In the meantime, here are some tips:
- Record with good lighting: Record with the iPhone's native camera app in well-lit environments. It's a key selling factor of iPhones, so take advantage of it. Filters perform best with even natural lighting. Harsh shadows and blown-out highlights create problems during editing.
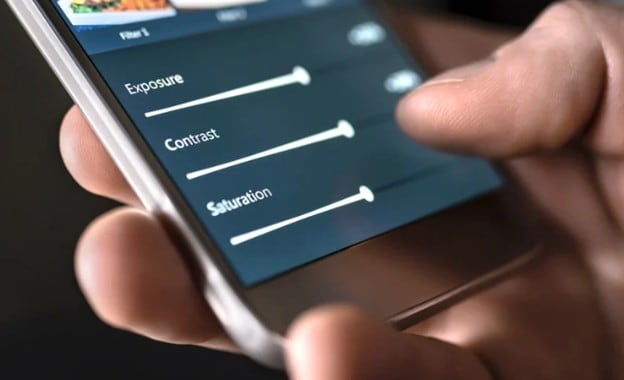
- Keep your exposure consistent throughout recording: Sudden lighting changes make filters look uneven across clips. Steady lighting gives you more options when adjusting colors.
Step 2: Edit in Filmora iOS App
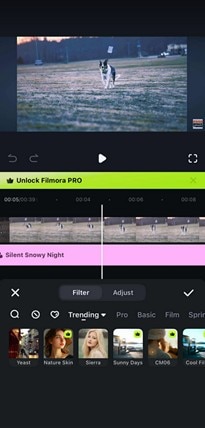
Once you've captured your footage, open the Filmora app and import your clips. This is the first step to using video filters for iPhone with Filmora.
Start by browsing the Filters library. Choose a filter that matches the tone you're going for. You can adjust the filter intensity and stack multiple filters throughout the timeline. You can also blend overlays to create a layered visual style.
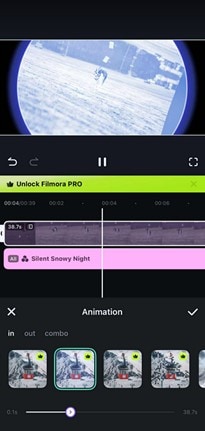
Filmora also lets you choose animations. This means that you can make some smoother visuals, add emphasis to certain actions, or add animations to the entrance of filters, making them less abrupt. It's a subtle effect that makes your edits feel more polished and dynamic.
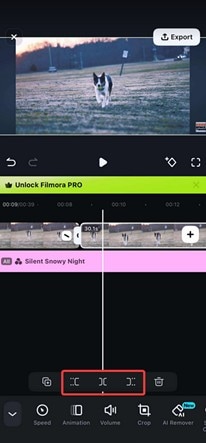
Other handy tools include crop, split, and trim, which help shape your video before you finalize your effects.
Step 3: Export and Share
After editing, it's time to export your video. Filmora lets you save in 1080p or 4K, keeping your filters and edits sharp. Choose from pre-made aspect ratio presets like 9:16 for TikTok, 1:1 for Instagram, or 16:9 for YouTube. These settings ensure your filters stay intact and your video looks correct on every platform.
Filmora also offers auto-captioning and audio tools, so you can quickly add text, sync subtitles, or trim out unwanted parts, all without affecting your filters.
Other Filmora Features You Can Use
You can also explore some other features of Filmora that you can tinker with, so much so that you'll make beautiful videos and amazing edits beyond filters.
- Music Library: Add background music from a built-in selection of royalty-free tracks.
- AI Audio Generation: Create voiceovers or narrations in seconds.
- Animations: Apply motion graphics or animated text for intros and outros.
- Masking: Blend clips or apply effects on specific areas only using mask shapes.
- AI Captions: Automatically generate subtitles from your voice track.
- Noise Reduction: Clean up background noise to improve audio clarity.
These features work smoothly alongside filters, helping you build high-quality content from start to finish. Then, you'll find it amazing that you can do all that work just with the help of your iPhone.
Conclusion
iPhones come with ways to quickly add filters to iPhone videos with built-in tools like the Photos app or even iMovie. However, these tools have limits when you want more control over your content. Filmora for iOS changes that. It offers more filters, effects, and editing tools that help you create great videos. These subtle edits can make your videos Instagram or social media-worthy.
Just make sure to put in a little effort to improve them. Adding Filmora to your workflow allows you to create videos that stand out.
secure download