
 100% Security Verified | No Subscription Required | No Malware


 ChatGPT
 Perplexity
 Gemini
 Claude
 Grok
Grok

Creating 3D text in Photoshop can help you enhance images and videos, giving them a new dimension and depth. It may seem challenging for beginners, but we'll walk you through the two most straightforward methods.
Whether making 3D text using Photoshop CS6 Extended or CC, follow along as we go through the steps to master the process quickly.
Before jumping into the 3D text Photoshop tutorial, let's see the benefits of using this raster graphics editor.
In this article
Part 1: Why Use Photoshop to Make 3D Text

The most notable reasons to make 3D text in Photoshop include:
- Non-destructive editing – Photoshop lets you create and edit individual layers without affecting the original image. That makes it perfect for adding 3D text to existing visuals because they remain unchanged while editing the text layer.
- Various layer styles – You can seamlessly customize your 3D text style in Photoshop. You can apply a color or gradient overlay, drop shadow, inner glow, texture, and other blending options to add depth to your 3D text effect.
- Extensive plugin support – Photoshop is compatible with many add-ons for streamlining designs. You can install a 3D text Photoshop plugin to add customizable effects and actions to your library. A ready-made, editable 3D text Photoshop mockup can make your work a walk in the park.
Whether you download Photoshop 3D text effects PSD files or make a custom design, Photoshop gives you creative freedom, providing many helpful tools beyond 3D text editing.
Let's see how to make 3D text in Photoshop.
Part 2: How to Make 3D Text in Photoshop
You can create 3D text in Photoshop by extruding text from a type layer or recording an action to apply specific effects. Here are the steps for each.
Method 1: Using 3D Extrusion
Extruding text from a selected type layer means turning it into a 3D layer. Here's how to make 3D letters in Photoshop using extrusion:
Step 1: Create a new Photoshop document, ensuring the Color Mode is RGB. Otherwise, you can't extrude text in Photoshop.

Step 2: Activate the Type tool and set the font and size.

Step 3: Open the Color Picker and select the text color.

Step 4: Type your (future) 3D letters in Photoshop and adjust their position using the Move tool. Then, right-click the text layer in the Layers panel.

Step 5: Click New 3D Extrusion from Selected Layer.

Step 6: Click Yes in the dialog box to switch to the 3D workspace.

Step 7: Right-click the background layer in the Layers panel and click Postcard.

Step 8: Long-press the Shift key and click both layers to select them. Then, release the Shift key and use the Ctrl + E shortcut (or Command + E on macOS) to merge the layers.

Step 9: Switch to the 3D panel and click the text layer to select it.

Step 10: Go to the Properties panel to browse Photoshop 3D styles under Shape Presets and pick your favorite.

Step 11: Return to the 3D panel and select your text layer. Then, hit the Light Bulb button at the bottom and click New Infinite Light. You can also change the material by selecting all the options under the 3D text layer (or clicking the third button at the top) and customizing them in Properties. For instance, you can create 3D metal text in Photoshop.

Step 12: Once you add a light source, adjust its direction to customize the shadows.

Step 13: Change the light source's color, intensity, and shadow softness in the Properties panel. Then, click the 3D Render button at the bottom and wait until Photoshop processes the design (it will take a while).

Step 14: Once your 3D text style in Photoshop is ready, right-click the layer in the Layers panel and click Convert to Smart Object.

Step 15: Select Essentials in the Workspace drop-down list and save your 3D text Photoshop PSD file.

Pros and Cons of Using 3D Extrusion
Method 2: Using a 3D Text Action
Another method to create 3D letters in Photoshop is to record an action. That lets you apply specific changes to multiple text layers before merging them to create a 3D effect.
An alternative is to get a 3D text action Photoshop free download. Many sites offer editable templates with multiple mockup designs, saving time and effort.
Here's how to create a 3D text action in Photoshop to turn letters into 3D:
Step 1: Create a new Photoshop document with preferred specifications (keep RGB as the Color Mode).

Step 2: Double-click the background layer to rename it for better organization. You can name it Top Layer to follow along better as we go through the steps.

Step 3: Activate the Type tool and choose the desired font. Adjust its size, style, and color, and type your text.

Step 4: Right-click the Top Layer and click Convert to Smart Object.

Step 5: Go to Layer > Duplicate Layer or hit Ctrl + J (or Command + J on macOS). Then, move the copy below the Top Layer and rename it to 3D Effect.

Step 6: Click Edit > Free Transform and adjust the Width and Height in the Options bar. Setting them to 99.9% is ideal because you'll shortly create more identical layers to add depth. Then, thicken the text by dragging it to the right using the Move tool. Be careful not to overdo it because you don't want blank space between the letters. The circled example below shows how NOT to leave the text.

Step 7: Go to Window > Actions > New Action (the Plus button) and pick a name like 3D Effect. Then, hit the Record button in the Actions panel and repeat Steps 5–6 (duplicating the Top Layer, moving the copy below it, and using Free Transform to resize and reposition the text). Once you finish, click the Stop button.

Step 8: Click the first 3D Effect layer and hit the Play button in the Actions panel multiple times (until you achieve the desired letter thickness). Then, use Shift to select all the copies and hit Ctrl + G (or Command + G on a Mac) to group them so they'll morph into a 3D font Photoshop layer.

Step 9: Double-click the 3D Effect group and hit the fx button at the bottom of the Layers panel. You can now enrich your text with 3D Photoshop styles. First, add a Color Overlay and set Opacity to 50% (just a suggestion). Then, pick a color under Blend Mode.

Step 10: Click Inner Glow and customize the Structure, Elements, and Quality.

Step 11: Add an Inner Shadow and adjust the parameters. Click OK.

Step 12: Double-click the Top Layer and activate fx in the Layers panel. Add a Stroke and customize the settings to your liking.

Step 13: Apply an Inner Glow and adjust the parameters.

Step 14: Finally, add a Gradient Overlay with the desired settings and click OK.

Here's the result of all our settings for a 3D layer style in Photoshop.

Pros and Cons of Using a 3D Text Action
You May Also Like: How to Outline Text in Photoshop
Part 3: Drawbacks of Creating 3D Text Effects in Photoshop

Although the 3D text in Photoshop can elevate your design with its creative potential, this method comes with several limitations. Provided below are some of the drawbacks of using this tool for generating 3-D text effects:
- Limited 3D Capabilities: The tool is basically a visual content creator more than a 3D modelling platform, which is why it has limited 3D capabilities.
- High System Resource Usage: Rendering 3D text on Photoshop can significantly slow down the system, especially with limited RAM or older graphics cards.
- Lack of Advanced Animation Tools: It has limited motion graphics and does not support advanced 3D animation capabilities.
- Steep Learning Curve: The interface of this editing tool is not as intuitive as compared to other image editors. Thus, it creates a learning curve for people with minimal editing skills.
Fortunately, there's an alternative. You can use tools like Wondershare Filmora if you are looking for a more comprehensive solution to generate 3-D text effects with a user-friendly interface. With Filmora, create videos with images that have 3D text in a Photoshop effect. Moreover, the platform offers a vast variety of preset 3D texts that complement your visual content.
Besides adding creative text effects from your PCs, you can create and add those effects right from their smartphones using the Filmora App.
Choose from various text styles, including 3D text options and change the font, size, and color of your 3D texts.

The best part? Filmora isn't resource-intensive. It offers fast rendering without consuming significant CPU or GPU resources. Its user-friendly interface makes it ideal for beginners, while its advanced functionalities (including many AI-powered features) make it the ultimate video editing software for all content creators. Here's how to use its 3D text tools.
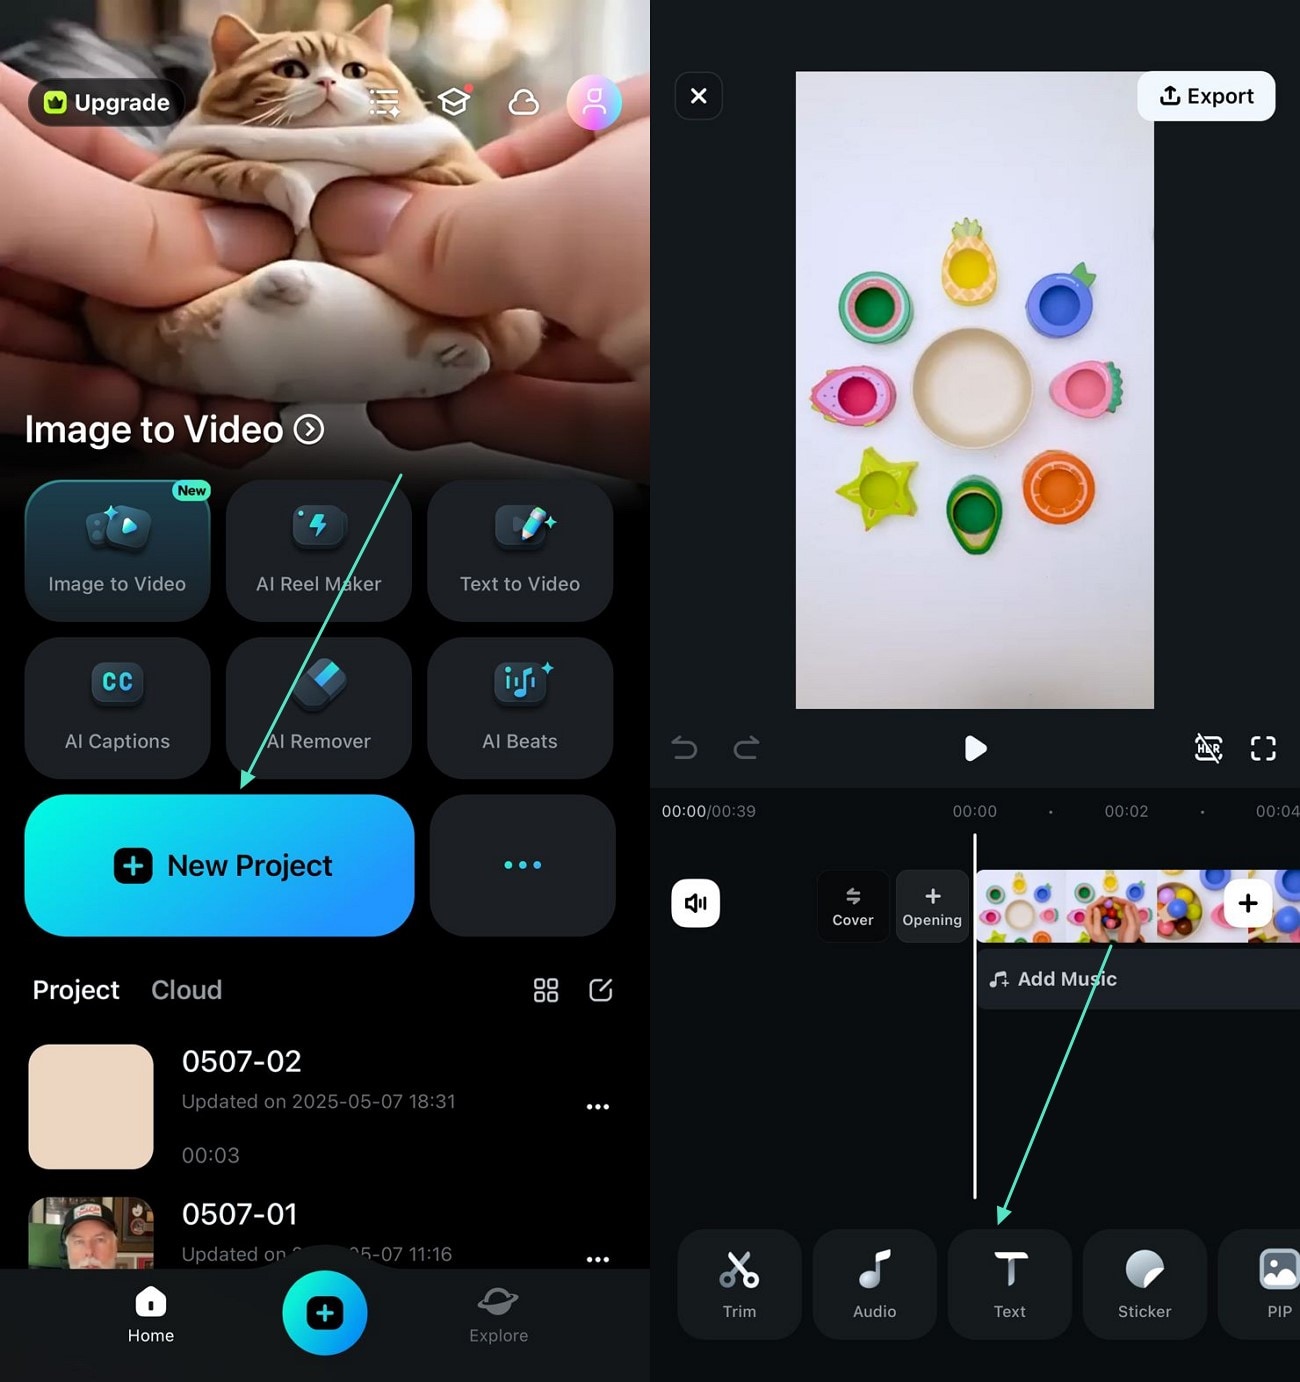
Part 4: How to Add 3D Texts to a Video [Filmora]
Adding 3D texts to a video is a walk in the park with Filmora. Filmora is a powerful tool for adding engaging and visually appealing 3D text to videos, enhancing the overall quality and creativity of the content with extensive practical features.
Key Features for Adding 3D Text in Filmora
- 3D Titles Library: Filmora's built-in 3D titles library offers a wide selection of pre-designed and visually rich text templates that simulate depth and dimensionality.
- Extensive Customization: It allows creators to tweak the font, color, size, and orientation of 3D text elements.
- Add Text Animation: Users can easily animate 3D text using Filmora's animation presets or manual controls.
- Bezier Path Effect: Filmora's Bezier Path Effect enables text to follow custom curves or motion paths in 3D space, making it perfect for stylized transitions.
- Text Key Framing: The platform offers precise control over 3D text transformations at specific moments in the timeline.
- Changing Text Position: You get the ability to change the position of generated 3D text according to your preferences.
- Text Shadow and Bevel Effect: This video editor offers editable shadow and bevel effects that simulate lighting and make the text pop off the background.
Here are the steps for the four methods for adding 3D Text to a Video:
Whether you've customized a mockup from a 3D text effect Photoshop free download or created an original design, you can import your 3D text into Filmora to add to a video. However, Filmora doesn't support PSD files, so convert it into a PNG format first and ensure it has a transparent background.
Follow these steps to add 3D text made in Photoshop to a video:
Way 1. How to Add 3D Text Made in Photoshop to a Video
As discussed, Filmora allows users to add 3D text Photoshop images to video and create a seamless outlook. Read the steps mentioned below to learn how to use this tool to add text made in Photoshop to video:
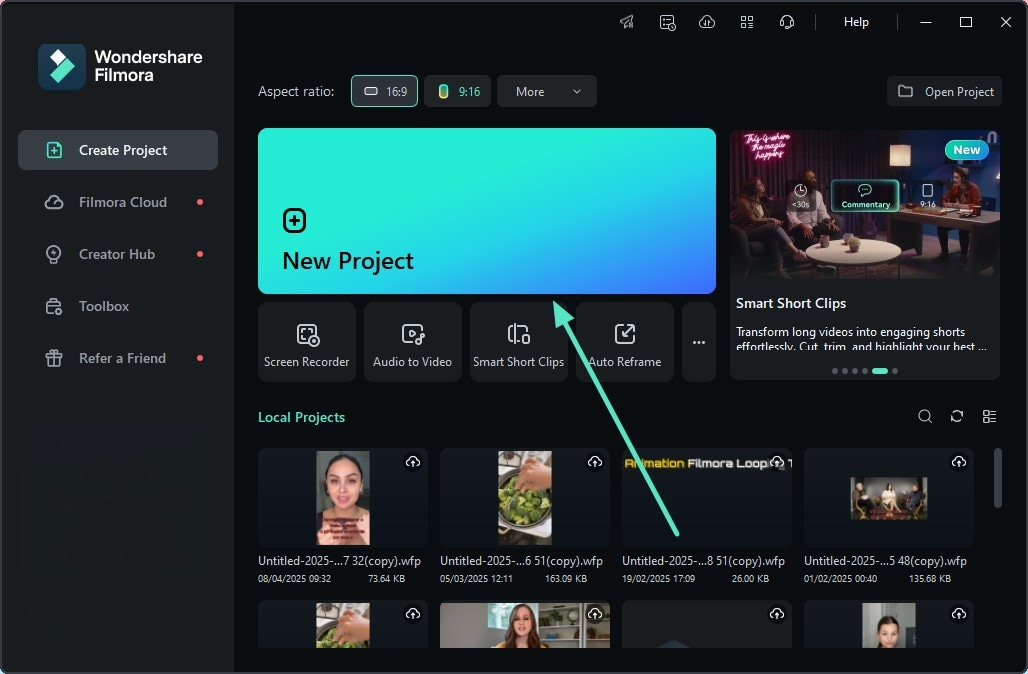
- Step 1. Start By Creating a New Project. To begin, launch the video editing tool on your desktop and press the "New Project" option from the homepage. Next, import the video on which you want to add the 3D text effect。
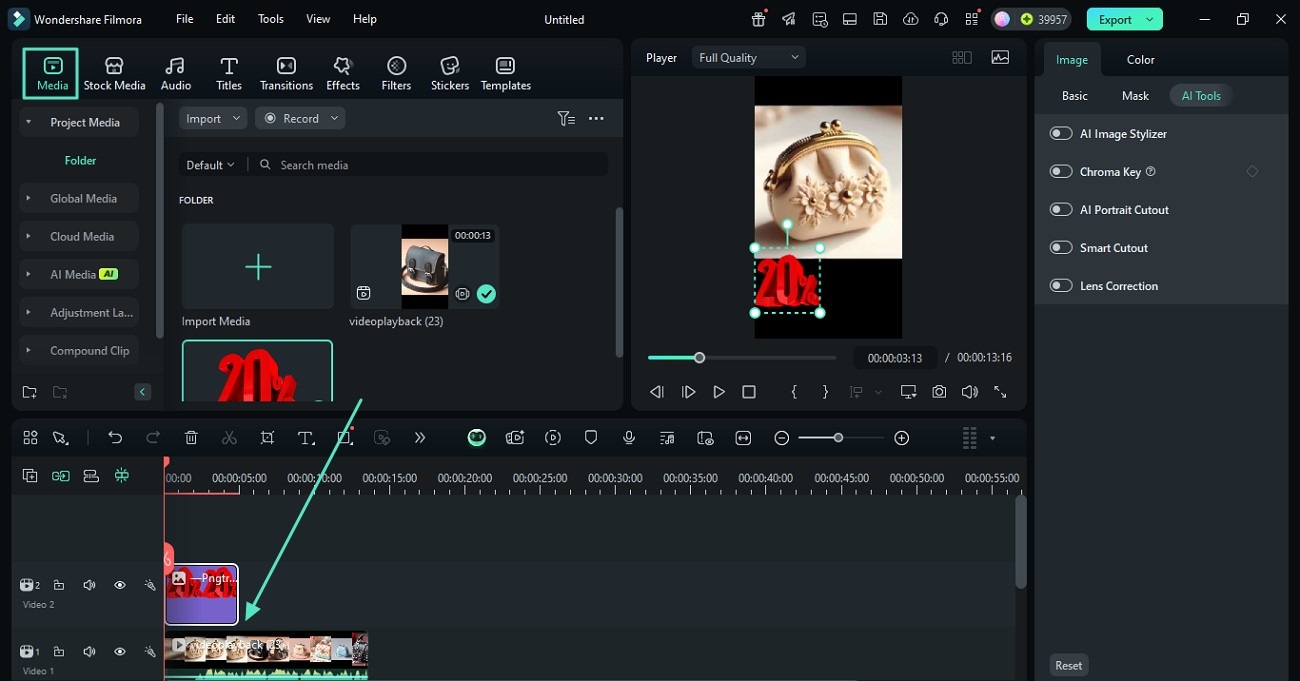
- Step 2. Import the Text Image. Use the "Media" section from the toolbar to import the text image into the tool's interface. Now, drag the image to the editing timeline right above the video track。
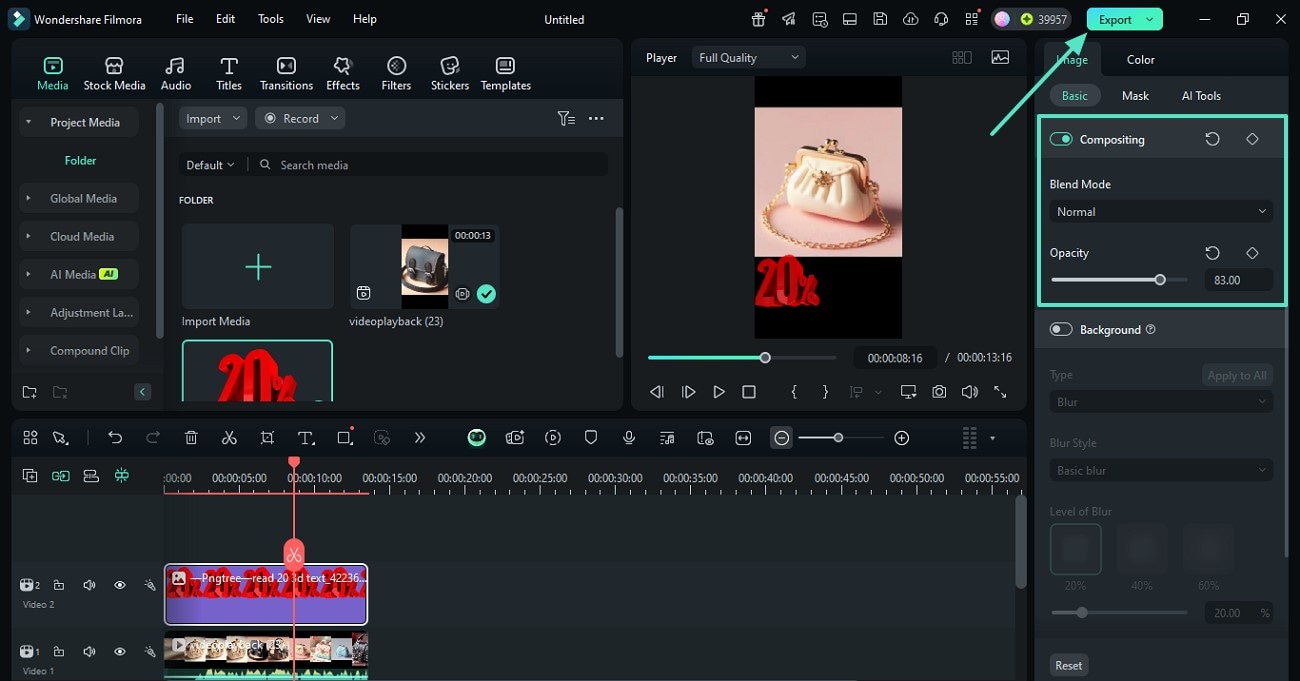
- Step 3. Access Properties Under Image Panel. Head to the "Image" panel on the right and adjust the position and other properties according to your preferences once the text image is added. Next, turn the toggle on to "Compositing" and select the "Blending Mode" option. Drag the slider to adjust the "Opacity" and hit the "Export" button when you are satisfied with the results。
 secure download

Way 2. How to Make 3D Text for a Video in Filmora With Presets
The extensive functionality of Filmora also offers a wide range of Photoshop 3D text presets to generate high-quality results. Provided below are the steps for creating these text effects using the presets offered by the platform:
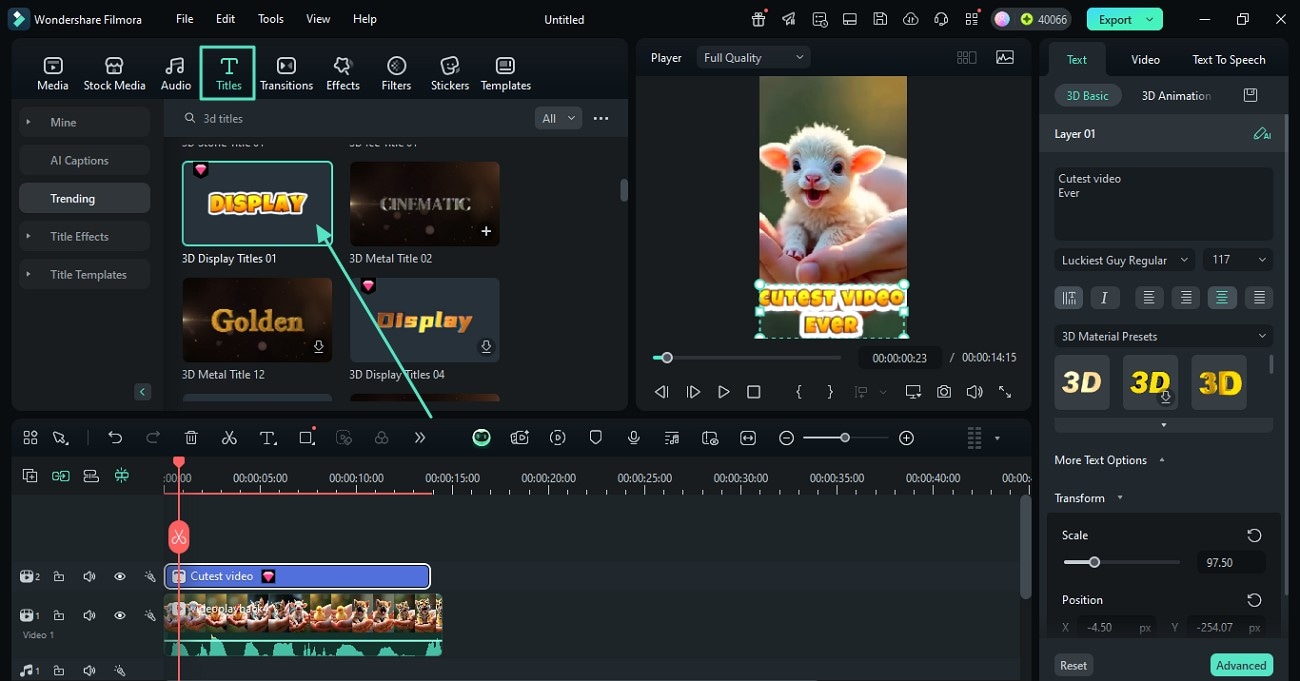
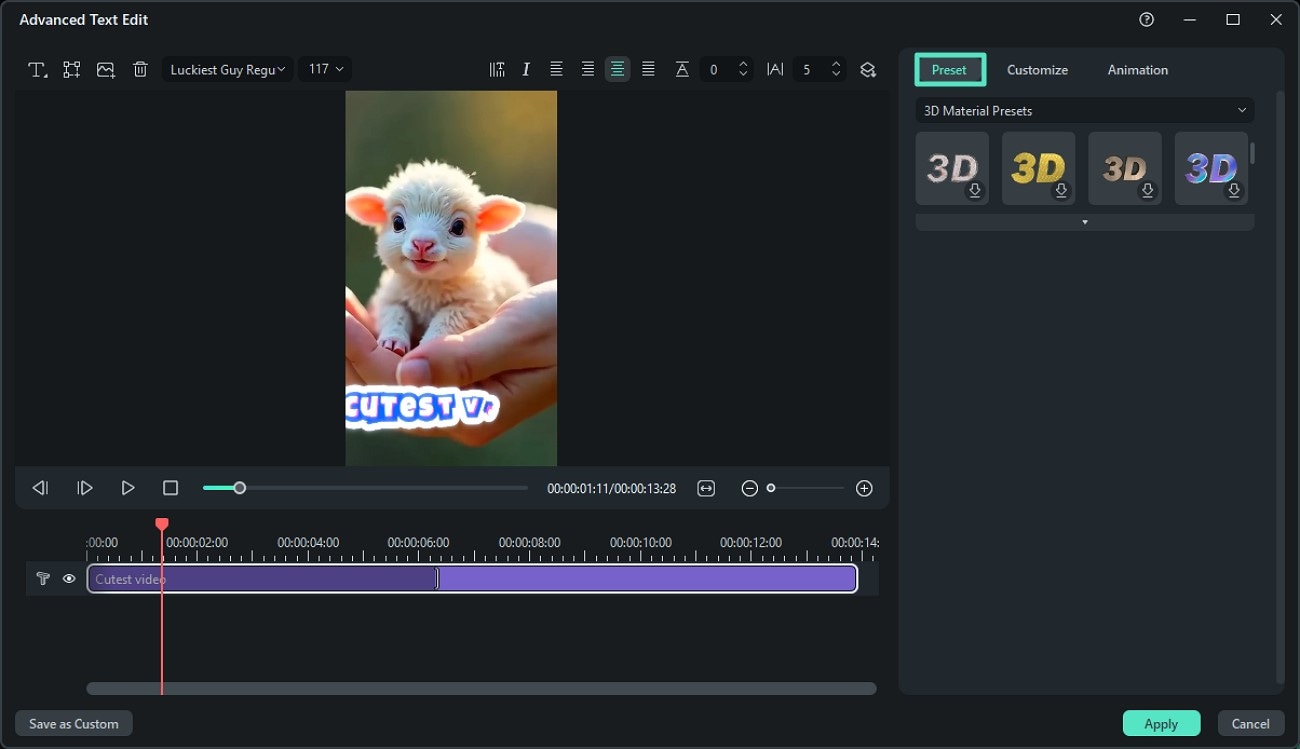
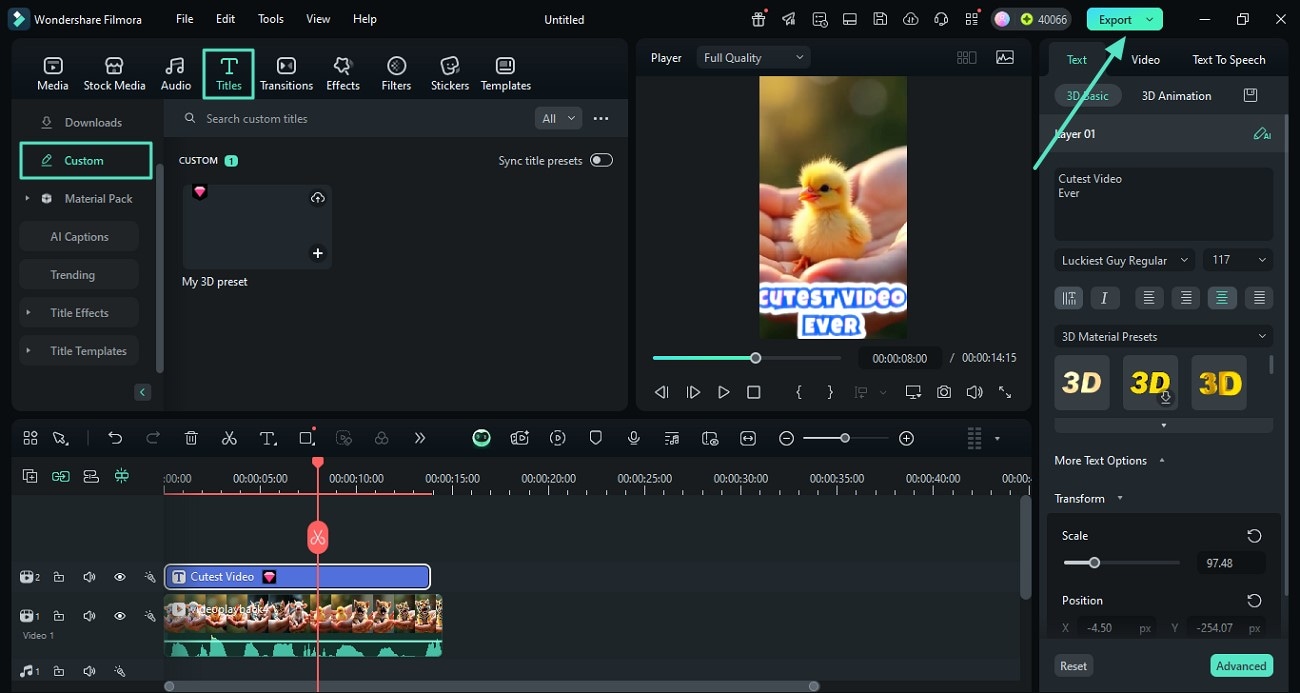
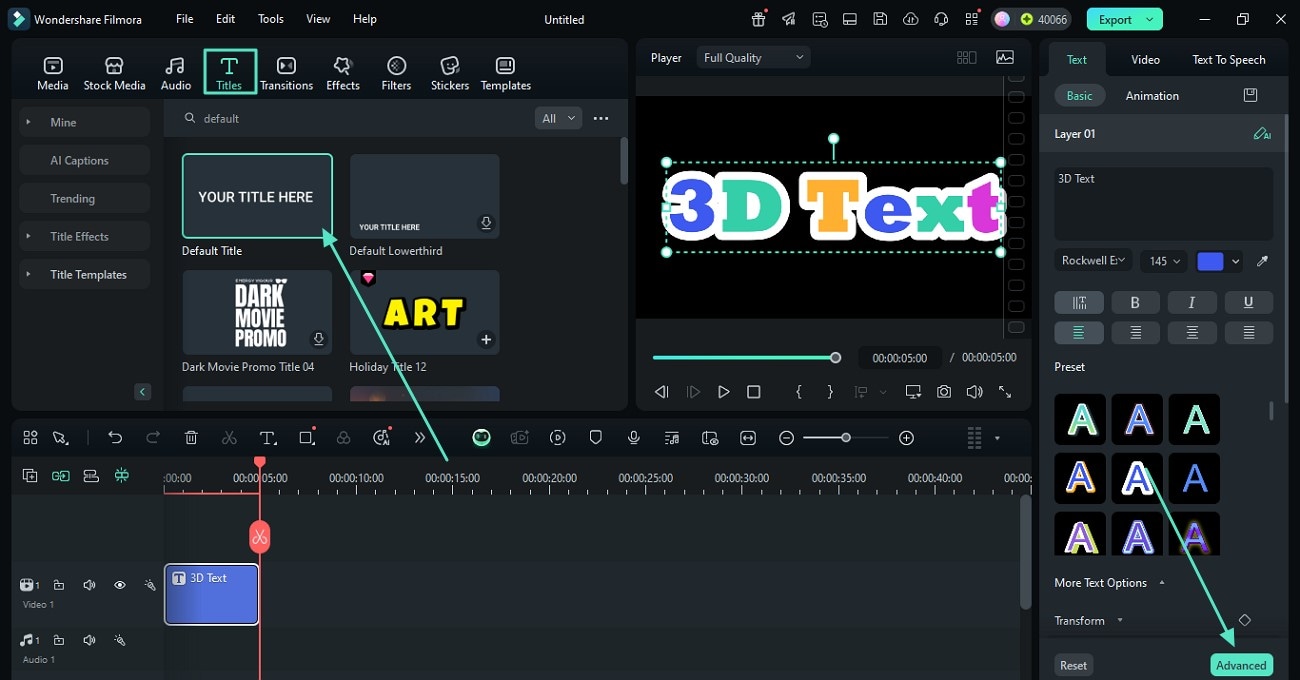
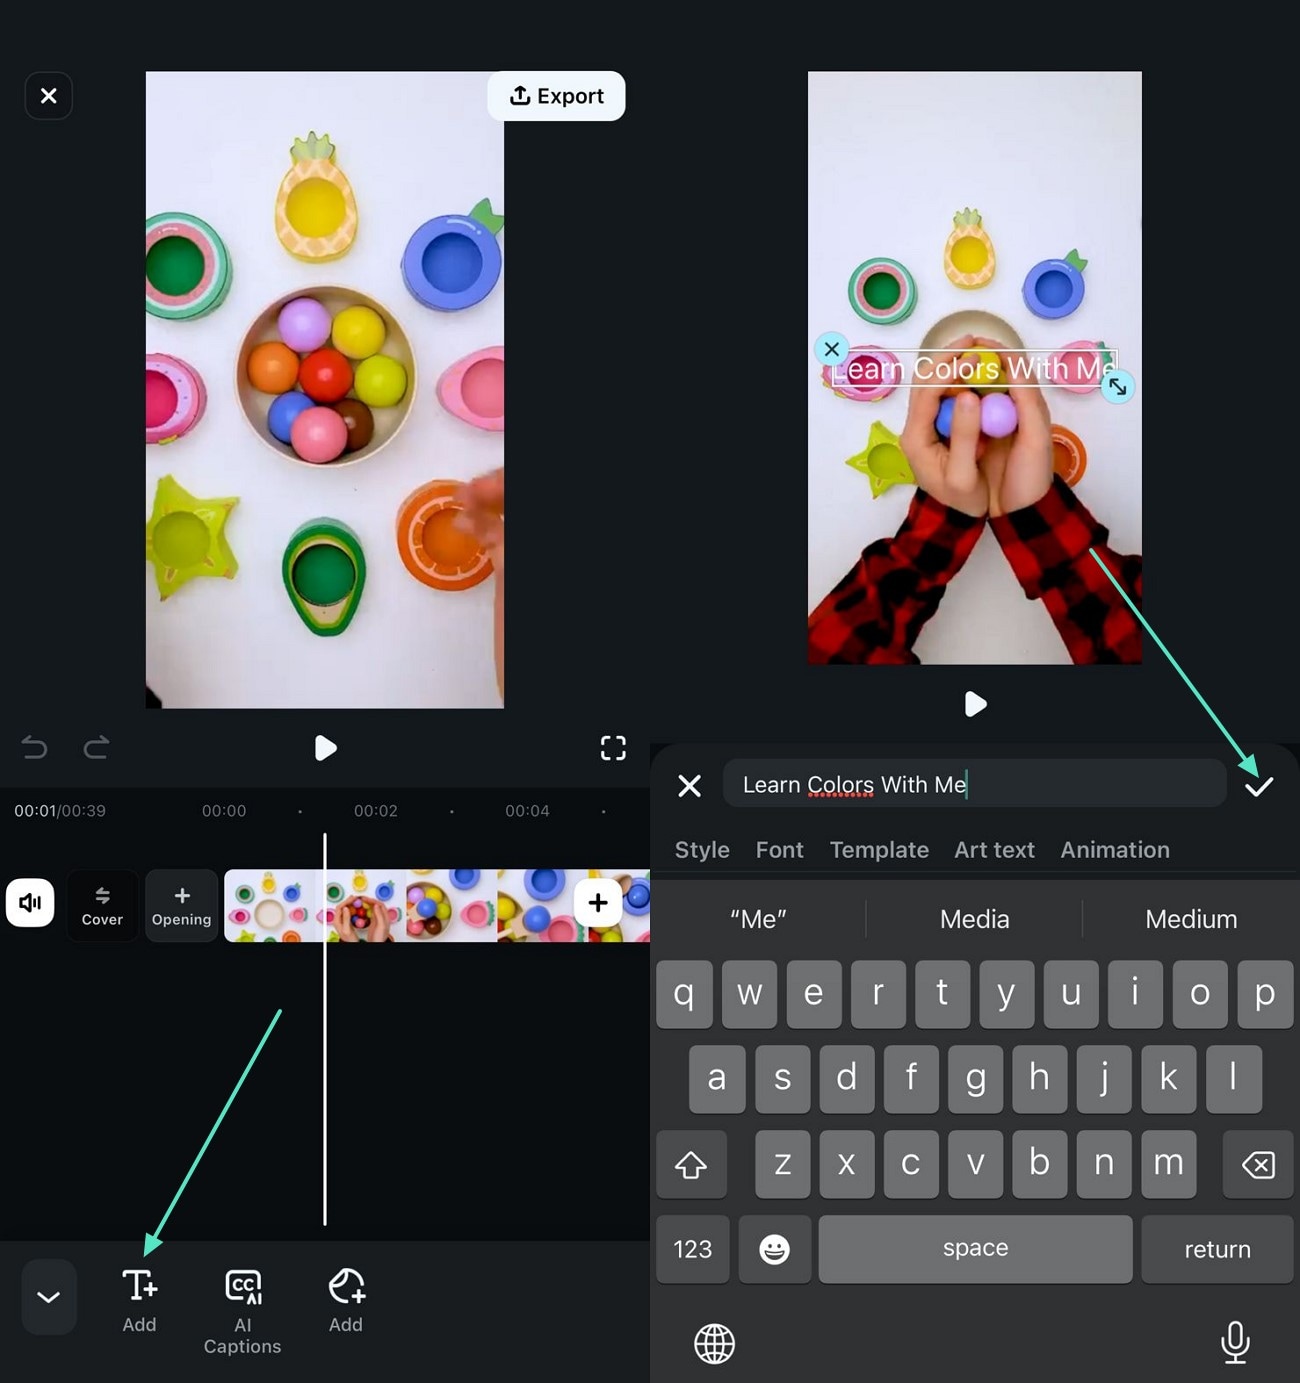
- Step 1. Choose the 3D Text Template From the Library. After uploading the video on Filmora, enable the "Titles" section from the toolbar and search for the 3D titles using the search bar. Select the desired title and bring it to the timeline with the "+" icon. Add the text using your device's keyboard in the text panel on the right. Press the "Advanced" button from the bottom to enable more customization options。
- Step 2. Select Presets to Apply. When you enter the "Advanced Text Edit" window, enable the "Preset" section on the right and choose the preset of your choice. Click on it to apply it to the text and preview it within the preview window。
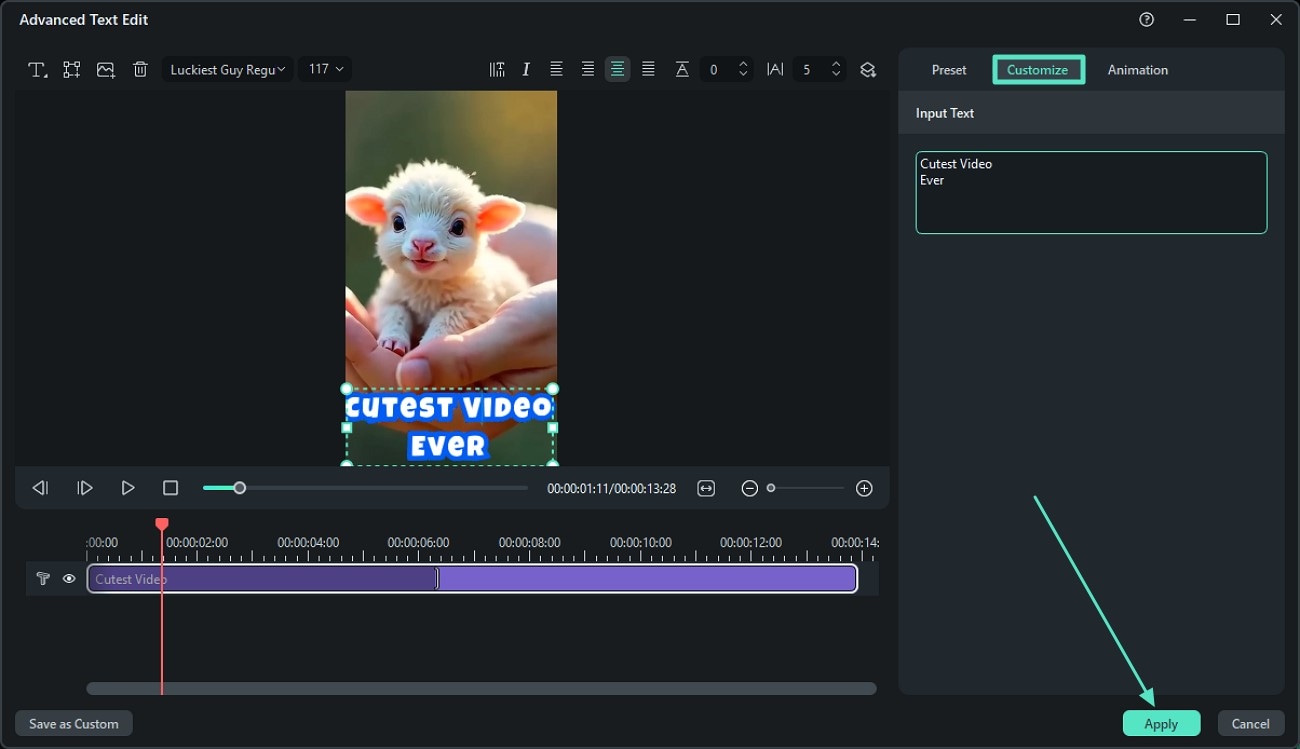
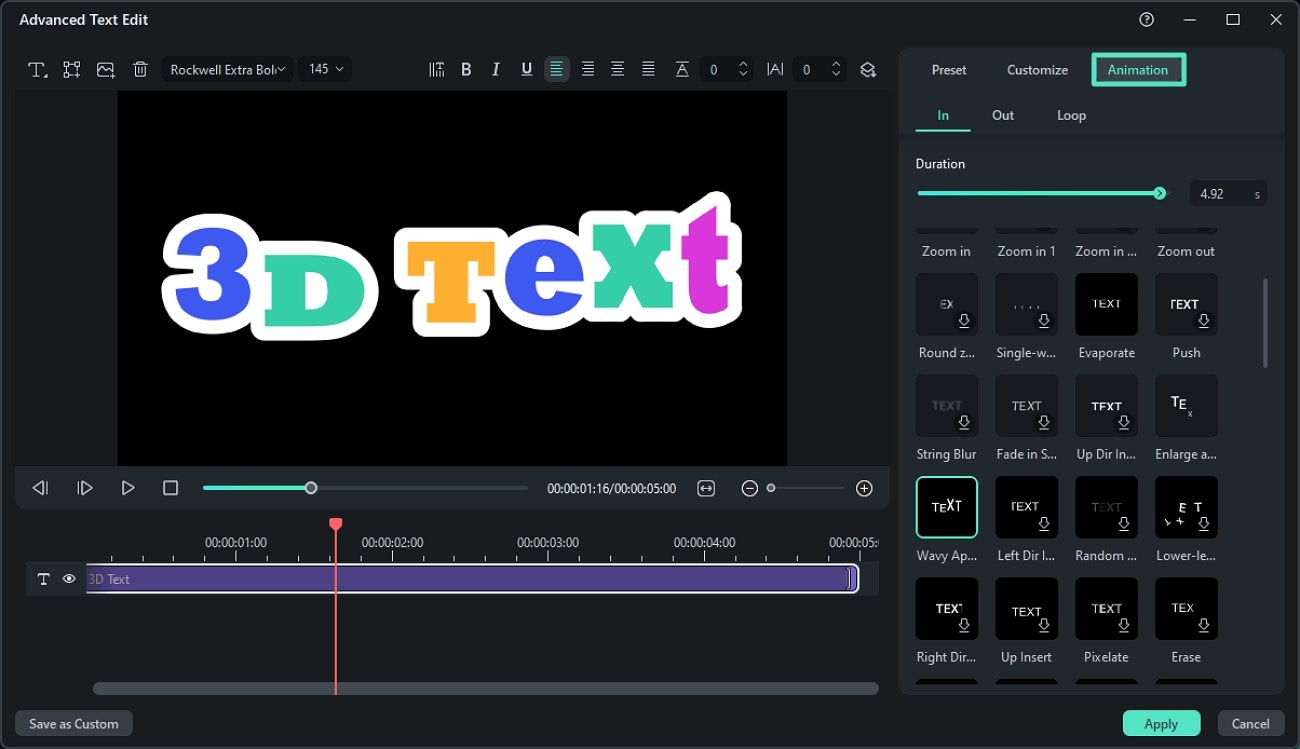
- Step 3. Customize the Input Text. Go to the "Customize" tab and make changes in the text according to your requirements. You can save the changes made to the text using the "Apply" button。
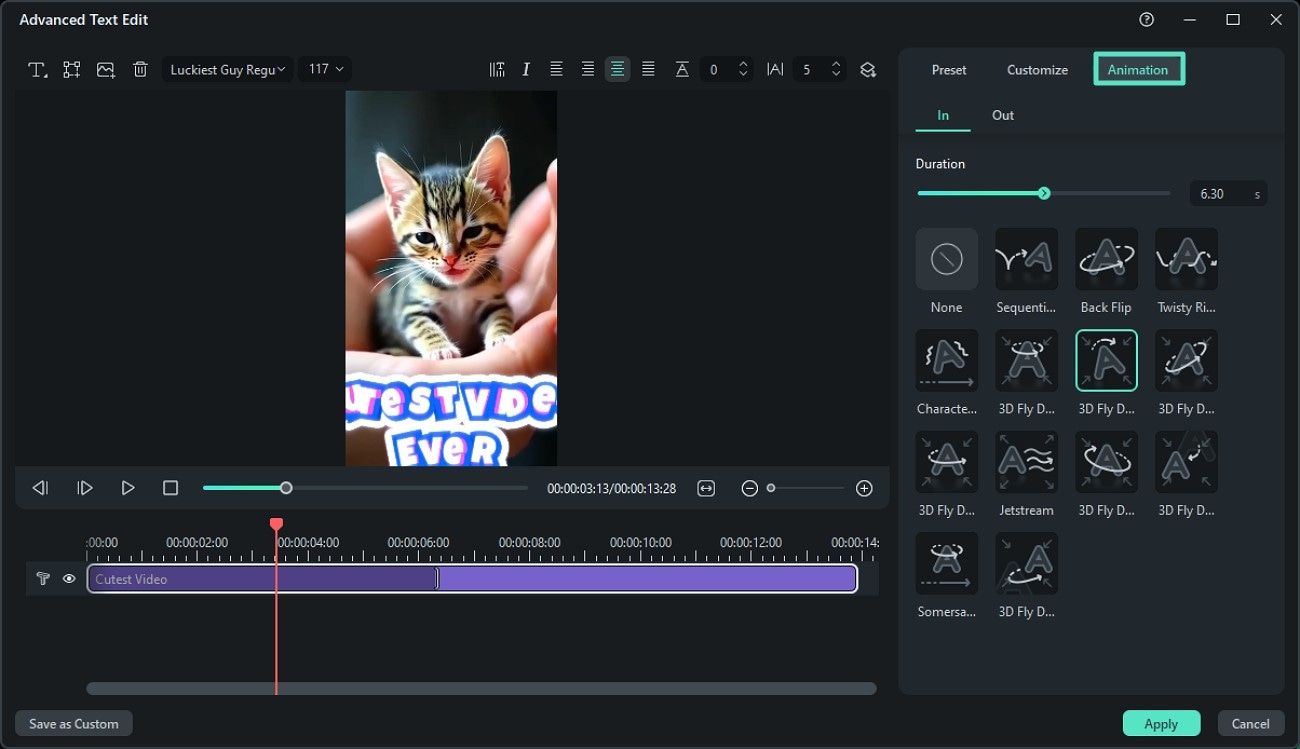
- Step 4. Add 3D Animation to the Text. Moving forward, click on the "Animation" tab and choose the In and Out styles from the options provided. Adjust the duration by dragging the slider according to your preferences。
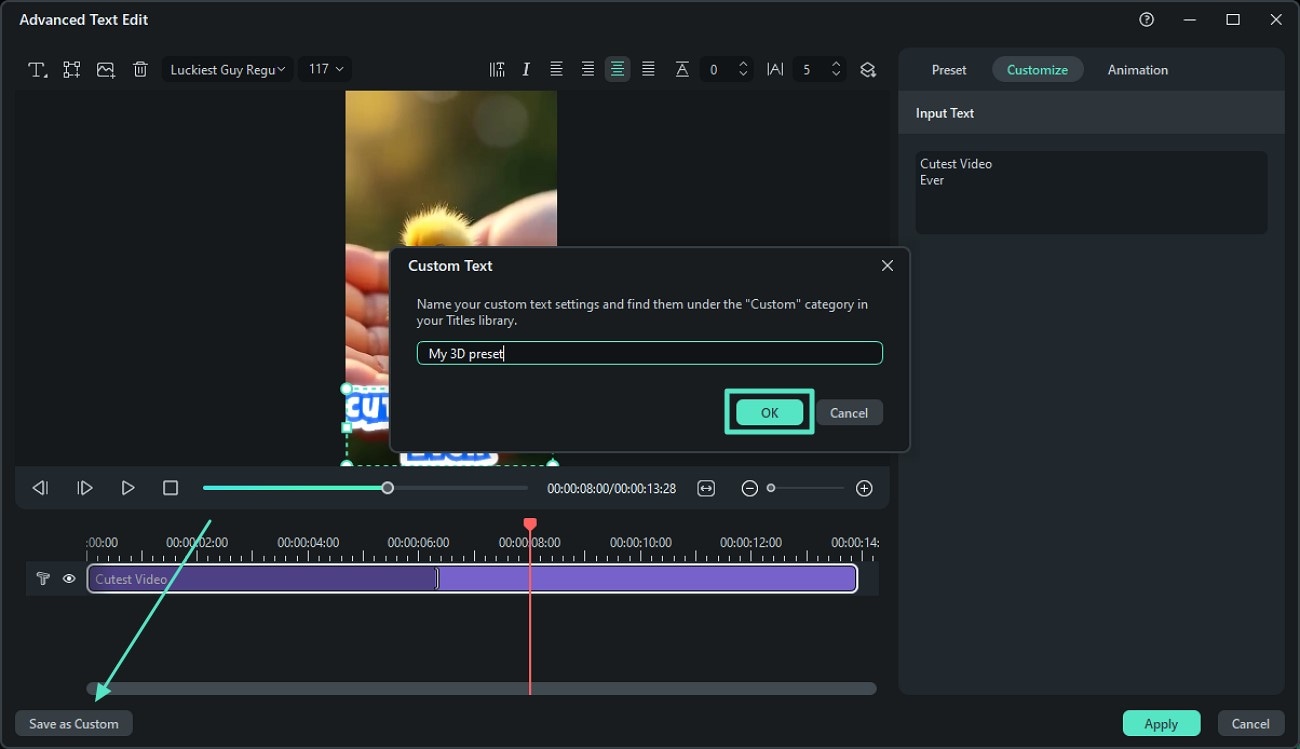
- Step 5. Save the Customization. Furthermore, save this 3D text animation for future access by clicking on the "Save as Custom" button located at the bottom. Now, name the preset according to your preference and press the "OK" button to save it to the library。
- Step 6. Access the Customize Title and Save Video. If you want to access the saved template, head to the "Titles" section and expand the "Custom" section from the left. You can apply the selected template by dragging it to the timeline. Head to the top-right corner of the interface to press the "Export" button and save your video when you are done with the text animation。
secure download
Way 3. How to Create Custom 3D Text for a Video in Filmora
You can create customized 3D text effects with Filmora's extensive multimedia functions. The platform lets you craft compelling text from scratch. Follow the provided guide below to learn how to use this multimedia editor to create customized 3D text:
- Step 1. Input Text for Creation. After you have created the new project on Filmora, head to the toolbar and acquire the "Titles" library. Next, choose the title type of your choice and press the "+" icon to use it. Access the panel on the right to add text in the text field. Make changes to the outlook of the text by customizing the attributes or choosing from the presets provided by the tool。
- Step 2. Add Animation to the Text. In the following window, access the "Animation" tab and choose the animation style from the "In," "Out"," or "Loop" section. Select your favorite text animation and click on it to preview it within the preview window. Apply the selected style by pressing the "Apply" button located at the bottom。
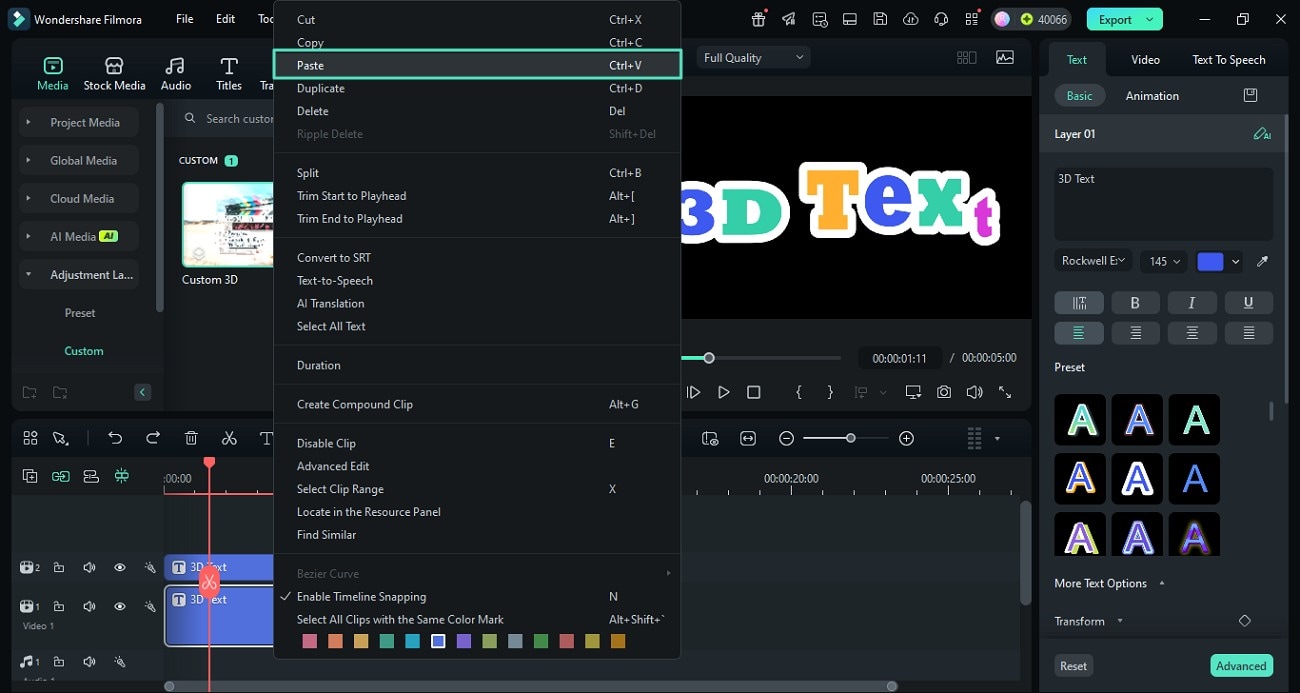
- Step 3. Copy the Text Track. Now, head to the timeline and right-click on the text track to copy it. Next, move to the bottom of the track and paste it to the timeline using the "Paste" option to create a duplicate of the text track。
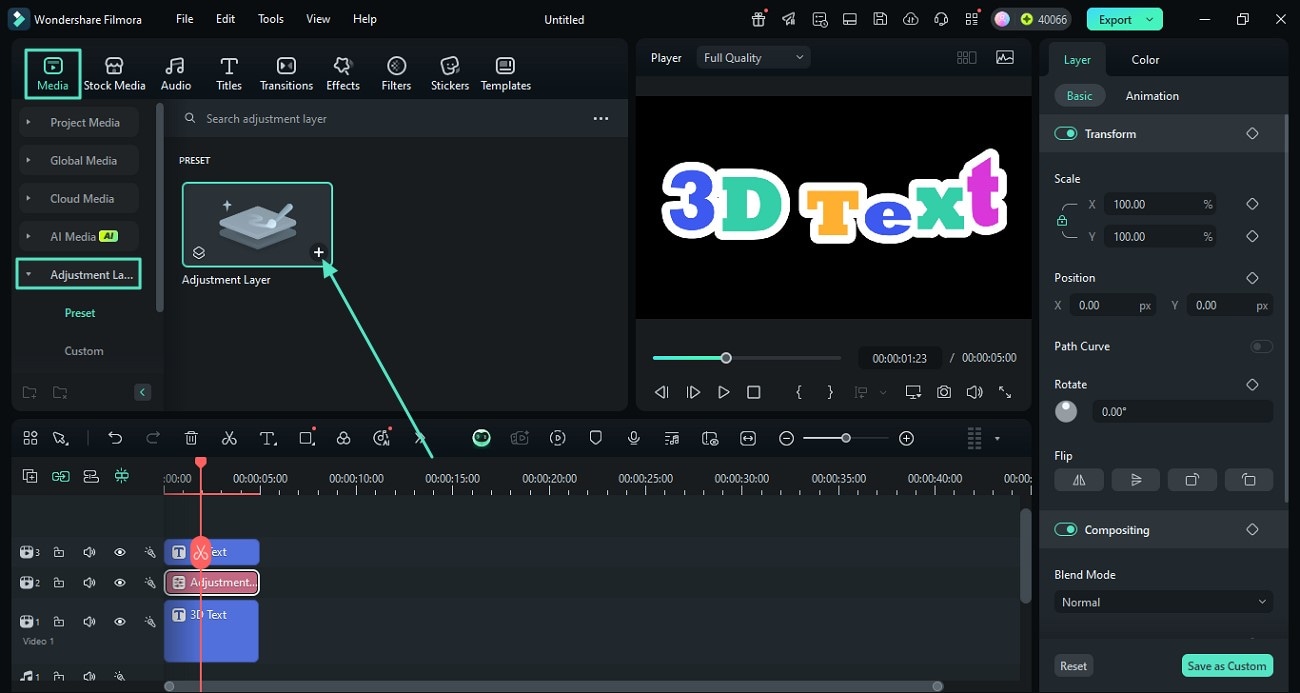
- Step 4. Add an Adjustment Layer Between the Text Track. Moving forward, access the "Media" section from the toolbar and expand "Adjustment Layer" from the left side. Now, press the "+" icon to add the adjustment layers between the title tracks。
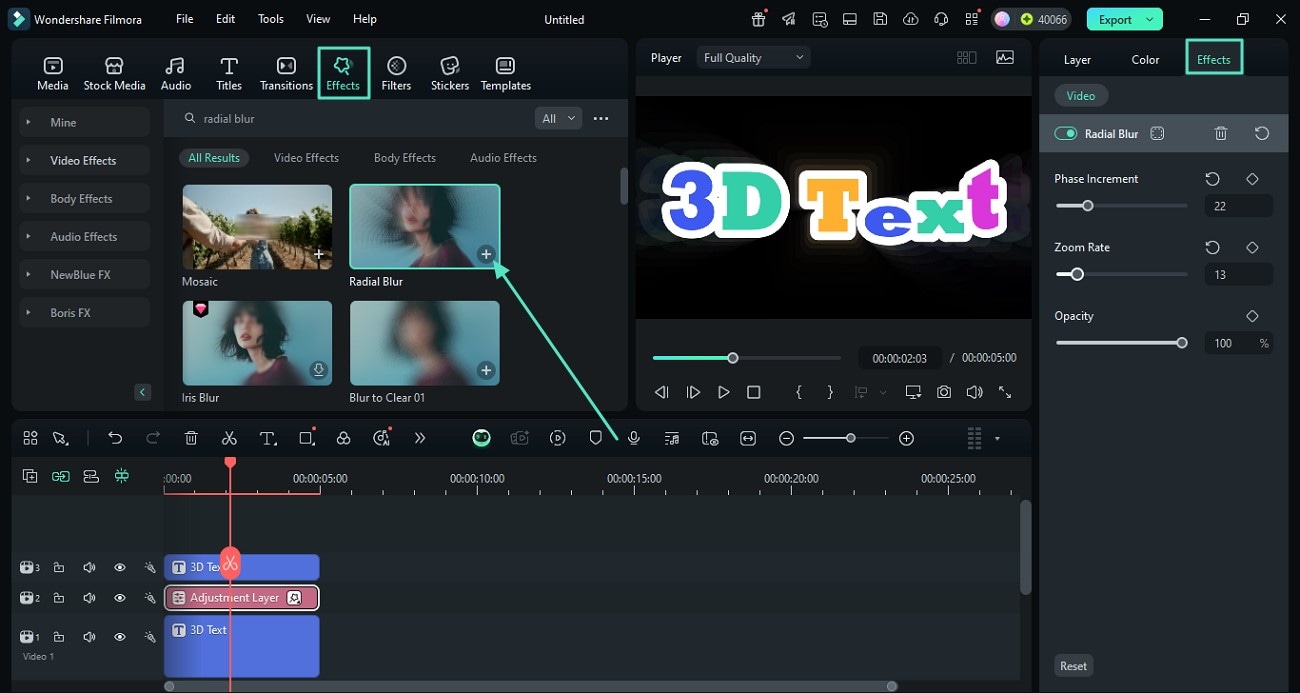
- Step 5. Apply the Blur Effect to The Layer. Head to the toolbar to enable the "Effects" library after clicking on the adjustment layer. Choose the blur of your choice from the library and apply it using the "+" icon to add a 3D motion effect to the text. Next, access the "Effects" panel on the right and make adjustments according to your preferences by dragging different sliders。
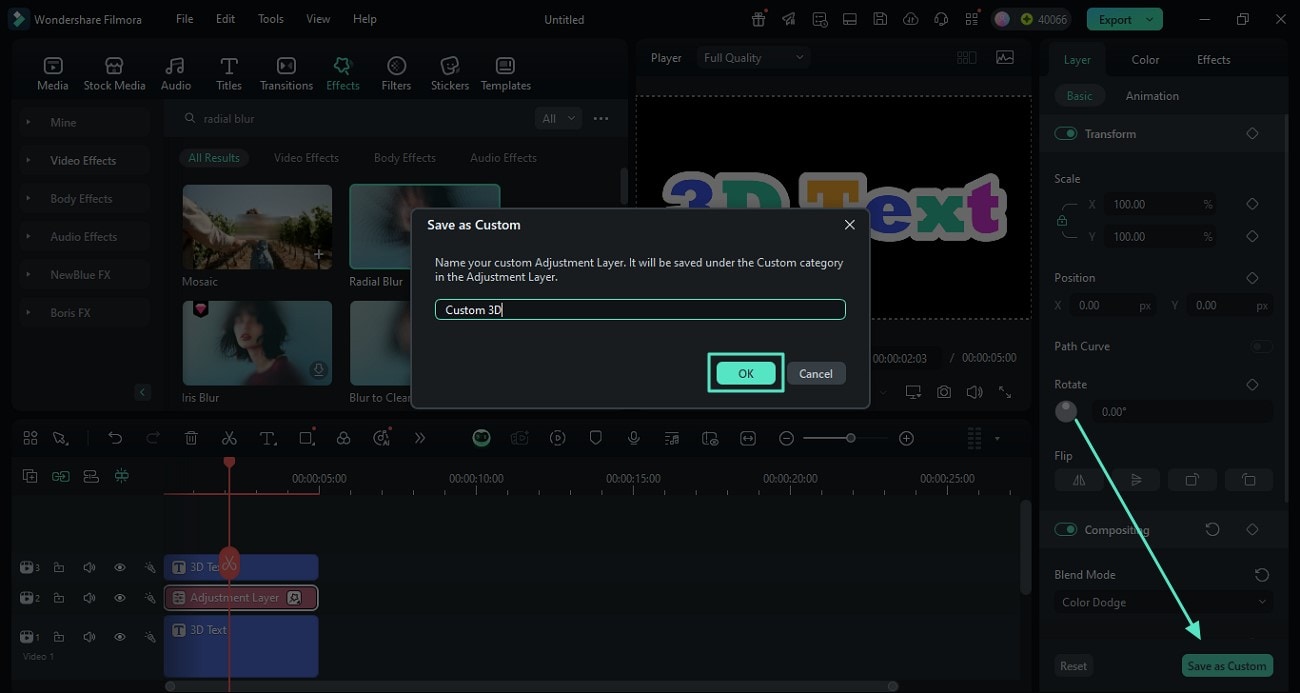
- Step 6. Save the Created Text for Future Use. Enable the "Layer" panel on the right and click on the "Save as Custom" button. Now, name the adjustment layer and save it for future access by clicking on the "Ok" button。
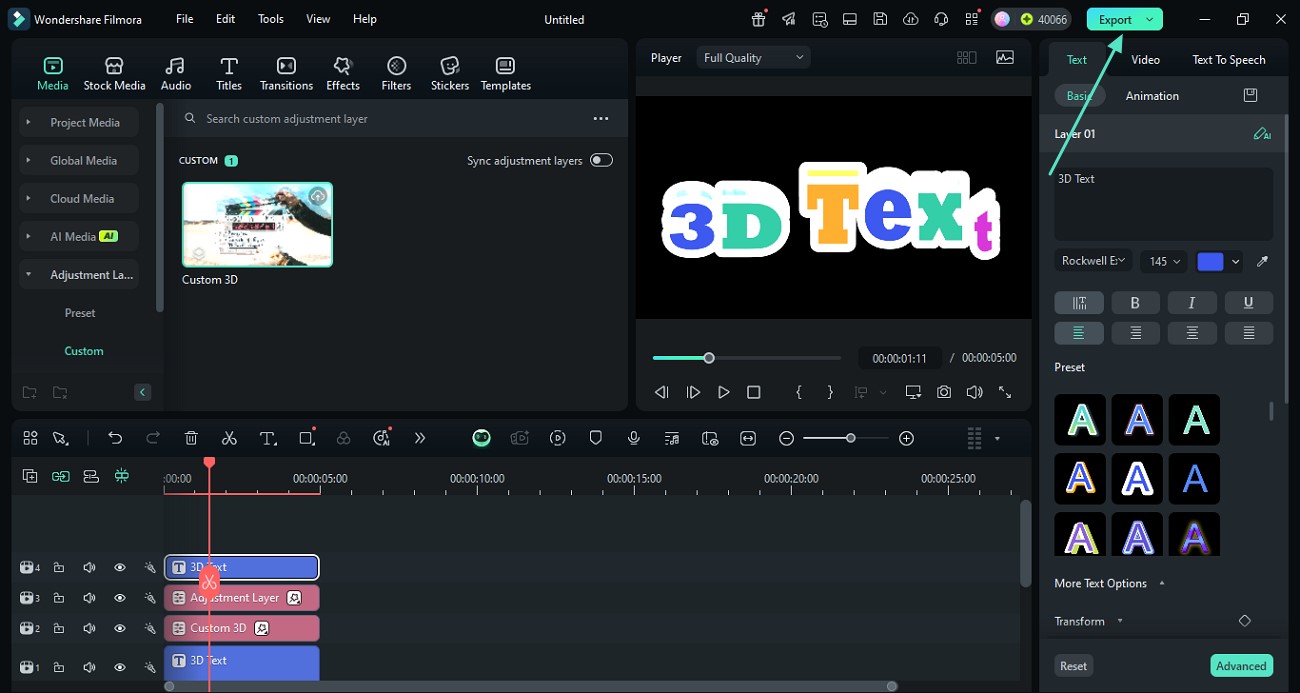
- Step 7. Reposition the Text and Export. To give a more defined 3D look to the text, click on the text in the preview window and reposition it by dragging the cursor. Once you are satisfied with the created text effect, click on the "Export" button to save the video to your computer device。
secure download
Way 4. How To Add 3D Text Effect Using the Filmora App
If you want to add text effects to your video while you are on the go, you can use the Filmora App [iOS/Android]. It offers a wide range of 3D text templates with various font styles to add compelling text to the content conveniently. To learn how to access the library and apply the text effect to the video using this application, read the steps mentioned below:
- Step 1. Create New Project and Select Text Feature. Once you have launched the application on your phone, access the toolbar at the bottom and tap on the "Text" icon。
- Step 2. Type the Text on the Video. Locate the "Add Text" icon on the enabled toolbar at the bottom of the screen. Next, input the text you want to add by typing and pressing the "Tick" icon。
- Step 3. Select 3D Effect And Export. Moving forward, enable the "Art Text" section by tapping on it. Now, scroll through the provided 3D text options and tap on the favorite one. To apply it to the text, tap on the "Tick" icon on the right. Finally, head to the top-right corner and tap on the "Export" button. Configure the output settings and press the "Export" option to save the generated results to your device。

Part 5: How to Turn Text Into a 3D Object in Photosho
Photoshop lets you turn text into 3D objects, including cubes, cylinders, pyramids, donuts, etc. The process involves creating a mesh from a text layer (or any 2D image).
Here's how to convert text into a 3D object in Photoshop:
- Step 1: Create a new document and add text using the Type tool. Our 3D object will be a sphere, so we'll copy and paste the text to fill the background for the most striking results。

- Step 2: Go to 3.New Mesh from Layer > Mesh Preset > Sphere (choose any 3D object)。

- Step 3: Click Sphere Material under Sphere in the 3D panel. Then, open the Base Color settings in the Properties panel。

- Step 4: Choose a color and the lowest intensity and hit OK。

- Step 5: Push the Glow to the maximum to make the letters more visible. You can also change the material. For instance, you can create a 3D gold effect in Photoshop。

- Step 6: Click Scene in the 3D panel and change the 3D Mode in the Options bar. For instance, you can zoom the 3D camera。

- Step 7: Experiment with other modes, including orbiting, rolling, and panning the 3D camera。

Bonus Part: Recommended 3D Font Files You Can Use
As discussed, 3D in Photoshop help give an instant appeal to the text added to your content. Provided below are some of the 3D font file recommendations you can add to your Photoshop creations:
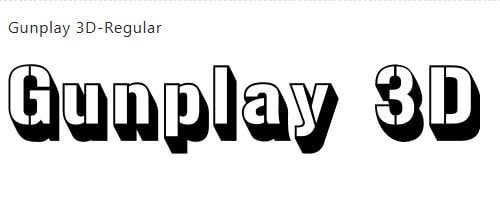
- Gunplay 3D: This bold and impactful typeface offers a vintage Westerns look with a retro action comics. It has deep shadows and sharp serifs to create a dimensional effect for posters and branding.
- Bullsy College 3D: An aesthetic typeface that is inspired by collegiate fonts is Bullsy College. The bold block letters are enhanced by a crisp 3D extrusion to give each character a standout appearance.

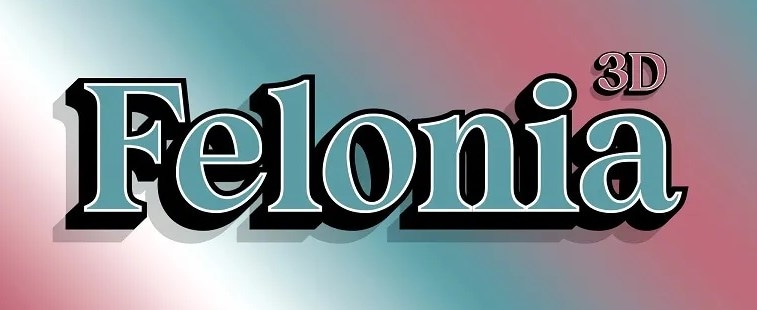
- Felonia 3D: It is an elegant font with a touch of colorful Gothic influence. You can use this typeface for book covers and logos for gaming interfaces.
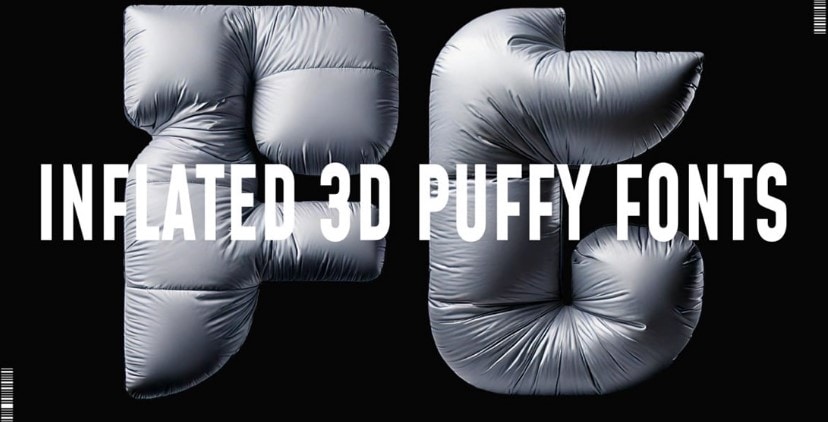
- Inflated 3D Puffy Font: This is a playful and funny font that mimics the look of balloon lettering. With rounded edges and inflated volume, this font is perfect for animated or celebratory videos for children.
- Frontage Condensed 3D: Frontage condensed 3D is a sleek and architectural typeface that comes from the original Frontage family. It offers a blend of modern style with vintage signage, which can be perfect for creating brand videos.

🤩 Posts You Might Be Interested In: 3D Text Premiere Pro Presets & Templates Guide >>
Conclusion
This 3D text effect Photoshop tutorial is a beast, so thank you for reading this far. We hope it helps you master 3D text and simplify the process.
However, Filmora can help you create 3D text for videos faster, whether using presets or starting from scratch. It will render your designs quickly without slowing down your computer. You can even import your 3D Photoshop text effects and add them to videos as PIP overlays.
