VLC is widely known as a media player and perhaps you have used it on your Windows, Mac, or Linux to play your favorite music or movies. "Can a VLC player record the screen?" Sure! Just as you can play your videos, you can also record screens with VLC. This article gives you a comprehensive guide on how to record screens using VLC and its best alternative.
In this article
VLC Player Overview
VLC is a popular media player and streaming platform that works on a variety of devices including Windows, Linux, Mac, Android, and iOS. While it is widely known for its media playing capabilities, this free open-source multimedia platform gives you the VLC screen record function that can help you record your desktop screen and webcam.
It has a simple interface that makes it easier to record your screen in a variety of formats. With this tool, you can adjust your recording frame rate, formats, audio sample rate, and aspect ratio among others.
It also provides some basic editing features like rotation and lets you convert your recorded screen to other file formats including MP4. Let's dive into how to record a screen with a VLC screen recorder.
How to Screen Record with VLC on Windows?
Follow the steps below to record on Windows using VLC.
- First, open VLC on your Windows computer and head to the "Media" section. From the options displayed, scroll down and click "Open Capture Device".

- In the pop-up dialog box, click the "Capture Mode" drop-down icon and choose the "Desktop" option.

- Next, adjust the frame rate to your desired values for suitable screen quality capture. Now, click the "Play" drop-down arrow then select the "Convert" option. This should take you to an output window.

- In the output window of the VLC player record screen, click the "Profile" drop-down icon and choose the desired output format and quality. Also, click the "Browse" button in the "Destination File" section and select your preferred destination folder.

- Finally, click the "Start" button to commence the screen recording with VLC. When you are done recording, tap the "Stop Recording" icon and find your screen recording in the save path you provided.
How to Record Screen with VLC on Mac?
For Mac users, follow the steps below to record the screen with VLC.
- Open the VLC player on your Mac PC and go to the "File" menu. From the submenu, choose the "Open Capture device“ option.

- A new dialog box named "Open Source" should pop up on the screen. Here, click on the "Capture" tab then select the "Screen" option. This means the screen is your video source.

- On the same pop-up, go to the bottom-right and expand the "Settings" tab. Customize the frame rate according to your needs. Ideally, a frame rate of around 10-15 fps will work for you unless you are recording something that is moving too fast.
- Now, confirm the settings and click "Open" to exit the "Open Source" window.
- Finally, go to the "Playback" tab and choose the "Record" option to capture with VLC. When you finish recording your screen, click the "Stop Recording" icon to end the recording and save it on your Mac device.

How to Record Your Webcam with VLC?
If you want to capture yourself in a screen recording, you can use VLC to record your webcam. The following steps show how to record your webcam with VLC. The steps in Mac and Windows are nearly the same, only that there are a few differences.
Record Webcam with VLC on Windows
Step 1. Open VLC then go to "File" and choose "Open Capture Device".
Step 2. Select "Direct Show" in the capture mode and choose your desired recording preferences.

Step 3. Click "Play" to start recording your webcam. To stop the recording, click the "Stop Recording" icon. You should find your recorded webcam in the destination folder.
Record Webcam with VLC on Mac
Step 1. Open VLC on Mac and head to the "File" section. Choose the "Open Capture Device" from the subsequent options.

Step 2. In the pop-up window, select the "Capture" tab and enable both "Video" and "Audio" options.

Step 3. You can then click the "Settings" tab to access and choose preferred webcam recording settings. Once satisfied, click the "Open" button to start the recording.
Best Alternative to Record Screen with VLC
VLC is undoubtedly a useful and free screen recorder with no watermarks for different needs. However, it has several limitations that make it unsuitable for high-quality recording needs.
For example, VLC lacks extensive recording and editing features and few customization options, and it often crashes, freezes, or records lagging videos. In addition to that, it cannot record webcams and screens at the same time, not to mention, it can convert speeches into texts automatically. To overcome this, you need a suitable alternative.
In this regard, you can go for a screen recorder like Wondershare Filmora.
This amazing platform gives you an array of features to record your screen easily and flexibly. With Filmora, you can record your screen, webcam, audio system, and microphone without additional third-party tools. Unlike VLC, Filmora lets you customize your recording area for different occasions.
VLC Screen Recorder VS. Wondershare Filmora
| Comparison | VLC | Filmora |
| Compatibility | Windows, Mac, Linux, Android | Windows, Mac, (Video editing features on Android, iOS) |
| Customize Screen Recording Area | Not available. You can only drag the target screen to reduce size and minimize other screens. | Customize the screen recording area according to your preference. |
| Record webcam and screen | Not available | Available to record webcam, screen, and audio simultaneously. |
| Show Mouse Clicks | Not available | Mouse clicks and keystrokes available |
| Schedule Recording | Not supported | Available |
| Video Editing Features | Very few and basic like rotations. | Extensive video editing features. |
Key Features:
- Schedule to finish recording tasks at a convenient time.
- Support recording screen, webcam, and audio at the same time.
- Customize screen recording parameters, such as area, resolution, and FPS.
- Record videos to 4k.
- Use keystrokes and mouse clicks to illustrate concepts and make your recording more exciting.
- Offer hotkey combinations for quick screen recording and navigation. You can use them to pause, resume, start, or stop a recording.
- Offer plenty of powerful video editing features, such as converting speeches into texts, changing video backgrounds, and translating videos into other languages.
- Enhance voice recordings and remove background noise from videos.
- Generate background music automatically according to your video content.
- Support a lot of output formats including MP4, MKV, MOV, and MPEG-2 among others.
- Easily share videos on other social media platforms.
How To Record Your Screen Using the Filmora Screen Recorder?
The following steps illustrate how to record your screen using the Filmora screen recorder.
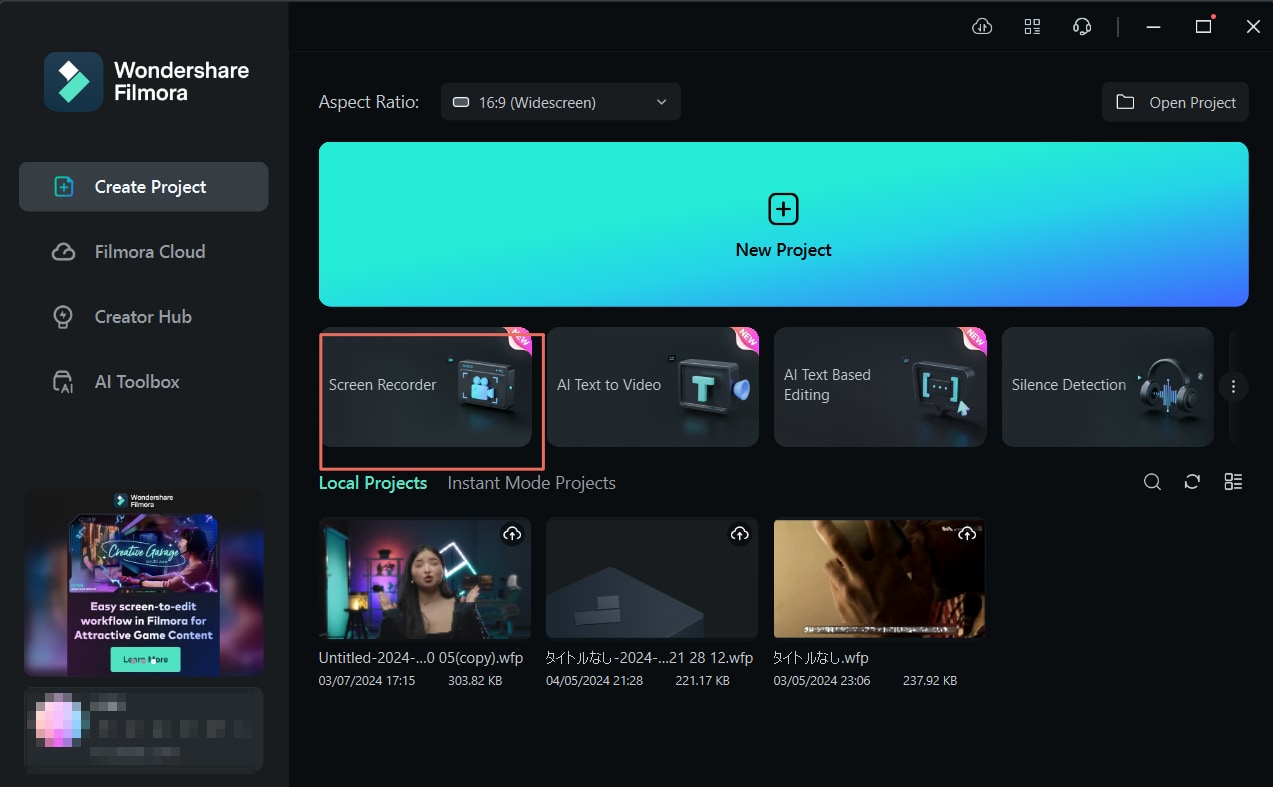
Step 1. Download Wondershare Filmora on your PC, install it, and run it to access the startup window. Click the "Screen Recorder" tab.

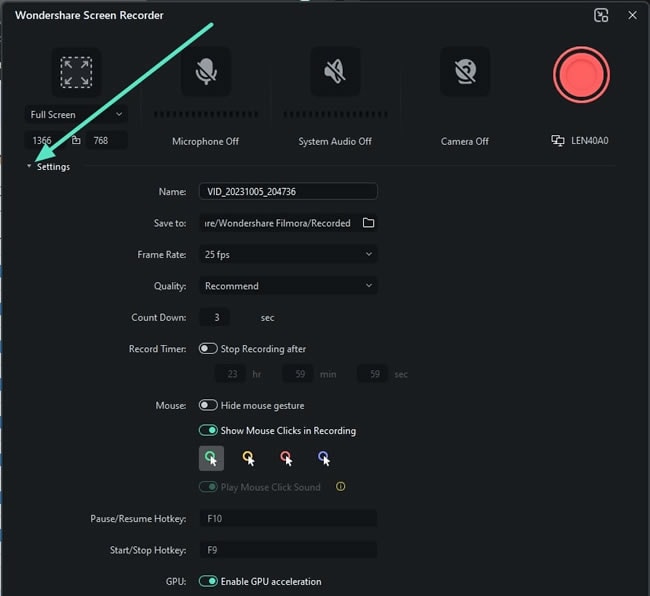
Step 2. In the "Wondershare Screen Recorder" window, click the "Custom" drop-down arrow and select the area you want to capture. Additionally, choose your preferred recording mode (microphone, system audio, and webcam).

Step 3. Now, click the "Settings" tab and tweak your recording settings accordingly. Once satisfied, click the "Record" button. The countdown should immediately start. If you want to start immediately, just click the "Start Directly" option.

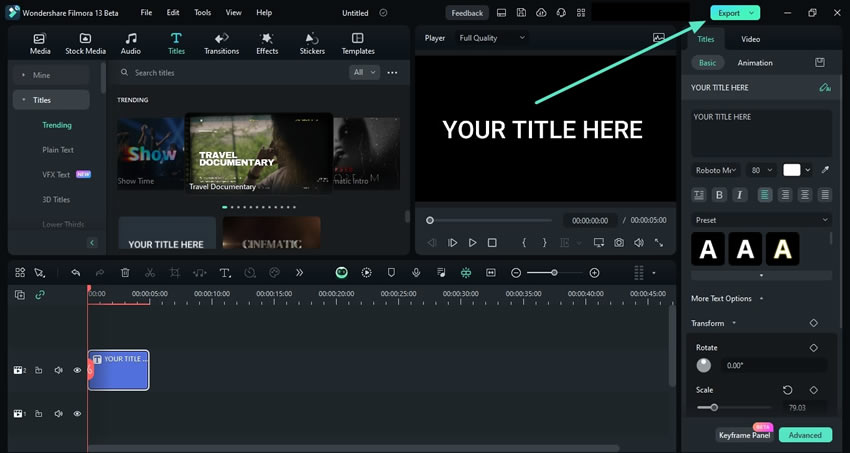
Step 4. When you have finished recording your screen, click the "Stop" or Press F9 button. You can then proceed to edit and click the "Export" button to export your recorded screen video to the desired format and destination.

Before exporting the screen recordings, you can also convert speeches into texts with the powerful Filmora video editor.
Conclusion
Screen recording with a VLC player is that easy! Here we provide the step-by-step guide to recording screens with VLC in this article, whether you are using a Windows computer or a Mac.
However, it doesn't offer extensive features to record quality videos for professional use. You can try out Wondershare Filmora, which is a pro-grade editor that gives you an array of screen recording features that suit various screen recording needs plus you can edit the recordings to create polished, professional-looking videos!
FAQs
-
How do I record one screen with VLC?
To record a screen with VLC is simple. Here are the steps:- Open VLC on your computer.
- Go to Media > Open Capture Device > Capture mode > Desktop.
- Extend the play dropdown list > covert > and then browser a location to save the files.
- Tab on start to start recording.
- When you finish recording, click stop recording to end it.
-
Can VLC record streaming videos?
Yes. You can record streaming videos with VLC. Just go to Media > Open Network Stream > Network then provide the URL of the streaming show in the pop-up window. At this point, just click the "Play" button to start recording the streaming video. -
Why is VLC not recording your screen?
Your VLC player may not record your screen for many reasons. Some of these reasons include outdated VLC software, incorrect output format, and codecs, and broken transcoding and recording in your latest build. You can try to restart, reinstall, or update your VLC. -
Why is there no sound on your VLC screen recording?
If there is no sound in your VLC screen recording, either your sound card is frozen or another program is using it. Additionally, the microphone in your device could be disabled. You can check the microphone settings or restart your computer to see if it works.


