Note: This video tutorial is compatible with Filmora V11, V12 and V13 versions.
Video Animation+Audio Visualizer
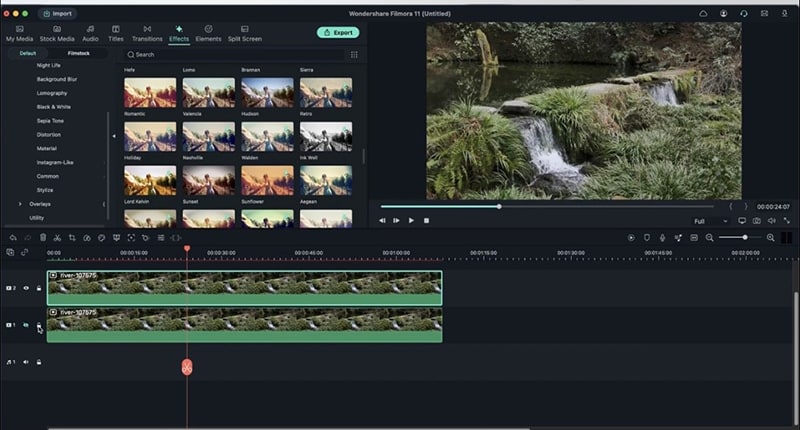
In this video tutorial, you will learn about video animations on Filmora. Basically, we are going to take all that we learnt so far, effects, elements, transitions, titles and see how we can animate those layers. With video animation we can fade graphics, overlays, etc so we can have control on how the effects look on the video.
To get a clearer picture, we have edited 3 different videos in different settings. So, let’s get started and see how this works!
The Auto Ripple feature by Filmora will automatically adjust the other videos in the timeline, instead of doing it manually.
You can try to change the video from day to night, using color correction and specific filters. By adding a blue toned filter, and cold toned filters along the timeline of the video, you can have a darker shade but not the exact illusion. To make a precise edit:
 Change The Video From Day To Night
● Make a copy of the video on the top.
● Double click the top video and click on color. You can use the given settings for a quick color grading, or go to the advanced settings.
 Double click the top video
● Go to adjust > lower the brightness > tune up the contrast and the vibrance. You can also click on the before & after icon for a comparison.
 Tune up the contrast
● Head onto the Light settings. Darken the shadows and increase the highlights. You can also turn the temperature to the colder side by clicking on the white balance and add purple to cancel the green.
 Light settings
Readjust this all over until you are satisfied. Then, lock the bottom video, click on Animation and gradually introduce this new video on top of the original video. You can customize the time when you want the video to darken. Add a keyframe and go back to adjust the opacity to zero. Use the second keyframe and drag it across the timeline to adjust how fast or slow you want the transition to happen. You can also add cricket sounds to make the night more realistic.
For instance if you have a video of a dull lamp you can make a few adjustments to give an illusion of it glowing. Here’s how it's done:
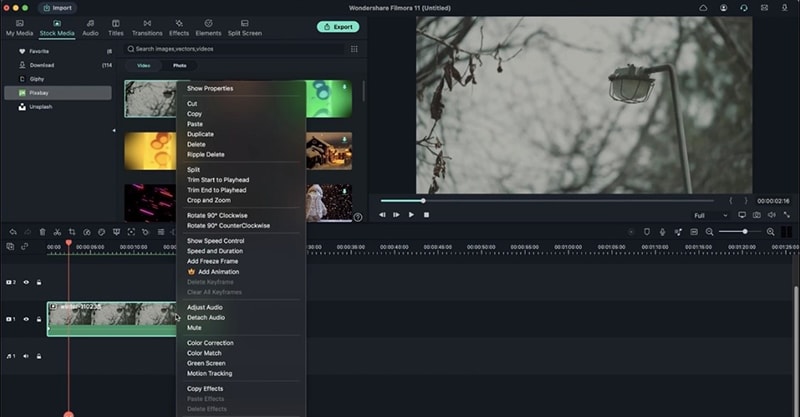 Turn on the lamp
● Head onto My Media > Sample Color and choose the color that you like to have. Drag it to the timeline by matching the duration of the video.
Turn on the lamp● Double click on the color > Click on video > increase the scale so that the color covers the screen.
● Head over to Compositing and change the blending mode according to your liking. Make sure to choose something under the Light category for that glow.
 Light category for that glow
● Go to effects > Utility > Click on Image Mask and drag it directly onto the color. Double click on the effect and choose Video.
 Click on the effect and choose Video
● Go to effects and choose a circle to mimic the glowing light. Work with the X and Y, to position it perfectly on the lamp. Make sure it’s slightly bigger than the lamp, and then increase the Blur Strength.
 Increase the blur strength
To make the lamp look realistic, we can add an flickering feature:
 Add flickering
● Double click on the color > Click on video > choose the Mask option and choose a circle.
● Blur out the edges, and work with X and Y. Keep on editing the settings to give a more realistic view to your liking. Make sure that the lamp is at the center of your color.
● To add that glow, go to effect > search for Glow > drag the effect to the color.
 Drag the color effect
● Double click to adjust the amount of glow, by changing the settings.
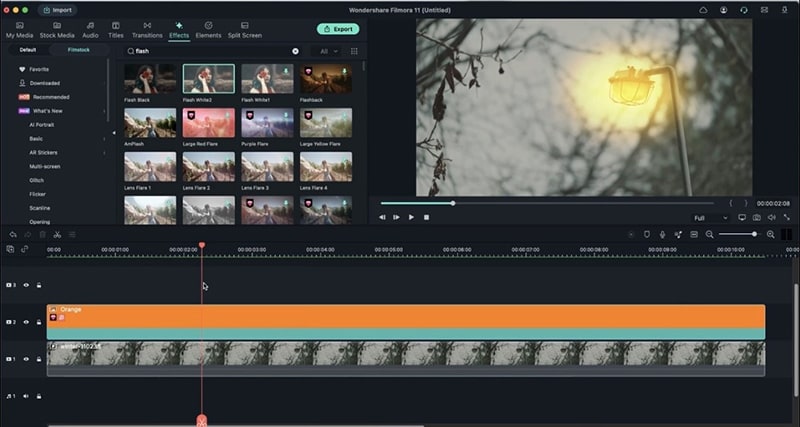
● Go to effects again and search for Flick. Choose the right one that suits the video and adjust the opacity.
● You can also add Flash effects for a more realistic look.
● Add the fade option in animation, to give a subtle flickering effect, until the electricity goes out.
For a perfect Halloween effect we can edit creepy eyes that blinks. Here’s how we can do it:
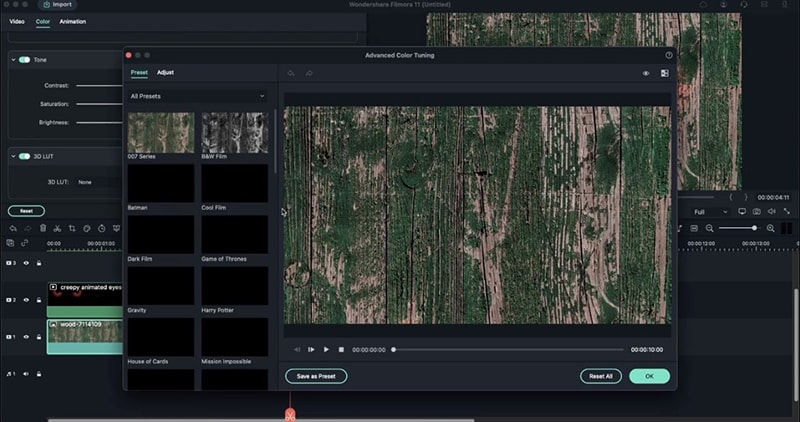 Creepy blinking eyes
● Drag down a picture of creepy eyes and a wall to your timeline.
● Head over to Compositing and change the blending mode according to your liking.
● Next, go to adjust > lower the exposure.
● We can then fade this video using key frames.
 Lower the exposure
● Add a keyframe and go back to adjust the opacity to zero. Use the second keyframe and drag it across the timeline to adjust how fast or slow you want the transition to happen.
● You can also add a Glow effect, to make the eye look more spooky.
