Note: This video tutorial is compatible with Filmora V13 version.
Filmora is a powerhouse with many features that elevate video editing. However, some of its most powerful tools are invisible in plain sight, waiting to be discovered. Be it drawing tools, seamless interface customization, keyframe shortcuts, or template filters! You have the power to craft visually engaging videos with remarkable ease.
Here, you can find these hidden gems that can transform your video editing experience. They will allow you to create stunning visuals with remarkable efficiency. Try these hidden features to improve your editing skills. Also, check out Filmora Creator Hub to discover tutorials created for other updates.
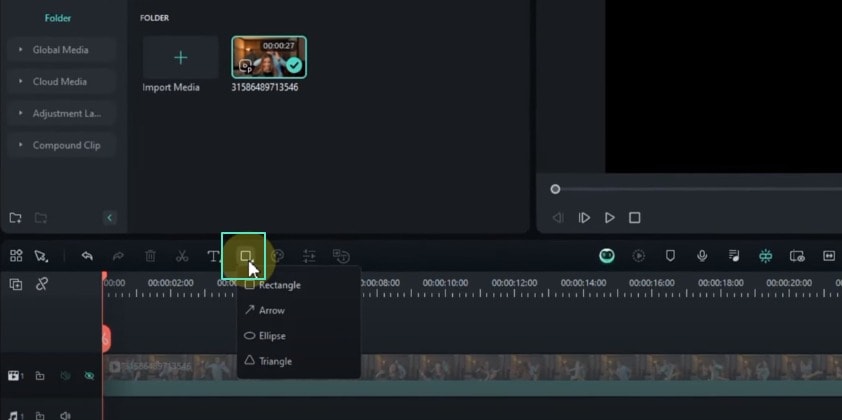
Find the Drawing Tools
Navigate to the toolbar and locate the "Drawing Tools" icon. This excellent feature allows you to form basic shapes. You can create rectangles, arrows, ellipses, and triangles directly on your video clips.
 Perform ai vocal remover
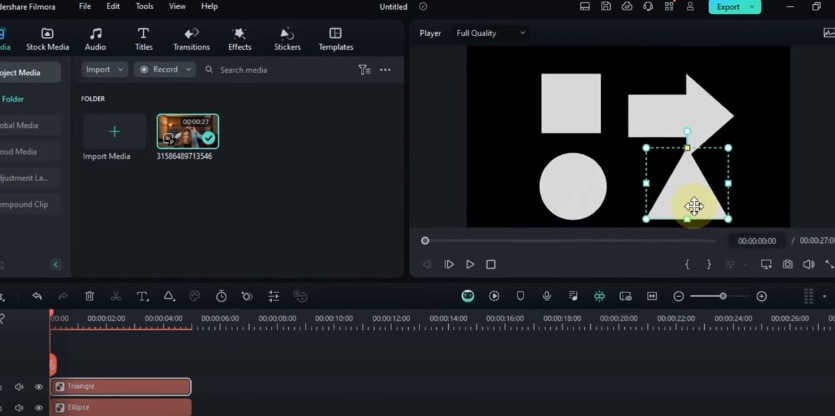
Use the Drawing Tools
With the Drawing Tools, you can do more than create static visuals. You can draw dynamic graphics and custom animations and even apply masking effects. Adjust any shape's size, position, and rotation to fit your vision. You can also try keyframe animations, making the shapes dance, morph, and pop onto the screen.
 Perform ai vocal remover
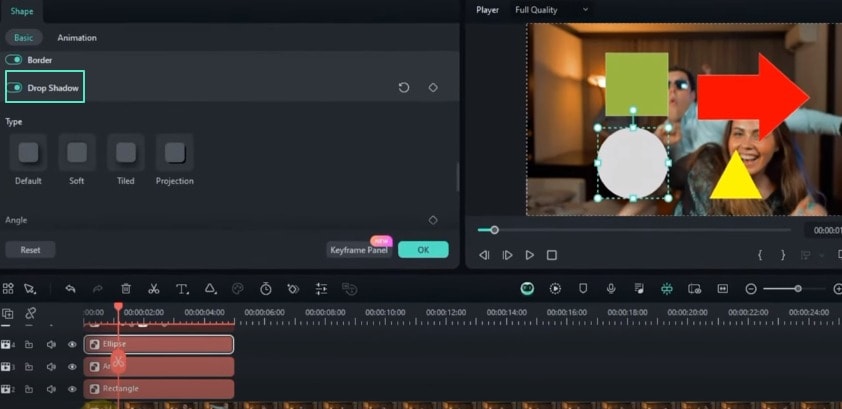
Customize the Appearance of Your Shapes
Ditch the dull defaults and paint your shapes in any color you like. Ensure the shapes match your brand by creating thematic elements. You can add drop shadows to give your shapes depth and dimension.
 Export final audio clips
Use the Quick Preview Mode
You can use the Quick Preview Mode, a fantastic addition to Filmora. Pressing the "B" key on your keyboard will play your clips with just one click.
 Export final audio clips
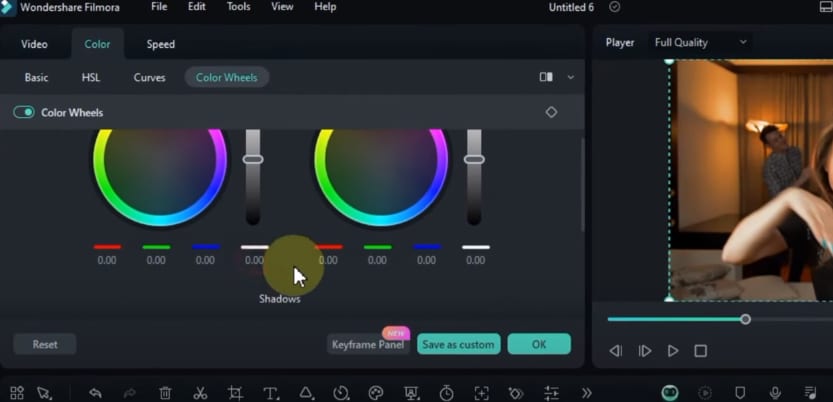
Explore Color Value Boxes
Double-click your clip on the timeline, navigate to the Colors panel, and click on the color wheels. The Red, Green, and Blue (RGB) value boxes are hidden beneath the color wheels. These boxes are not just for decoration; they let you fine-tune colors with pinpoint accuracy.
 Export final audio clips
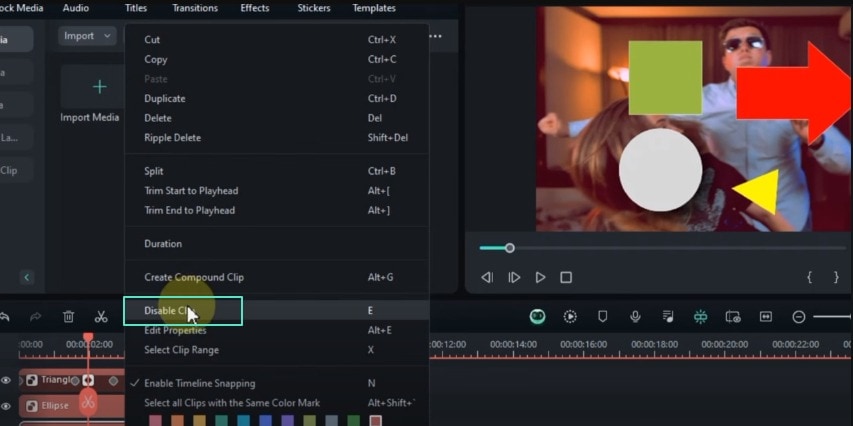
Enable or Disable Clips
It's easy to find the "Disable Clip" option. Right-click on any clip, video, or audio element on your timeline. Clicking this function will hide the clip from the timeline, but it's not gone forever. To bring it back, right-click the disabled clip and choose "Enable Clip."
 Export final audio clips
Customize Your Interface Layout
You can customize the timeline, toolbar, player, and media library to suit your style. You can arrange screens for ultimate editing if you have a multi-monitor setup.
 Export final audio clips
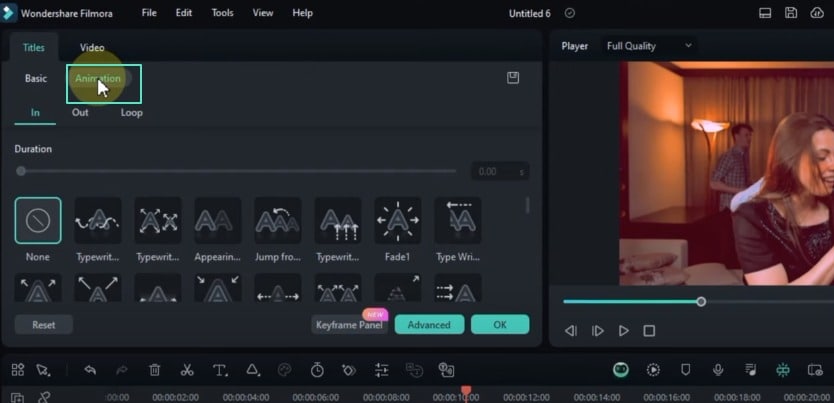
Explore Text Animation Loop Options
Add text to your project and navigate to the Titles panel. Customize the text style, then click on the Animations tab. Here, you'll find many free, fantastic loop animations. You can apply them to your text, bringing it to life without needing third-party plugins or software.
 Export final audio clips
Use Video Keyframe Shortcuts
You can use a shortcut to create video keyframes. Hold the "Alt" key, select your video clip, and left-click to generate a keyframe instantly. You can tweak, refine, and string these keyframes to create stunning effects.
 Export final audio clips
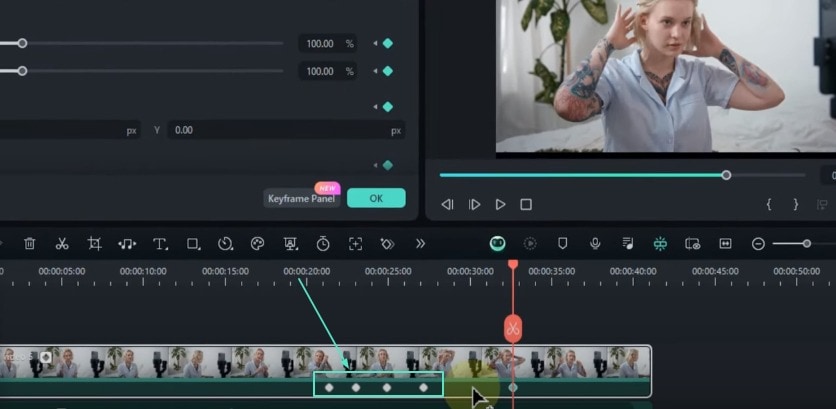
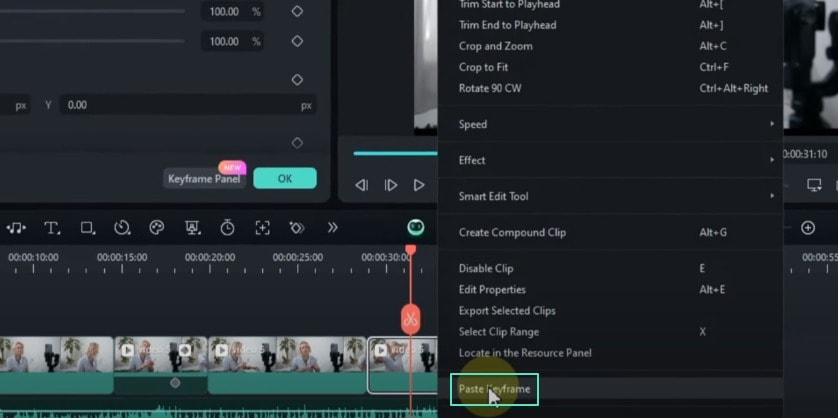
Copy and Paste Adjusted Values Between Clips
You can change a clip's size, position, rotation, or opacity on your timeline. Next time, you may need to repeat those changes to another clip. So, double-click on the adjusted clip to add a keyframe for all the values. Right-click on the keyframe and select "Copy." Then, right-click on the target clip and choose "Paste Keyframe."
 Export final audio clips
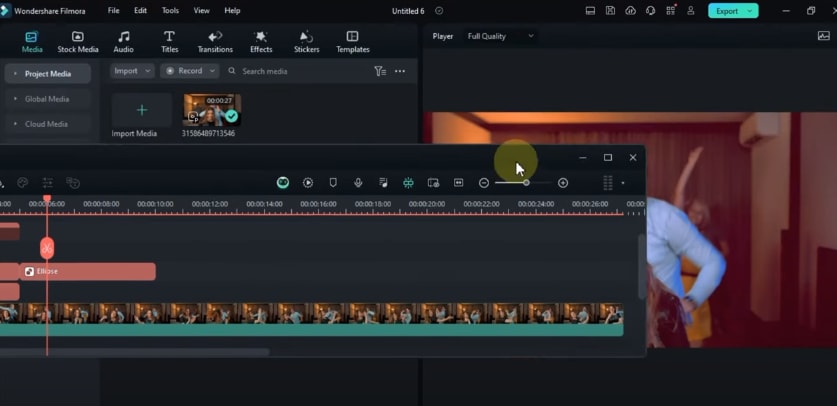
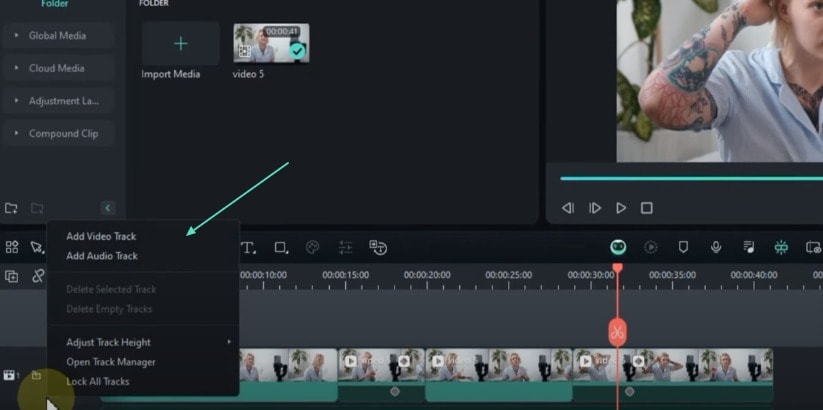
Manage Tracks Efficiently
To manage your tracks, you don't need to click the plus sign repeatedly. Instead, right-click on any timeline track to access the track settings option. This flexible and powerful feature can streamline your editing workflow.
 Export final audio clips
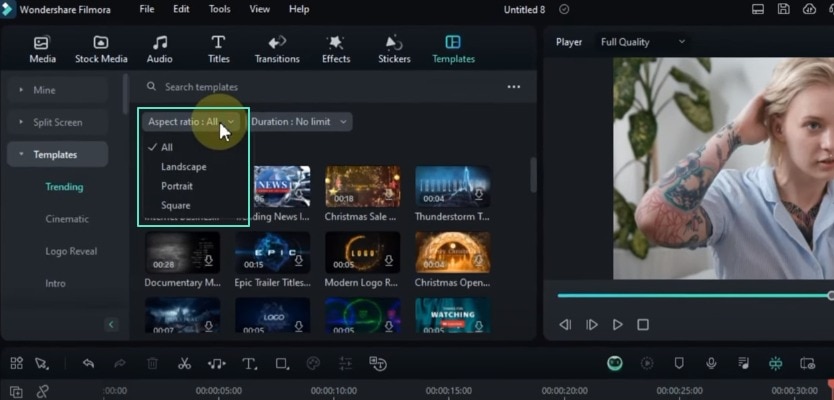
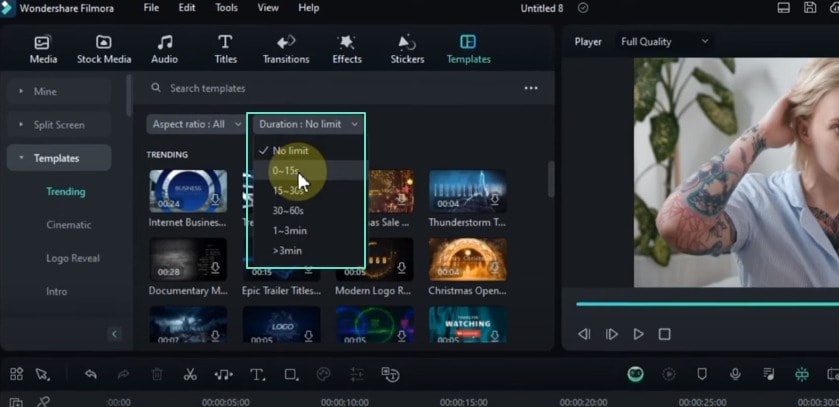
Filter Templates by Aspect Ratio and Duration
You can use filters to find templates. Moreover, you can refine the search based on aspect ratio and duration. The aspect ratio can be landscape, portrait, or square.
 Export final audio clips
The duration can vary from seconds to minutes. This feature will help you locate the perfect templates for your projects.
 Export final audio clips