Note: This video tutorial is compatible with Filmora V11, V12 and V13 versions.
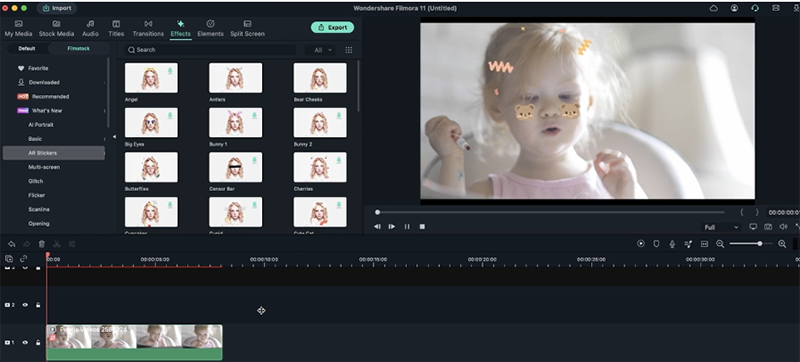
Add AR Stickers to Video
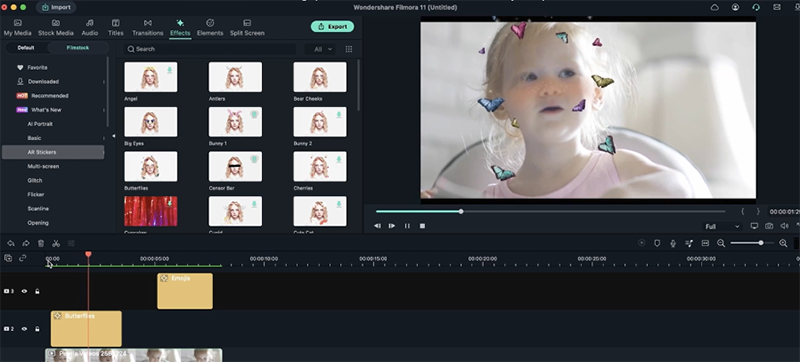
The elements of the stickers stay attached to the model and move as their head movement. Note that you can select different types of AR stickers as per your choice. For example, here we have attached DJ stickers and fun rainbow stickers in the subject too. You can add more AR stickers by dragging them into the video.
Now, let's take a look at our second subject. As you can see here, our model has a sideways face. She is also looking downwards.
 AR Sticker on Subject
If you apply the sticker on someone like this model, the stickers may look distorted. The stickers are also shaking as the model moves. Also, when the model gets out of frame, the sticker disappears too. Some elements, like the glasses, in this case, may act as a barrier for the stickers to appear flawlessly.
For an AR sticker to appear perfectly, your subject should have:
- Clear face
- Less movement
- Less covered face
Drag the third video to the timeline. Select a good sticker and apply it to the video.Note that, the first AR sticker gets applied to the entire video automatically. However, if you want to add any second sticker, you may have to adjust the duration as per your video requirement.
Here, we have added two AR stickers. If you see, here, the subject's face is straight and within the frame. That's why the stickers aren't moving as they did in situation 2. In situation 2, the subject's head was in a downward direction, and that's why the AR stickers looked weird.
 Why AR Sticker looks weird
 The face of the subject should always be directed toward the camera. That will ensure the stickers are fixed perfectly on the subject.
Now, let's test an AR eye sticker on the same subject. Here, the model's eyes are looking straight at us, but they are facing down a bit. That's why, when you apply the AR sticker, it looks a little strange.
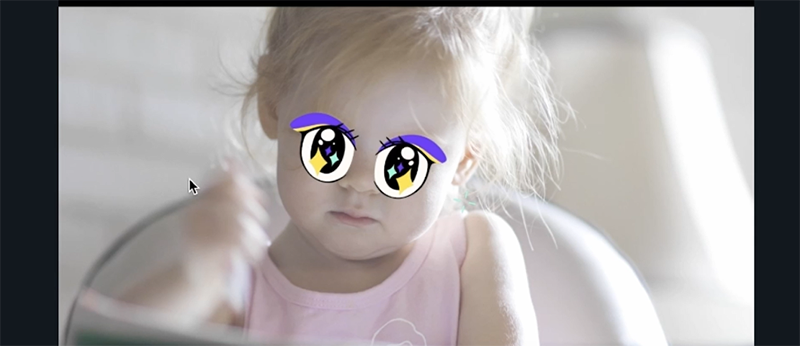 Eye Sticker
If we apply the same AR sticker to the second situation, it looks a lot better. That's because the subject or model is looking right at the camera. When she moves a bit sideways, the AR stickers move towards the nose. All in all, it's still much better than other situations.
In our last example, the model's forehead is sometimes out of the frame. However, when you apply the AR sticker, it doesn't disappear. Except for the forehead, the AR sticker applies perfectly to other regions like the eyes, neck, and mouth. This is because Filmora analyses the face to display the AR sticker on the model.
 How AR Sticker Works
However, when the face gets covered, the AR sticker disappears. Also, it looks weird when the model moves sideways. Although, the sticker elements stays right in the place.
Let's make a video to combine everything that we learned till now. First, choose any footage to create the video. For that, navigate to the stock media and type a genre. Here, we want something funky, so we have typed the term party.
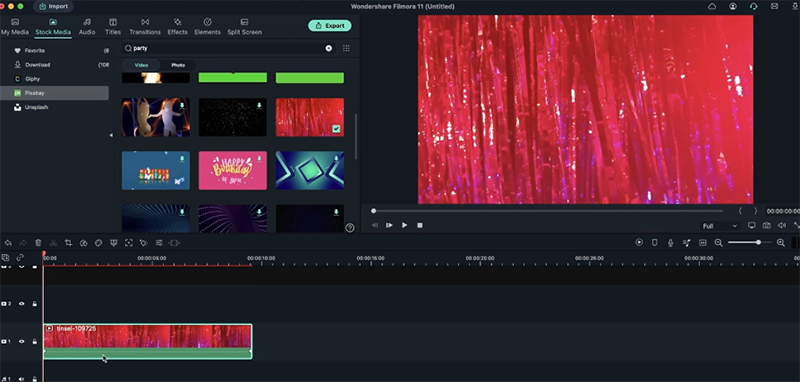 Adding Pixbay Footage
Then, select the footage and add it to the timeline. Next, take any video ( here, we have taken our first subject video, i.e., the lady with green background) and drag it to the timeline.
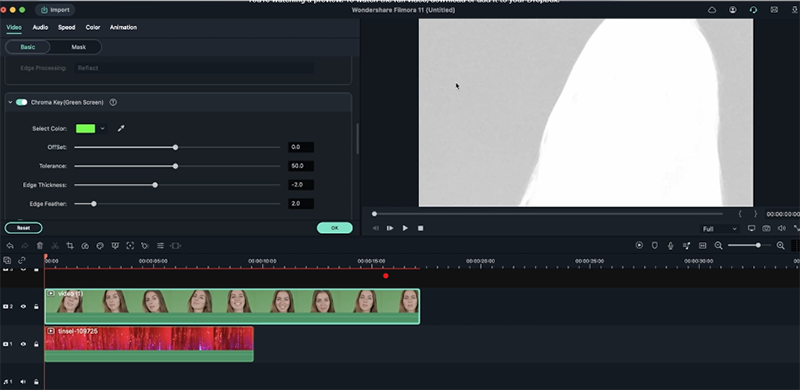
Blend both the footage and the other video together by turning on the Chroma key. On doing so, the green background will disappear, and the chosen party footage will appear at the back.
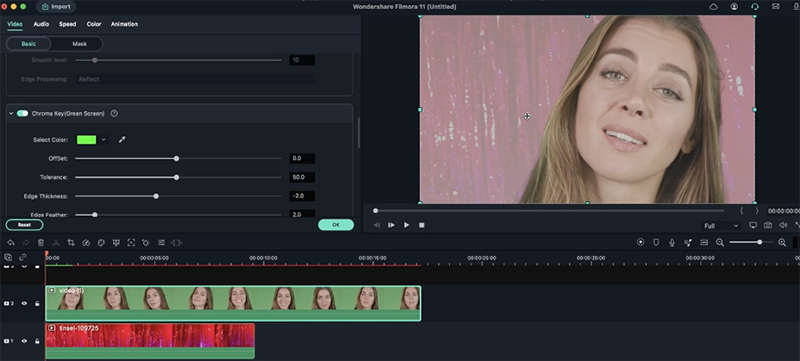 Adjusting Chroma Key
As you can see, the footage looks blurry and less vibrant, after combining the two. To bring out its real shades, go to video settings and turn on the alpha channel. Get over any grays that you find in the background.
 Adjusting Black and White Ratio
For both the videos to appear perfectly, there should be black and white colors on the video. Modify the Chroma keys settings by adjusting the offset, tolerance, edge thickness, and edge feather features.
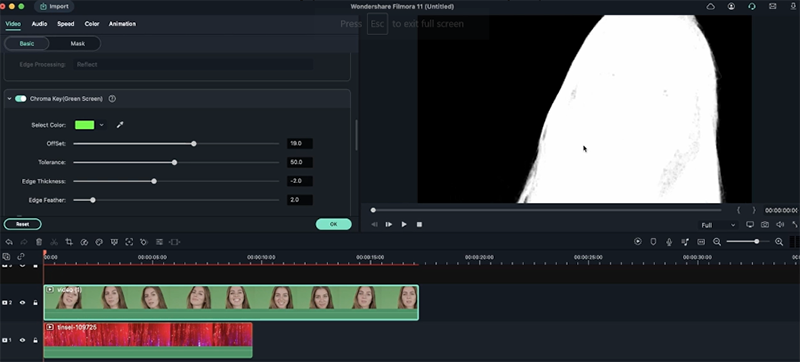 Adjusting Other Settings
Once done, your video will look perfect!
Now, go to the effects>AR stickers, and select an AR sticker for the video. Drag it to the timeline, and your video is completed.
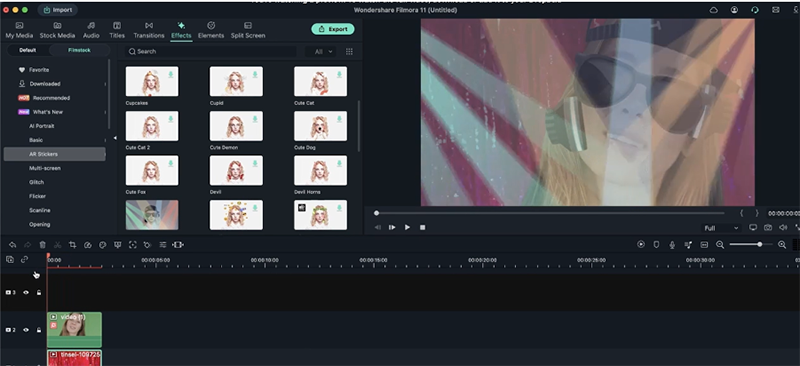 Final Outcome with AR Sticker
As mentioned earlier, you can add more than one AR sticker in a video to make it look more appealing. Try out these steps:
- Select any video from your media and drag it to the timeline.
- Now go to the Effects and then AR stickers section.
 Combine Multiple AR Stickers
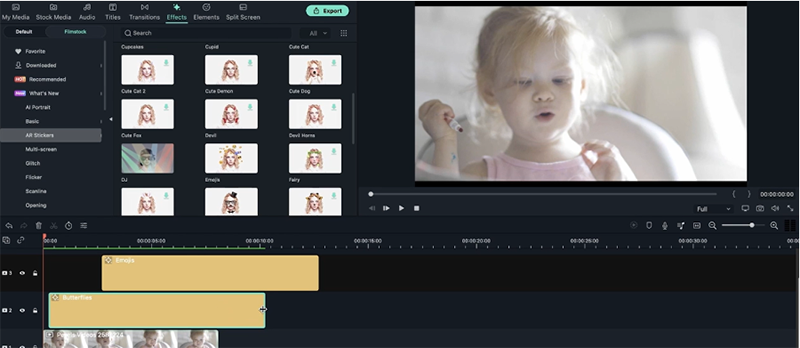
- Select 1-2 (or more) AR stickers and add them to the timeline.
- Adjust the duration as you want. You can trim the AR sticker timing and apply them to the video parts where you want them to appear.
 Adjust the Duration of AR Stickers
You can intensify a cinematic bar to add more dimension to the video. For that, follow the below steps:
- Go to My Media, then Sample color.
- Select any color that you like. In the video, we have chosen the color black.
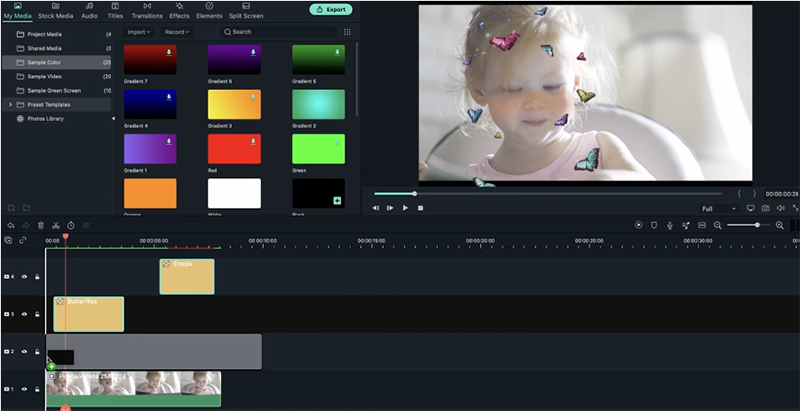 Adjust Sample Color
- Drag it to your timeline. Make sure that it appears just above the video on the timeline. If you already have stickers on the timeline, shift them to the top.
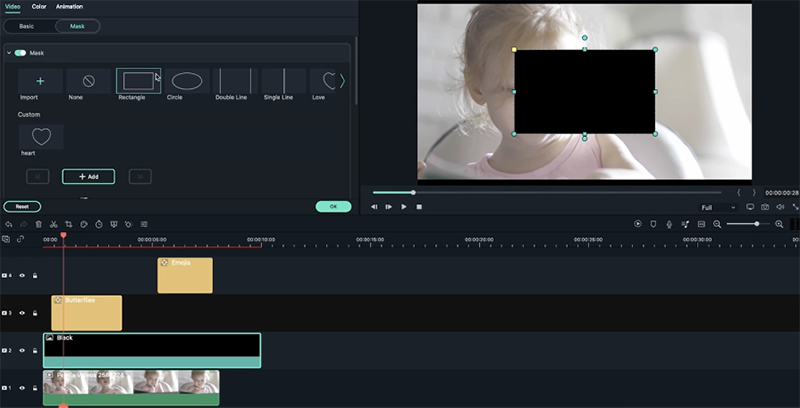 Select a shape for cinematic bar
- Go to Mask and select a shape. Here we have selected a rectangle.
- Click on Invert Mask and adjust the size of the video.
- On doing so, your cinematic bars will appear on the video. The stickers will appear over this bar, and you will get a 3D effect.
 Add More Advanced Editing
You can also add AR elements to make your video even more attractive. It adds a more fun effect to the video. Follow the below steps to add AR elements.
- Go to elements and then click on AR.
- Select an AR element and drag it to your video.
You can keep the cinematic bar for the element to look even more compelling in the video. Besides that, you can add multiple AR elements for perfect results.
Now, you must be curious to know whether these AR stickers could be applied to a video without any face. Let's try it out:
- Go to Stock Media and select a faceless video. Here, we have chosen footage with flowers. You can also add any media of your own.
- Now, click on the Effects>AR Stickers.
- Select any AR Sticker and drag it down to the video timeline.
You will see that the AR sticker doesn't appear.
Import any media with animals, if you have one. You can also select the same from Stock Media. Drag it to the video timeline and add the AR stickers.
You will see that the AR sticker wouldn't appear. This means Filmora AR stickers do not work on other faces. It's applicable only to the human face. To double-check, we have applied the AR sticker on a cat and tiger. It didn't work for either case.
