Note: This video tutorial is compatible with Filmora V11, V12 and V13 versions.
Editing Action Cam Video Using Filmora
In this video tutorial, we’ll be learning about action cam videos! Basically, they allow you to capture videos in motion, but in an effective way. For instance, if you’re riding a bike it would be hard to carry a DSLR, so they make tiny recording devices for an accessible way. The downside of these video cams is that they cause a bit of distortion, which can be recovered during post production, giving you a high-quality video.
So let’s get started and learn how to remove any distortion and understand motion editing. For a clearer view, we have introduced three different samples for basic round distortion, rounded distortion with multiple scenes and creating distortion for video effects.
When you take a video from the front of a boat ride with an action camera, the water body bends tend to create a rounded picture, due to the lens of the action camera. We can effectively remove this distortion caused by the small lens of the action camera, by using the lens correction feature. Here’s how you can easily remove this kind of distortion. Take a look at this picture with distortion, and get ready to see the magic with Filmora.
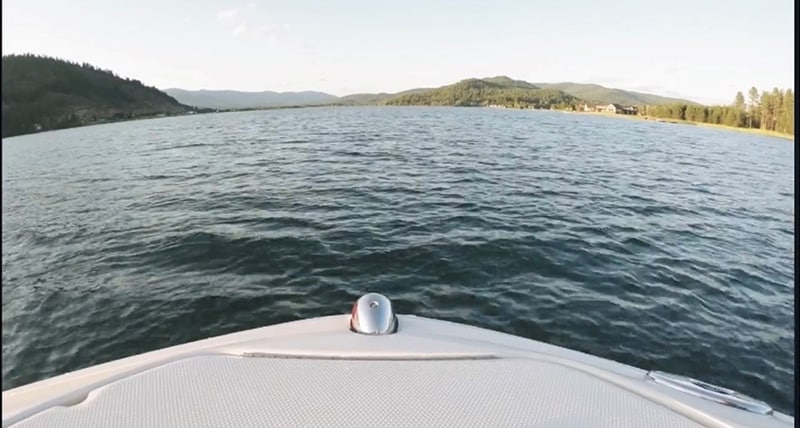 Rounded Distortion
Step1: Start by deleting any empty tracks, and duplicate the video, to get an insight of the before and after.
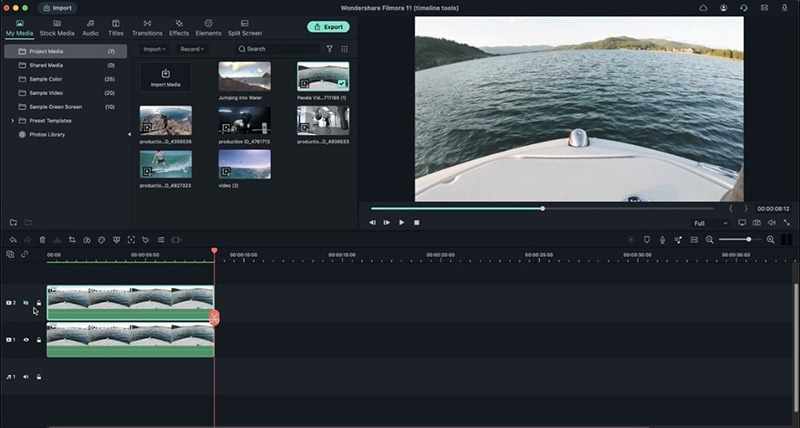 Start by deleting any empty tracks
Step 2: Double click the video > go to Video > Basic > and scroll down to Lens correction. Turn on lens correction and choose the camera model as well as the resolution. If you're not sure about the type of camera used, you can try out multiple lenses and models to get the accuracy you want.
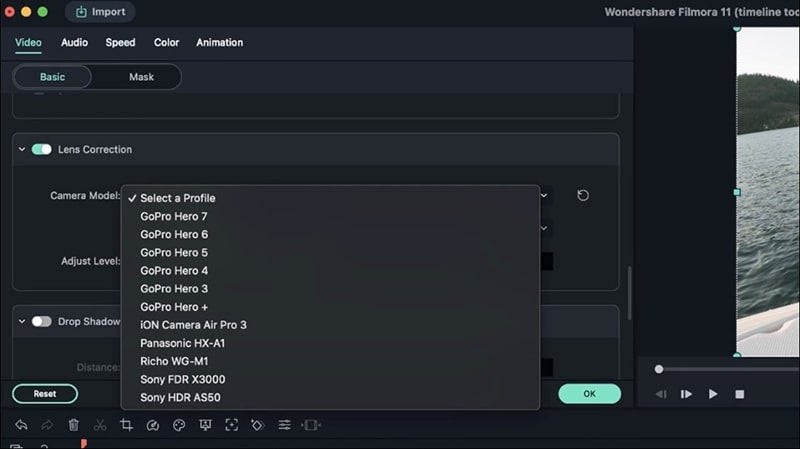 Turn on lens correction
Step 3: Adjust the level to -100 to get rid of any round distortion. That’s how you fix a basic round distortion. To make sure that the video is centered, you can double click the video, go back to Basic and turn on Transform.
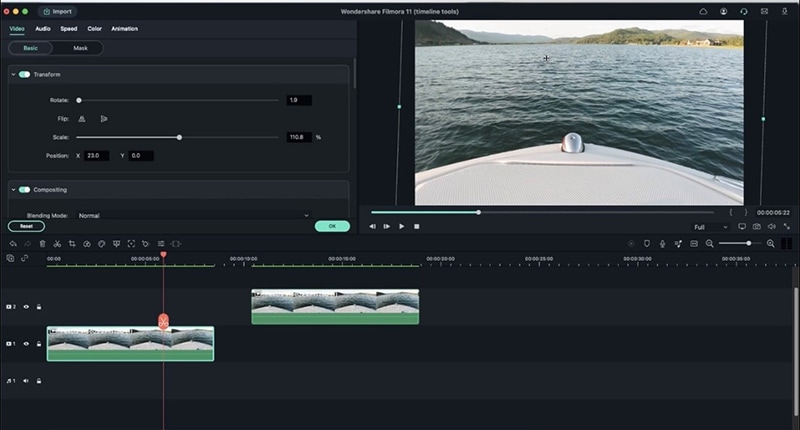 Adjust the level
You can then simply use the rotate option to bring the video to a centred position and Scale it in a bit to remove any black borders.
In case you want to remove any distortion in a video that has multiple scenes. You can right click and select scene detection.
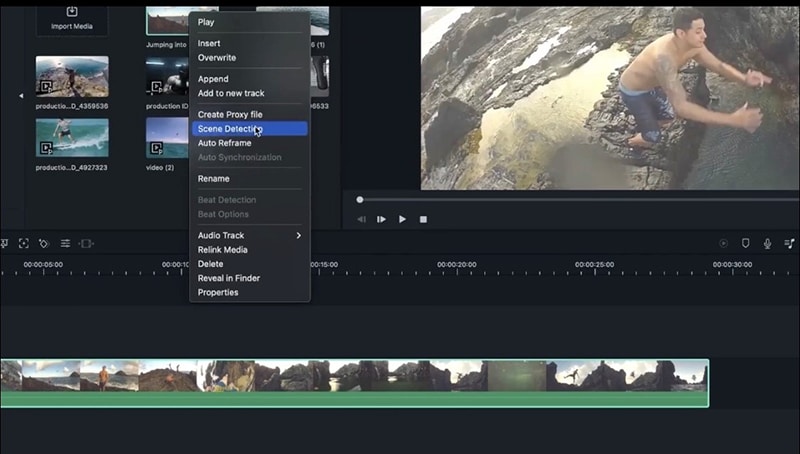 Rounded Distortion (Multiple Scenes)
 Filmora automatically detects any scene differences, and puts them into separate videos, so you can select the ones that you will be needing to edit.
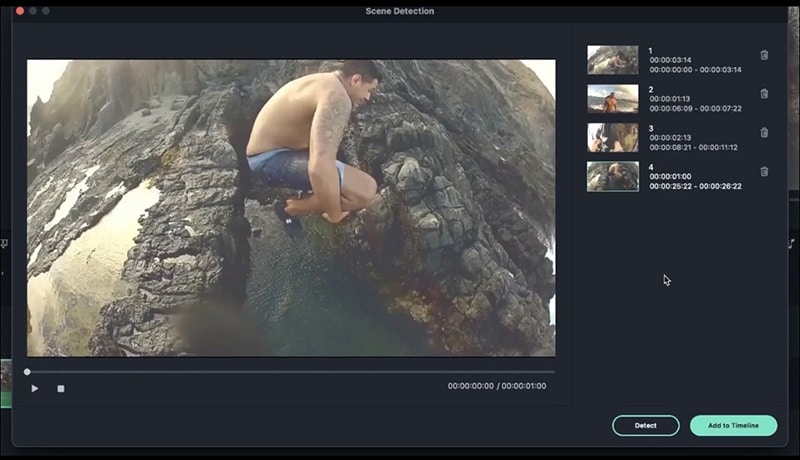 Select the scene needed to be edit
Step 1: Start by deleting any empty tracks, and duplicate the video, to get an insight of the before and after.
Step 2: Double click the video > go to Video > Basic > and scroll down to Lens correction.
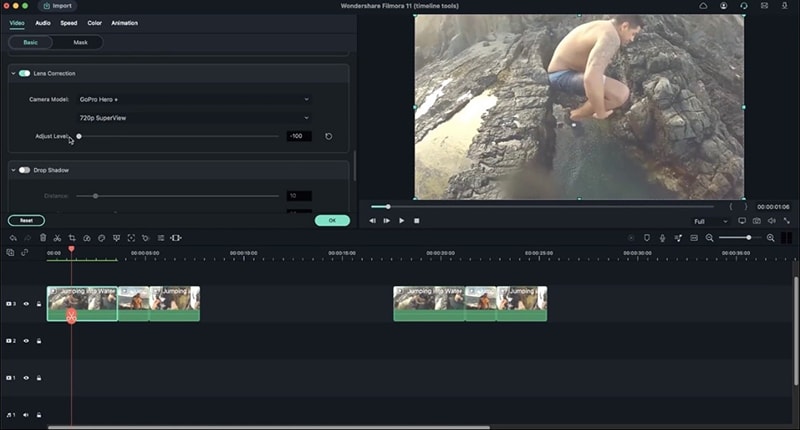 scroll down to Lens correction
●Turn on lens correction and choose the camera model as well as the resolution. If you're not sure about the type of camera used, you can try out multiple lenses and models to get the accuracy you want.
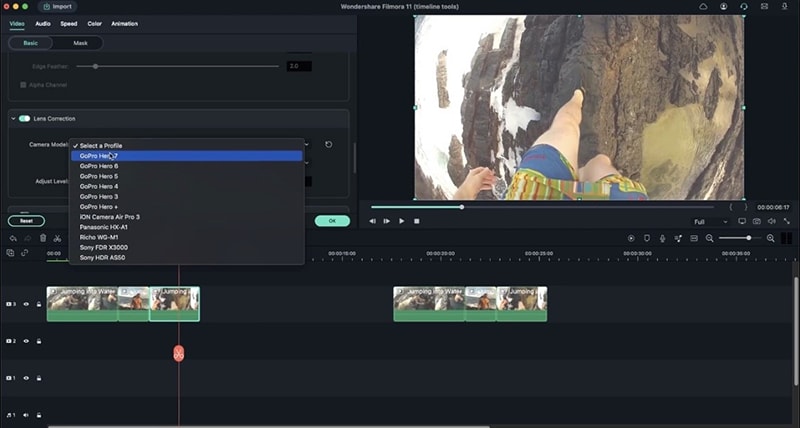 Choose the camera model
Step 3: Adjust the resolution level to get rid of any round distortion.
Step 4: Select each of the remaining videos and follow the same procedure. Once you have fixed the distortion, your video will appear more straight and stable. You can also try out some of the effects that Filmora offers, like transitions, titles etc.
You can also create a distortion in stable videos, to have a cool or game like effect. For instance, if you take a video of a boxer, we can create an effect to make every punch look more realistic & powerful. Here’s how it is done!
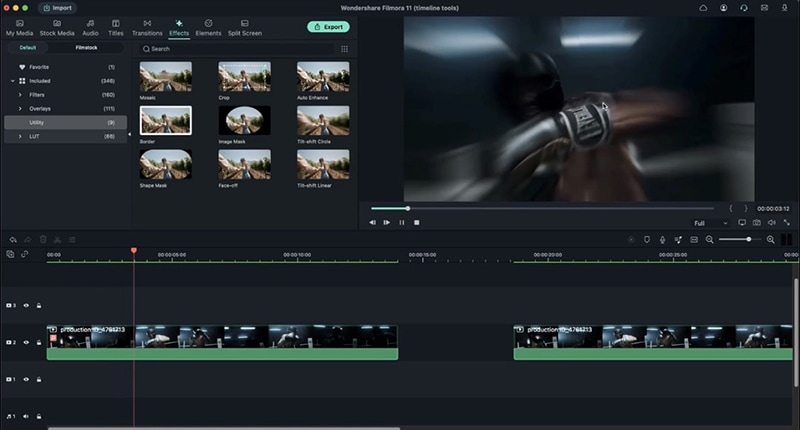 Creating Distortion
Step 1: Select the video > head over to Effects > and choose tilt shift circle effect > drag it directly onto your video. This creates a blurry effect!
Step 2: Next go to sample color > choose red > drag it to the timeline.
Head over to Compositing and change the blending mode according to your liking. Make sure to choose something under the Light category for that glow.
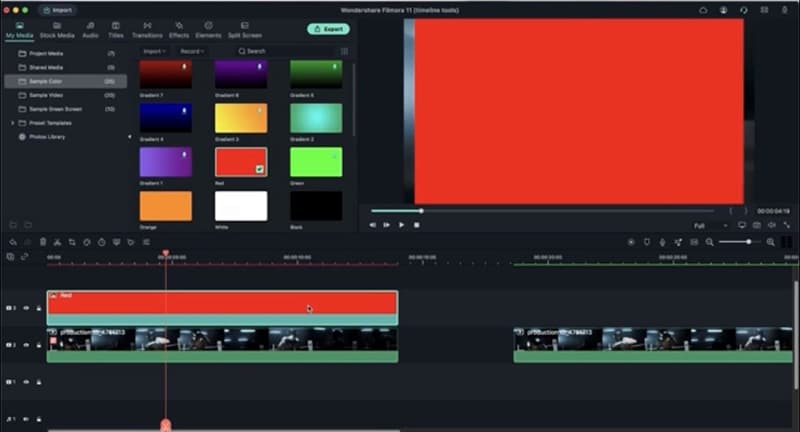 Drag it to the timeline
Step 3: Click on the color red on the timeline > click the Color option > enable Tone > reduce the brightness to get a blood like red color.
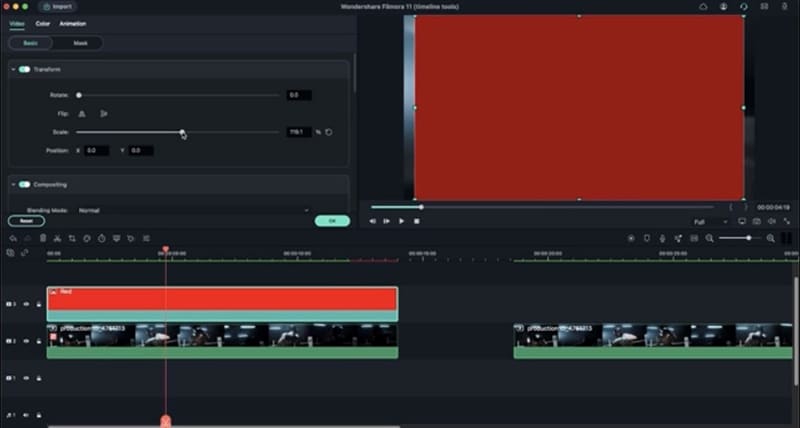 Get a blood like red color
To make the boxer look weaker, with every punch:
● Go to Video and scale the color in until it covers the whole video.
● Double click on the color > Animation > Drag the Opacity slider and set a keyframe.
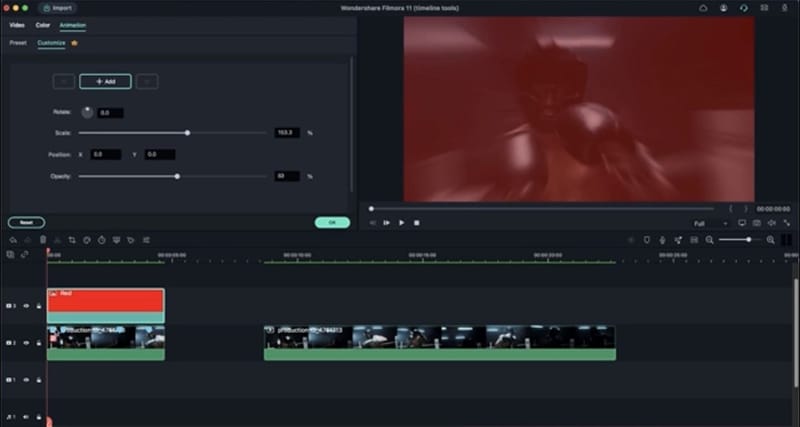 Double click on the color
● Play the video and mark every time the punch gets closer to the frame, in the timeline. You can use the left and right arrow keys to move frame by frame.
● Go to animation > Click on the first keyframe > and set keyframes on every marking.
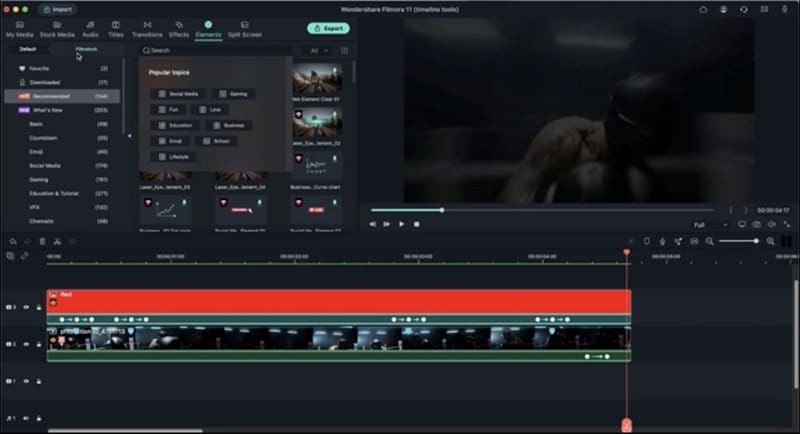 Set keyframes on every marking
● In order to make the color fade out between the keyframes, select each key frame and adjust the Opacity.
● Then adjust the distance for an equal effect.
For the end you can adjust the Opacity to fade out using keyframes, to give a knockout effect. For a cool game end:
● Go to Elements > Search for Game Over > Download your choice and drag it to the timeline.
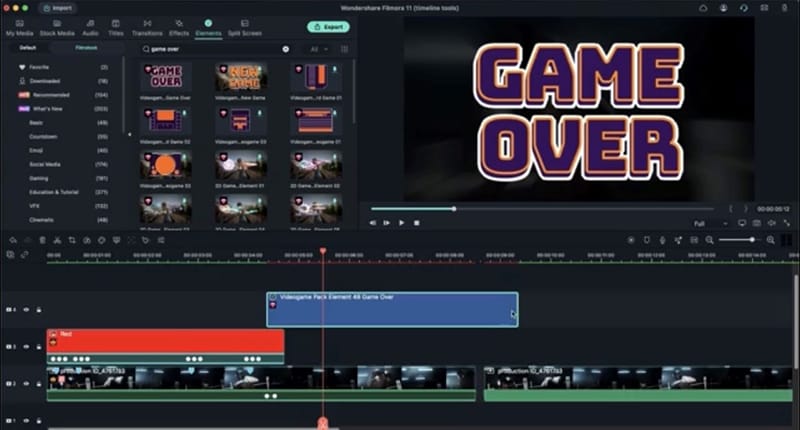 Download your choice
● Decrease the duration of the Element, set a keyframe towards the end of the element and change the Opacity to zero.
● Drag the keyframe of the video and the element so it coincides.
You can also add these elements, titles and effects in the previous videos.
