


 ChatGPT
 Perplexity
 Gemini
 Claude
 Grok
Grok
Importing image sequences into DaVinci Resolve can really boost your video projects. It’s a fantastic way to integrate high-quality graphics and animations. Whether you’re working on animations or slideshows, JPG sequence is essential.
DaVinci Resolve is a powerful video editing tool. It supports various image formats. Importing image sequences can seem tricky, but it’s simpler than you think.
In this guide, we’ll walk you through the process step-by-step and cover how to do this in Filmora, another popular video editing software. Let’s dive in and master these essential skills.
In this article
Part 1. What is Image Sequence?
An image sequence is a collection of images played back-to-back to produce an animation. Each image represents a single frame. When viewed swiftly, one after the other, they give the impression of motion.
Time-lapse films, visual effects, and animations frequently employ this method. It's an excellent way to enhance your projects with intricate visuals and animations. Employing individual frames allows you to attain high control and precision.

DaVinci Resolve supports several image formats, including JPG, JPEG, TIFF, and EXR. Because of this versatility, working on a variety of projects is simpler. Gaining proficiency with image sequences can greatly improve your video.
Now, let's get your video from JPG image sequences ready for post.
Part 2. Prepare Your image Sequence for the Import
Before importing your image sequence, ensure all images are correctly named and numbered. Consistent naming helps DaVinci Resolve recognize them as a sequence. For example, name your files "image001.JPG," "image002.JPG," and so on.
Ensure that all images have the exact resolution and aspect ratio. This consistency prevents issues during import and playback. Also, place all your pictures in a single folder to keep things organized.
Now, let’s get into the step-by-step process of importing your image sequence into DaVinci Resolve.
Part 3. How To Import Image Sequence in DaVinci Resolve
It's easy to import an image sequence into DaVinci Resolve. Just follow these easy guidelines to add your JPG sequence to your project.
Step 1. Open DaVinci Resolve
Start by launching DaVinci Resolve on your computer.
Step 2. Create a New Project
Click on "New Project" and give your project a name. Click "Create" to proceed.
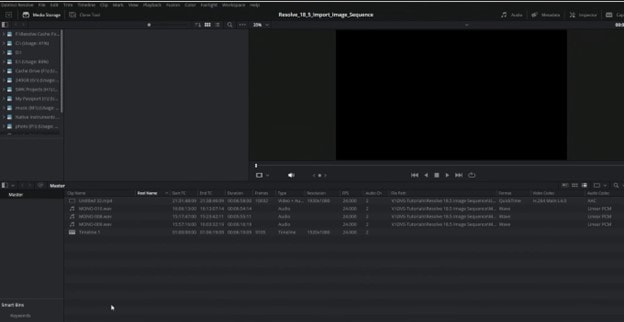
Step 3. Go to the Media Page
Click on the "Media" tab at the bottom of the screen to open the Media workspace.
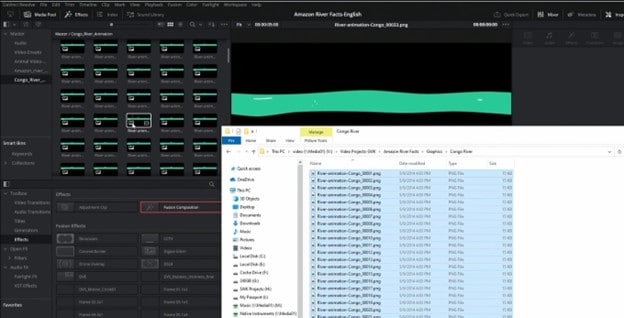
Step 4. Navigate to Your Image Sequence Folder
Use the file browser on the left to locate your image sequence folder.
Step 5. Select the First Image
Click on the first image in the sequence. DaVinci Resolve will automatically detect the rest of the sequence.
Step 6. Check the Image Sequence Box
Ensure that the "Image Sequence" checkbox is selected. This tells DaVinci Resolve to import the images as a sequence rather than individual files.
Step 7. Import the Sequence
Drag the selected sequence into the Media Pool. Your image sequence is now ready for editing.
Once your sequence is imported, you can start editing and integrating it into your project. Let's move on to learning how to import images individually.
Part 4. How To Import Images Individually in DaVinci Resolve
You can import pictures one at a time instead of in order. This strategy gives you more control over each frame.
Step 1. Open the Media Page
Click on the "Media" tab at the bottom of the screen. This opens the Media workspace where you manage all your files.
Step 2. Navigate to Your Image Folder
Use the file browser on the left to locate the folder containing your images. Ensure all photos are organized and ready for import.
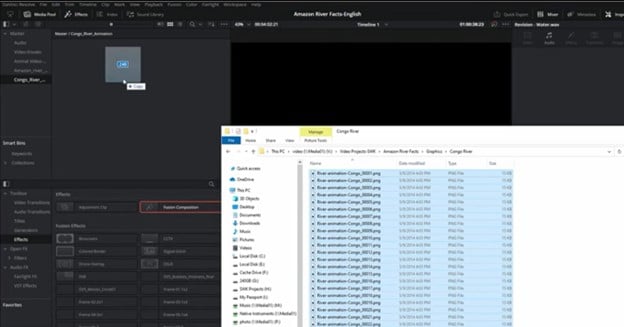
Step 3. Select Your JPG Image Sequences
Hold down the Ctrl key and click on each image you want to import. This allows you to select multiple photos at once.
Step 4. Drag to Media Pool
Drag the selected images into the Media Pool. They will be imported as individual files, not as a sequence.
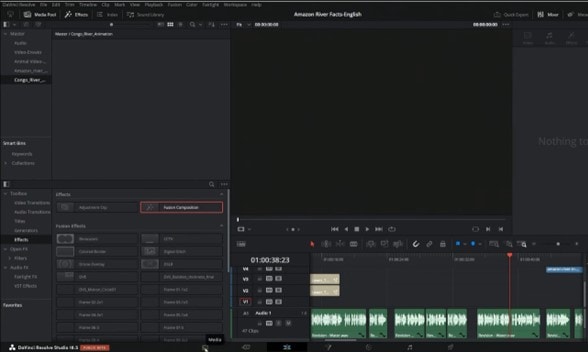
Step 5. Arrange on Timeline
Drag each image from the Media Pool to the timeline. You can place and edit them individually, giving you precise control.
After learning how to import, let's examine why you have problems importing image sequences.
Part 5. Why Do I Fail To Import Image Sequences in DaVinci Resolve?
Occasionally, problems can occur with DaVinci Resolve while importing image sequences. There are numerous typical reasons for this.
- Incorrect File Naming
Among the most frequent problems is improper Image names. Ensure the numbers on your files are recurrent, such as "image001.JPG," "image002.JPG," and so on. Inaccurate or missing numbers can confuse the software.
- Mixed Resolutions
The aspect ratio and resolution of each image in your series must be the same. Import errors may arise from mixed resolutions. Before importing, double-check your photos to make sure they are consistent.
- Unsupported Formats
Ensure that your photos are in one of the file types: JPG, JPEG, TIFF, or EXR. Unsupported formats won't recognize the sequence.
- Corrupted Files
If any of your files are corrupted, it may be impossible to import the complete sequence. Look for damaged pictures and replace them if necessary.
You can effectively import your image sequences and troubleshoot them. As a bonus, let's now examine how to import image sequences in Filmora.
Part 6. Great Alternative: Import Image Sequence in Filmora Without DaVinci Resolve
Wondershare Filmora is another popular video editing tool known for its simplicity and ease of use. It’s great for both beginners and professionals. Importing an image sequence in Filmora is straightforward. It can enhance your video projects with smooth animations.
Filmora supports various image formats, making it versatile for different projects. Whether you’re creating a time-lapse video or an animation, Filmora makes the process easy.
- Automatic Detection: Automatically identify image sequences when importing, streamlining the process.
- Customizable Settings: Adjust frame rates and other settings to tailor the video output to your specific needs.
- Supports Multiple Formats: Compatible with popular video output formats like MP4, MOV, AVI, etc., allowing for flexibility in content creation.
Easily Convert a Series of Still Images Into a Cohesive Video Clip

Here’s how you can import a JPG image sequence in Filmora.
Step-by-Step Guide to Import and Image Sequence Create Video
Video Guide on Using Image Sequence to Video in Filmora
Let's breakdown the video tutorial with detailed how-to steps.
Step 1. Download and Open Filmora
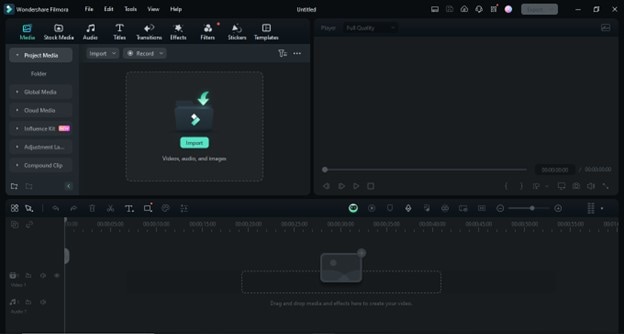
Download Filmora by clicking the buttons below. And then, launch Filmora and create a new project. Ensure your software is up to date for the best performance.
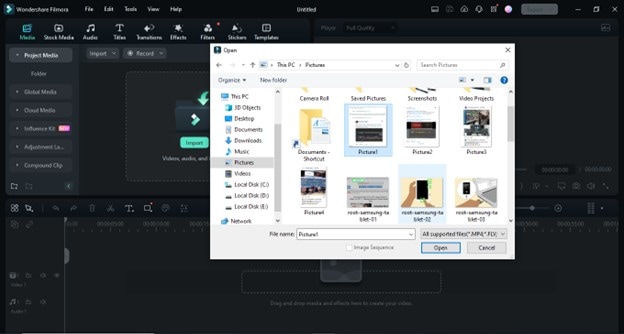
Step 2. Import Your Images
Click the "Import" button and navigate to your image folder. Select the first image of your sequence and check the "Image Sequence" box.
Step 3. Adjust Frame Rate
Right-click on the imported sequence and select "Properties." If necessary, adjust the frame rate to match your project’s settings.
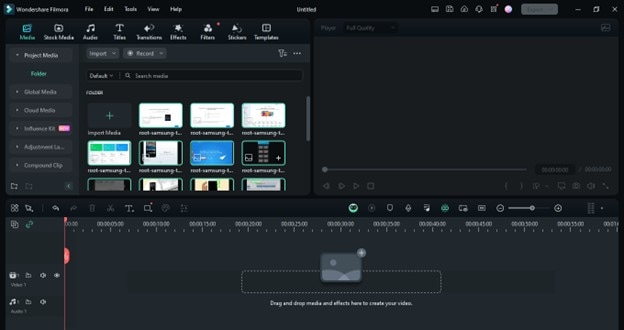
Step 4. Add to Timeline
Drag the imported sequence onto the timeline. Arrange the sequence as needed for your project.
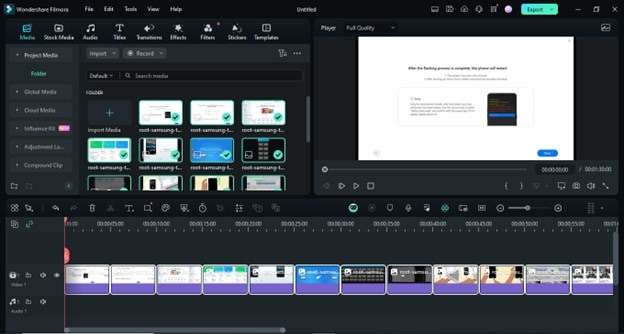
Step 5. Edit and Enhance
Enhance your video with effects, transitions, and audio tracks. Use Filmora’s tools to customize your project.
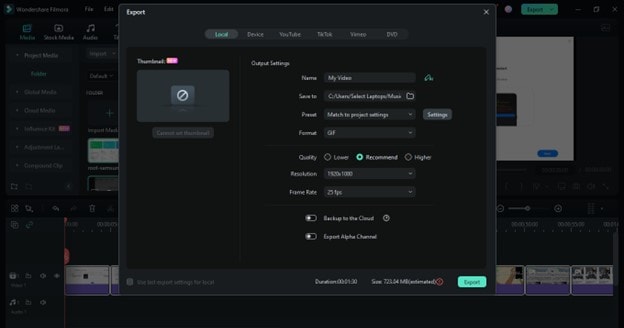
Step 6. Export Your Video
Once you are satisfied with your edits, click the "Export" button. Then, choose your desired format and save your video.
Using Filmora, you can easily create professional-quality videos with image sequences. Now, let's discuss why importing image sequences can be so beneficial.
Part 7. What Is the Purpose of Importing Image Sequences to a Video Editor?
Importing image sequences can be incredibly useful in various scenarios. It’s a technique often used in professional video production.
1. Animations
Creating animations is an everyday use case. You can bring your hand-drawn or computer-generated animations to life by importing image sequences. Each frame becomes part of a smooth, continuous motion.
2. Time-Lapse Videos
Image sequences are perfect for time-lapse videos. Importing pictures as a sequence lets you show changes dynamically. It’s a great way to compress hours, days, or months into a short video.
3. Visual Effects
Importing image sequences allows for precise control of visual effects. You can integrate detailed effects frame by frame, which is essential in professional film and video production.
4. Stop-Motion Projects
Stop-motion animation relies heavily on image sequences. By capturing each frame individually, you can create intricate animations. Importing these frames as a sequence simplifies the editing process.
5. High-Quality Slideshows
If you’re creating a slideshow, importing images as a sequence can make it professional. Each image transitions smoothly to the next, creating a cohesive visual story.
Using image sequences can significantly enhance your video projects. They provide flexibility and precision that single images or video clips might not offer. Let’s move on to FAQs about importing sequences in DaVinci Resolve.
Final Words
Adding image sequences to your video projects in DaVinci Resolve can make a big difference. It's an effective method for producing visual effects, time-lapse films, and animations.
It's simple to master if you follow the correct steps. The procedure is the same whether you use Filmora or DaVinci Resolve.
If you follow this guide, you can quickly and precisely realize your creative visions—and have fun while doing it!
