
Suppose you have been on a trip, and now your phone is full of short clips and videos of the entire journey. You want to share all the memories in one go with your friends by joining all the videos. For this, you might need the utility of video splicing is required. If you are not a professional video editor, you can get help from various AI-powered tools such as Wondershare Filmora.
This article will discuss how you can use this incredible platform to splice a video from your PC as well as your smartphone. The guide will provide a walk-through for you to gain insight into the procedure using this video splicer.
In this article
Part 1. Filmora: The Best Method to Splice a Video on Your PC
To convert your short clips into a proper chronological story, it is evident that Wondershare Filmora is the right resource. This all-in-one video editing tool allows users to craft, edit, and modify the visual and audio content by offering an extensive suite of features.
It constitutes a magnetic timeline utility that automatically snaps clips into space within the editing timeline to avoid gaps and overlaps. Moreover, users can enhance the quality of their created long videos by leveraging advanced editing functionalities such as auto reframing to make the aspect ratio consistent for all the clips across the video.
This coherent clip splicer lets you remove unwanted objects from your videos and make the audio noise-free using the Denoise feature. To learn how to splice together videos, read the detailed stepwise guide below:
Powerful AI video editor for all creators


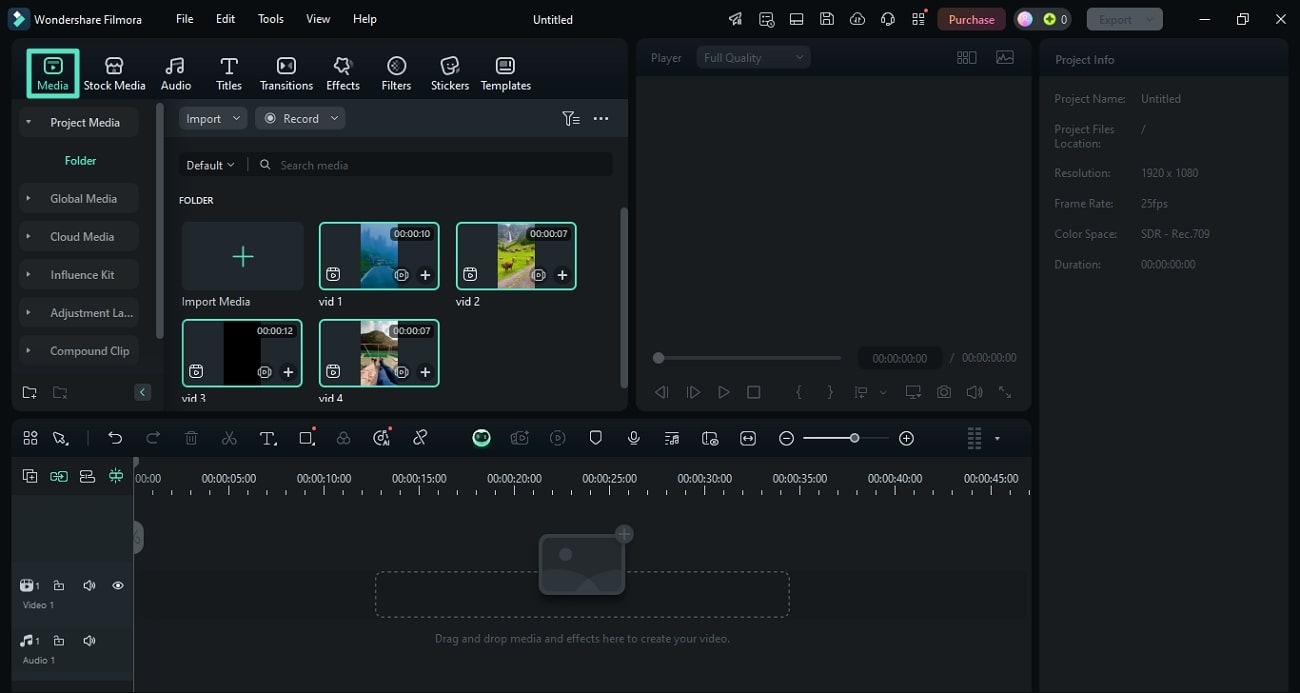
Step 1. Import Your Short Clips to the Interface
Once you have launched Filmora on your device, select the “New Project” option from the homepage. Next, head to the “Media” section in the main interface and press the “Import” button to add your short clips within the section.
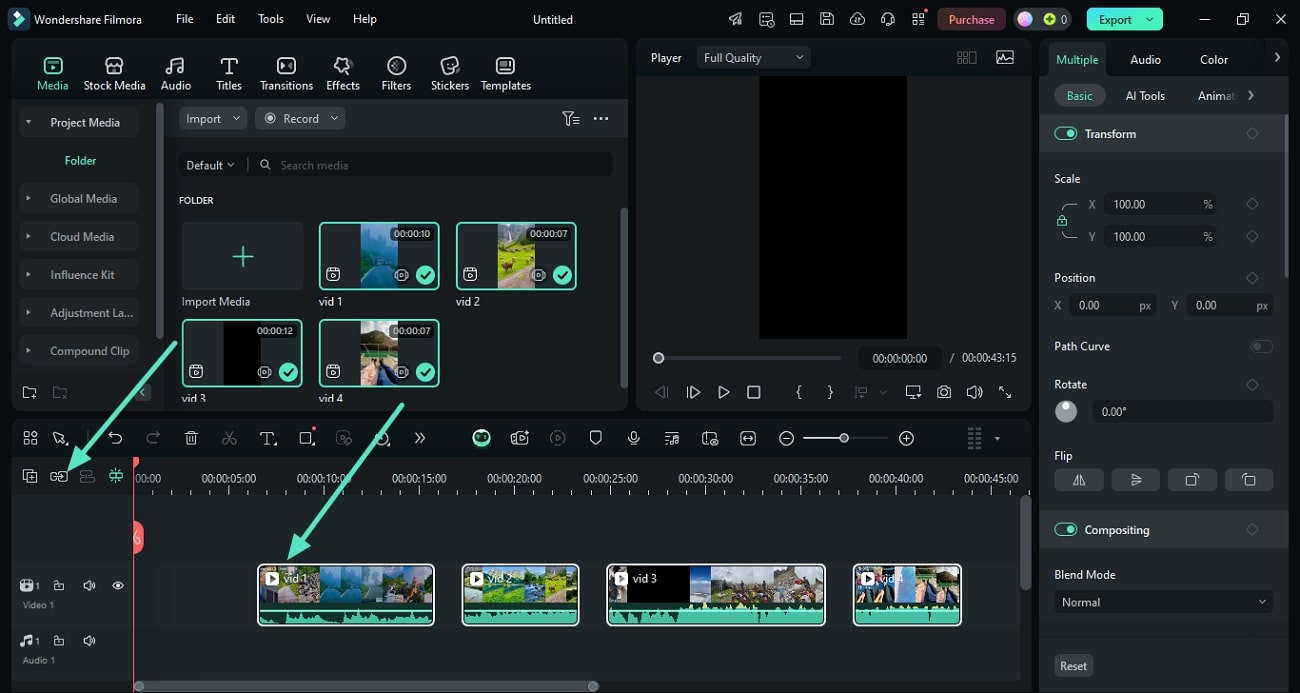
Step 2. Splice the Clips by Dragging and Dropping
Once all files are successfully imported within the Media section, simply drag and drop each clip to the editing timeline. Now, head to the right side of the timeline and press the “Magnetic Timeline” icon to enable it. This will keep all your clips together while removing the gaps between them.
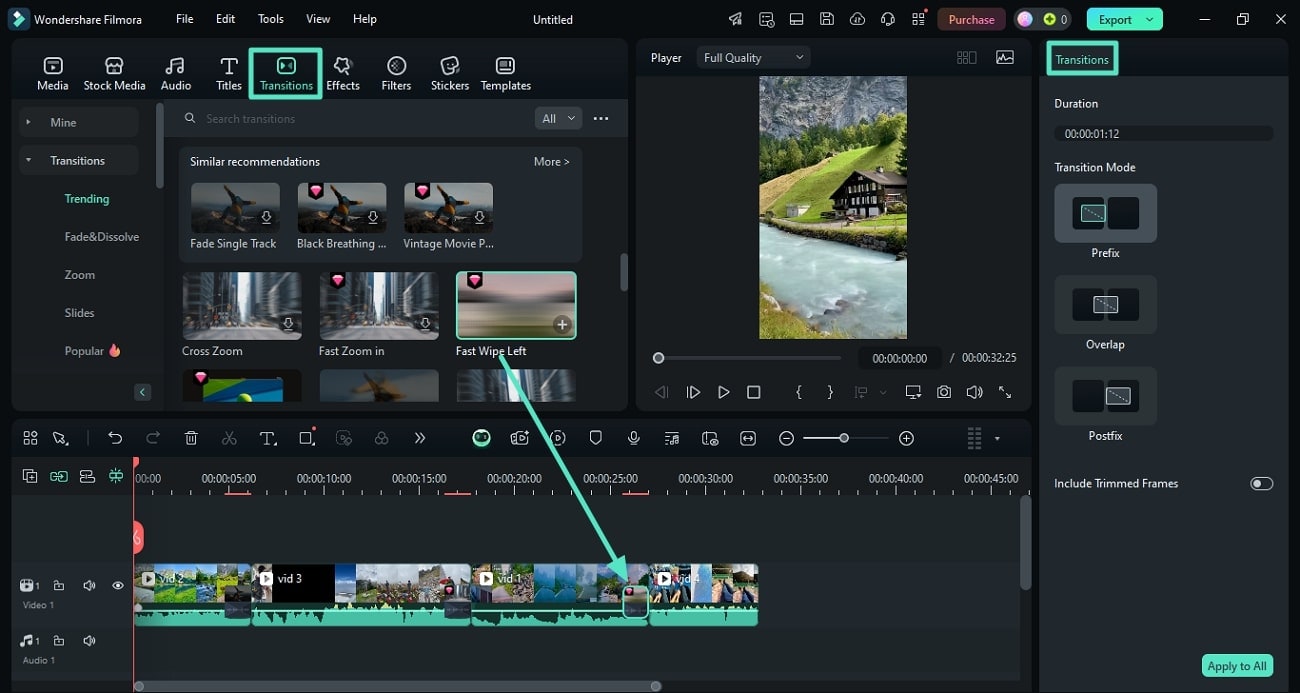
Step 3. Add Transitions Between Clips
When splicing videos together, rearrange them by simply selecting the clip within the tracks and placing it elsewhere. Now, access the “Transitions” icon from the media toolbar and enable its library. Next, drag your favorite transition and drop it between the two clips on the timeline. Repeat this step to add different transitions between the clips and change their modes from the right side of the "Transitions" panel.
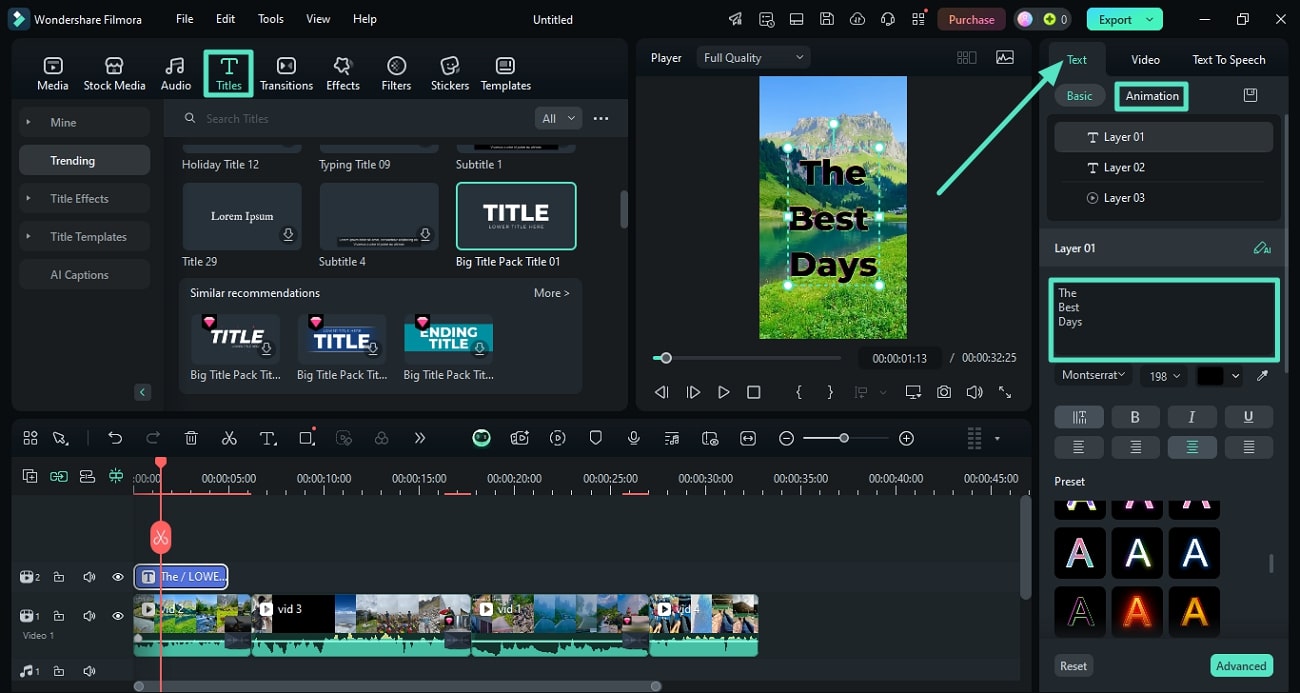
Step 4. Insert a Compelling Title
To give your created travel movie a name, access the “Titles” section from the toolbar and choose your desired templates. Now, access the “Text” panel on the right side and input the specific text within the text box. Next, adjust different attributes such as size, color, and alignment using the same panel. You can also add animated text by accessing the “Animation” section of the Text panel within this video splicer.
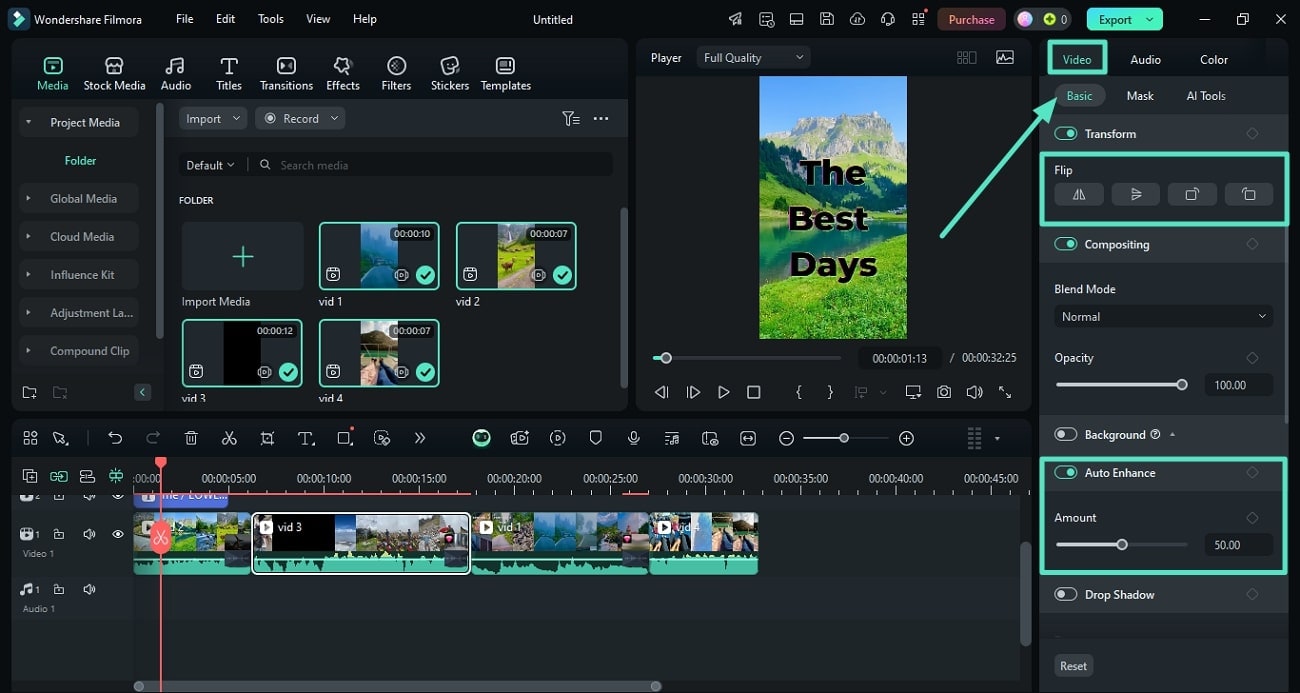
Step 5. Edit Your Clips With Basic Editing Features
Click the video on the track to enable the “Video” panel on the right side of the screen. Now, acquire the “Basic” section and access the “Flip” option to change the orientation. Next, toggle on next to “Auto Enhance” to let the tool enhance the visuals for you automatically.
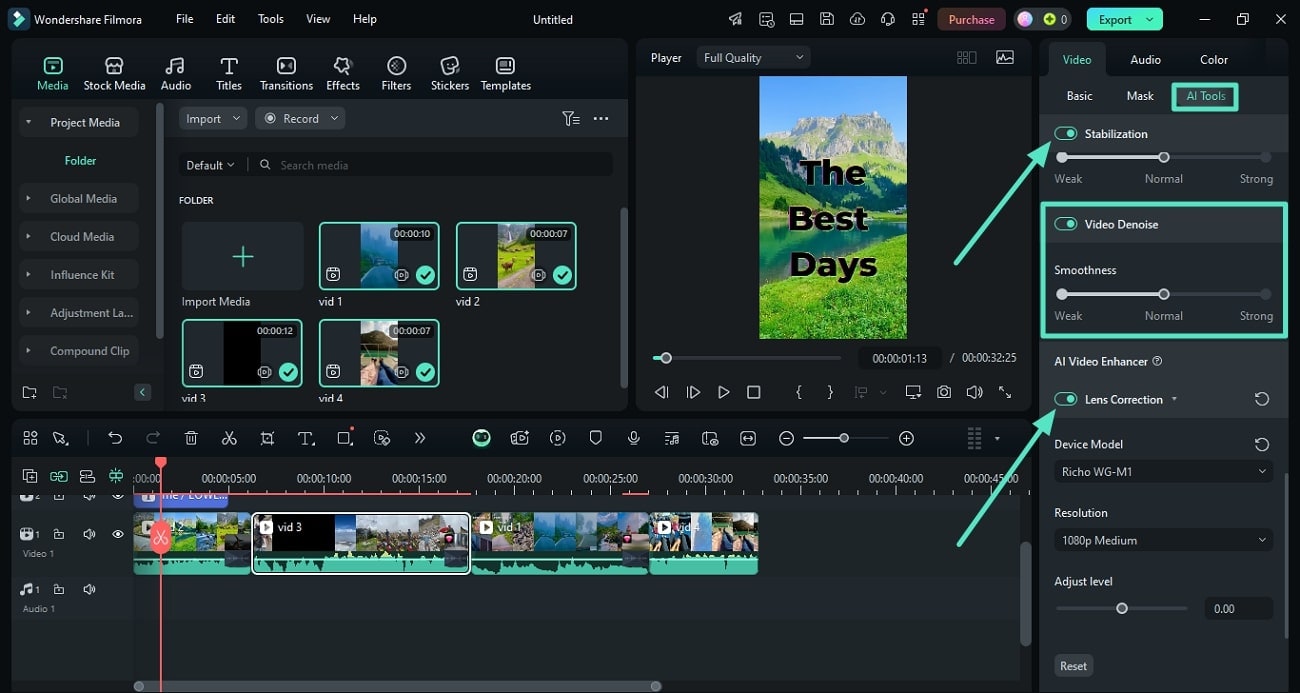
Step 6. Apply AI Features for Further Enhancement
While staying within the same panel, access the “AI Tools” section and enable the “Stabilization” features if your travel clips have jitters or are unstable. Next, activate the “Video Denoise” option and specify its strength. Moving forward, toggle on the “Lens Correction” option and specify the device and resolution to improve the video quality.
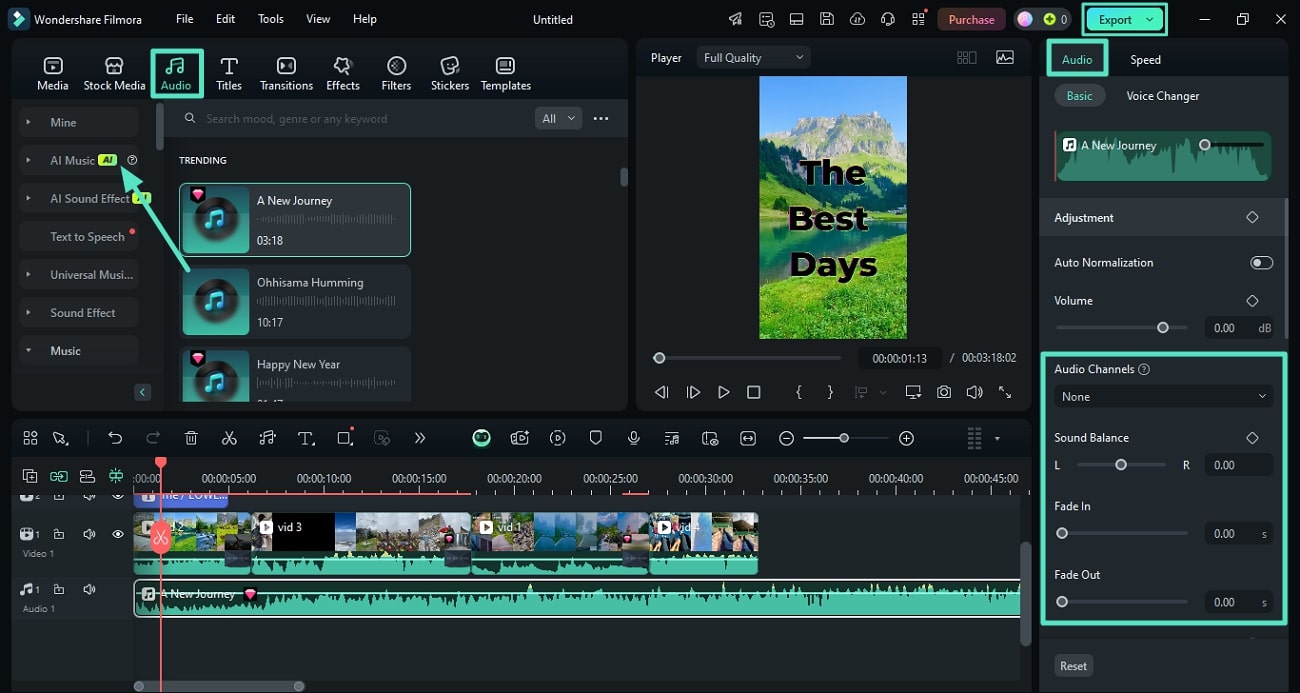
Step 7. Add Music to The Spliced Video
To give your splice together video a final flair, access the “Audio” section to enable the music library. You can opt for “AI Music” to let the tool generate automated music across your input requirements. Otherwise, select the music from the library and drag it to the editing timeline to apply it to your video.
Next, adjust the audio settings, such as “Audio Channels” and “Sound Balance” by accessing the “Audio” panel. Once you are satisfied with the spliced video, head to the top-right corner of the interface and press the “Export” button.
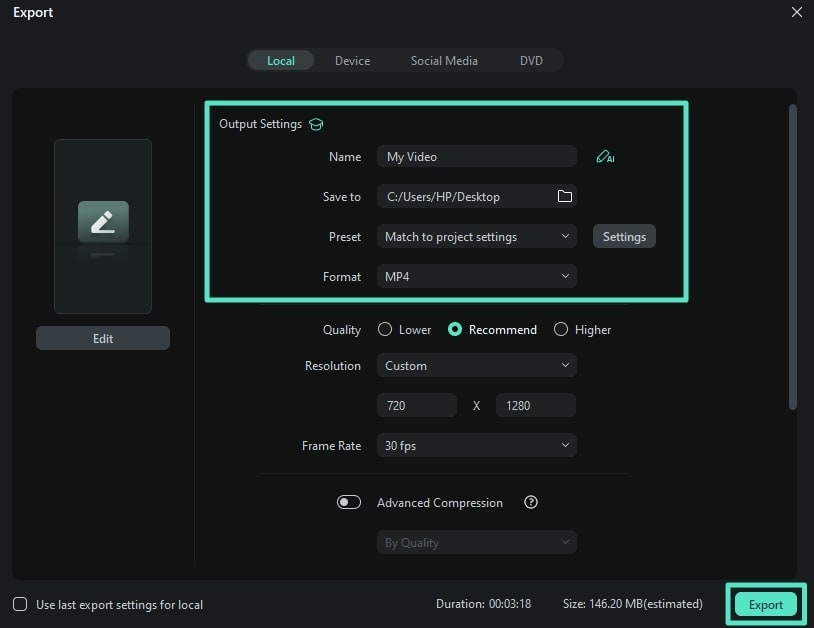
Step 8. Configure The Export Settings and Save
In the Export window, configure the “Output Settings” such as quality, resolution, and format. Once done, press the “Export” button and save the spliced video to your computer device.
Powerful AI video editor for all creators
Part 2. Splicing Up Your Video From Your Smartphone
If you have your videos on your phone and do not want the hassle of moving them onto the PC and then splicing them, you can use Filmora App [iOS/Android]. This extensive video editing app and video splicer lets you add multiple clips for the desired generation. Moreover, you get various basic and AI-powered enhancement features to make your montage stand out.
With the Filmora App, users can add stunning effects and transitions between the clips to show a smoother consistency between them. You also get a resource library right within the app to add elements like background music to your visual content. Read the steps mentioned below to learn how to execute the procedure within Filmora App:
Step 1. Start by Creating a Project and Importing the Video From the Phone
To begin, launch the app on your phone and tap the “New Project” option from the homepage. Next, select the videos from the gallery and press the “Import” button to proceed forward.

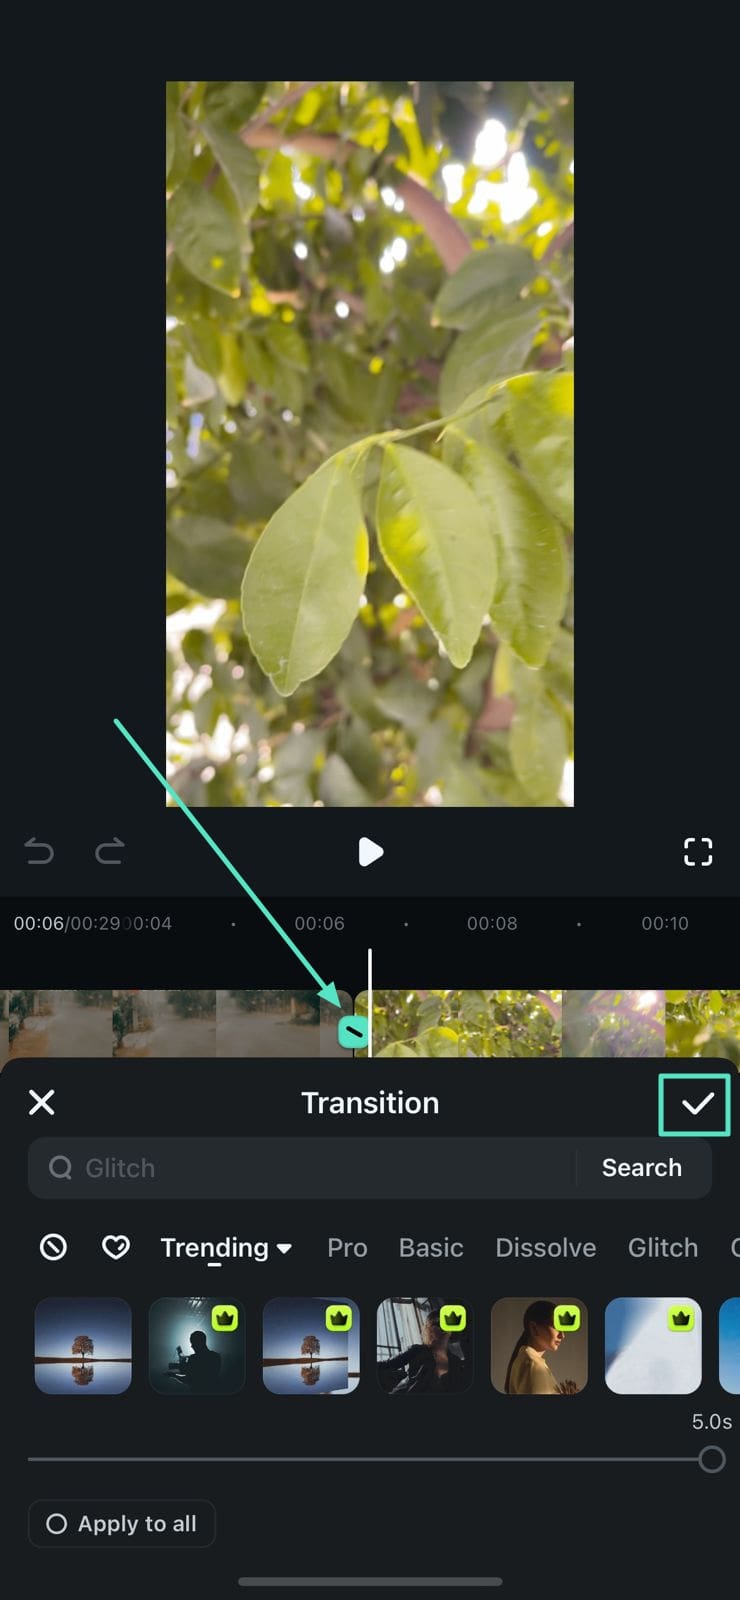
Step 2. Insert Compelling Transitions Between Clips
Moving forward, click the icon between the two clips to enable the transition library and select your desired one from the options provided. Next, tap the “Tick” icon to apply it between the selected clips. Repeat this to add multiple transitions between the videos.
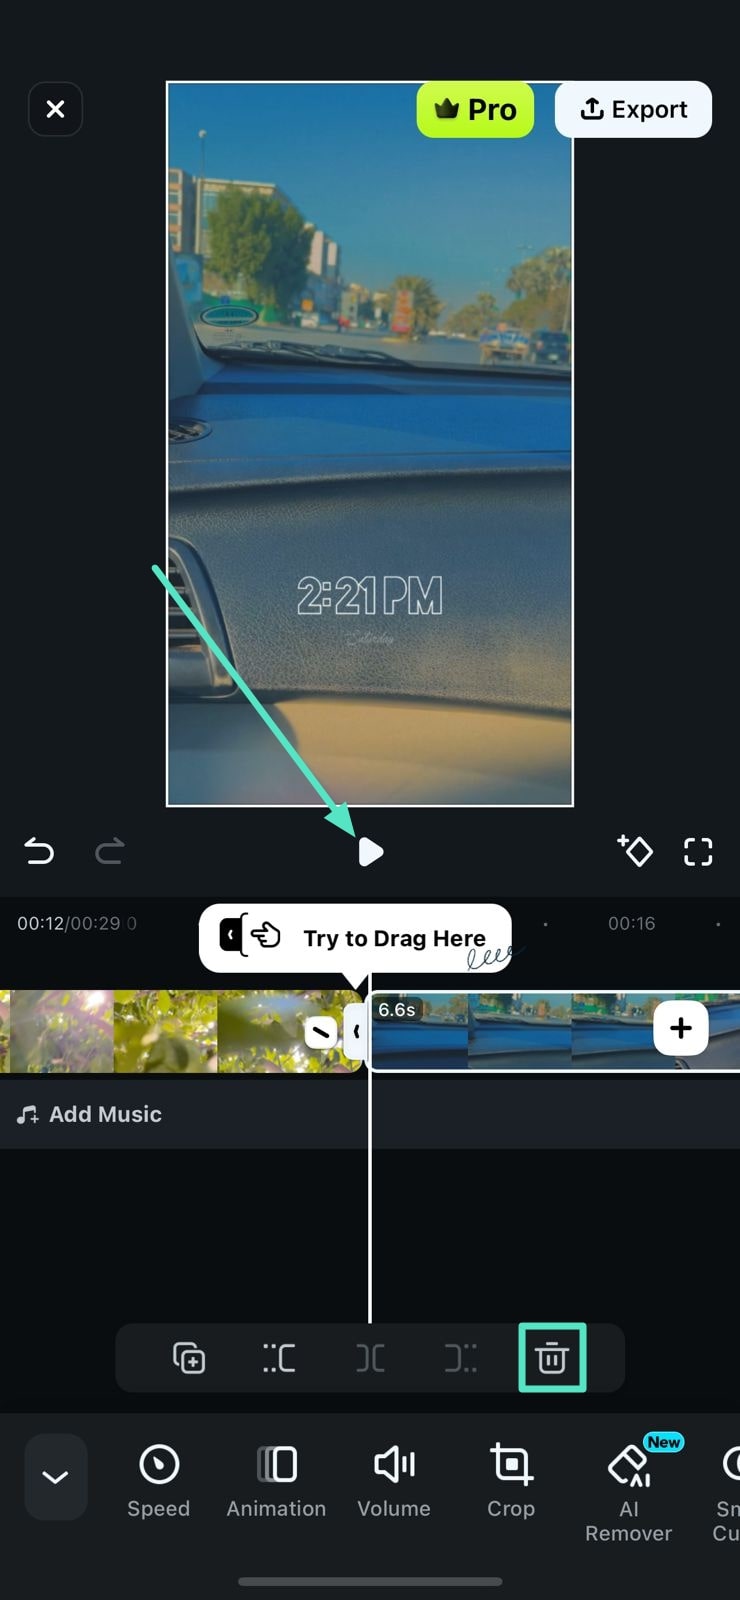
Step 3. Trim Unwanted Parts from the Spliced Videos
To trim the unwanted section from the splice-together videos, select it and drag it till the unwanted part ends. To remove an entire clip, select it and tap the “Bin” icon to delete it completely.
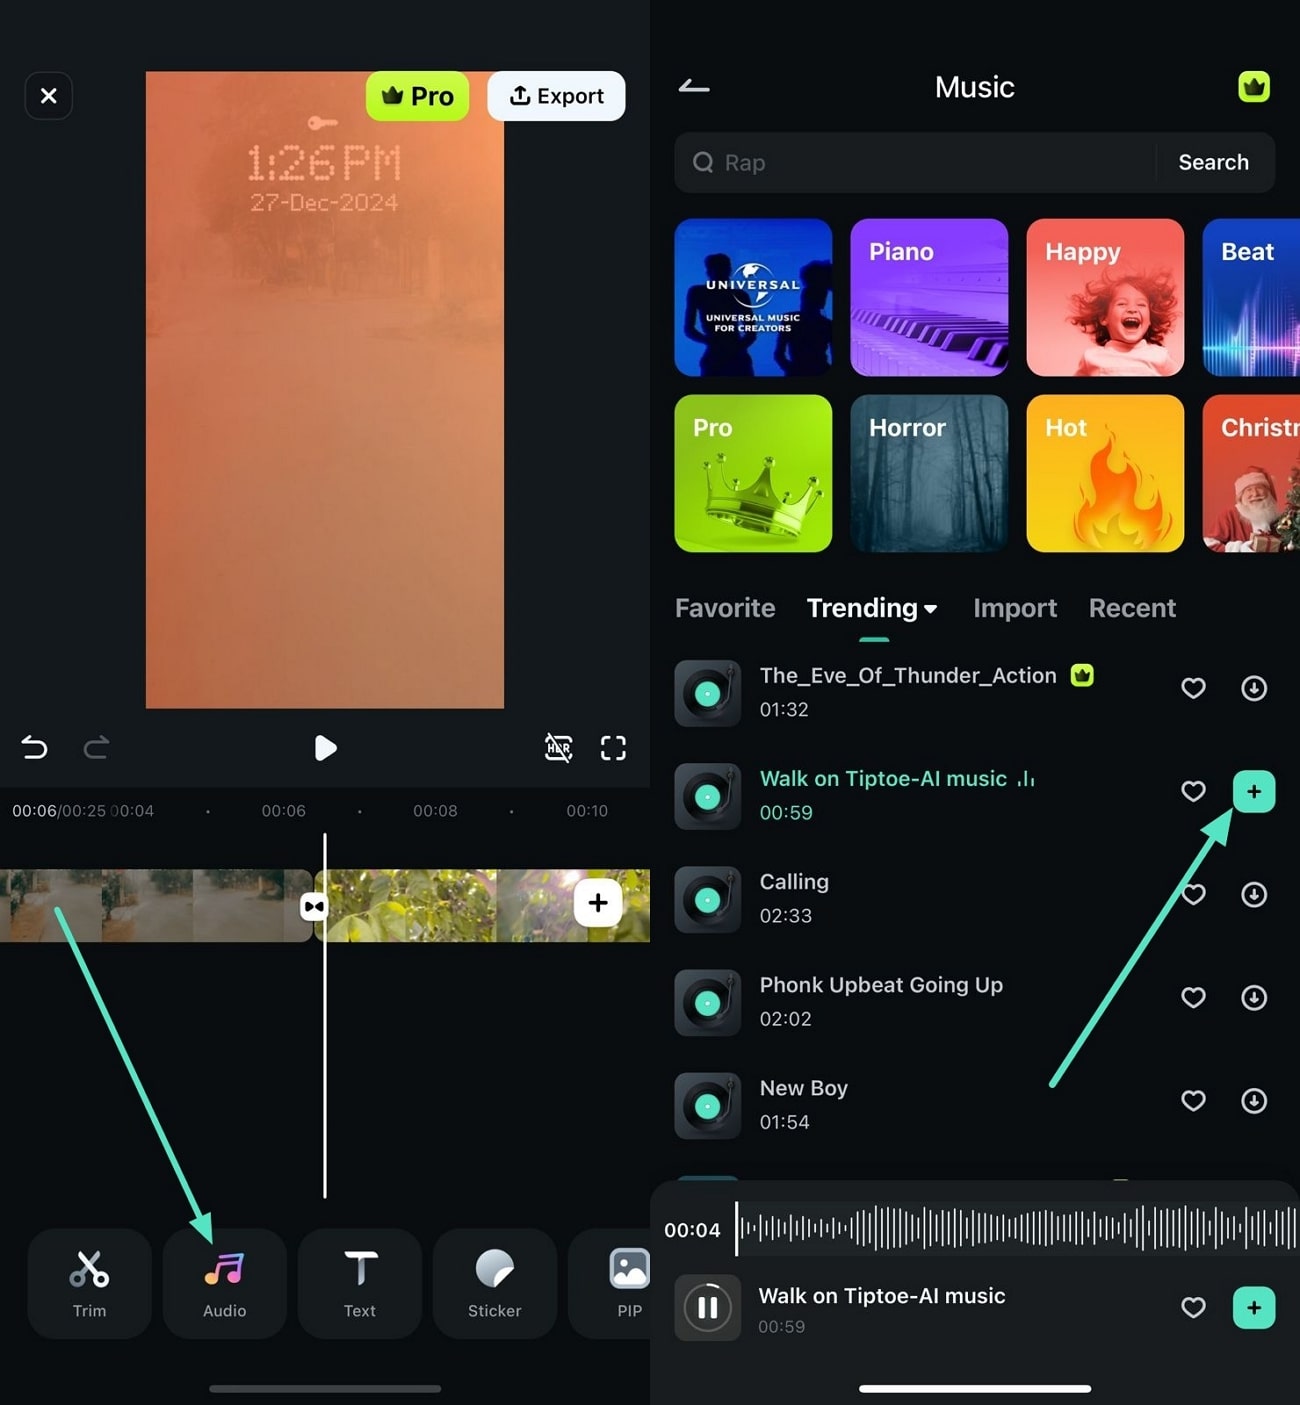
Step 4. Add Engaging Music to the Clips
Access the same toolbar from below and use the “Music” icon to enable the background music library. From there, choose your favorite song or audio piece and tap the “+” icon to add it to your montage.
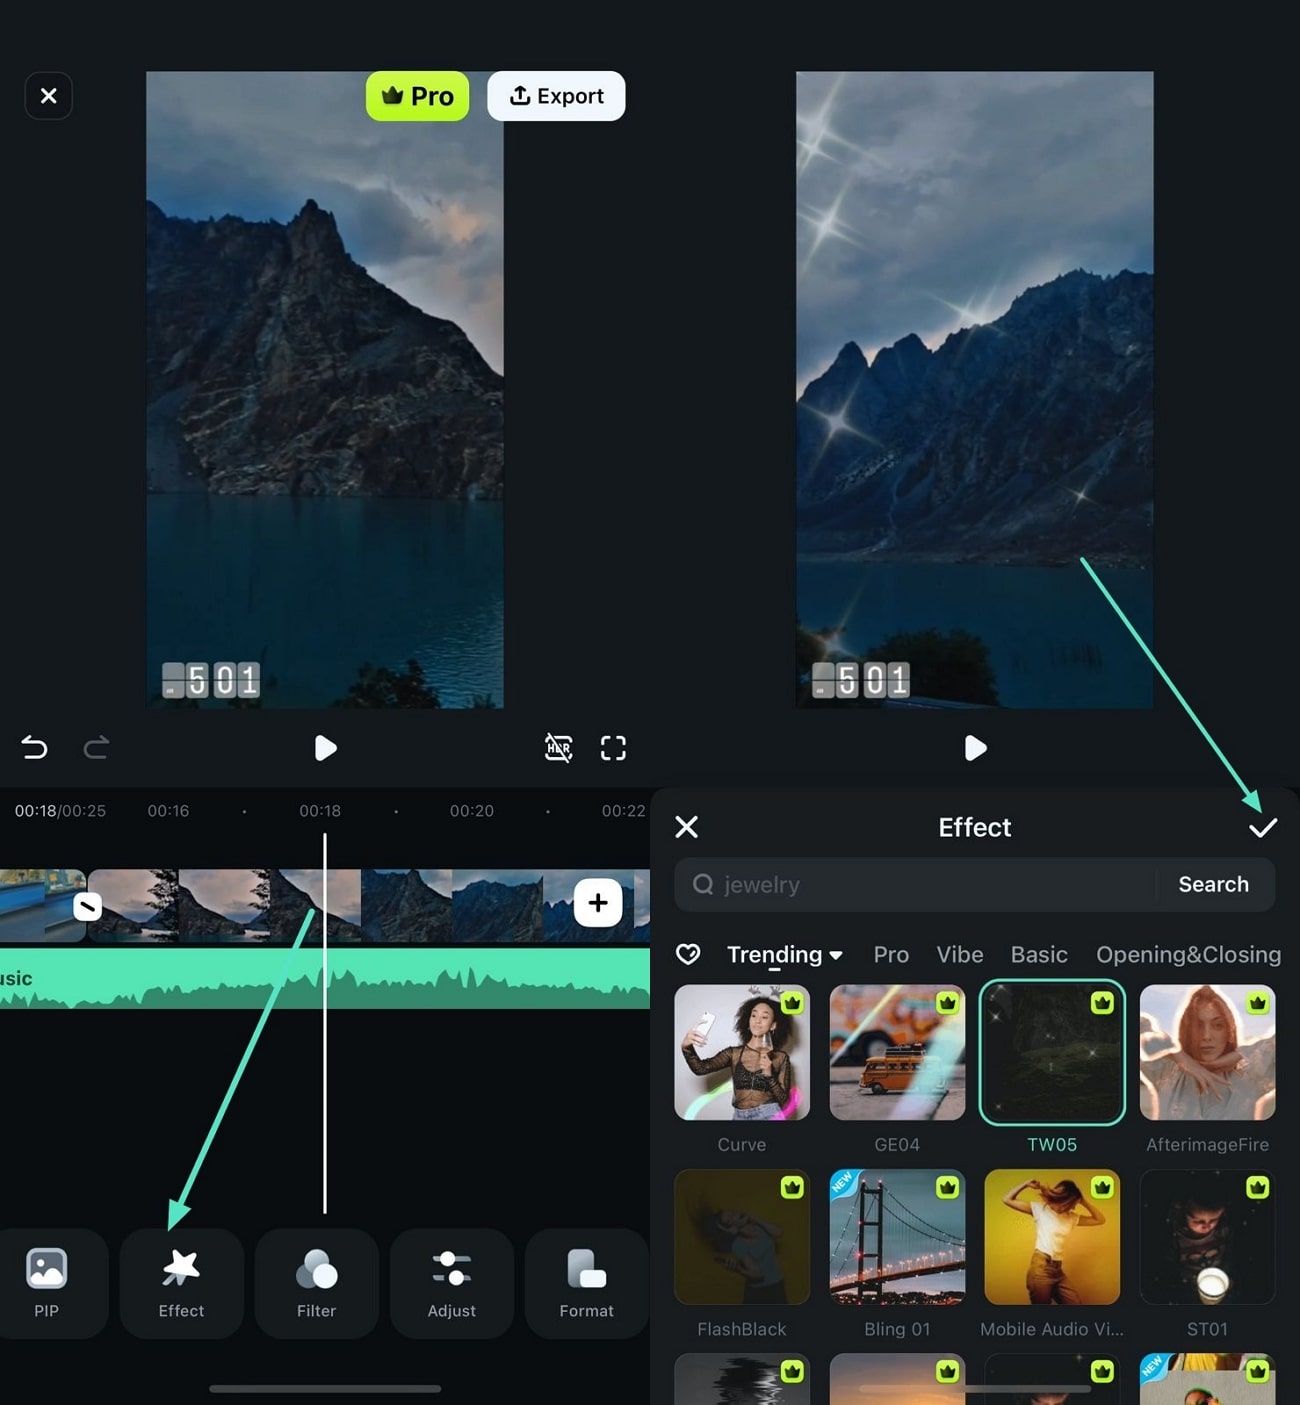
Step 5. Incorporate Different Effects
For a more enhanced and professional look, go to the toolbar and opt for the “Effects” feature. Choose your favorite effect and apply it to your video using the “Tick” button located at the right.
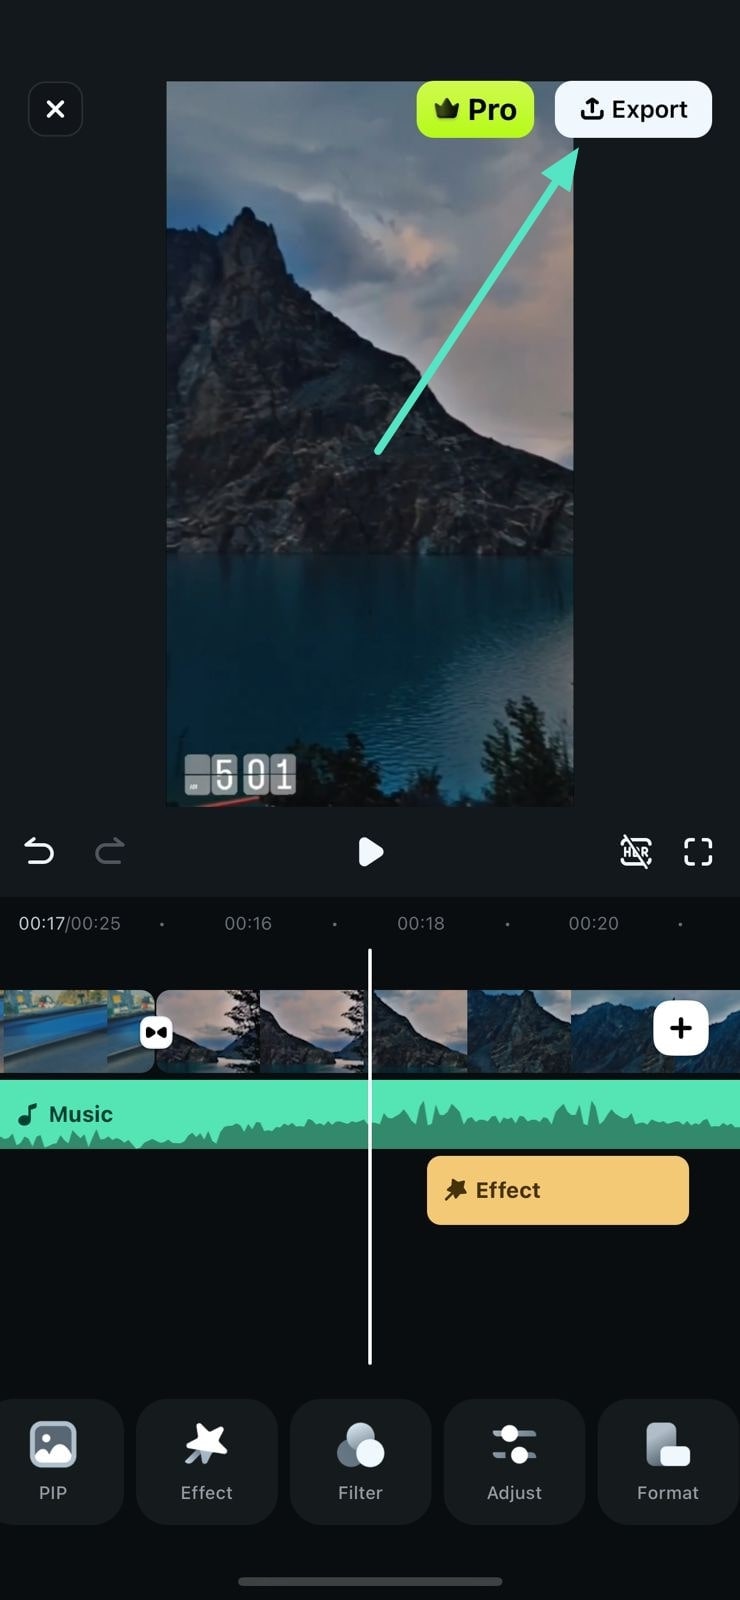
Step 6. Export the Spliced Video to Your Phone
Once all the enhancements are done through this video splicer app, head to the top-right corner of the screen and press the "Export" button. This will successfully save the spliced video to your smartphone.
Filmora for Mobile Filmora for Mobile Filmora for Mobile Filmora for Mobile Filmora for Mobile
Boost Your Video Editing for Viral Success
- • Powerful Brand New AI Features.
- • User-friendly video editing for beginners.
- • Full-featured video editing for professional.


Conclusion
To conclude, this article discussed solutions on how to splice together videos using two essential methods offered by Wondershare Filmora. First, we demonstrated how to create a video montage using multiple clips from your PC using the desktop version, followed by a mobile app tutorial. Anyhow, Filmora offers comprehensive splicing and other AI-powered editing features, whether on a computer or mobile.
