Stable videos have a certain appeal that captures your attention without any doubt. Smooth, jitter-free videos can improve our viewing experience. It allows you to focus on the content rather than being distracted by shakiness. A stable video creates a sense of professionalism to make your content better to watch. There are several equipment options available to help in video stabilization.
However, these equipment options are quite expensive for a normal person to buy. Fortunately, there are software solutions that can help stabilize shaky footage. These software alternatives are less expensive and provide great results. Such software applications analyze and correct the movements in your videos. You can also stabilize shaky footage into smooth visuals with the right software.

In this article
A cross-platform for making videos anywhere for all creators!

Part 1: Why Should You Stabilize Your Video While Editing?
Stabilizing your video during the editing process offers several benefits. There are many different video stabilizers that you can use. But first, discuss some reasons why you should consider stabilizing your video:
1. Enhanced Viewing Experience
Stabilizing your video helps create a smoother and more pleasant viewing experience. Shaky or unstable videos can be distracting, and viewers can't focus on the content. By stabilizing the video, you reduce unwanted camera movements. This also ensures that the video appears steady and professional.
2. Increased Professionalism
A stable video conveys a sense of professionalism and competence. It gives the impression that the video was captured intentionally and with care. By stabilizing your video, you can improve the overall quality of your content. Additionally, you can also make a positive impression on your audience.
3. Improved Storytelling
Stability in videos allows viewers to better engage with the story or message you're conveying. Smooth and stable shots enable the audience to focus on the subject matter. Individuals absorb the information and follow the narrative in a better way. This helps to enhance the effectiveness of your narrative. It also ensures that your intended message is communicated properly.
4. Corrected Camera Shake
Camera shake is a common issue that can occur due to various factors. Hand movements, unstable camera setups, and conditions may result in shakiness. Stabilizing the video helps to correct the camera shake and minimize its impact. This is particularly important when capturing walking or running shots in particular.
5. Compatibility with Other Visual Effects
Video stabilization makes it easier to apply additional effects to your videos. It makes it even easier to apply post-processing techniques during editing. When your video is stable, it becomes simpler to add creative effects to your video. Stabilizing the video provides a solid foundation for integrating various video elements seamlessly.
6. Improved Editing Workflow
Lastly, stabilizing your video during the editing process can streamline your workflow. By stabilizing the videos early on, you can work with more consistency. You can even get predictable visuals, making it easier to make precise edits and adjustments. It can also save time and effort in the long run for you. Moreover, you won't have to compensate for shaky footage during editing.
Part 2: What Are Some Manual Ways to Stabilize Video to Avoid Shaky Footages?
Various methods exist to stabilize shaky footage and eliminate unwanted camera vibrations. Let's explore four commonly used techniques:
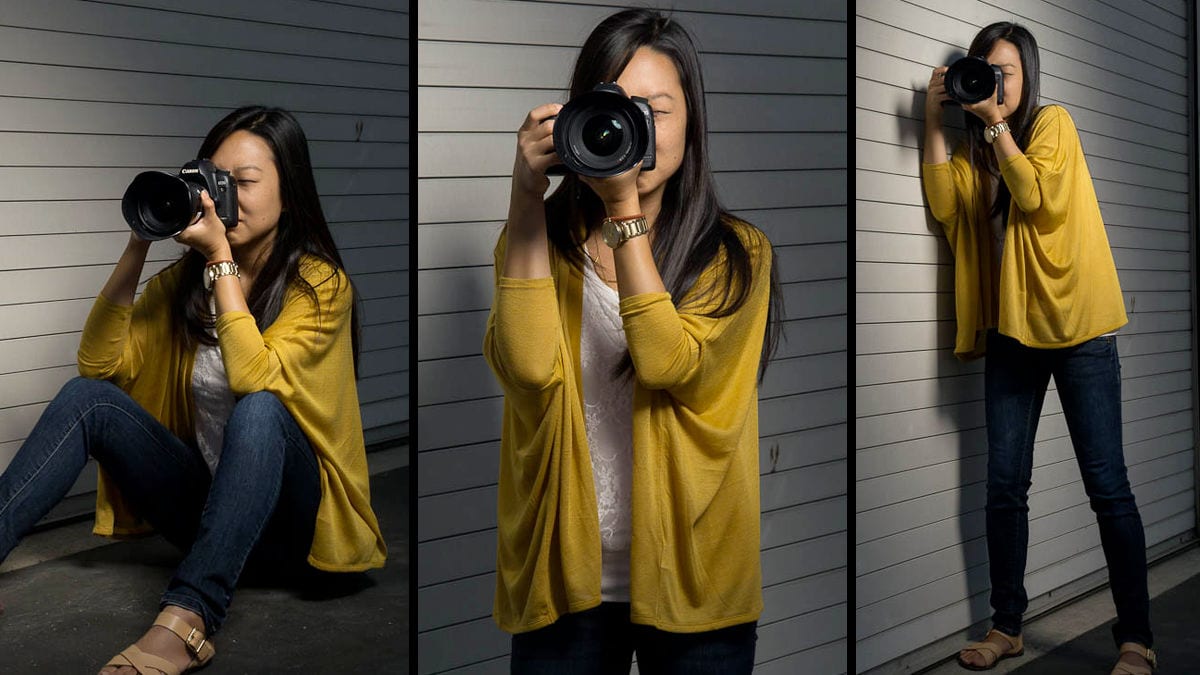
1. Handheld Stabilization
When shooting handheld, the key is maintaining a steady grip on your camera. Hold it close to your body, keep your elbows tucked in, and use both hands to stabilize the camera. This technique minimizes your body's natural movements. Furthermore, this provides a solid foundation for capturing smoother video.
2. Tripods and Monopods
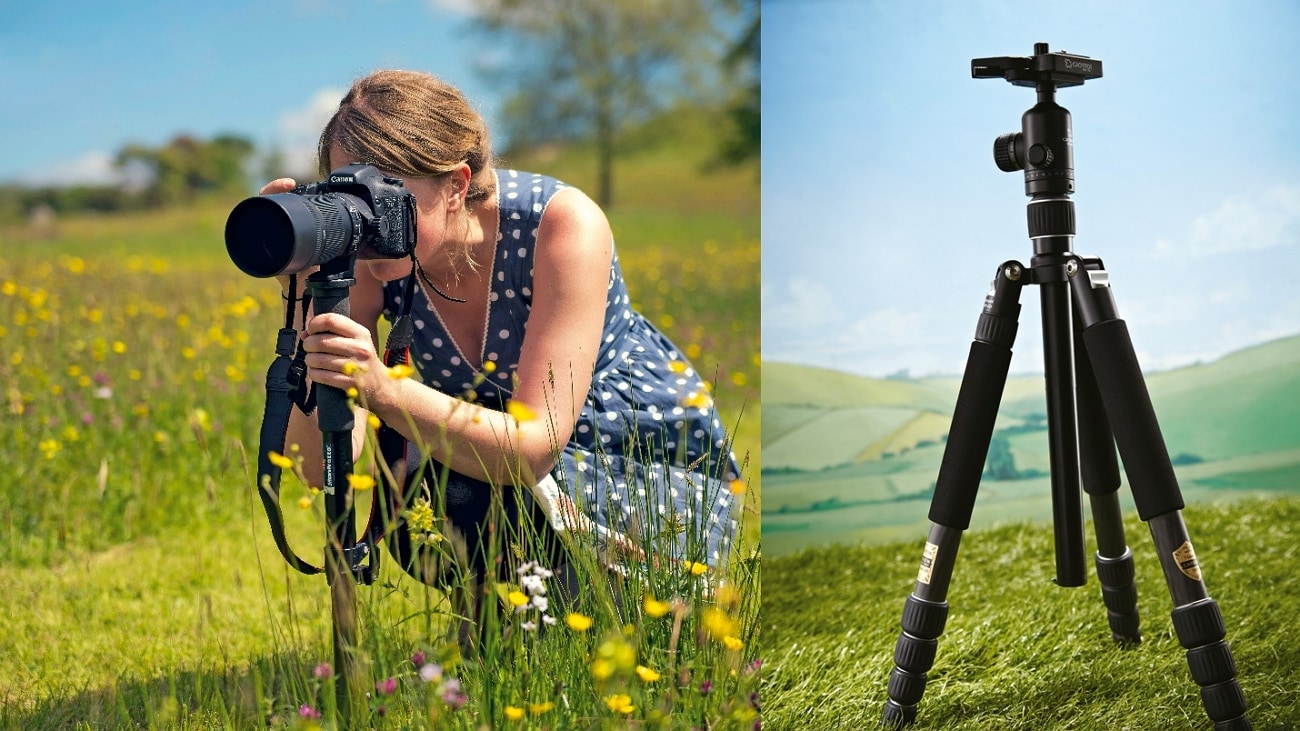
Using a tripod or a monopod is a good way to stabilize your videos. This technique helps, especially for stationary shots. Tripods offer a three-legged support system that can help capture steady footage. Meanwhile, monopods provide single-point stabilizing support to capture videos. Both options ensure a stable base for your camera. These types of equipment can eliminate shakes in a video.
3. Shoulder Rigs
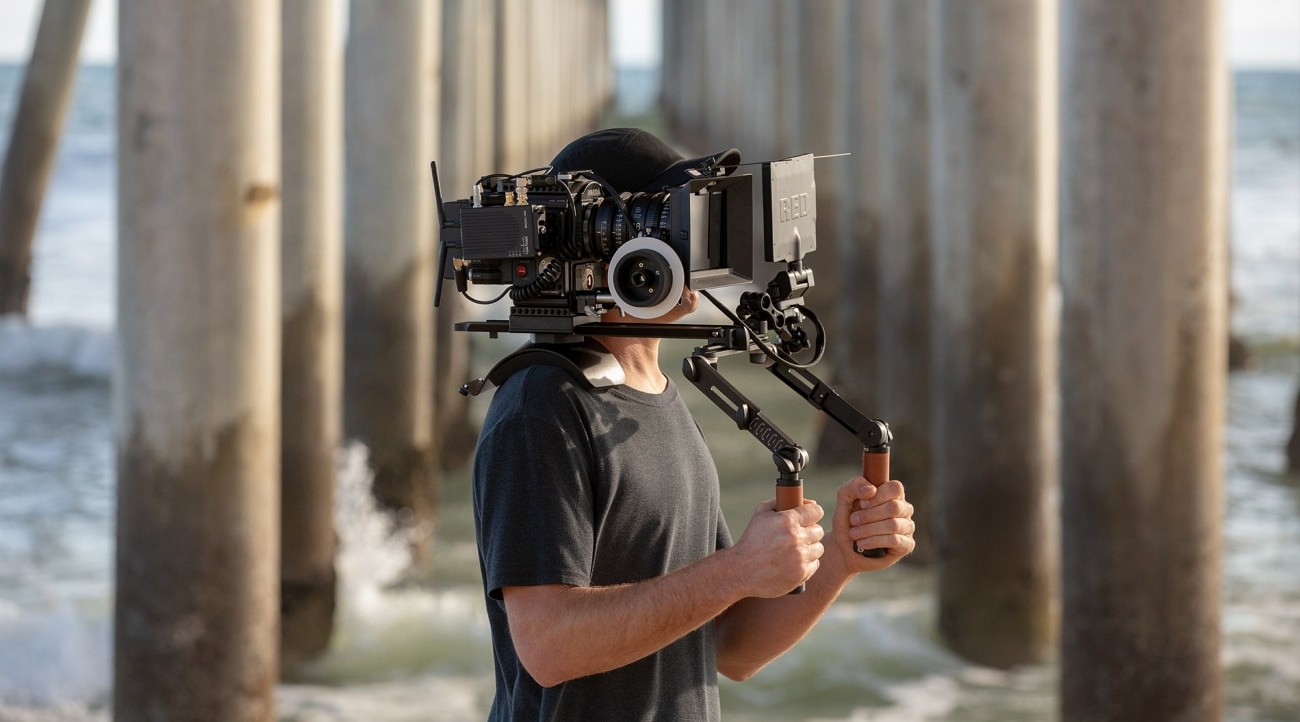
Shoulder rigs are camera stabilizing systems that distribute the weight of your camera. They provide a comfortable and stable platform for handheld shooting. Putting weight on the shoulder reduces camera shake and improves overall stability. Shoulder rigs are particularly useful for longer video recording sessions. It may also help prevent fatigue and maintain steady footage.
4. Camera Stabilizers and Gimbals
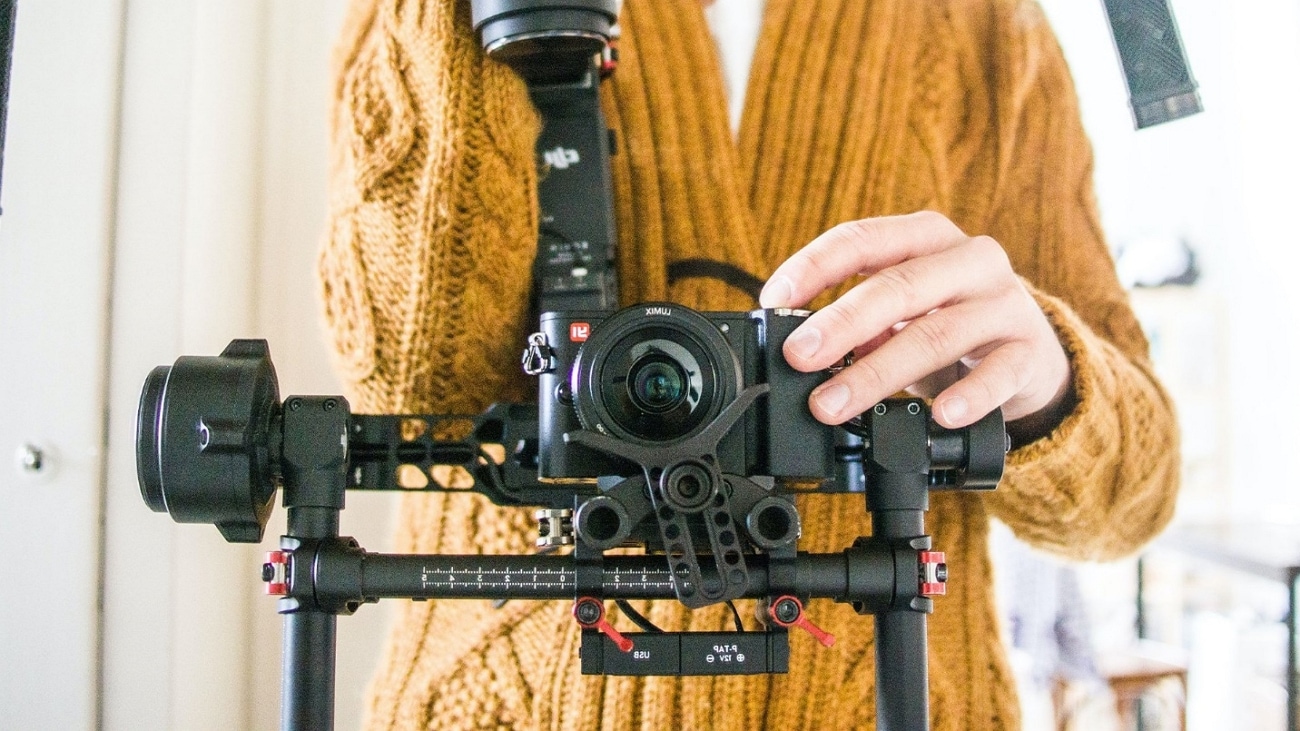
Camera stabilizers and gimbals are mechanical devices designed to stabilize camera movements. They use various mechanisms, such as counterweights, to record stable videos. Additionally, motorized systems are also used to minimize vibrations and camera shakes. Stabilizers and gimbals allow smooth camera movements, even during walking or running shots.
Part 3: Wondershare Filmora: Video Editor That Makes Video Production Easy
Wondershare Filmora is packed with a good interface and robust features. It is revolutionizing the way we edit and modify our videos. You can unleash your creativity and transform your raw footage into stunning edited videos. With its set of editing tools and intuitive timeline, you can do a lot of things to your clips with ease. Shaky videos can be a drawback when it comes to the quality of your videos.
Thankfully, Filmora offers a solution for stabilizing your videos. With Filmora video stabilization, you can remove unwanted camera shakes and vibrations. This tool goes the extra mile by providing an automated video stabilization option. So, all your action-packed moments will look professional with no more jitters. Using Filmora, your videos won't have any unwanted distracting elements.
Some Prominent Features of Wondershare Filmora
Why surf the internet when Filmora has got the right tools for you? Before you direct into understanding video stabilization with Filmora, learn some details about its innovative features:
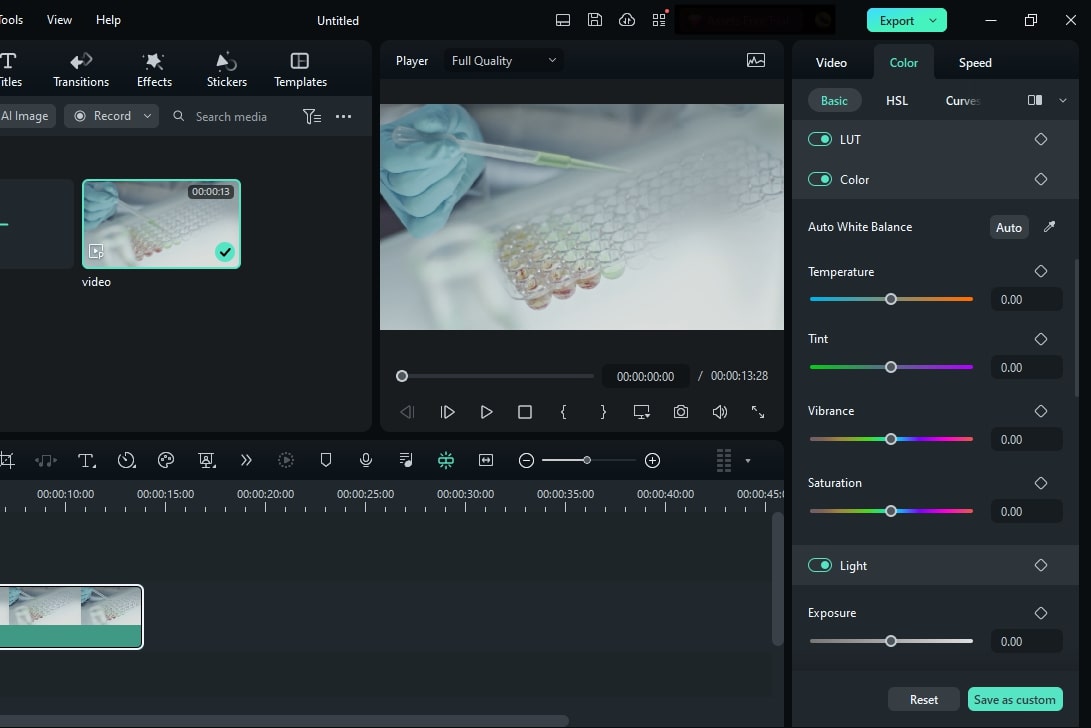
1. Color Correction
Wondershare Filmora provides advanced color correction and grading options. These options allow you to improve the color tone of your videos. You can correct white balance, adjust exposure, saturation, and much more. The software offers a wide range of built-in presets as well to use. Additionally, the tool offers the flexibility to create custom color presets as well.
2. Remove Video Background
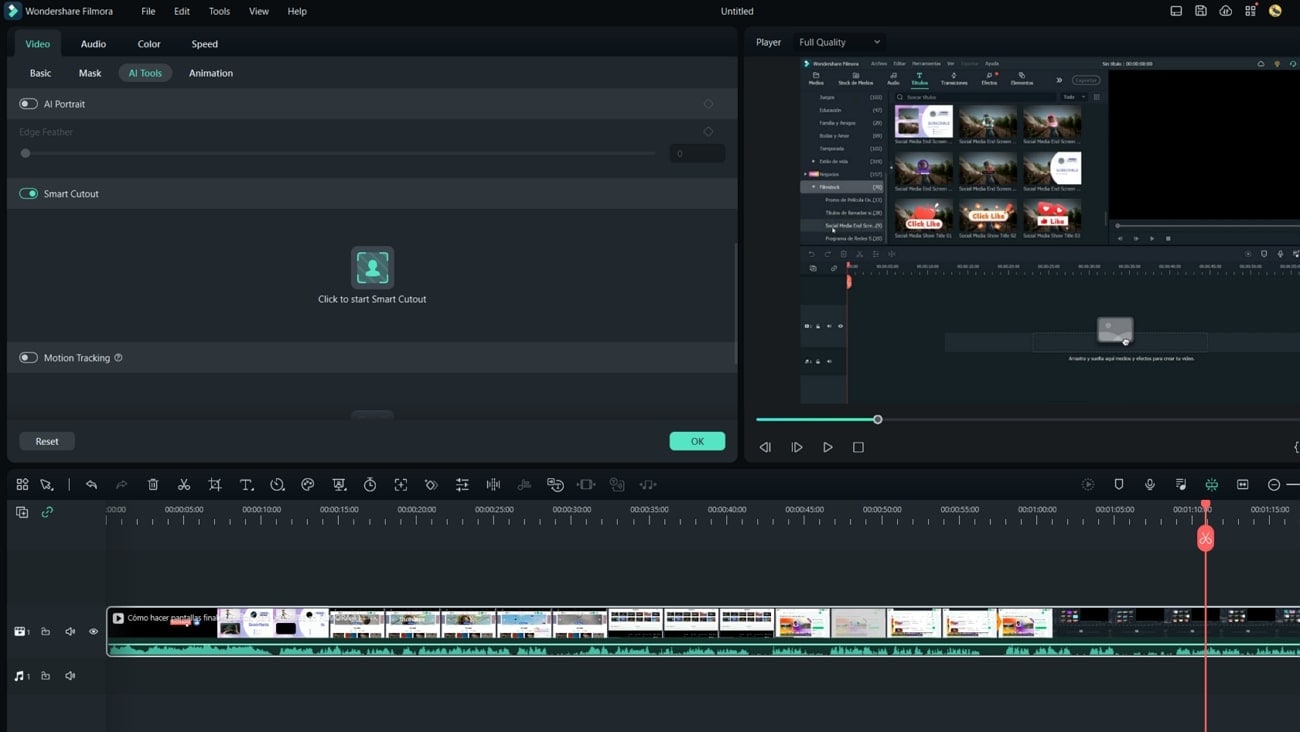
Filmora simplifies the process of using green screen effects in your videos. The software's Chroma Keying feature allows you to remove the green background. It can be replaced with any image or video of your choice. This feature is particularly useful for creating virtual backgrounds in your videos. Moreover, you can integrate different elements in your background with this feature.
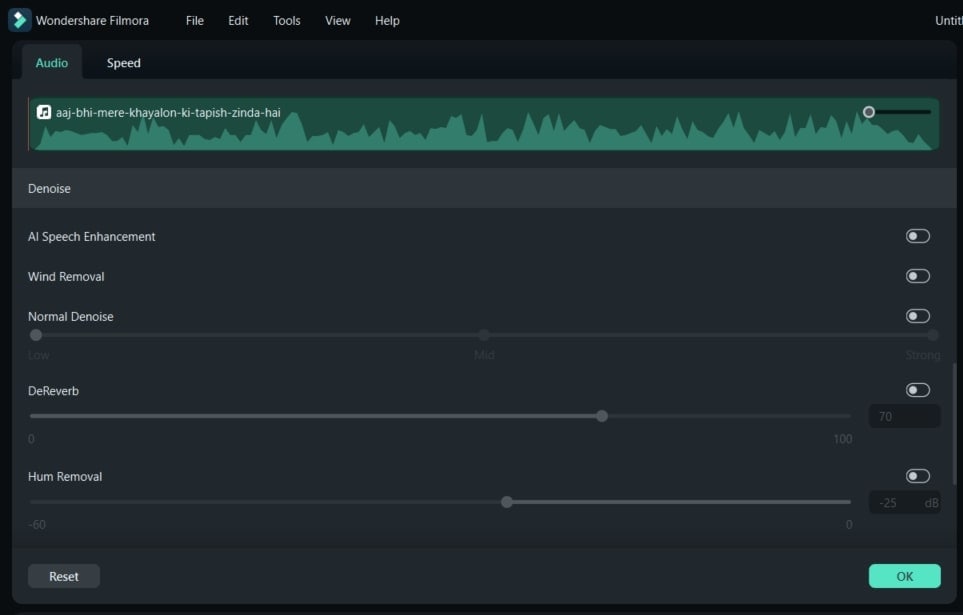
3. AI Audio Denoise
This tool understands the importance of high-quality audio in videos. It offers an audio equalizer that allows you to fine-tune the audio levels. You can even adjust audio frequencies and create a balanced audio experience. Additionally, Filmora provides noise removal capabilities to eliminate unwanted background noise. This will ensure clear and crisp audio throughout your video.
4. Presets Templates
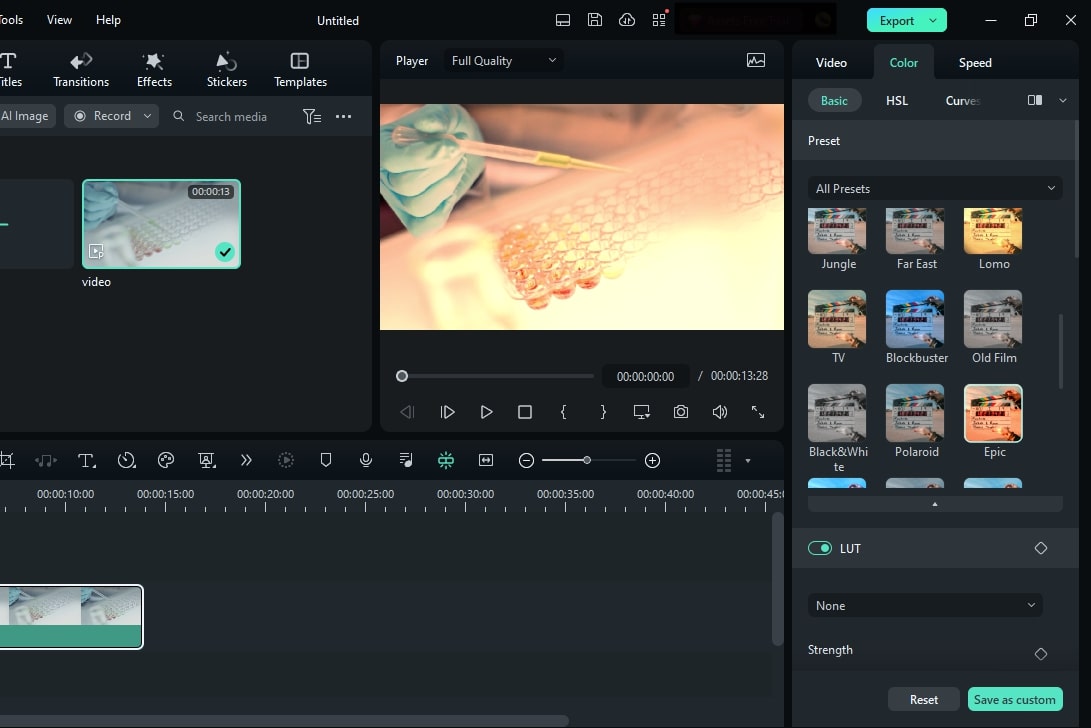
With Filmora, you can access a vast collection of filters, overlays, transitions, and effects. These creative resources enable you to add style to your videos effortlessly. There are many in-built effects collections, including LUTs and titles to use. To use and apply these effects is also very simple. You need to select your effect and drop it onto your video footage.
Part 4: Automatic Way to Stabilize Shaky Videos Using Wondershare Filmora
If you want to learn how to use the Filmora video stabilization method, don't panic. This section is going to discuss the step-by-step process to stabilize video using this tool:
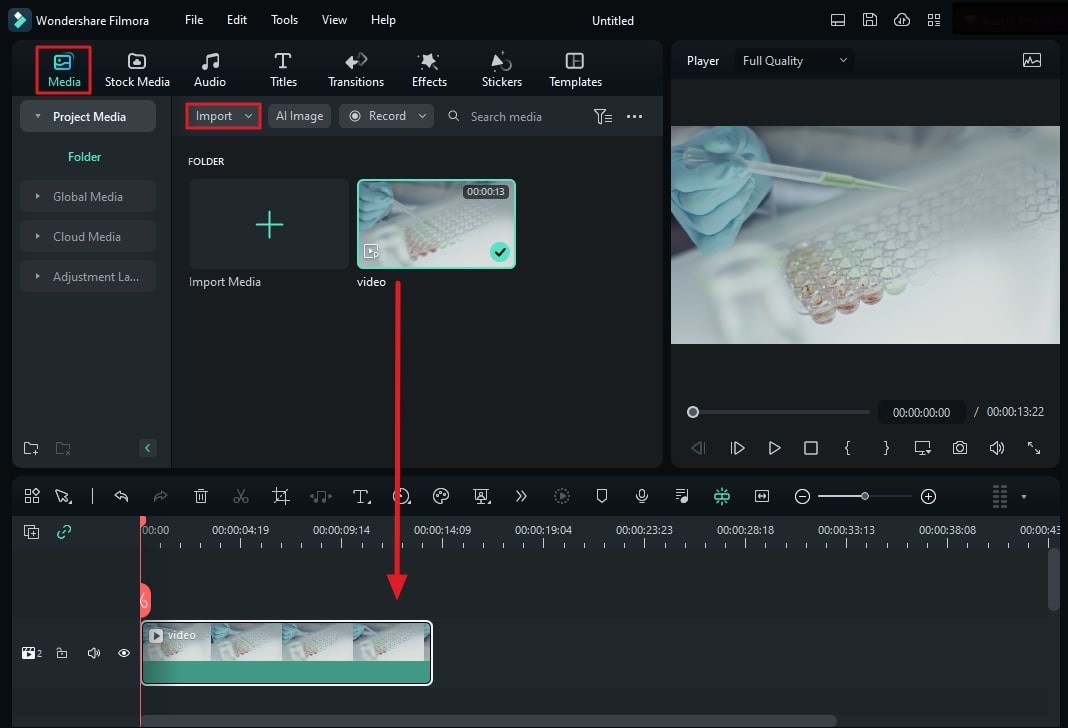
Step 1Bring Your Media to the Timeline
Once launched, import your shaky video to the tool by dragging and dropping it. Then, click and hold your media file to bring it into the timeline.
Step 2Access the AI Tools Option
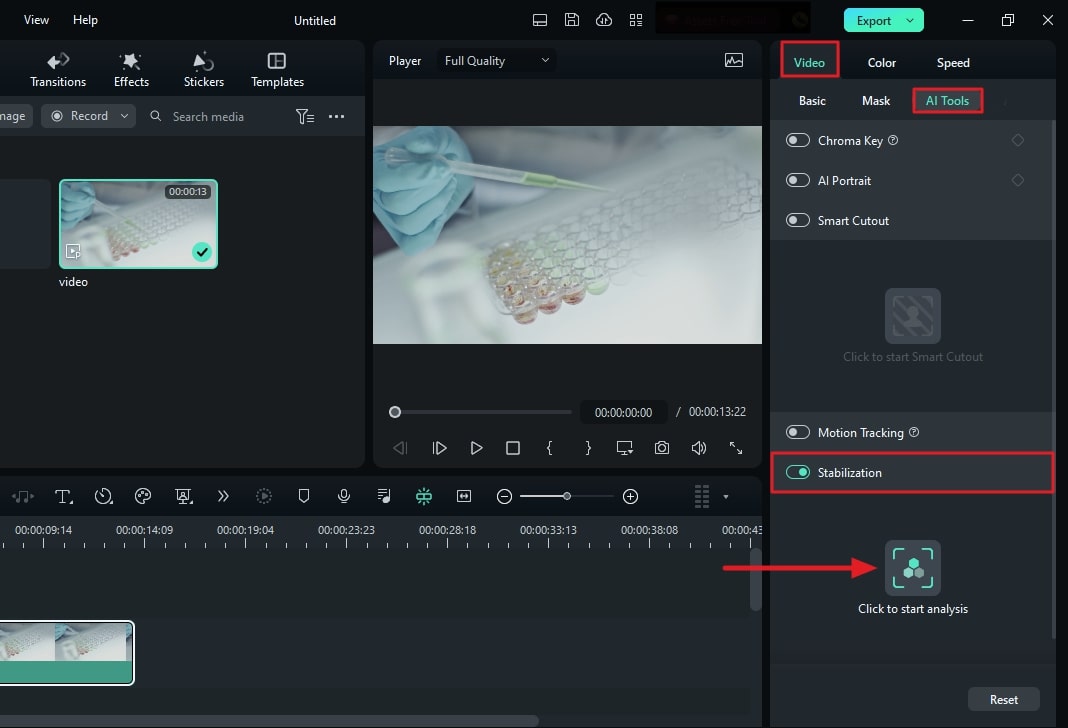
Next, click the video in the timeline and locate "AI Tools" in the right panel." After that, click the option, and then a new tab will appear. From the different options, select the "Stabilization" switch.
Step 3Initiate the Stabilization Process
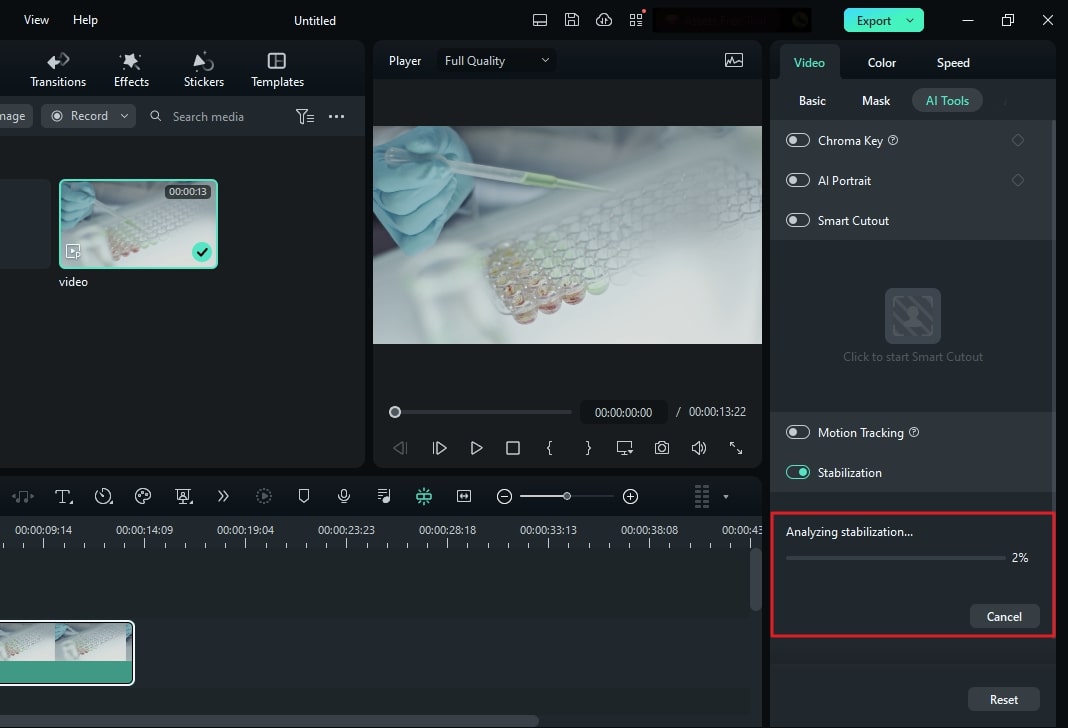
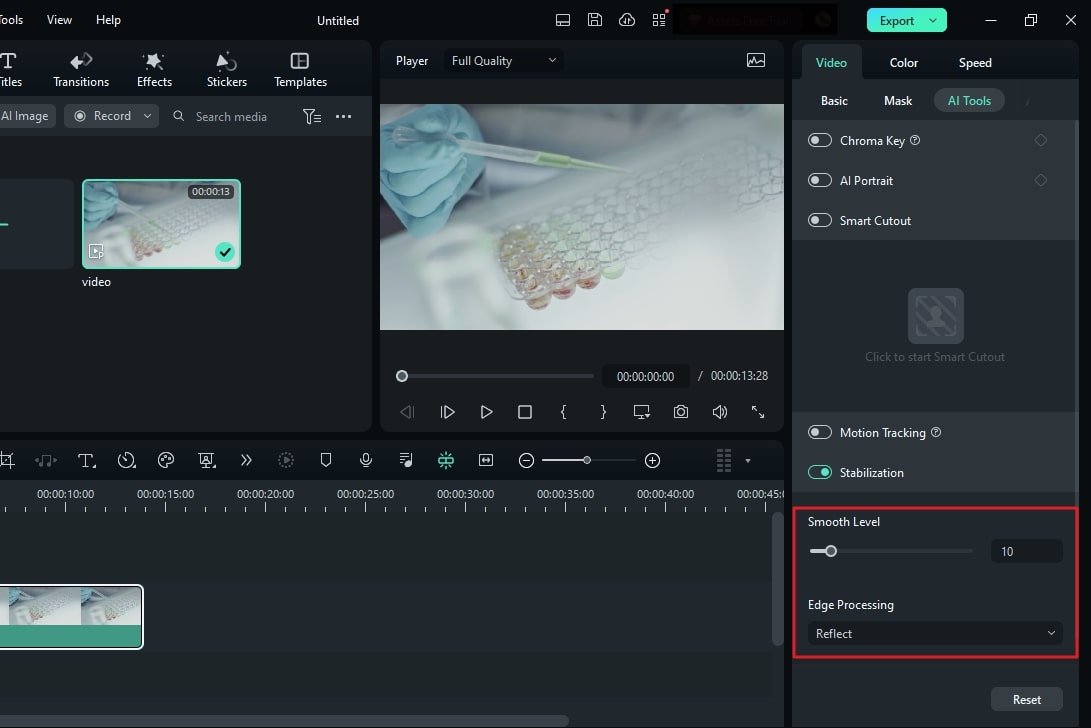
Press the "Click here to start analysis" option below the "Stabilization" switch. After processing, adjust the "Smooth Level" according to your preference.
Step 4Final Touches To Stabilize
Continue to change the "Edge Processing" from the drop-down menu and choose the option of your choice. Save your video file, as it is ready to be exported.
Conclusion
In conclusion, stable videos add a professional touch to your content. There are expensive equipment options that exist for achieving stability. However, not everyone can buy such expensive equipment. Thankfully, software solutions provide affordable alternatives as well. One such software is Wondershare Filmora, which has video stabilization capabilities. You can use this tool to create shake-free videos.


