
 100% Security Verified | No Subscription Required | No Malware

Creating a slideshow on Windows 10 or 11 is done for a variety of reasons. You might want to watch a slideshow with your family featuring all the fun moments from your recent vacation. You also might want to create a slideshow of your kid's baby photos and create a slideshow to embarrass them in front of their new boyfriend or girlfriend. The possibilities are endless.
All in all, slideshows are one of the best ways to relive some memories. If you want to create or view pictures as a slideshow on Windows 11 or 10, there are proven methods to do that. Let's dive in.
In this article
The Best Ways to View Pictures in a Slideshow on Windows 11/10 for Free
Windows, as one of the oldest and most popular operating systems, has provided users with two methods to play slideshows. Check them out.
Method 1: Create a Windows 10/11 Slideshow Using the Photos App
The Photos app is a free and built-in tool for every Windows PC, which not only stores pictures but also provides an easy and free way to view pictures as a slideshow on your computer.
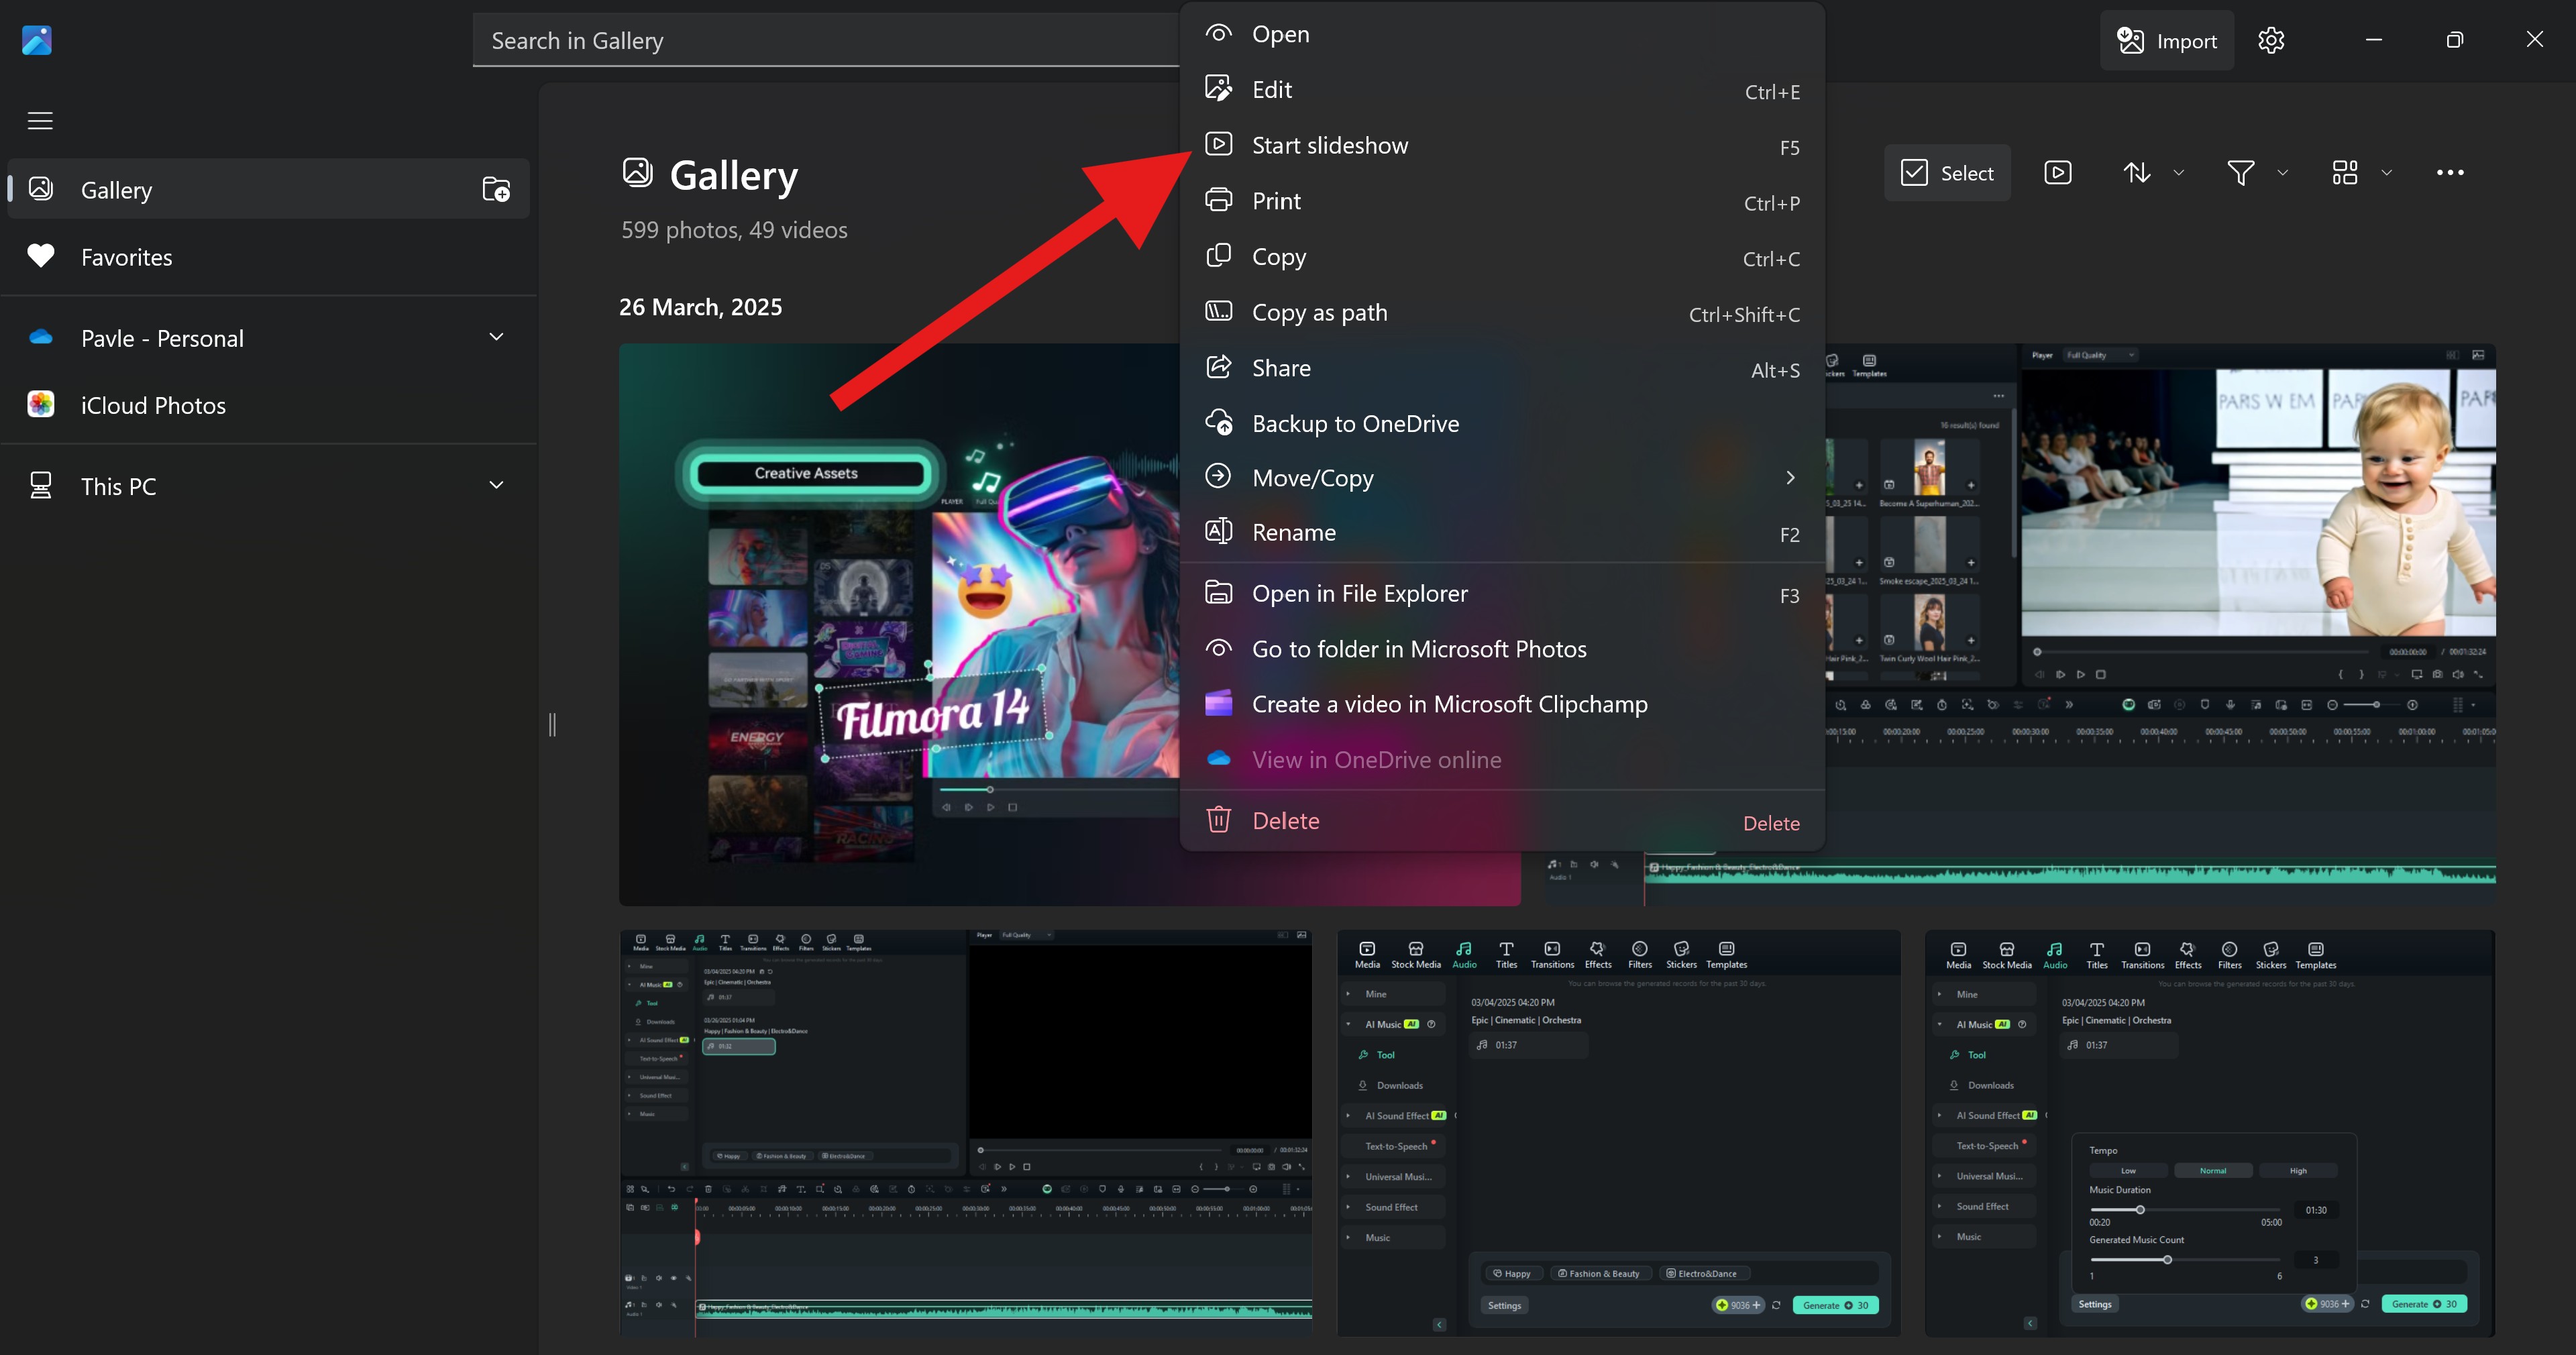
Open the Photos app on your PC or laptop, right-click on an image where you want to start a slideshow, and then simply select the Start slideshow feature. You can also use the F5 button on your keyboard to do the same thing.
The Photos app works the same on Windows 10 and Windows 11. For Windows 10 users, you can also look for another way to view photos as a slideshow. Let's dive in.
Method 2: Create a Slideshow on Windows 10 Using the File Explorer
File Explorer is also a necessity and a free tool for all Windows users. To view multiple pictures as a slideshow on Windows 10 via File Explorer, you need to open it > select the images > and then go to Picture Tools > Slideshow. Voila, you have started a slideshow on Windows 10 directly from your file explorer.

With the above methods, you can easily view pictures as a slideshow on Windows 11 and 10. However, if you want to share those exciting moments with your friends, you should combine those pictures and make a video to share.
Luckily, there is a tool that can help make pictures into a photo slideshow video on Windows. It is called Filmora. Let's dive into the details.
- Create slideshow videos with ease.
- Vast video/photo effects and creative assets.
- Powerful AI for effortless content creation.
- Intuitive, professional yet beginner-friendly.
- Works on Mac, Windows, iOS, and Android.


A Better Way to Make Photo Slideshows on Windows 11/10
Filmora is actually a very powerful video editing software solution designed to help you create videos that have Hollywood-grade production quality. To create a photo slideshow in Filmora, you only need a handful of features.
You can either create adorable and attractive photo slideshow videos with built-in templates or create from scratch with your own creativity, such as managing photos, adding transitions, adjusting durations, syncing beats with photos, adding background music, and more.
Here are the steps to make a shareable photo slideshow on Windows 11 and 10:
- Download and install Filmora on your device.
 secure download
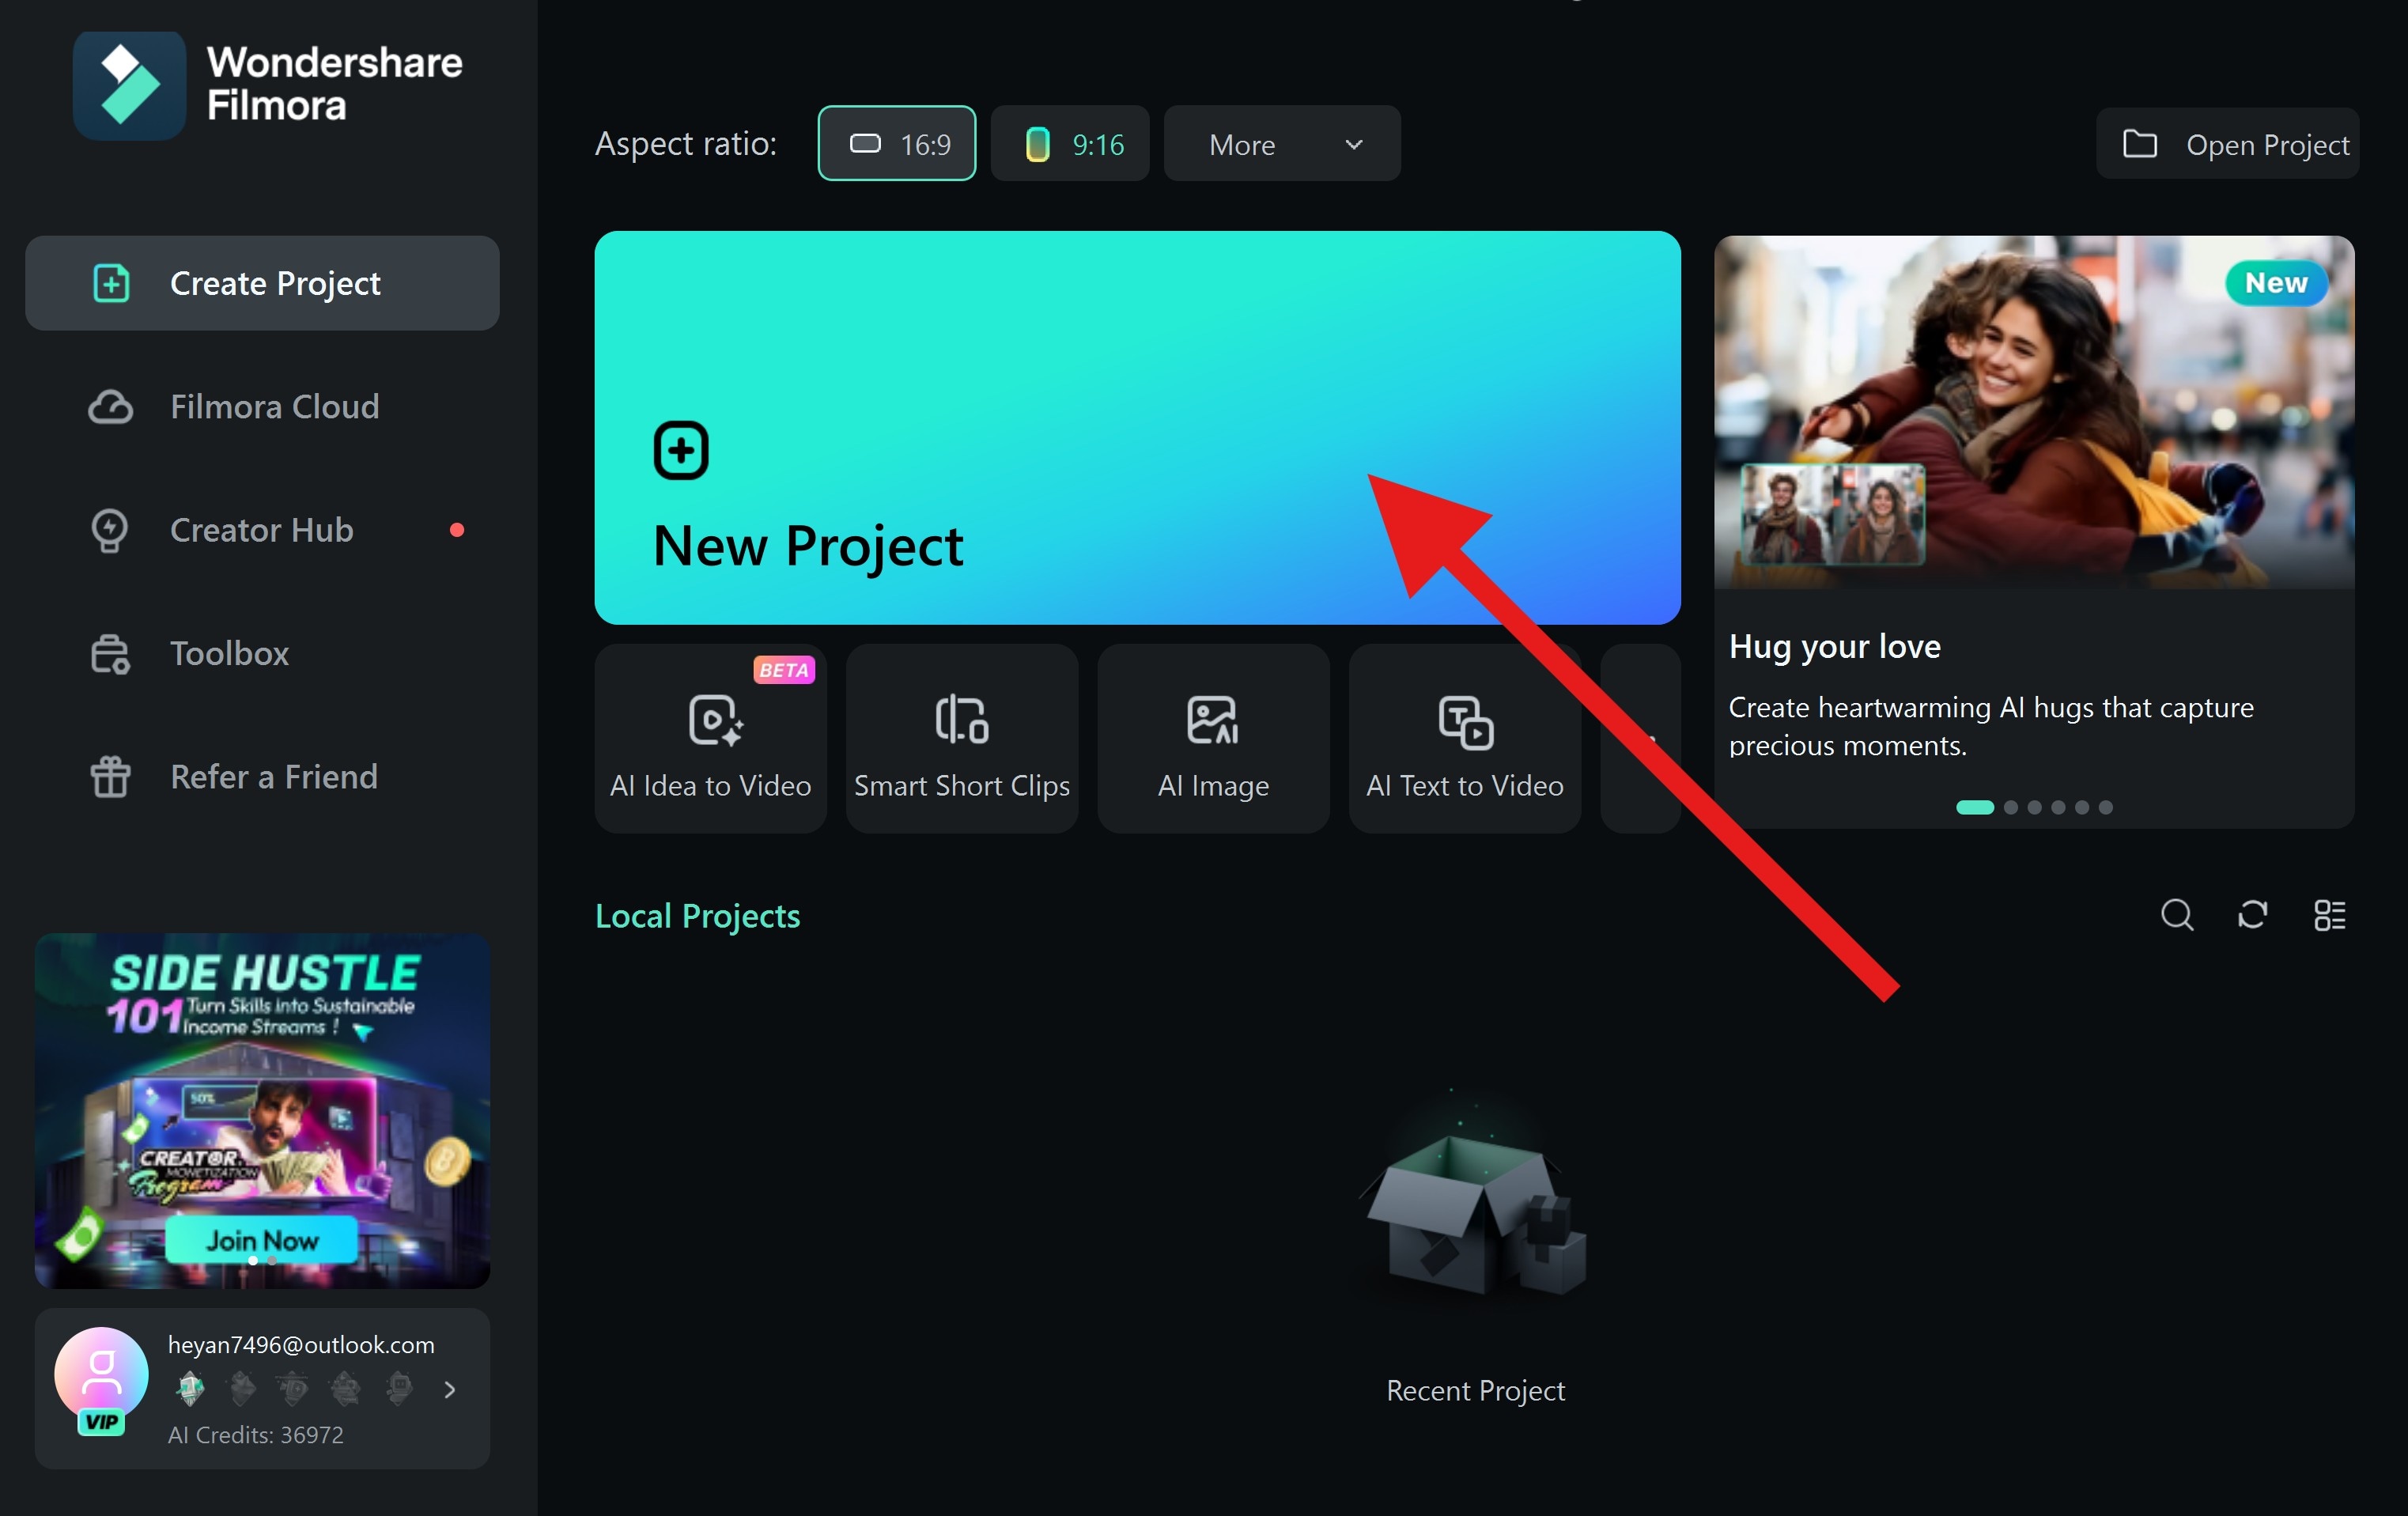
 - Open the app and create a New Project.
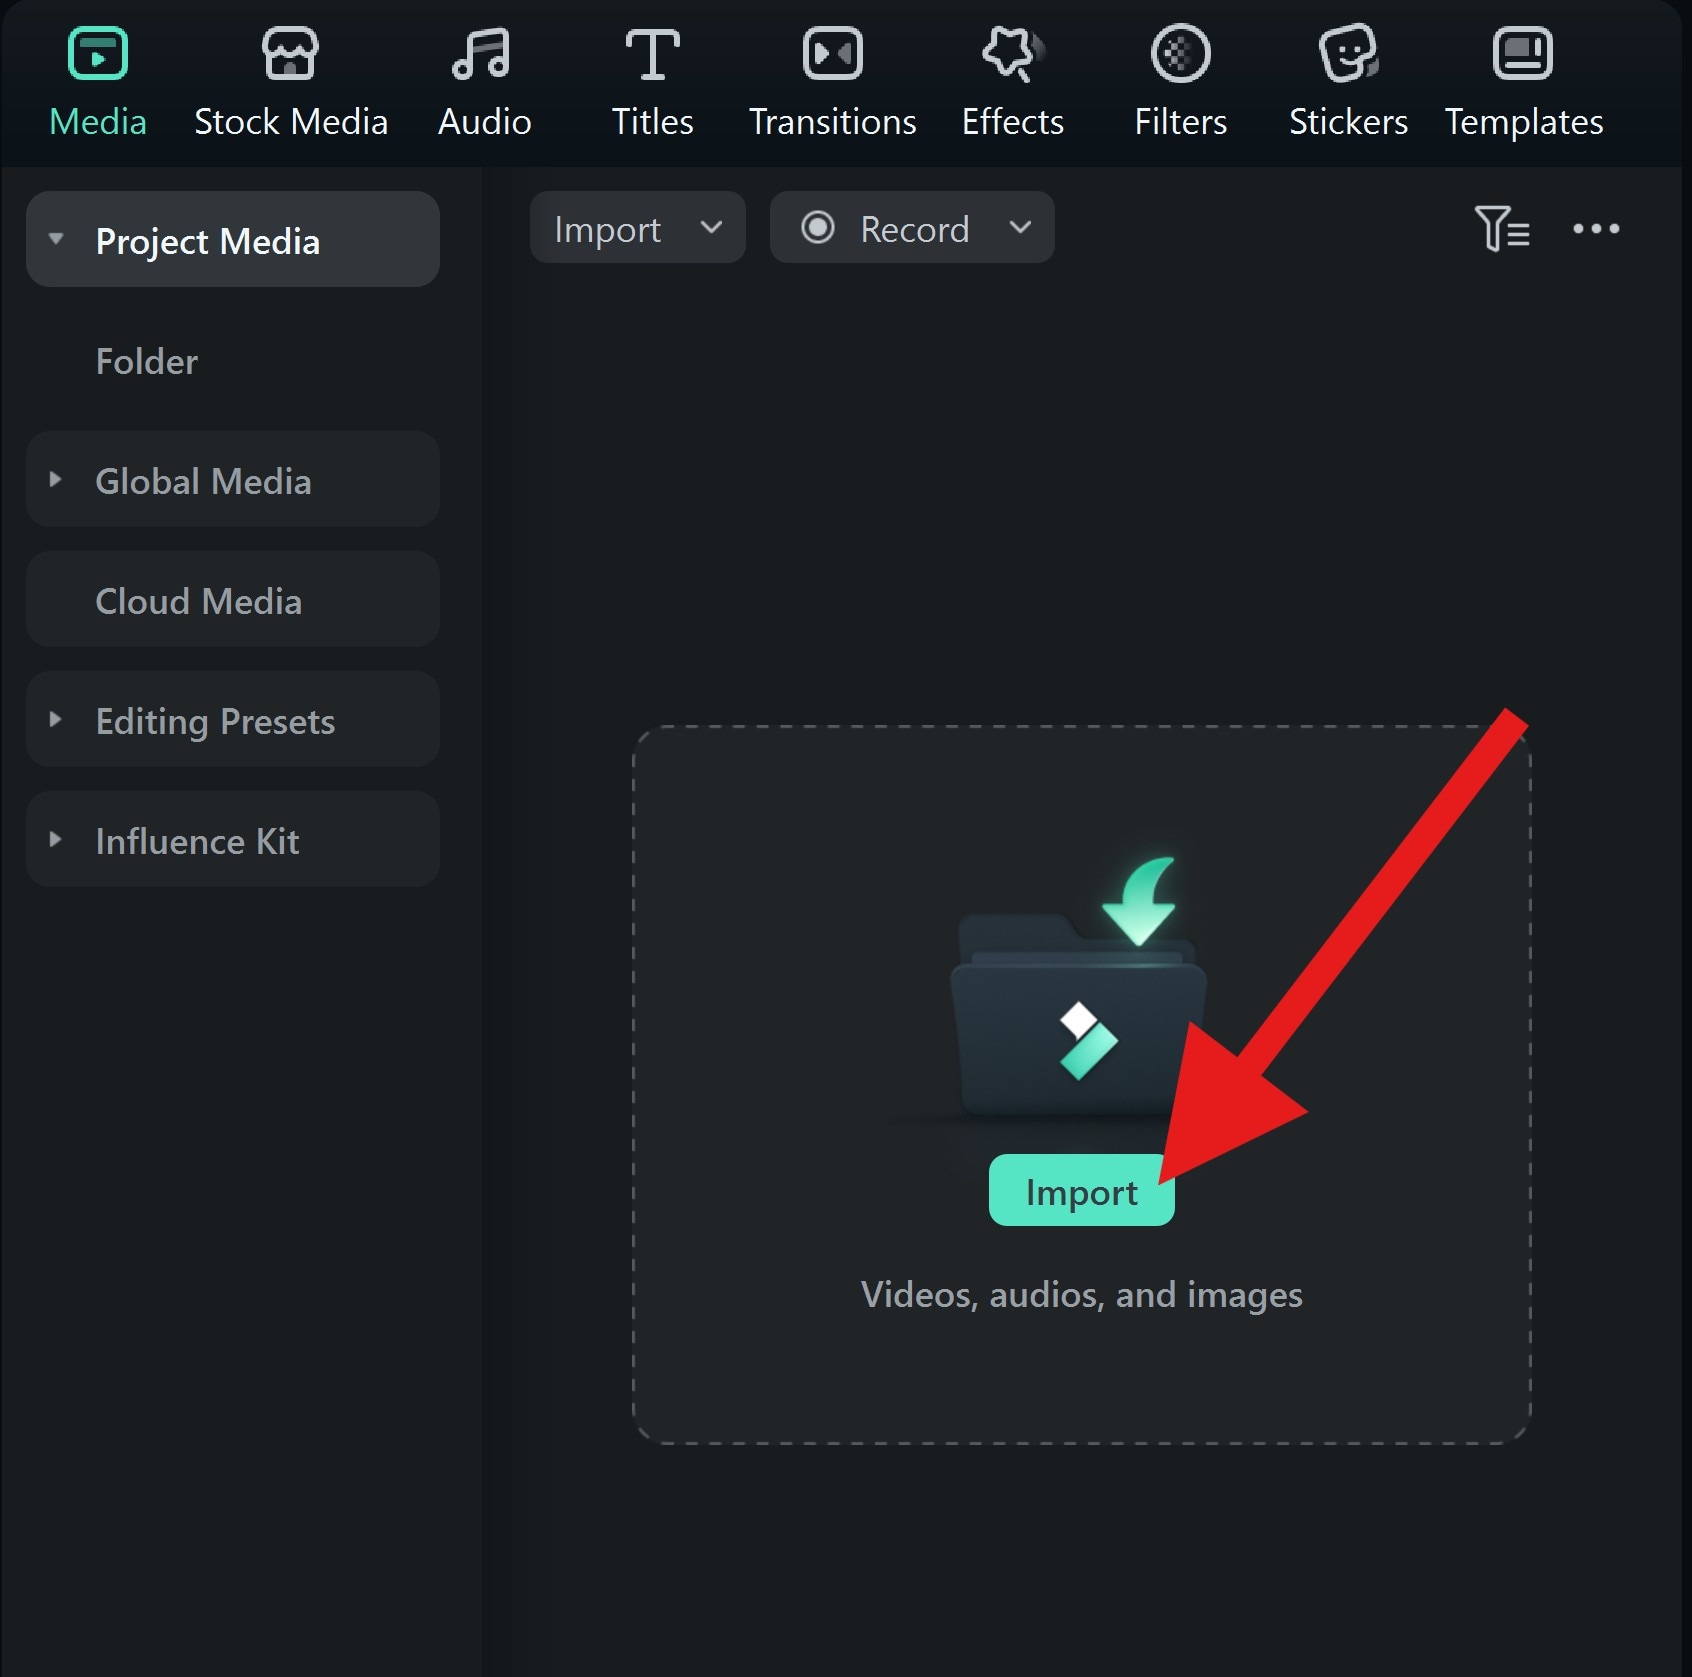
- Tap on Import, and proceed to add several photos (or videos) to your project.
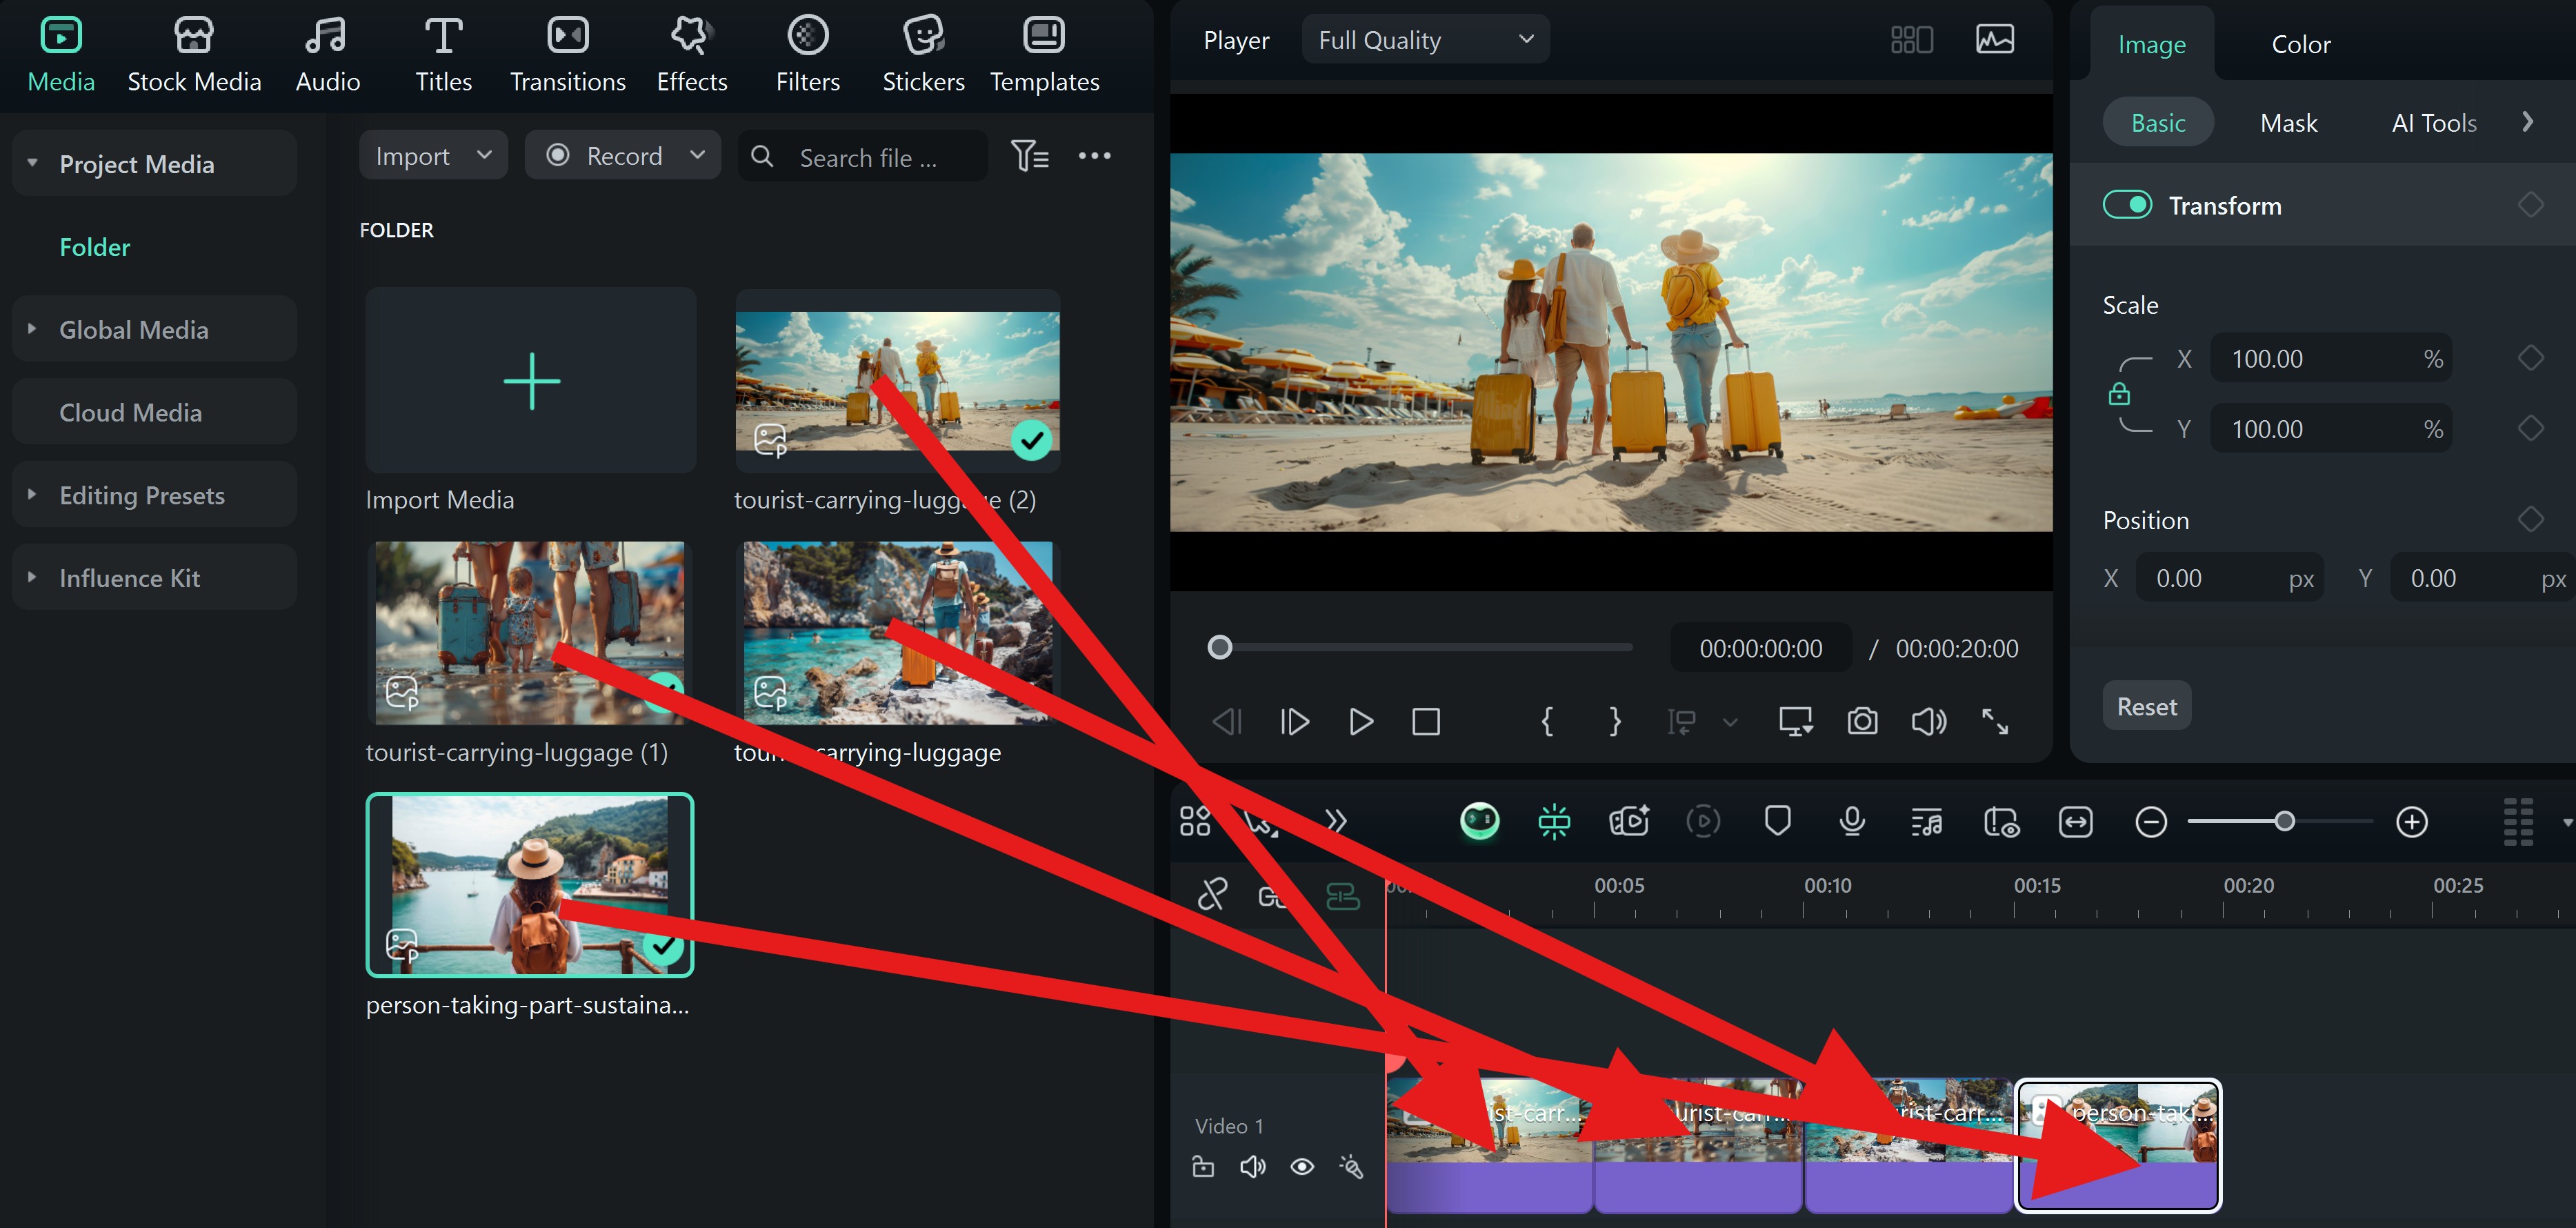
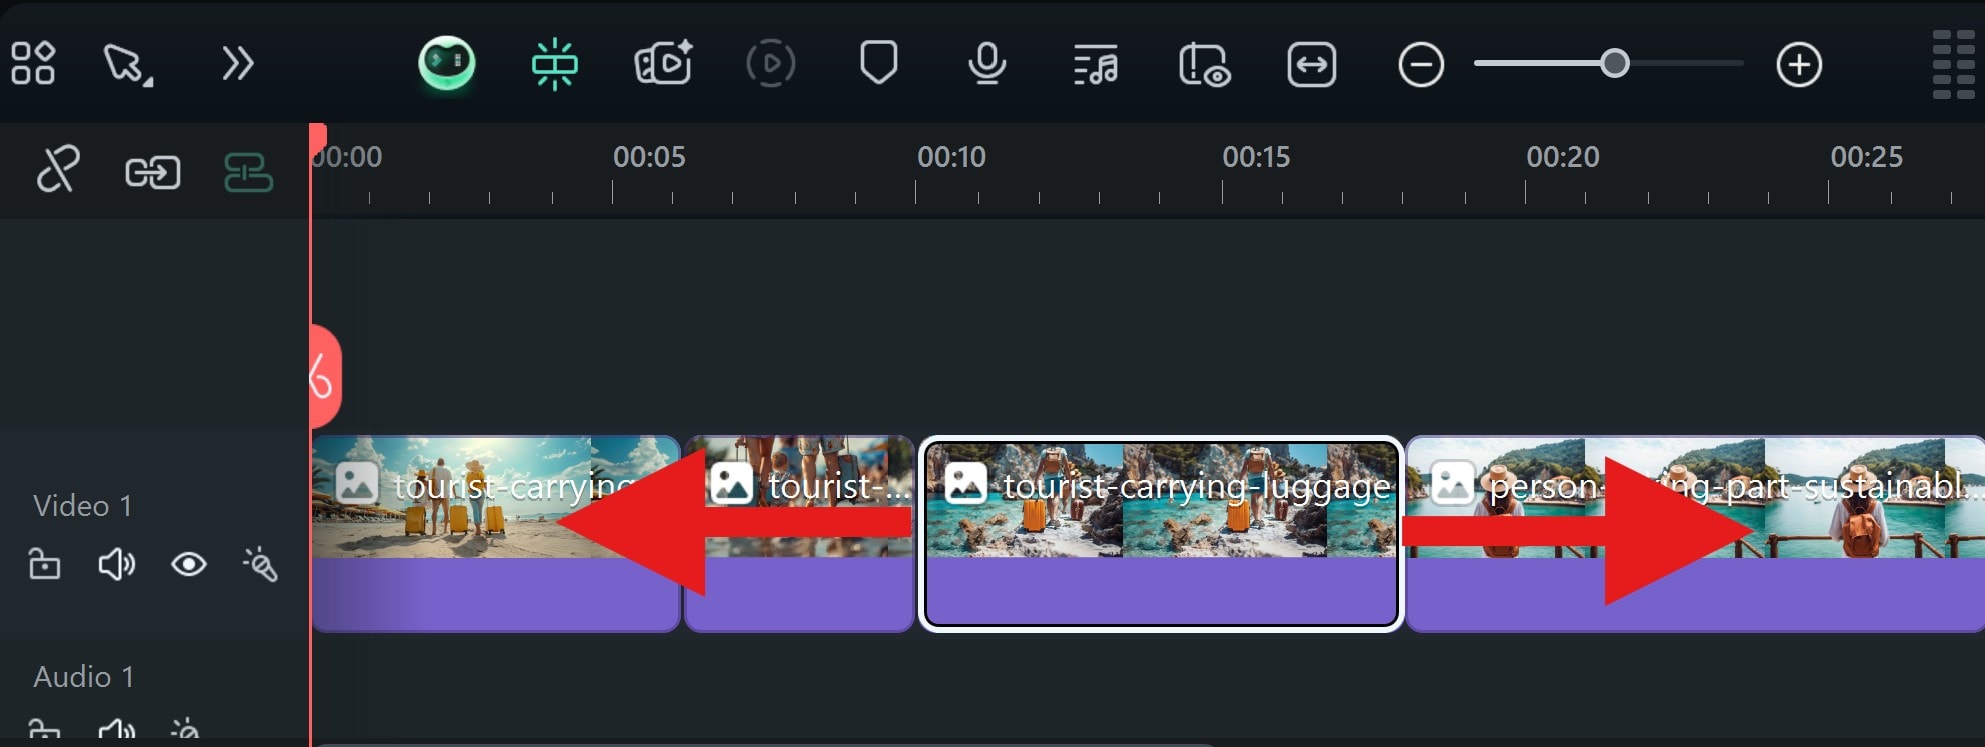
- Drag the images to the timeline in the order you want them to appear.
- You can adjust the duration of each clip in the timeline by hovering over its beginning or end. Then, click and drag left or right to trim.
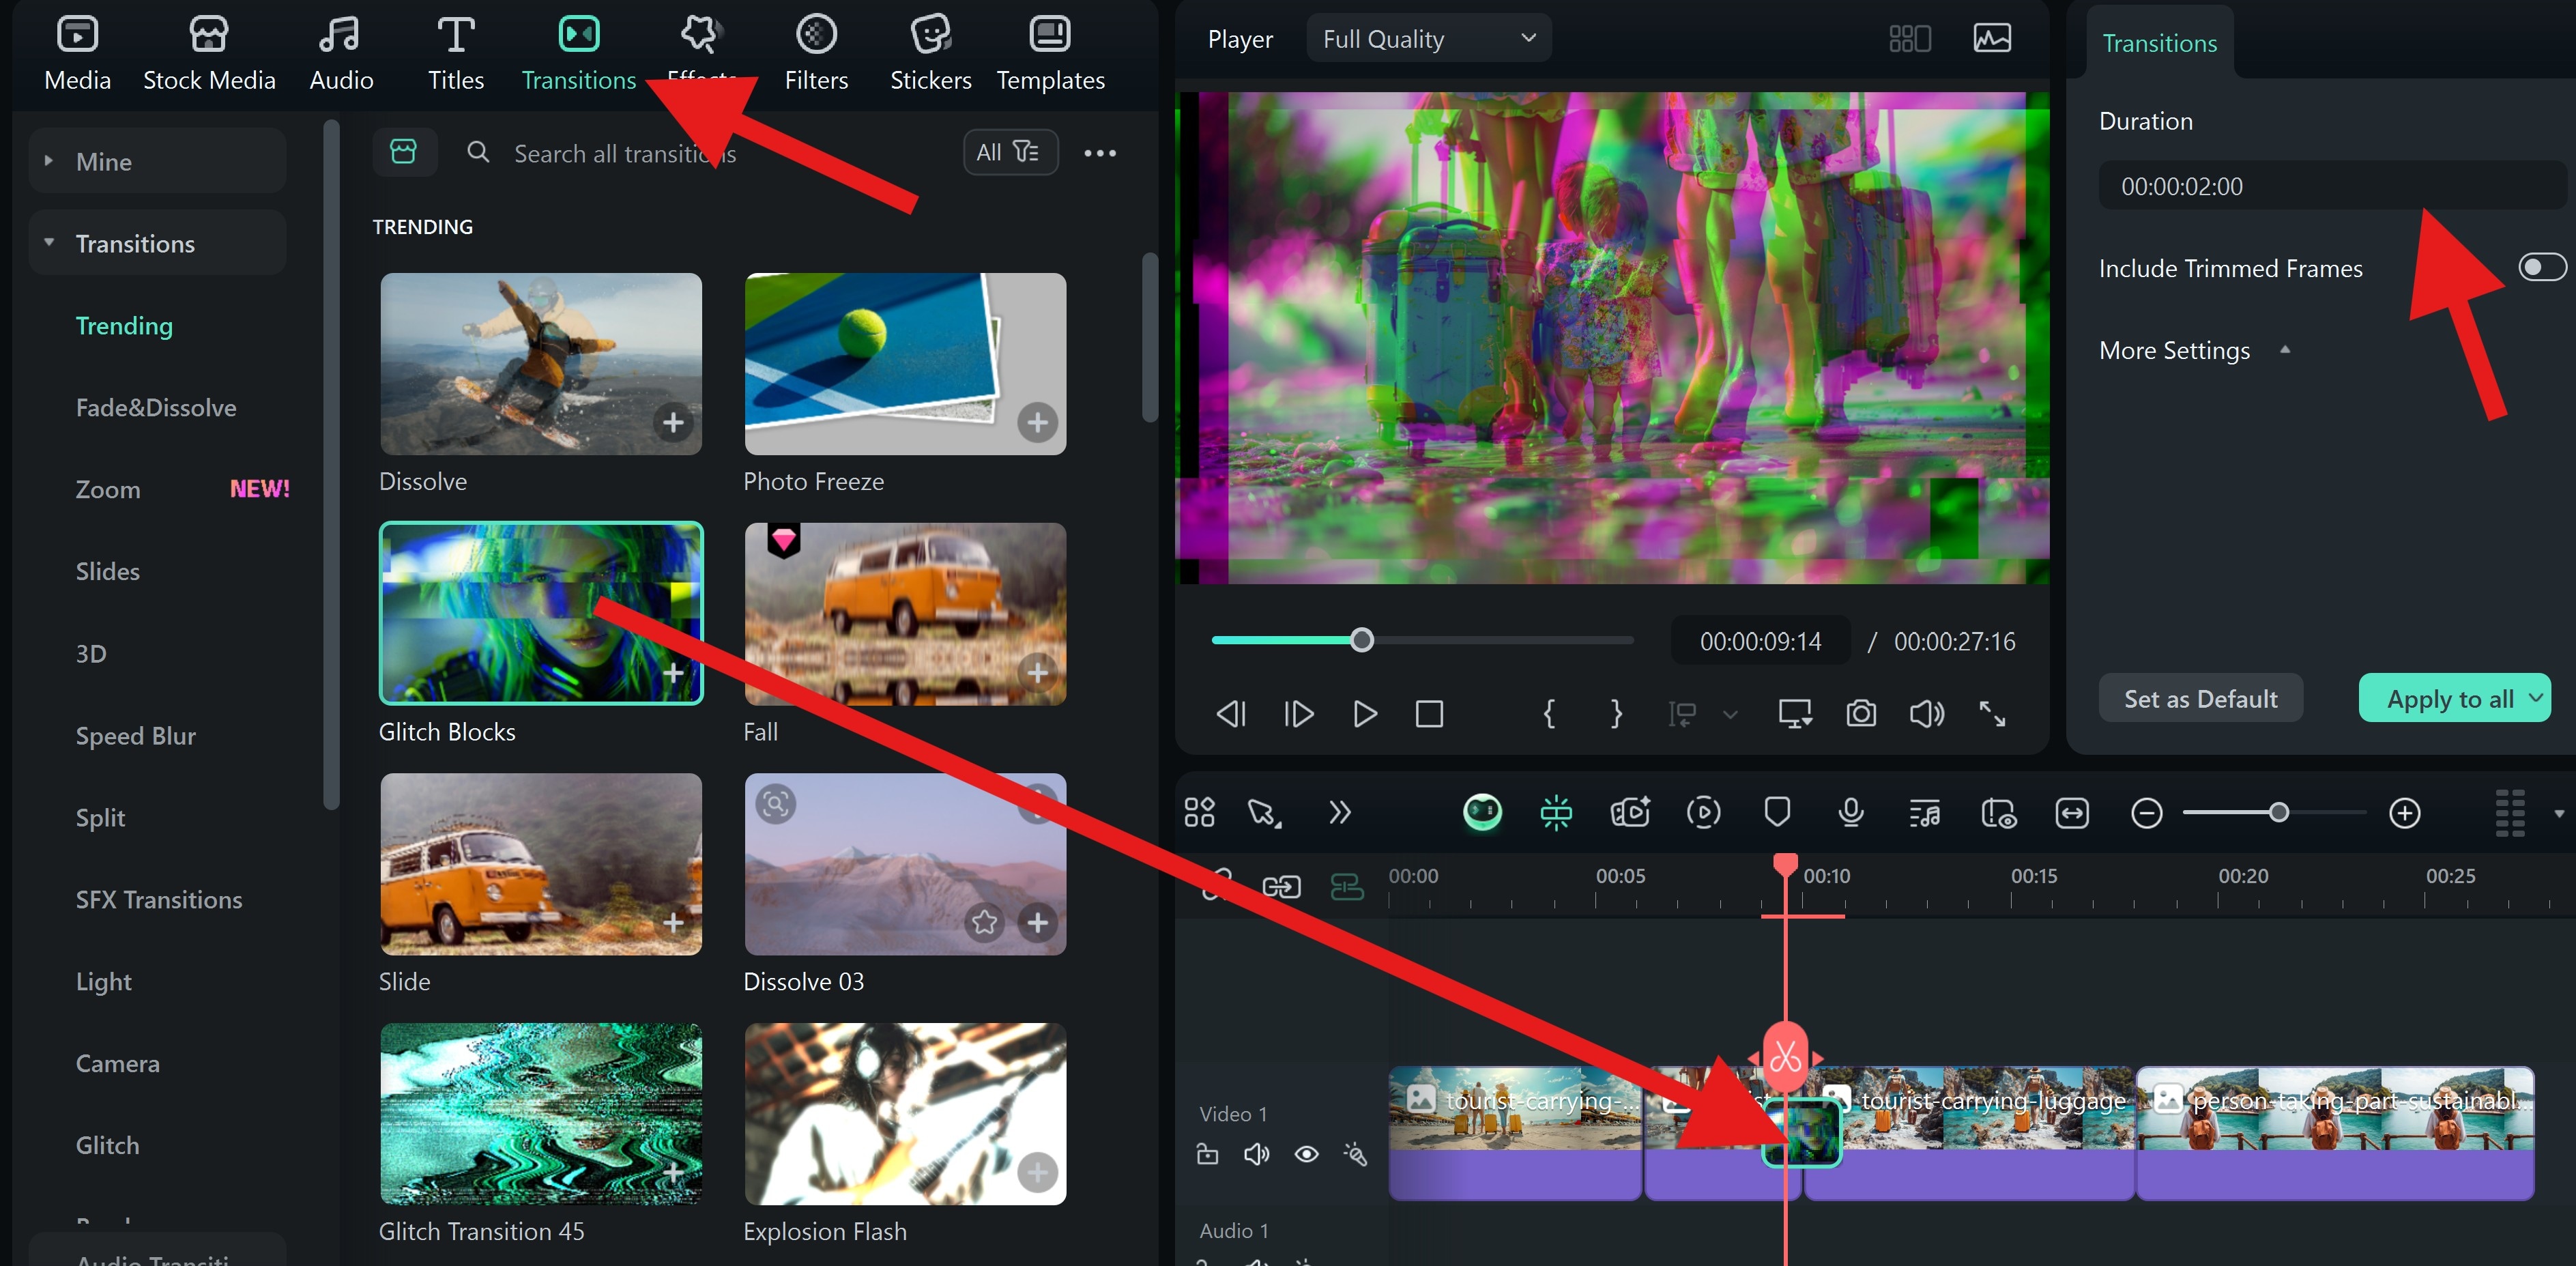
- Go to the Transitions tab, pick something that you like, and drag it between two clips in the timeline to apply it. You can also adjust the Duration.
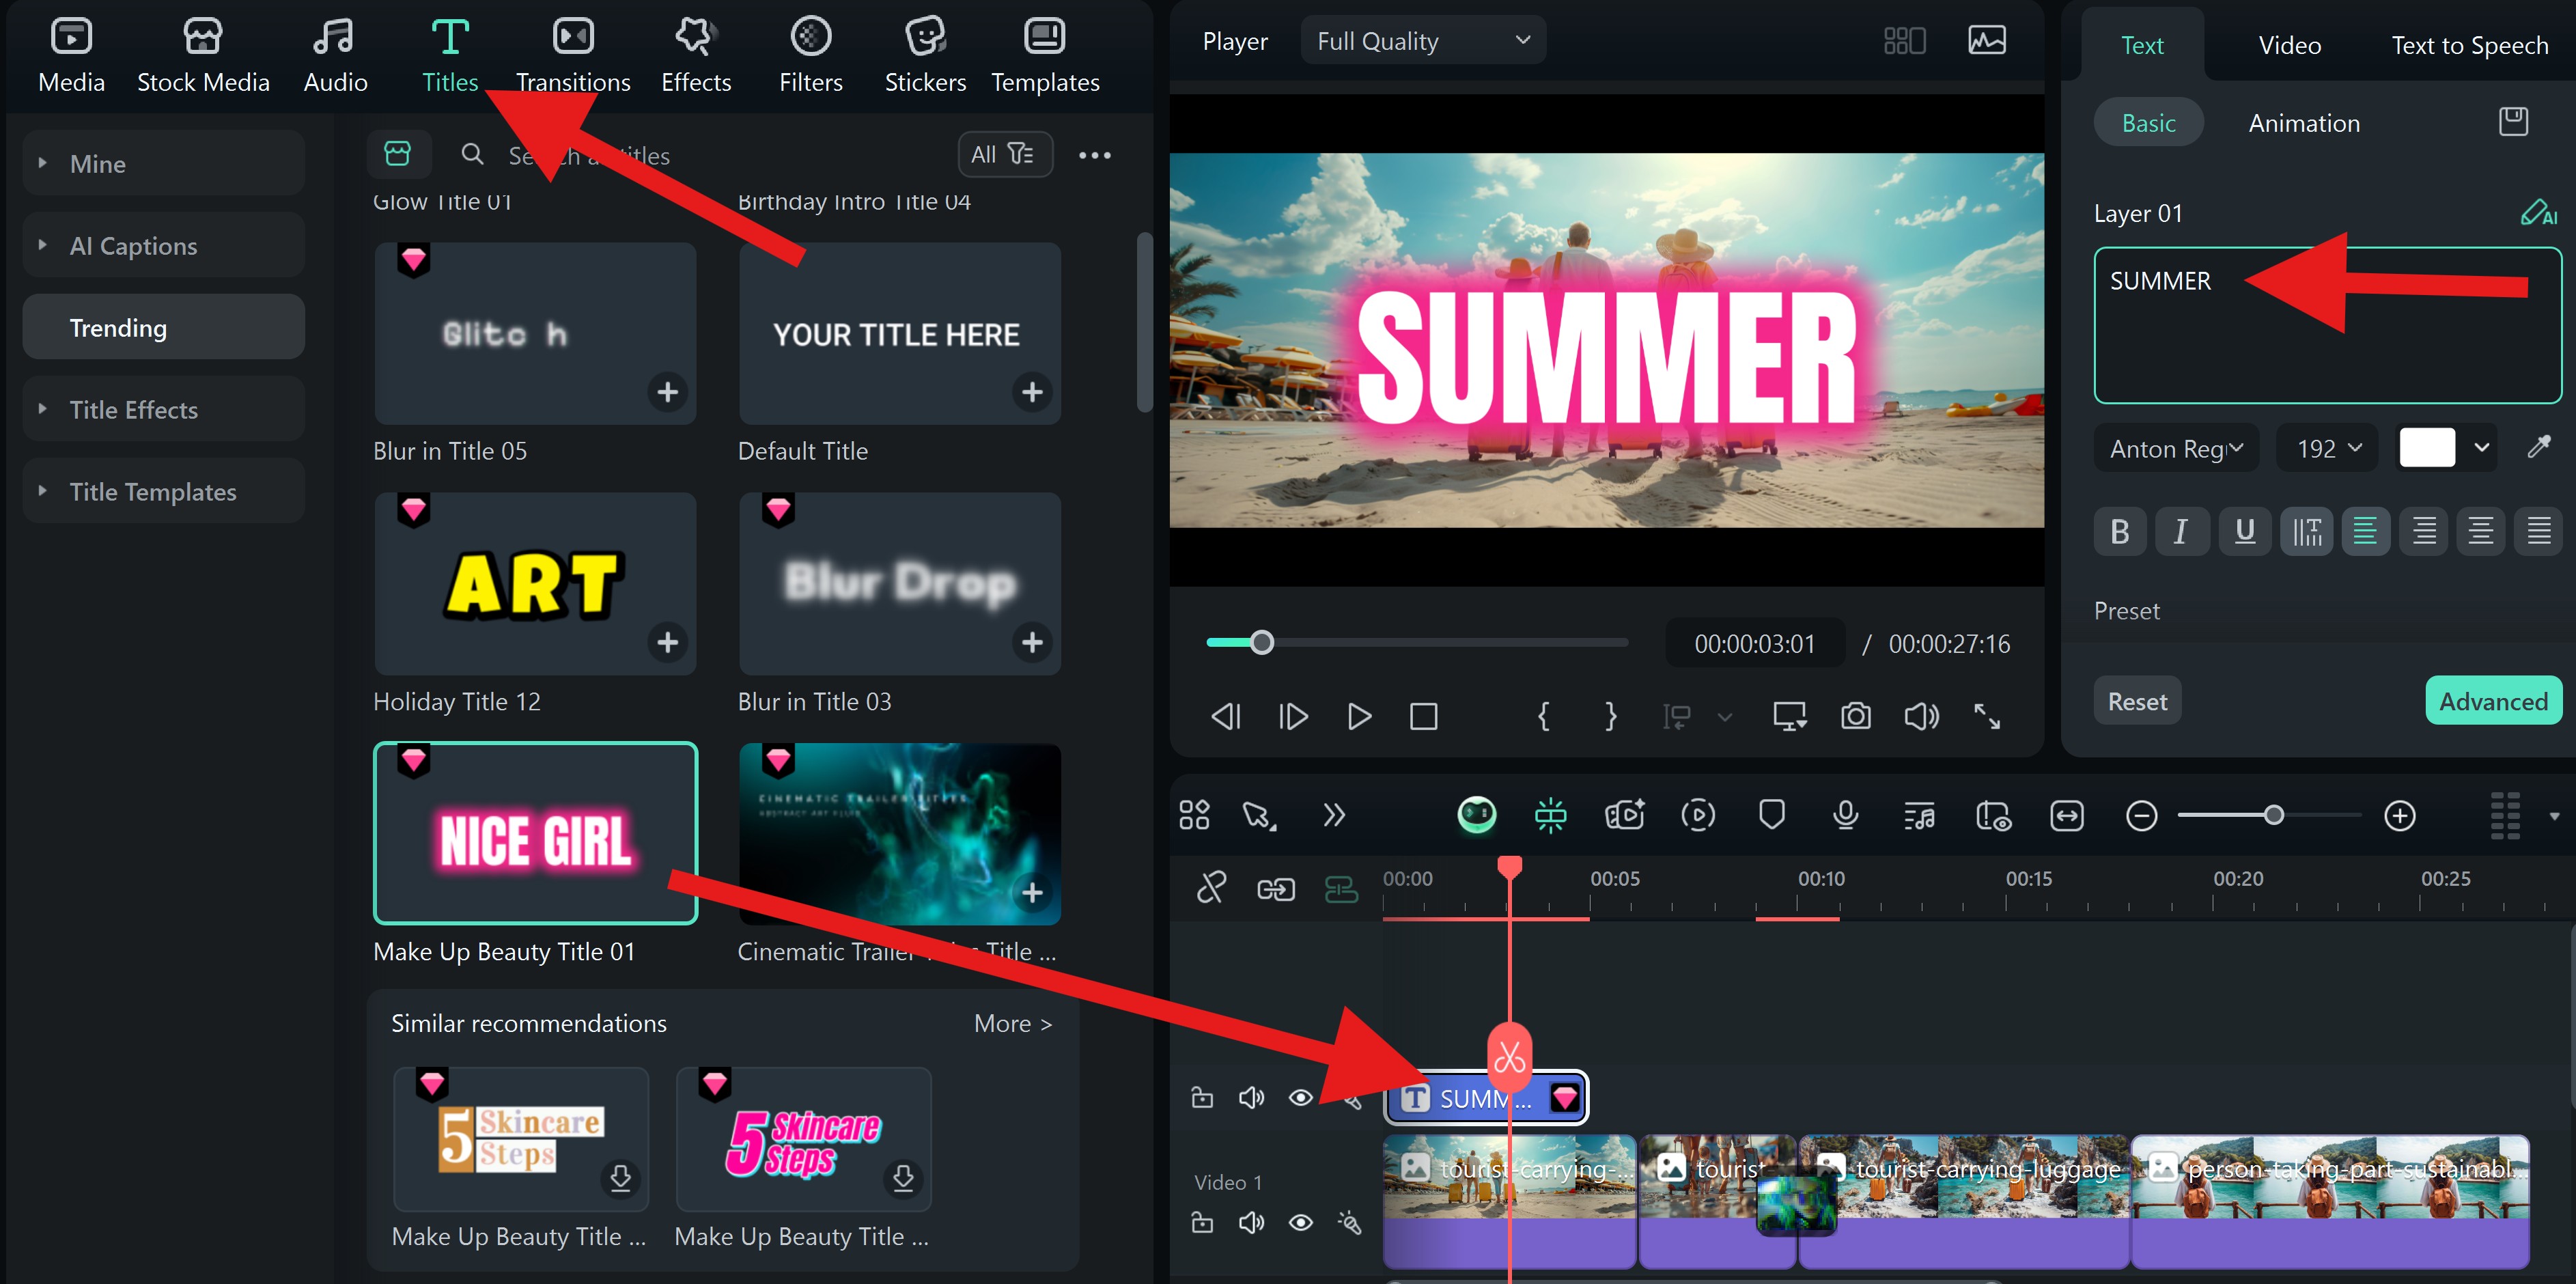
- Now, go to the Titles tab. Pick an animated text template and drag it to the timeline. You can edit the text to your liking as well.
- You can now go to Effects, and when something catches your eye, you can drag it to the timeline.
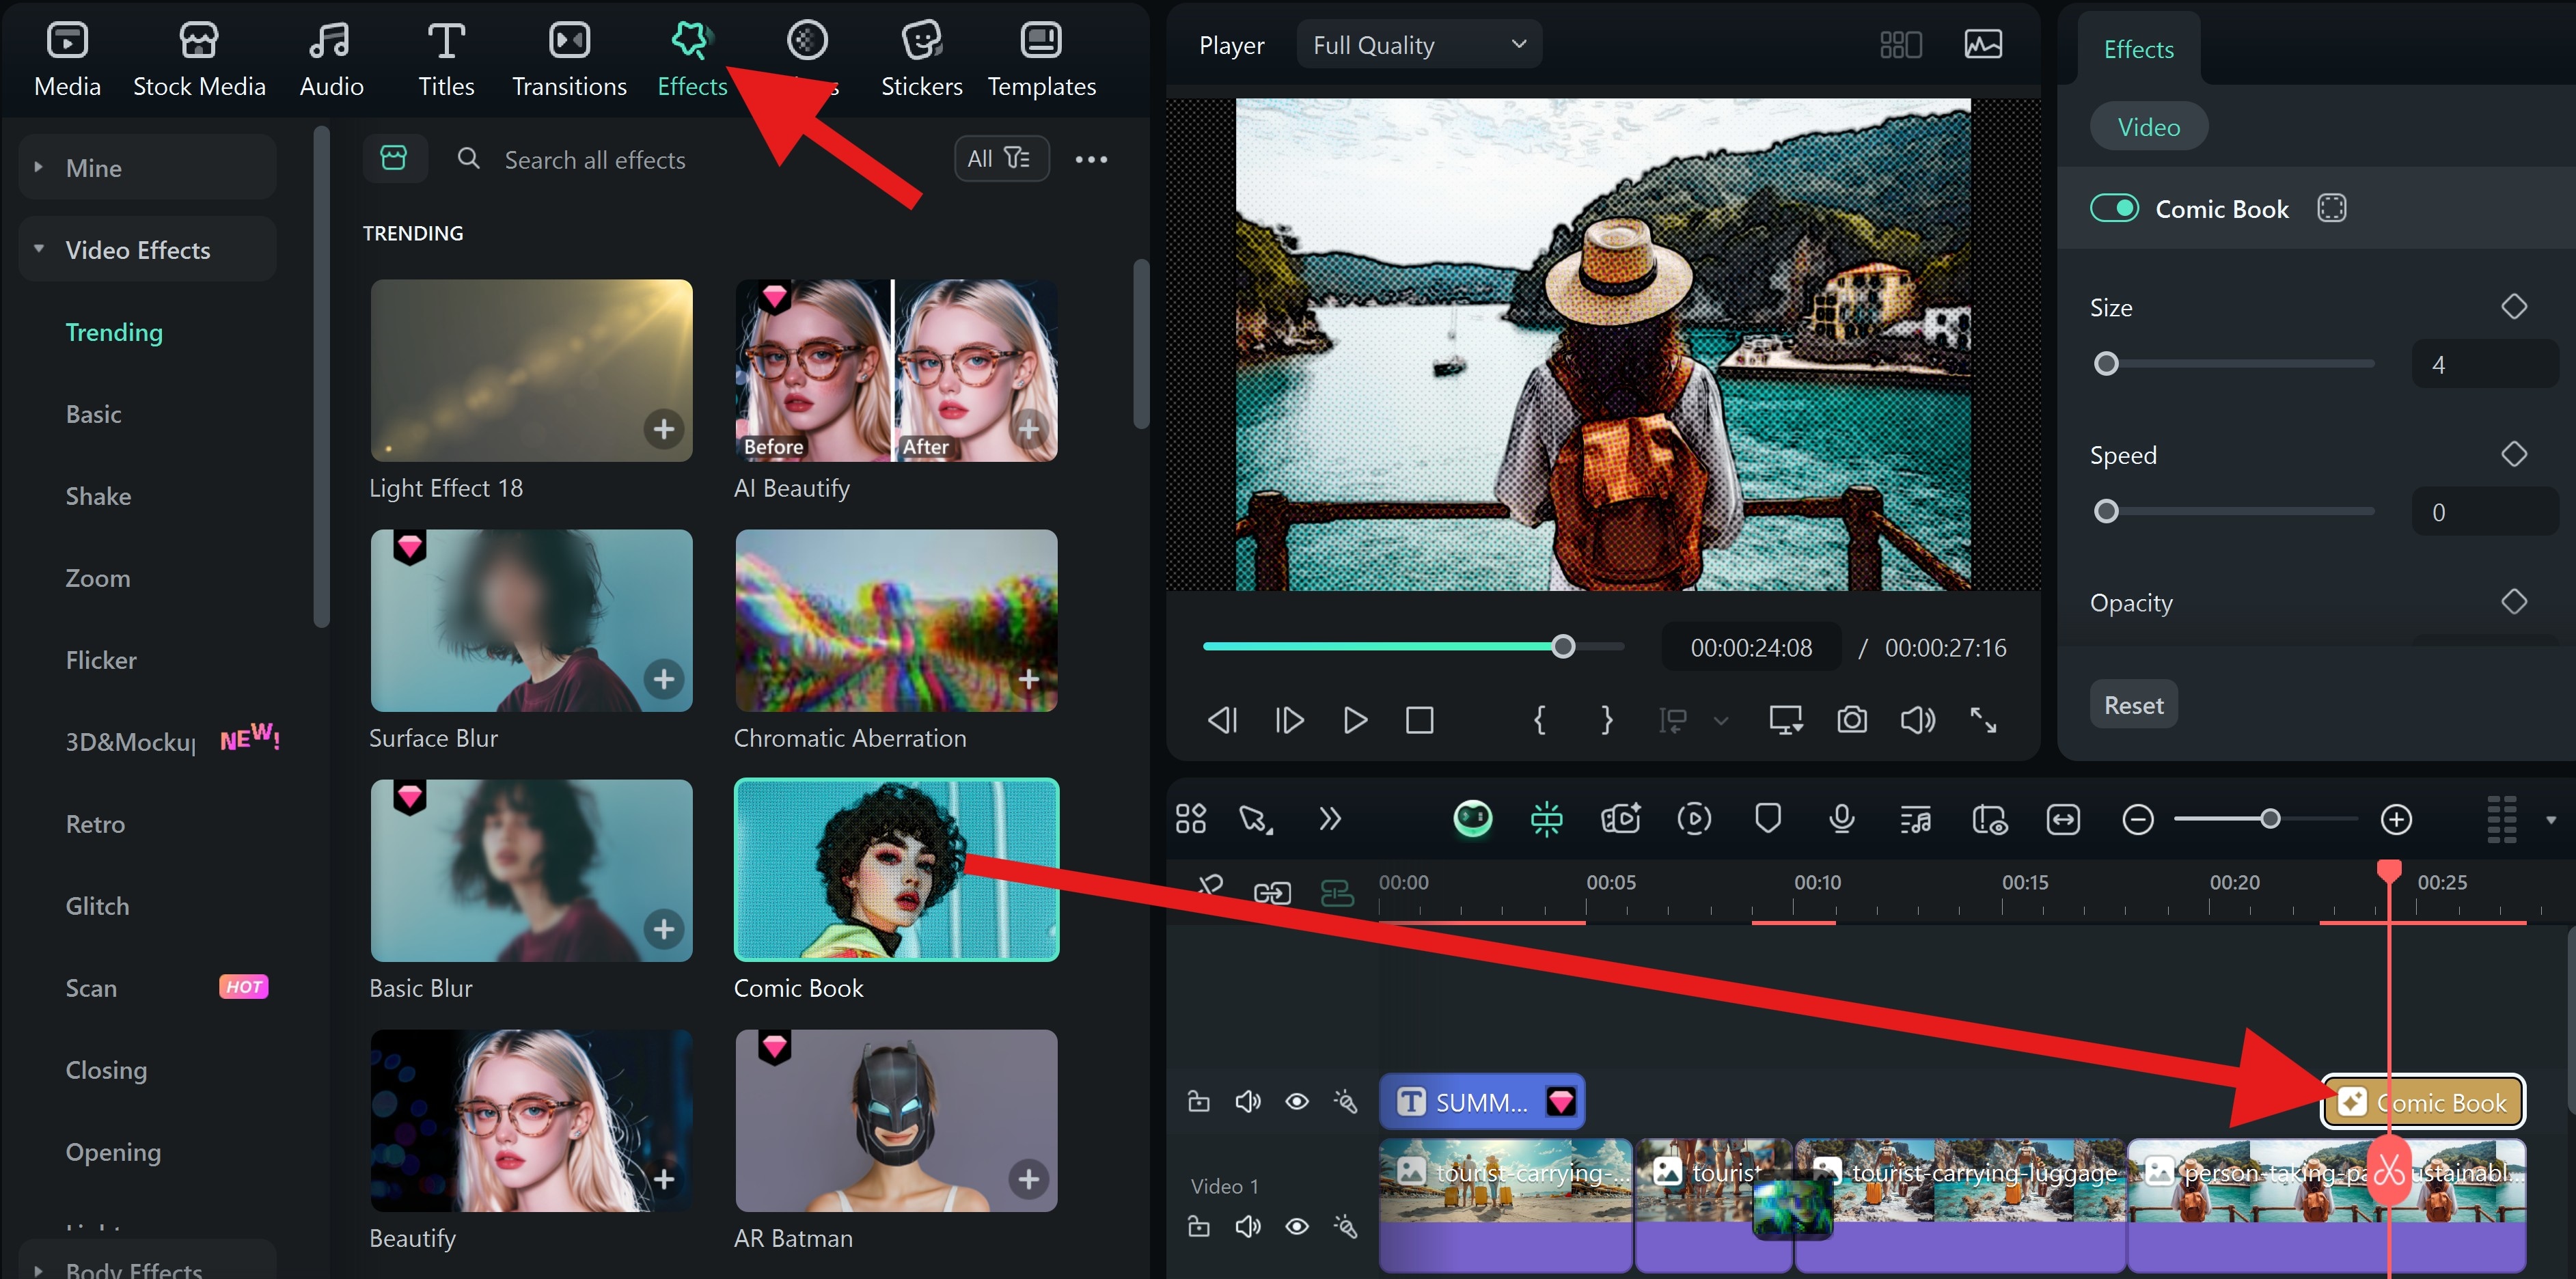
- The process for adding Filters is the same.

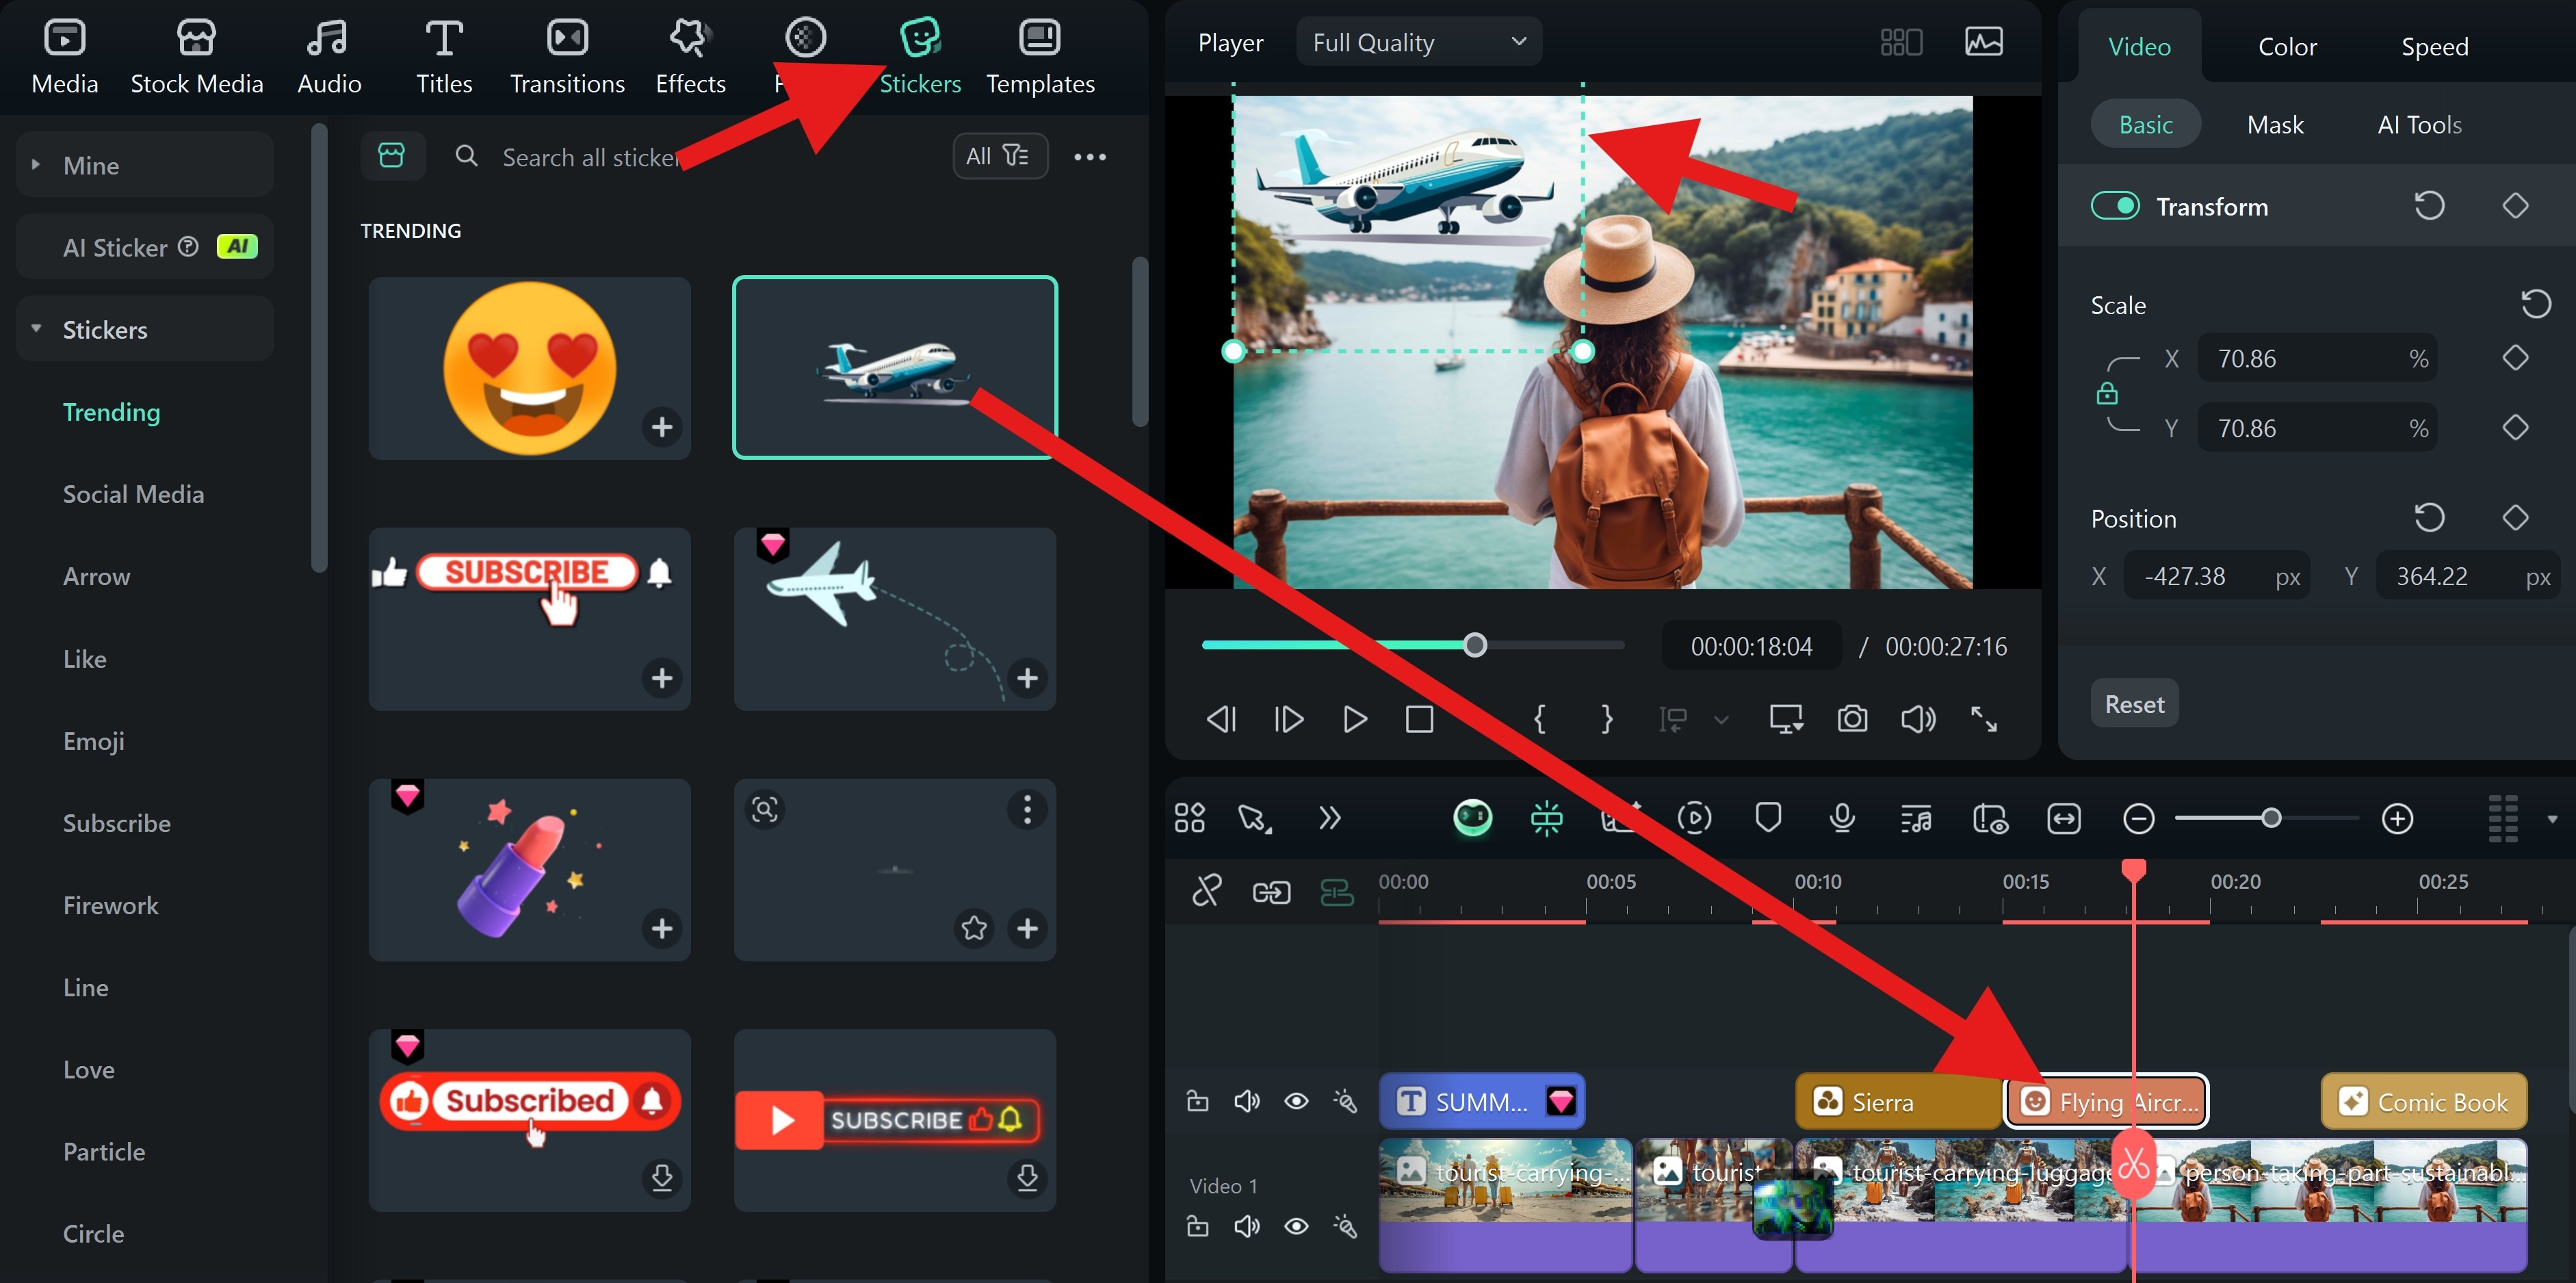
- You can also add Stickers. Find one, move it to the timeline, and adjust its size and position in the video player.
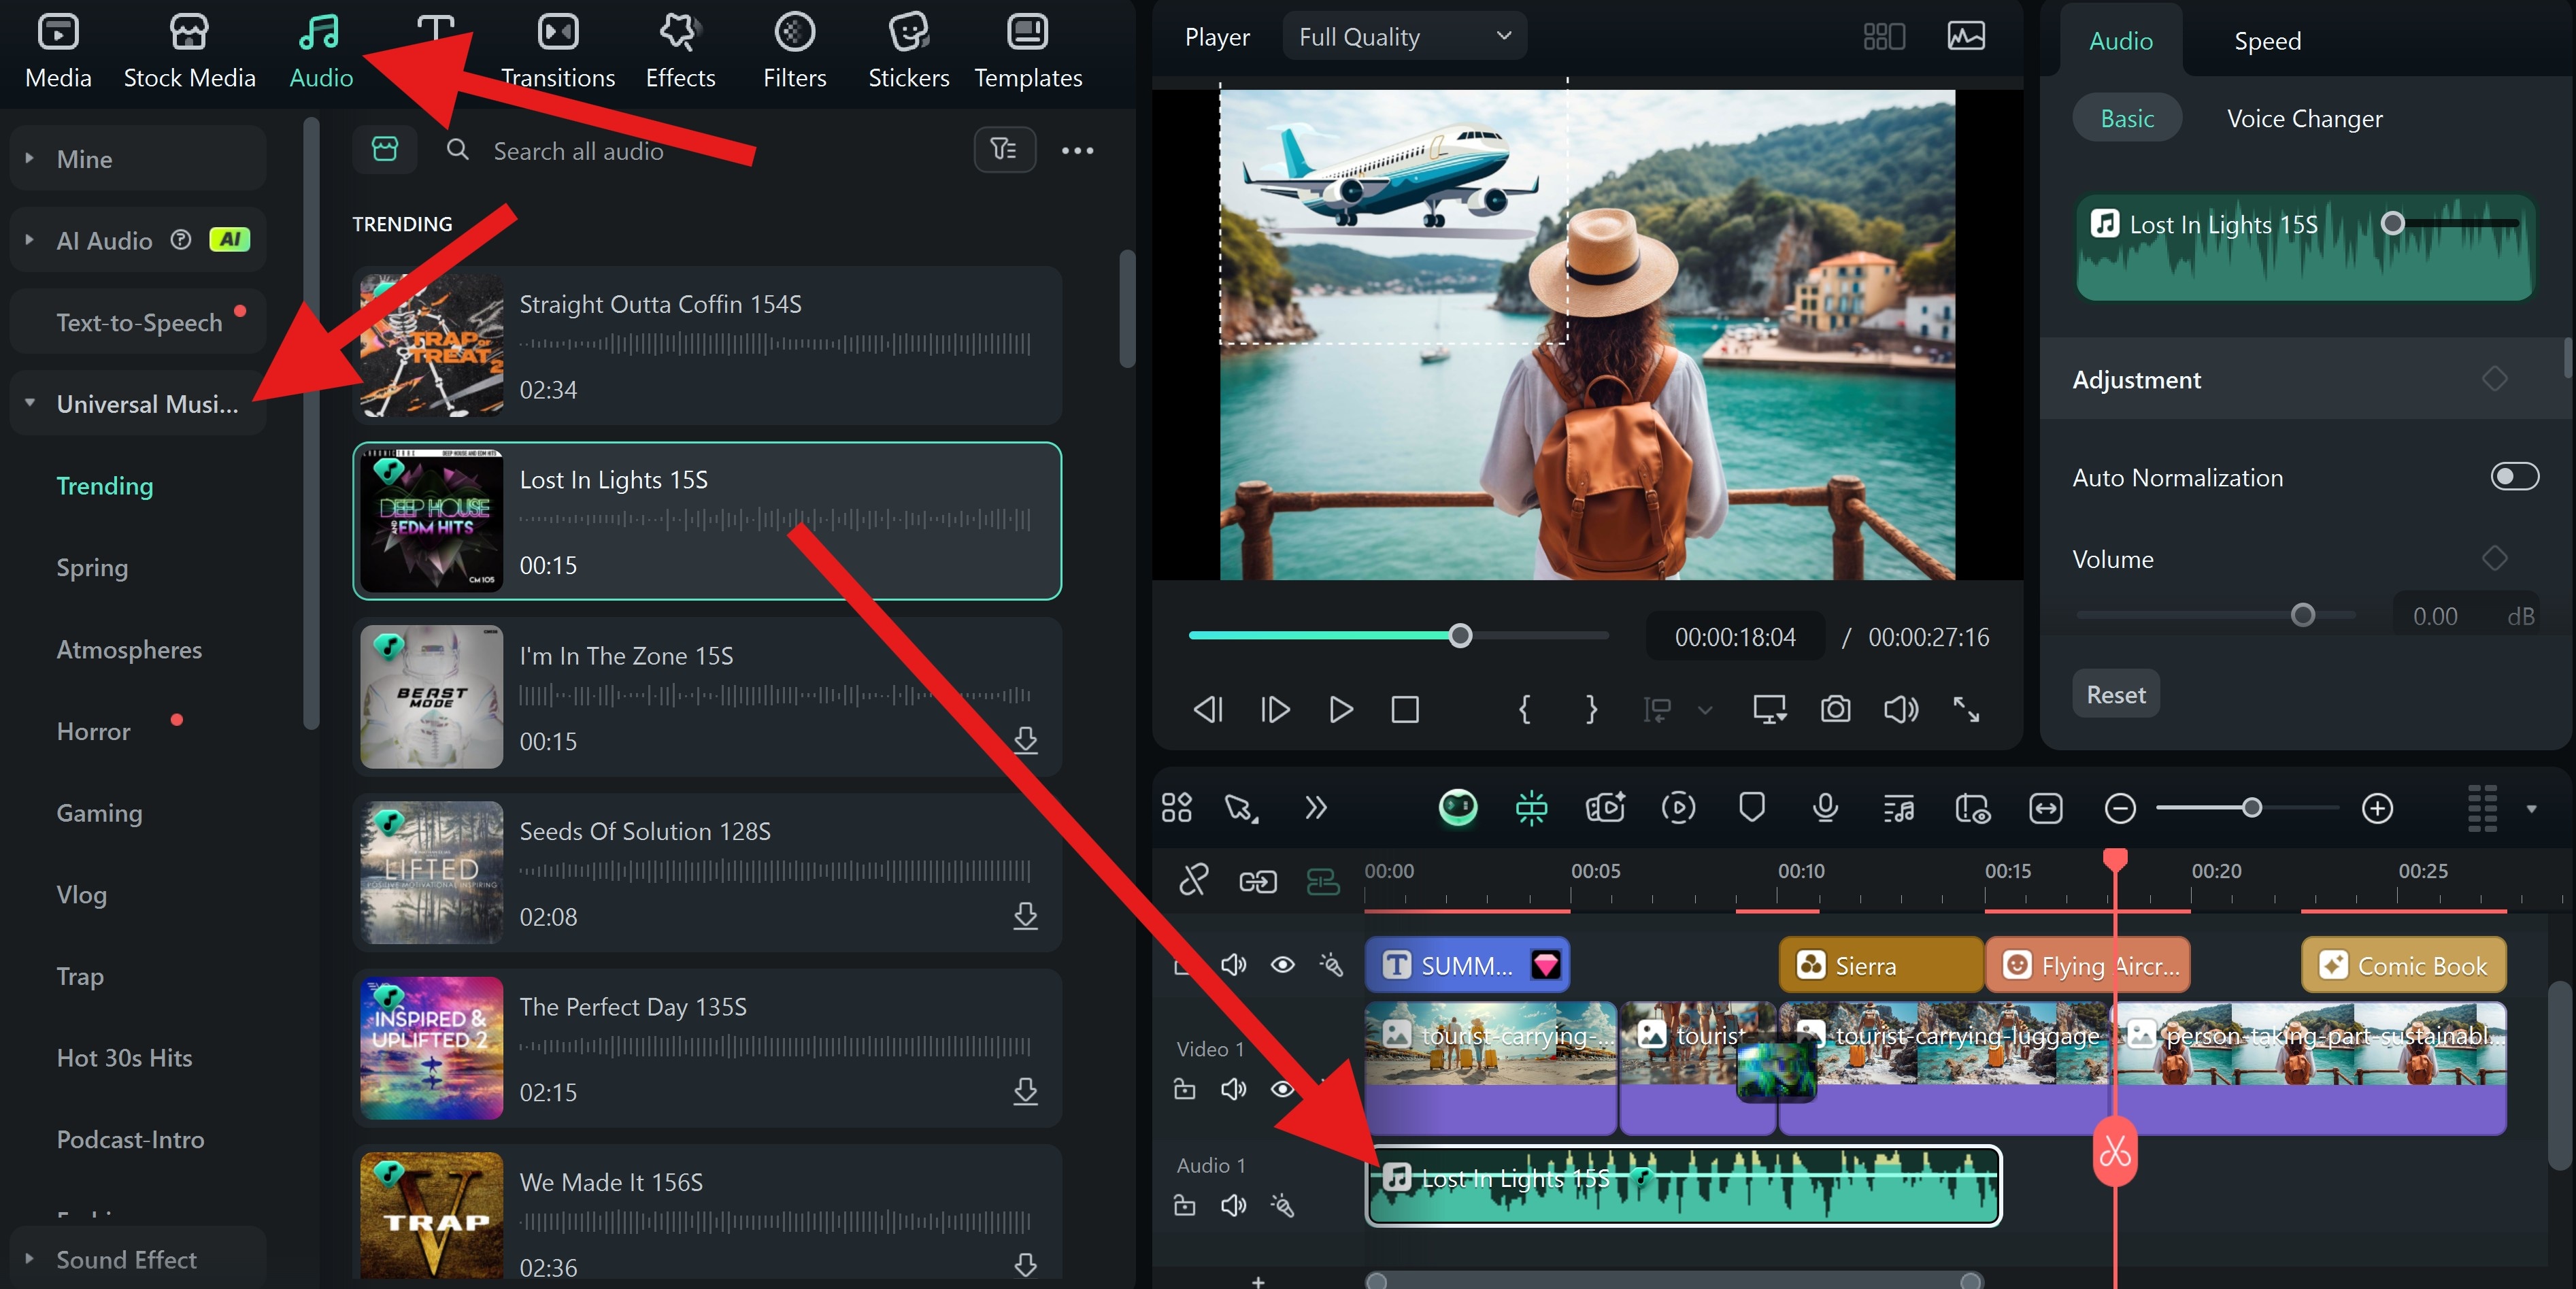
- Finally, when the visual aspect of your slideshow is complete, go to Audio > Universal Music, pick a song that you like, and drag it to the timeline.
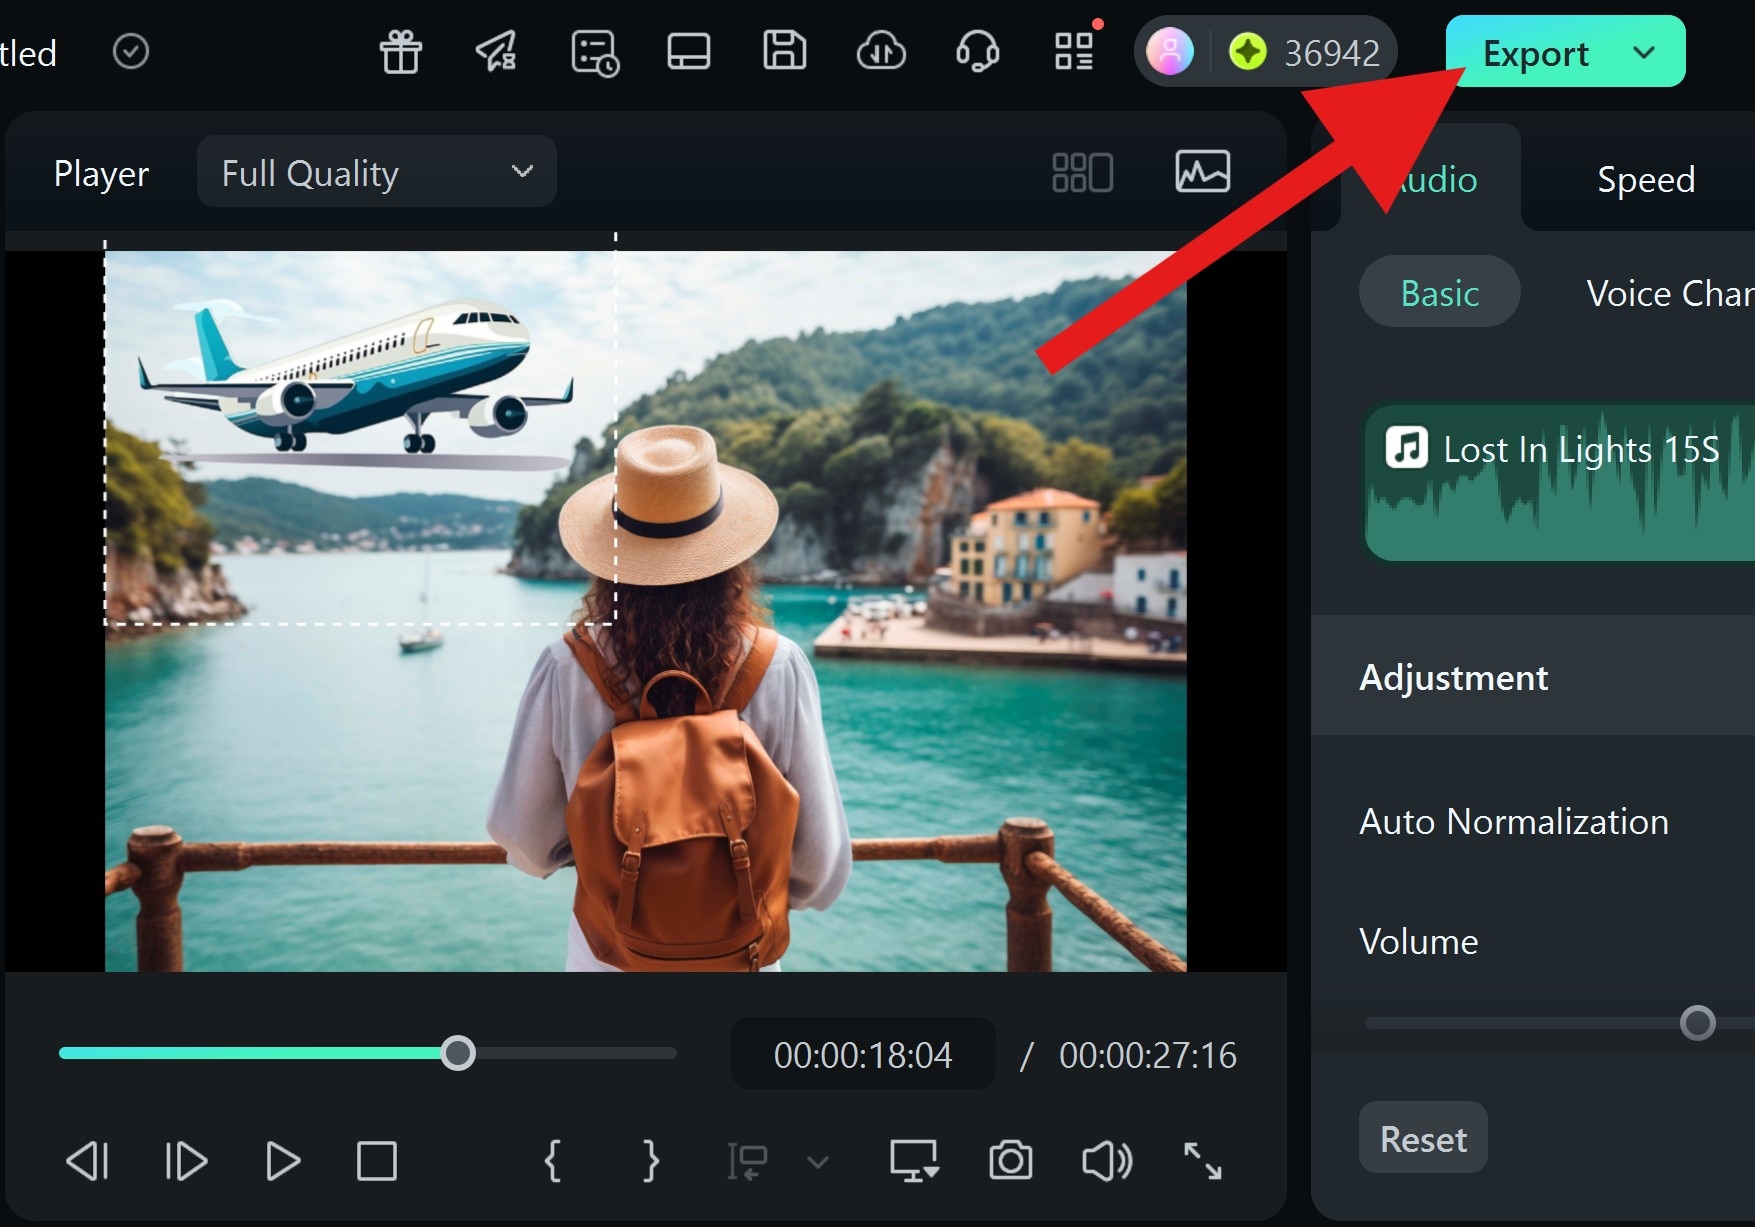
- Once you are completely satisfied with your slideshow, you can click on Export and explore exporting options before hitting the Export button once more.
Conclusion
If you simply want to view pictures as a slideshow on your Windows computer, you can either use the free Photos app or file explorer's picture tools to do that.
However, if you come across a situation that may need to share the slideshow with your friends, Filmora is a great option.
Download Filmora today and start making a stunning photo slideshow with transitions, music, and effects. You will soon realize that Filmora lets you experience the joy of video editing like never before.
If you want to create a slideshow on the go, Filmora is also available as a mobile app for Android and iOS.
secure download 