


As one of the most recognized video editors in the industry, DaVinci Resolve's auto color correction feature is widely hailed as one of the best around. But while it has a legendary reputation, it definitely isn't the only top dog in town.
If you're wondering how DaVinci Resolve's auto color correction holds up when placed side-by-side with tools like Premiere Pro's automatic color correction, we've got the details you need. We’ll review DaVinci Resolve first, then compare its approach with Premiere Pro and Wondershare Filmora to see which one makes color correction easier.
Part 1. Understanding DaVinci Resolve’s One-Click Auto Color Tool
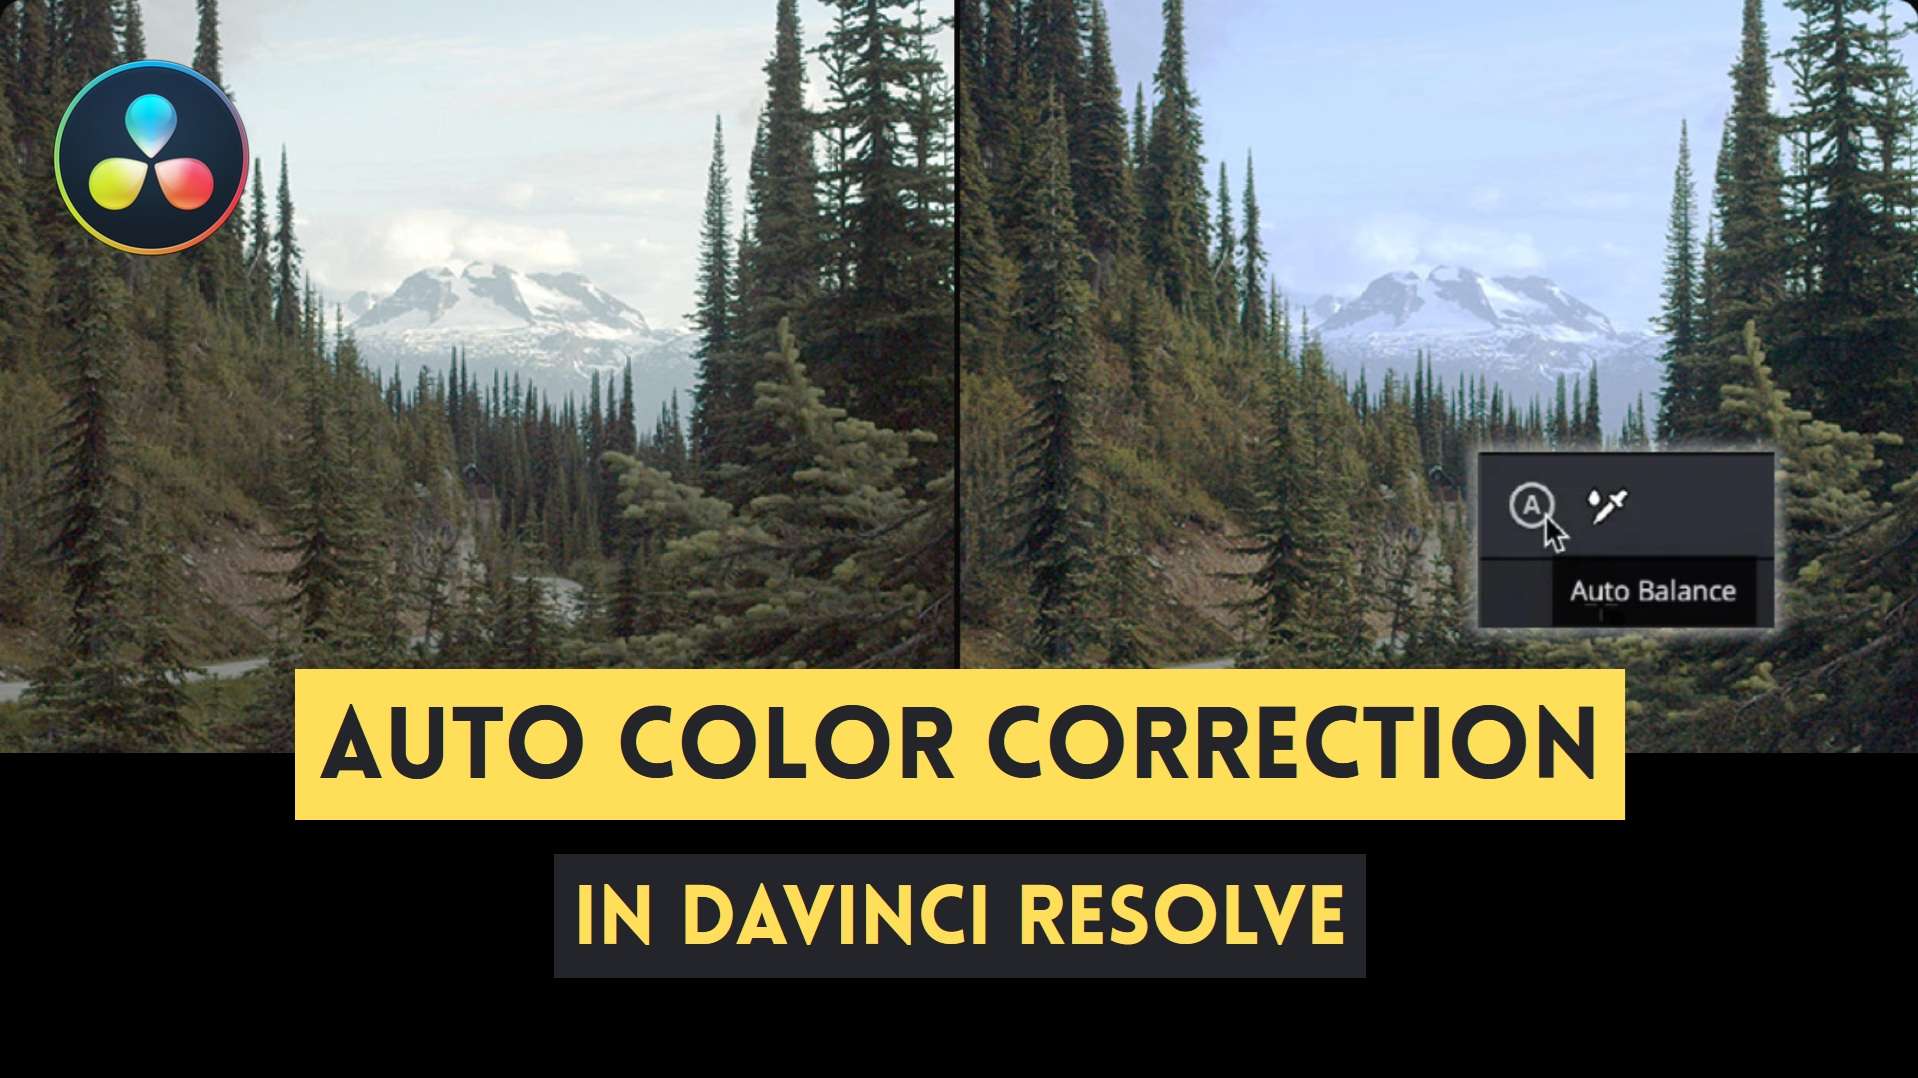
DaVinci Resolve is a video editing software particularly well known for its color tools, but you don't always have to start by manually adjusting wheels, curves, and other controls. Its automatic correction tools can give footage a more balanced starting point with less manual work.
Since configuring the software can be a little overwhelming, especially for first-time users, DaVinci Resolve auto color correction is a quick way to make initial color adjustments without having to fine-tune every setting yourself. It’s useful when you want to correct basic color issues first and then make more precise adjustments as needed.
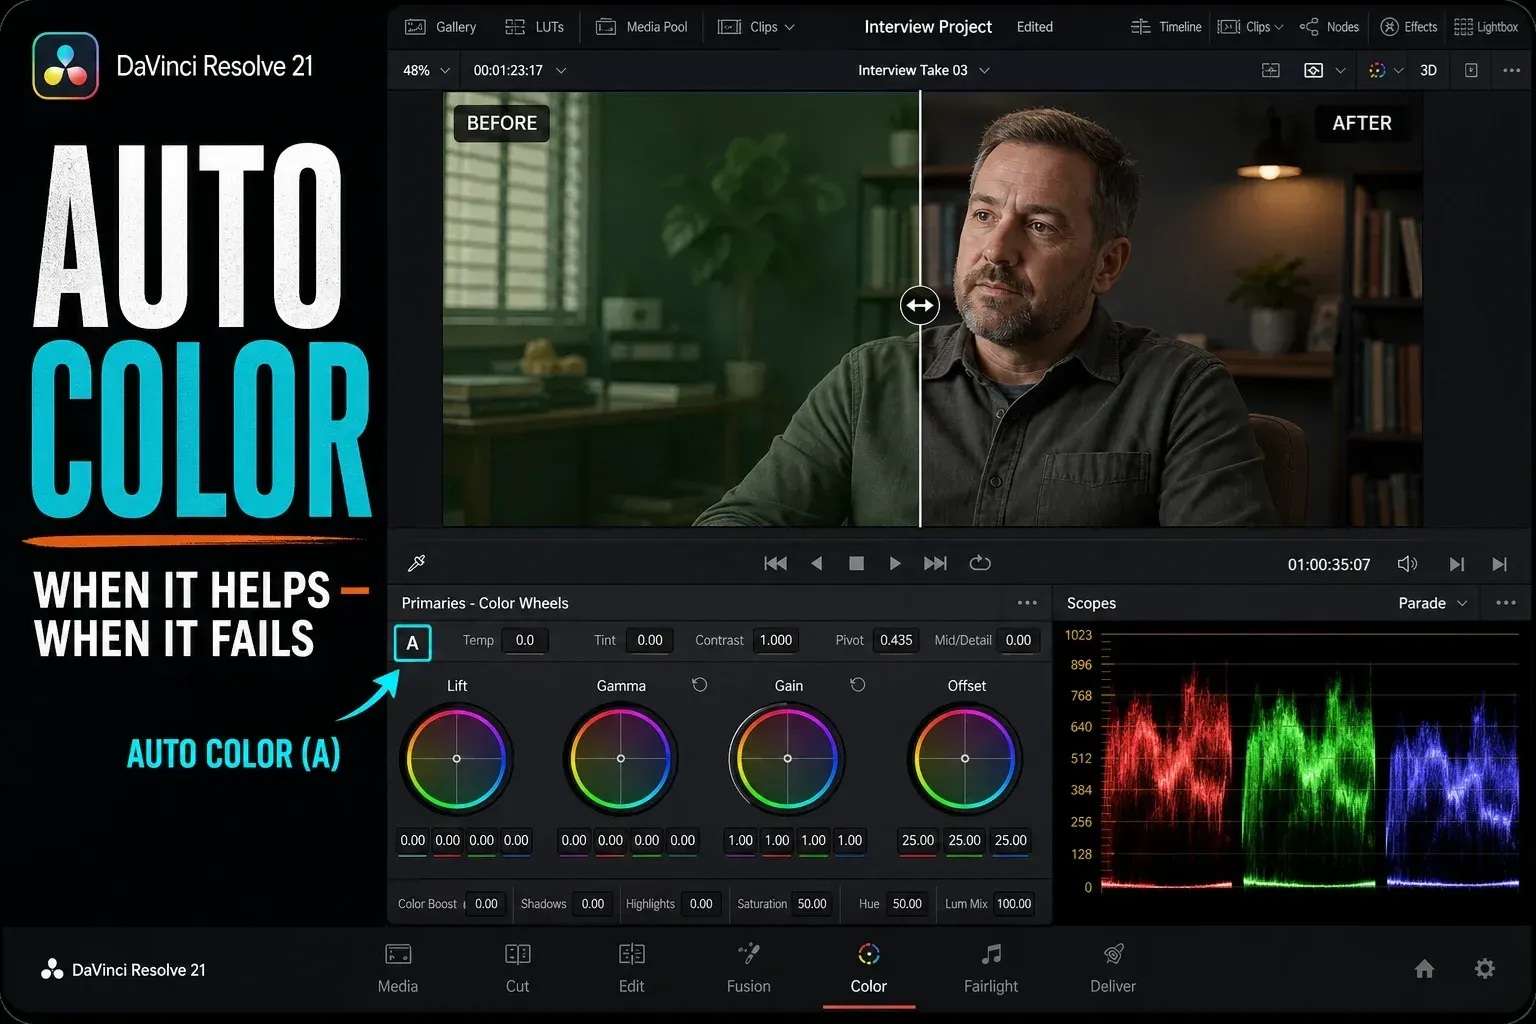
Key Capabilities of DaVinci Resolve Auto Correction
- Frame analysis for exposure and color space. The tool reads the frame and normalizes exposure while working within Rec. 709 color space, which covers most standard HD and 4K delivery.
- Automatic RGB and contrast neutralization. It looks at the darkest and brightest points in a shot and uses them to pull color casts out of the highlights, midtones, and shadows, bringing the white balance closer to neutral.
- Node-based, non-destructive workflow. Auto color correction gets applied to its own node in the chain, so any manual grading you do on other nodes stays completely untouched.
- A fast baseline for batch work. Running it across several clips gives you a consistent starting point before you move into deeper manual grading, rather than eyeballing white balance shot by shot.
Part 2. How to Use Auto Color Correction in DaVinci Resolve
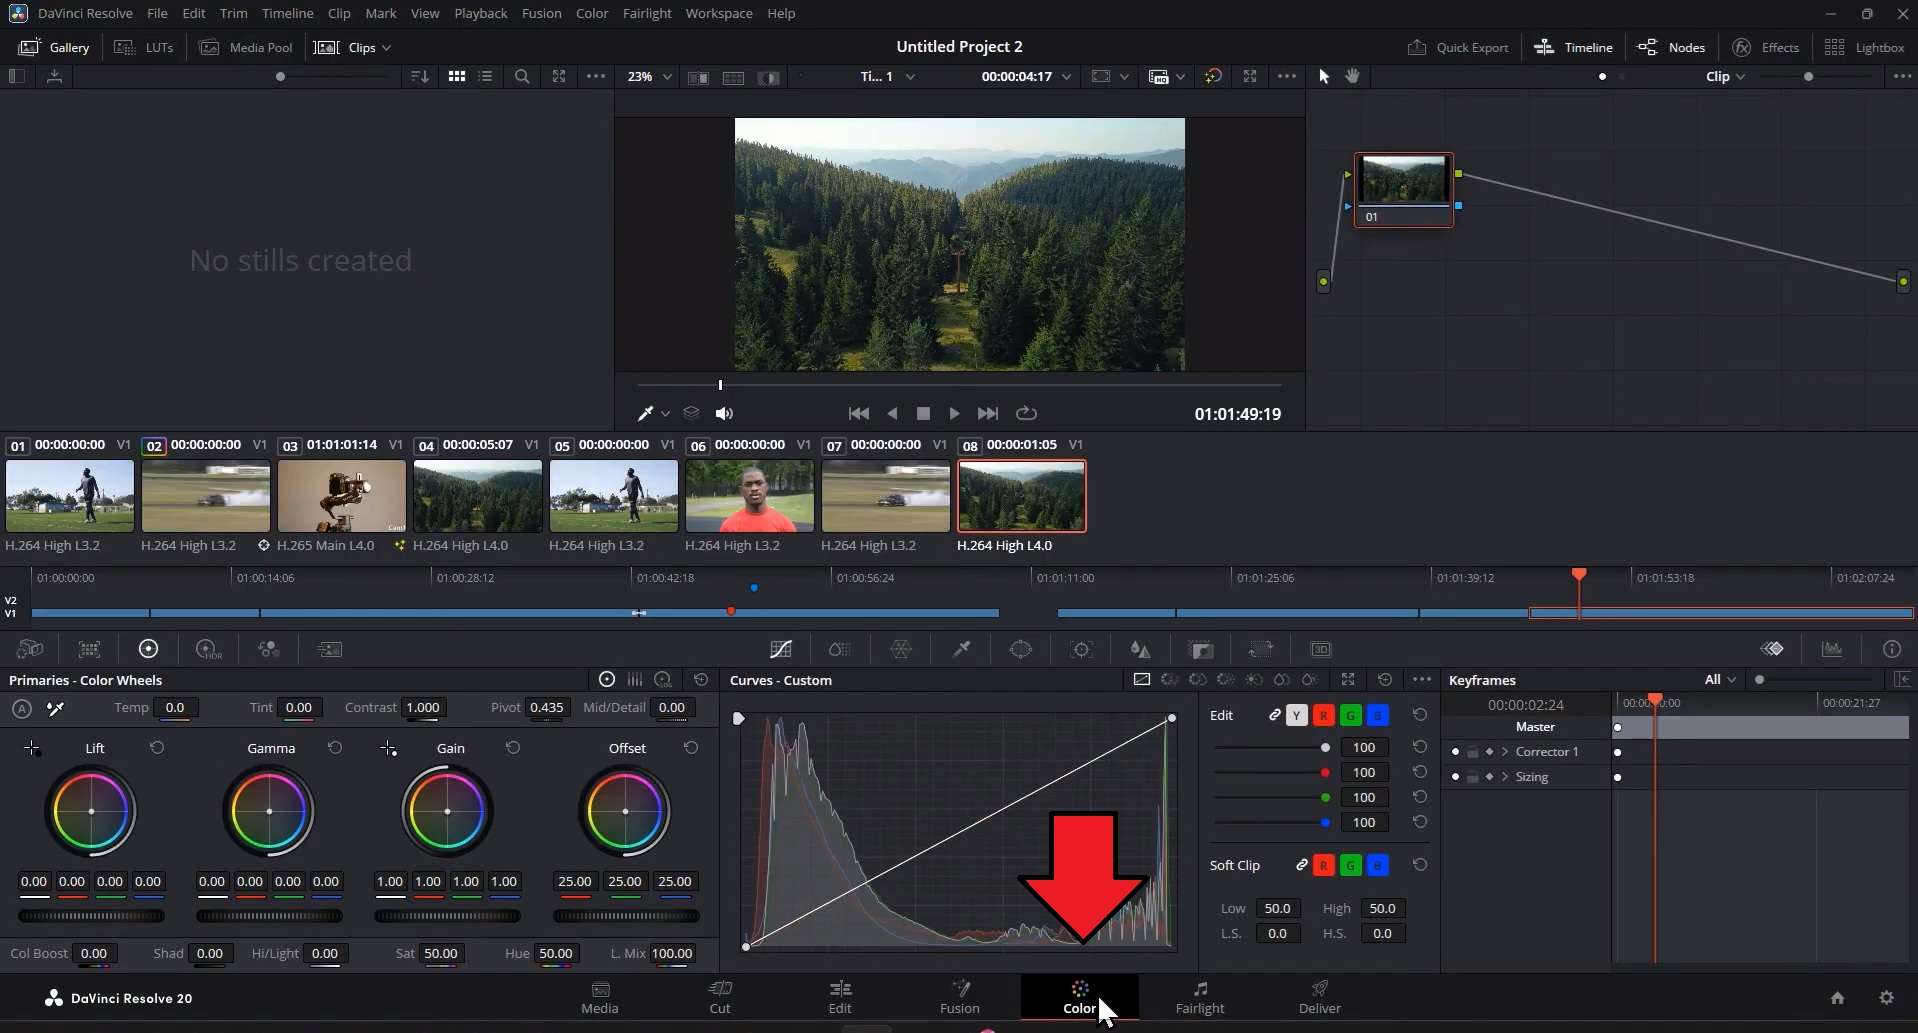
The auto color correction in DaVinci Resolve is available inside the Color page. Follow these quick steps from Tedd’s Tutorial to get started. This tutorial uses DaVinci Resolve 20, but the steps should be similar across versions.
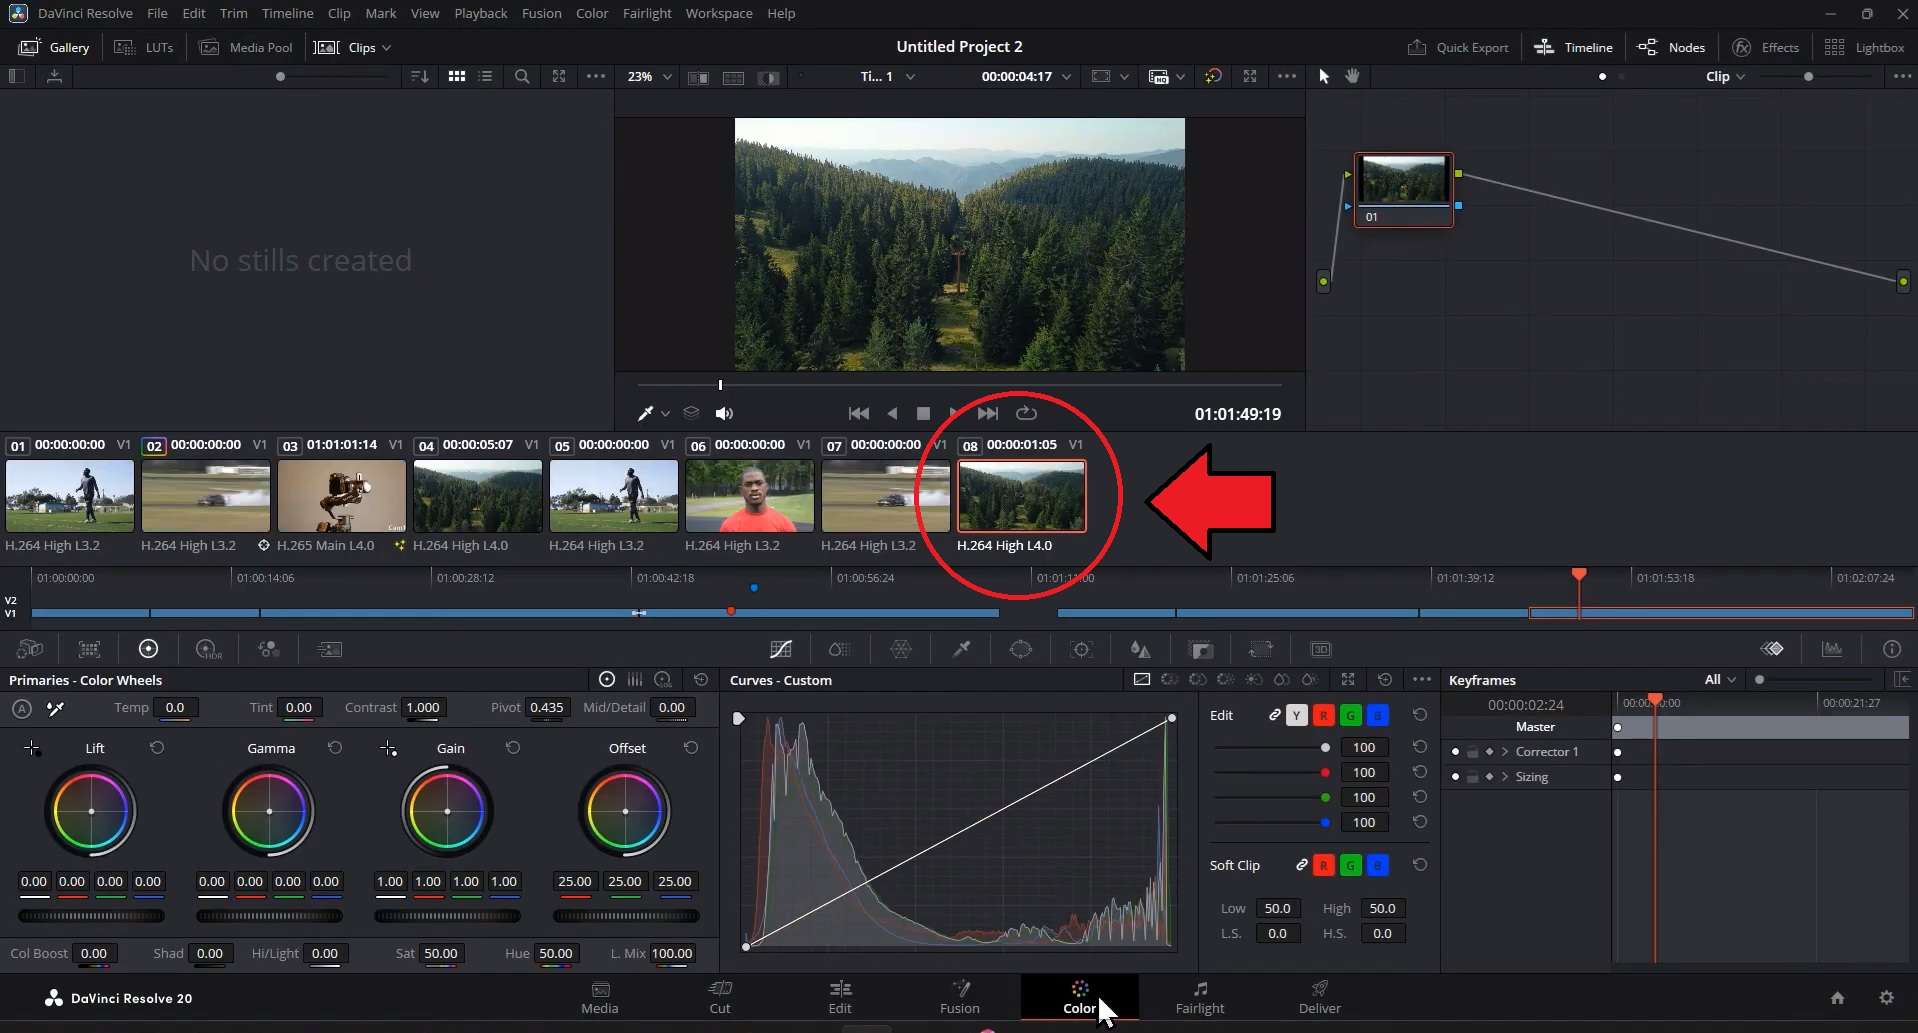
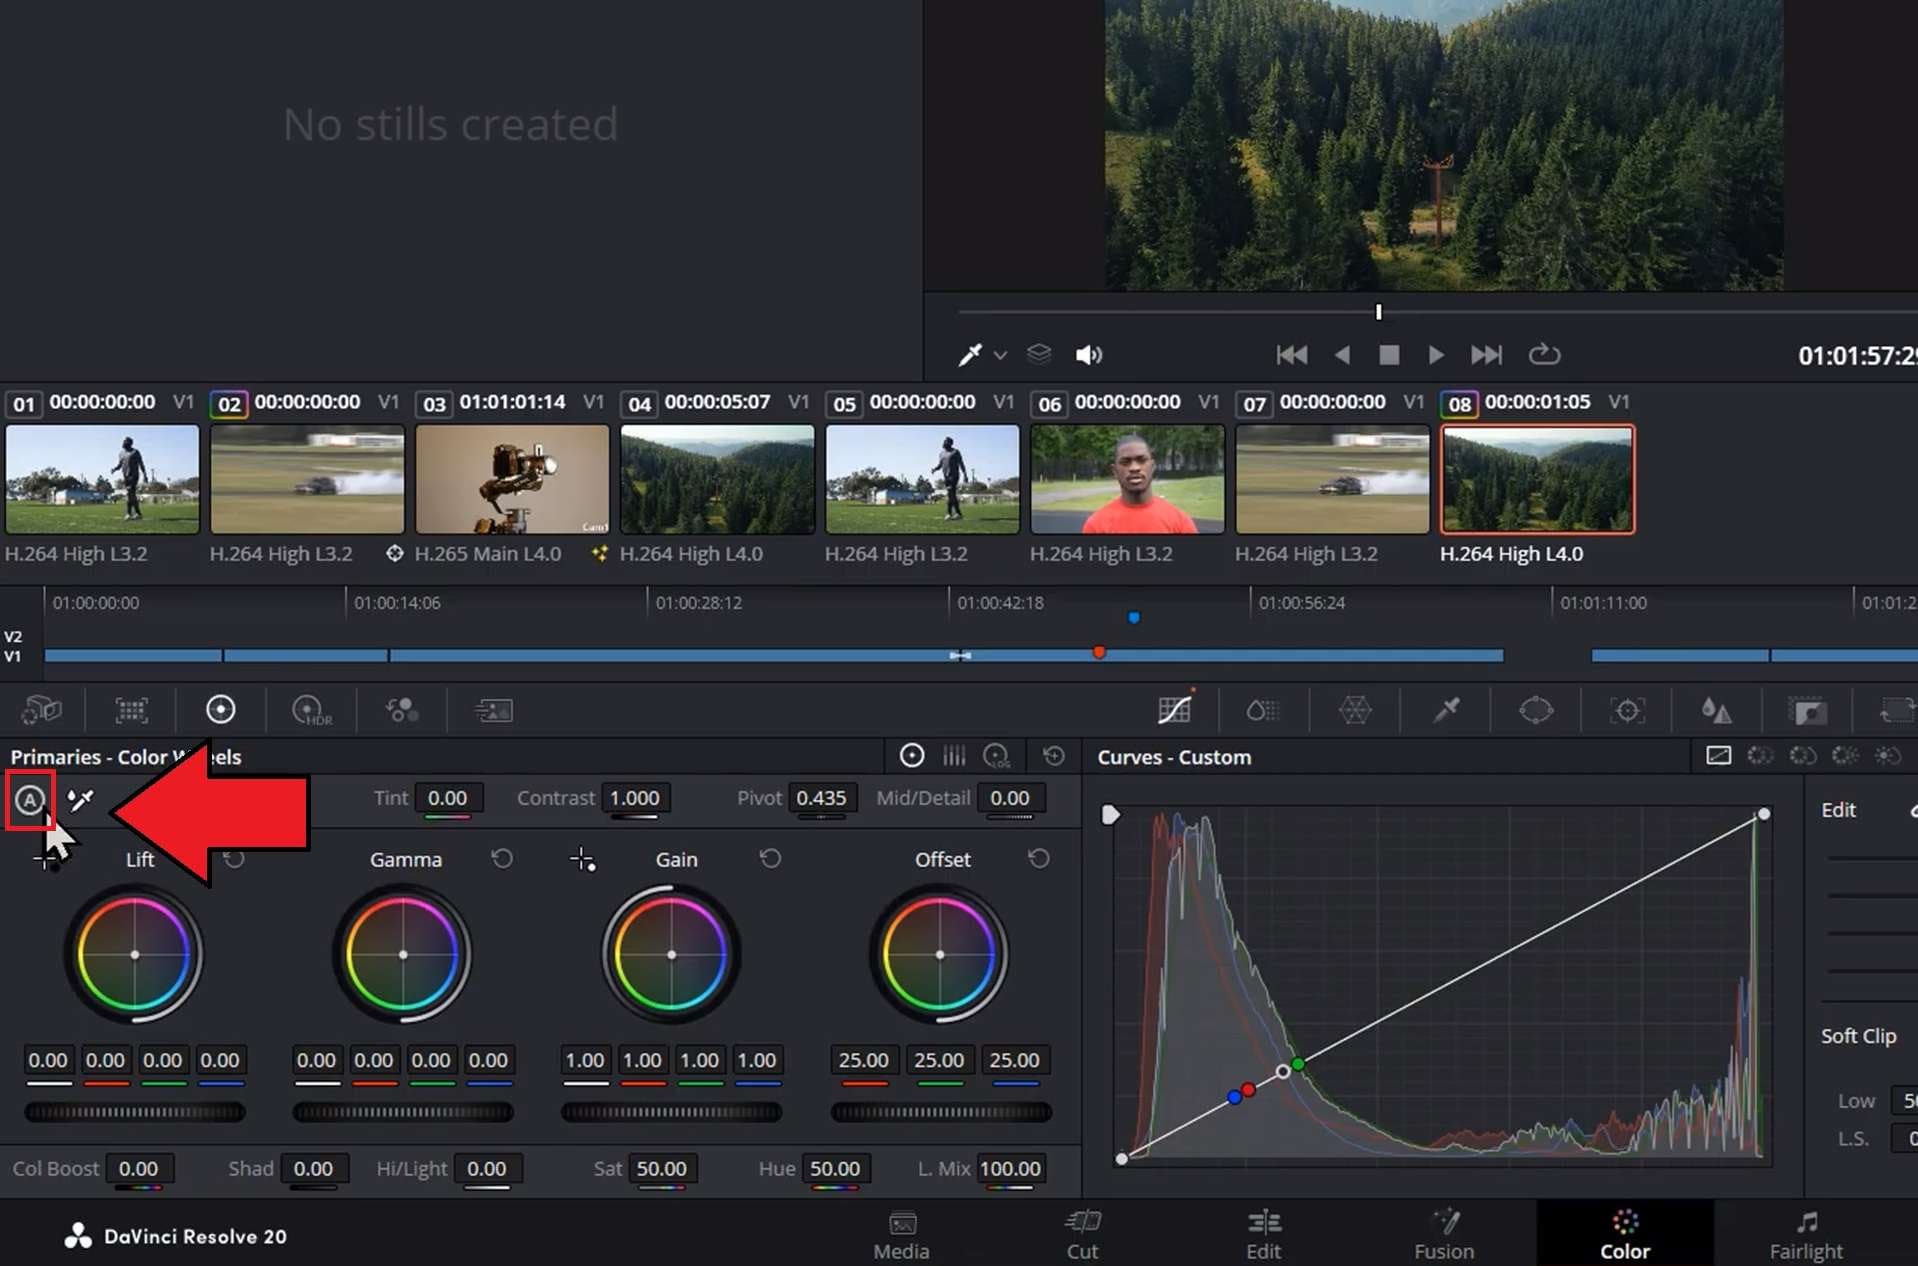
If the auto pass needs help, stack a fresh serial node on top instead of editing the auto-corrected node directly. That way, you can always strip your manual work back out.
Part 3. DaVinci Resolve Auto Color Review: Honest Pros and Cons
After trying automatic correction in DaVinci Resolve, there are a few takeaways regarding how consistent the results are, how much control you retain afterward, and whether it actually saves time compared with doing the correction yourself.
From the clips tested, we found strengths in how DaVinci Resolve reads a frame’s black and white points, along with some limits worth flagging before you lean on it.
- Included in both the free version and Resolve Studio
- Applies to its own node, which keeps your other manual grading fully intact.
- Reads actual black and white points in the frame instead of applying a flat preset, so results shift sensibly from shot to shot.
- A quick way to bring every clip in a project to a similar starting exposure before you begin the real grade with DaVinci Resolve
- No built-in intensity slider. You either accept the correction as-is or dial it back manually through the wheels afterward.
- Works best on footage that actually has a clear black point and white point. Flat, low-contrast, or hazy shots can get overcorrected.
- Applying it to a whole batch of clips at once isn’t a single click. You run it per clip, then copy the resulting grade across similar footage if you want consistency.
- The rest of the Color page has a real learning curve. Newer editors can feel intimidated even though the auto tool itself takes one click.
Part 4. DaVinci Resolve vs Premiere Pro Auto Color: Which Is Better?
DaVinci Resolve isn’t the only major editor with automatic color correction. Premiere Pro also offers automatic color correction that lives inside the Lumetri Color tools. It gives you a similarly quick way to set a basic correction before making detailed adjustments.
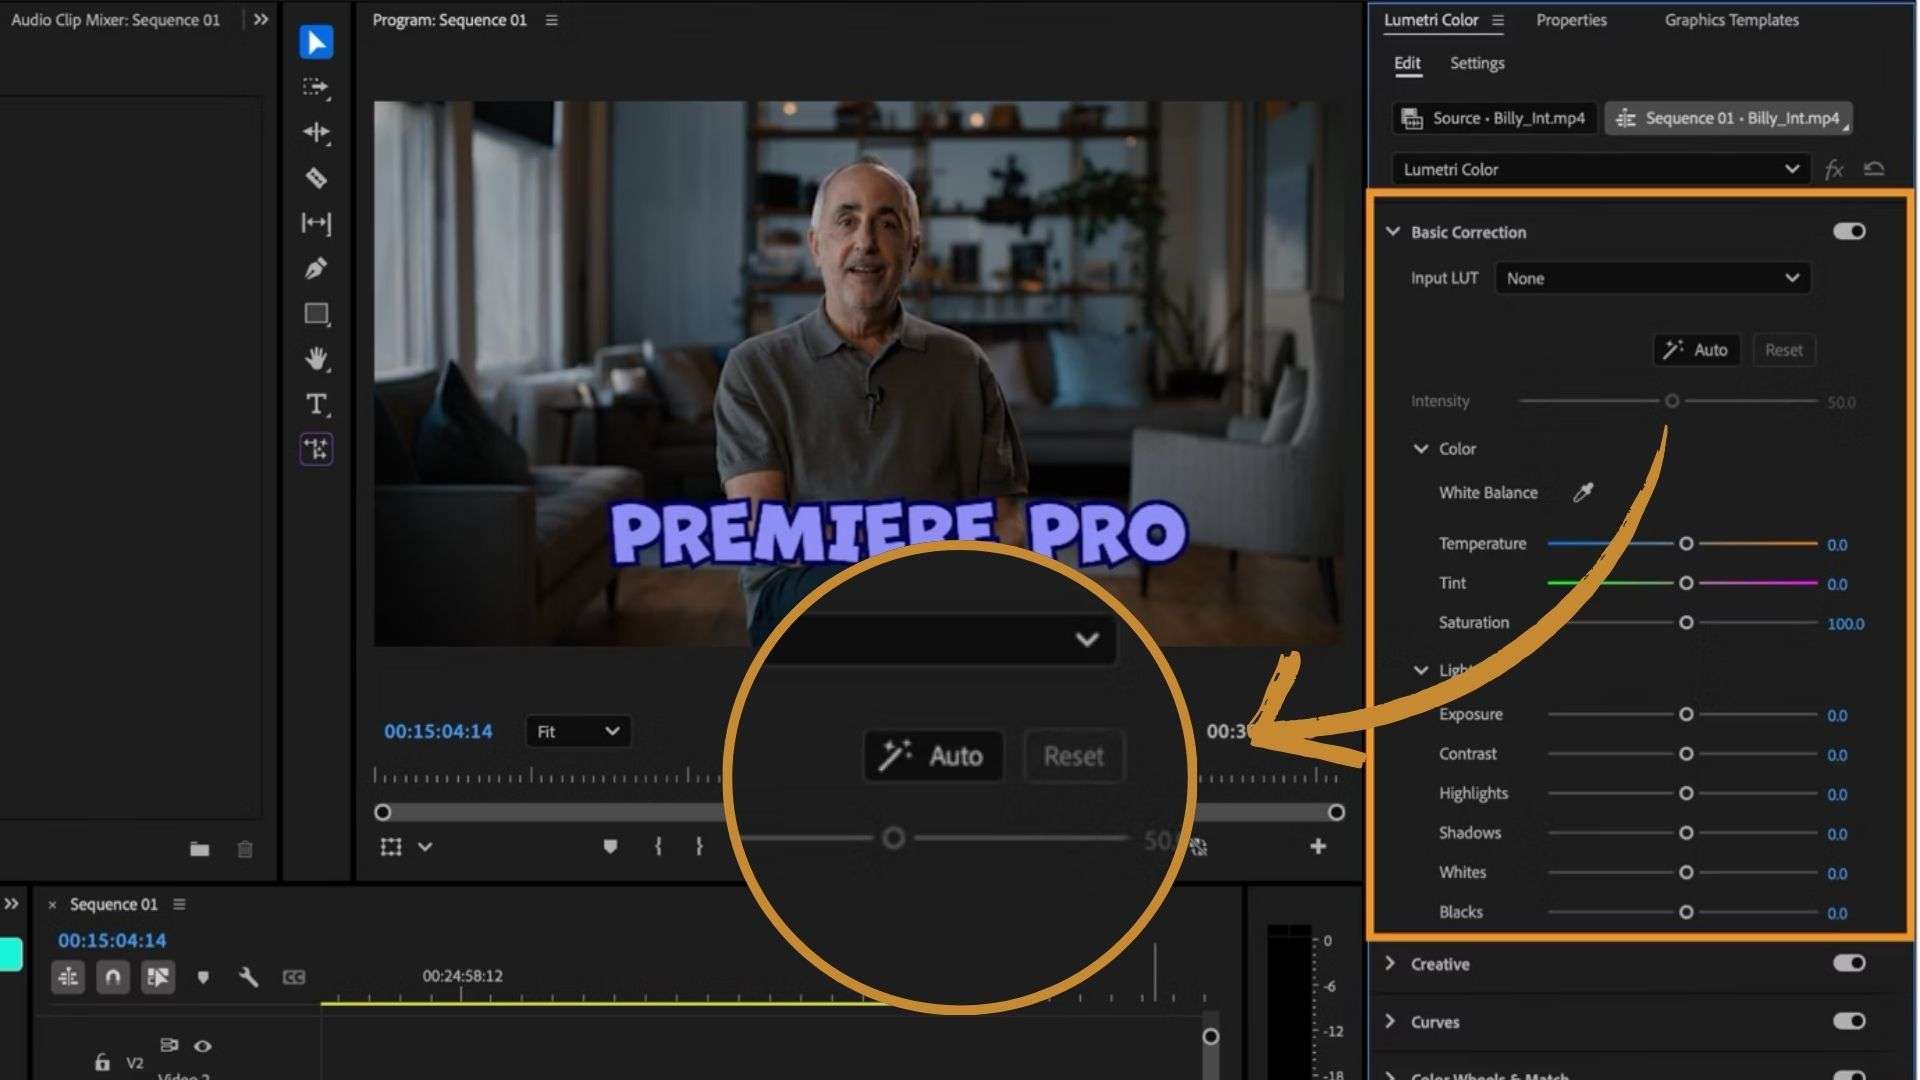
Adobe describes Premiere's Auto Color as using Adobe Sensei machine learning to adjust exposure, white balance, and contrast with a single click. Now, let’s see how its approach compares with DaVinci’s auto color correction.
| Category | DaVinci Resolve | Premiere Pro |
| How It Works | Analyzes the frame's black and white points to rebalance RGB | Uses Adobe Sensei machine learning to analyze footage and apply automatic color corrections |
| Strength Control | No dedicated slider built in. You need to scale it back manually afterward | Built-in Intensity slider, which defaults to 50% |
| Batch-friendly | Apply per clip, then copy the grade to matching footage | Applied per clip inside Lumetri |
| Cost | Available in the free version | Requires subscription through Creative Cloud or a single-app plan |
| Best Fit | More advanced colorists who want a solid base before a full manual grade | Editors who want a fast correction |
|
Show More
Show Less
|
||
Neither tool actually beats the other across the board. It largely comes down to how much control you want over the correction and what you plan to do with the footage afterward.
- DaVinci Resolve’s auto color correction sits inside a deeper, node-based color pipeline, which suits anyone planning to keep grading manually afterward. It can be used for free without DaVinci Resolve Studio, but it can be harder to navigate for beginners.
- Adobe Premiere's automatic color correction gives you more control right out of the gate with its Intensity slider, which helps if you want a fast fix. It can be a convenient choice if you already use Adobe apps, but using Premiere Pro requires a paid plan.
Part 5. An Easier Solution for Auto Color Correction: Filmora
DaVinci Resolve and Premiere auto color correction have their own strengths, especially for editors who want extensive manual control. But there is another option worth considering if the goal is to get a quick correction without dealing with a complicated color workflow: Wondershare Filmora.
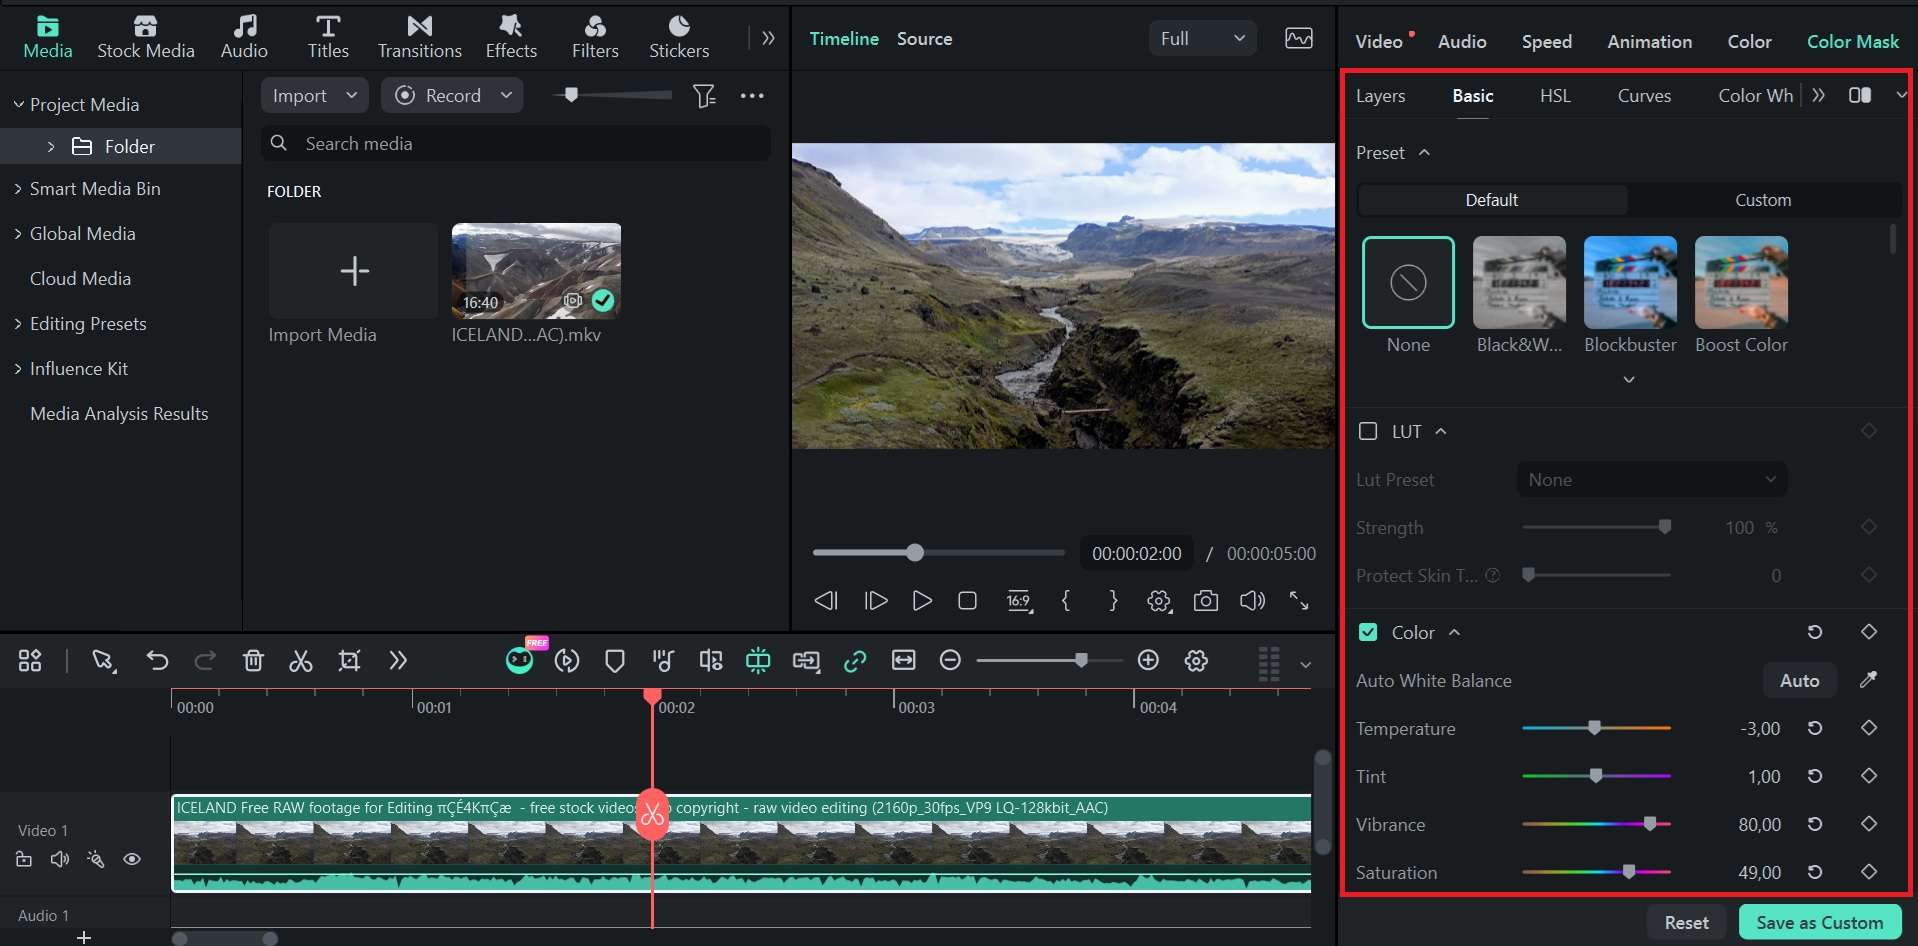
Filmora introduces the Auto Color feature, built around a simple one-click approach that still gives you control over how strong the correction should be. Compared with more advanced color tools in DaVinci Resolve and Premiere Pro, Filmora is lighter and easier to get started with, and its interface keeps the controls straightforward and easy to navigate.
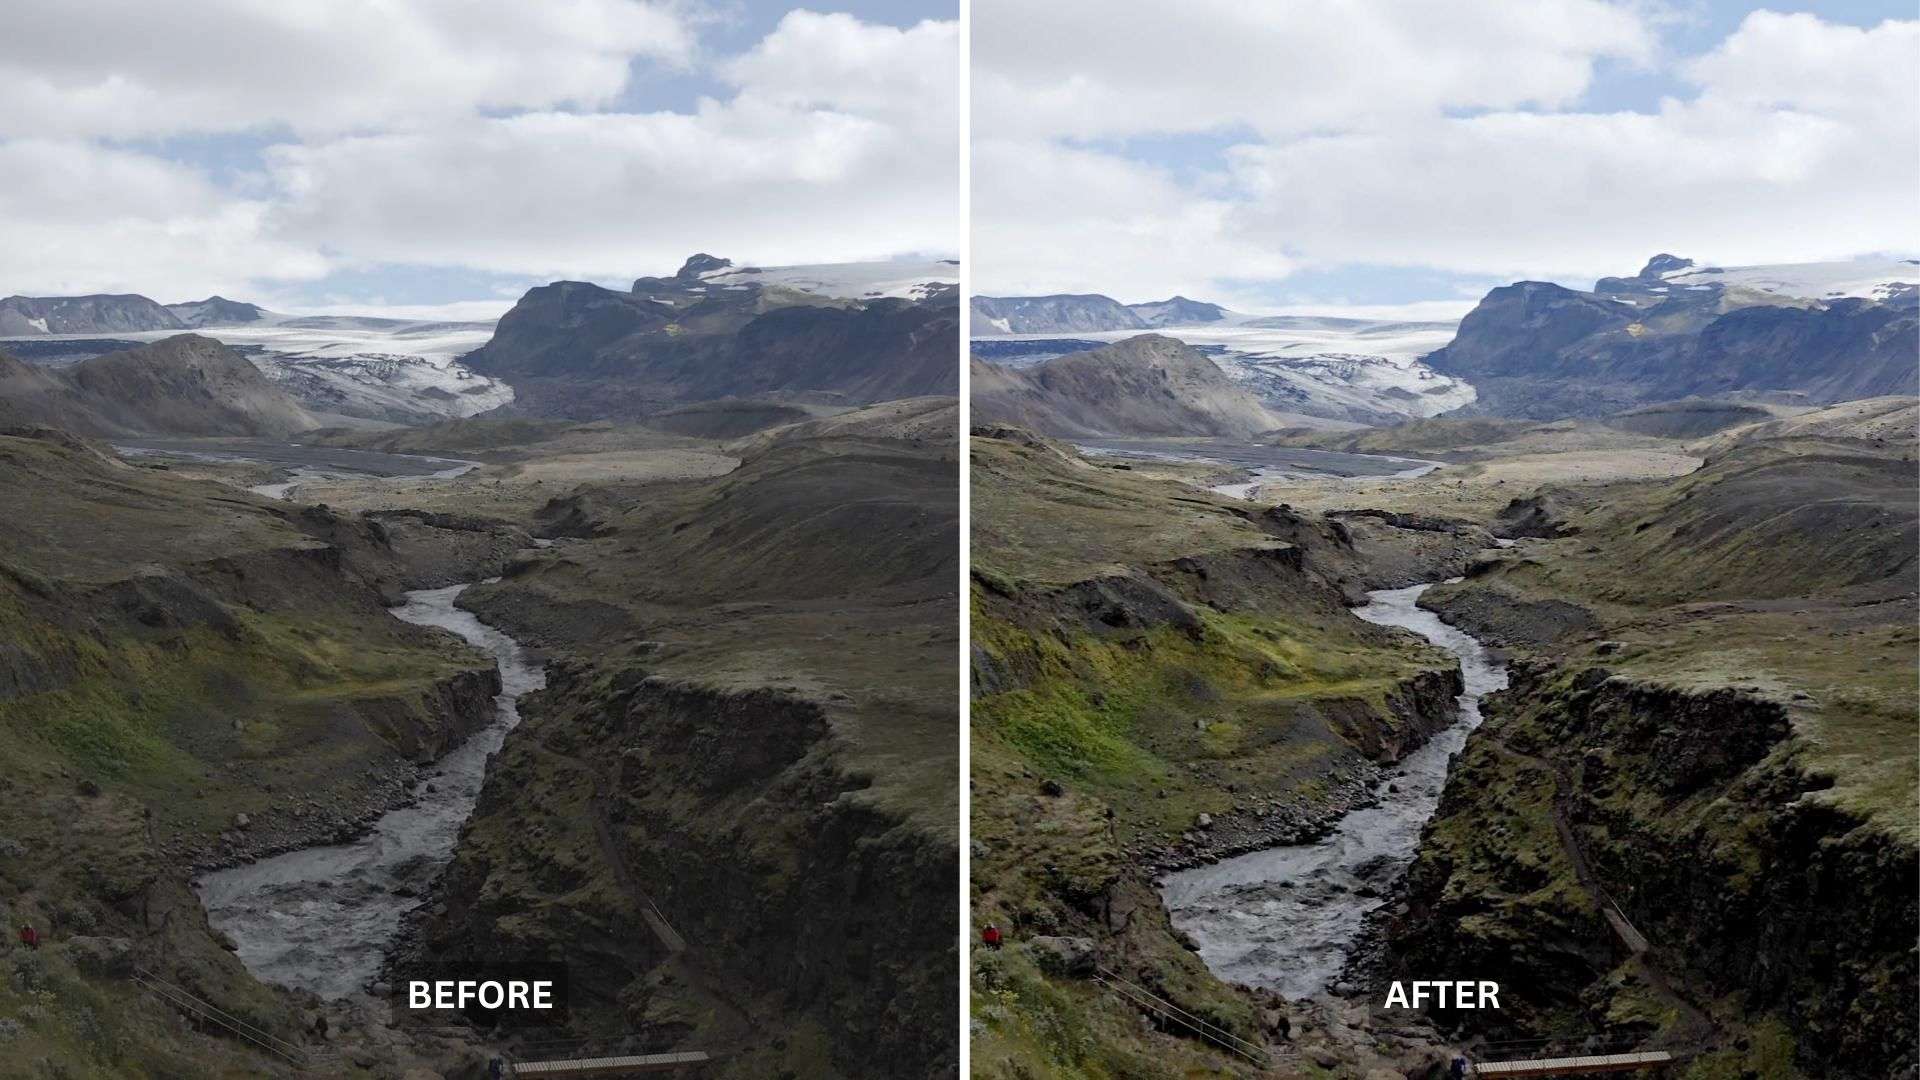
Why Choose Filmora Instead?
- Dedicated 0–100 Intensity Control: Unlike auto-adjust tools with limited control over the final result, Filmora provides a dedicated Intensity slider, so you can adjust how strong the auto color correction is.
- Keyframe-Enabled Dynamic Adjustments: Filmora lets you add keyframes to the Auto Color Intensity parameter directly on the timeline. You can use it to gradually increase or reduce the correction as lighting or color conditions change within a clip.
- One-Click Preset Saving: You can save your preferred Auto Color settings, including the toggle state and intensity level, as custom presets. It’s now easier to apply the same settings to multiple clips with similar footage.
- Zero Technical Learning Curve: Filmora keeps the Auto Color process simple without requiring you to work with technical controls such as HSL, Curves, or node-based color grading.
- Built Inside a Full Video Editor: Apply automatic color correction, then refine your footage with color tools, filters, and LUTs. It also includes Color Match, which lets you isolate specific areas with masks and adjust them independently.
 Secure Download
How to Use Auto Color in Filmora
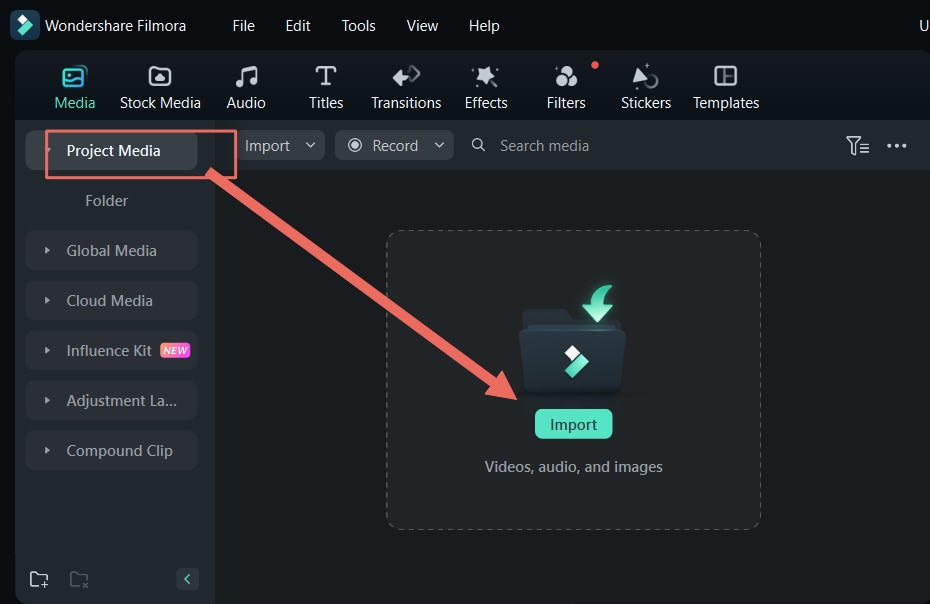
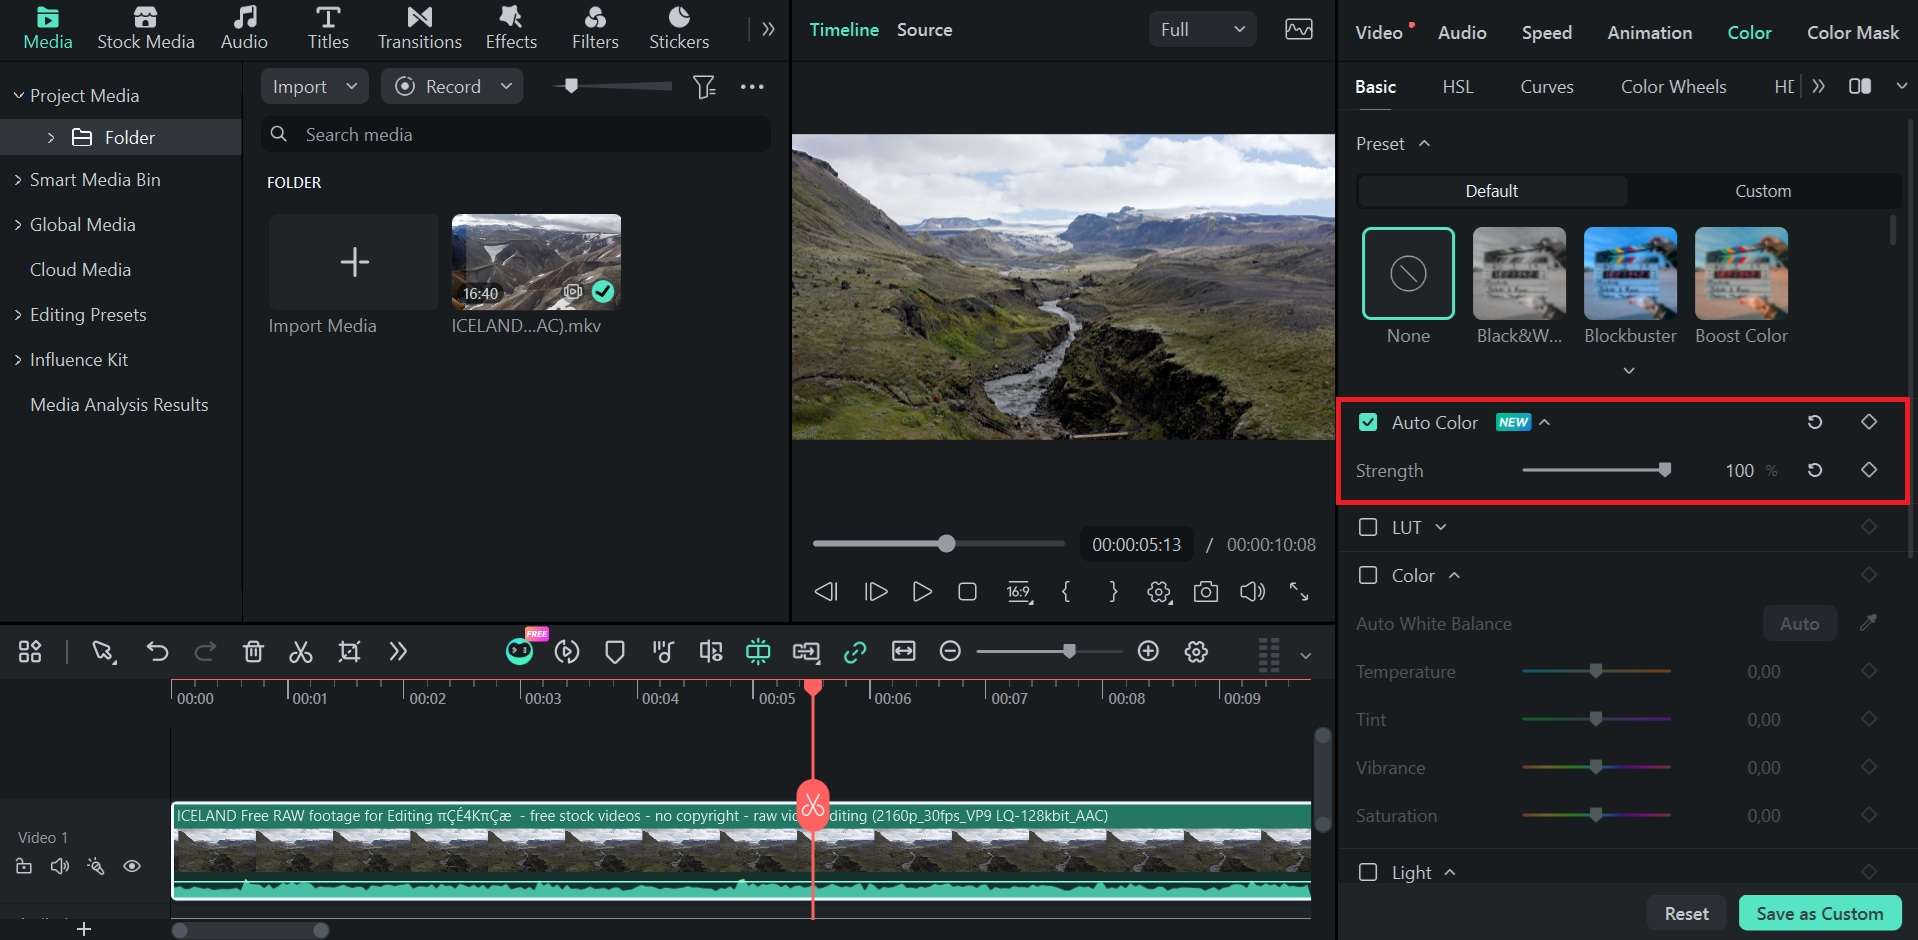
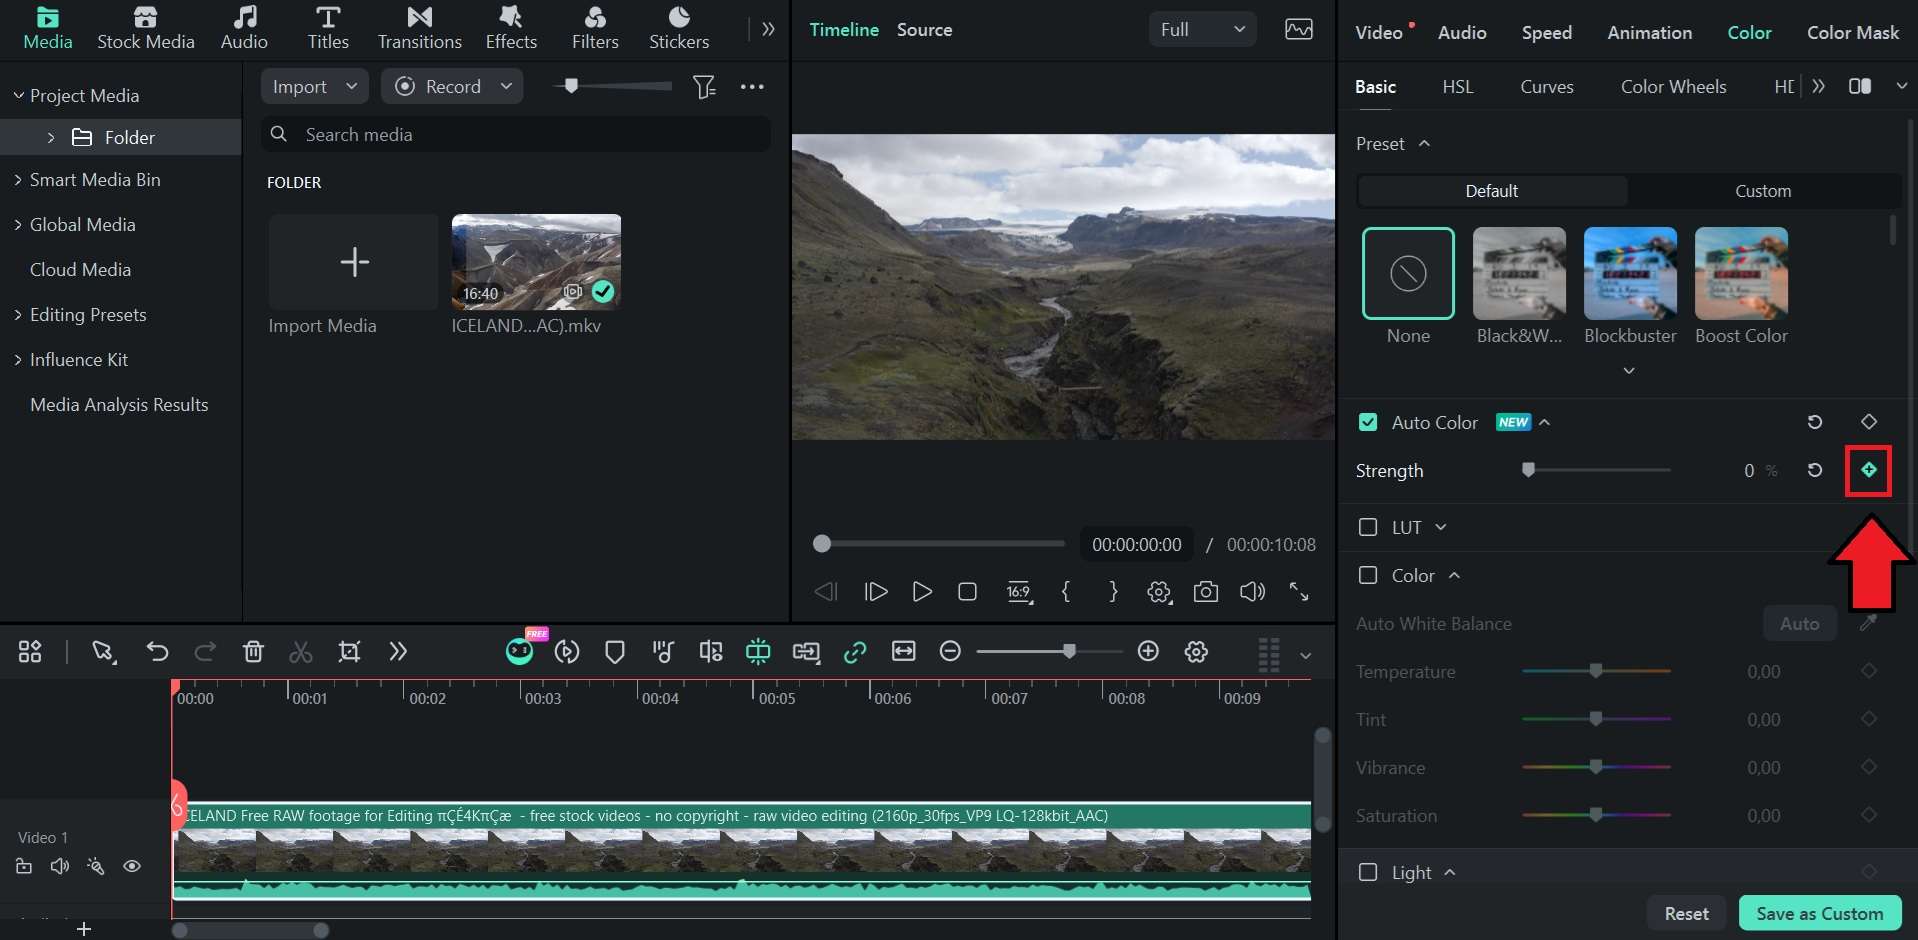
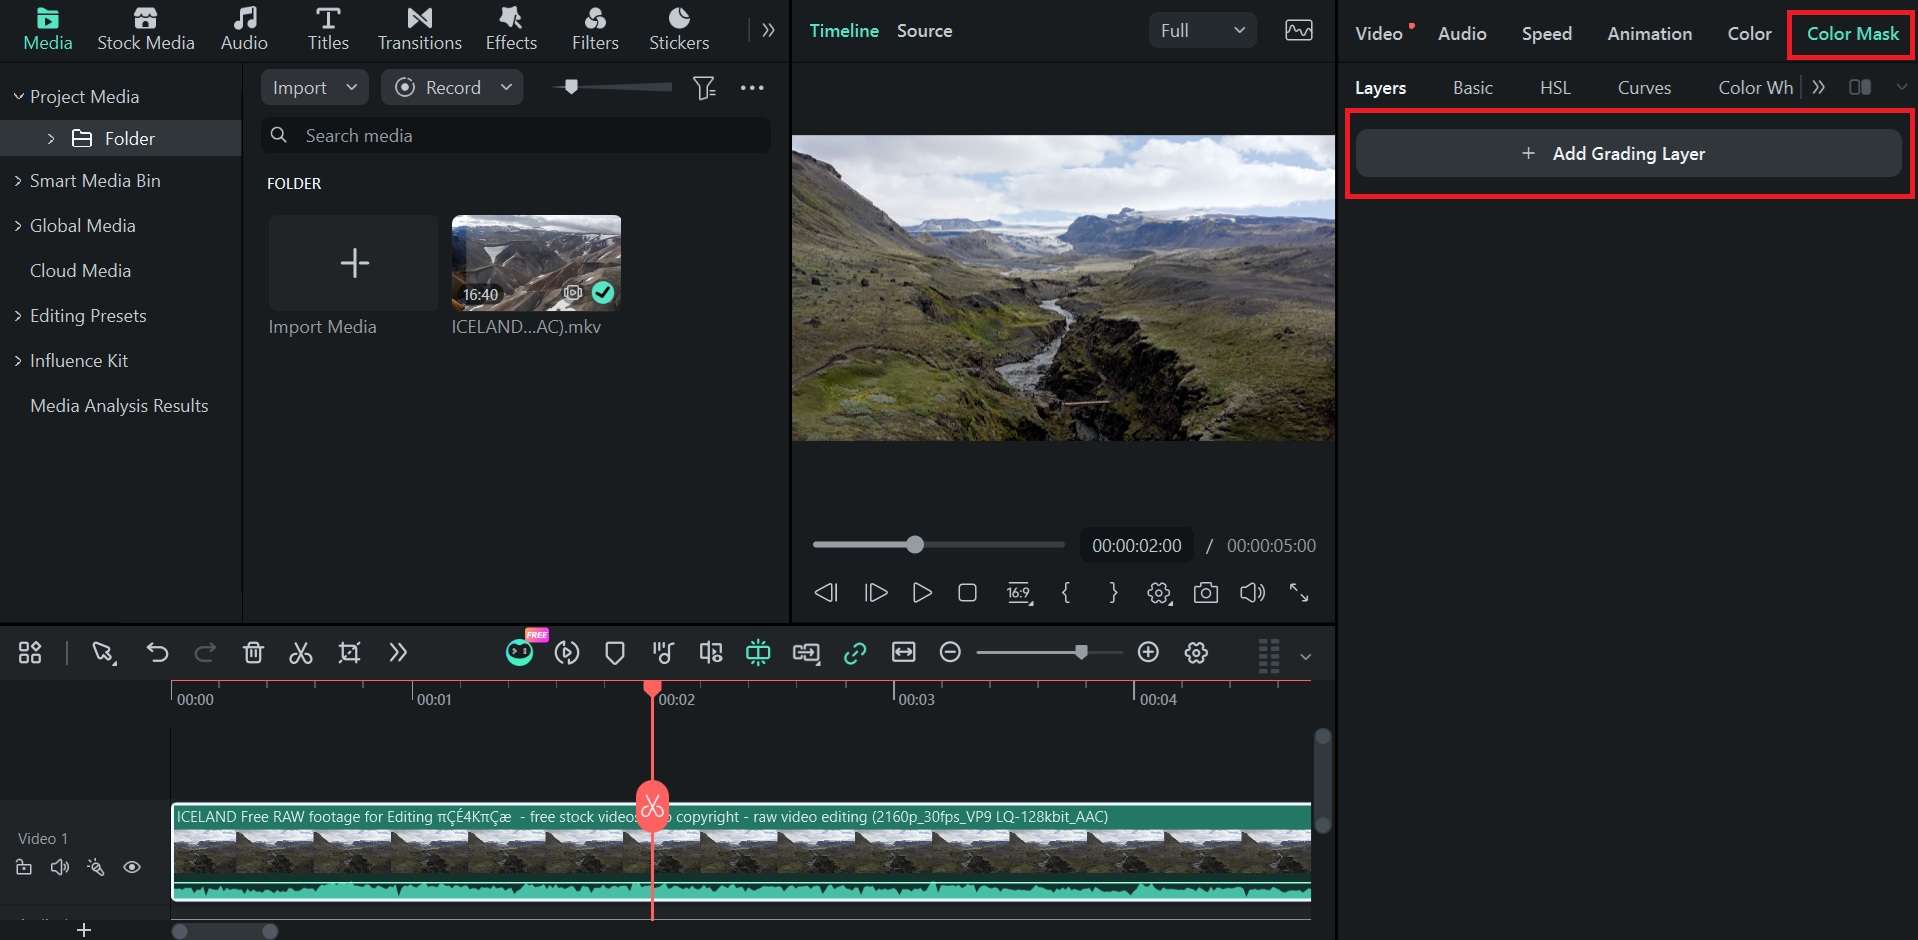
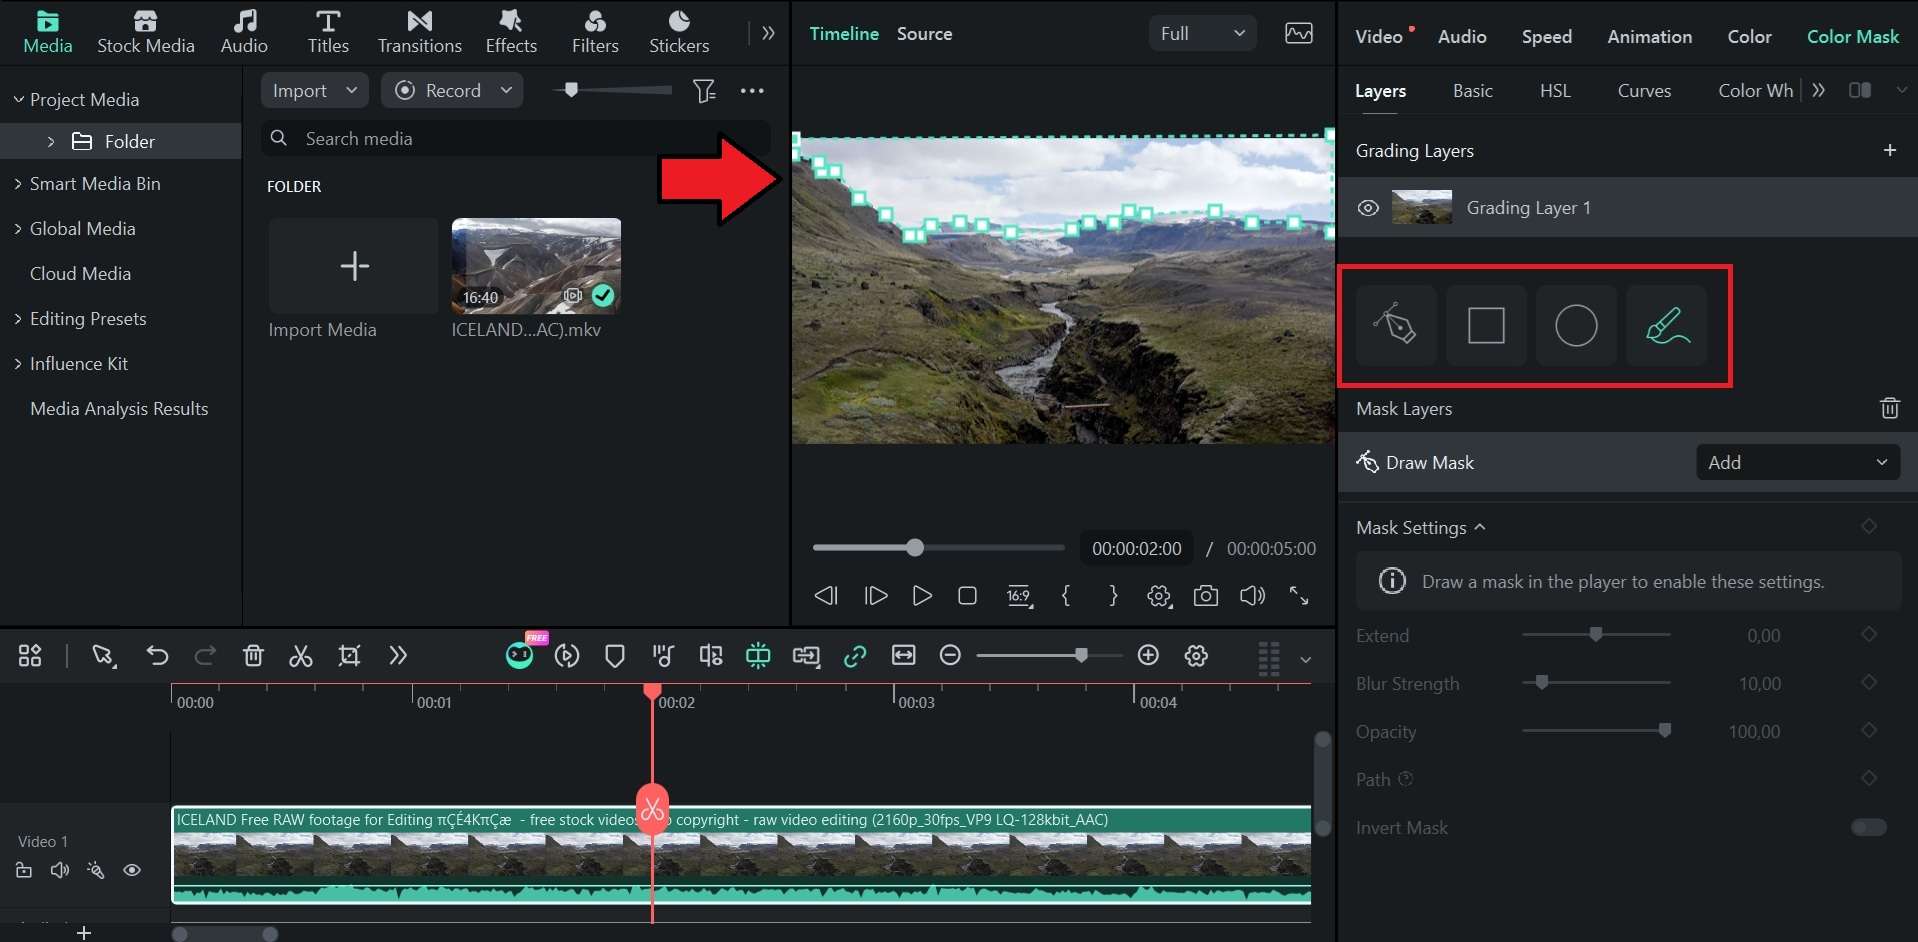
 Secure Download
Conclusion
DaVinci Resolve, Premiere Pro, and Filmora each take a different approach to automatic color correction. DaVinci Resolve auto color correction works well as a starting point for deeper grading needs, while auto color correction in Premiere Pro offers a quick fix with an Intensity control for adjusting the result. Both work fine, but their broader color tools are not very beginner-friendly.
For a simpler approach, Filmora introduces Auto Color with a dedicated Strength control, keyframe support, and preset saving. You can apply an automatic correction in one click, then use Color Match and masking tools when you need more targeted adjustments.
FAQs
-
Should you use Auto Color before or after applying a LUT?
It’s recommended to apply Auto Color before a LUT. Automatic color correction can first balance exposure, contrast, and white balance, which gives the LUT a more suitable starting point.
Applying a LUT first can produce stronger or less predictable results if the original footage has significant color or exposure issues. However, the best order can vary depending on the LUT and the footage you have.
-
What should you check after applying automatic color correction?
Check skin tones, exposure, white balance, highlights, and shadows after applying automatic color correction, and make sure they don’t appear too bright, too dark, overly saturated, or noticeably tinted. Compare the corrected clip with the original to make sure the adjustment improves the footage.
-
Can auto color tools fix severely blurry or out-of-focus footage?
No. Auto color tools correct color and tonal issues, not focus or image sharpness. They can adjust things such as exposure, contrast, and color balance, but they can’t restore detail from blurry or out-of-focus footage. In that case, you’ll need a sharpening or AI video enhancement tool to improve the footage.
