

 TL;DR:
Topaz Video Enhancer AI restores and upscales low-quality footage using dedicated AI models in a standalone application, while Wondershare Filmora version 15.2+ directly integrates the Topaz Starlight model for seamless, credit-based clip enhancements on the active editing timeline.
● The standalone Topaz software requires a paid subscription, functions as an isolated workflow step, and significantly increases export times and file sizes when applying a 4X upscale alongside high-quality codecs like ProRes.
● Filmora's integrated Topaz Starlight workflow operates on automated presets and restricts processing to clips up to 1 minute in duration, with maximum outputs strictly capped at 4K resolution and 60 frames per second.
● For alternative enhancement needs inside Filmora, Generative Enhance reconstructs missing textures for clips under 3 minutes, while AI Night View specifically corrects blur, color casts, and heavy grain in low-light recordings.
Ask AI for a summary
 ChatGPT
 Perplexity
 Gemini
 Claude
 Grok
Grok
Trying to fix blurry, noisy, or low-resolution footage? Topaz Video Enhancer AI is one of the tools creators look up to when simple sharpening and scaling are no longer enough. It is known for rebuilding detail and reducing noise in footage that standard editors often fail to improve.
If you are still considering using Topaz, but don't know where to start, this guide breaks down Topaz video upscale performance and workflow. It also shows how Wondershare Filmora now includes the Topaz Starlight model inside its AI video enhancement tools. Let's get started!

Part 1. Why Creators Trust Topaz Video Enhancer AI
Topaz Video Enhancer AI is a video upscaling and restoration tool designed to enhance resolution, reduce noise, and restore detail from low-quality footage. It targets scenarios where standard video editors reach technical limits during scaling or cleanup.
The software addresses common video quality issues, such as low-resolution sources, visible noise, and detail loss in older or compressed videos. Instead of basic resizing, it uses trained AI models to analyze frames and rebuild structure and texture.
Key Features of Topaz Video Enhancer AI
- AI-Based Super Resolution: Topaz Video Enhance AI uses trained AI models instead of pixel interpolation. These models analyze patterns across frames and reconstruct image structure during upscaling rather than stretching existing pixels to fill space.
- Noise Reduction with Edge Preservation: Topaz reduces digital noise while keeping edge definition intact. This approach prevents loss of detail and avoids over-smoothing during enhancement.
- Frame Rate Conversion and Motion Smoothing: The tool can generate additional frames to increase frame rate or create smoother motion. This supports slow motion and frame rate conversion tasks.
- Support for Older and Compressed Footage: Topaz includes tools such as deinterlacing and stabilization. These tools help improve footage from older cameras and legacy video formats.
Part 2. How to Use Topaz AI to Upscale Your Video
After learning about the Topaz Video Upscale tool, the next step is to see how it fits into an actual workflow. It works as a standalone enhancement tool rather than a full video editor. You need to prepare footage first, apply AI models in Topaz, then return the enhanced file to a video editor if needed.
If you're wondering whether Topaz Video Enhance AI is free, the answer is no. Topaz Video is available through a paid subscription with monthly or yearly options. You can subscribe to Topaz Video on its own, or choose a Topaz Studio plan that includes additional Topaz apps.
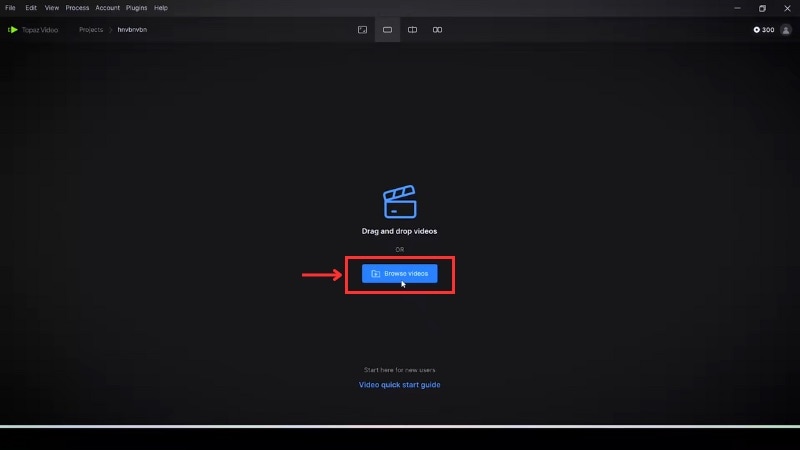
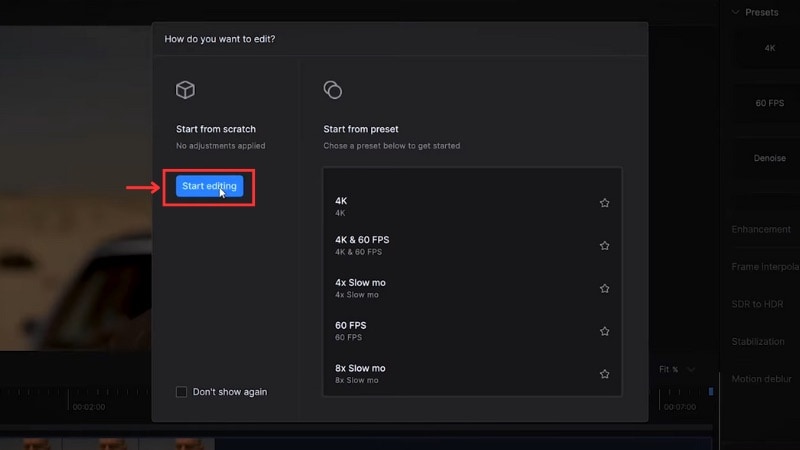
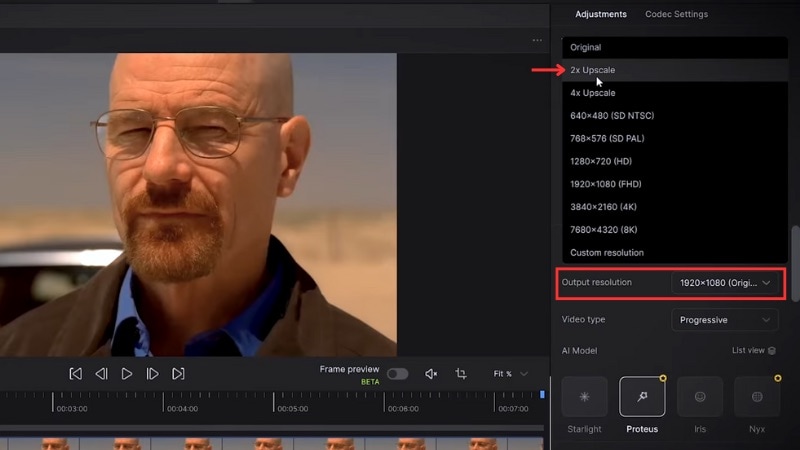
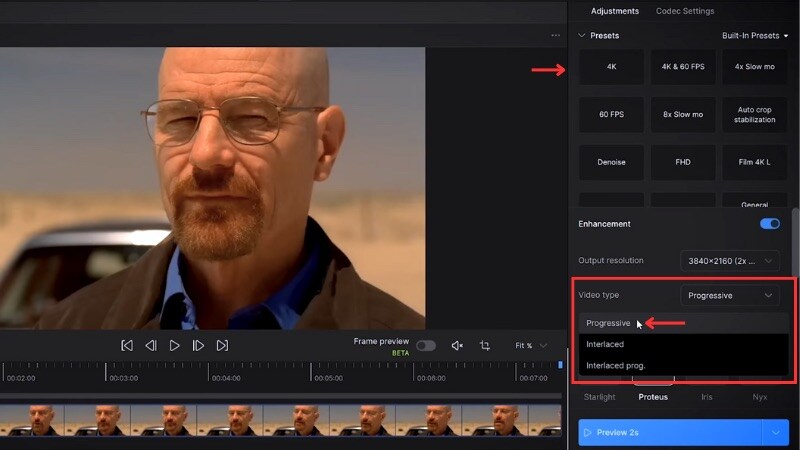
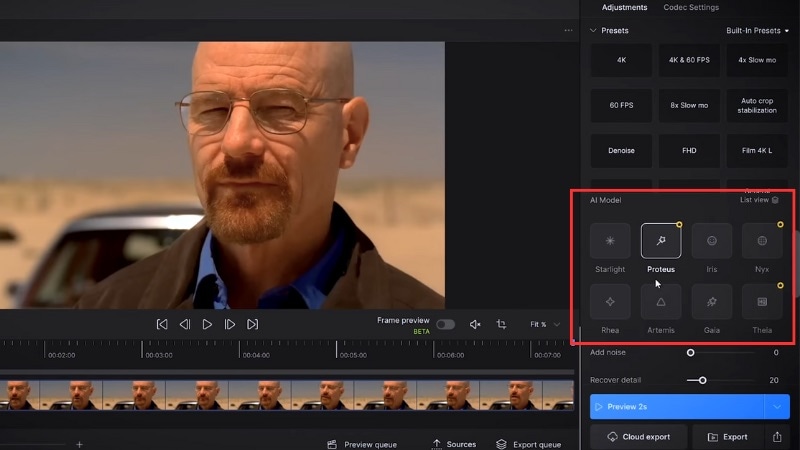
Step by Step: Upscale a Video with Topaz Video Enhancer AI
Before starting, download Topaz Video Enhance AI from the official Topaz Labs website and install it on your system. You can then enhance low-quality videos by following the steps below.
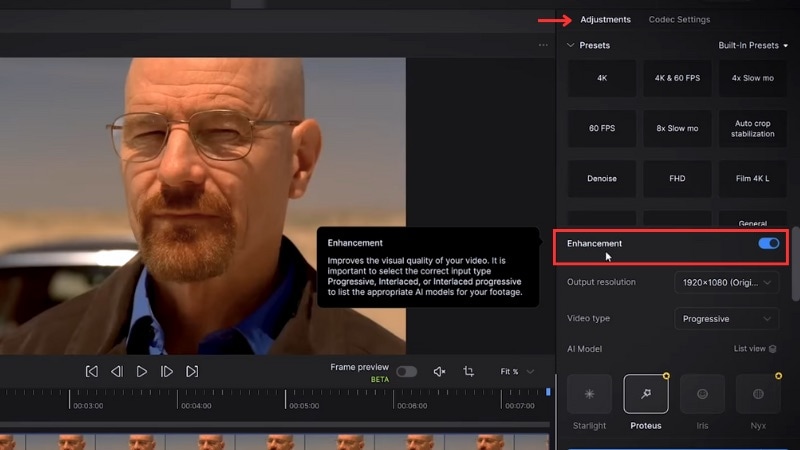
- Proteus works well for general upscaling and gives manual control over detail and noise.
- Iris suits noisy, compressed, or face-heavy footage that needs stronger cleanup.
- Starlight targets higher-end detail reconstruction and video restoration.
Part 3. How Well Does Topaz Video AI Perform in Real Use? Pros and Cons
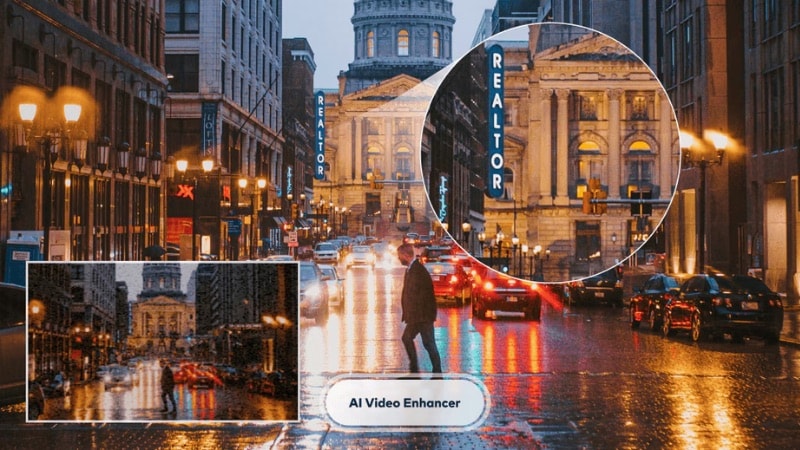
When tested on soft and compressed footage, Topaz AI Video Enhance shows clear visual improvement. The changes come from detailed reconstruction and noise control rather than simple sharpening, which affects how natural the final result looks.
The image below compares the original frame on the left with the enhanced result on the right.
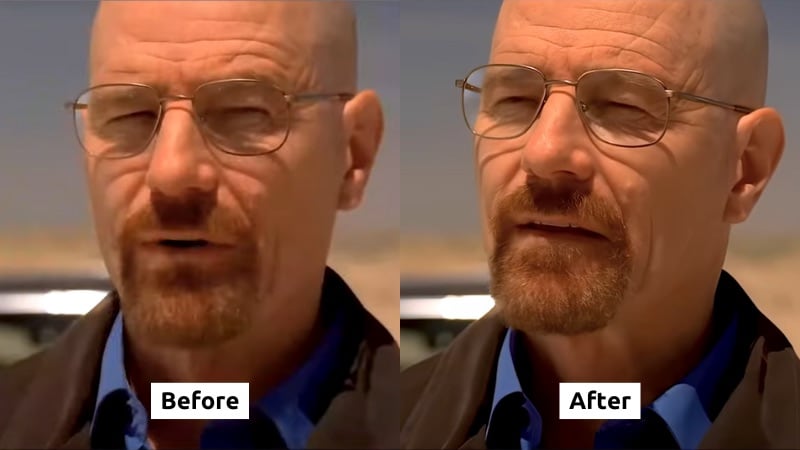
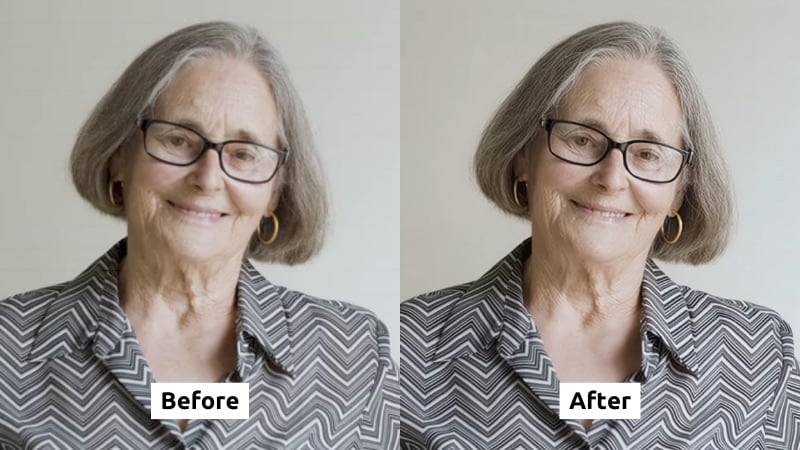
What Improved in the Enhanced Result:
- Sharper facial detail: The enhanced frame shows sharper facial features, including clearer skin texture and beard detail. Fine details appear more defined without harsh sharpening.
- Cleaner edges around glasses and face: Edges around the glasses, jawline, and facial contours appear more defined. Meanwhile, the original frame looks softer and slightly blurred.
- Reduced noise and compression artifacts: The before frame shows softness and minor blockiness, especially around shadows. The enhanced version smooths these areas while keeping the structure intact.
- Better texture separation: Facial hair and clothing show clearer separation from the background. The image no longer looks flat or smeared.
- Improved overall clarity: The enhanced frame holds more visual information, making the subject appear more natural at higher resolution.
Pros and Cons
The comparison highlights both strengths and tradeoffs in how Topaz Video Enhance works. These points become clearer when looking at the pros and cons below.

- Improves detail and clarity on low-resolution or compressed footage.
- Reduces noise and artifacts when settings stay balanced.
- Offers different AI models for different types of footage.
- Works well for restoring older or soft-looking videos.
- Export times increase with higher resolutions.
- File sizes grow quickly with 4X upscale and high-quality codecs.
- Works as a separate enhancement step, not a full video editor.
- Results vary depending on source quality and settings.
Part 4. Filmora + Topaz Starlight: Next-Level AI Video Enhancement
Earlier, we examined Topaz Video Enhancer AI as a standalone tool. While powerful, it often requires stepping outside the editing process to enhance footage, creating extra breaks in workflow.
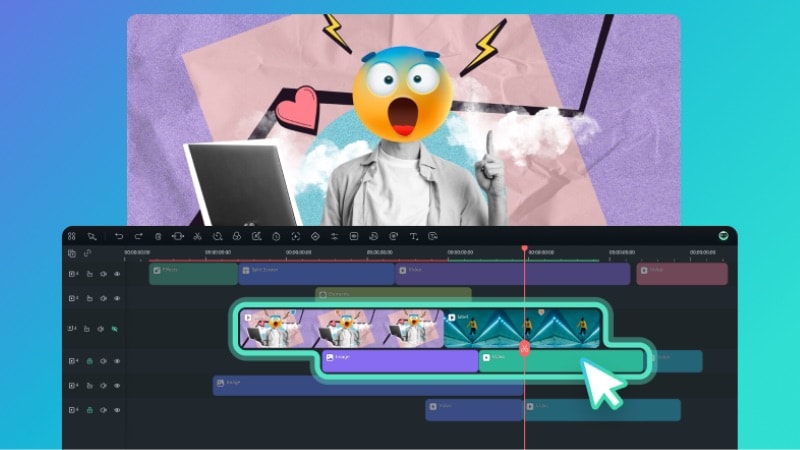
Filmora removes that separation by bringing the Topaz Starlight model directly into its AI Video Enhancer. Instead of exporting clips or switching software, enhancement happens inside the same timeline where editing decisions are made.
This integrated approach lets creators improve video quality without interrupting their creative flow. In the following sections, we'll look at how Filmora applies Topaz Starlight in practice, including its key features and practical limits.
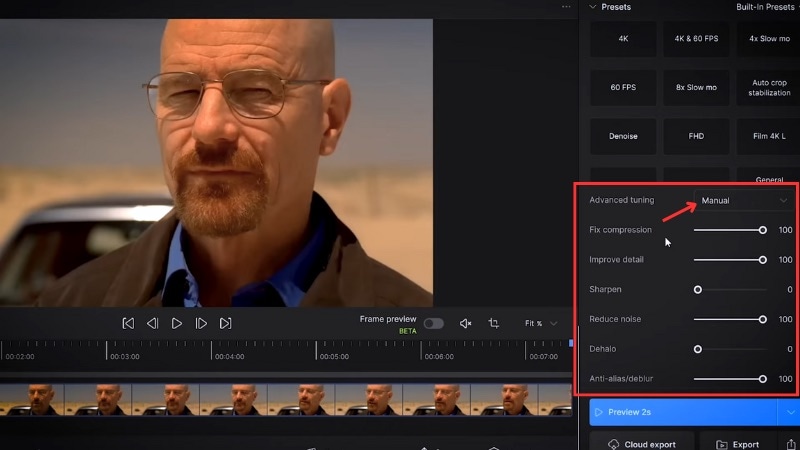
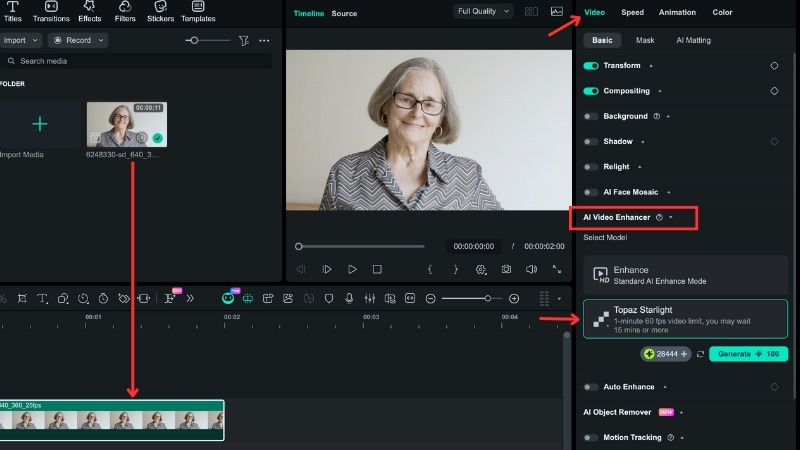
How Topaz Starlight Works Inside Filmora
Filmora lets you apply the Topaz Starlight model directly on the editing timeline. Enhancement happens within the same project used for editing, previewing, and exporting. This workflow keeps enhancements close to the edit.
Key Features of Filmora's AI Video Enhancer (Topaz Starlight)
- AI Enhancement Applied Directly on the Timeline: You can enhance clips without exporting files or switching to another application. The clip stays inside the same project used for editing.
- Reduced Setup and Manual Controls: The Starlight model runs with preset behavior. Users do not need to adjust detailed parameters to achieve usable results.
- Integrated with Other Editing Tools: Enhancement works alongside Filmora's color tools, effects, templates, and AI features within the same workflow.
- Credit-based Processing Model: Filmora calculates credit usage before processing each clip. This approach makes cost and usage limits clear before enhancement begins.
Key Capabilities and Limits
This section outlines how Topaz video upscaling works inside Filmora and the limits to expect. These details help clarify when the integrated approach fits a project and when a standalone tool may work better.
| Aspect | Filmora AI Video Enhancer (Topaz Starlight Model) |
| Best For | Enhancing short clips during active video editing. |
| Video Duration Limit | Up to 1 minute per processing session. |
| Frame Rate Support | Up to 60 frames per second. |
| Processing Time | Longer than standard effects, depending on clip length and resolution. |
| Resolution Output Rules | Videos ≤1080p output at 1080p; videos above 1080p keep original resolution. |
| Ultra HD Resolution Cap | Up to 4K |
| Credit Usage | Calculated per clip before processing. |
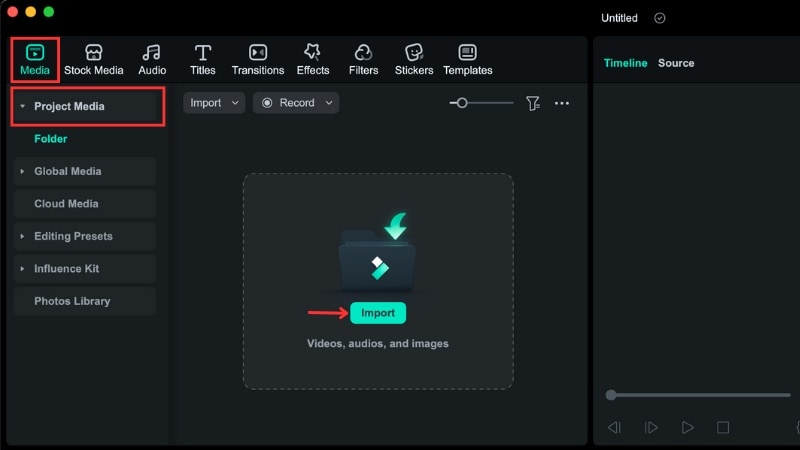
How to Enhance Video With Topaz Starlight in Filmora
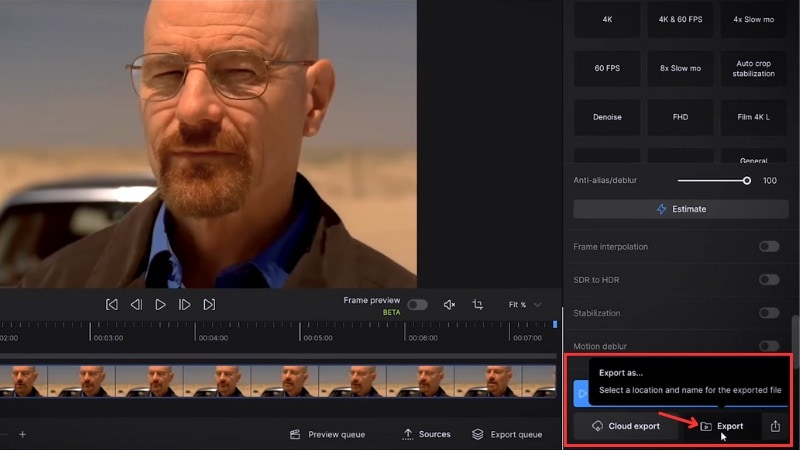
Follow the steps below to upscale a video with Topaz Starlight in Filmora. The process stays inside the editor and does not require exporting clips to a separate tool.
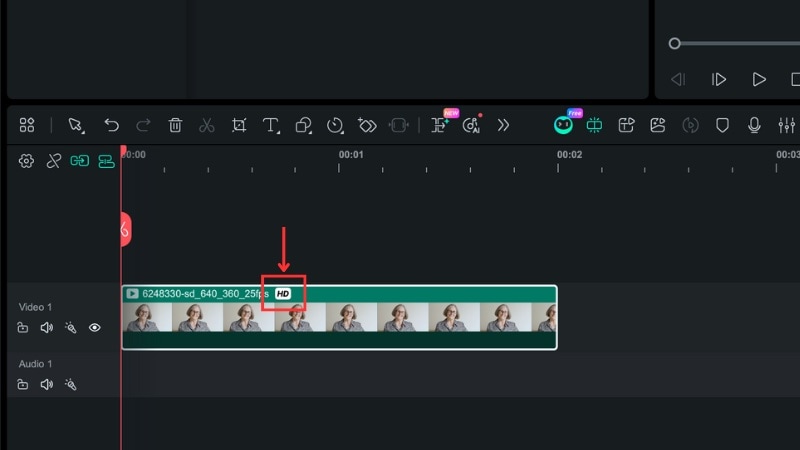
The enhancement process may take a few minutes. Once it finishes, the clip on the timeline will display an “HD” tag, indicating that the enhancement is complete.
Here's the result of the enhancement using Filmora's Topaz Starlight model:
After enhancement, facial details look clearer and edges around glasses and hair appear sharper. Skin texture and clothing patterns hold up better at higher resolution. Softness and minor noise are reduced, producing a cleaner, more consistent image without sharpening artifacts.
Two More AI Enhancers in Filmora: Generative Enhance & AI Night View
Beyond Topaz Starlight, Filmora also offers Generative Enhance and AI Night View to handle more specific quality issues—low-res texture loss and poor low-light footage.
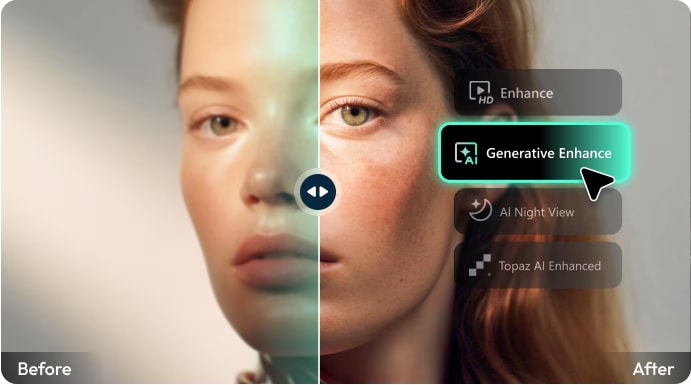
- Generative Enhance: Uses AI to intelligently fill in missing textures, making low-res footage look naturally sharp rather than artificially smoothed. Optimized for clips under 3 minutes, it works with mobile footage, old videos, compressed files, and AI-generated content. One click, automatic clip replacement on the timeline—no workflow interruption.
- AI Night View: Designed for low-light scenes, it fixes blur, color casts, and heavy noise. Restores accurate colors, brightens shadows, sharpens edges, and reduces grain. Perfect for night Vlogs, street shots, travel scenes, and aerial footage—turning dark clips into publish-ready content.
Together with Topaz Starlight, these three tools cover resolution upscaling, texture restoration, and low-light rescue—all inside Filmora's seamless editing workflow.
Part 5. When to Use Filmora's Topaz-Powered AI Enhancement
The Topaz Video Enhancer AI Starlight model in Filmora works well when video enhancement needs to happen during editing. It suits short clips that benefit from AI upscaling without breaking the editing workflow or moving files between tools.
Here are common use cases when you should use Filmora's Topaz Video Enhance AI with the Starlight model:
- Upscaling low-resolution footage for modern platforms such as YouTube, streaming services, or large displays.
- Improving older videos that appear soft or lack detail when viewed on higher-resolution screens.
- Restoring archival or legacy footage that shows visible wear, noise, or detail loss.
- Cleaning up noisy clips recorded in low light or with heavy compression.
- Enhancing selected shots before final delivery rather than processing entire timelines.
- Creating clear before-and-after comparisons for AI testing, demos, or educational content.
Conclusion
Topaz Video Enhancer AI helps improve video quality when basic editing tools fall short. It can restore detail, reduce noise, and improve clarity in low-resolution or compressed footage. With several AI models available, Topaz Video Enhance AI can handle different video types and quality problems.
If you prefer to enhance clips during editing, Filmora's integration of the Topaz Starlight model offers a practical option. You can apply Topaz Upscale directly on the timeline without leaving the project.
If your workflow involves regular enhancement work, try Topaz Video Enhance AI in Filmora and see how it fits into your next project.
FAQs
-
When should I avoid using AI enhancement on a clip?
You should avoid using AI enhancement on already sharp, high-quality clips, as it may not add visible improvement. Clips with heavy motion blur or severe damage may also show limited results. -
How does AI enhancement affect export time and file size?
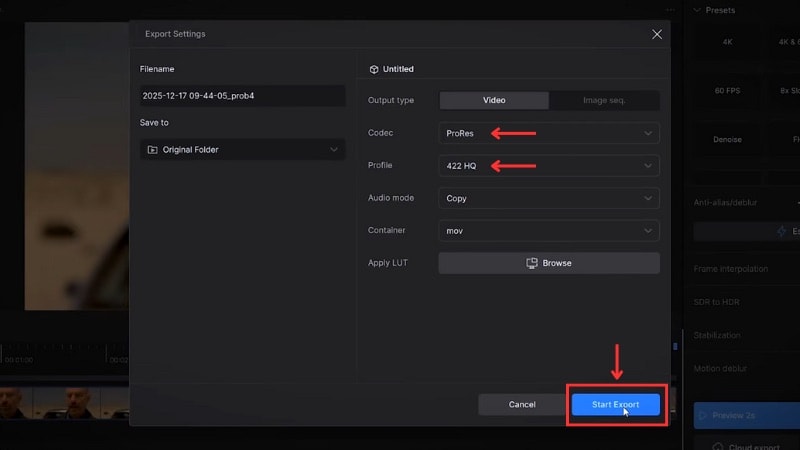
AI enhancement increases export time because the system analyzes and rebuilds each frame. Higher resolutions and longer clips take more time to process. File sizes also grow, especially when using higher upscale settings or professional codecs like ProRes. -
Can Topaz Starlight AI enhancement be applied to specific clips within Filmora instead of the entire project?
Yes. In Filmora, you can apply Topaz Starlight to individual clips on the timeline. This approach allows you to enhance only selected shots rather than processing the entire project.
