


 100% Security Verified | No Subscription Required | No Malware
 TL;DR:
To create disappearing or background smoke effects in Wondershare Filmora X, layer a downloaded smoke clip over your footage and adjust the positioning, playback speed, and compositing settings.
● For disappearing effects, shoot an empty background scene before filming the subject jumping, then align the "Blast – 05 smoke effect" from Filmstock's "blockbuster blast pack" over the highest jump point.
● To apply a smoke background, place a smoke video with a black background above the main video track and change the Compositing Blending Mode from Normal to Pin Light.
● Stock smoke footage can be sourced based on budget requirements: Pixabay offers free content, Filmstock provides a vast royalty-free library, and Rocketstock requires a nominal fee for its effects.
Ask AI for a summary
 ChatGPT
 Perplexity
 Gemini
 Claude
 Grok
Grok
Best Editor for Stunning Effects - Wondershare Filmora
An easy yet powerful editor
Numerous effects to choose from
Detailed tutorials provided by official channel
A smoke effect is a video editing technique that can add extra oomph and a mysterious look to your video, depending on the content. So, this simple guide will walk you through how to generate an award-winning disappearing and appearing smoke effect video. In addition, I’ll furnish you with some simple steps to apply a smoke effect background to any video footage. Plus, there are some suggestions on where to download the perfect stock motion graphics.
Part1. How to make a disappearing smoke video in 2minutes?
In this short read, I will teach you how to shoot the perfect clip for adding a smoke element. Also, you’ll learn how to apply a smoke effect on Wondershare Filmora X before adjusting the effect’s playback speed, color, background, and so much more. Let’s get started!
For Win 7 or later (64-bit)
For macOS 10.12 or later
Step1Shoot a short video clip.
Using a camcorder or a smartphone camera, start by shooting a video clip on an empty scene. This can be in the living room, study room, bedroom, or any other open space. Continue filming for around 5 seconds before the subject comes in.
Then, ask the subject to jump on multiple spots. This allows you to have numerous backup clips or sections while editing. Also, make sure you film the subject’s whole body and ask them to pause for a second or two between each jump. Great!
Step2Upload the video on Filmora.
Install and run Filmora X on your Mac or Windows PC and then import the footage. Then, click New Project before dragging and dropping the video footage on the Import Media window. Alternatively, click the Import button to open local clips to customize with a smoke effect. Either way, trim and drag the empty scene footage to the first track and the action scene clip to the second timeline. Use the playhead to choose the jump that works the best.
Step3Download a disappearing smoke effect.
Next, click the Elements tab and search for the Blast – 05 smoke effect. Can’t find the video effect? Don’t worry; visit Filmstock.com and search for “blockbuster blast pack” and download it. After downloading the smoke effect, drag and place it above the first video before moving it to the start of the jump position. The preview screen should help you with that. Also, drag the effect’s edges on the preview screen to resize and fill the jumping subject.
Step4Edit the smoke effect settings.
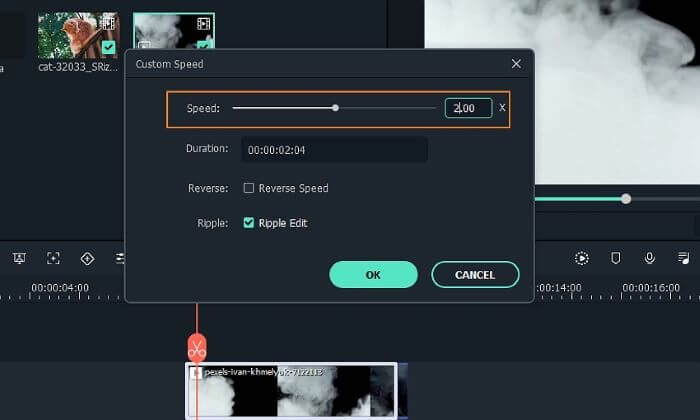
Is the smoke effect too slow or too fast? Right-click it on the timeline and choose Speed and Duration before adjusting the payback speed accordingly. As expected, you can customize the smoke effect even further. Just double-click it, tap Color, and then tap the Advanced button. Then, click Adjust and begin styling the smoke video with unique color effects.
If satisfied, drag the second jump clip and place it above all the video tracks on the timeline. Then, cut it at the highest jumping point before copying the smoke effect and dragging it above the clip. Now resize the smoke effect to cover the beginning of the clip. Finally, preview the video and adjust if necessary. Enjoy!
Note: If you want to make a cool fire effect to your video, see this article: From shooting to editing: Create a Fire Effect
Part2. Where to find the best free smoke effect video to download?
Before we learn how to apply a smoke effect background to a video, let’s discuss some resourceful websites to download stock video effects.
No.1 Pixabay
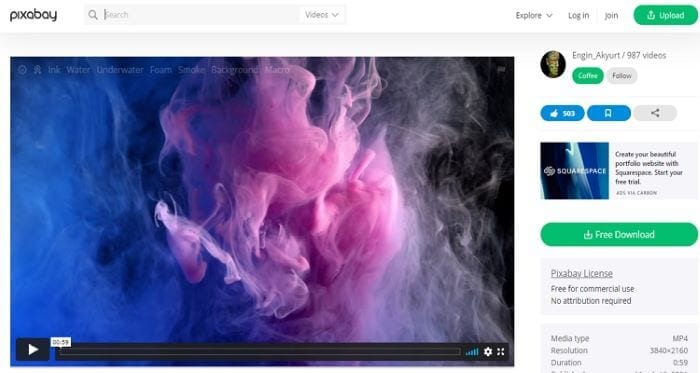
Pixabay is a good option if you’re looking for videos and photos for different projects. The videos and pictures are of excellent quality and can be downloaded in varying resolutions and sizes. In addition, the Pixabay database is vast, consisting of millions of royalty-free content. What’s more, Pixabay users can contribute to the already colossal stock library.
No.2Filmstock
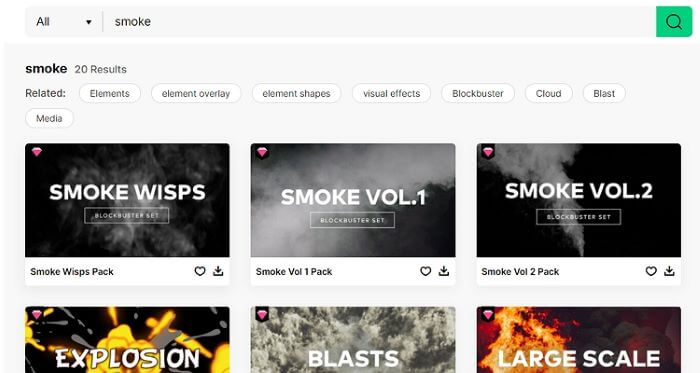
As the name suggests, Filmstock is one of the best resources to download royalty-free stock content for any project. On Filmstock, video creators can download video effects for intros, transitions, app reviews, and more. In addition to video effects, Filmstock also comes with thousands of stock footages, images, music, and sound effects for any use.
No.3Rocketstock
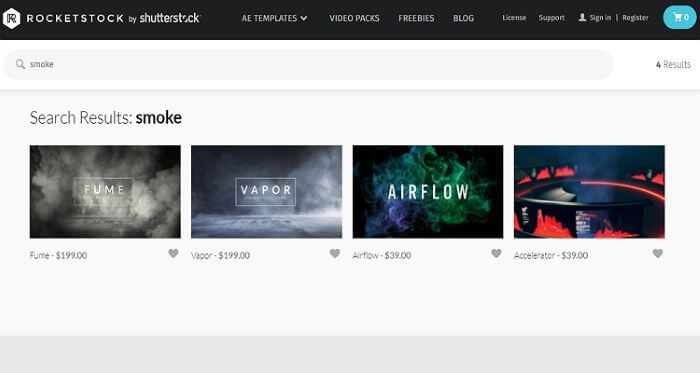
From contemporary and modern to digital and organic, Rocketstock features all video effects for any project. Here, you can browse through an extensive collection of after-effects and download them for your project. Note, however, that there is a nominal fee to pay for Rocketstock video effects.
Part3. How to add a smoke effect to the background of your video?
Finally, let’s learn how to add a smoke effect background to a video. Just like adding disappearing smoke effects, this trick is pretty self-explanatory. It’s even easier than the former. Just follow these steps:
Step1Download a smoke effect video and import it on Filmora.
For starters, download a short smoke video on one of the websites listed above. If possible, make sure the smoke effect clip has a black background. Then, upload the video alongside the footage you want to apply a smoke background to on Filmora X.
Step2Adjust the smoke effect playback duration (optional)
Next, drag the smoke effect track above the main video to adjust the playback position. You can also trim out unwanted sections of the videos to make them shorter. Another thing, select the smoke effect and then click Speed and Duration to adjust its playback speed.
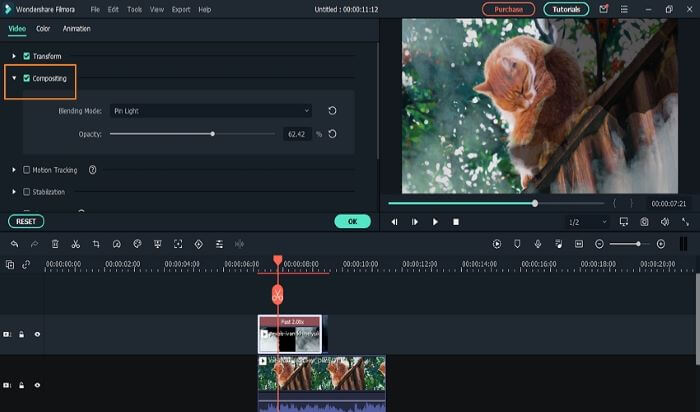
Step3Blend the smoke effect into your video.
Now double-click the smoke effect track and then tap Compositing. Here, change the Blending Mode from Normal to Pin Light before adjusting the smoke effect Opacity. You’ll also see options for image stabilization, motion tracking, chroma-keying, and so much more. Nonetheless, click Play to preview the clip before tapping Ok to save your brand-new video with a smoke effect background. It’s that simple!
Part4. Conclusion
See, adding a disappearing/appearing smoke effect to your footage is so straightforward with the right software and tutorial. Even better, you can create a smoke background for your video project. Just follow the steps above to edit on Filmora X. Remember, keep creating and practising, and you’ll be a pro editor in no time.
Wondershare Filmora
Create your own smoke effect easily with Filmora!

