
 100% Security Verified | No Subscription Required | No Malware


 ChatGPT
 Perplexity
 Gemini
 Claude
 Grok
Grok
For video content creators, highlighting text in videos is an important aspect in storytelling and also acts as an instructional tool for viewers. Through this technique, the perception quality of video content is increased, and the complex topics are easy to read. Therefore, to prevent key information from being lost in on-screen texts, Wondershare Filmora enables users to apply vivid text effects using built-in templates and Vox-style highlight effect feature.
The effective highlighting of texts adds professionalism to the videos whether you're making food recipe tutorials or giving a makeup guide on YouTube. Filmora's user-friendly text highlighting features with AI captions tools boost the visual engagement in an effortless way. In this article, we will explore practical methods on how to highlight text in videos using Filmora's latest tools.
In this article
Part 1. How to Highlight Text in Filmora?
Creating an engaging YouTube tutorial that highlights important on-screen text is a challenging task for creators during the editing process. Highlight text in Filmora is designed for creators to add, customize, and animate text with AI-powered highlight features and manual editing controls. In this section, we will discuss a step-by-step guide on how to highlight text in your videos through Filmora:
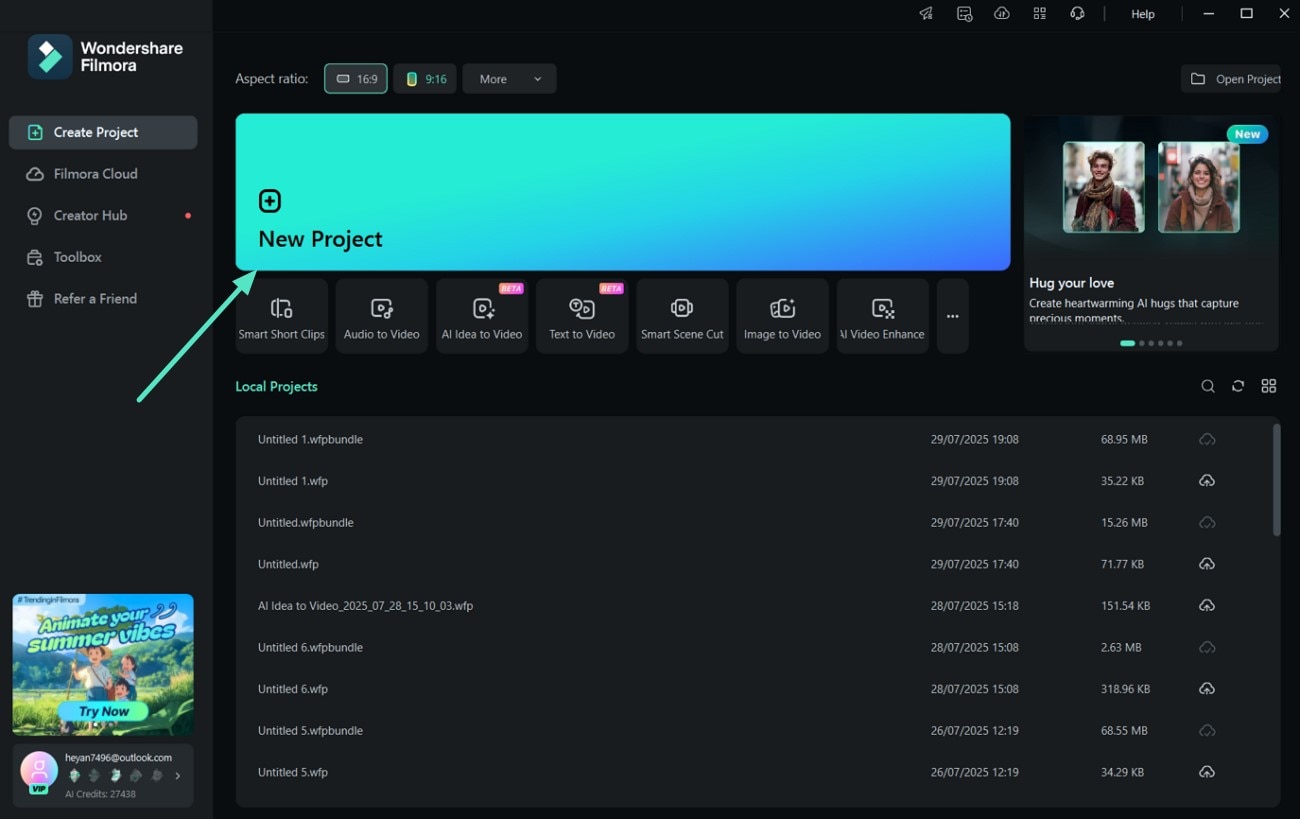
- Step 1. Launch Filmora and Import Your Video. Click on "New Project," then import your video by clicking the "Import" button and dragging it onto the editing timeline.
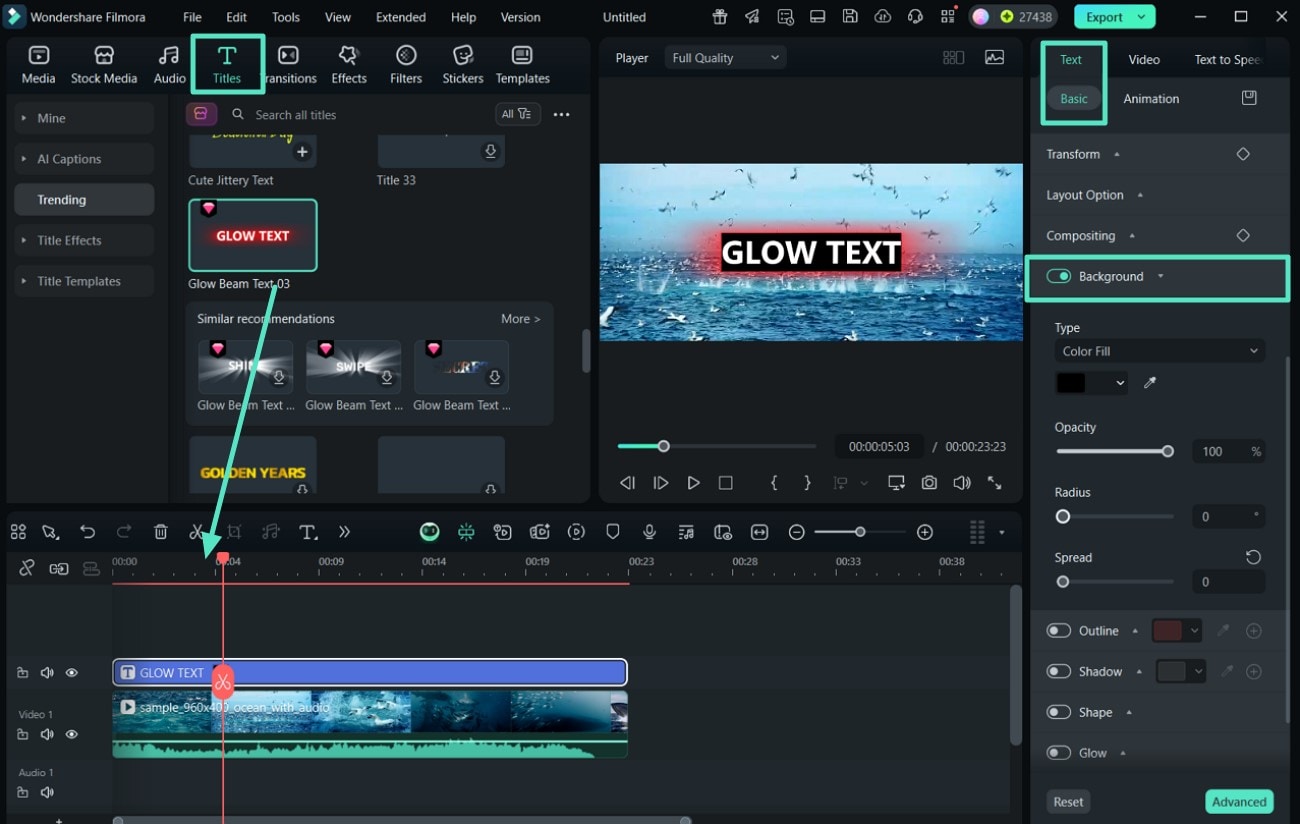
- Step 2. Add Text to Your Video and Highlight Your Text. Go to the "Titles" tab from the top toolbar and select the text style by clicking on the "+" icon. From the "Text" section within the right panel, enter your text in the title box present in the "Basic" tab. Scroll down to highlight text in video by enabling the "Background" option to highlight the selected text.
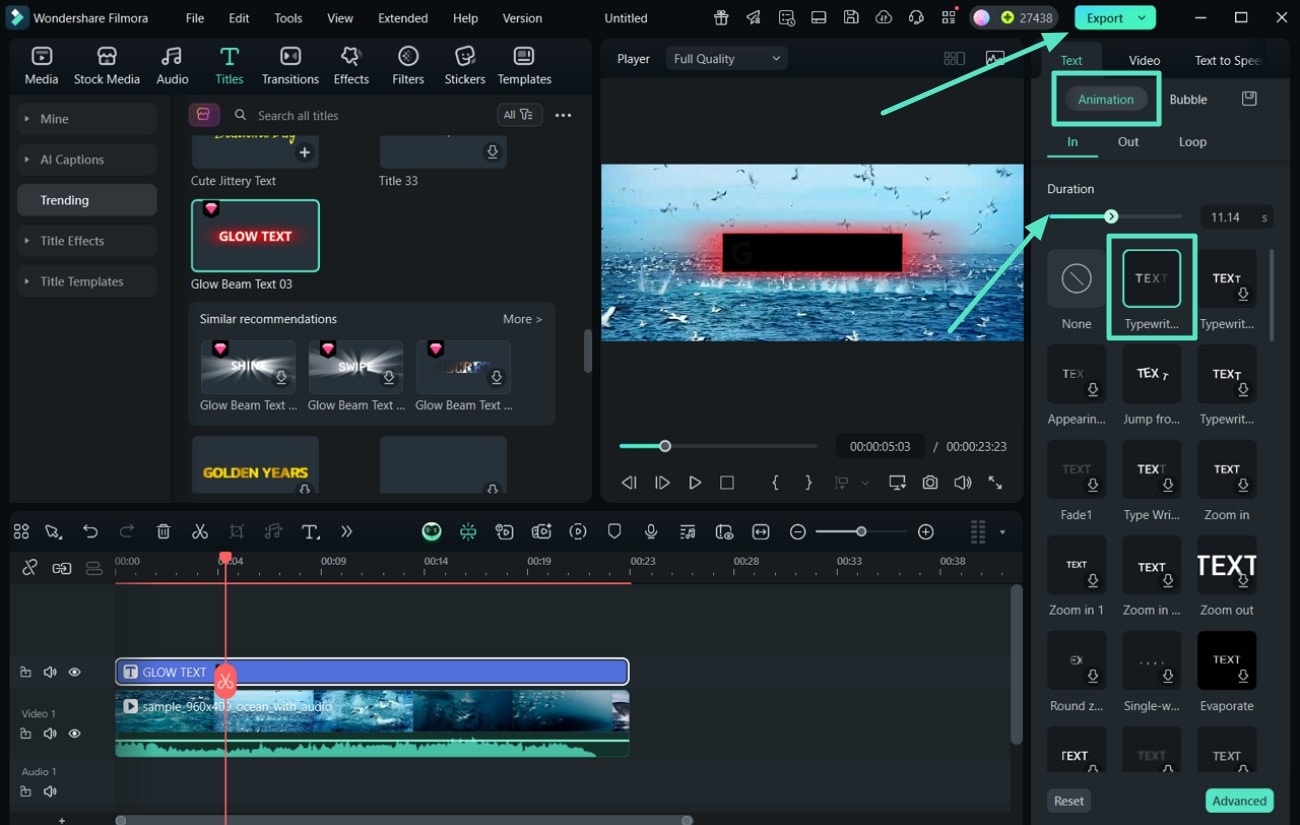
- Step 3. Customize Further Text Enhancements Using Animation Feature. With the help of the section "Animation," you are free to modify the text in by choosing an option which will add the effect of popping. The popping impact could be set by adjusting the slider in the section of "Duration" and then after previewing the edits, press the "Export" button.
Please see the export video below.
 secure download

Part 2. How to Create a Vox Highlighter Effect Using Filmora?
For creators who prefer not to manually edit text highlights in their videos, Filmora AI Captions' feature allows you to add the Vox Highlighter effect to the text automatically. It uses advanced speech recognition features to generate subtitles from spoken audio in the videos. The spoken words are automatically highlighted using the advanced AI. Given below is a step-by-step guide to generate AI captions to create professional marketing content using Filmora:
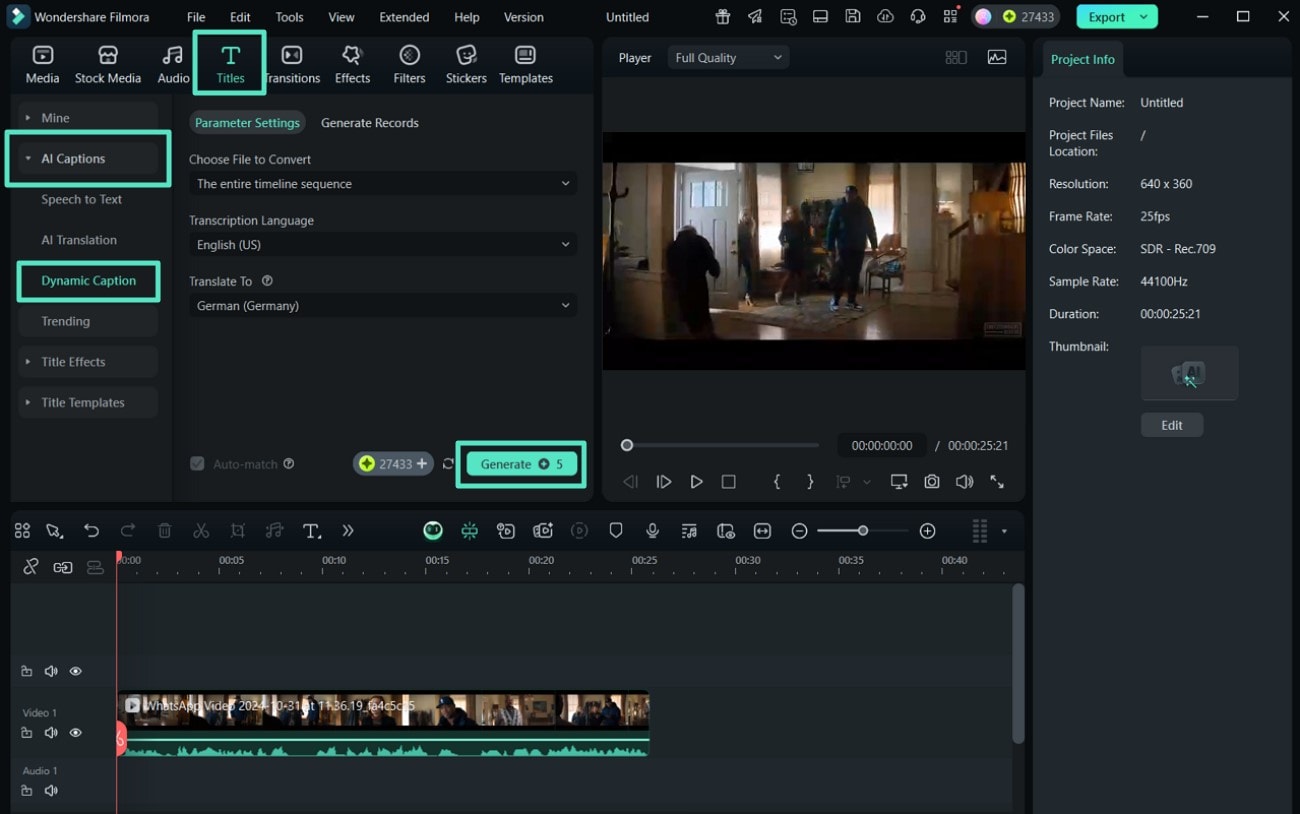
- Step 1. Import Your Media and Access AI Captions. After importing your video file, drag it onto the editing timeline, navigate to the "Titles" tab on the toolbar and select "AI Captions." Select "Dynamic Caption" from the options, choose the "Transcription Language" for your video, and click on the "Generate" button.
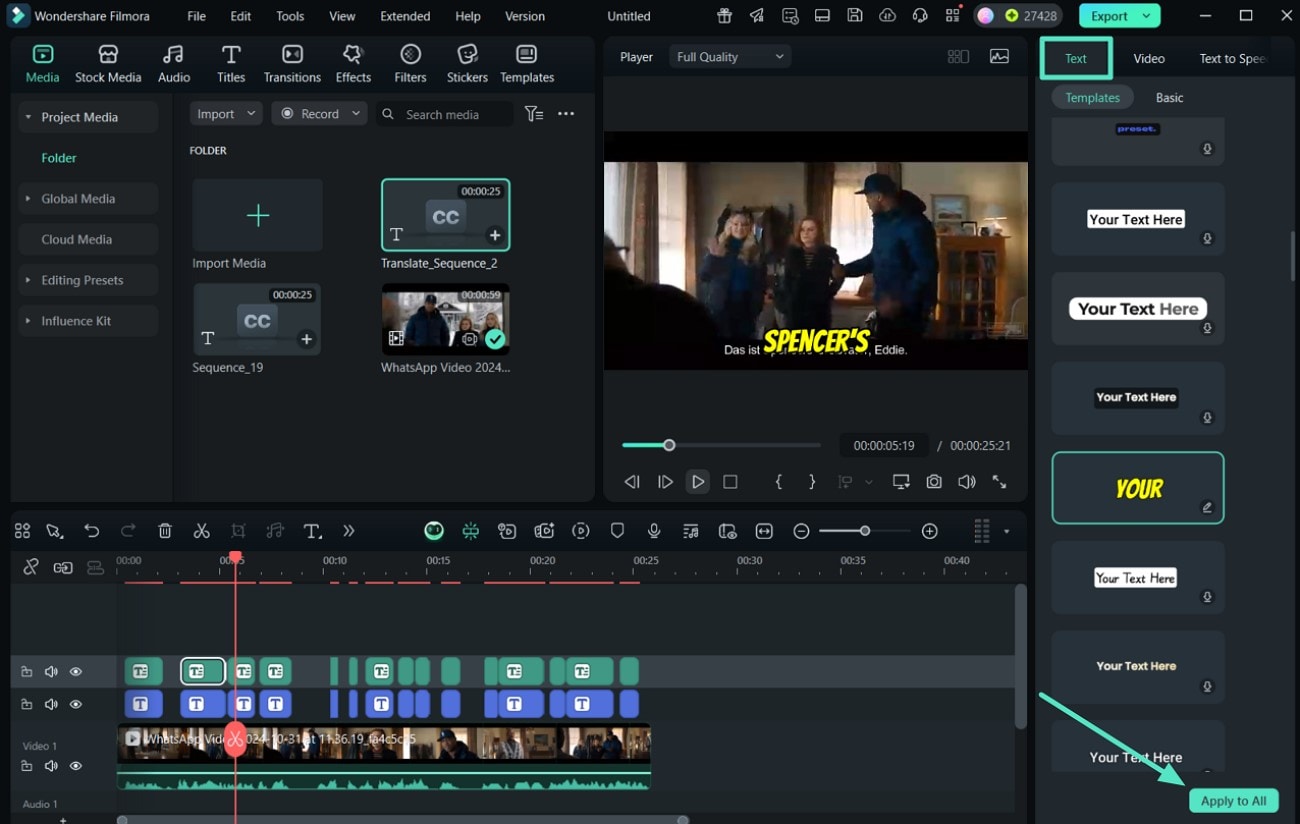
- Step 2. Edit and Highlight the Transcribed Text of Your Video. Customize the captions by clicking on the "Text" section and change the layout of your selected caption by clicking the "Apply to All" button.
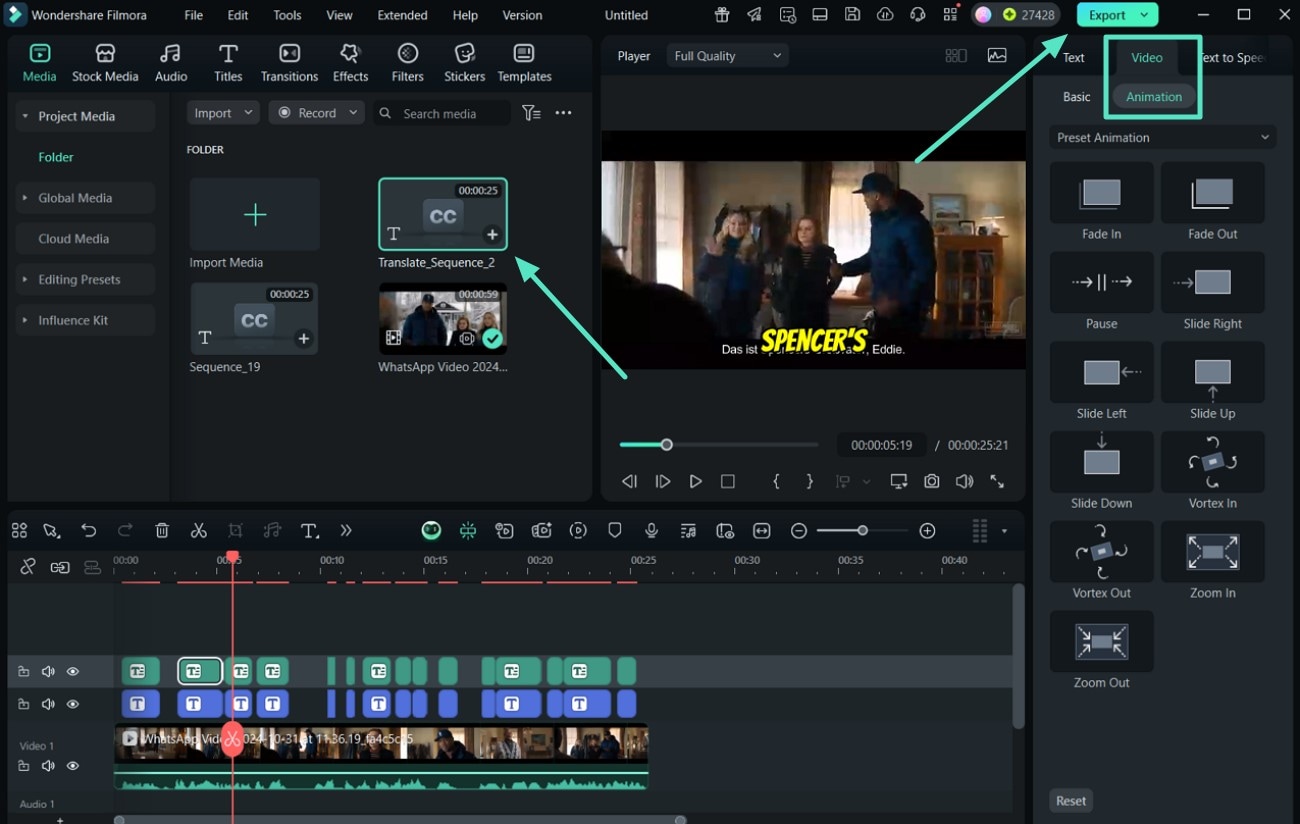
- Step 3. Animate Your Text for Further Highlighting. You can also animate your highlighted text caption by clicking on the "Video" to "Animation" tab in the "Edit Subtitle File" interface. After previewing the edits click on the "Export" button from the top right corner of your window.
Please review the export video below.
secure download
Part 3. How to Highlight Text Using the Filmora App?
To create an engaging social media content, the Vox highlighter style to your video text is the most easy option for creators. Filmora App [Android/iOS] offers advanced AI captions and title effects to highlight text in video, giving your social media content a stylish and professional touch.
Moreover, you can manually highlight the text in your video using this comprehensive application. In this section, we will walk you through the two different approaches to add a highlight effect to your video titles using Filmora App:
Method 1. Highlight Text Using Manual Methods in Filmora
Many social media marketers emphasize highlighting text in videos through manual methods because it gives precise control over the style and vibe of their content. Filmora App allows users to customize texts for their videos by selecting the color, style, and animation features. To give Filmora highlight text for your videos through its app, follow the step-by-step instructions below:
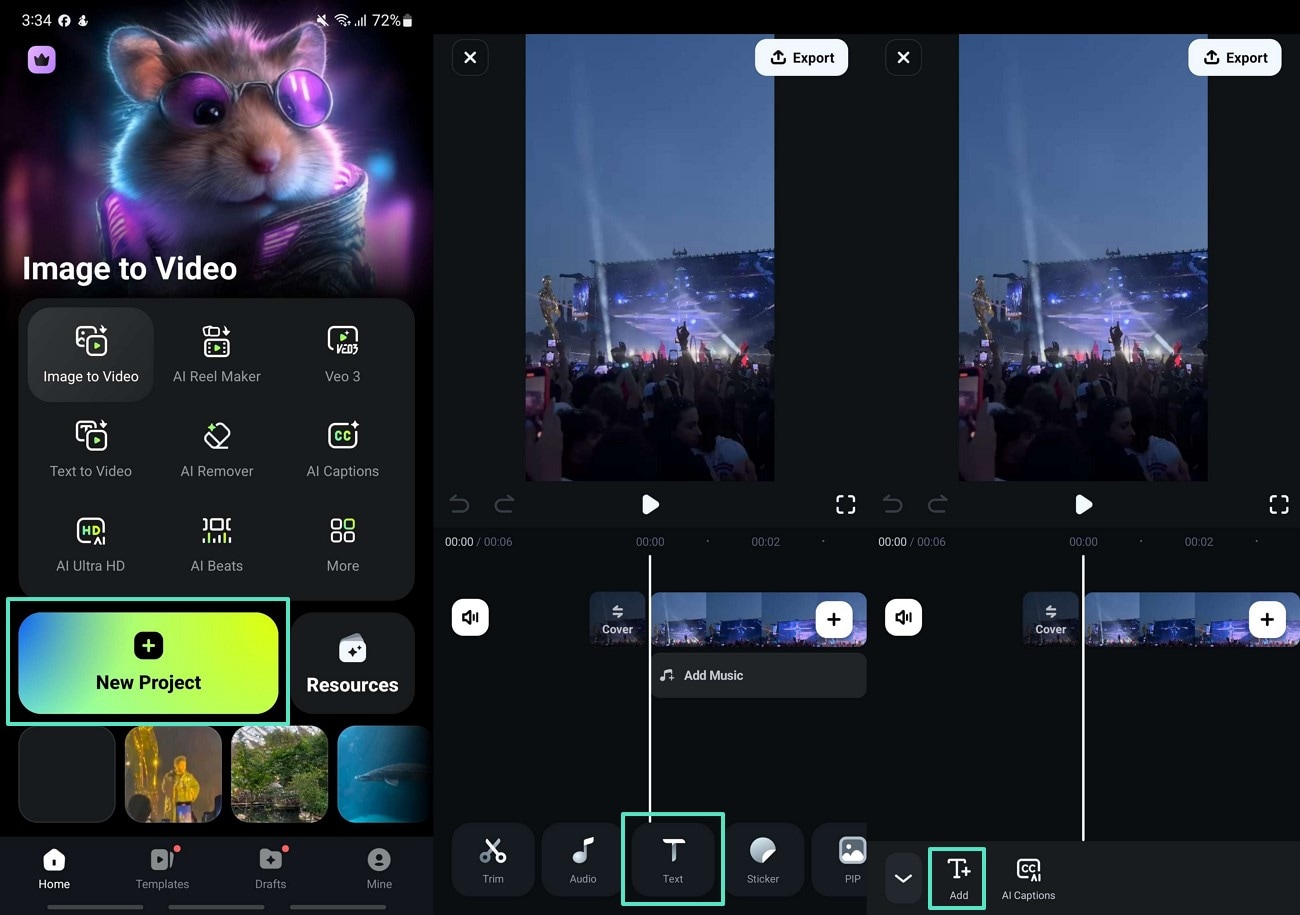
- Step 1. Open Filmora and Create a New Project. First, open the Filmora App and tap on "New Project" to import your video into the editing screen. Tap on the "Text" option from the bottom toolbar and select the "Add Text" icon to enter the text you want to highlight.
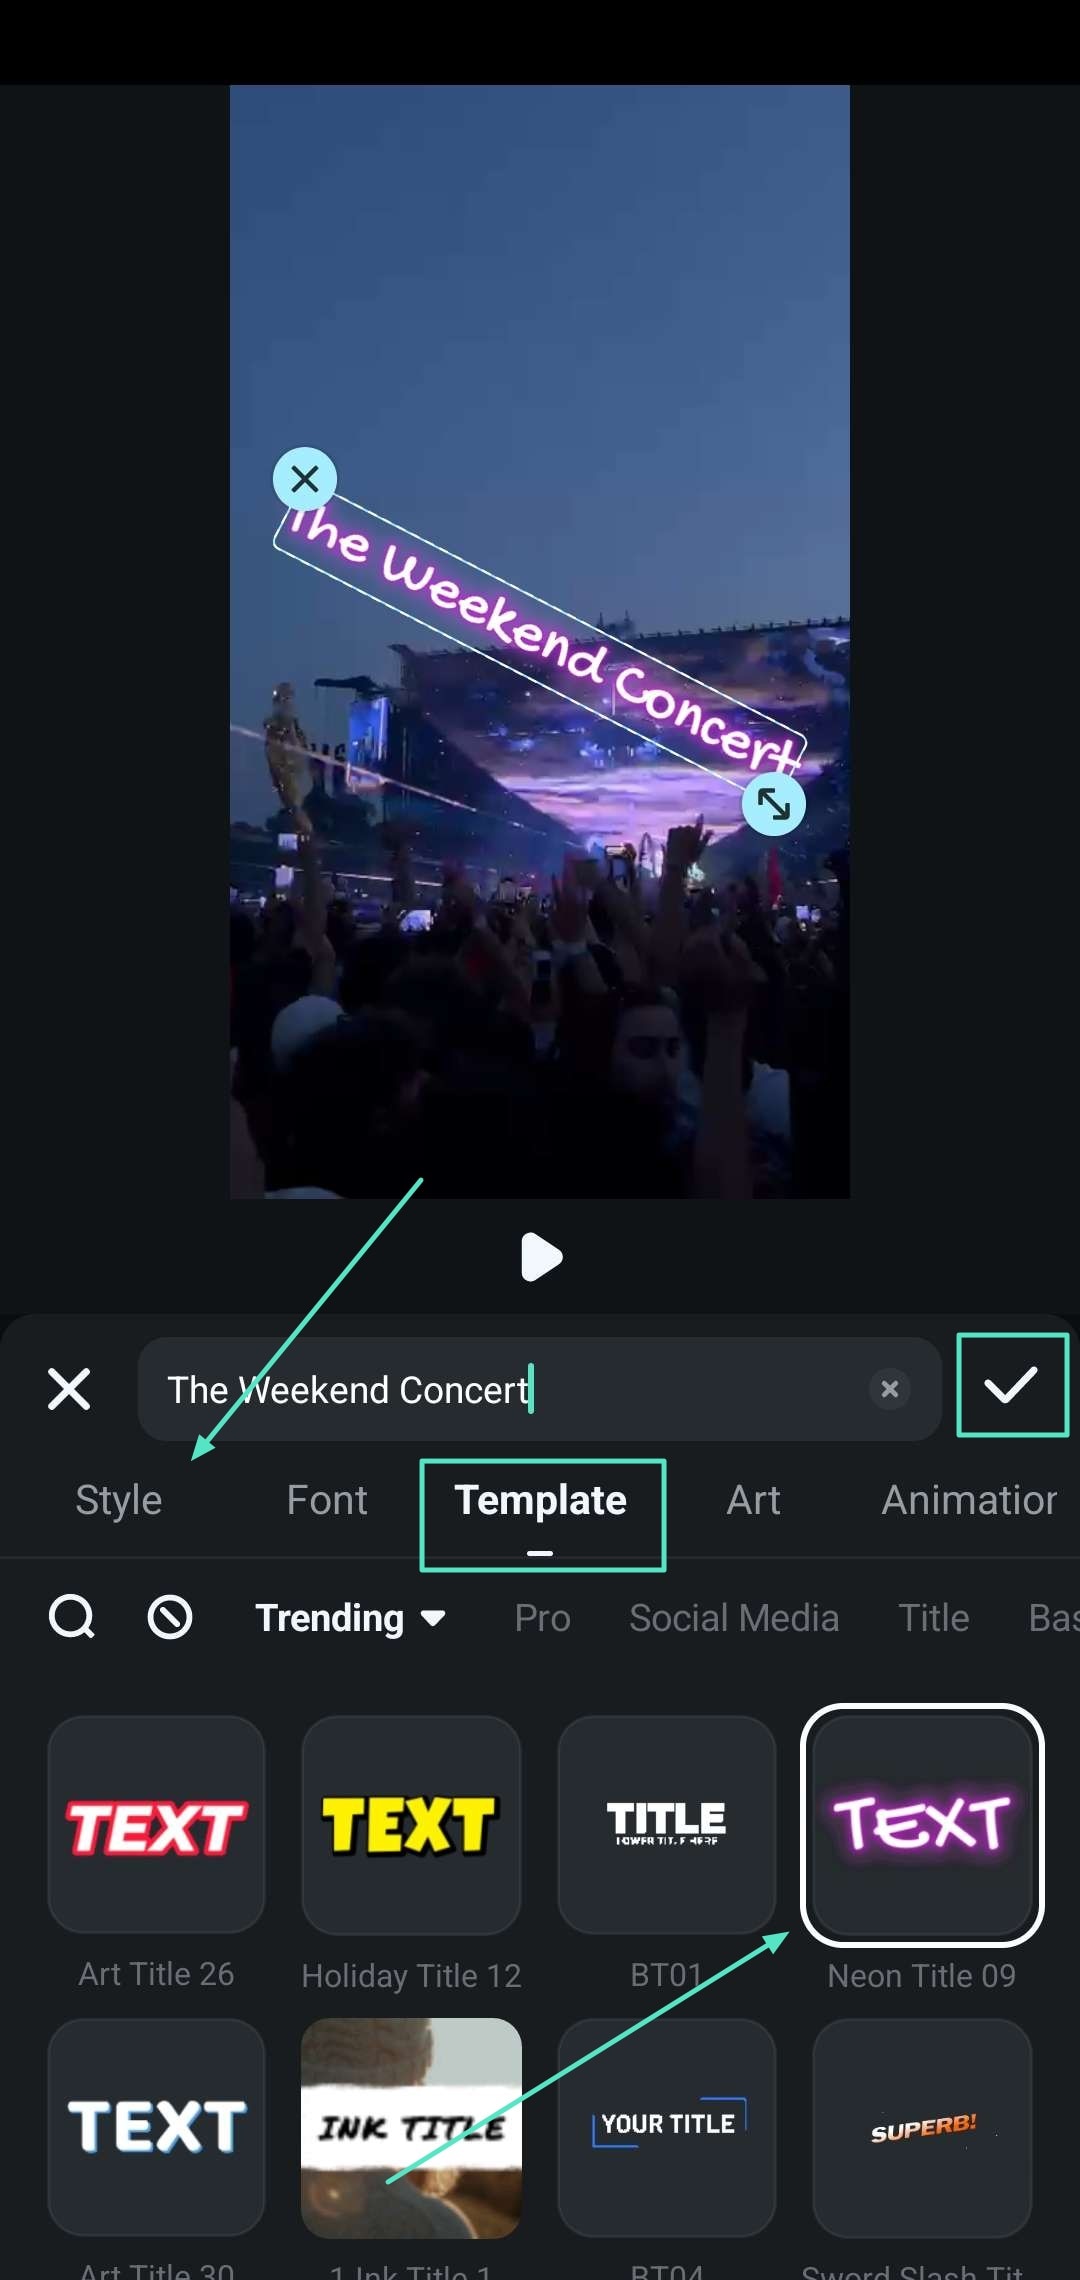
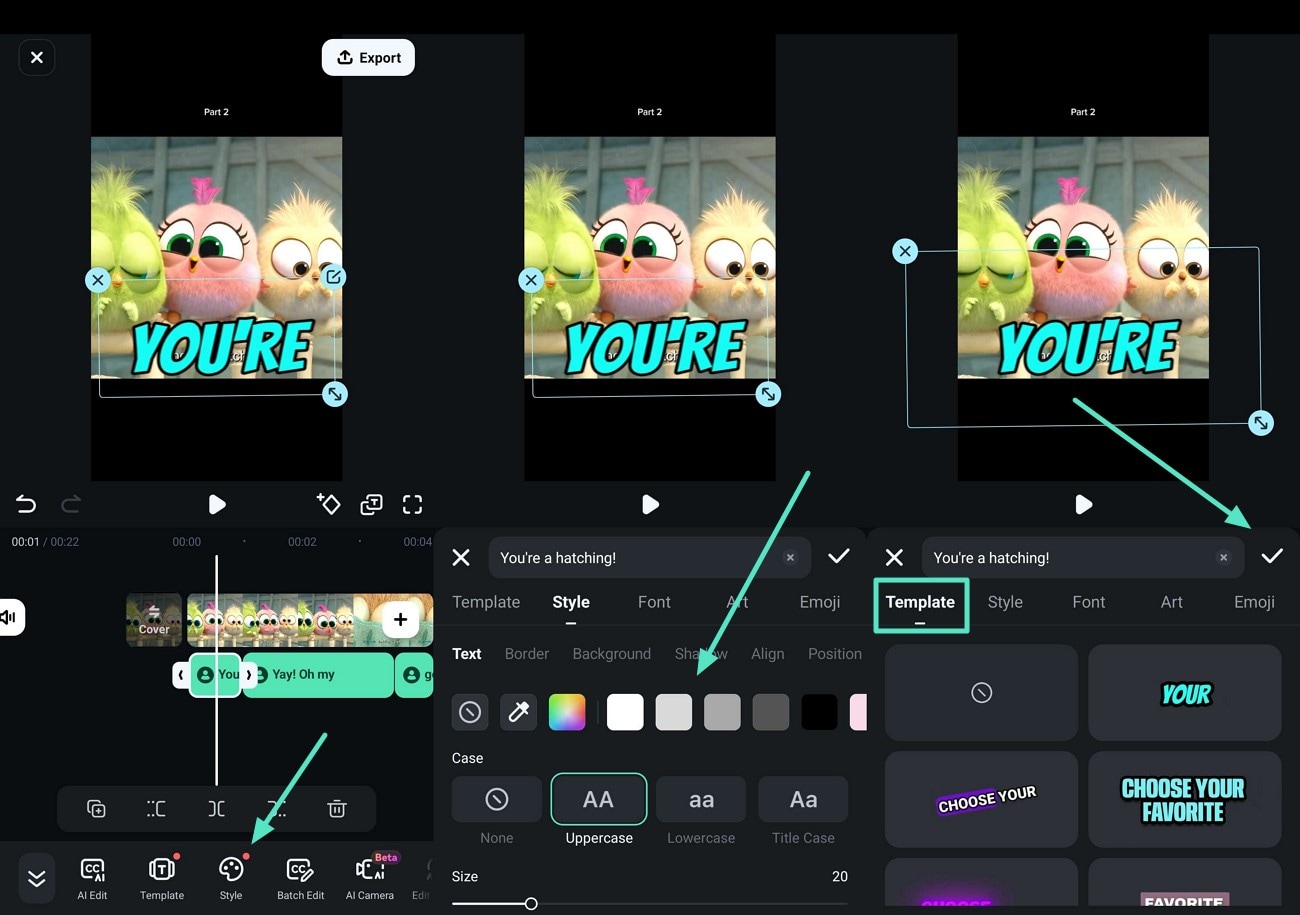
- Step 2. Customize and Edit Your Text Using Template Tools. Navigate through the toolbar and select "Template" to add the "Neon Tite" effect from the "Trending" section and press the "Tick" option to highlight text in video. Switch between tabs to customize the Style, Font, and Animation of your text.
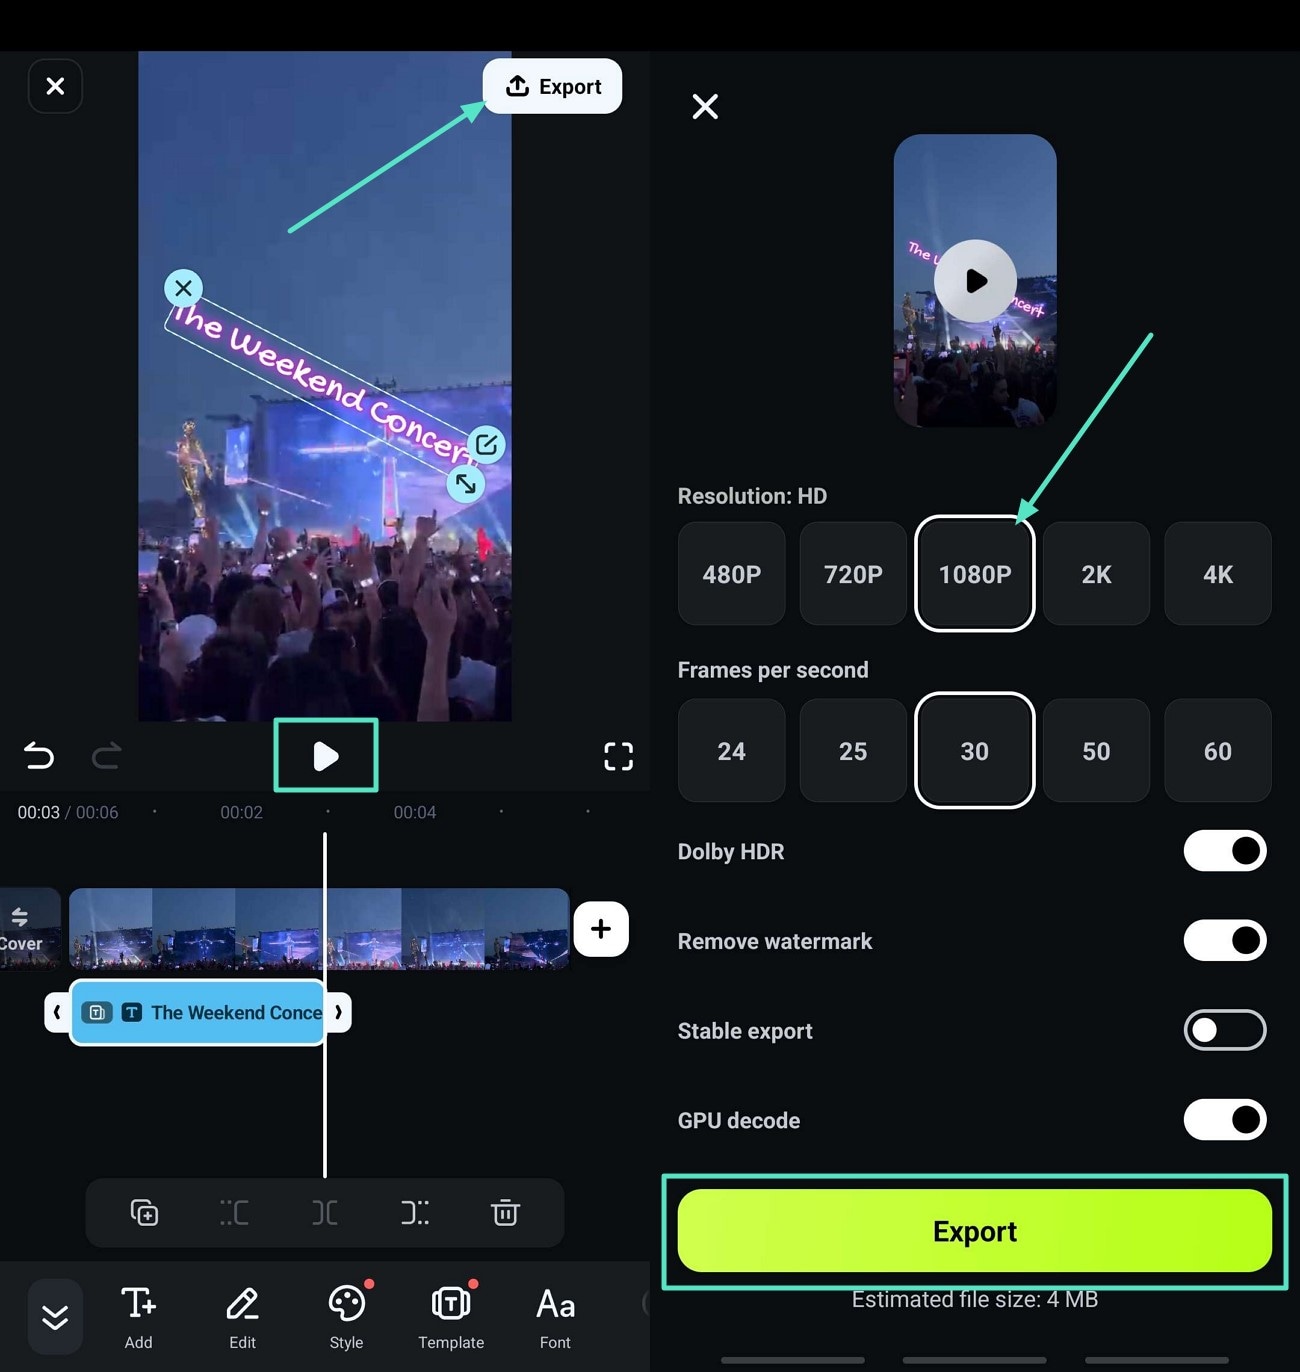
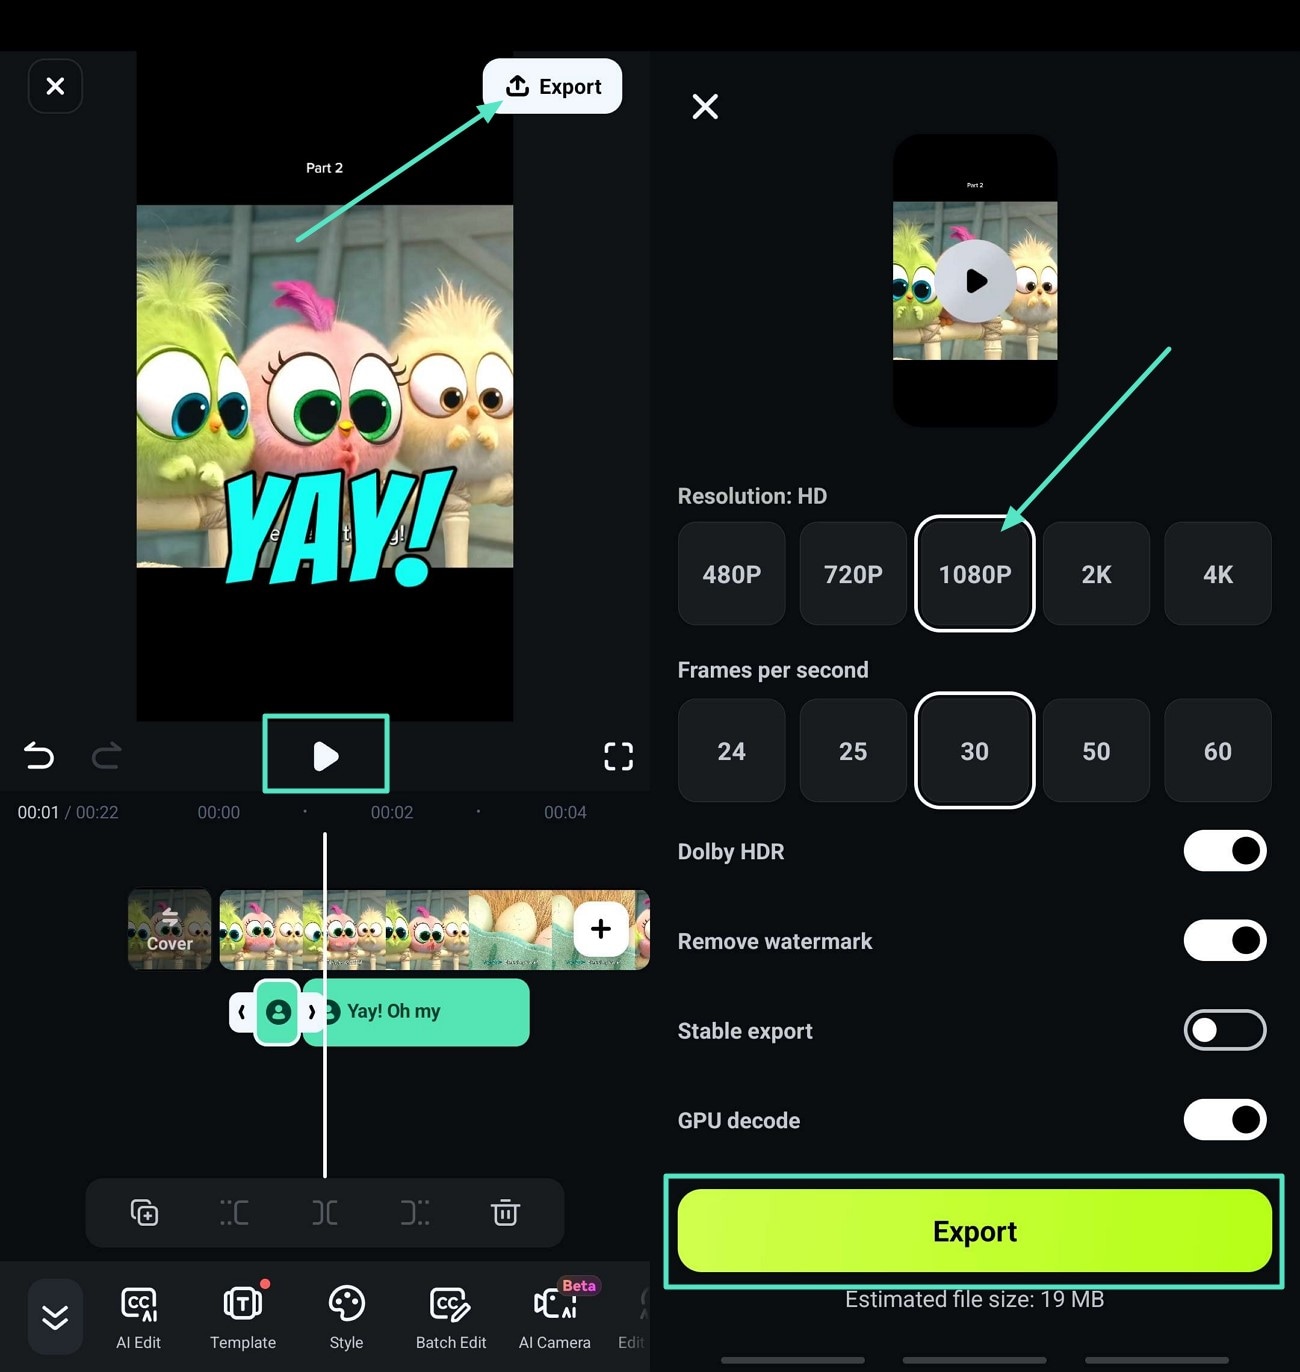
- Step 3. Preview Your Edits and Export Your Video. After customization of your text, tap on the "Play" icon in the preview screen to view your final highlighted text edits. Press the "Export" button to save the video file when you're certain of your results.
View the exported video below.
secure download
Method 2. Generating AI Vox Highlighter Effect Using Filmora App
To create standout video content, Filmora App's dynamic caption feature enables users to add engaging, AI-generated, bilingual captions to their videos with just a few taps. It not only creates AI captions but also detects the speaker's voice from the video file, allowing users to automatically apply it to their content. The following steps should be adapted on how to highlight something in a video using the Filmora App:
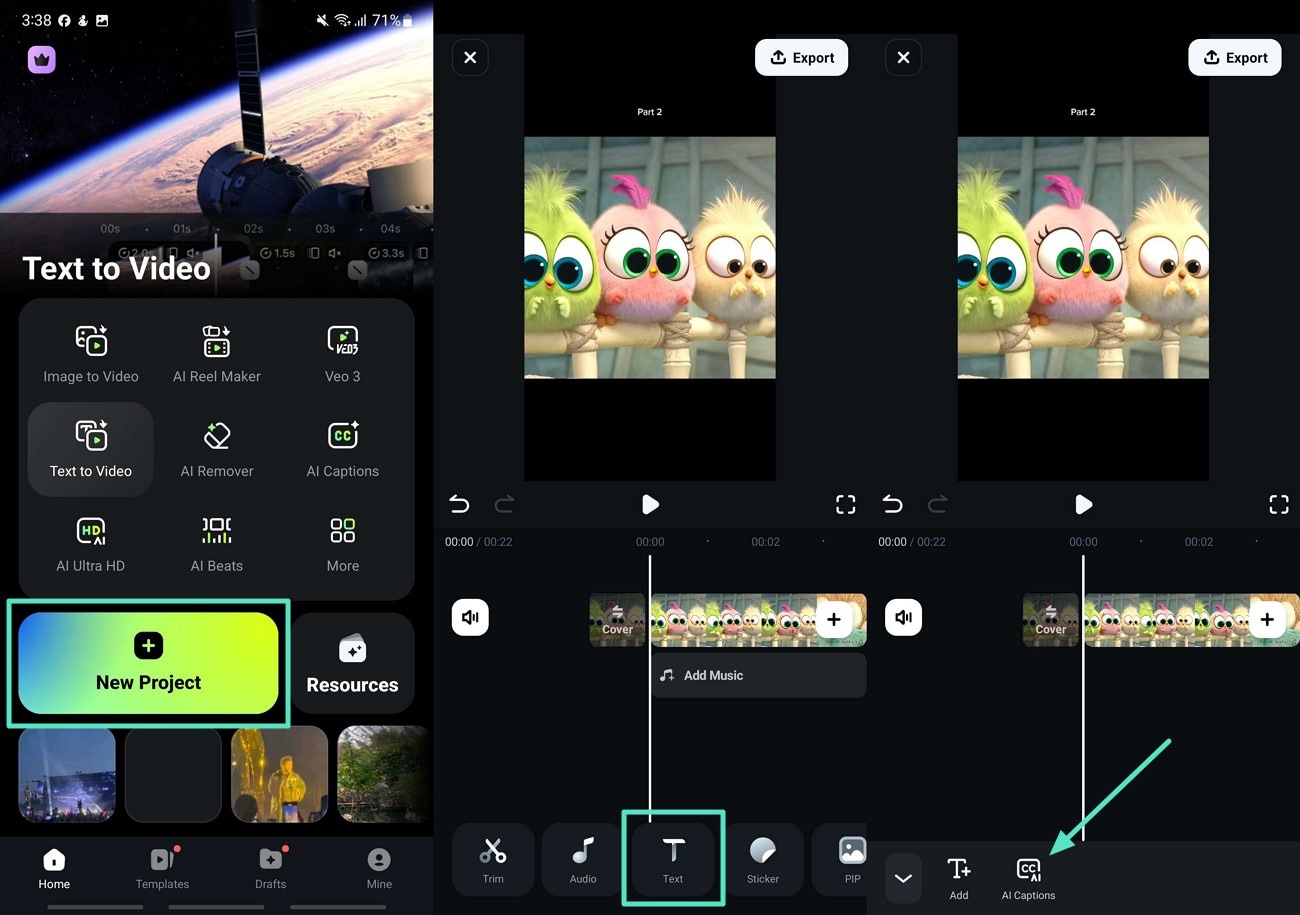
- Step 1. Start a New Project and Select AI Captions. Tap on the "New Project" and import your video, then navigate through the toolbar and select "AI Captions" by tapping on the "Text" feature.
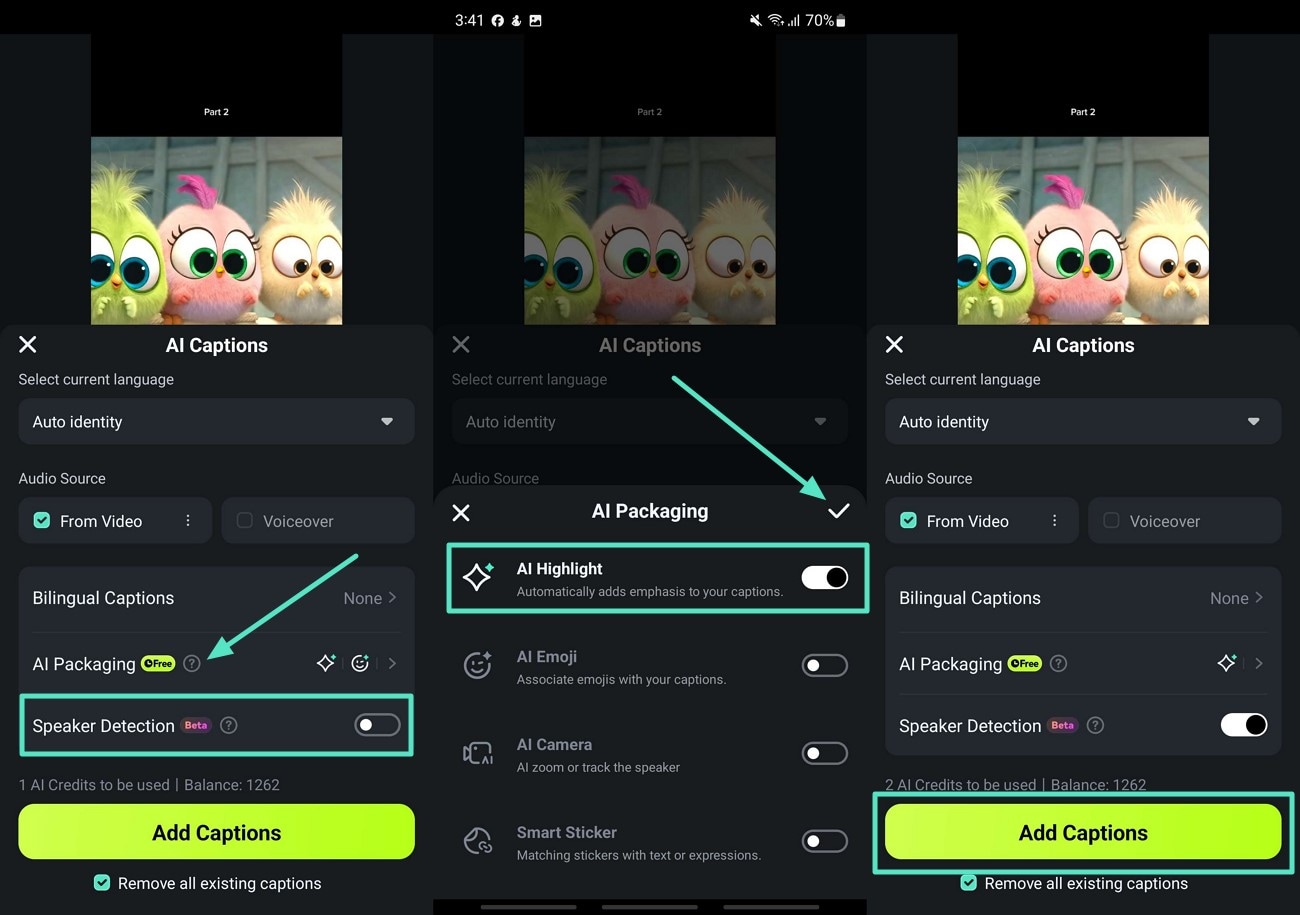
- Step 2. Enable AI Highlight and Speaker Detection Effect. Toggle on the "Speaker Detection" and move to the "AI Packaging" tab to enable the "AI Highlight" effect and tap the "Tick" icon. After selecting the options, tap on the "Add Captions" button to generate AI captions for your video.
- Step 3. Customize the Highlighted Captions of Your Video. After generating the AI captions for your video, tap on the "Style" icon from the bottom toolbar and adjust the properties of the AI captions. From the "Template" feature, select different styles for your text from the template library and press the "Tick" icon.
- Step 4. Preview Your Edits and Export Your Video. From the preview screen, tap the "Play" icon to ensure the highlight text in the video perfectly syncs with the video sound. Once you're satisfied with the output video, press the "Export" button located at the top right side. Choose the preferred resolution settings, save the video, and then hit the "Export" button.
Check out the export result video below.
secure download
Conclusion
It is essential to improve the effectiveness of what you share on the social media and video story-telling. In this article, we thoroughly discussed the versatile tools of Filmora to highlight text in video using customized tools and AI-generated captions. With Filmora's built-in templates and title effects features, creators can easily highlight their video texts, making them ideal for social media tutorials.
