
 100% Security Verified | No Subscription Required | No Malware

Learning mask with shape Premiere Pro allows precise control over what is visible. You can hide distractions, highlight subjects, or add cinematic focus. Rectangles, ellipses, and free-draw Bezier masks let you target areas accurately. Keyframes, feathering, and opacity adjustments give dynamic motion and smooth transitions.
Proper use of the Premiere mask with shape elevates ordinary clips into professional-quality sequences. Editors can conceal objects, create visual emphasis, and enhance storytelling with minimal effort. Understanding these tools unlocks creative possibilities.
This guide will show step-by-step methods, practical tips, and simpler alternatives for using shape masks effectively.
In this article
Part 1: What is Masking in Adobe Premiere Pro?
A mask in Premiere Pro is used to manipulate a part of a video clip directly. You can apply effects, remove elements, or color things within a specific area. With the mask with shape Premiere Pro, you can create consumable special effects in no time at all; editors can also direct the focus easily to whatever they're featuring.
Just like with all other effects, the Premiere masking tool can be handled through the Effect Controls Panel. You can control what's being exposed and hidden in your footage.
Types of masks in Premiere Pro
- Ellipse Mask: This mask creates a circular or oval selection. It's ideal for highlighting round objects or creating vignette effects.
- 4-Point Polygon Mask: A four-sided shape that works well for rectangular or square objects. Perfect for isolating areas with straight edges.
- Free Draw Bezier: The most flexible mask type. You can draw any custom shape, making it suitable for complex or irregular objects.
Common use cases:
- Hiding Faces and Objects
Masking is a basic method to achieve privacy protection on video data. Editors can blur or pixelate any portion of a clip, preserving images the way they appear in the shot list but with face or sensitive area masked to comply with privacy laws and ethical guidelines.
- Creative Transitions
This graphic mask will allow you to add a smooth transition between your scenes by covering the action with geometrical shapes. The use of this technique is popular in video motion, creating dynamic scene transitions MotionEvent.
- Highlighting Specific Areas
With masks, editors can draw the eye to specific elements on a screen. Editors could highlight a subject or section you've separated, and apply brightness changes or color effects to make the highlighted area pop out.
- Selective Color Grading
Selective color correction is when you change the color of just one part of a video clip. Editors can reach specific parts of the frame (like a face or background element) on which to adjust color, without touching the entire frame, using masks.
Part 2: How Premiere Pro Handles Mask with Shape
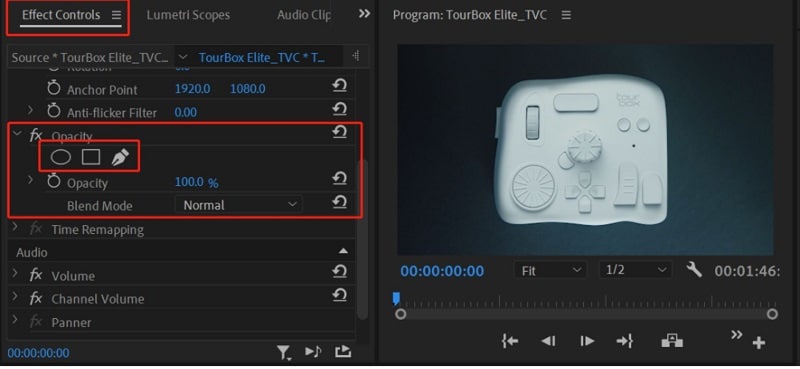
To get to the mask tools in Premiere Pro, select your video clip on the timeline and go to "Effect Controls > Opacity." Here you have choices of masks that can be oval, rectangular, or a Bezier curve.
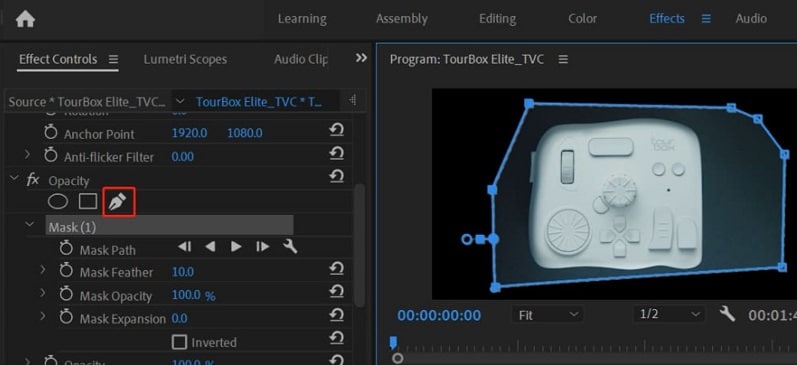
2.1. Working with the Free Draw Bezier Tool
The Free Draw Bezier Tool allows you to create custom, freeform masks.
- Left-click to add anchor points. Drag to adjust the curvature of the mask.
- If you want to close the path now, make sure you stop drawing exactly where you started; otherwise, it won't work.
- To remove the mask, just right-click it and choose Clear.
- Adjust the mask and other adjustments as needed. Select the mask to adjust in the Program Panel.
For precise adjustments:
- Left-click a segment to add anchor points.
- Ctrl + Left-click an anchor to delete it.
- Alt + Left-click an anchor to reset it and add control handles for curvature adjustments.
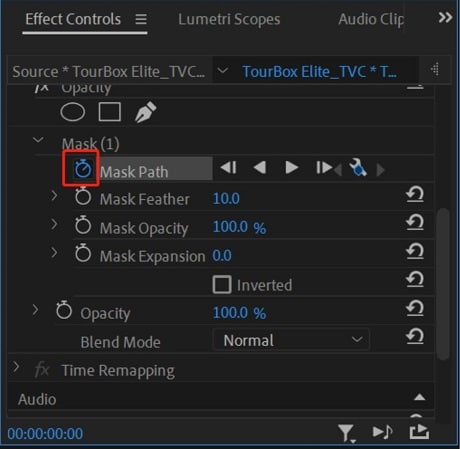
2.2. Mask Path & Animation
The Mask Path feature lets you animate the mask by creating keyframes.
- Click the stopwatch icon beside Mask Path to enable keyframing.
- Adjust the mask shape at different points in the timeline. Premiere Pro will automatically generate smooth transitions between keyframes.
- Use the Track selected mask forward button to automatically track moving elements.
- Adjust the Tracking Method (using the wrench icon) for different tracking accuracy, saving time in manual adjustments.
2.3. Mask Parameters & Adjustments
You can further refine your mask with several parameters:
- Mask Feather: Blurs the edges of your mask. A larger feather can be achieved by increasing the value.
- Mask Opacity: This adjusts the transparency level for the masked area.
- Mask Expand: Expands or contracts the mask by in- or out.
These parameters can be animated over time, allowing you to have dynamic control over how your mask behaves.

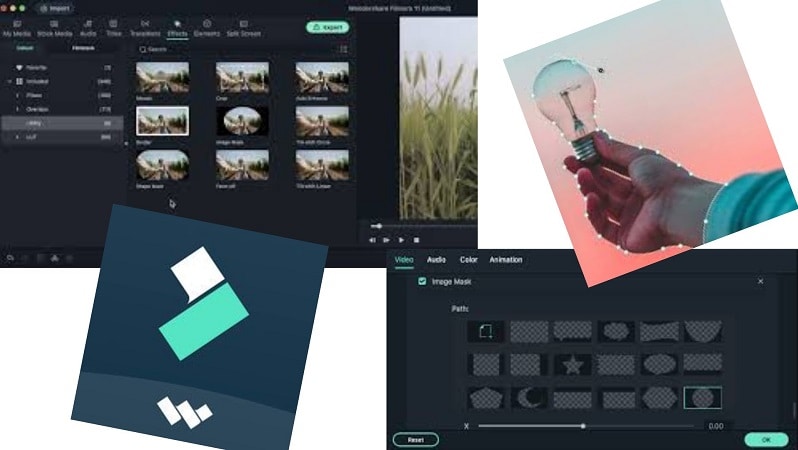
Part 3: Easier Ways to Work with Shape Masks (Filmora)
After exploring the detailed mechanics of the mask with shape Premiere Pro, it's clear that precision comes at the cost of complexity. For editors who want similar creative control with fewer technical steps, alternative software provides a smoother path to the same cinematic outcomes.
In this case, Wondershare Filmora provides a library of ready-made overlays that work as instant shape masks. Circles, rectangles, speech bubbles, and marveling design elements can be used with one click. Instead of drawing paths by hand, you just add a shape to the timeline and customize it.
 secure download

What You Can Do with Filmora's Masking
- With Filmora's Draw Mask tool, users can sketch out custom shapes without navigating Bezier curves.
- Sliders let you control feather, opacity, edge softness, and rotation in seconds.
- Simple keyframing options make it easy to animate a mask's size or position over time, keeping edits smooth.
How to Mask with Shape in Filmora
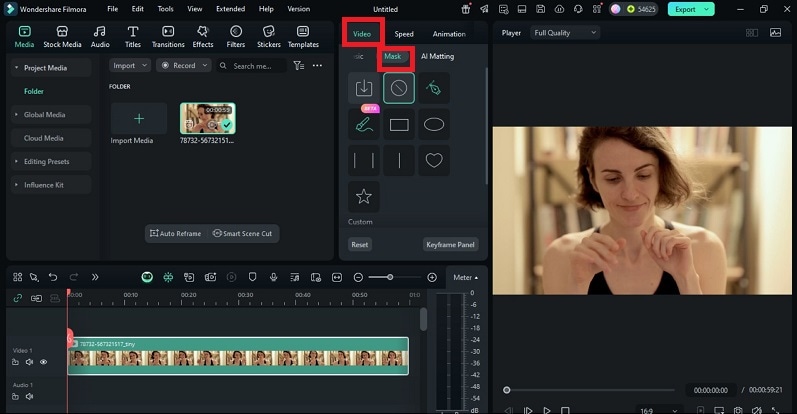
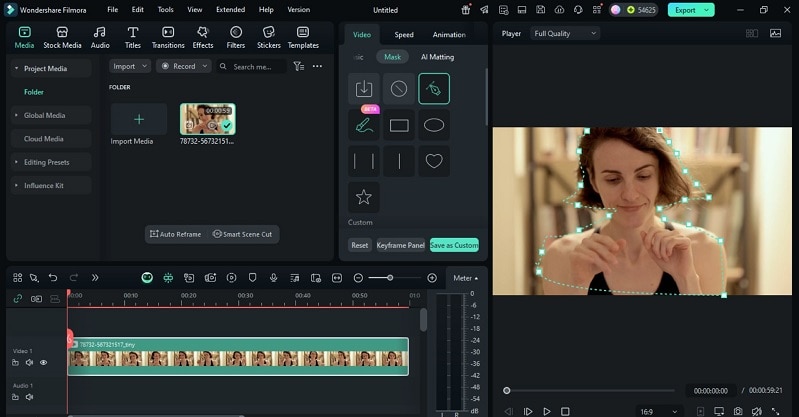
Step 1: Open the Mask Tab
Click on the video clip from your timeline to access the editing panel. Switch to the Mask tab, where you'll find standard shapes such as circles, rectangles, lines, stars, and hearts. You can also design your own mask for greater creative control.
 secure download
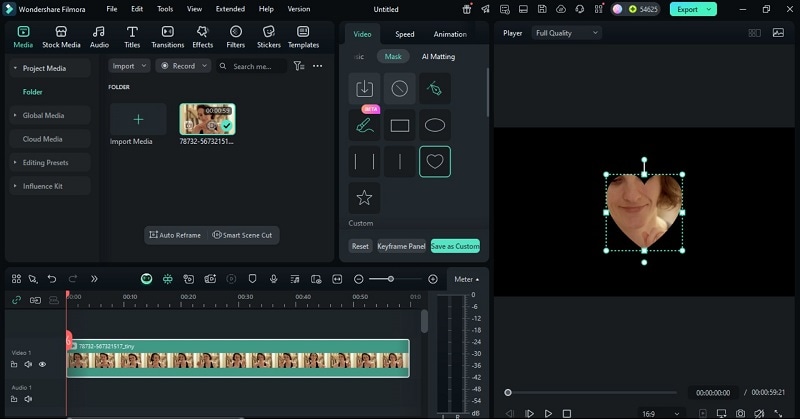
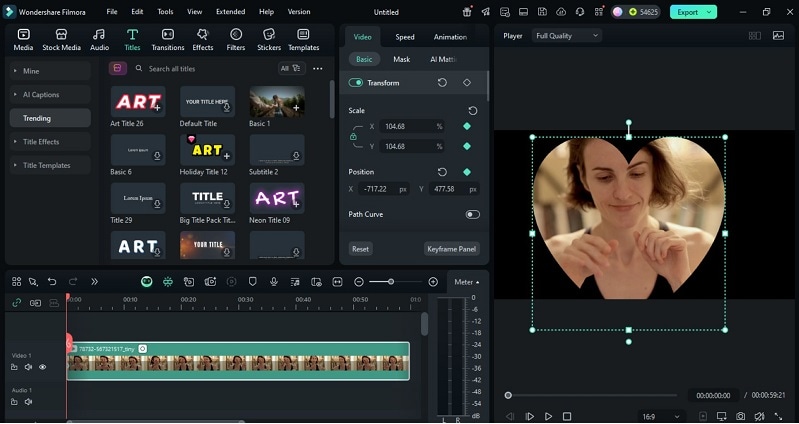
Step 2: Apply a Preset Shape Mask
Click any mask shape to apply it instantly. The area inside the shape remains visible, while everything outside becomes hidden in the preview window. This quick method is perfect for creating focus or hiding background details.
Step 3: Draw a Custom Mask
Use the Draw Mask feature to outline shapes freely. Add points, curve the edges, and adjust precision by zooming in on the preview screen. Hold the Alt/Option key to refine curves and create smooth lines. Once done, you can save your custom mask as a preset for later use.
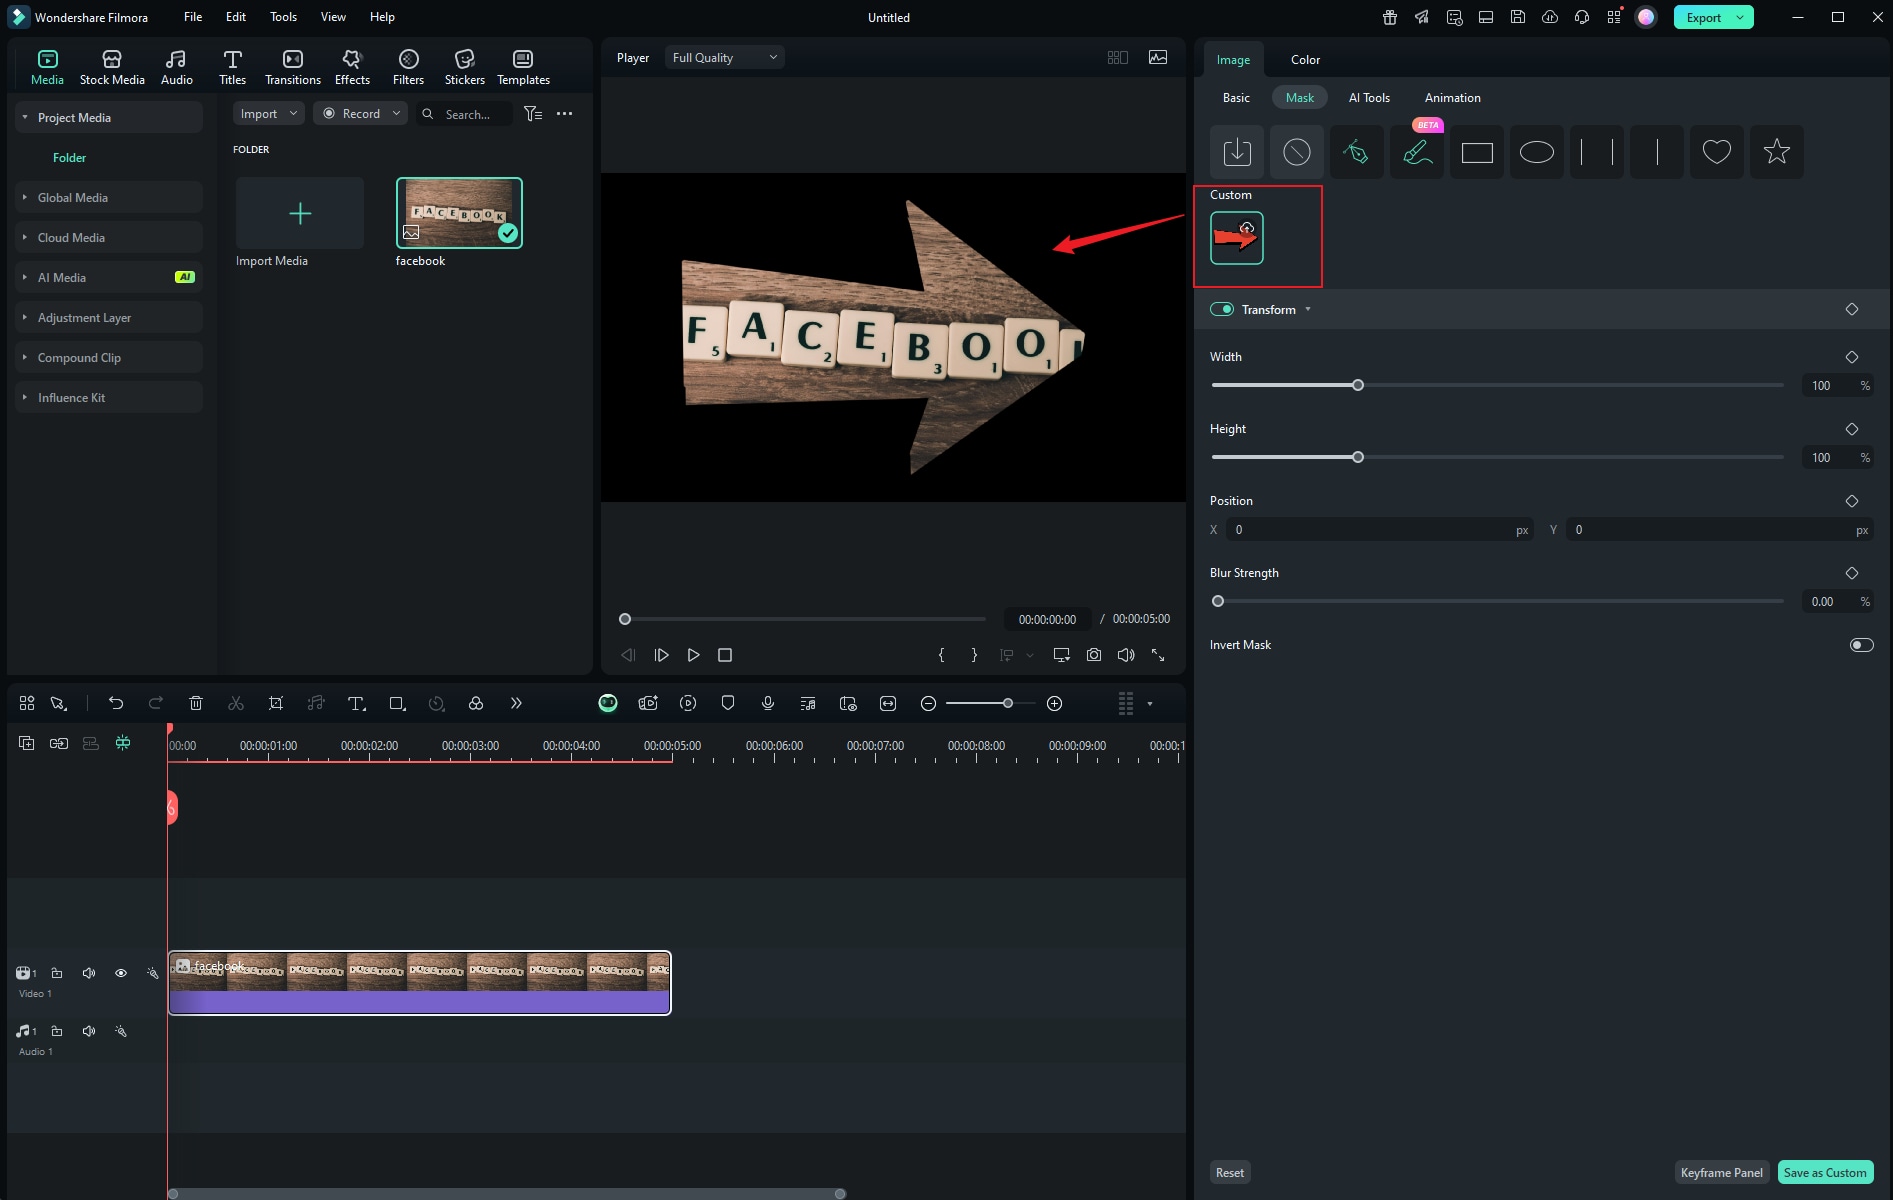
Step 4: Import Custom Shapes
If you like premade designs, import an alpha-channel PNG of arrows, triangles or geometric outlines. Filmora will then automatically turn the outline of the image over into a mask that you are allowed to customize by resizing, moving, and making changes to it.
Step 5: Adjust the Mask
Drag mask handles directly on the preview to modify shape, position, or angle. You can also fine-tune properties using sliders, control rotation, width, height, blur, and scale. The Invert option swaps visible and hidden areas for a reverse effect.
Step 6: Animate the Mask with Keyframes
Move the playhead to a specific frame, click Add Keyframe, then reposition or resize the mask. Add another keyframe later to animate the change. This gives your mask shape Premiere Pro-style motion effects, but with easier control.
Smarter Masking
Filmora's AI Smart Masking uses advanced object recognition to detect people or items in a video automatically. This feature creates precise masks around subjects without requiring manual tracing or Bezier editing. It's ideal for adding blur, color effects, or cinematic spotlights to a specific area, similar to what editors achieve using Premiere Pro masks with shape, but with far less complexity.
Step 1: Open Your Project
Open the newest Filmora and import your videos to the timeline. Choose the clip you want to edit.
secure download
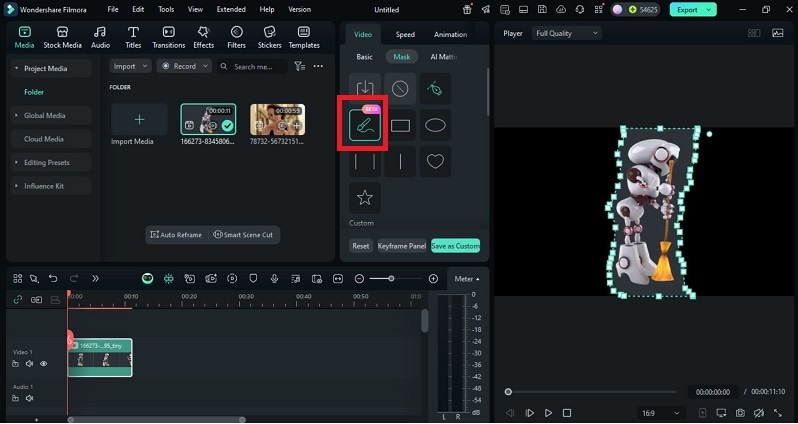
Step 2: Access the AI Mask Tool
Go to the Mask tab in the editing panel. Choose the AI Brush option. Filmora automatically scans the video and identifies the main subject or object.
Step 3: Refine the Selection
If your footage includes multiple subjects, preview the results and pick which one to keep masked. You can fine-tune edges or switch focus areas using simple brush adjustments.
Step 4: Customize the Mask Settings
Open the AI Mask Panel to modify the mask's shape and smoothness.
- Use Extend to increase or reduce the mask's coverage.
- Adjust Blur Strength to soften edges.
- Control Opacity to change visibility.
- To follow movement, click Path and enable tracking.

Step 5: Apply Visual Effects
After applying the mask, you can still add the color grading (as well as blur or spotlight effects) inside/outside your newly created area. This technique keeps attention on your main subject and creates cinematic focus.
Step 6: Export the Video
Once you've previewed your results, complete the project and export in any format. The entire process offers precise results that mirror the effect of a mask with the shape Premiere Pro workflow, but faster and easier.
Part 4: Filmora VS Premiere Pro Masking & Blending
When it comes to shape masking and blending, there are different options available in both Wondershare Filmora and Adobe Premiere Pro. A fact-based comparison of the key aspects below can help you understand which one suits your workflow best.
|
Feature |
Premiere Pro |
Filmora |
|
Mask & Shape Support |
Allows ellipse, rectangle, free-draw (Bezier), and compound masks per effect. You can apply masks to almost any effect or property. |
Offers basic shape masks, freehand (Draw Mask), and AI-powered masking with object detection. |
|
Blending & Composite Modes |
Rich blending modes (Normal, Multiply, Overlay, etc.) via the Opacity/Blend mode setting. |
More limited blending options compared to Premiere. Filmora's blending is simpler for overlaying mask effects and transitions. |
|
Automation & AI Assistance |
Object masking mostly manual, though newer beta versions now include object mask options. |
Strong AI features: AI Smart Masking, object detection, and automatic mask generation. |
|
Mask Tracking & Motion |
Advanced mask tracking (track forward, backward), keyframing mask paths, and inverting masks. Highly flexible motion control. |
Supports motion tracking for masks and integration with Mocha for planar tracking (advanced). |
|
Ease of Use / Learning Curve |
Powerful but steep learning curve, especially with blending logic, nested masks, and complex scenes. |
More intuitive, user-friendly interface with fewer technical barriers. Better for users who want results quickly. |
|
Limitations |
Complexity can become slow in large projects with many masks and blend modes. Requires strong system resources. |
Less precision in extremely fine mask control, blending options are more basic than Premiere. |
|
Ideal Use Cases |
Professional editing, complex compositing, film and broadcast work, detailed masking + blending. |
Fast creative projects, YouTube, social video editing, where ease and speed matter. |
Conclusion:
The power of Premiere Pro mask with shape lies in how it transforms editing into visual storytelling. Each curve, feather, and transition adds structure and emotion to a frame. Yet creativity thrives when precision meets simplicity.
Filmora offers that balance, turning complex masking steps into intuitive movements guided by AI and clean design. The contrast between these tools isn't competition but evolution: one builds mastery through control, the other through speed and freedom.
Learning both expands every creator's visual vocabulary and makes every use of a mask with shape Premiere Pro a deliberate act of cinematic intent.
secure download
