
 100% Security Verified | No Subscription Required | No Malware


 ChatGPT
 Perplexity
 Gemini
 Claude
 Grok
Grok
You might need different elements to make the video engaging and interesting if you are a visual content creator or a video editor. A text animation helps users in capturing the attention of audiences for videos like tutorials or introductory clips.
However, you can use tools like Adobe After Effects if you are unaware of how to add those animations. This professional tool provides various features for users to edit videos and add different elements to them. In this article, we will discuss different methods for text bounce expression After Effects.
In this article
Part 1. How to Create Bouncing Text in After Effects
Adobe After Effects provides two unique methods to add text animation to your videos. Let us explore them to make the text in our video more compelling:
Method 1. Create Bouncing Text in After Effects using Animator
- With this method, you can create customizable text motion without relying on complex techniques. Users get the ability to make the text move in continuous motions without any disruption with the help of adjusting the properties like position and scale. It is ideal for creating titles and intros that need engaging and playful movements. Read the steps mentioned below to learn how to make text bounce in After Effects:
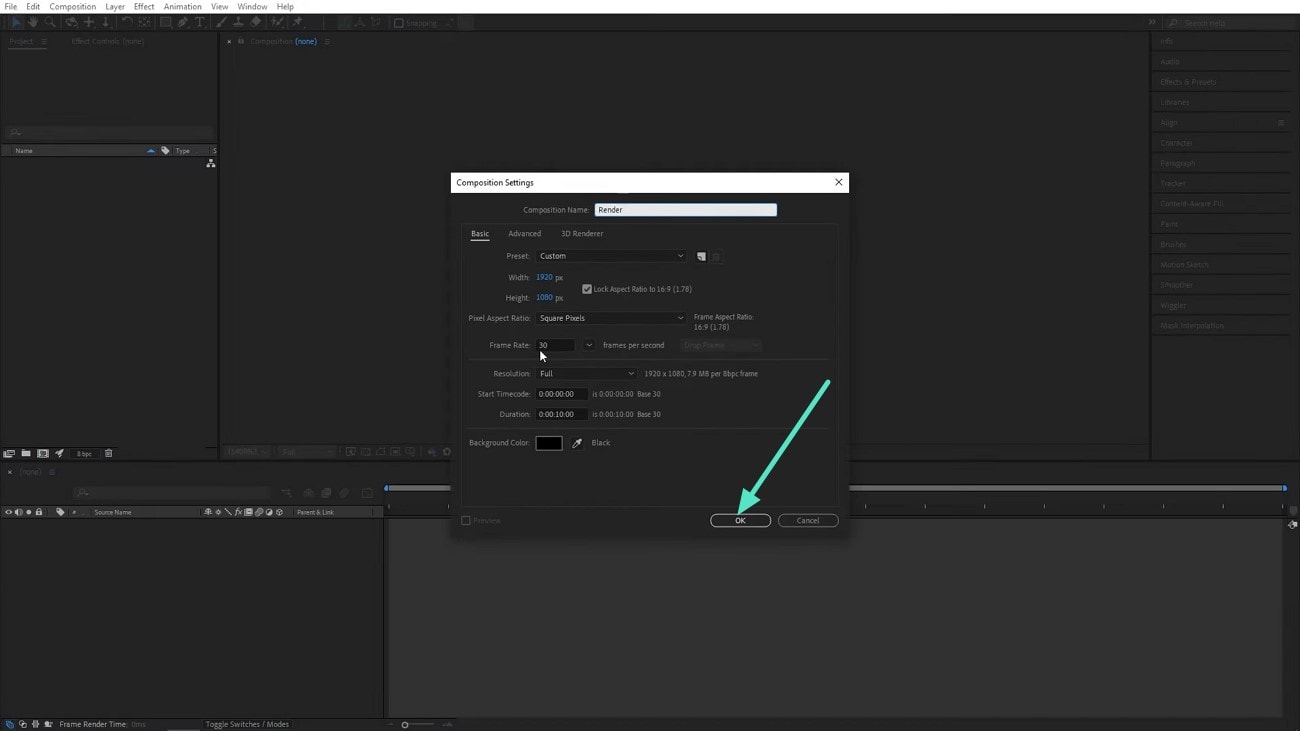
- Step 1. To begin the process, launch the tool on your device and create a new composition. Give a name to the composition and press the "OK" button to proceed。
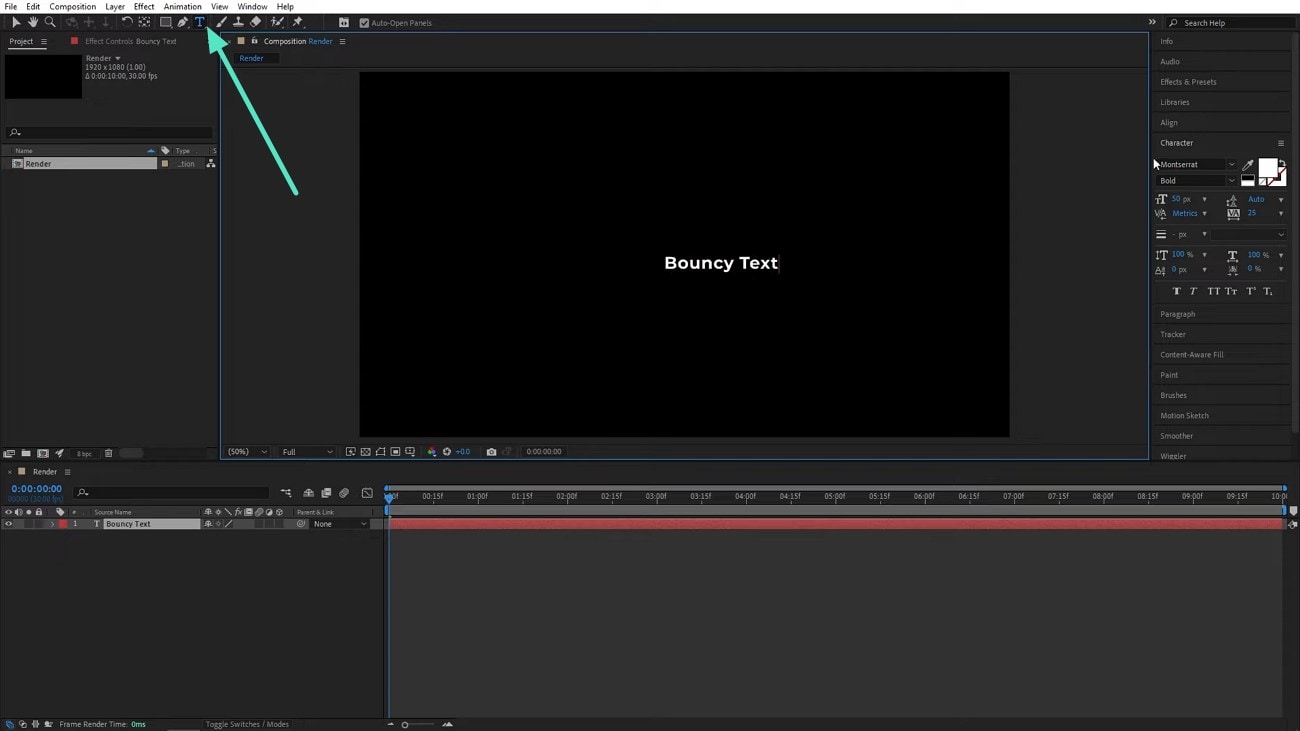
- Step 2. Next, head to the toolbar on the top left corner and click on the "Text" icon to enable the text option. Place the cursor within the preview window and type in your text using the keyboard。
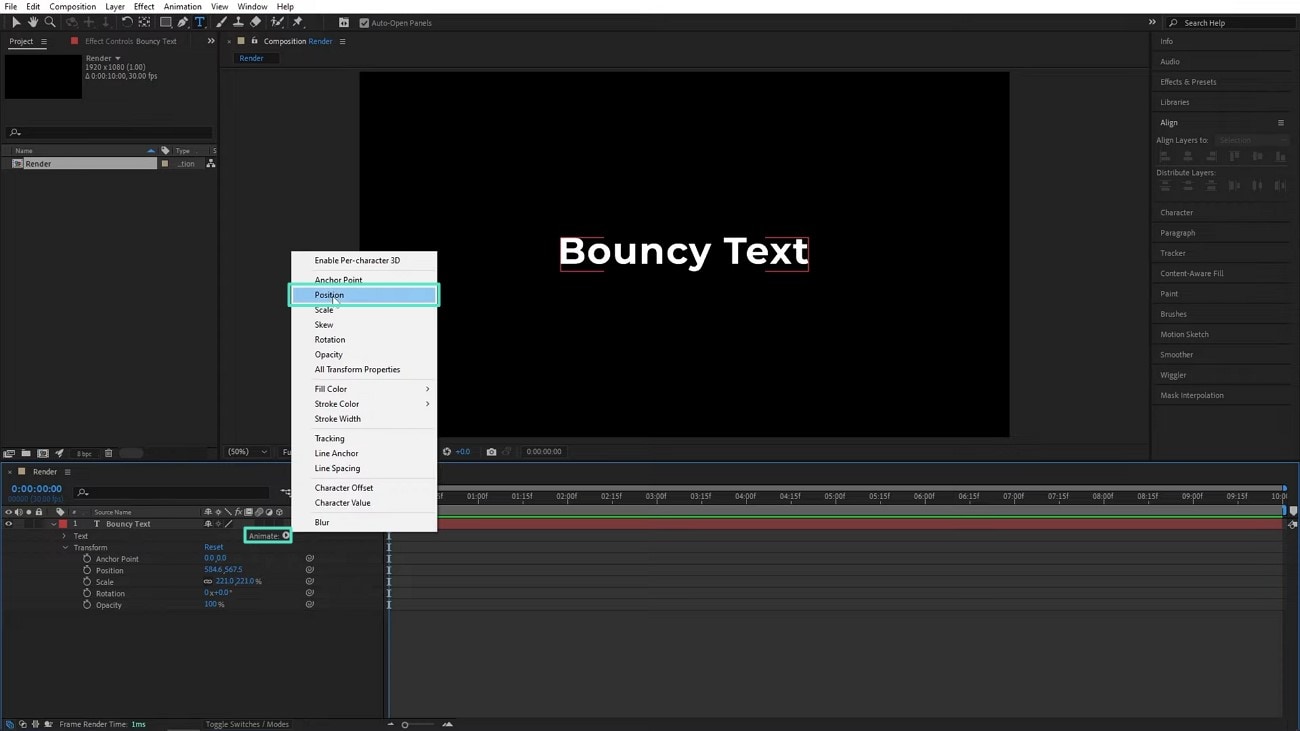
- Step 3. Once the text is added to the video, head to the small sub-window at the bottom left corner and click on the small "Arrow" icon located next to the "Animate" option. Now, choose the "Position" option from the expanded list to enable the text position settings。
- Step 4. Adjust the "Position" and "Scale" by modifying their numbers according to the positions you want to set for the animation。
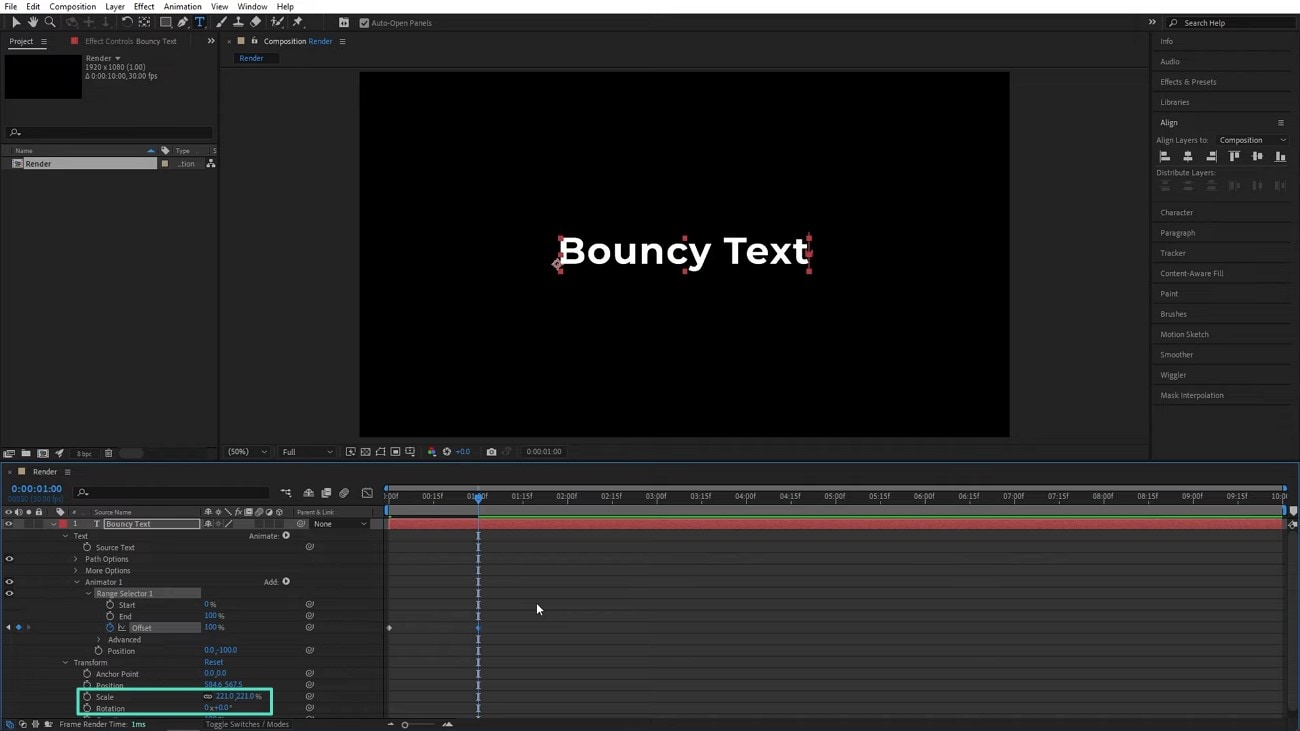
- Step 5. Expand the "Animator 1" and choose the "Offset" option to "Ramp Down" to make the text bounce up and down。

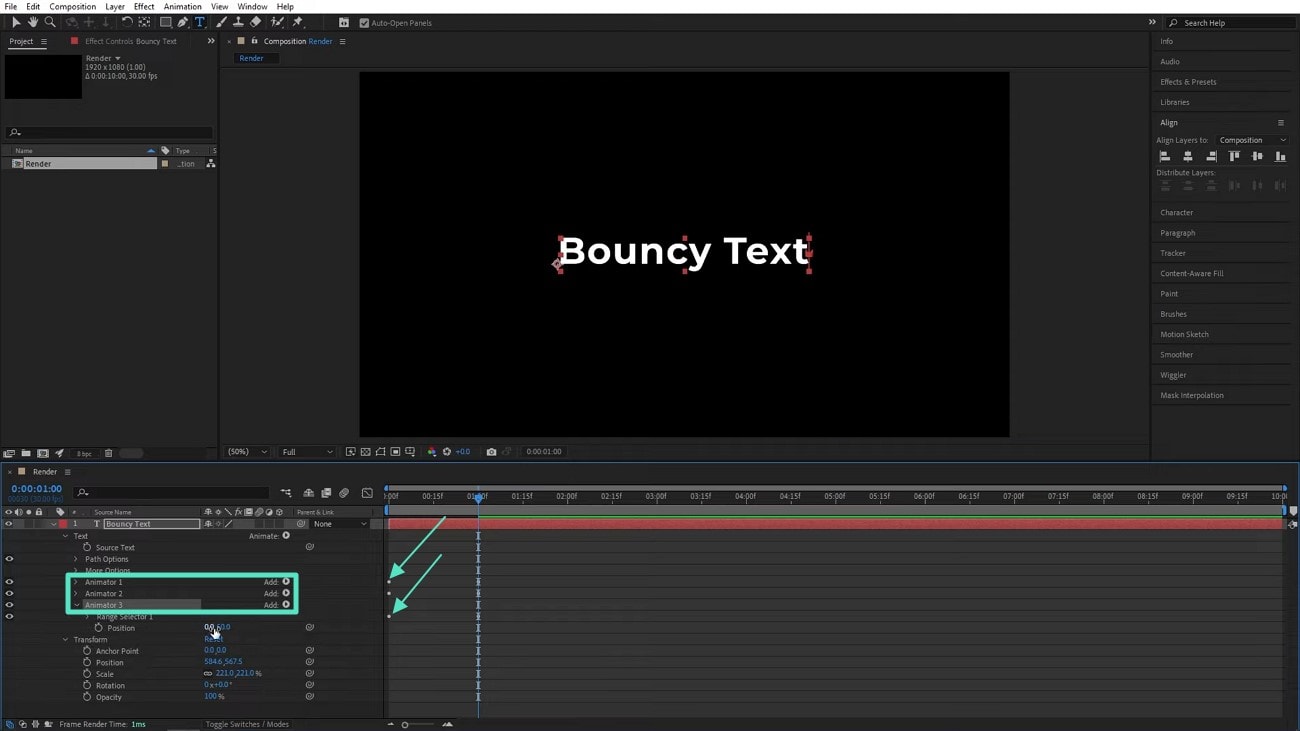
- Step 6. Next, create multiple "Animators" by clicking the "Control + D" keys to add multiple key frames. Change and modify the position of each keyframe and click on the text to make it bounce。
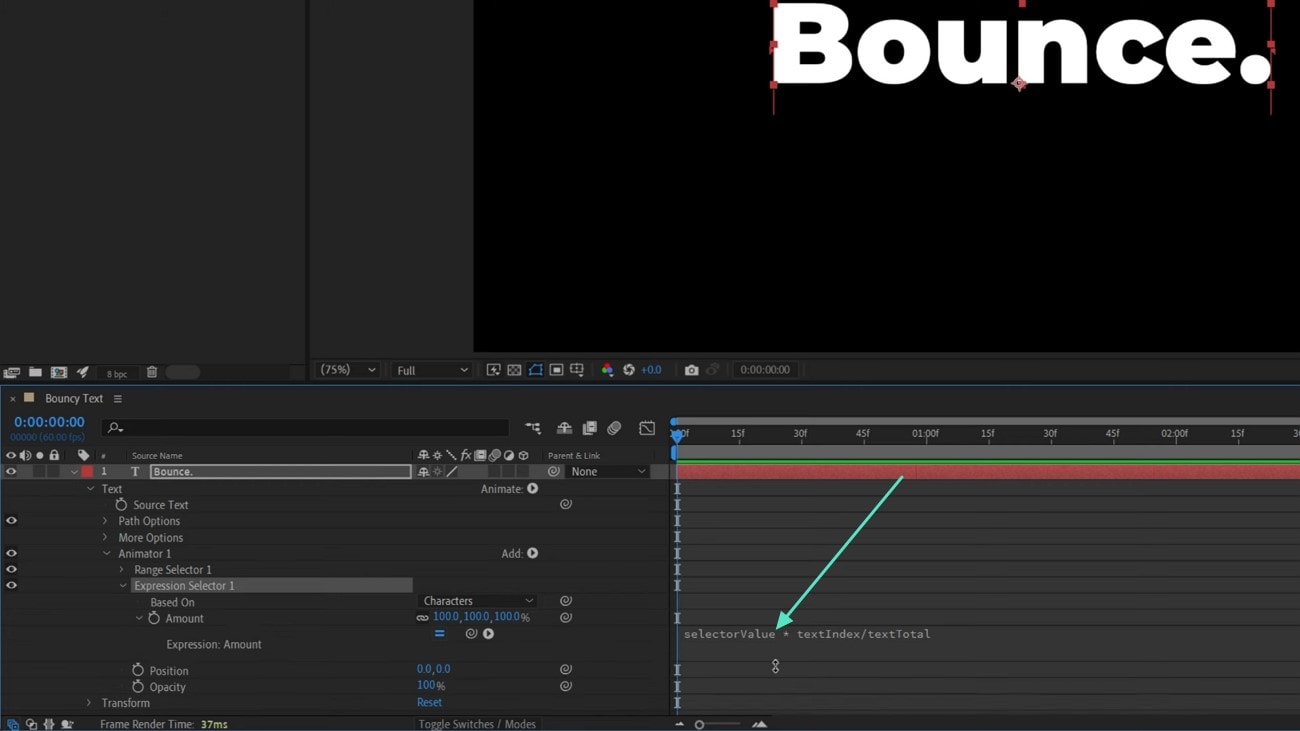
Method 2. Create Bouncing Text in After Effects using Expressions
If you want to achieve realistic text motions with minimal keyframes, you can use this technique. This method is ideal for designers seeking flexibility and consistency. It allows users to easily adjust the bounce intensity and frequency for polished motion graphics. A step-by-step guide on how to use the After Effects text bounce expression is provided below:
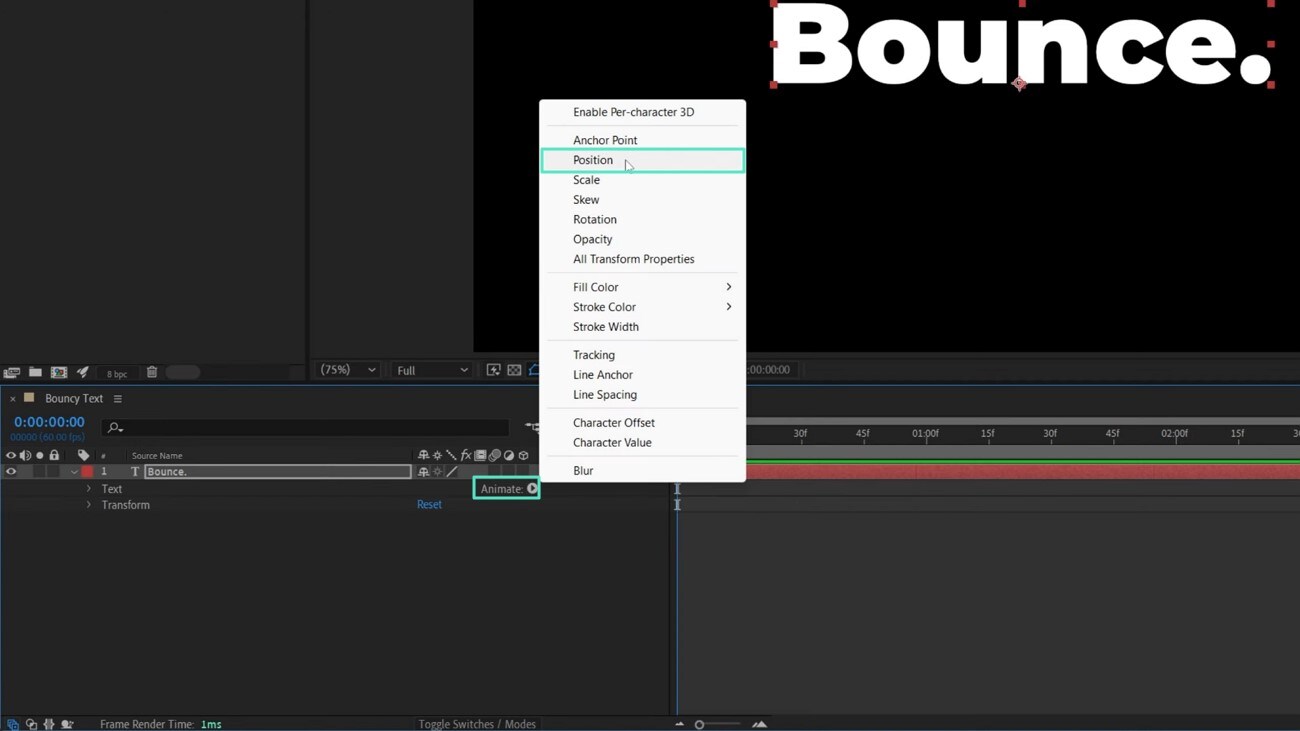
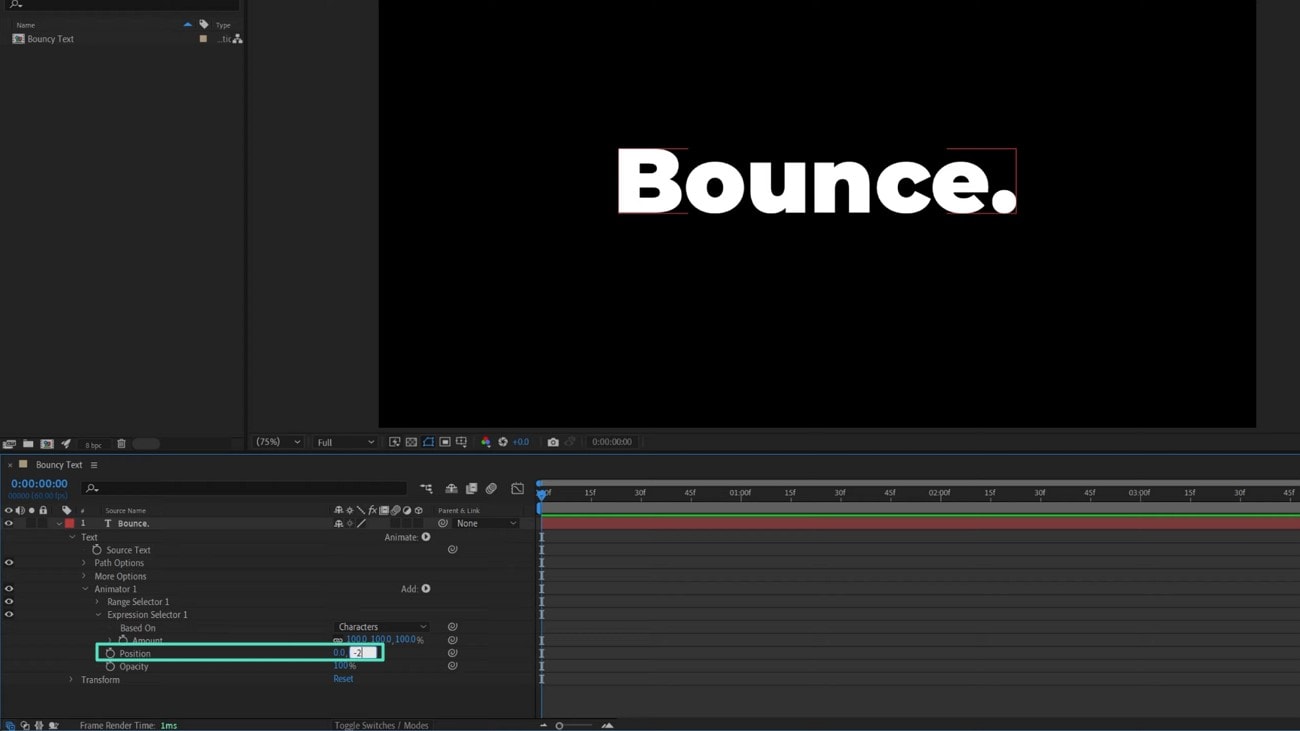
- Step 1. After you have created a new composition within the tool and added the text, head to the sub window at the bottom and click on the small "Arrow" next to Animate. This will enable a list of options from which you click on the "Position" option. Now, set the position of the text by adjusting the numbers。
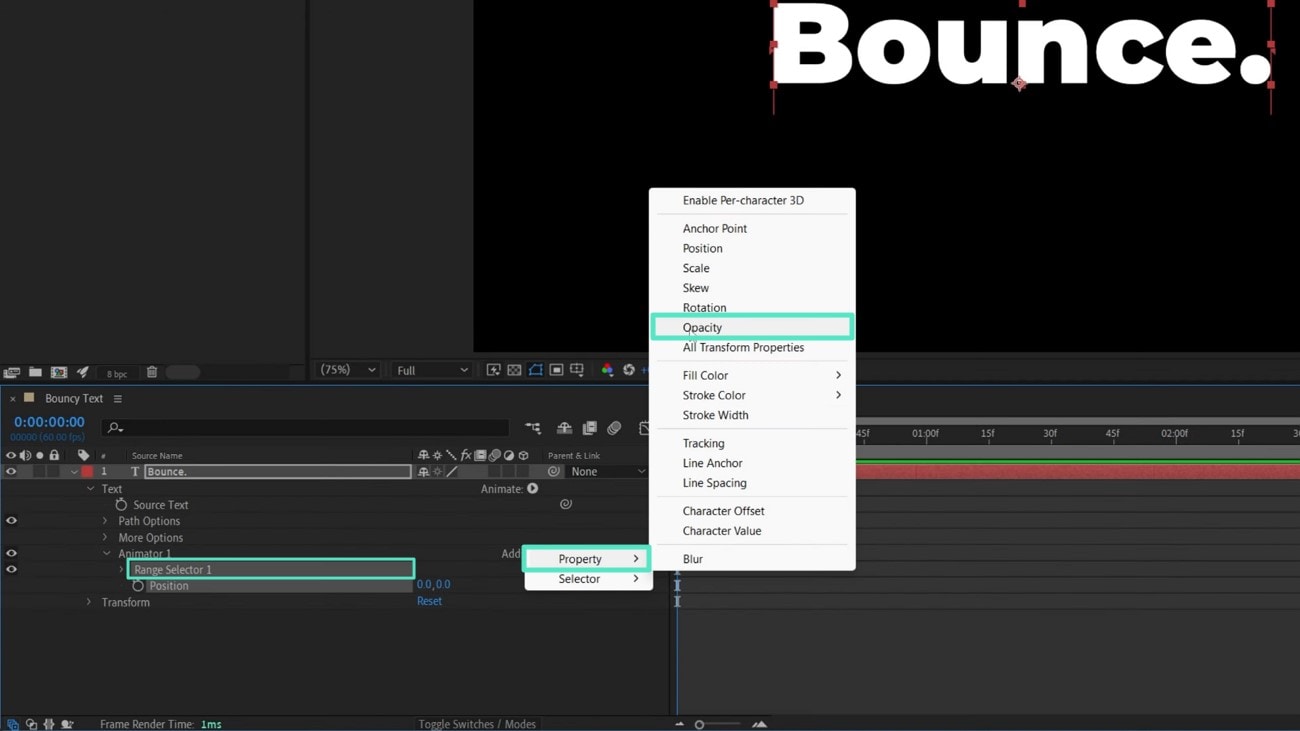
- Step 2. Moving forward, click on the "Range Selector" option and press "Property." Next, choose the "Opacity" option by clicking on it。
- Step 3. Now, expand the panel on the bottom to paste the "Expression" code to add a bouncy text effect. Once added, the text will be animated according to your preferences。
- Step 4. To change the position of the bounce, click on the "Position" option and adjust its number as per the requirements. Once it's done, the text will start bouncing in your specified animation。
Part 2. Create Bouncing Text Animation with Filmora
As per the above discussion, we can understand that the creating bouncing text can be complicate with Adobe After Effects. However, there are tools like Wondershare Filmora that allow users to add bouncy effects to the text added to their videos. Moreover, users can save that animated text as GIFs, expanding their shareability for multiple platforms. Users get to add text animations using their smartphone with the dedicated Filmora App [iOS/Android].
The desktop version of Filmora enables users to provide various text animations and modifications, like changing the text path. Furthermore, the platform allows users to add other dynamic effects to animate the text in a video.
Comprehensive Guide for Creating Bouncy Text Animations with Filmora
As discussed, Filmora offers extensive functionalities for adding and editing text animations with an easy-to-use interface. To learn how to add After Effects bounce text with Filmora, read the steps mentioned below:
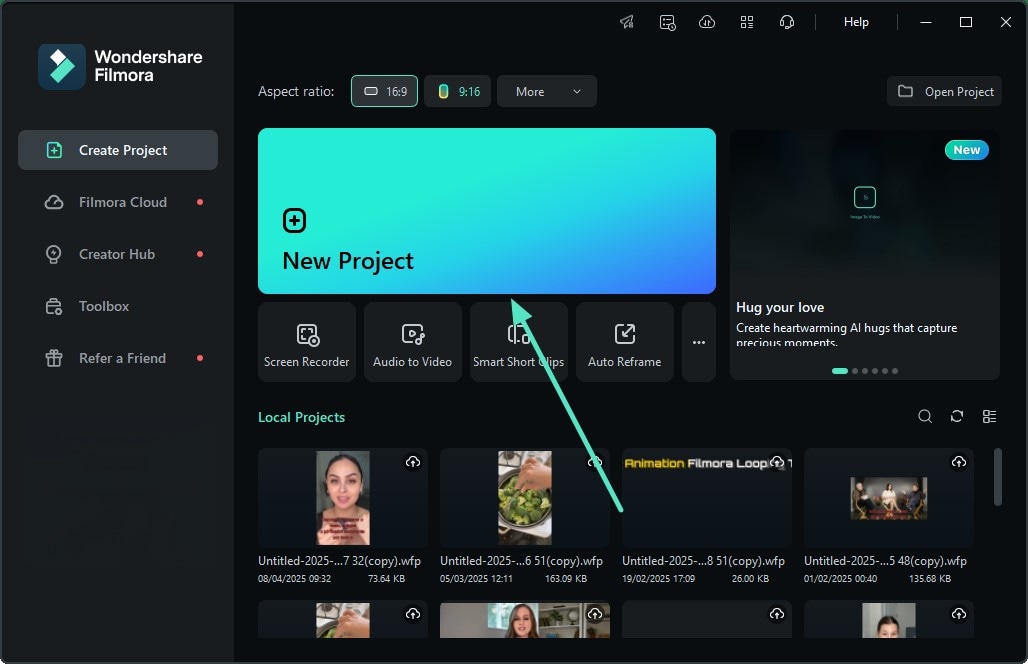
- Step 1. Create a New Project. To begin the process, launch Filmora on your desktop and press the "New Project" option located on the homepage。
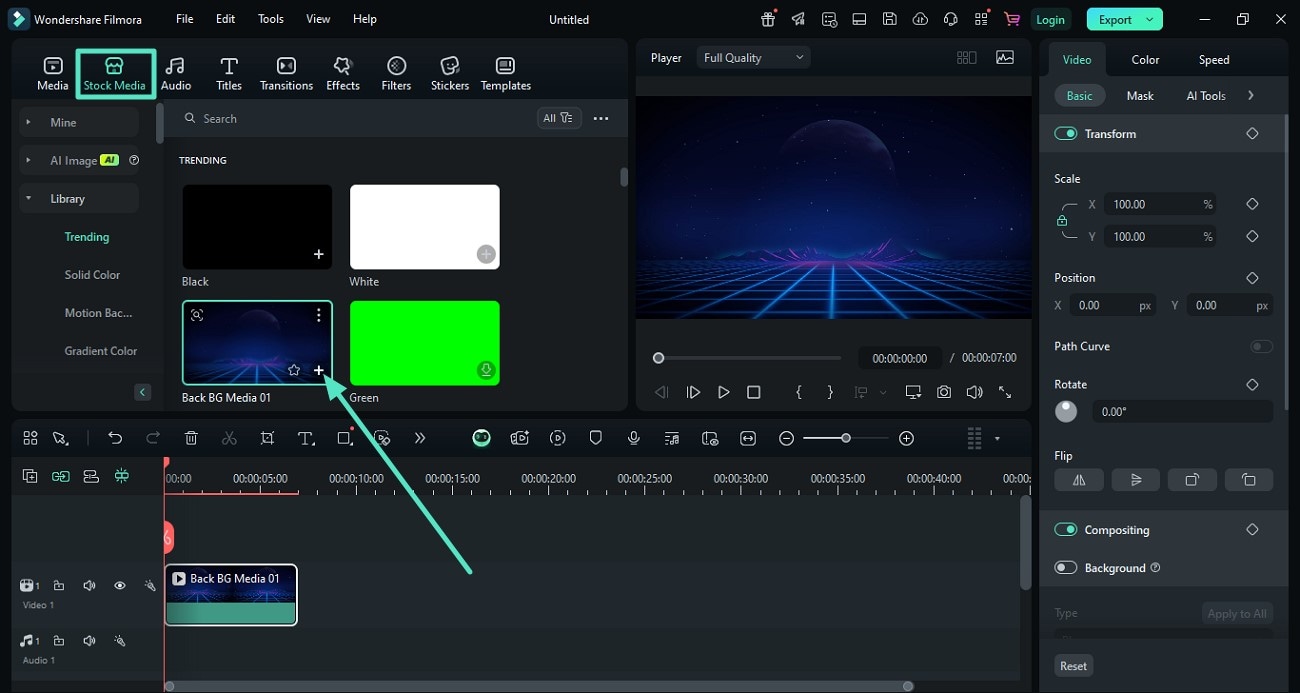
- Step 2. Insert a Background for Text. Head to the "Stock Media" section from the toolbar to access the library after entering the editing interface of the tool. Then, choose the background from the library and add it to the timeline by clicking on the "+" icon。
- Step 3. Add Text for Bouncing. Moving forward, click on the "Titles" section from the toolbar and expand the "Titles Effect" on the left. Now, choose the text template of your choice and click on the + icon to turn it on. Next, head to the "Text" panel on the right side and type in the text you want to add。
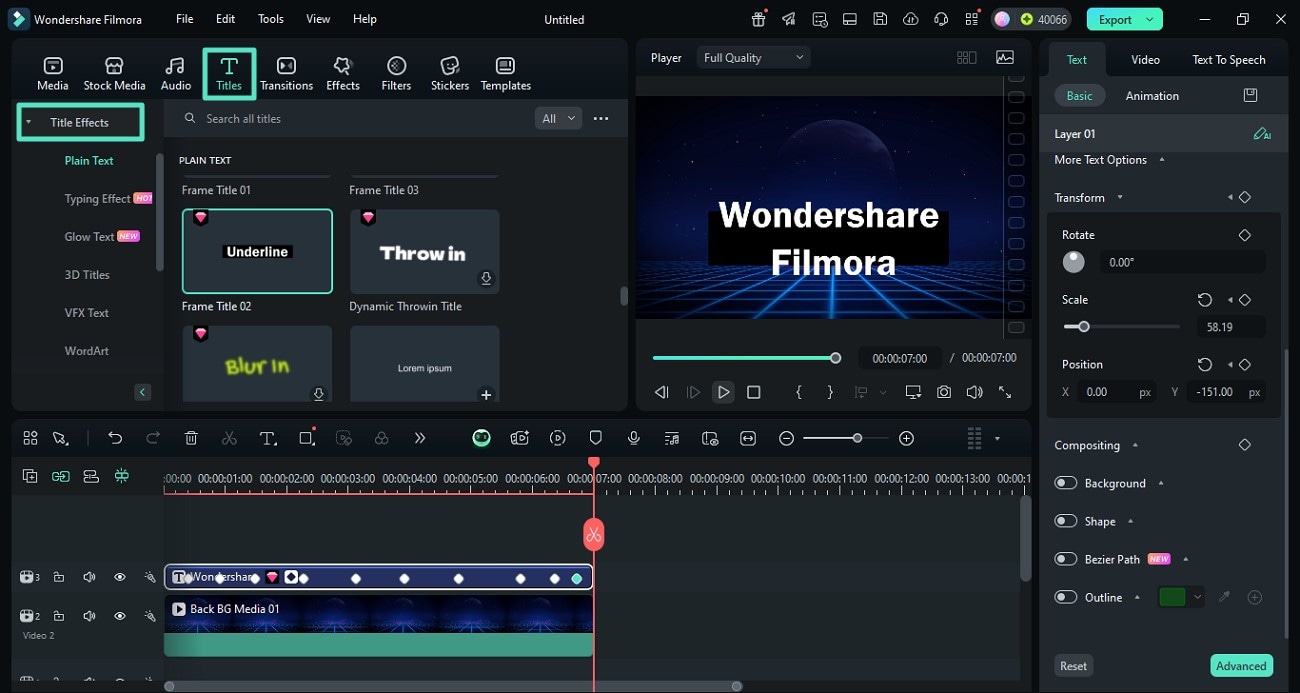
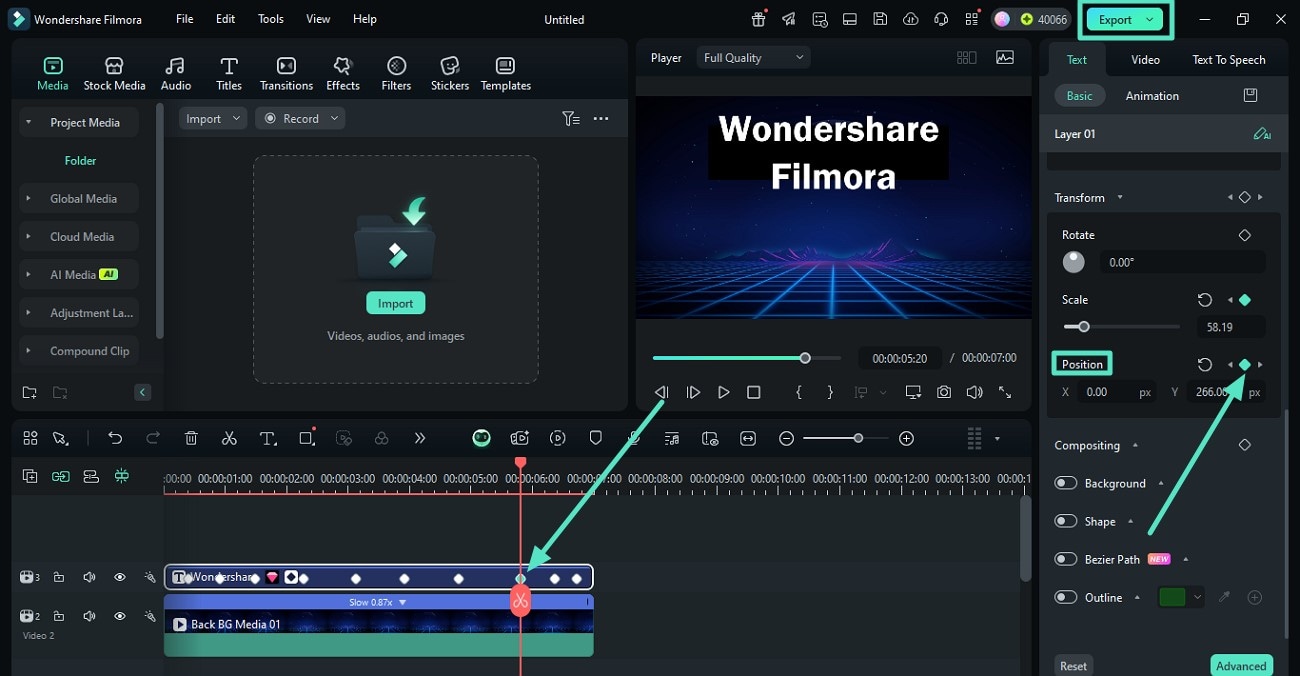
- Step 4. Create Text Animation Path. Access the "Position" option and enable keyframe by clicking on the small circle next to it within the same panel. Head to the text track at the timeline and add multiple keyframes to create a path. Now, change the "Position" from the right panel while moving to each keyframe to create an up and down effect. Head to the top-right corner of the interface and press the "Export" button to save the video when the bounce is created。
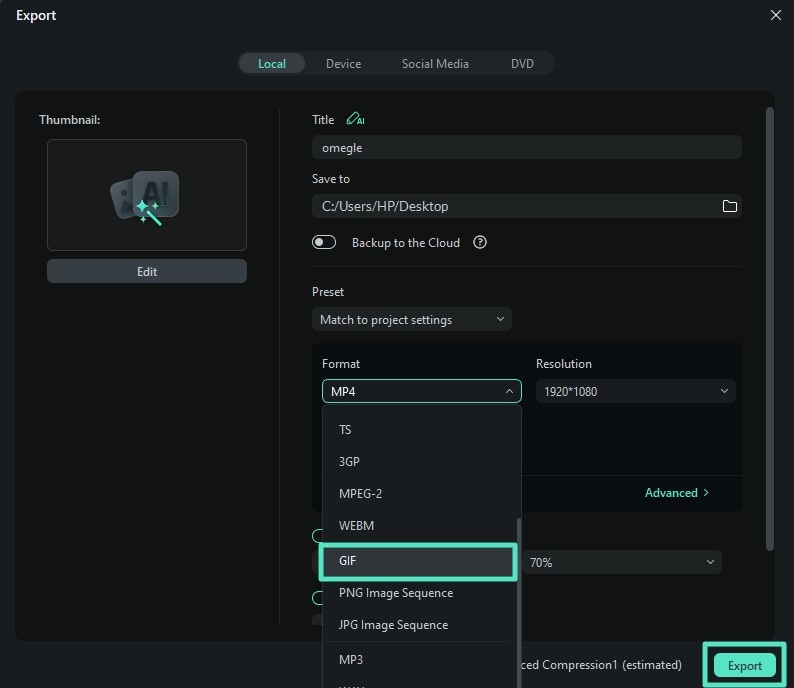
- Step 5. Export Animation as GIF. In the following export window, select the format as "GIF" by expanding its list. Finally, export the GIF to your PC using the "Export" button。
 secure download

Detailed Steps to Create Text Animation Using Filmora App
This efficient app allows users to apply animation to the added text. Follow the step-by-step guide provided below on how to add bouncy text in After Effects using this application:
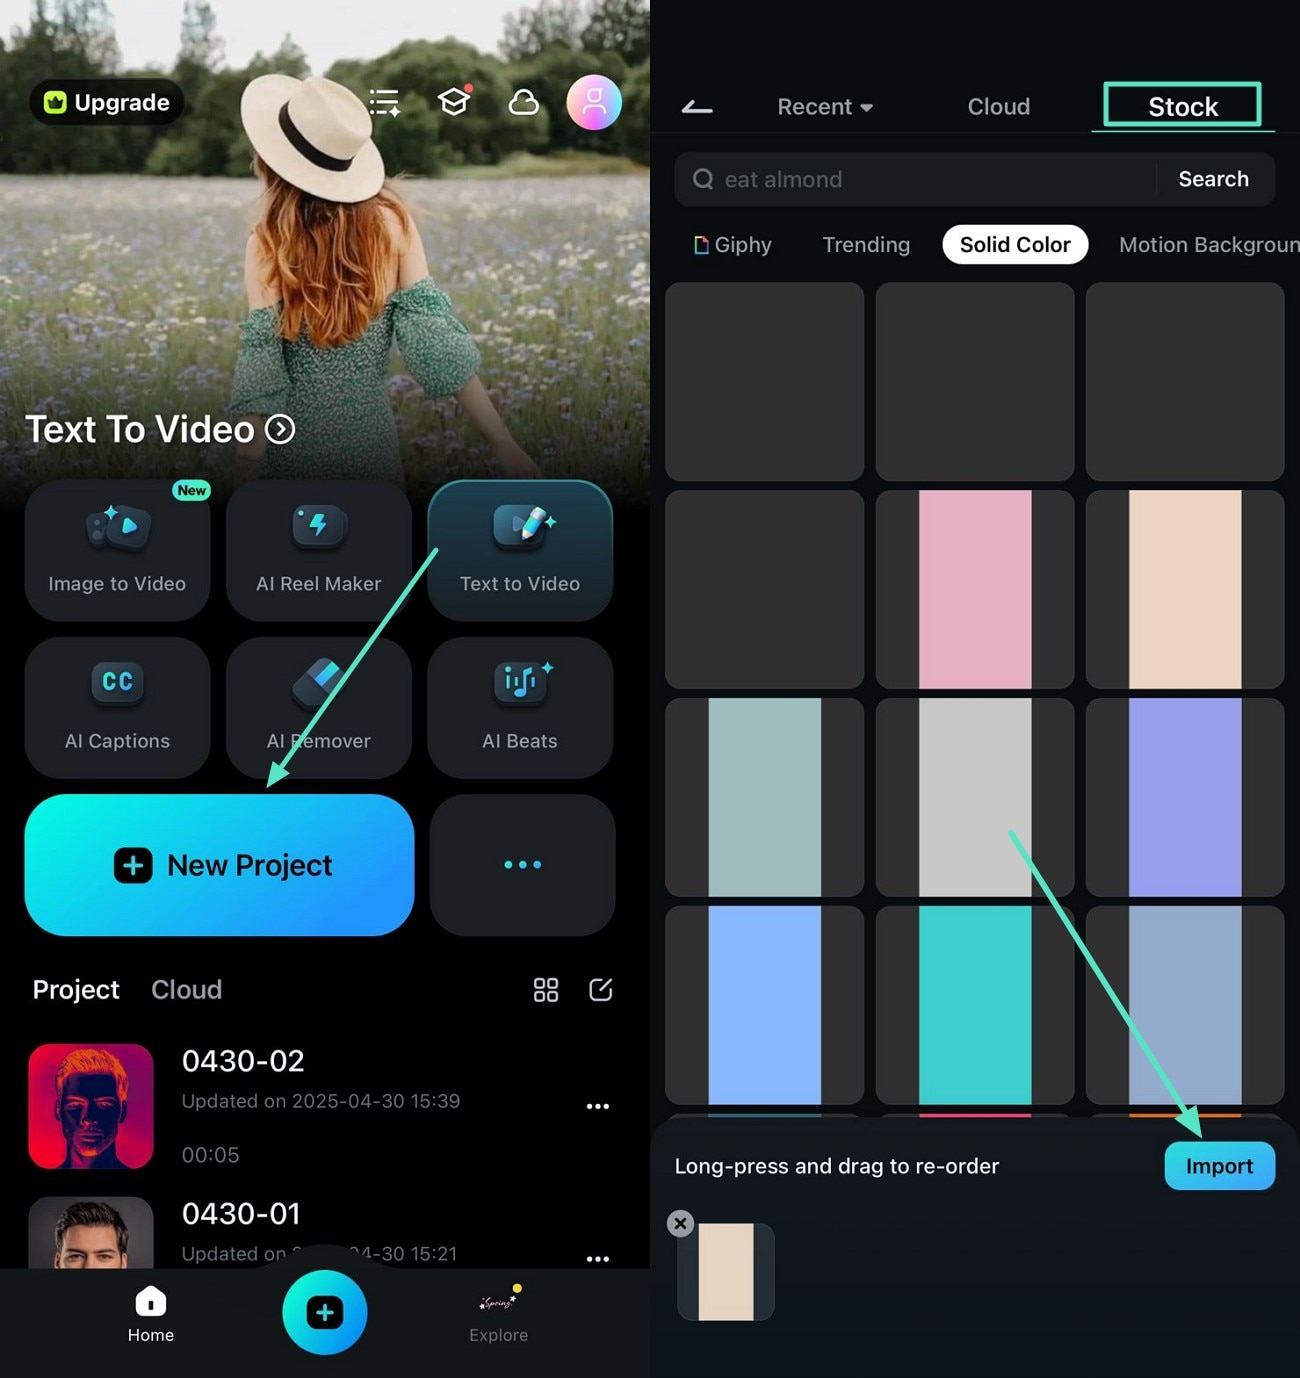
- Step 1. Select New Project and Add Background. Tap on the "New Project" option from the homepage after launching the application on your phone. Next, head to the "Stock" section and choose the background of your choice from the options provided. Use the "Import" button to add the selected background to the app's interface。
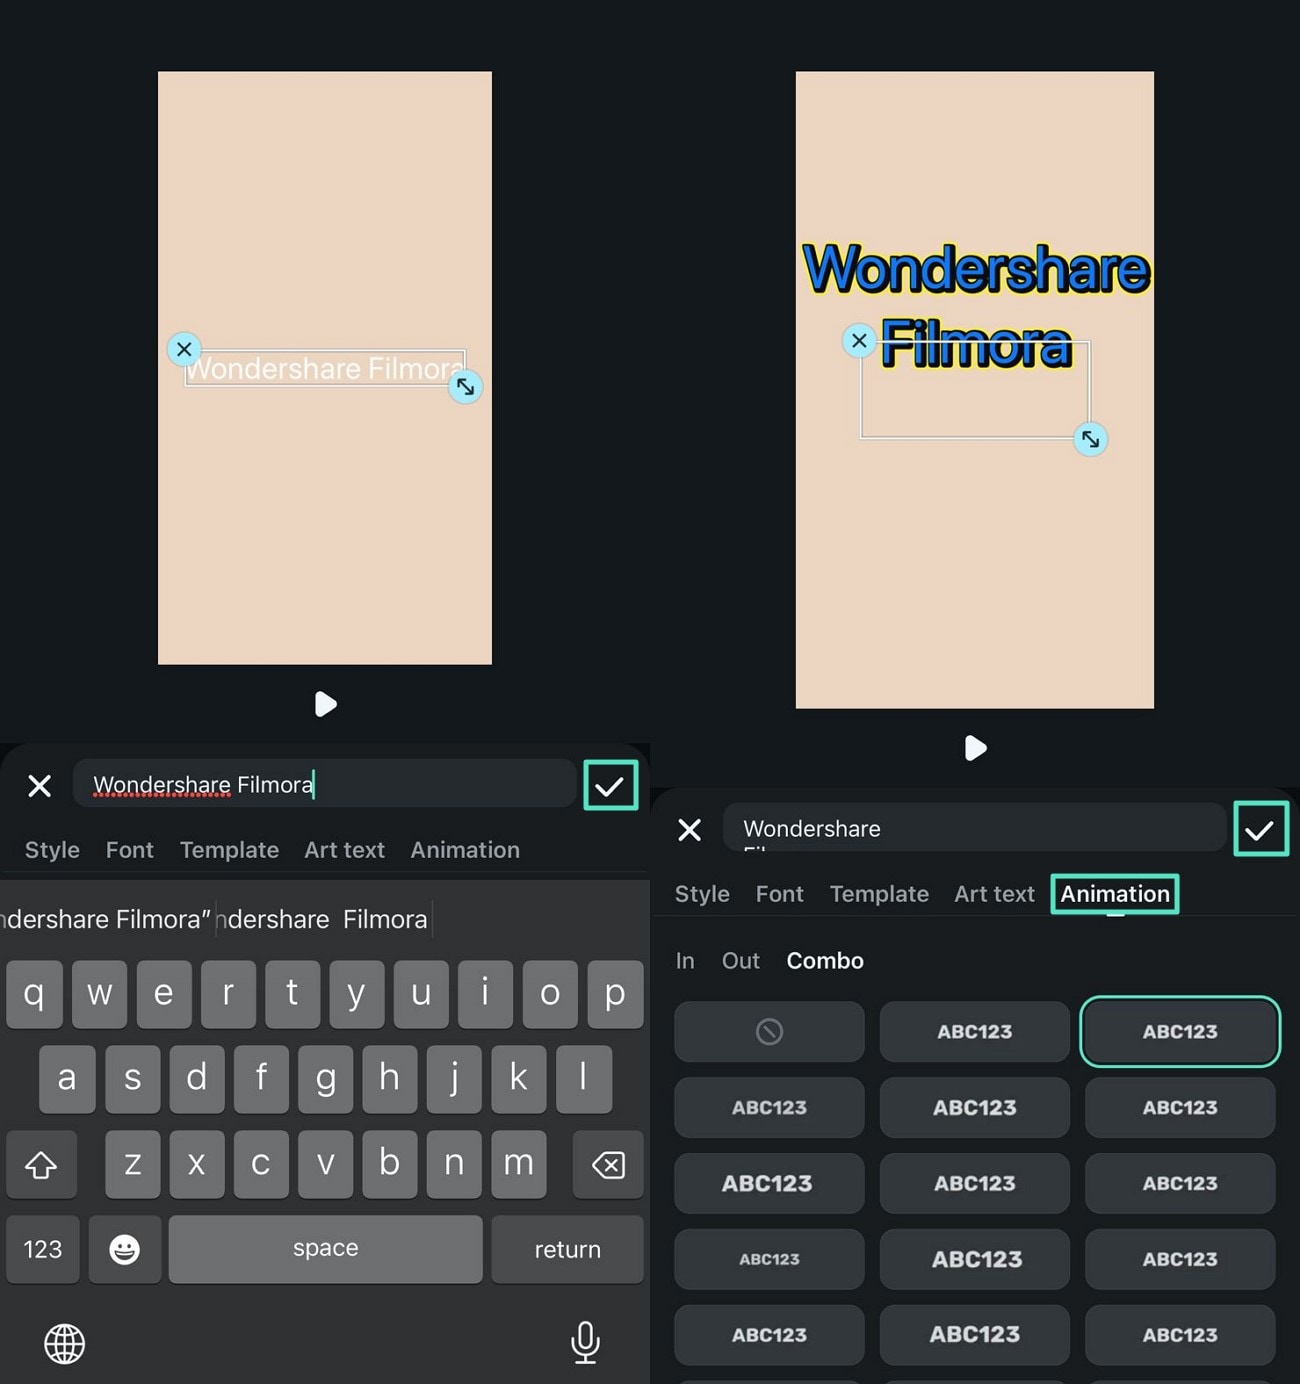
- Step 2. Select Text Option and Apply it. Press the "Text" icon in the following interface by tapping on the toolbar located at the bottom. Now, select the "Add Text" icon from the bottom to input text within the preview window。

- Step 3. Type in the Text and Add Animation. Now, type the text using the phone's keyboard and tap on the "Tick" to include it. Next, choose the style for the text from the presets library to stylize it. Next, head to the "Animation" section and apply the bounce effect to the text using the small "Tick" located on the right。
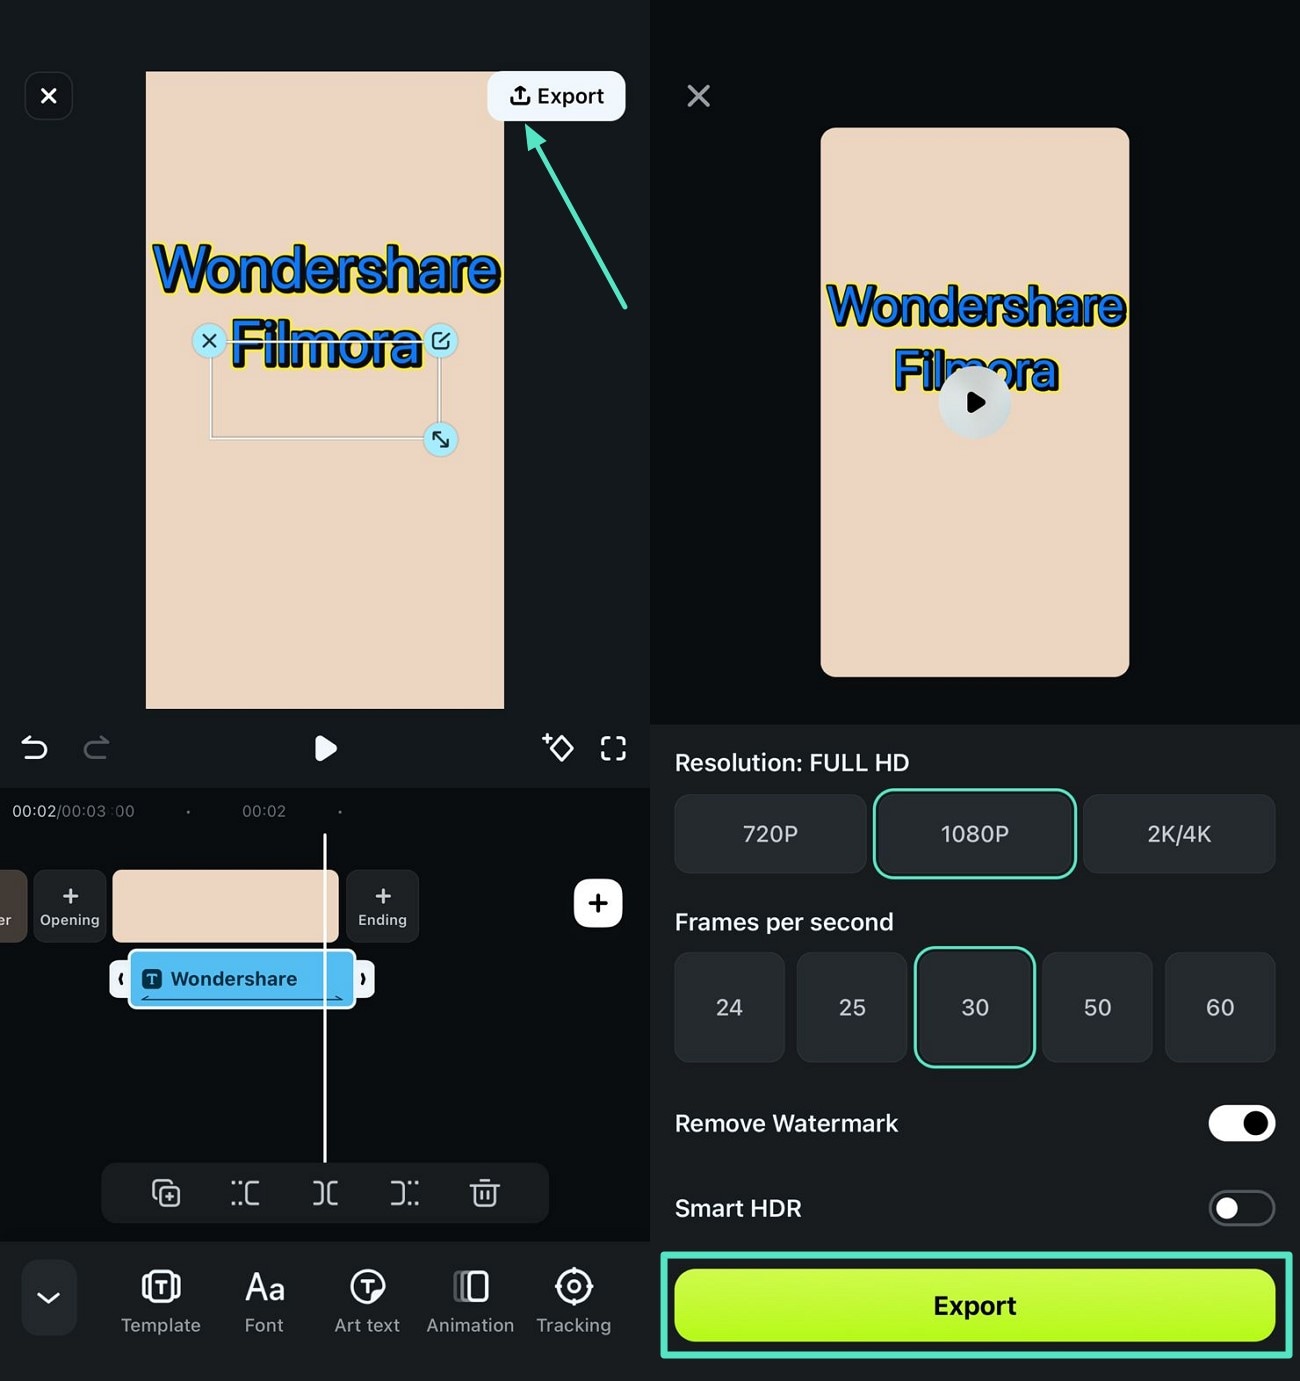
- Step 4. Configure Export Settings and Export. Press the "Export" button from the top-right corner of the Filmora App's interface. Finally, choose resolution and other settings, and hit the "Export" button to save the animated text video to your smartphone。
secure download
Conclusion
To sum it up, this article discussed some of the top methods for creating text bounce expressions in After Effects. The article also suggested Wondershare Filmora as a more reliable solution for generating bouncing effects. Filmora allows users to create a text path to generate a bounce as per their preferences. Moreover, you can also use the Filmora App to generate text animation right from your smartphone.
