You may have experienced a situation when you're ready to relax and enjoy your favorite Netflix show, but suddenly, the audio and video are out of sync. Maybe the dialogue doesn’t match the characters’ lips, or the sound is a few seconds ahead of the action.
While it’s super frustrating and can totally ruin the vibe, don’t be too stressed out about it! This problem is actually pretty common. In this article, we’re going to break down why this happens and more importantly, how you can fix it.

In this article
Part 1. Why is Netflix Audio and Video Not Syncing?
If you’ve ever noticed that the audio and video on Netflix aren’t lining up, there could be a few reasons behind it. Knowing these potential causes behind it can help you diagnose and resolve the issue more effectively. They range from network connectivity problems to device settings and even issues with Netflix content itself.
- Network Connection
- Problems with Device Settings
- Outdated Firmware
- Problems with Netflix Content
- Streaming Quality
One common reason is your network connection. Slow internet speeds or a weak connection can cause delays and buffering, which can throw off the sync between the audio and video.
Sometimes, the issue lies in the settings on your TV or streaming device. If your audio settings aren’t correctly configured, it can lead to sync problems. It’s a good idea to check that your settings match the requirements of both your device and the content you’re watching.
Another possible cause is issues with your device’s hardware or software. Outdated firmware, incompatible hardware, or even corrupt files can all contribute to the audio and video falling out of sync.
Sometimes, though, the problem isn’t on your end—it could be with the content itself. Occasionally, a movie or show might have issues that affect audio sync, and these are typically resolved when Netflix updates the content.
Finally, the quality of the video you’re streaming can also be a factor. Streaming high-quality video can sometimes overwhelm your internet connection or device, causing the audio and video to lose sync.
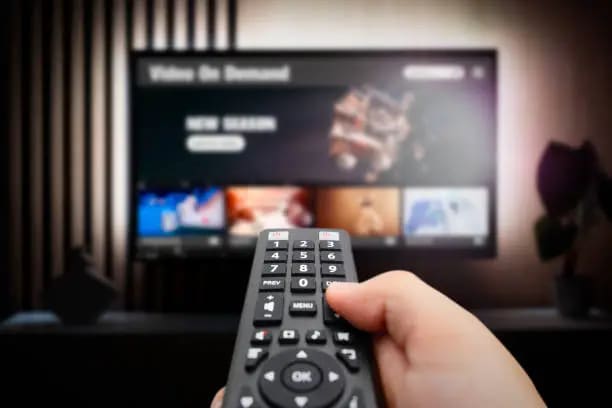
A quick and easy fix that might solve the problem is simply reconnecting your network. However, if the issue persists, you may need to dive a bit deeper into troubleshooting to get things back in sync.
Part 2. How to Fix Netflix Audio and Video Out of Sync on PC
If you’re watching Netflix on PC and dealing with audio and video being out of sync, here are a few simple fixes that might help.
1. Check Your Internet Connection
A slow or unreliable internet connection is often the main reason for video and audio not synced on Netflix. If your connection is being shared by multiple people, it can slow down, causing streaming problems. Netflix needs a minimum speed of 3 Mbps for basic streaming, and 5 to 23 Mbps for HD or Ultra HD.
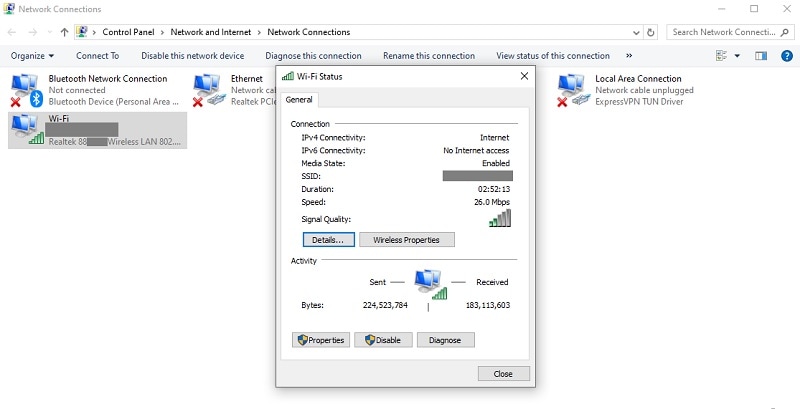
To check your internet speed on your PC, press Win + R to open the Run dialog, type control, and press Enter. In the Control Panel, go to Network and Sharing Center and click Change adapter settings on the left. Double-click your Ethernet or Wi-Fi adapter to open its properties, and then check the connection speed in the Speed field.
2. Try a Different Browser
If your internet connection is solid but the issue persists, try switching to a different browser. Sometimes, your current browser might not handle Netflix well so it leads to the sync issues. For Windows users, Microsoft Edge is the best browser for Netflix as you can enjoy resolutions of up to 4K. For Mac user, it’s recommended to use Safari.
3. Turn Off HD Streaming
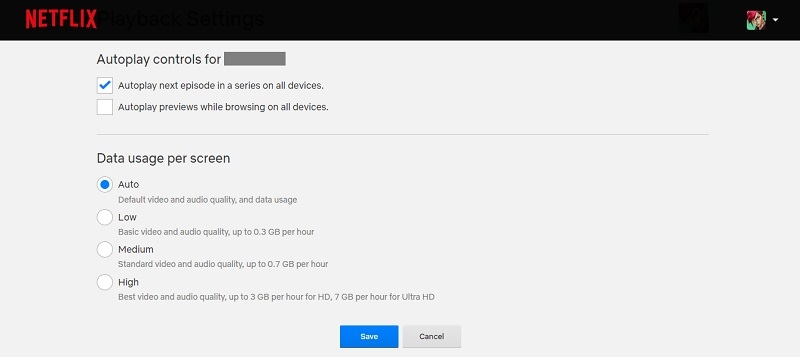
Streaming in HD can eat up a lot of bandwidth, and if your connection can’t keep up, it might cause the Netflix audio and video to fall out of sync. Turning off HD streaming is a quick fix. To do this, go to your Netflix profile, click on "Account" > "Playback Settings" and select a lower streaming quality that helps with the sync issue.
Part 3. How to Fix Netflix Audio and Video Out of Sync on TV
Apart from using a PC, you can watch Netflix on your TV. Watching Netflix on your TV should be a smooth experience, but sometimes the audio can fall out of sync with the video. If that happens, don't worry—there are also a few ways to fix it, depending on the type of TV you’re using.
Fix Netflix Video and Audio Out of Sync on Apple TV
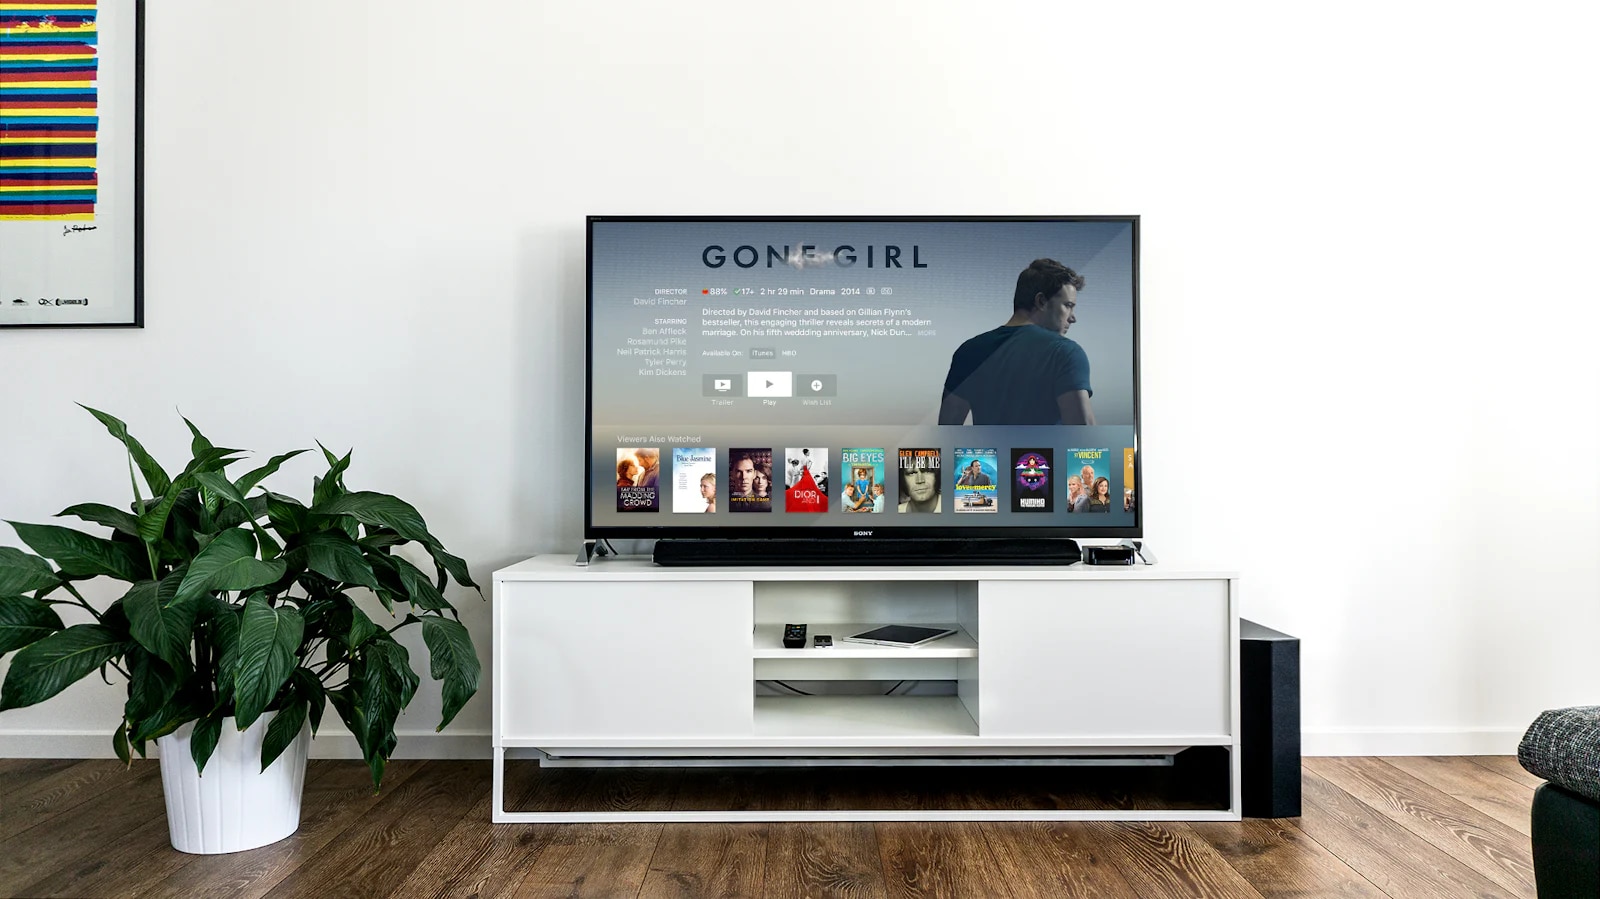
If you’re streaming on Apple TV and the audio isn’t syncing with the video, the issue might be with your device or the content itself. Here are a few steps you can take to fix it:
- Change Your Audio Settings
Start by tweaking your TV’s audio settings. Open the Audio Output on your Apple TV, select the "Change Format" option, and turn it off. Then, under the "Videos and Audio" settings, select "Audio Output" and choose "Dolby Digital 5.1."
- Troubleshoot Device Connections
If you’re using external speakers, a soundbar, or a receiver, make sure everything is connected correctly. Check that all HDMI cables or connectors are securely plugged in. If the issue persists, try using a different cable or reversing the ends of the HDMI cable.
- Disable Dolby Digital
Sometimes, disabling Dolby Digital can help. Go to the Audio and Video settings on your Apple TV, find "Dolby Digital," and turn it off. After making these changes, check Netflix to see if the audio sync issue is resolved.
Fix Netflix Video and Audio Out of Sync on Samsung TV
For Samsung TV users, the problem might be related to the TV’s settings. Here’s how to adjust the audio settings to get things back in sync by enabling the Lip Sync/Audio Output Delay:
Go to your TV settings, open the "Sound" menu, and select "Expert Settings." From there, click on "Digital Output Audio Delay" and enable the "Lip Sync" feature. This should help align the audio with the video.
Bonus: How to Match Downloaded Audio and Video Automatically
Having an out-of-sync audio and video doesn’t only happen on the video you are watching on Netflix. Sometimes it also happens to the movie you’ve downloaded or video project you are working.
For these scenarios, having reliable video editing software with auto-synchronization features is what you need. Wondershare Filmora is one such tool that offers an easy and efficient way to match audio and video tracks automatically through its Auto Synchronization and Auto Beat Sync features.
Filmora’s Auto Synchronization feature is a one-click solution for matching sound with video. Simply input a video of someone speaking, along with audio captured from a separate file. Select all files and click on ‘Auto Synchronization,’ and Filmora will automatically synchronize them. This feature can handle multiple audio tracks and align them seamlessly with the video.
On the other hand, Filmora’s Auto Beat Sync feature is also designed to simplify the process of syncing audio and video. However, this tool works best to sync video with music. It works by matching your video content with a music beat automatically, thus saving you time and effort.
Key Features of Wondershare Filmora
- Auto Beat Sync: Effortlessly syncs your footage with chosen music by automatically editing to match the rhythm, making your video flow smoothly with the soundtrack.
- Auto Synchronization: Simplifies the process of matching audio with video, enhancing overall clarity and ensuring everything aligns perfectly.
- Auto Montage Maker: Automatically matches footage with music clips, analyzes beat points to add effects or switch views, and removes poor-quality segments like dark or shaky footage for a polished result.
- Silence Detection: Detects and removes moments of silence based on your criteria, ensuring your videos are seamless and free from annoying pauses.
- Audio Ducking: Automatically lowers background music volume to enhance voice clarity in recordings, voiceovers, podcasts, and other projects, making speech stand out more clearly.
How to Sync Video and Audio Using Auto Synchronization in Filmora
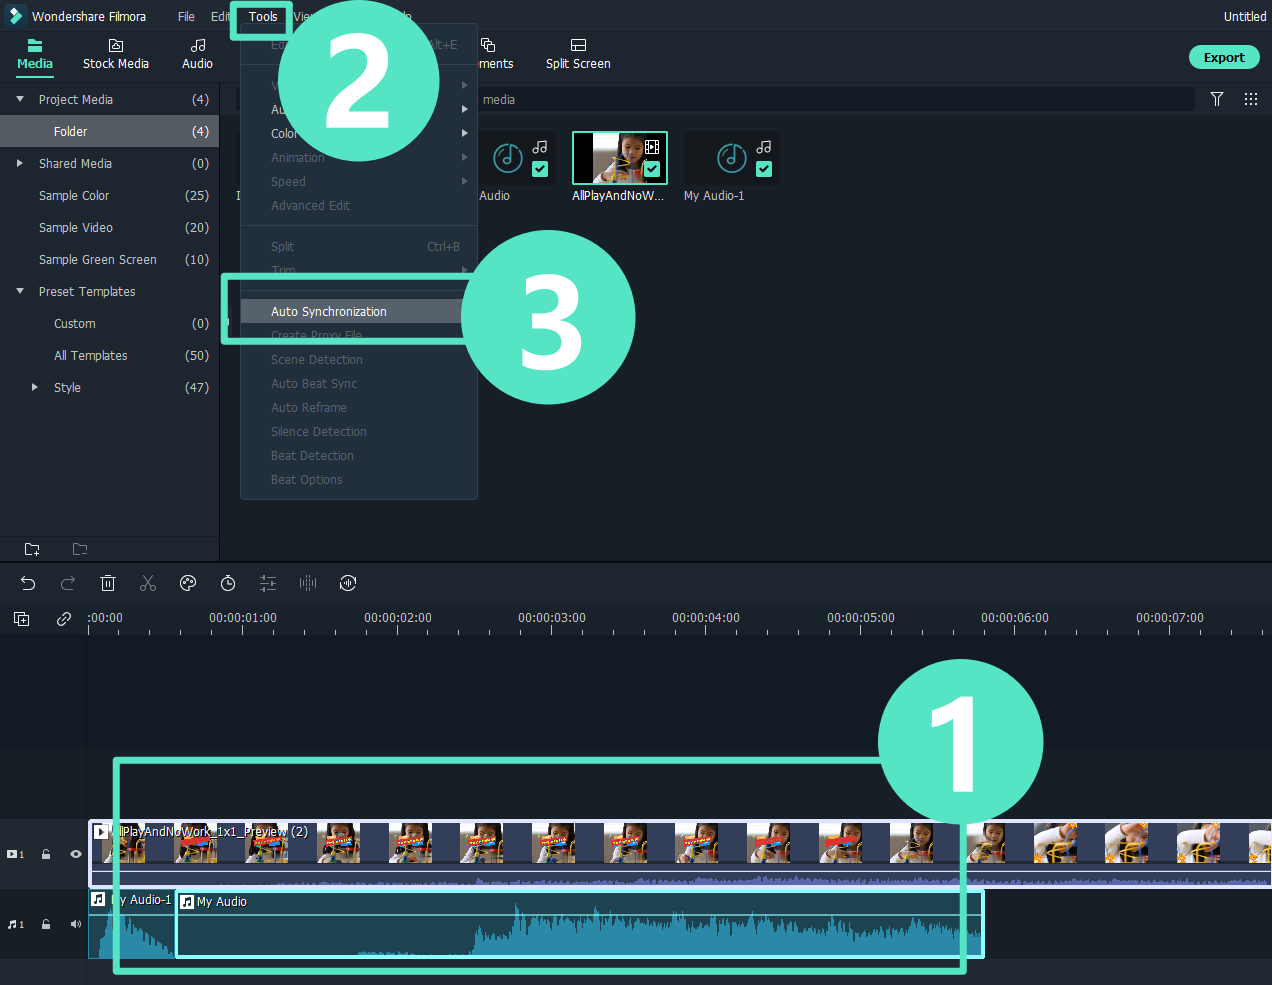
You can apply Filmora’s Auto Synchronization feature in three ways. First, select both the video and audio tracks on the timeline. Then, the Auto Synchronization button will appear on the toolbar. Select this icon to proceed with the auto synchronization process.

Alternatively, you can select both the video and audio tracks on the timeline, right-click, and choose Auto Synchronization from the context menu.
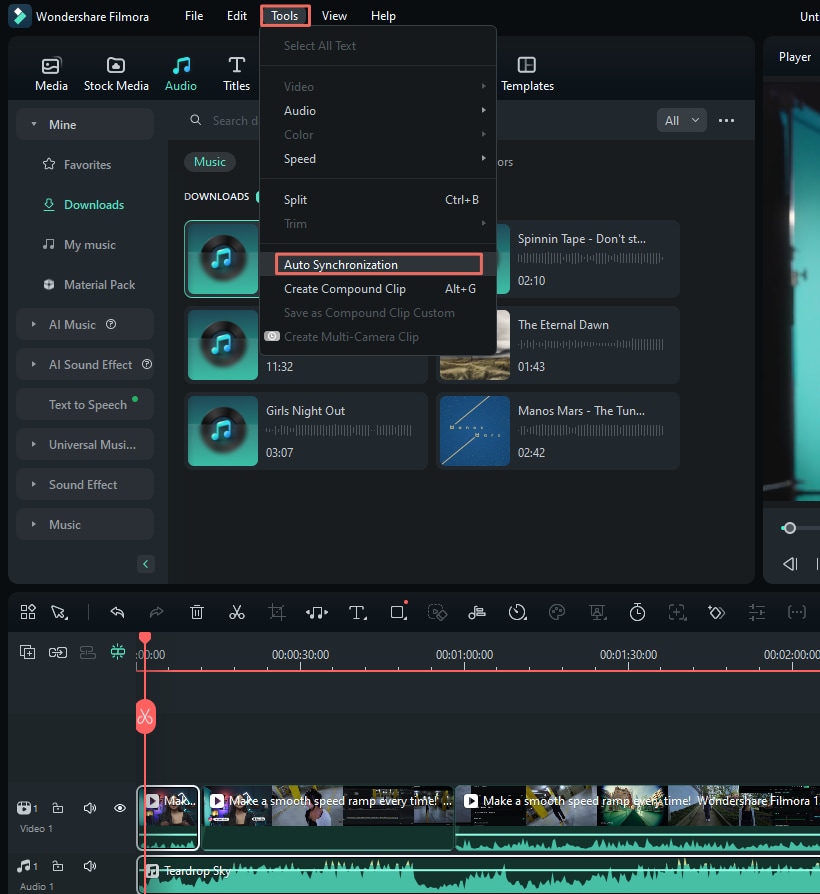
Another option is to select the video and audio tracks on the timeline, then go to the top menu bar, click on Tools > Auto Synchronization from the dropdown menu.
How to Sync Video and Audio Using Auto Beat Sync in Filmora
Step 1. Open Auto Beat Sync
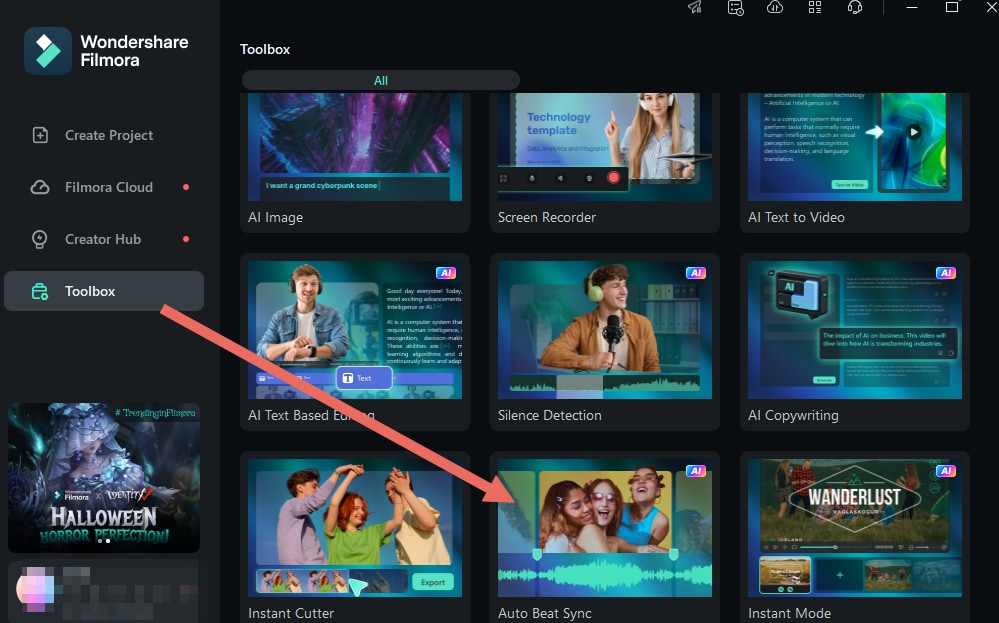
There are a few ways to access the Auto Beat Sync panel in Filmora. First, when you first open Filmora, you’ll see the Auto Beat Sync option right in the startup window. Click on it to get started.
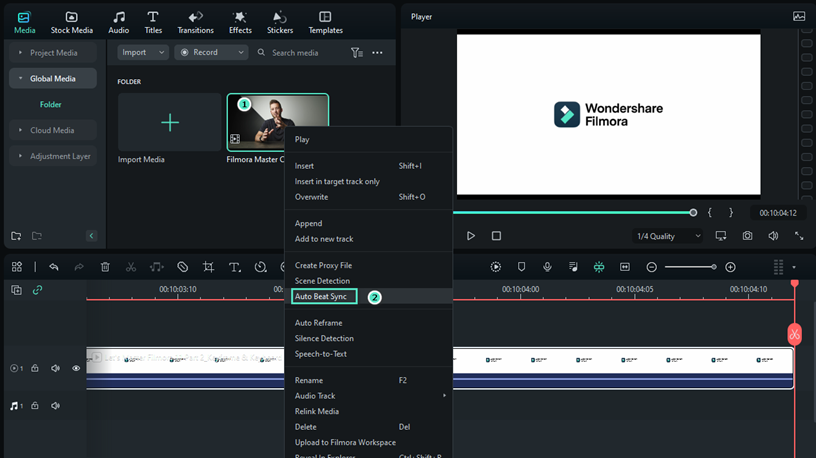
If you’re already in the editing interface, right-click on the files you’ve imported into the Project Media. Then, select Auto Beat Sync from the menu.
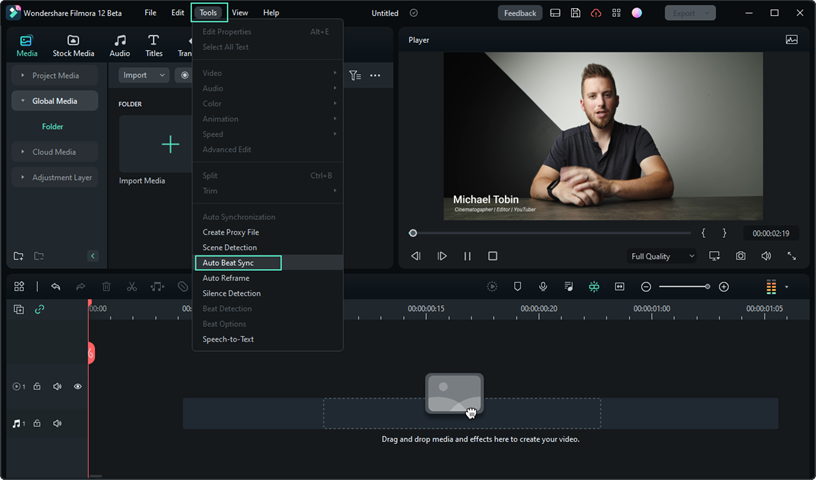
Alternatively, select the files in Project Media, then click on Tools > Auto Beat Sync in the navigation bar.
Step 2. Adjust the Settings
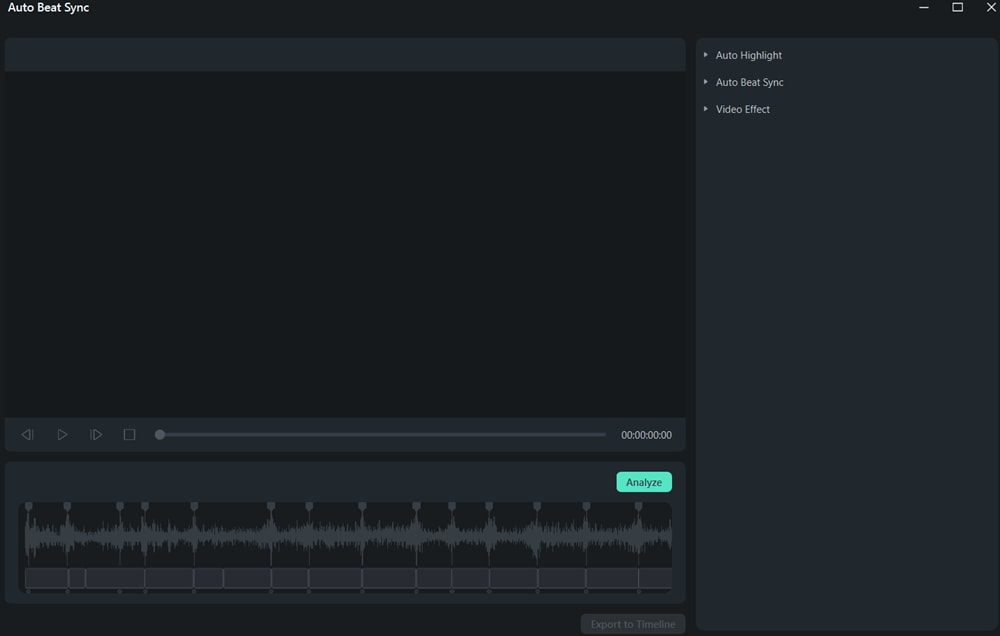
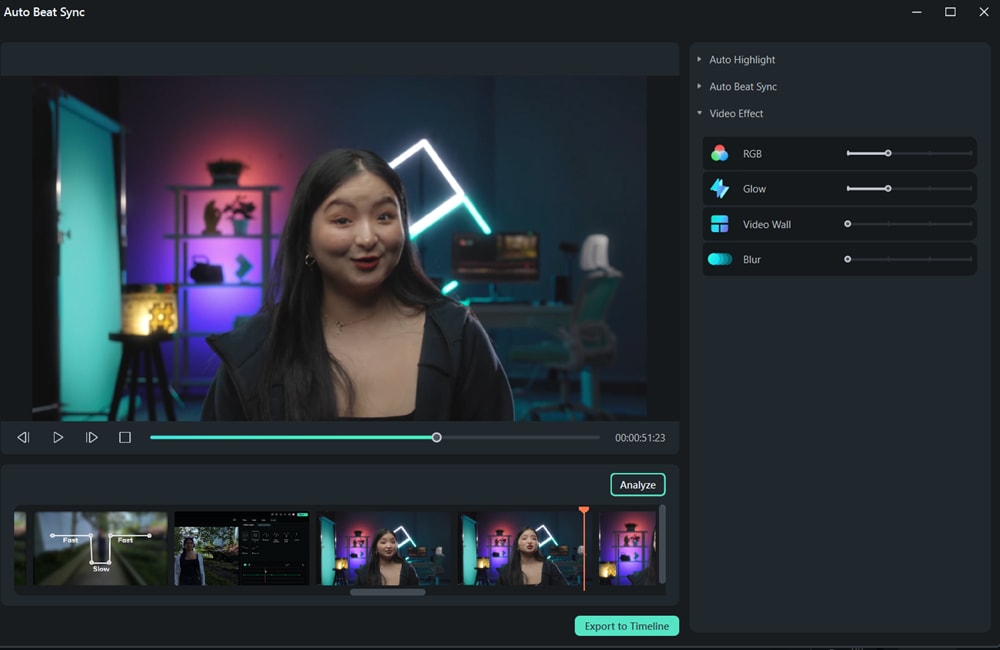
Once the Auto Beat Sync panel pops up, you’ll have three main options to tweak:
- Auto Highlight:Here, you can add more video or audio clips, change their order, or delete any clips you don’t need. You can also adjust how long the generated video or audio clip will be.

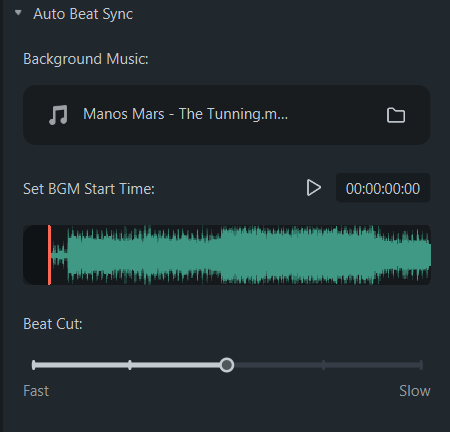
- Auto Beat Sync:In this section, import your background music and set the start time. You can even preview the music to pick the perfect starting point. Additionally, choose whether you want the beat cuts to be fast or slow.
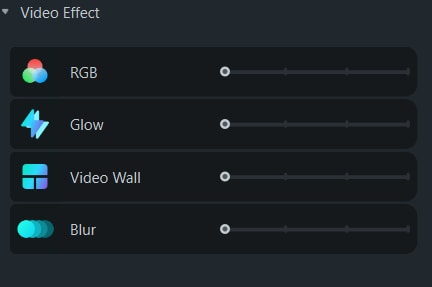
- Video Effect:This lets you set how often effects like RGB, Glow, Video Wall, and Blur appear in your video.
Step 3. Analyze
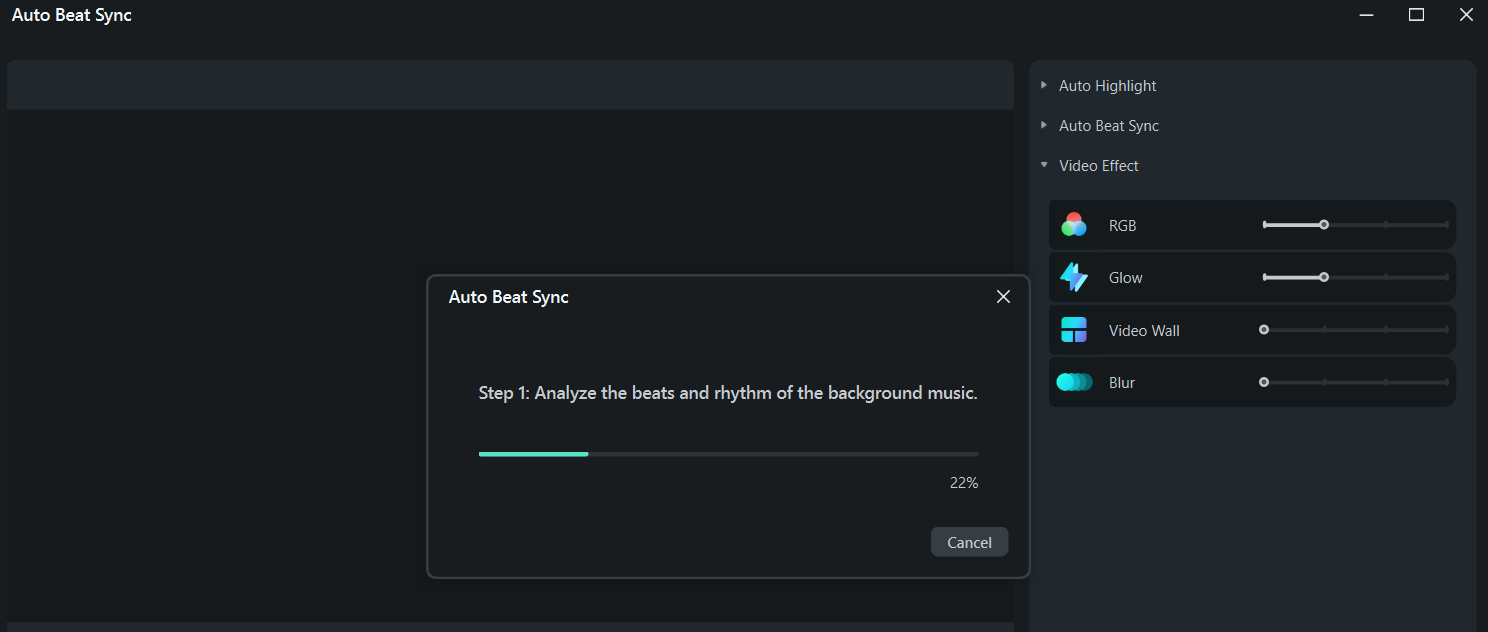
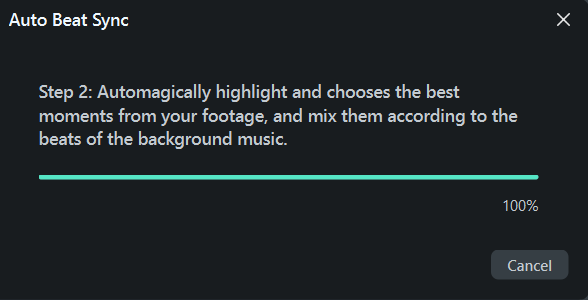
After you’ve adjusted everything to your liking, click the `Analyze` button to start the automatic syncing process. It usually takes two steps:
- Analyzing the beats and rhythm of your background music.
- Highlighting and selecting the best moments from your footage, then syncing them to the music.
Step 4. Preview the Generated Video
Once the analysis is complete, preview your video by clicking on the `Play` icon. If you’re happy with the result, export it to the timeline. If not, go back and adjust the settings, then analyze again until it’s just right.
Conclusion
If you’re dealing with audio and video out of sync on Netflix, don’t stress—there are some straightforward fixes to get things back on track. Whether it’s tweaking your internet connection, trying a different browser, or adjusting TV settings, you’ve got options to solve the issue. And if you’re working with downloaded content or making your own videos, Wondershare Filmora can be a lifesaver. It’s super easy to use and automatically syncs your audio and video, so you can enjoy a smooth, hassle-free experience. Using Filmora’s features like Auto Synchronization and Auto Beat Sync, you’ll have everything lined up perfectly in no time.


