One common challenge video editors face is figuring out how to stretch audio in Premiere Pro when clips are too short. Luckily, Premiere Pro stretch audio tools let you extend audio duration without losing quality. Whether you're editing music, voiceovers, or sound effects, learning how to make audio longer in Premiere Pro is essential. This guide covers simple ways to stretch audio in Premiere Pro, even if you're new to Premiere Pro or prefer easier methods.
In this article
Stretch Audio in Premiere Pro: 3 Simple Tricks for Seamless Sound Editing
If you're looking to make audio longer for your project, you might wonder how to extend it without compromising its overall feel or quality. The best solution depends on the type of audio you're working with and the specific result you want to achieve.
Below, we've provided a few solutions on how to stretch audio in Premiere Pro. You can try and choose the one that best suits your project's needs.

Method 1: Looping the Audio
Before we get to stretching audio in Premiere Pro, there's a simple solution if the audio you're working with is short but repetitive: loop it. Looping is an easy and effective way to make your audio last longer, especially when working with background music or sound effects that don't require changes in variation.
Here's how you can loop audio to make it longer in Premiere Pro:
Step1Choose the Audio Clip
After importing the video and audio to Premiere Pro, click on the audio clip in your timeline to select it.
Step2Copy and Paste the Audio Clip
Use the keyboard shortcut Ctrl + C (Windows) or Cmd + C (Mac) to copy the selected audio clip.
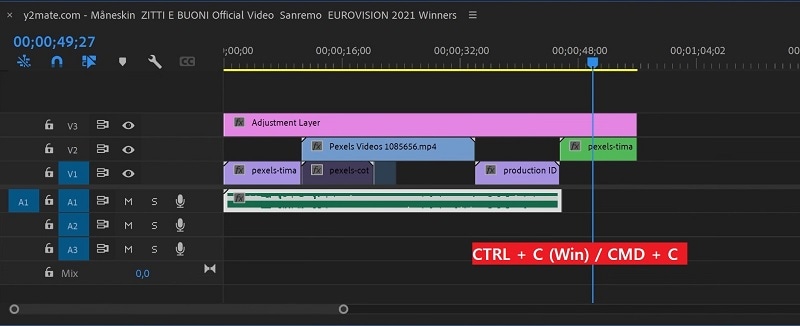
Then, paste a duplicate using Ctrl + V (Windows) or Cmd + V (Mac) at the end of the original clip.
Step3Repeat the Process
Continue copying and pasting the clip as many times as needed to extend its length.
Method 2: Stretch Audio Duration
For the next method, you can stretch the audio duration in Premiere Pro to fit your project's needs without changing its pitch. This is particularly useful when you have an audio track with the perfect ending beat, but the audio isn't long enough to fit the rest of your video.
The option to stretch the audio in Premiere Pro can be found in the Essential Sound panel. Here's how to do it:
Step1Find the Ending Beat
First, identify the section of the audio you want to extend and cut that portion. Focus on a good ending beat that will loop naturally.
Step2Open the Essential Sound Panel
Go to Window in the top menu and select Essential Sound to open the panel.
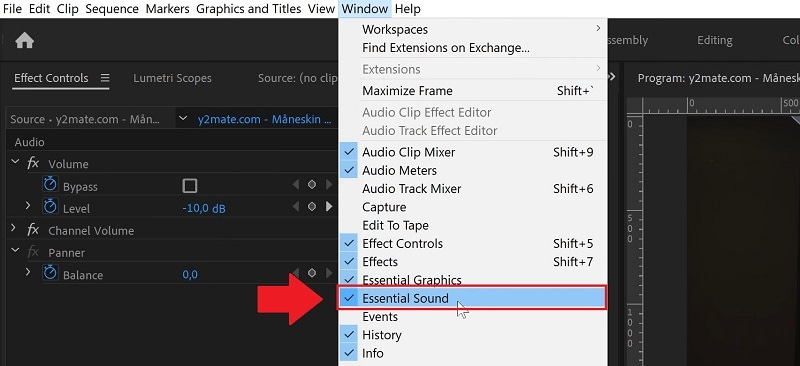
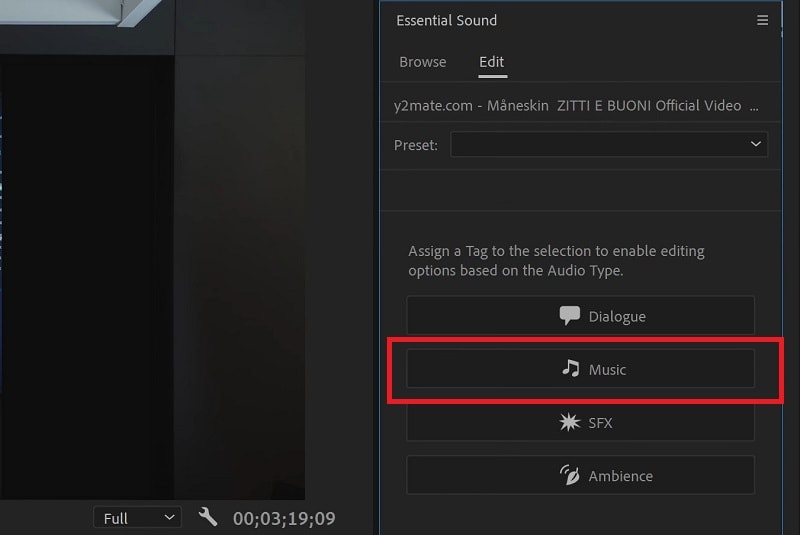
In the Essential Sound panel on the right, select the Music option.
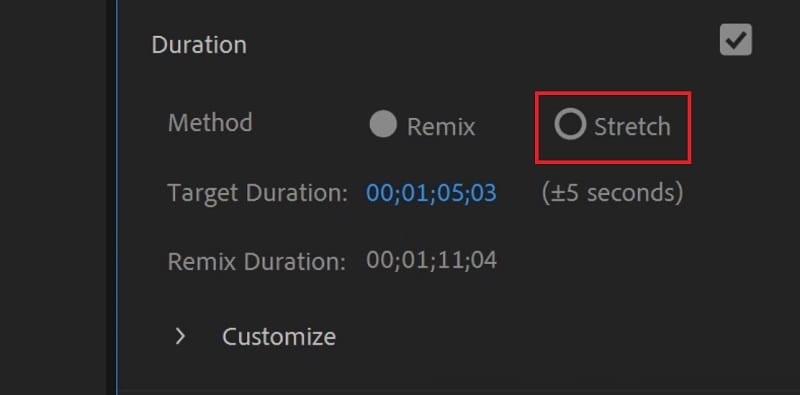
Next, check the Duration box and change the method to Stretch.
Step3Adjust the Duration
Enter the desired duration in the field provided. Premiere Pro will automatically stretch the audio while maintaining its original pitch and quality.
Method 3: Using Audio Effects
In addition to stretching and looping, you can also make audio longer in Premiere Pro using built-in audio effects. Effects like Pitch Shifter or Time Stretch are useful tools for adjusting the properties of your audio and extending its duration while keeping it in sync with your video. Here's how to apply these effects to your audio clip:
Step1Select the Audio Clip and Go to Effects
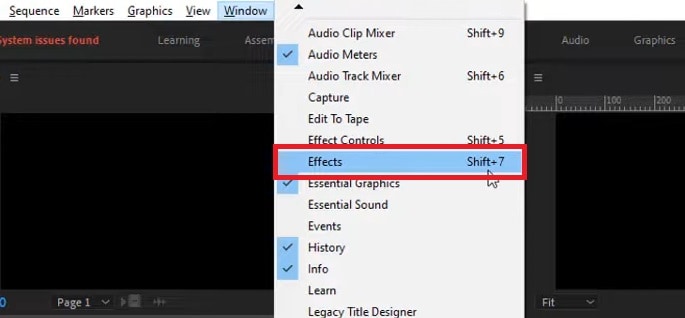
Click on the audio track in your timeline to highlight the clip you want to edit. Then, open the Effects panel by going to Window > Effects.
Step2Search for Effects
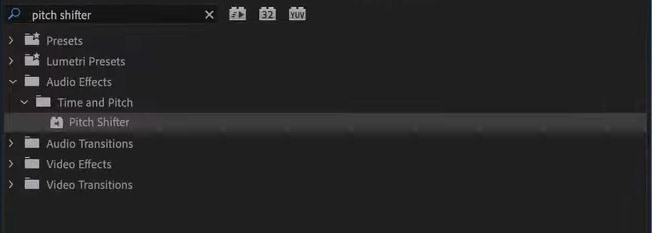
In the Effects panel, search for audio effects such as Pitch Shifter or Time Stretch. These effects will allow you to adjust the pitch or duration of your audio without distortion.
Step3Apply Effects
Once you've found the desired effect, drag and drop it onto the audio clip in your timeline. The effect will automatically be applied, and you can then adjust the settings in the Effect Controls panel to fine-tune how the audio sounds.
Easier Way to Stretch Audio Without Compromising Quality
Even without Premiere Pro, you can actually still stretch audio without sacrificing quality. We get that Premiere Pro isn't for anyone since it can be a bit complex and pricey. If you prefer using a more accessible option, there are alternative tools like Wondershare Filmora.
Filmora is a video editing software that strikes the perfect balance between functionality and ease of use. It offers advanced editing tools, similar to what you'd find in Premiere Pro or other high-end programs, but with a much easier interface that's simpler to figure out.
One of Filmora's powerful advantages is its use of AI, including in the Audio Stretch feature. You to easily stretch and modify your audio clips to match your video's timing, all while preserving the original quality.
Highlights of Filmora AI Audio Stretch
- Drag-and-Drop Functionality: The drag-and-drop functionality in Filmora lets you stretch or shrink your audio clip with minimal effort. The AI-powered feature works intelligently to keep the audio's quality intact.
- Any Music to Fit Any Duration: Filmora's AI Audio Stretch supports many audio types, making it perfect for any video project. The technology can also adapt to different kinds of music.
- No Quality Loss: Filmora's AI Audio Stretch recognizes the dynamics and patterns within vocals and music, automatically remixing the clip to suit the video's needs and preserving audio quality. You can listen to your changes in real time, ensuring the final product meets your expectations.
- Superb video stabilization with low distortion.
- Vast video/audio effects and creative assets.
- Powerful AI for effortless content creation.
- Intuitive, professional yet beginner-friendly.
- Works on Mac, Windows, iOS, and Android.

How to Stretch Audio Using Filmora AI Audio Stretch
Step1Launch Filmora and Import Your Audio/Video
Filmora is available on Windows and Mac. Make sure you've installed the software to the latest version. Then, open the program and click New Project.

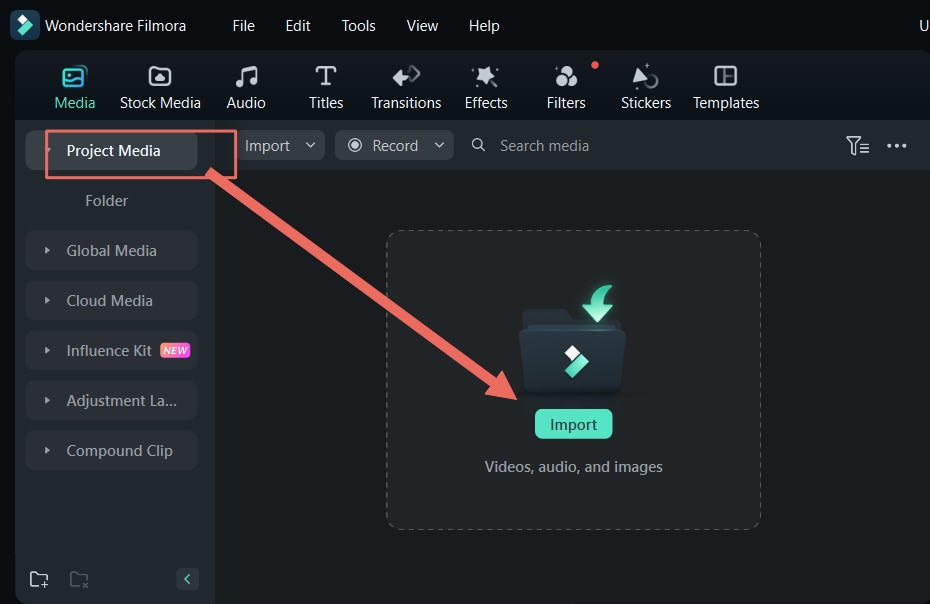
In the Filmora's editing workspace, click Import to add the audio or video you want to work on.
Step2Open the Stretch Function
Once you've added the audio, click the stretch icon on the toolbar to activate the feature.
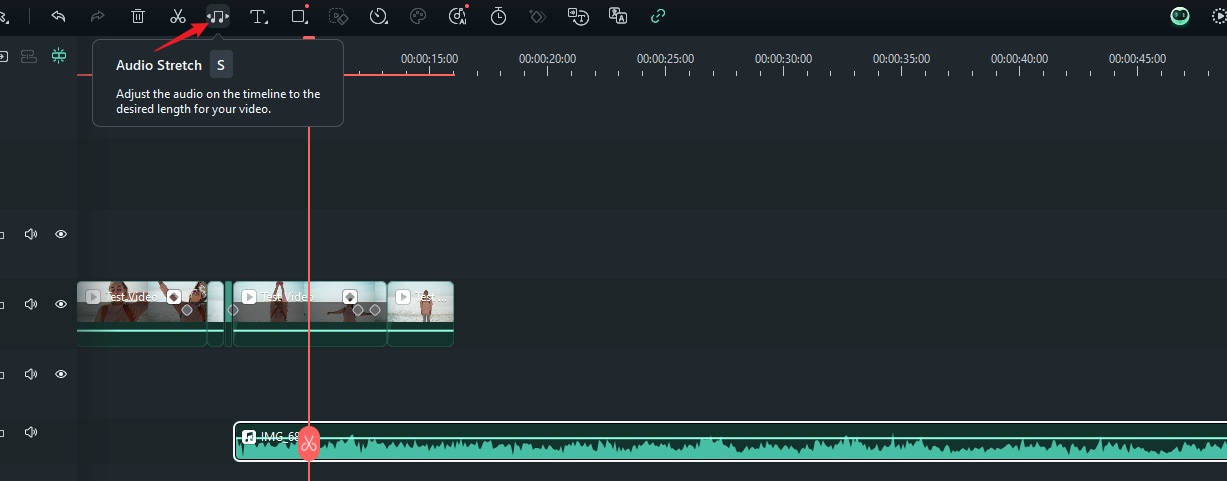
Alternatively, you can select the detached audio clip in the timeline and press the "S" key on your keyboard to trigger the Audio Stretch function.
Step3Set the Time of the Audio Clip
Next, select the audio clip you want to modify. Drag the clip forward or backward on the timeline to adjust the point at which it starts and stops, effectively stretching the audio to fit your video's length.

Step4Adjust or Delete the Effect
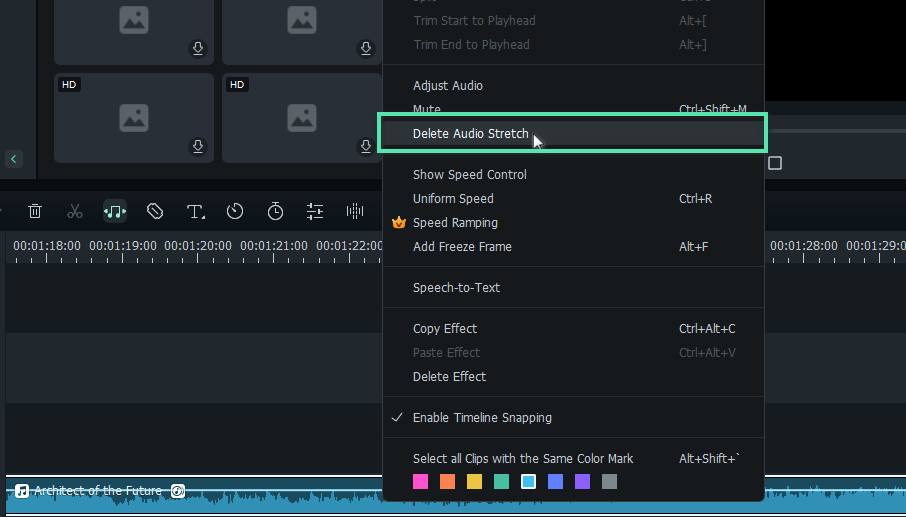
If you want to remove the stretch effect, right-click the clip and choose Delete Audio Stretch. You can also click the stretch icon again to reset the duration of the audio as needed.
Solving Common Audio Issues
Now that you know how to make audio longer in Premiere Pro and Filmora, keep in mind that this is just one of the many challenges you might face when working with audio in your video projects. There are various other issues that can affect the overall quality and synchronization of your project.
From audio distortion and sync issues to unnatural speeds and quality loss, it's important to know how to tackle these problems to ensure your final audio sounds professional. Below are some common audio issues you may encounter, along with practical solutions to fix them.
- Audio Distortion: Audio distortion occurs when the sound becomes unclear or garbled, often due to recording issues or problems during editing. To fix it, you can audio repair tools such as noise reduction or de-esser filters to reduce unwanted distortion.
- Audio Sync Issues: If the recording was done at a different frame rate than your video, or if there were issues during the editing process, it can cause audio and video sync problems. You can use tools like Auto Synchronization to match your audio with your video, making it clearer.
- Unnatural Audio Speed: Sometimes, stretching or shortening audio (to fit the video length or make it longer) can result in unnatural or choppy sounds. You can avoid this by making only subtle adjustments to the speed of the audio.
- Quality Loss: When audio is compressed or edited too many times, it can lose its original quality, becoming muffled or flat. To avoid quality loss, always work with the highest-quality audio files available. When exporting audio, use lossless formats like WAV or AIFF rather than compressed formats like MP3.
Conclusion
Stretching audio in your video project is simple once you understand the process in Premiere Pro and Filmora. Premiere Pro offers advanced features and customization, making it suitable for professional editors. On the other hand, Filmora delivers an easy, AI-powered solution for those seeking a more straightforward, user-friendly experience. Both tools allow you to extend audio with ease, so you can choose the one that best fits your editing needs.


 100% Security Verified | No Subscription Required | No Malware


