
 100% Security Verified | No Subscription Required | No Malware


 ChatGPT
 Perplexity
 Gemini
 Claude
 Grok
Grok

Ever snapped a nice photo, only to realize there’s something in the background that ruins the whole shot? Maybe it’s a random person walking by, an item that's not supposed to appear on camera, or even just a small blemish that draws too much attention.
It’s frustrating, but luckily, fixing it—right on your phone—is easier than ever.
These days, plenty of object removal tools have been developed for mobile apps, so you don’t need fancy software or advanced editing skills.
One of the best options? Snapseed—a free, easy-to-use photo editing app from Google, available for both Android and iOS. It comes with a Healing Tool, designed specifically for erasing unwanted objects with just a few taps.
In this article, I’ll show you exactly how to use Snapseed to remove objects from pictures. Whether you’re a casual phone photographer or just someone who edits pictures regularly, this article will help you remove objects using Snapseed to create cleaner shots in no time.
In this article
Part 1: Step-by-Step Guide for Removing Objects in Snapseed Photos

Snapseed’s Healing tool is perfect for removing small distractions from your photos—things like blemishes, dust spots, or even people in uncluttered backgrounds. You can also use Snapseed to remove emojis, text, watermarks, or any other element added to your photo after snapping.
However, if you're trying to remove something from a complex background, the results might not be perfect. (For tougher edits, see Part 3.)
Here's a step-by-step guide on using Snapseed to remove objects in photos.
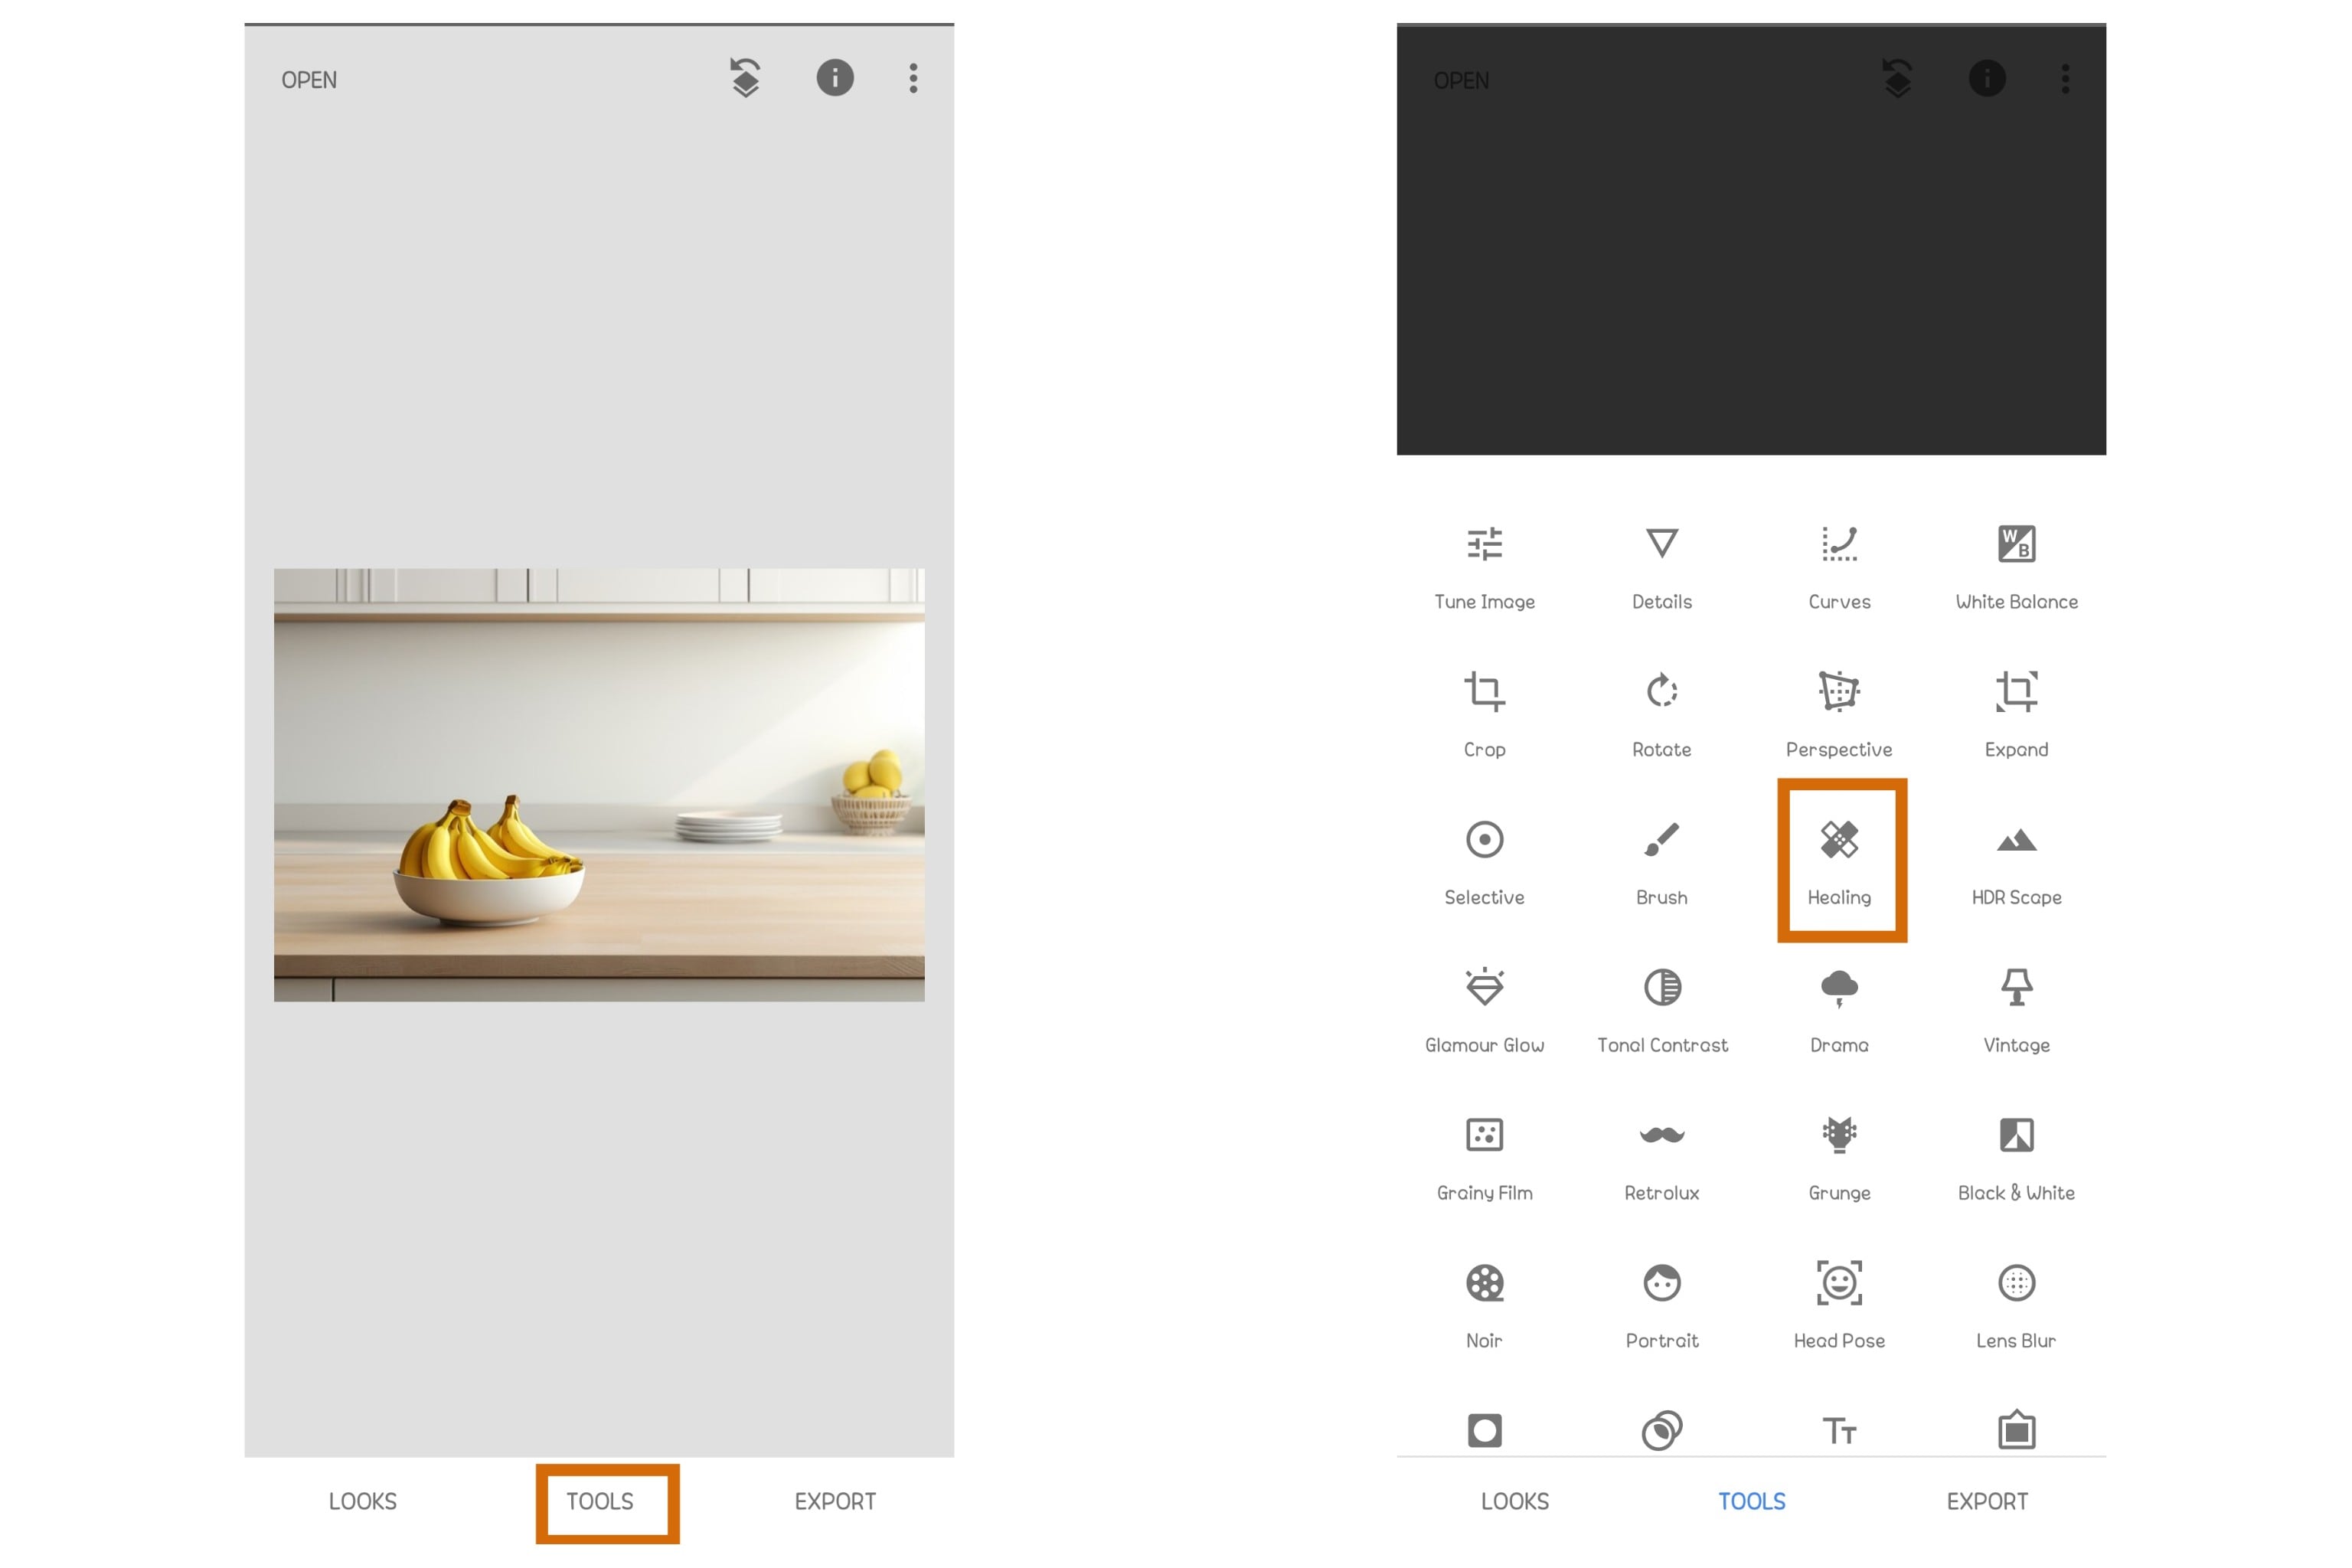
- Step 1: Open your photo in Snapseed.
- Download and install Snapseed (if you haven’t already) from the Google Play Store or Apple App Store.
- Open the app and tap the “+”icon or anywhere on the screen to select a photo from your gallery.

- Step 2: Select the Healing Tool.
- Click Toolsat the bottom of the screen.
- Select Healingfrom the list of tools.
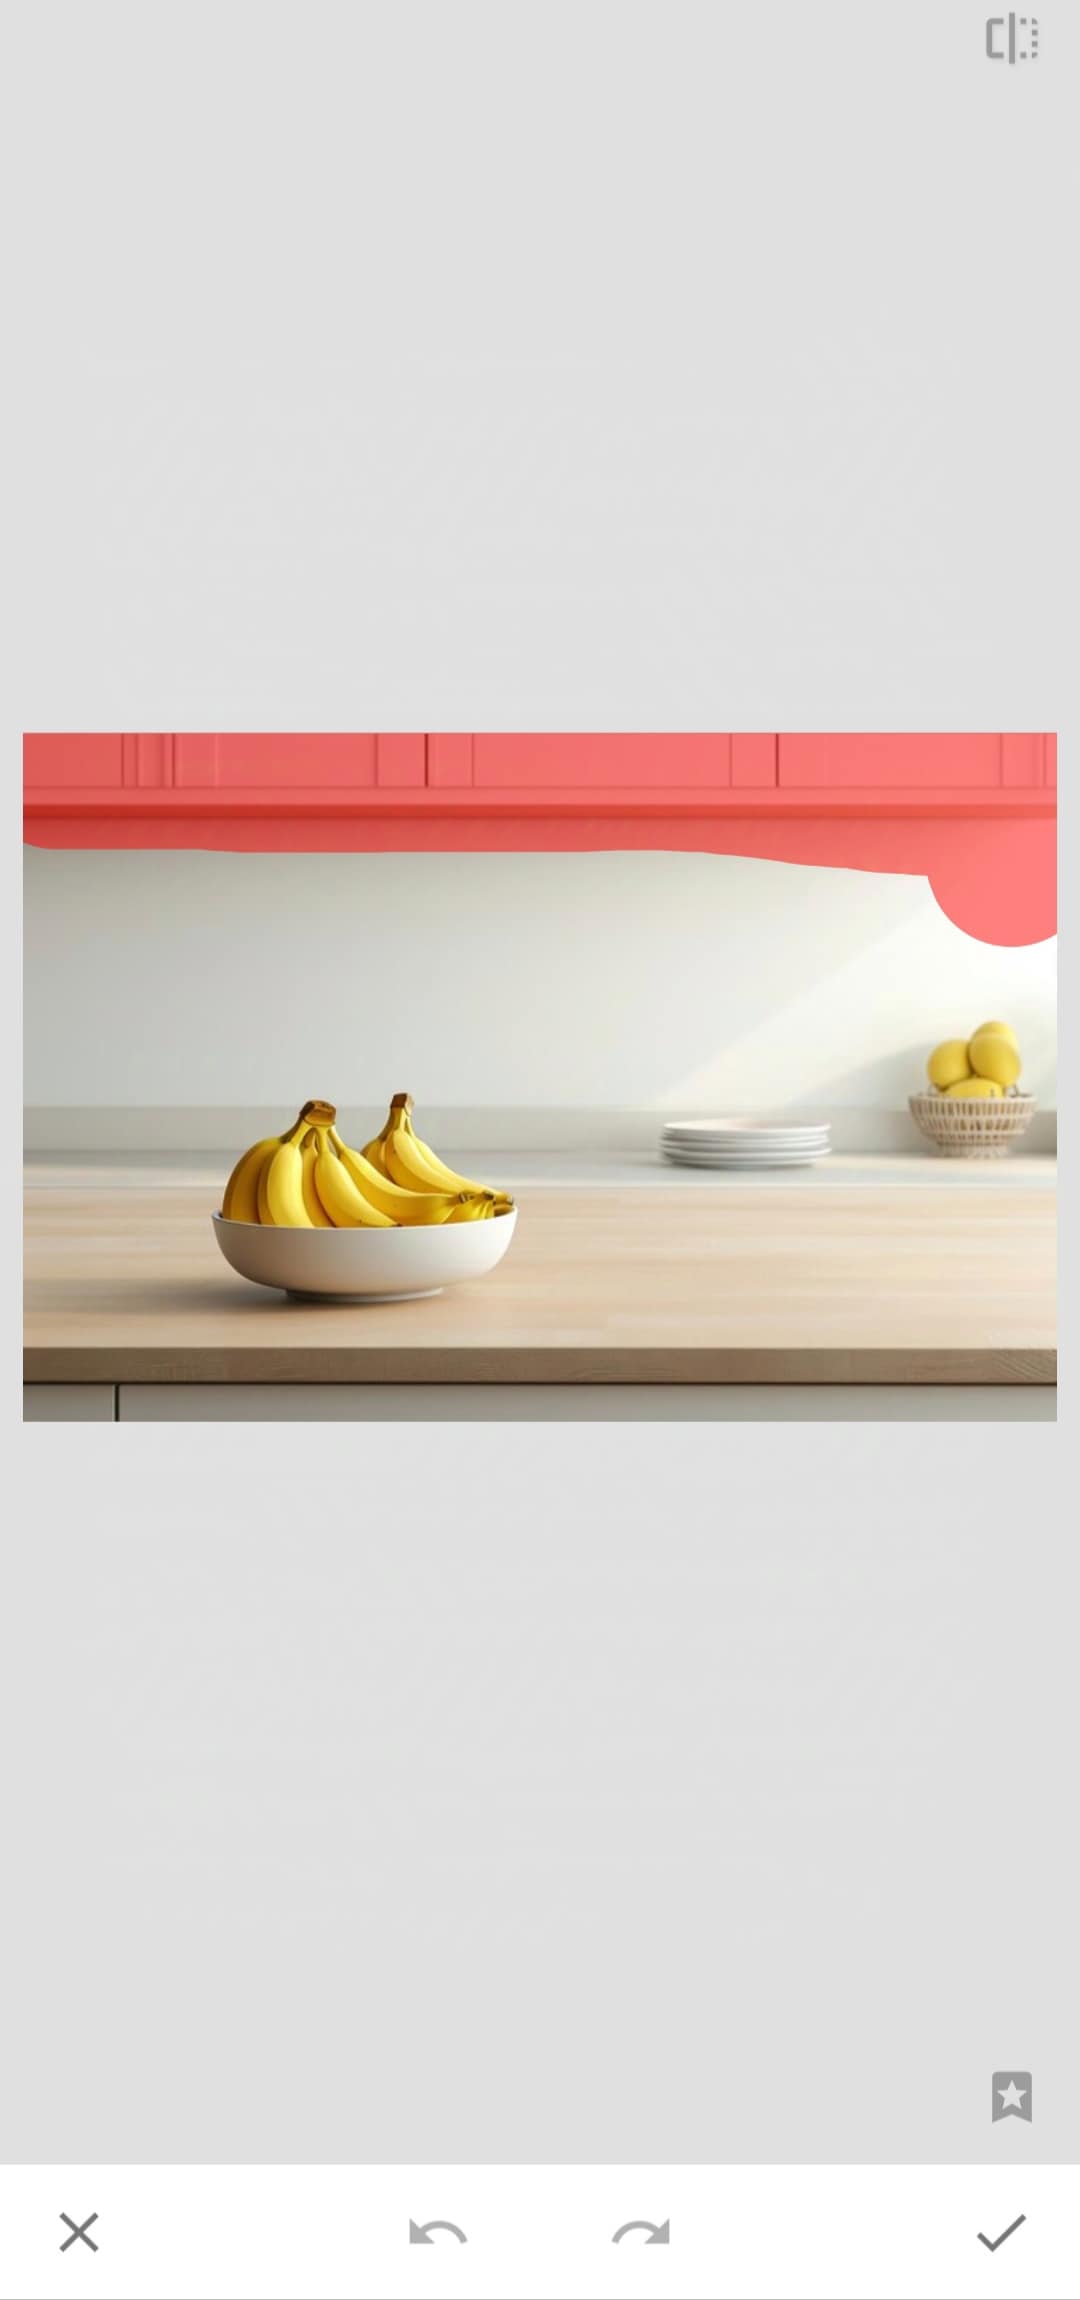
- Step 3: Brush over the object you want to remove.
- Zoom in on the area you want to edit by pinching outward with two fingers.
- Use your finger to brush over the unwanted object. The tool will automatically replace it with pixels from the surrounding area.
- If the removal doesn’t look perfect, use Undo (⟲) at the bottom and try again with smaller, precise strokes.
- Step 4: Save your edited photo.
- Once satisfied, tap the checkmark (✔) in the bottom-right corner to apply the edit.
- Click on Export > Saveto keep the changes. You can also select Export As to create a copy in a specific folder.

Part 2: How Can You Achieve Perfect Object Removal in Snapseed
Learning how to remove objects in Snapseed sounds easy. You expect to open the Healing tool, brush over the object, and the object disappears. But if you’ve tried it, you know it doesn't come out perfect, especially for first-time users. The edits can look a little off with smudged areas, duplicated textures, or blurry patches.
The good news? With a few tricks and some patience, you can improve your edits and get cleaner, more natural results.

Tips for Flawless Object Removal
These tips are especially helpful if you’re still getting the hang of how to remove objects in Snapseed.
- Pinch to zoom in so you can target specific areas more accurately.
- Use small, controlled taps instead of long swipes to avoid unwanted background textures, awkward smears, and noticeable distortions.
- If you're dealing with a larger object, removing it in one go might confuse the tool. Instead, remove objects in sections and work from the outer edges toward the center.
- Choose simple backgrounds or backgrounds like grass, sky, or sand when possible. The tool might struggle to blend backgrounds with patterns or multiple colors.
- Fix the Edges After Removal. Use small, precise taps around the edges to smooth things out.

Common Mistakes & How to Fix Them
| Mistake | What Happens | Fix |
| Brushing over an object in one go | Creates weird smudges or stretched textures | Remove the object in small sections instead |
| Editing on a textured background | The tool replaces the object with unnatural patterns | Try a different approach (or use an advanced tool in Part 3) |
| Not zooming in | Inaccurate edits with leftover traces of the object | Always zoom in for better precision |
| Brushing too close to another object | The tool copies unwanted parts from nearby | Use smaller strokes and avoid overlapping objects |
Part 3: Snapseed Alternative: Automatically Remove Objects From Photos Using an AI Tool
While Snapseed can remove objects in quick edits and simple touch-ups, it’s not always the best choice for every scenario.
For instance, you may struggle if you try to use Snapseed to remove emoji stickers or edits that are embedded over facial features or detailed areas.
If you’re dealing with a busy background, a large object, or you just want faster, more precise results without manually brushing every detail, it might be time to switch to a more advanced tool—like Wondershare Filmora.

Filmora is a video editing tool. However, it isn't just for video editing. This tool has powerful photo editing capabilities with several AI tools that are integrated for both video and image processing.
Filmora's AI Object Remover detects and erases unwanted objects with minimal effort on your part. It gives you the option to choose between manual brushing and auto removal. No guesswork. Just clean, professional-looking edits in seconds.
- Remove unwanted objects from videos & images in seconds.
- No manual masking—AI does the hard work for you.
- Preserve background quality with smart auto-fill.
- Works seamlessly on Windows, Mac, iOS & Android.


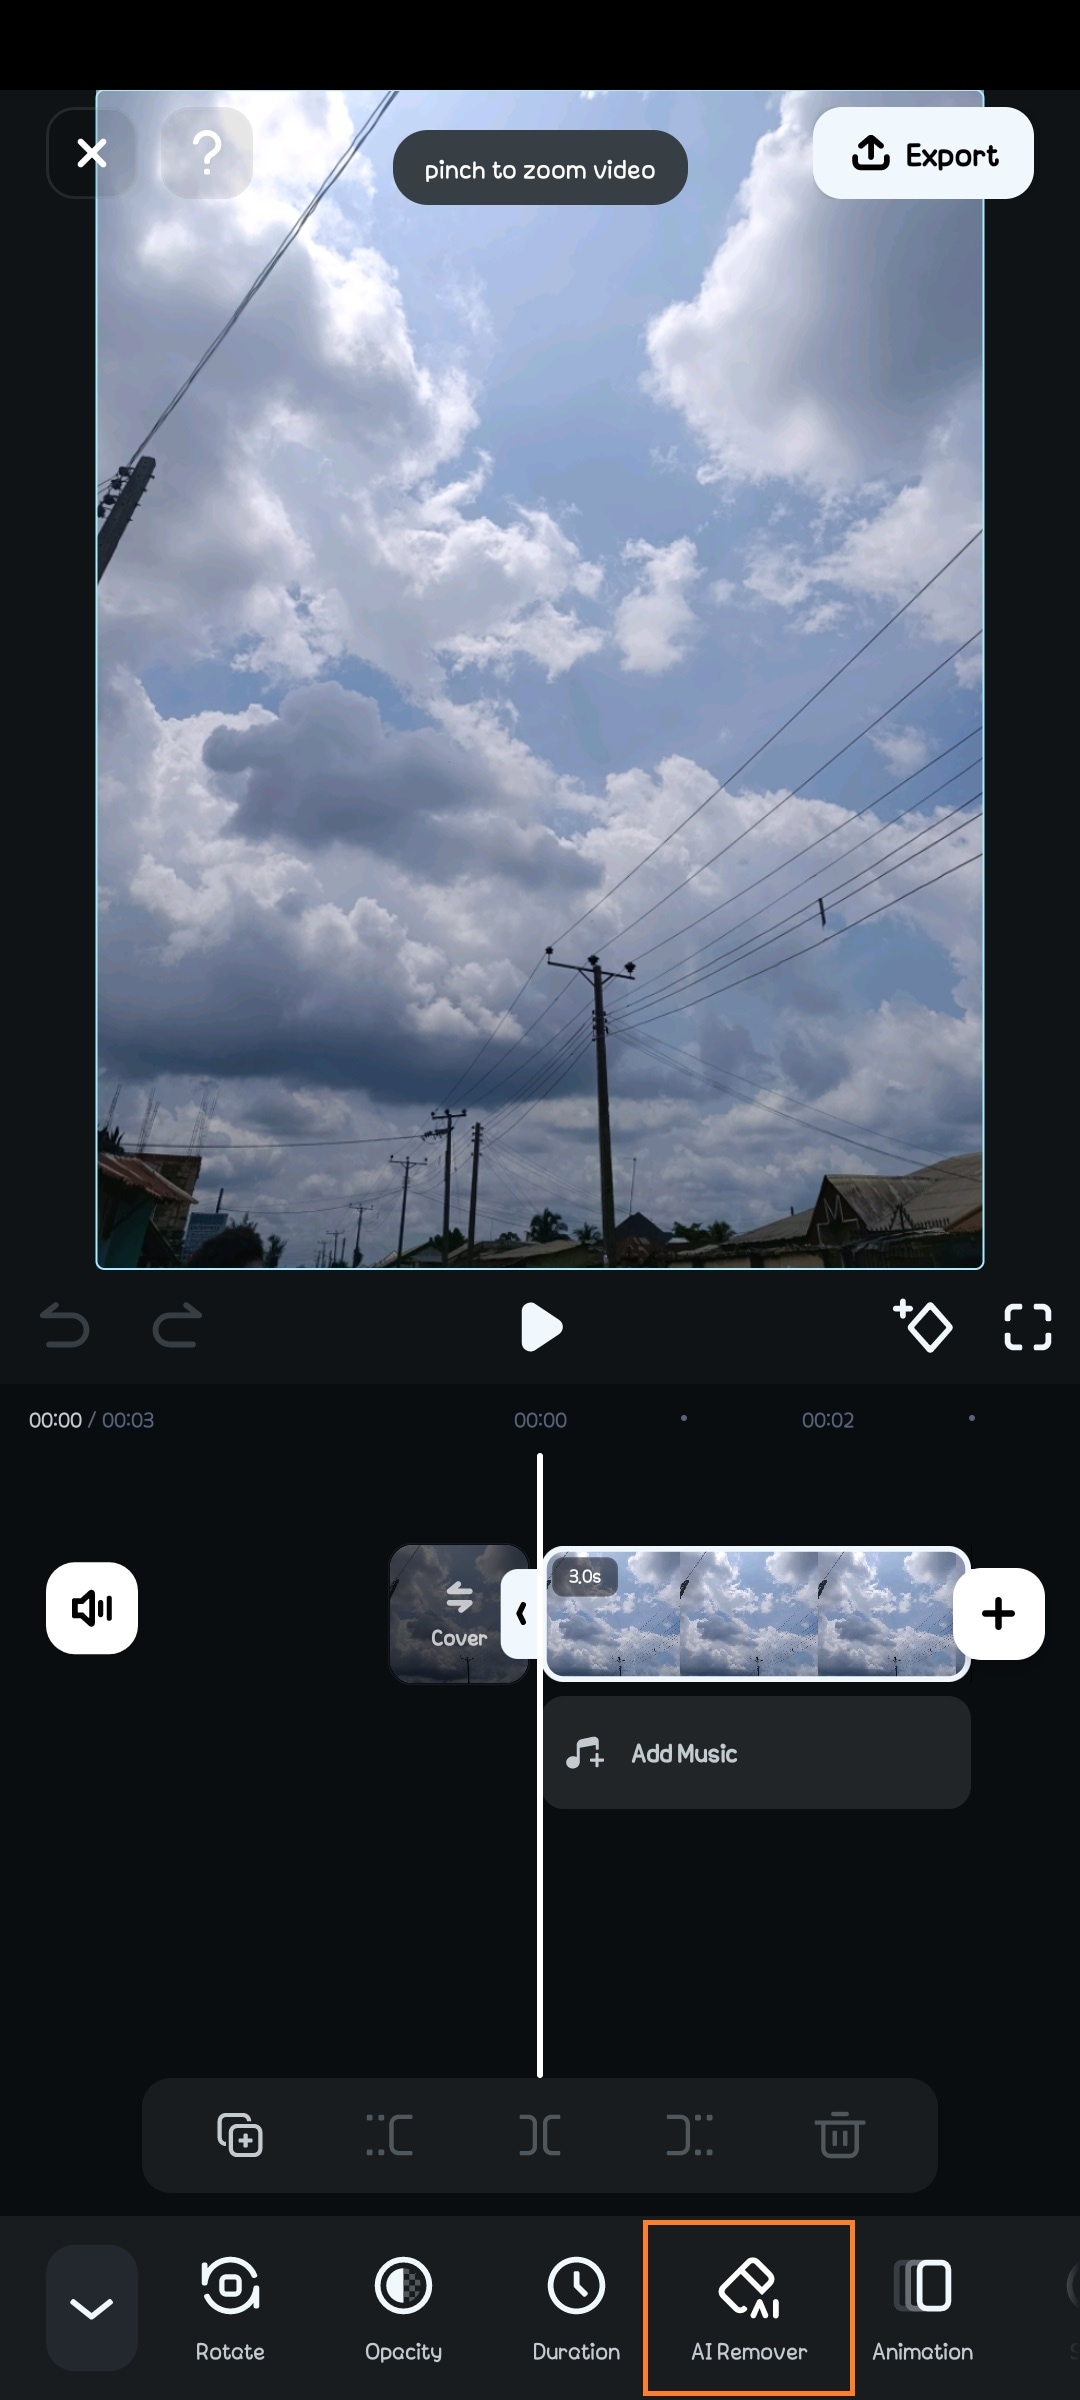
How to Remove Objects Using Filmora’s AI Object Remover on a Phone
Here’s how to use mobile Filmora for AI object removal on your phone.
- Step 1: Download and Open Filmora on your phone.
- Install the Filmora app from the App Store or Google Play.
- On the home screen, click on New Project and upload your photo. Alternatively, tap the three dots on the right to access the Filmora AI tools section.

 secure download
 - Step 2 (optional): Select the AI Object Remover Tool.
- Go to the AI Tools section and choose AI Remover.
- Then, select the photo you want to remove the object from and upload it.

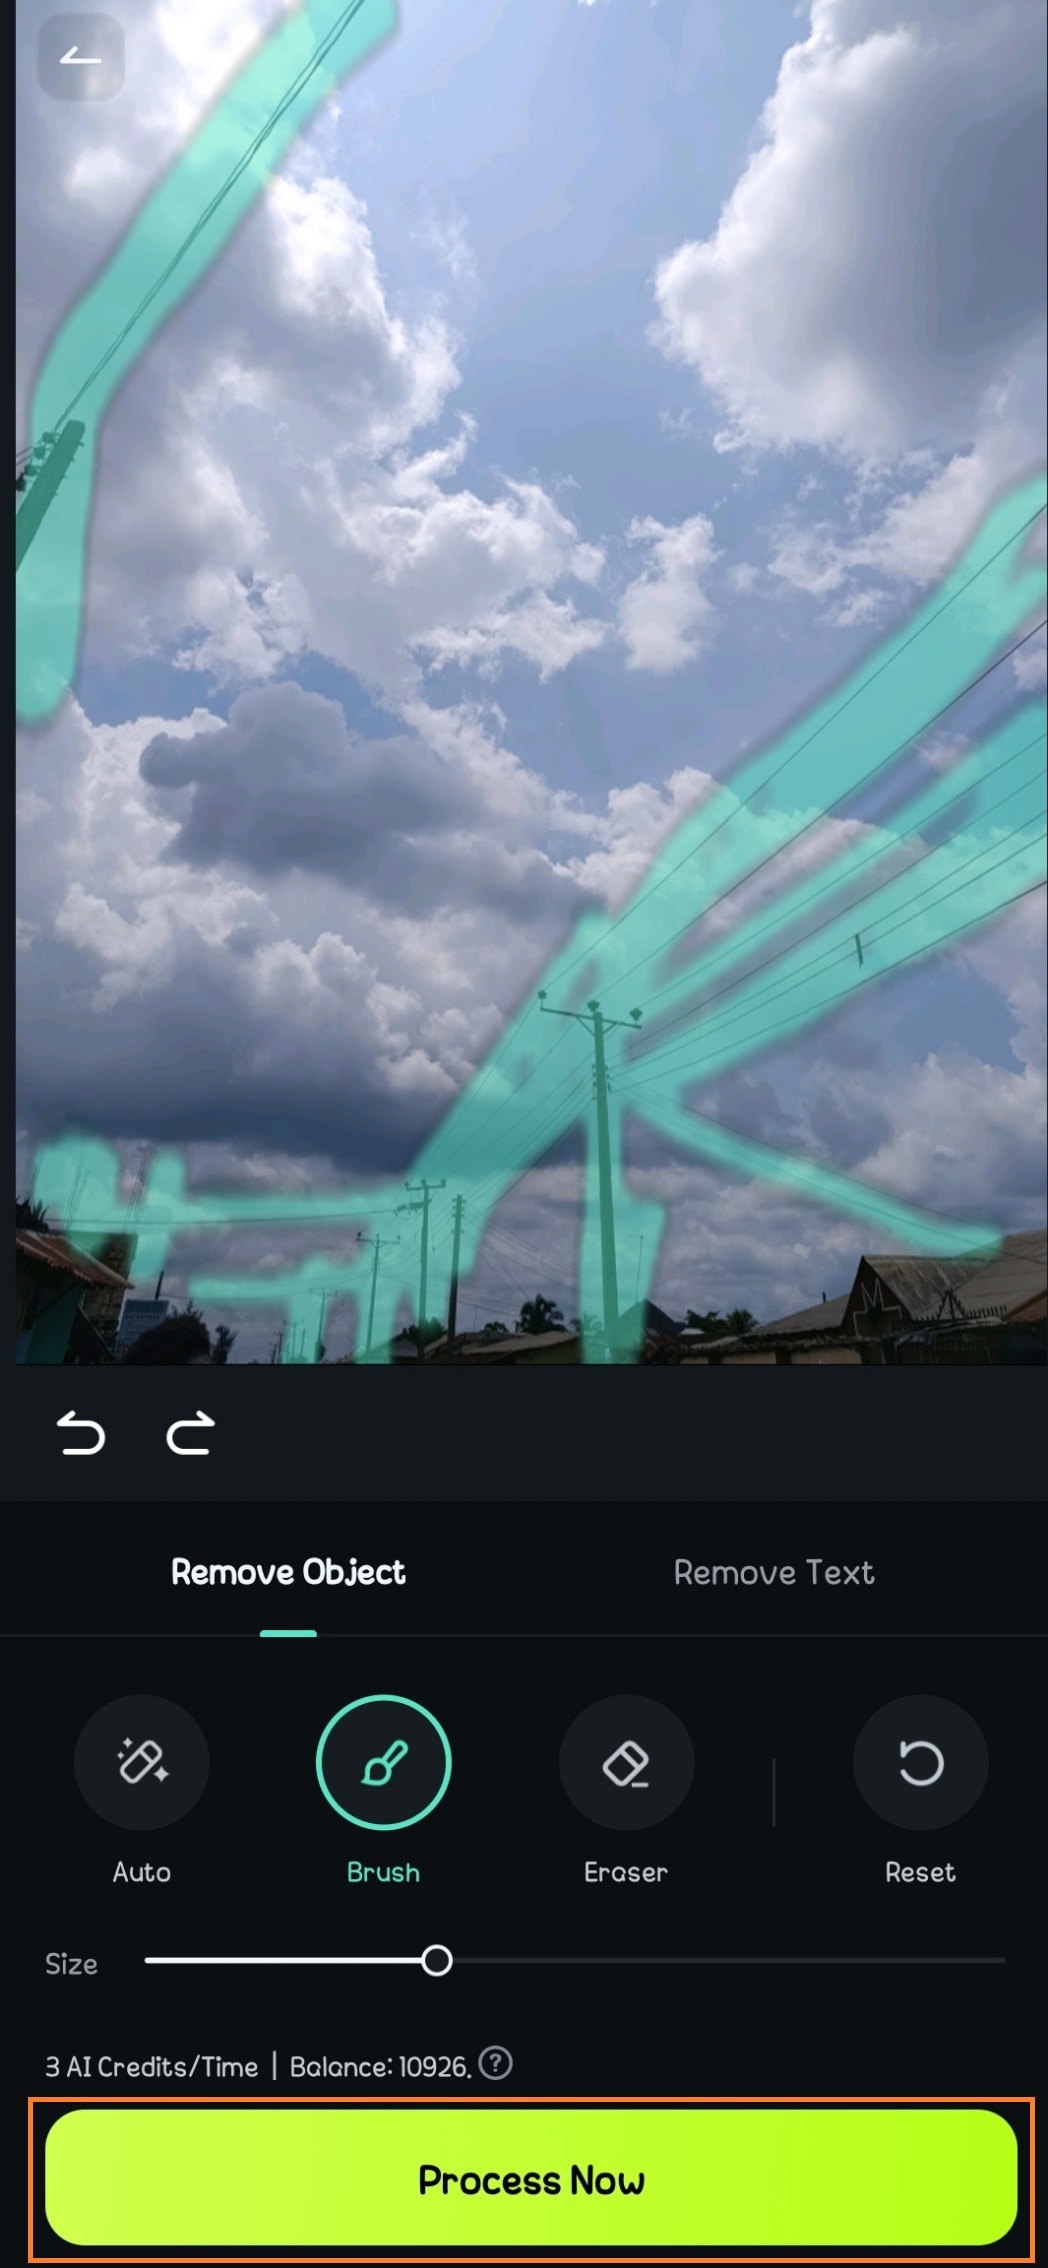
- Step 3: Use AI Remover.
- Select the photo or video on the timeline.
- Amongst the editing options, click on AI Remover.
- Step 4: You can choose to remove text or objects. Choose an option that suits your needs.
- To remove objects, select a brush mode—manual or auto.
- For precision during manual removal, adjust the brush size to match the object to be removed.
- Brush over the unwanted object—Use your finger to highlight the object or person you want to erase.
- Once you’re done, click on Process Now.

How to Remove Objects Using Filmora’s AI Object Remover on Desktop
For more control and advanced editing, the desktop version of Filmora offers an even smoother object removal process. Here’s how to use the tool on a PC.
- Step 1: Open Filmora on your computer.
- Go to Toolboxon the Filmora home screen.
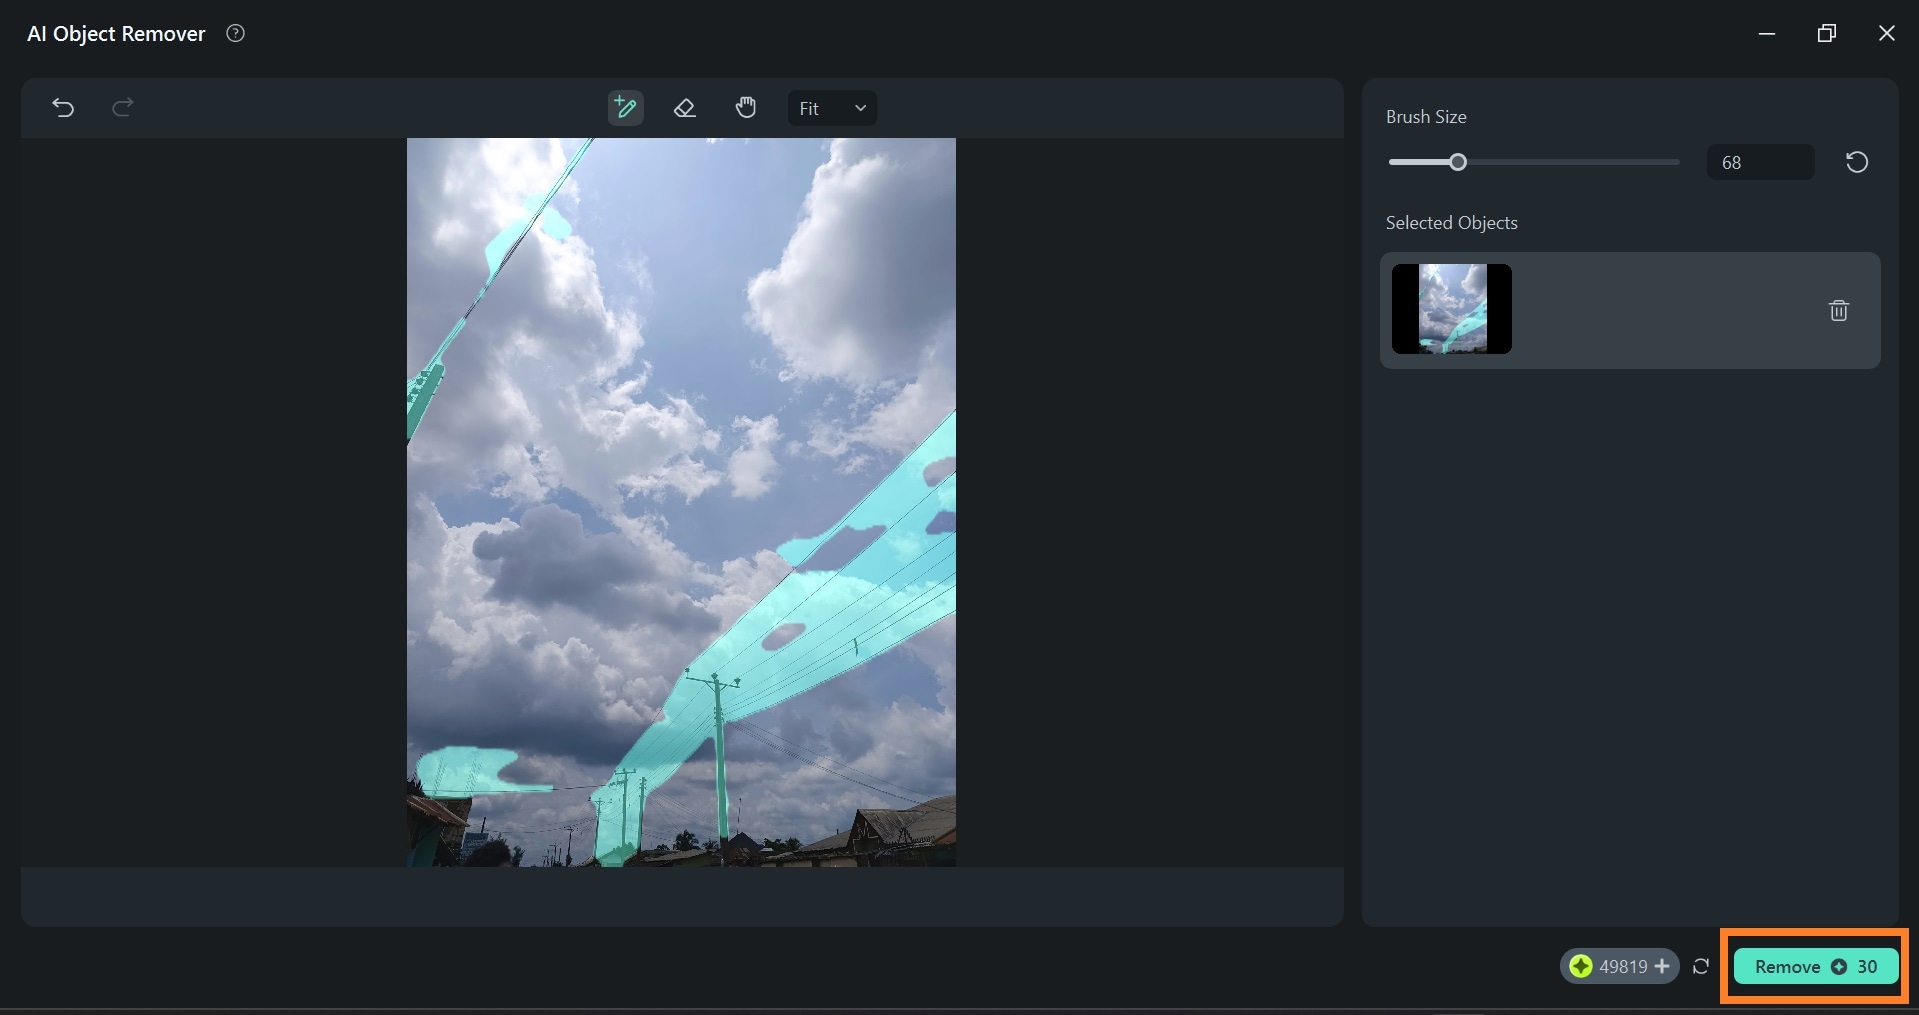
- Select AI Object Removerand open your image.
 secure download
 - Step 2: Highlight the object and apply Object Remover.
- Use the selection tool to mark the unwanted object. You can fine-tune the edges for better accuracy and adjust the brush size for more precision.
- ClickRemove.
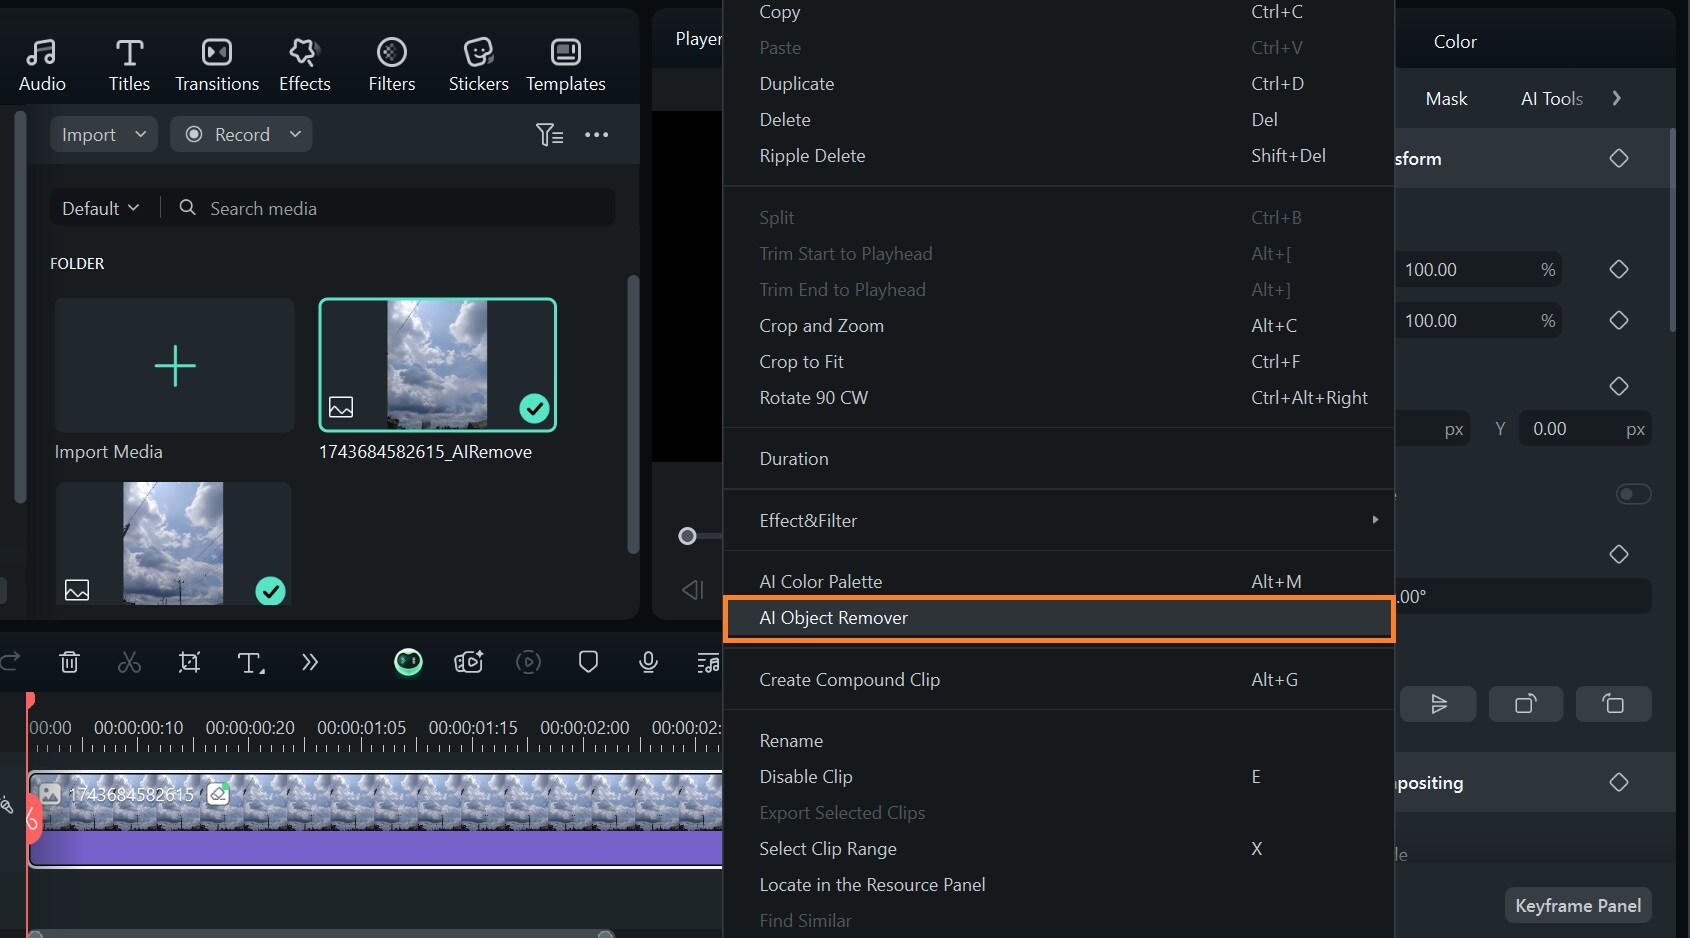
If you already have your photo or video on the dashboard and want to remove an object while editing, simply right-click on the image on the timeline and select AI Object Remover.
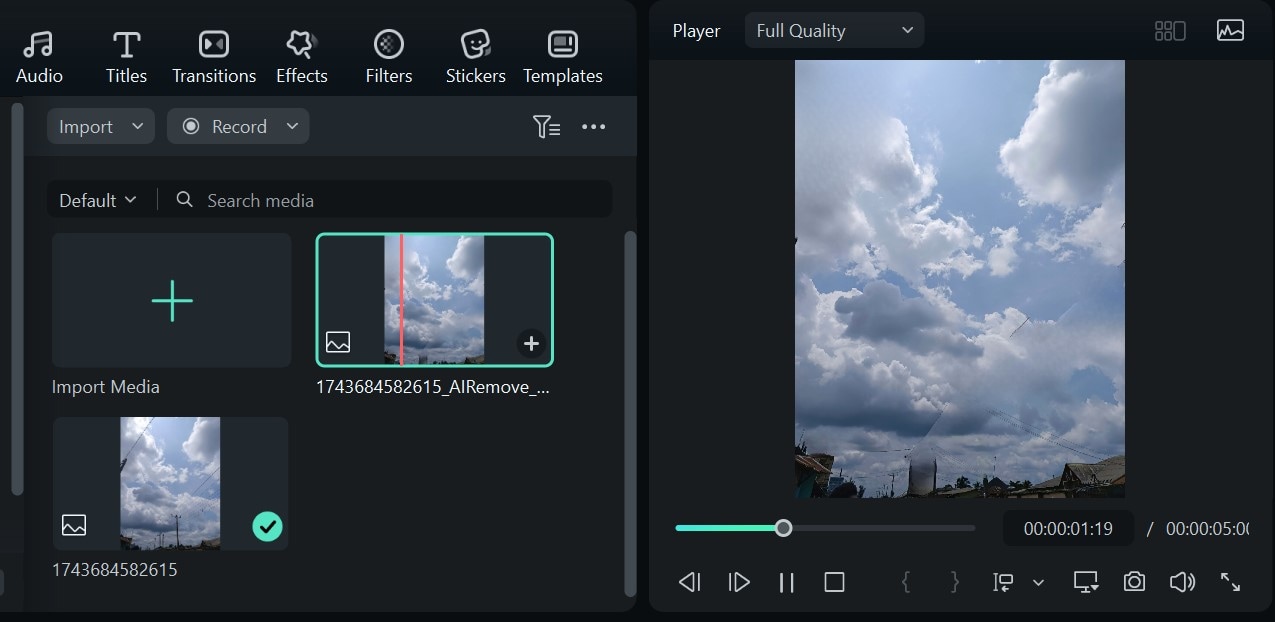
Your edited photo will automatically be updated on the editing dashboard.
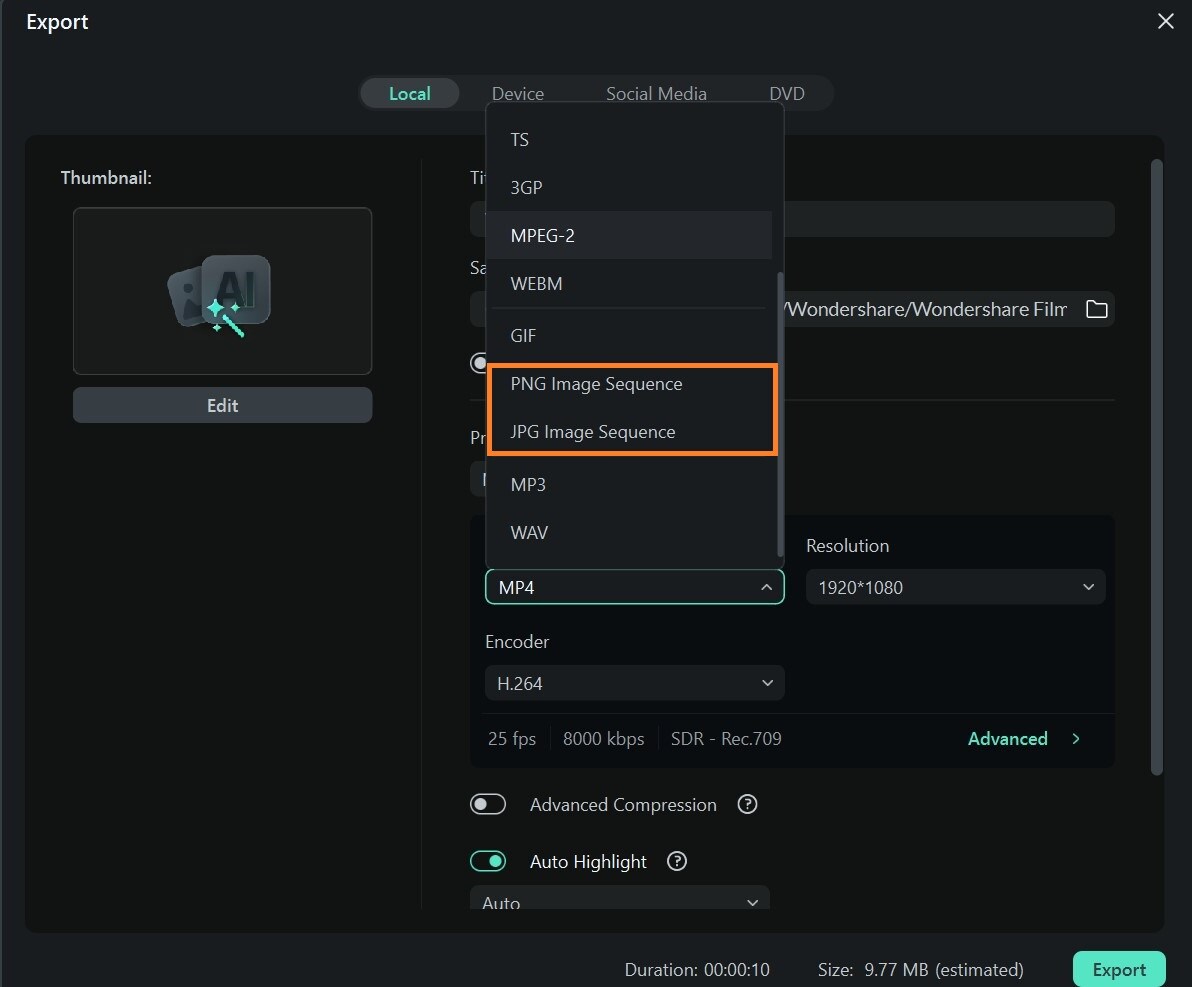
- Step 3: Export the final image.
- Once you’re satisfied with the result, export the image in your desired resolution.
- Ensure you set the media format to JPG or PNG to avoid exporting your image as a video.
Conclusion
Thanks to tools like Snapseed and Filmora, removing distractions from your photos is easier than ever. If you need a quick fix, the Snapseed remove object feature is a great choice for simple backgrounds and small edits. However, when dealing with complex textures, larger objects, or tricky elements like text and stickers, an AI-powered tool like Filmora can provide a cleaner, more professional result with minimal effort.
Choosing the right tool depends on your editing needs, but with these options, you’ll always have a way to create stunning, distraction-free images. Put Filmora to the test and transform your photos like a pro!
