Text-to-speech on a Mac is excellent for proofreading, people with low vision, and those who like multitasking. Your Mac can read aloud everything on the screen or selected text on a website or within an app. It can even read a document, note, message, or email as you type.
Is this capability available as a built-in macOS feature? Let’s find out.
In this article
Does Your Mac Have Built-in Text-to-Speech?

Every Mac has built-in text-to-speech. Apple introduced it in 1984 when it unveiled the first Macintosh and its MacinTalk text-to-speech engine.
The feature underwent many changes over the decades, sporting new voices, languages, functionalities, and names, including Speech up to macOS Catalina and Spoken Content since macOS Big Sur.
Let’s see how to enable your iMac or MacBook text-to-speech feature.
How to Enable Text-to-Speech on a Mac
You can enable Mac text-to-speech in Accessibility settings, but the feature is under different names depending on the macOS version. Here are the steps for newer and older systems.
Official Method: macOS Big Sur or Newer
Step 1: Go to the Apple menu > System Settings (macOS Ventura or newer) or System Preferences (macOS Big Sur or Monterey) > Accessibility > Spoken Content.

Step 2: Toggle the desired switches for text-to-speech and customize the settings.

macOS Catalina or Older
Step 1: Go to the Apple menu > System Preferences > Accessibility.

Step 2: Select Speech in the sidebar and tick the desired text-to-speech checkboxes.

Customization Options and Features of Mac’s Text-to-Speech
You can customize your Mac text-to-speech in many ways. Here’s a quick overview.
Regardless of your macOS version, you can choose a voice (which depends on the system language) and adjust the speaking rate and volume.

You can also have your Mac read announcements aloud. For instance, it can notify you of a new email or alert you about an action to perform within an app.

This feature lets you pick a different voice for announcements only, set a delay, and choose a default or custom phrase to precede the text (e.g., the app name, “Alert,” or “Attention”).

The Speak Selection feature may interest you the most. Once you enable it, your Mac can read any selected text on the screen aloud.

You can customize the keyboard shortcut (the default is Option + Escape) and choose whether to highlight words, sentences, or both as your Mac speaks the selected text. You can also change the word and sentence color, pick a sentence style, and automatically show the on-screen Speech Controller.

Furthermore, your Mac can read text under your mouse pointer. That’s perfect for longer text, eliminating the need to select multiple paragraphs.

This feature’s default setting is to activate TTS only when you zoom in, but you can set it to Always. You can also adjust the speech verbosity and delay.

Another TTS option is to have your Mac read the text and the keys you press on the keyboard as you type. It can read each character, word, selection change, and modifier key aloud. However, this feature isn’t available on macOS Catalina and older systems.

How to Use Your Mac’s Text-to-Speech
Once you enable macOS text-to-speech, follow these steps to have your Mac read selected text aloud:
Step 1: Select any text on the screen. We’ll use Apple’s website page in Safari for demonstration.

Step 2: Press Option + Escape (or another keyboard shortcut if you’ve changed the default).

Step 3: Use the on-screen Speech Controller to pause, resume, and stop text-to-speech or adjust the speaking rate. You can also return to previous sentences or skip them using the Rewind and Fast Forward buttons (respectively).

Another way to use text-to-speech on a Mac is to select text within any app, right-click it, and click Speech > Start Speaking. However, that doesn’t display the Speech Controller.

Why You Should Consider a Third-Party Text-to-Speech App for a Mac
The built-in text-to-speech on MacBook and iMac devices limits you to hearing on-screen text and app announcements. After all, it’s an accessibility feature. It’s beneficial for everyday use, primarily for people with low vision.
However, what if you wanted to convert text to speech for a video voiceover? Your Mac could read it aloud, but you’d need a recorder to capture the system audio. That’s too much trouble for something that third-party software can provide in a few clicks. Here’s one excellent software to consider.
An Alternative to Consider: Wondershare Filmora
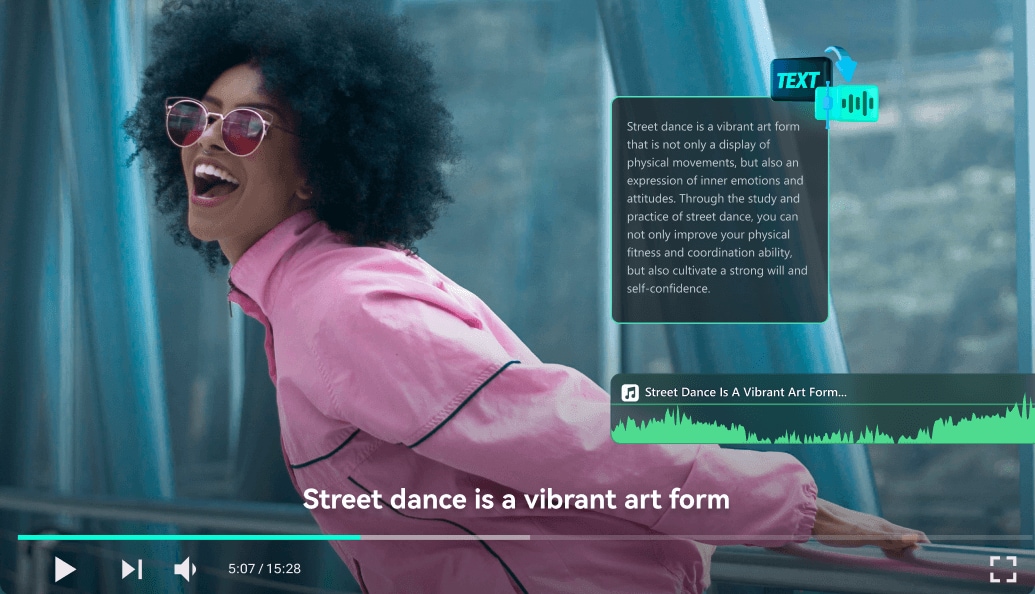
Wondershare Filmora is an advanced video editor with AI-powered text-to-speech for turning any text into a voiceover within seconds. You only need to provide a text input and choose from 33+ languages and 40+ natural-sounding voices. Filmora will automatically convert it, generating an MP3 file and segmenting all sentences to simplify editing.You can also have Filmora’s AI generate text according to a topic and your specified details before converting it into speech. The best part? You can clone your voice (in 16 languages) if you don’t want to use the available options. That’s perfect for personalization and branding consistency.

Filmora has many more aces up its sleeve. Some include AI Speech-to-Text, AI Translation, AI Text-Based Editing, AI Color Palette, and AI Video Denoise. You can also generate music and sound effects with AI, enhance your voice and video footage, convert long videos into short clips, enjoy planar tracking and multi-camera editing, etc.
These features only scratch the surface, so download Filmora to your Mac to uncover a treasure trove of audio, video, and text editing tools and ever-expanding creative assets (e.g., templates, effects, LUTs, stickers, titles, transitions, etc.).
How to Use Filmora’s Text-to-Speech on a Mac
Filmora has a user-friendly interface that makes audio, video, and text editing a breeze. Here’s how to use its AI Text-to-Speech on your Mac:
Step 1: Launch the software and click Create Project > New Project.

Step 2: Click Import and choose a video from your computer. Drag and drop it onto the timeline.

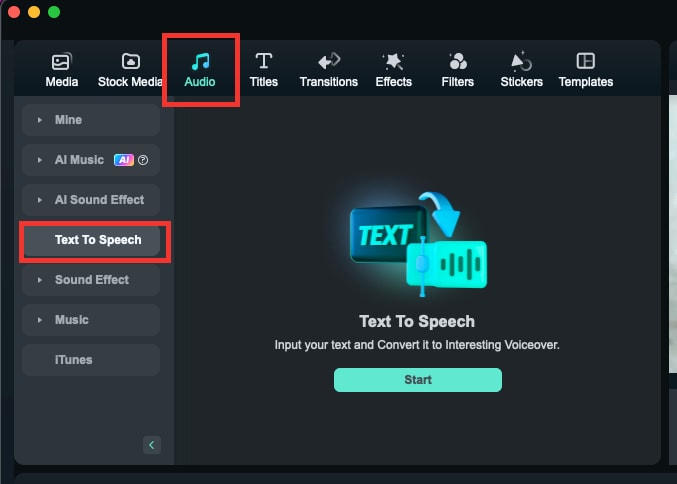
Step 3: Go to Audio > Text-to-Speech and click Start.

Step 4: Type your text in the specified box (or copy and paste it) or have AI create it by selecting a topic and describing your idea. Then, choose a language and voice (or clone yours) and adjust the speed and pitch. Click Generate to turn the text into a voiceover.

Step 5: Edit your text and voiceover and fine-tune the video with effects, filters, transitions, and other assets. Click Export to save it on your Mac or share it directly on YouTube, TikTok, or Vimeo.

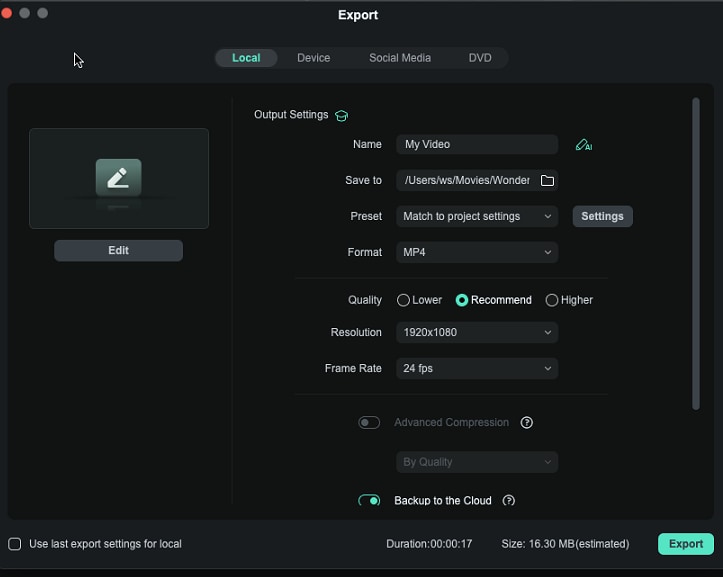
Step 6: Customize the output settings and click Export.

Conclusion
Mac text-to-speech has been around since the first Macintosh graced us with its presence. However, it’s an accessibility feature without advanced functionalities like creating a voiceover from a text input.
Third-party software is your only option if you need text-to-speech going beyond accessibility. Wondershare Filmora is your best bet because of cutting-edge AI algorithms, an intuitive UI, and many more features besides text-to-speech. Try it for free to see how it can transform your videos. You’ll get 100 AI credits upon signing up.


 100% Security Verified | No Subscription Required | No Malware

