Background noise is a common audio issue that can negatively affect the quality of your video. Whether it originates from wind noises, traffic, or just random talking, audio noise can be incredibly distracting, making it difficult to focus on the footage or hear what’s being said in the video.
That’s why its removal is a vital step for many editing projects, and today’s guide will show you how to remove background noise in CapCut. Stick around; we’ll discuss the app’s noise removal features, show you how to use them on all devices, and provide an alternative app you might like more than CapCut.
In this article
Can CapCut Remove Background Noise?
Yes, CapCut can remove background noise, making it a fantastic option for enhancing your audio quality and your video’s effectiveness. The free video editor has a remarkably potent built-in noise-reduction feature that lets users remove background noise from videos with CapCut on any device.
How to Remove Background Noise in CapCut on All Devices
One of CapCut’s most underrated features is its cross-platform availability, allowing users to remove background noise in CapCut’s mobile apps for Android and iOS, desktop apps for Windows and macOS, and the online browser-based tool. So, let’s learn how to reduce background noise in CapCut with these.
How to Remove Background Noise in CapCut on Mobile
As CapCut is owned by ByteDance, the same company behind TikTok, this free video editor is most commonly used to create TikToks on smartphones and tablets. That’s why we’ll kick things off by showing you how to remove background sounds in CapCut’s mobile apps, so let’s dive right in:
Step 1: Head to the Google Play Store or Apple App Store and download CapCut.
Step 2: Open the app on your Android or iOS device, log into it, and give it all the necessary permissions.
Step 3: Tap the New Project button, select a video, and hit Add.

Step 4: Once inside the Editor, tap the video in the Timeline, scroll the menu bar at the bottom, and hit the Reduce noise option.

Step 5: Enable the app’s noise reduction feature and listen to the changes in the audio.

Once applied, you can hit the Export button in the top right corner to save the video with reduced background noise.
- Remove background noise precisely with AI.
- Clean audio based on noise type.
- Edit audio separately after noise removal.
- Remove wind, reverb, hum, and hiss easily.
- Reduce noise for clear sound.

How to Remove Background Noise in Caput on Computer
CapCut is also available as a desktop tool for Windows and macOS, and since the interface is different from the mobile apps, we’ve also included a step-by-step guide for desktop users:
Step 1: Navigate to the official CapCut website, tap the Download button, and run the installer.
Step 2: Launch the app on your Windows PC or Mac and tap the Create project button.

Step 3: Import a video with audio and drag it into the Timeline section at the bottom.

Step 4: Tap the audio track or the video with audio in the Timeline to select it and navigate to the Editing panel on the right side. Then, locate and enable the Reduce noise feature inside the Basic tab.

You can then preview the project by reviewing the clip in the Player panel, after which you should notice significant improvements to the quality of your video.
How to Remove Background Noise in CapCut Online
Lastly, we have the web-based CapCut app, a browser tool perfect for those who want to avoid downloading or installing software on their devices. Here’s how to reduce background noise in CapCut’s online version:
Step 1: Visit the official CapCut website and tap the Try CapCut Online option in the top right corner.

Step 2: Log into CapCut’s web-based app with one of the following options.

Step 3: Tap the Plus icon or drag and drop the video into the Import section to upload it.

Step 4: With the video uploaded and ready for editing, navigate to the Audio tab on the right side and enable the Noise reduction option.

That’s all there is to it, as CapCut’s noise reduction feature only requires being enabled, and the video editor does the rest for you.
Pros and Cons of Using CapCut for Noise Removal
Although CapCut’s video editor packs a punch and carries some great benefits, it’s not all rainbows and sunshine with this tool. That being said, we should explore CapCut’s strengths and weaknesses so you know what you’re dealing with, and we’ll start with the pros:
While these limitations might not interest you, especially if you only want to remove background noise from videos with CapCut, they’re not exactly small. They can be significant enough to prompt users to look into alternative solutions.
An Alternative to Consider: Wondershare Filmora

If CapCut’s drawbacks, be it the imperfect noise removal tool, the lack of other audio editing tools, or the fact that many professional-grade features are missing from this free video editor, are steering you away from the app, you’ll love hearing more about Filmora, an alternative solution with none of these cons.
Filmora is a cross-platform video editor for Windows, macOS, Android, and iOS, and this robust app combines the best of both worlds regarding professional-grade features and beginner-friendliness.
Whether you need audio or video editing tools, this powerful editing app certainly doesn’t lack in this department. It offers a lot, including AI-powered tools, despite being as user-friendly as CapCut.
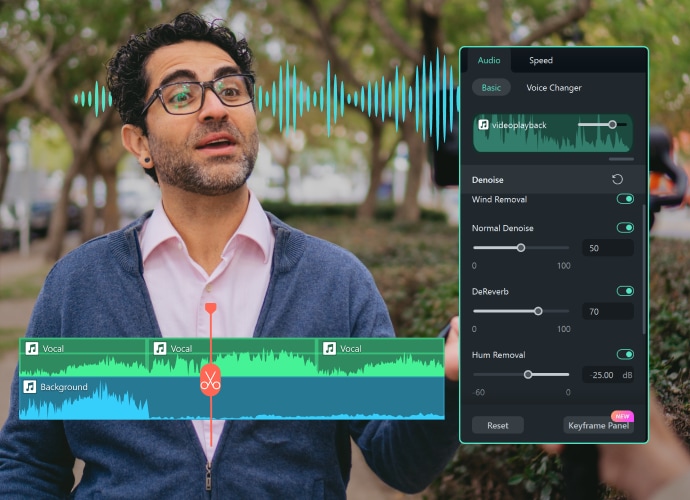
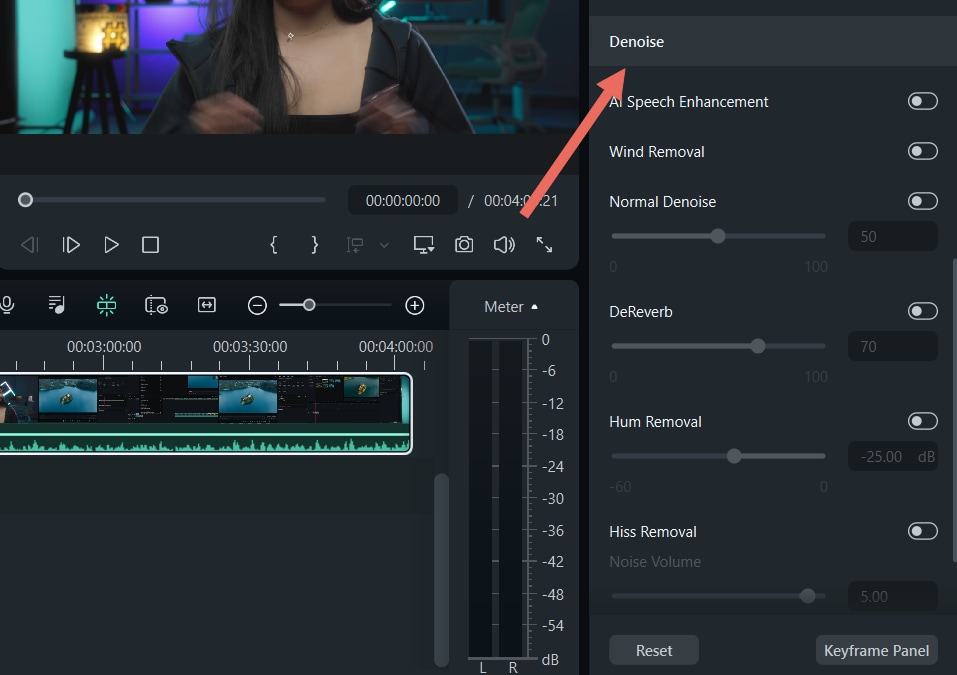
Its Denoise features include Wind Removal, Hum Removal, Hiss Removal, DeReverb, and Normal Denoise tools, and they can also be combined with Filmora’s remarkably potent AI Speech Enhancement tool for crystal-clear audio and a superb video experience.
How to Remove Background Noise in Filmora
Thanks to its beginner-focused approach, editing in Filmora is effortless. That’s also the case with background noise removal, and that process looks like this:
Step 1: Launch Filmora and hit the New Project button on the startup screen.

Step 2: Tap the Import button to add your media files and then drag them from the Import section onto the Timeline.

Step 3: Head to the Audio tab in the Editing panel on the right and scroll down to the Denoise section. Then, enable Wind Removal, Normal Denoise, DeReverb, Hum Removal, or Hiss Removal options, depending on the background noise you’re dealing with.

Step 4: Once applied, preview the audio in the Player panel and check whether you’re satisfied with the improvements. If not, you can adjust sliders for each feature or combine them with the AI Speech Enhancement tool to achieve clear voices.
Step 5: When ready, tap the Export button in the top right corner, adjust the output settings to your liking, and save the improved video without background noise.
With Filmora, users can remove background noise instead of merely reducing it, and the program’s host of features employ powerful, state-of-the-art AI algorithms that make noise removal incredibly effective.
These features are also user-adjustable and can be combined with the AI Speech Enhancement tool and the Equalizer, ensuring professional-sounding audio in the final project.
Conclusion
As one of the most widely spread side effects of recording in home studios and outside environments, background noise is the leading culprit behind low-quality, unprofessional audio and ineffective videos. Fortunately, these unwanted sounds can be reduced or removed with CapCut.
For those who want to learn how to remove background noises in CapCut, we’ve provided detailed step-by-step instructions for the tool’s mobile, desktop, and online versions.
However, it’s worth noting that CapCut also has limitations, as it lacks professional editing tools, has limited audio editing features, and offers uneven noise removal quality, all drawbacks prompting users to look into alternatives.
Unlike CapCut, Filmora doesn’t suffer from these weaknesses, offering more robust and AI-powered editing features in a beginner-friendly form. Moreover, its noise removal tools include six modes and adjustability and can be combined with AI Speech Enhancement for a superior audio editing experience.


