Ready to learn how to make a Picture-in-Picture video on your Mac and learn another effect in video creation? It's good you came here because we have great tips for you! We'll show you the best methods for creating macOS Picture-in-Picture videos so you can use this versatile technique in future tutorials, presentations, or vlogs.
If you like straightforward step-by-step explanations and overlay picture-in-picture effects in your content, it's your lucky day. Keep scrolling down and try Picture-in-Picture on Mac right after!
In this article
Understanding Picture-in-Picture on Mac: Use Cases and Applications
Picture-in-Picture is a useful feature you can use in different situations for your content and create a dynamic experience for viewers. This functionality can be applied in different situations, and here we listed the most common:
Educational Videos: Perfect for different online courses and educational videos for students, where educators can overlay their images or commentary over the slides and instructional material.
Gaming Content: Gaming streamers frequently use the PiP option in video creation to create more dynamic content for their fans, with gameplay and the player.
Webinars and Presentations: Webinars and presentations with the PiP are more dynamic and interactive, with slides and demos shown on the screen with the presenter.
Video Tutorials: Tutorials are more understandable with the PiP function, where viewers can see the screen and the creator's face, making it easier to follow instructions and understand them.
Product Demonstrations: If you want to showcase the product while providing visual commentary, PiP is the perfect way to achieve that.
Social Media Content Creation: Personal reactions to social media content are easily achievable with this function. You probably came across short on Instagram and TikTok with a commenting head overlay, usually for fun purposes.
Cooking Shows: PiP can display the chef alongside the cooking process in cooking shows. This way, viewers can follow the chef's expressions, recipes, and cooking techniques.
Travel Vlogs: Travel vloggers can use PiP to add commentary or reactions while showing scenery or experiences, allowing viewers to enjoy visuals and connect with them.
- Superb video stabilization with low distortion.
- Vast video/audio effects and creative assets.
- Powerful AI for effortless content creation.
- Intuitive, professional yet beginner-friendly.
- Works on Mac, Windows, iOS, and Android.

How to Make a Picture-in-Picture Video on Mac Using Filmora (Third-Party Software)
Applying Picture-in-Picture video on Mac with Wondershare Filmora can be quite a fun and easy experience. Filmora is an excellent, AI-powered video editor that has a user-friendly interface, easy to use for all skill levels. You can make a Picture in Picture video with Filmora easily and quickly on your Mac, and here are the steps to follow:
Step 1: Download and install Filmora on your Mac. Launch the program and start a New Project.
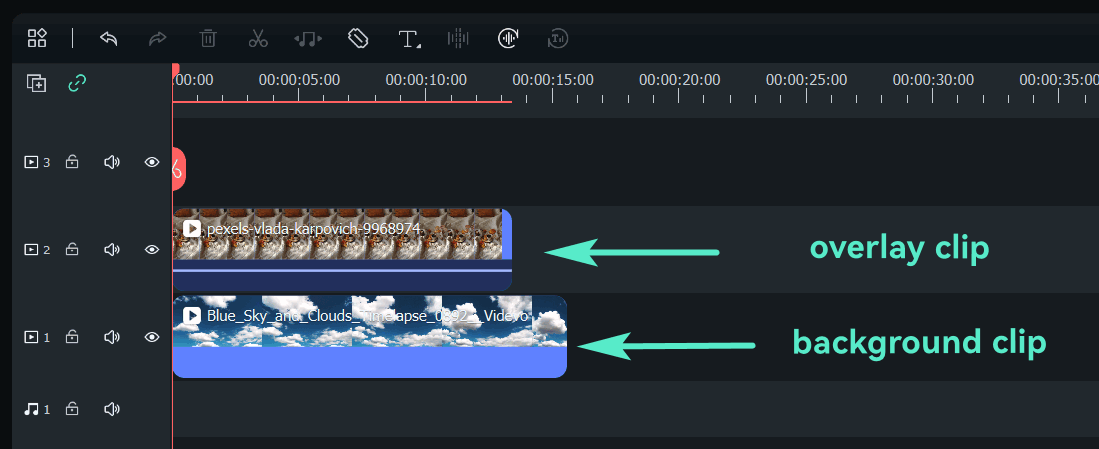
Import background and picture-in-picture videos to the media library and drag and drop them onto the timeline. The background video should be on video track 1 in the timeline, and the PiP video should be above.

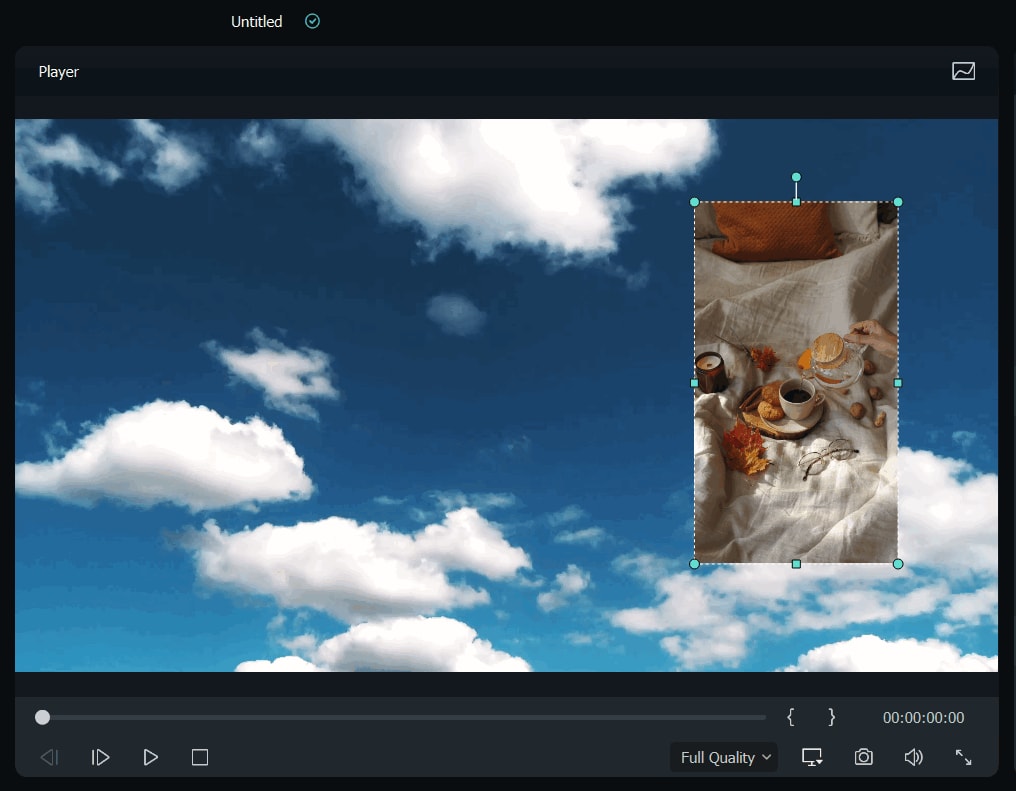
Step 2: Select the PiP video in the timeline, drag it in the Preview window, and adjust its position and size. Additionally, you can adjust blending modes, shape and mask, add animation, motion and effects to PiP.

Add a Picture-in-Picture Effect on MacOS Using iMovie (Built-in Software)
If you are more interested in a built-in Picture-in-Picture MacBook solution for your video, iMovie can do the work for you. You'll just need to follow these steps:
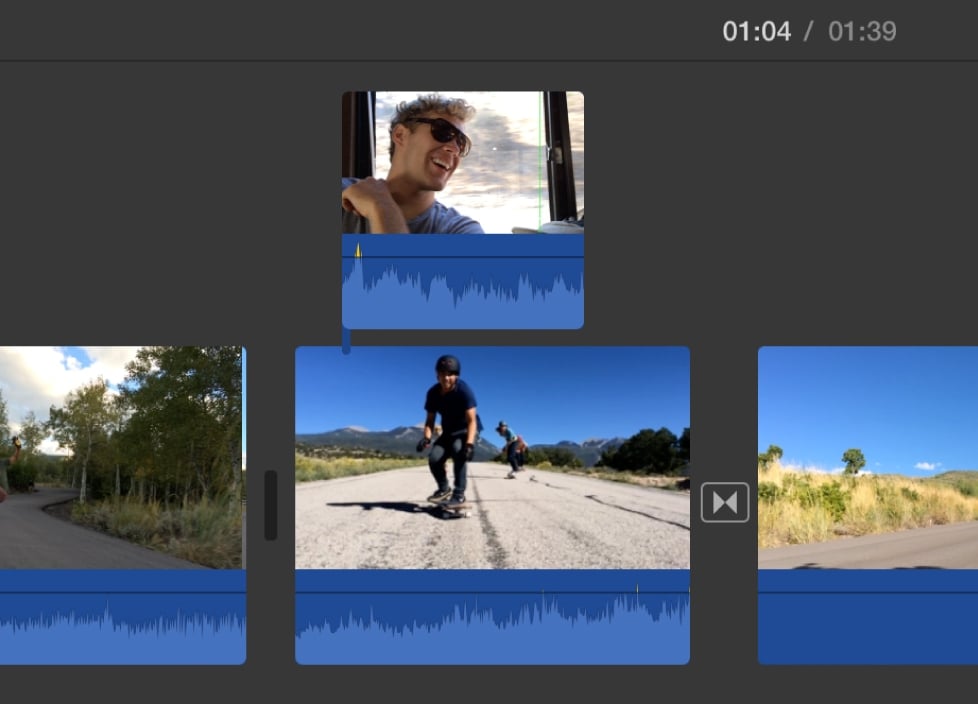
Step 1: Open the iMovie app on your Mac, select a clip or range you want to use as a PiP clip and drag it above the background clip on the timeline. When the green Add icon appears, release the mouse button.

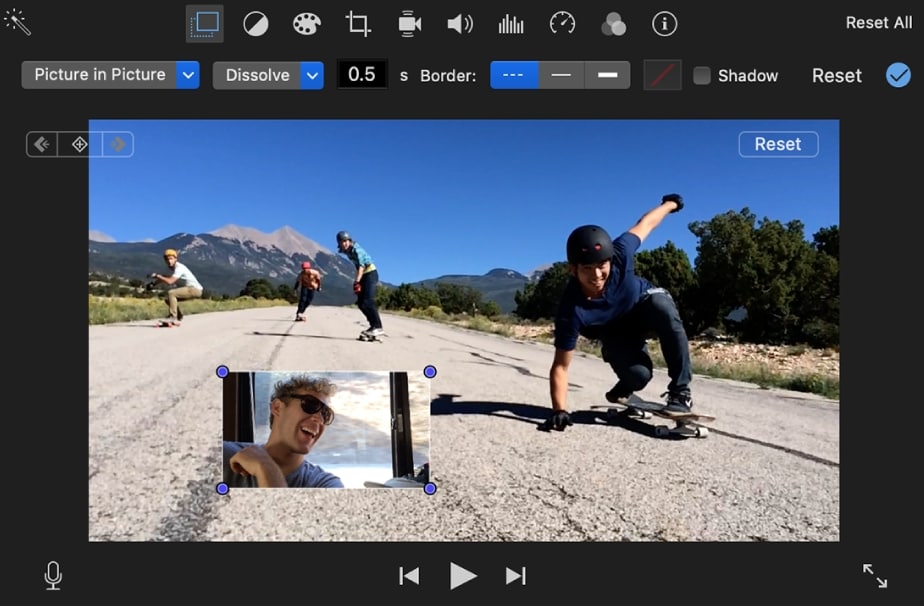
Step 2: Click the Video Overlay Settings button, and overlay controls will show if they already didn't.

Step 3: Click the pop-up menu on the left and select Picture-in-Picture. The PiP clip will appear in an inset window on the top of the background clip. To change the position of the PiP clip, drag it to the spot in the clip where you want to position it.

Step 4: Click the Apply button in PiP controls and you are done.
Comparing the Top Methods for Creating Picture-in-Picture Videos on Mac
Here is a comparison table for both methods we showed you today for applying Picture-in-Picture on Mac:
| Feature | Filmora | iMovie |
| User Interface | Intuitive, user-friendly interface with drag-and-drop functionality | User-friendly interface |
| Picture-in-Picture Functionality | Easy-to-use PiP functionality with multiple layers | Simple PiP functionality, limited to one layer |
| Customization Options | Extensive customization options for size, position, and rotation | Basic customization options |
| Transitions | Variety of transitioning options for PiP | Limited transition for PiP |
| Effects | Advanced effects and filters available | Basic effects available |
| Text and Titles | Comprehensive text editing options | Solid selection of titles and text styles |
| Audio Control | Detailed audio mixing features | Basic audio adjustment tools |
| Export Options | Multiple export formats and settings | Limited export options |
Conclusion
Picture-in-Picture functionality opens up so many creative possibilities in content creation, but overall, it brings dynamic and engaging storytelling. No matter what type of video you want to create, you have two options for Picture-in-Picture on Mac. Filmora is perfect for both beginners and advanced users, and it has advanced features and customization options with numerous layers available. That's perfect for more complex video editing with PiP functionality and professional results.


 100% Security Verified | No Subscription Required | No Malware


