


Standing out often means making your content feel genuinely cinematic. People drop that word all the time, but real creators know one of the best tricks for that high-end look is playing around with depth of field. It's the key to making your subject pop while turning messy backgrounds into silky blur.
If you are a beginner trying to understand depth of field in photography without getting lost in technical jargon, this guide is for you. We'll discuss what DoF in photography really means and show you simple ways to apply it to your own project!
Part 1. What Is Depth of Field in Photography?
Ever notice how a portrait can have a perfectly sharp face with a beautifully blurred background, while a landscape keeps everything from the foreground to the horizon in focus? Depth of field (DoF) is what creates that difference.
In simple terms, depth of field is the range of distance in a photo or video that appears acceptably sharp. A shallow depth of field keeps a small area in focus and blurs more of the surroundings, while a deep depth of field keeps a wider range of the scene sharp.

Types of Depth of Field
Once you understand the meaning of depth of field, there are two main types to know: shallow depth of field and deep depth of field:
- Shallow depth of field, also known as a narrow or small depth of field, helps to isolate the subject from its surroundings. For example, you can keep a person’s face sharp while the background appears softly blurred.
- Deep depth of field, sometimes called a wide or large depth of field, keeps more of the scene in focus. It works well for landscapes, architecture, and shots where details throughout the frame matter.
| Type | What It Means | Common Uses | Visual Effect |
| Shallow DoF | A narrow range appears sharp | Portraits, close-ups, product photos | Separates the subject from a blurred background |
| Deep DoF | A wider range appears sharp | Landscapes, architecture, group photos | Keeps more foreground and background details visible |
Part 2. Main Factors That Control Depth of Field
Why does the background appear blurry and smooth in one photo with a certain depth of field, while in another photo almost every part remains in focus? This doesn’t depend only on the camera. Several factors influence the size of the in-focus area and how blurry the background is.
1. Aperture (f-stop)
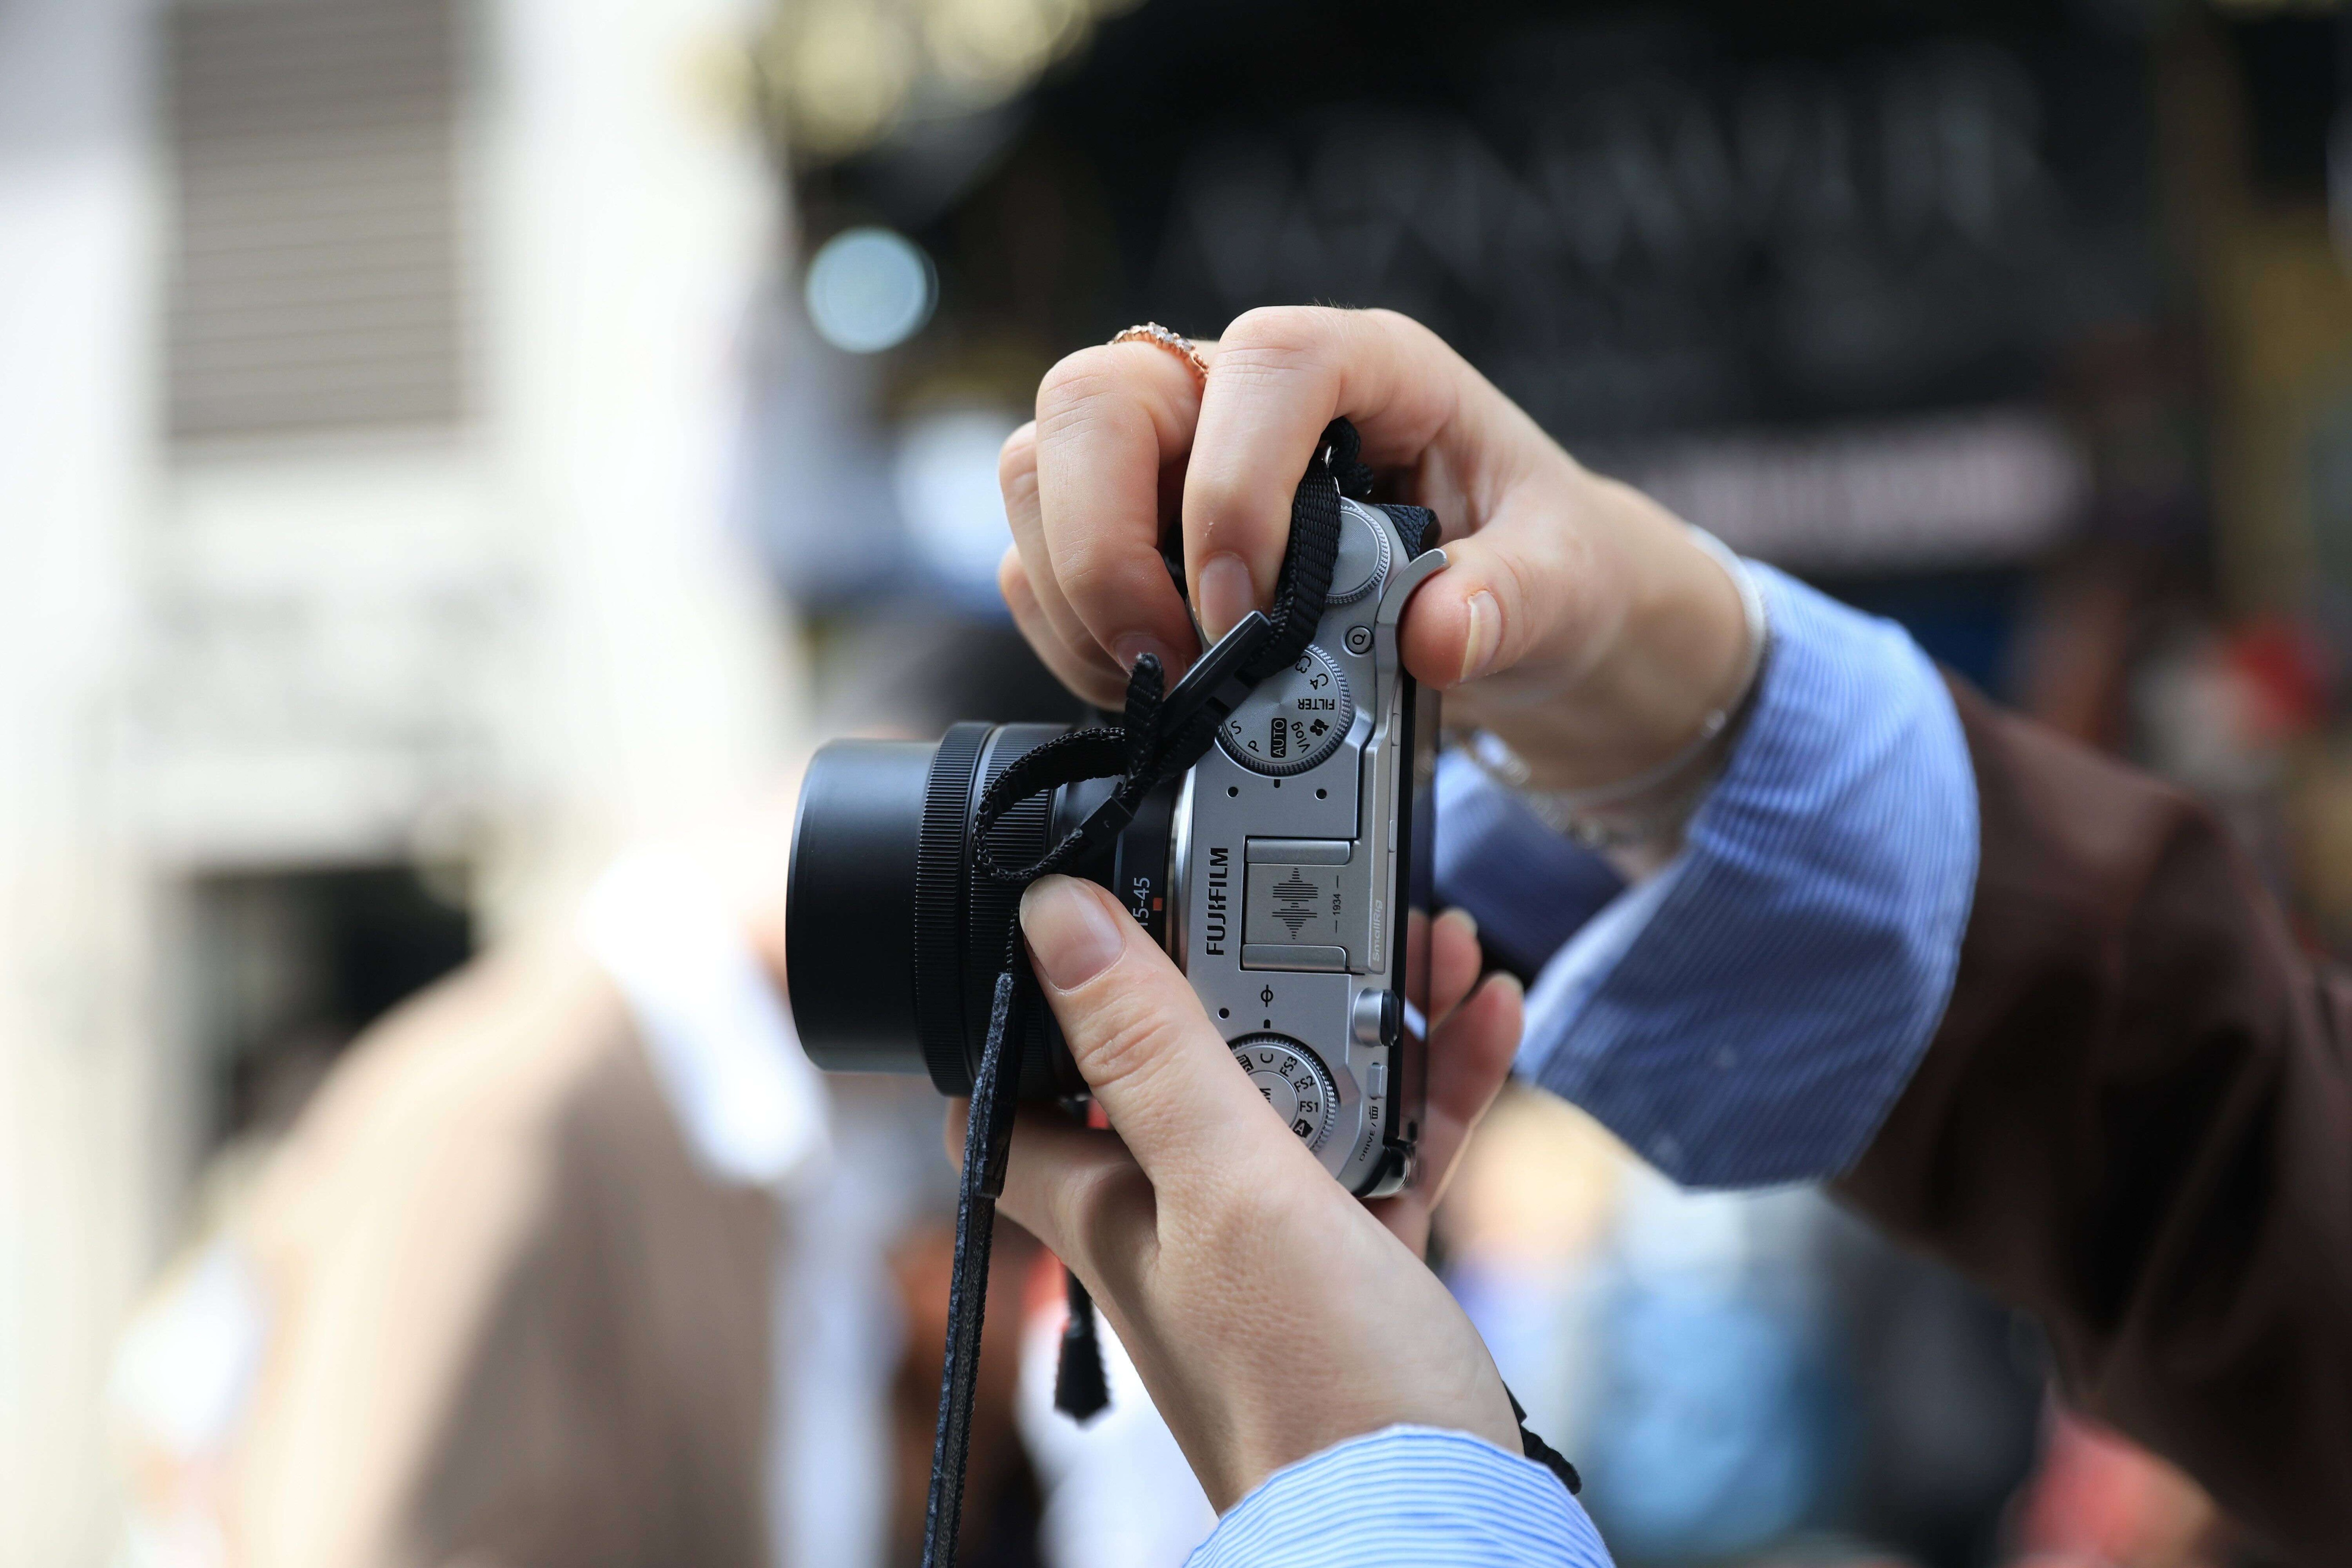
Aperture is a key setting for depth of field in photography. A lower f-number, such as f/1.8, opens the lens wider and creates a shallow depth of field, blurring the background. A higher f-number, such as f/11, reduces the aperture and creates a deeper depth of field, keeping more of the scene sharp.
2. Distance to Subject
Your distance from the subject also changes the depth of field. Moving closer generally makes the depth of field shallower, while stepping farther away increases it, assuming the other settings stay the same. This effect is noticeable in close-up photography.
3. Focal Length
Focal length affects both framing and background blur. Longer focal lengths, such as those used with telephoto lenses, make it easier to isolate a subject and create the look associated with shallow depth of field. Wide-angle lenses show more of the scene and can make it easier to maintain a deep depth of field, especially when shooting from farther away.
4. Sensor Size
Sensor size also affects how easily you can create a shallow depth of field at the same framing and f-number. A full-frame camera can generally produce a shallower depth of field than cameras with smaller sensors, provided the composition and other relevant conditions are the same.
Part 3. Shallow vs. Deep Depth of Field: Which Should You Use?
The depth of field you choose can change how viewers see a photo. A shallow depth of field image keeps the main subject sharp while blurring the surrounding area, which works well when you want to reduce background distractions.
Meanwhile, a deep depth of field keeps more of the foreground and background in focus, making it useful for landscapes and scenes where context matters. Your choice depends on the subject and how much of the scene you want to keep sharp.
When to Use a Shallow Depth of Field

A shallow depth of field works well when you want the main subject or a specific detail to be the primary focus. Some of the examples of shallow depth of field are:
- Portrait photography: Focus attention on the eyes or face and soften distracting surroundings.
- Product photography: Highlight a product or particular feature, especially in lifestyle compositions.
- Food photography: Draw attention to the dish without giving every background element equal visual weight.
- Macro and close-up shots: Emphasize fine textures and tiny details, where the focus range can become very narrow.
- Street photography: Isolate a person or moment from a busy street scene.
- Detail shots: Direct attention to small elements such as jewelry, flowers, textures, or materials.
When to Use a Deep Depth of Field
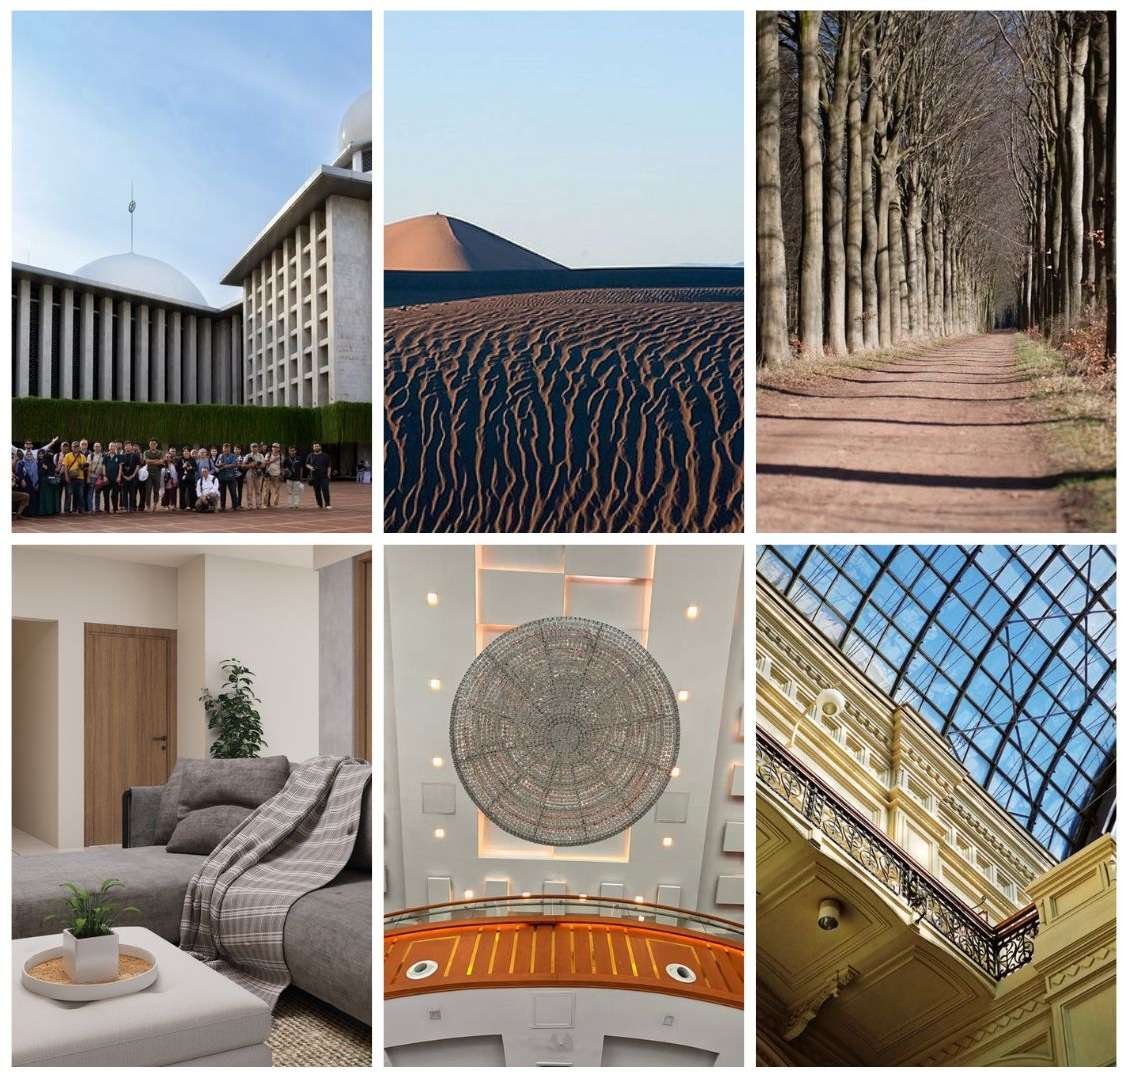
Deep depth of field is usually used when the setting is an important part of the image. For example:
- Landscape photography: Include both nearby foreground elements and distant scenery.
- Architecture: Show structural details, lines, and surrounding spaces clearly.
- Travel photography: Capture a subject together with enough of the location to establish context.
- Group photos: Keep people at different distances within the acceptable focus range.
- Interior photography: Show details across a room, especially in spaces where depth matters
- Scenes where foreground and background details matter: Keep multiple elements readable instead of isolating just one part of the frame.
Part 4. Applying Depth of Field in Your Content Easily with Filmora
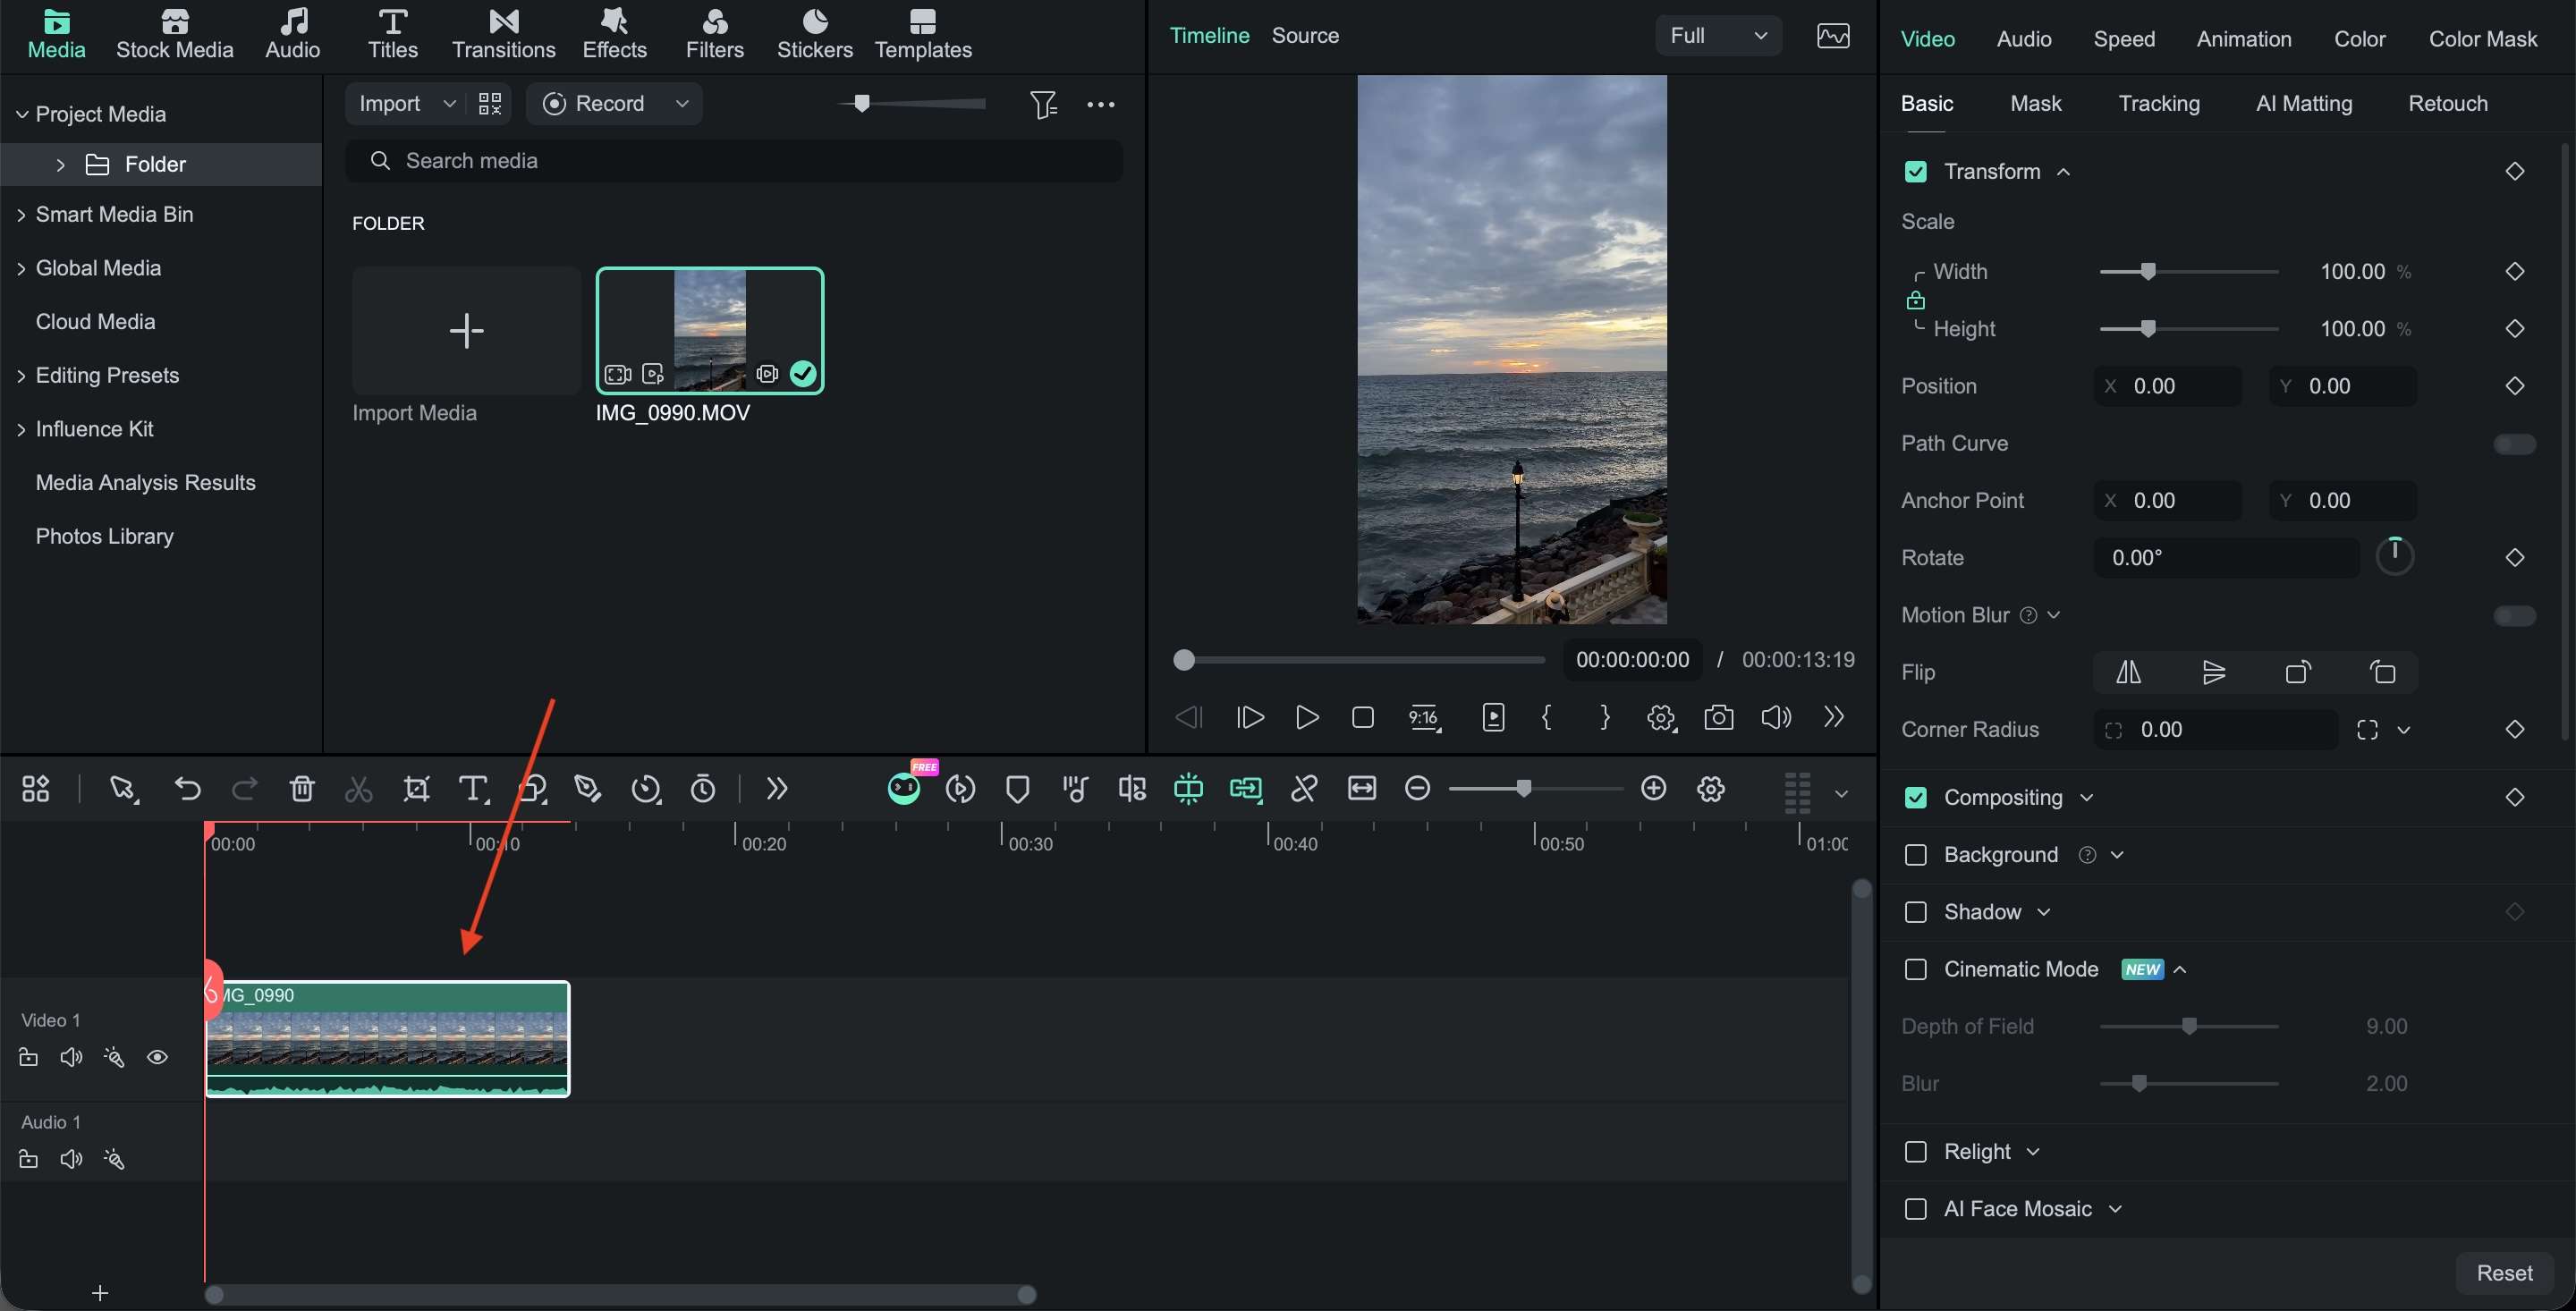
Now that you understand how depth of field works in photography, you can apply the same visual idea to your video content. Wondershare Filmora makes this easier by providing a dedicated Depth of Field setting in Cinematic Mode, so you can adjust the effect with a slider instead of building the blur manually.
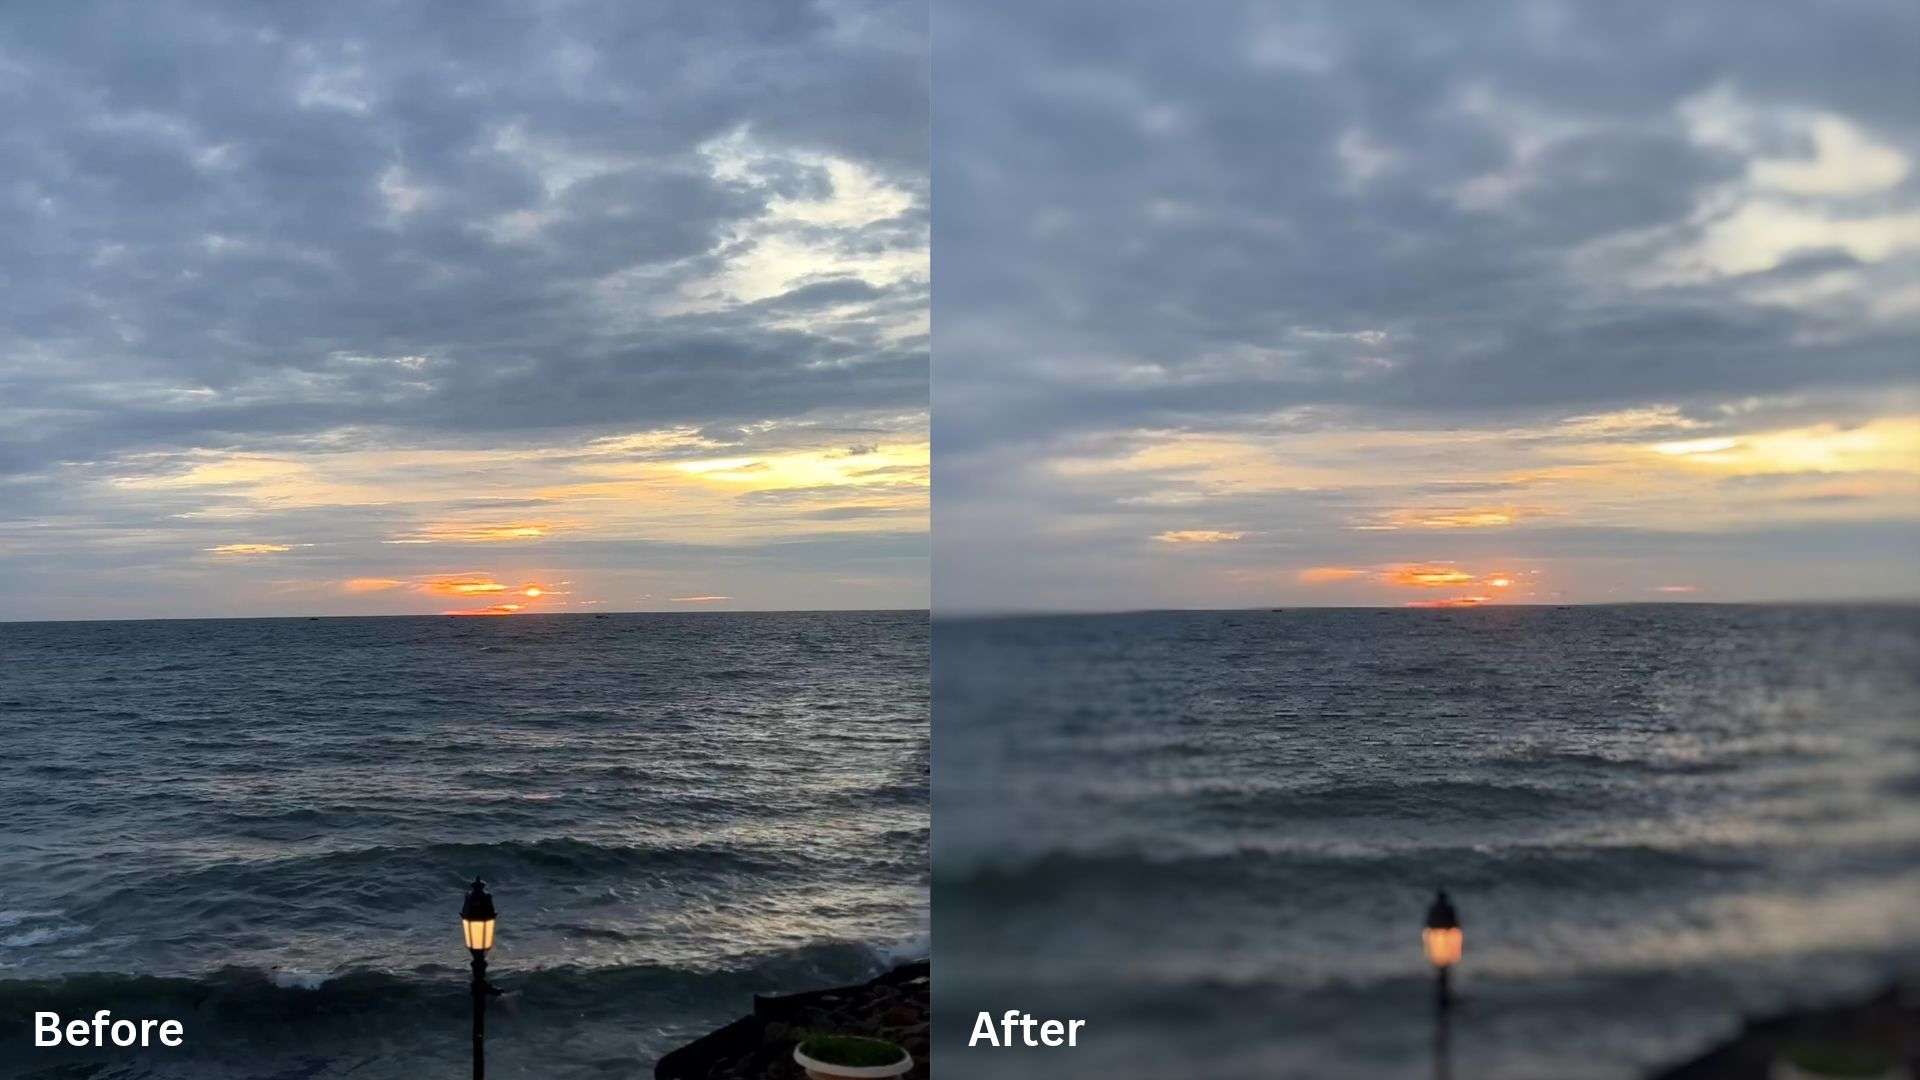
How to Add a Depth of Field Effect in Filmora: Tutorial Guide
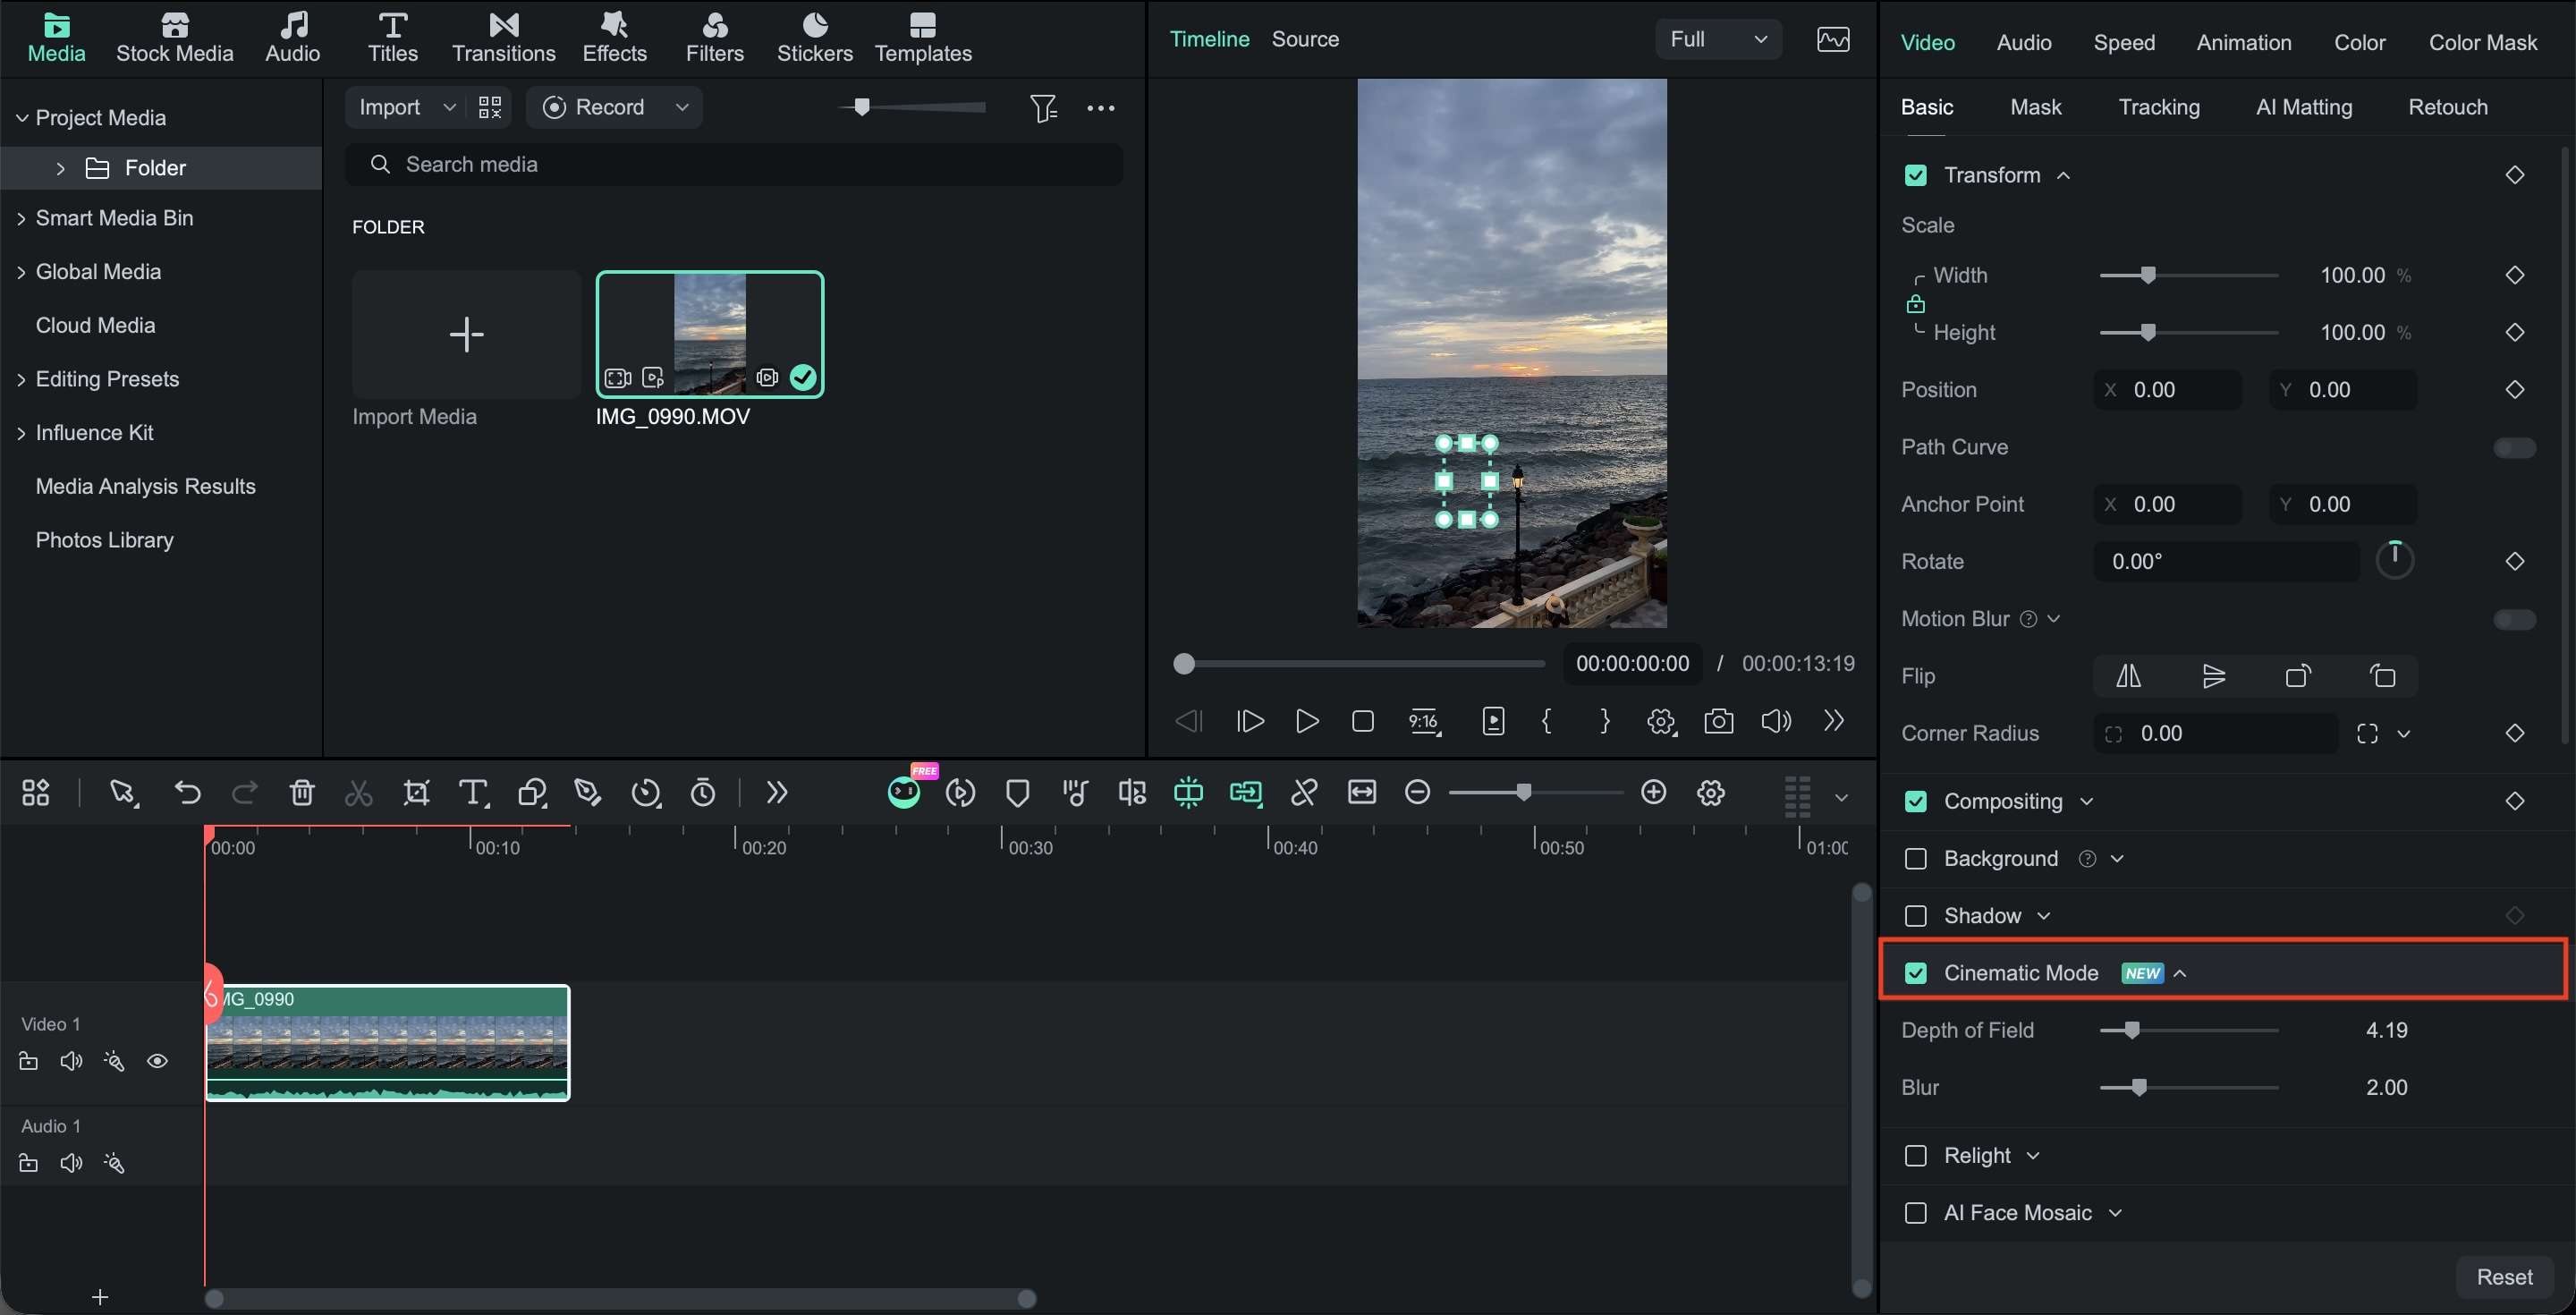
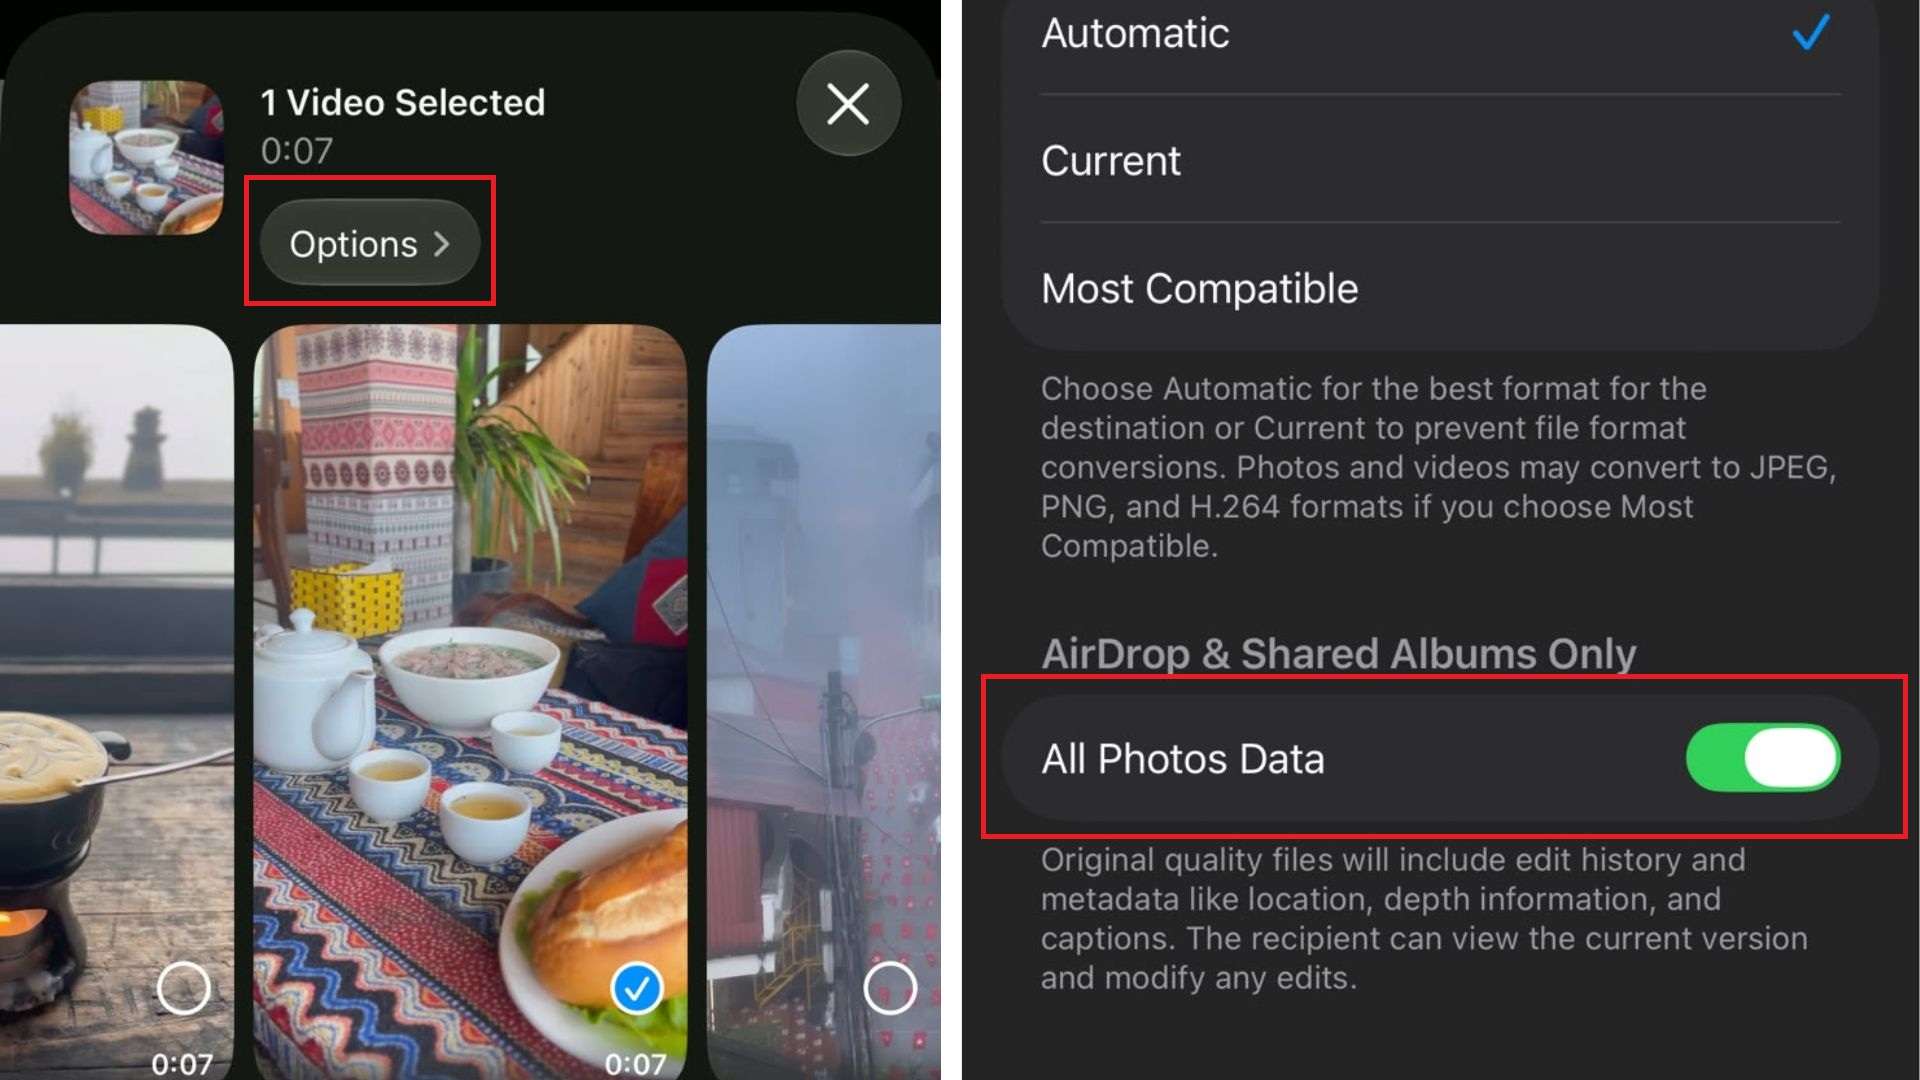
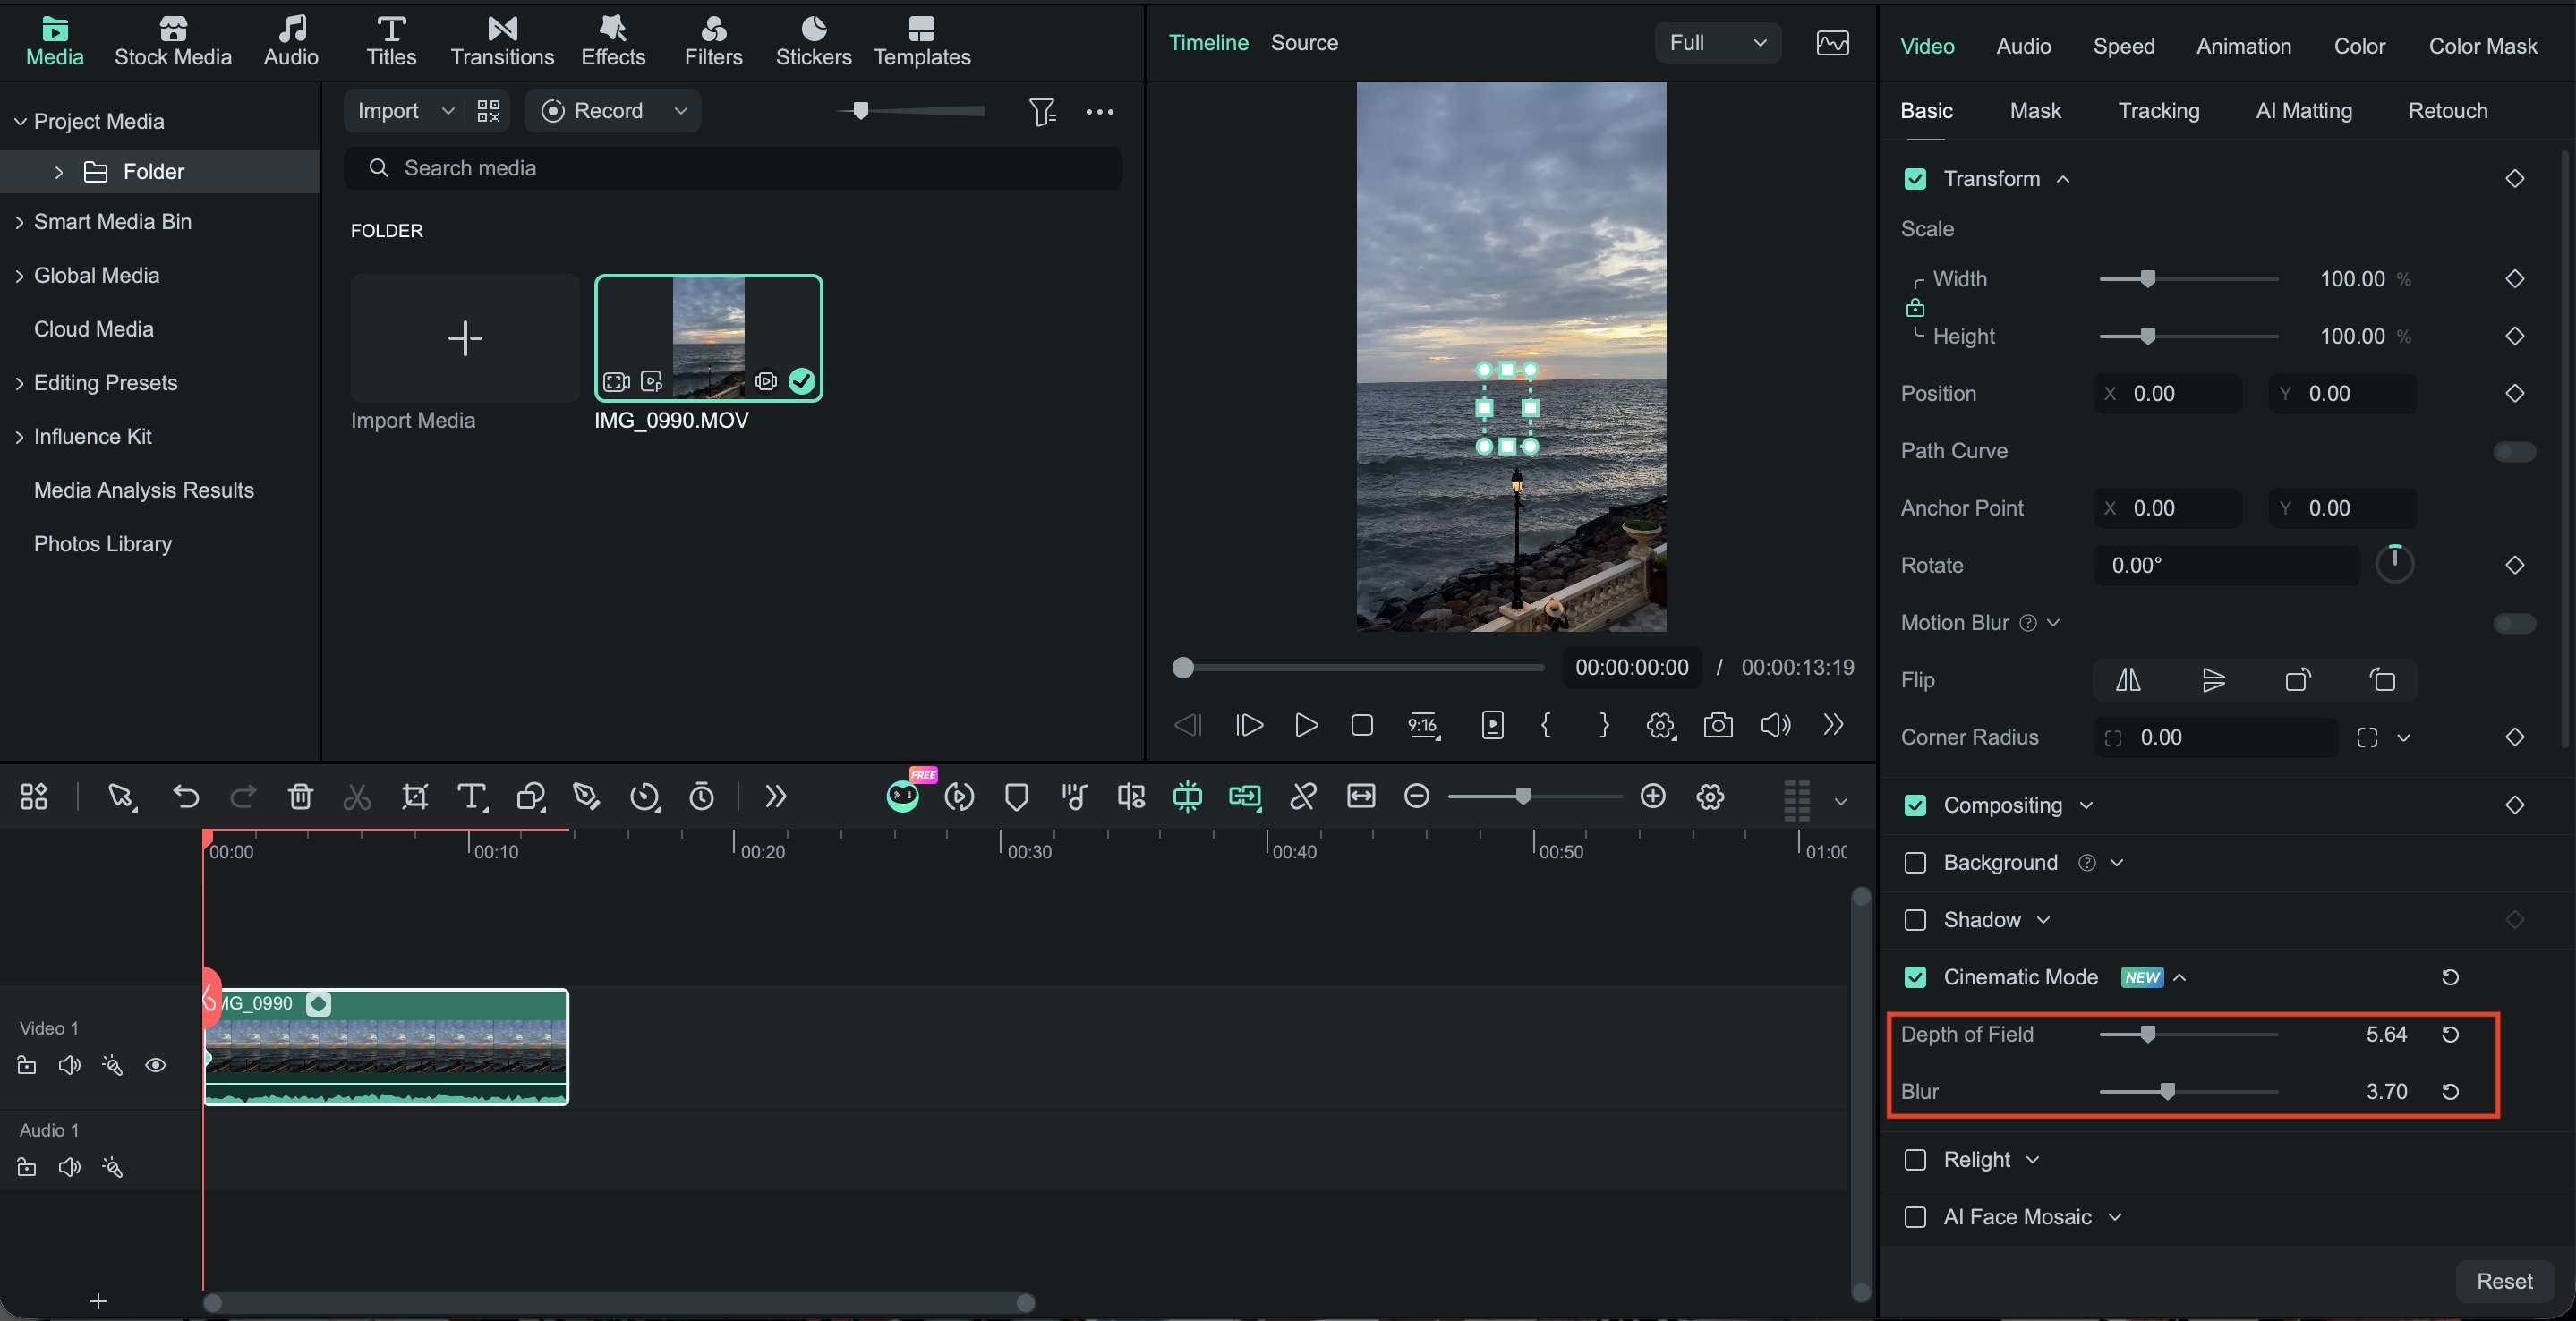
 Secure Download
Bonus: Other Filmora Features to Make Your Content More Cinematic
A cinematic look takes more than background blur. After adjusting depth of field, use Filmora’s color, facial retouching, text, masking, and motion tracking features to refine the rest of the frame:
- AI Color Palette: Matches the aesthetic and color grade of any reference video or cinematic image in one click.
- AI Video Beauty Filter: Smooths skin tones and keeps subject faces clean without losing detail.
- Text Path: Allows titles to follow curves, perspective lines, or objects for dynamic motion graphics.
- Smart Masking: Isolate a person or object so you can apply effects, adjustments, or background blur to specific areas.
- AI Motion Tracking: Keep text, graphics, effects, or blur attached to a moving subject without manually adjusting its position frame by frame.
Conclusion
Depth of field allows you to control what stays sharp and what fades into the background. Use a shallow DoF to draw attention to a face, product, or small detail, or choose a deep DoF when the surroundings matter to the shot. Aperture, subject distance, focal length, and sensor size all play a role, so you can adjust the effect to suit the scene instead of relying on background blur alone.
For creators working with video, Filmora brings depth of field into the editing workflow through its Cinematic Mode controls. You can also use AI Color Palette to refine the grade, Smart Masking to isolate subjects, and AI Motion Tracking to keep effects attached to moving objects. These tools give you more control over focus, color, and motion, so you can refine each shot to match the look you want.
FAQs
-
Can low lighting affect how depth of field looks in video?
Yes. Low light often requires a wider aperture, such as f/2.8 instead of f/5.6, which creates a shallower depth of field. If you need more of the scene in focus, adding light lets you use a smaller aperture. -
Is it better to blur the background during filming or in post-production editing?
For the most natural result, create the blur during filming with your lens and camera settings. Post-production blur works well for strengthening subject separation, but it can look less natural around hair, transparent objects, or moving subjects. -
Can smartphone cameras create a real shallow depth of field?
Yes. Getting closer to your subject or using a phone's telephoto lens can produce optical background blur. Portrait and Cinematic modes can also simulate shallow depth of field with computational processing, but unlike the natural lens blur effect found in cameras equipped with larger sensors.
