If you want to engage with people and make them pay attention, a text reveal is an excellent way to start. This particular type of animation creates movement that draws the eye, adds a dynamic quality to your text, and puts it in the spotlight where it belongs.
It’s hard to think of an animation style that is more effective for website design and can be achieved solely with CSS. You will appreciate this guide if you’re fluid in Cascading Style Sheets. Today, we will help you master text reveal animation in CSS. Let’s dive straight in.
In this article
The Power of CSS Text Reveal Animations
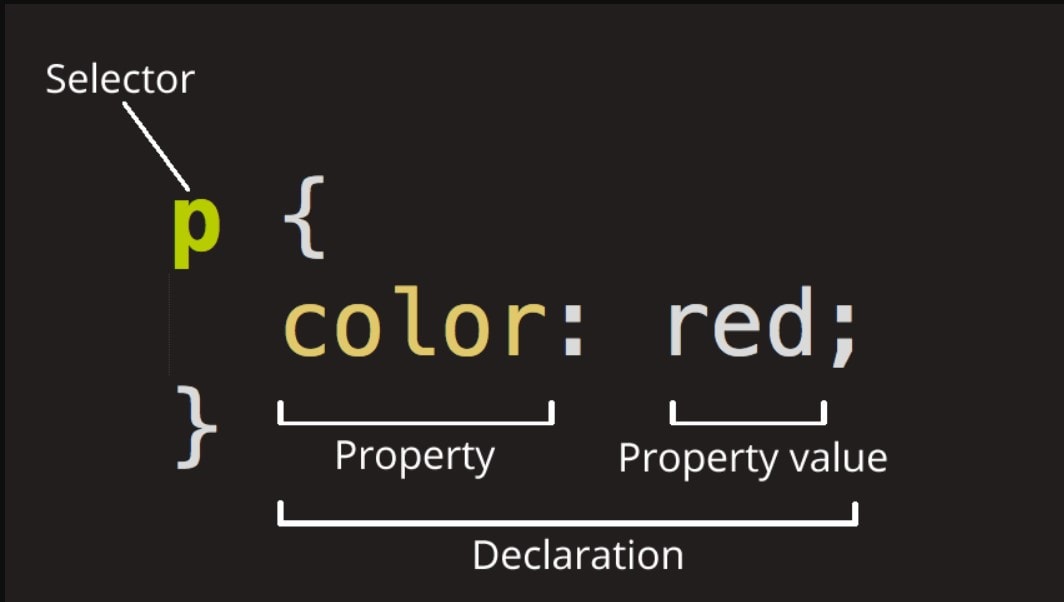
As a beginner developer, you’ve undoubtedly noticed that CSS text reveal animation is everywhere. Do you want to know why? The first reason is – CSS text reveal is very simple to create. If you know the basics of web development and can write code, it’s a simple trick to learn.
Are there any other reasons to animate text reveal with CSS? Sure! CSS animations are known to be very smooth because they are hardware-accelerated. CSS uses intra-frame interpolation to calculate values for each frame, so the animation stays smooth even when rendering is delayed.
For those of you who are only starting out with web development, all this means that CSS animations are simpler to make, easier to maintain, and have faster loading times than JavaScript-based effects. And in addition to all that, they require less code than most JS animations.
How to Create a Text Reveal CSS Animation Effect
So, where do you begin? Believe it or not, you can create your first text reveal animation with CSS. Simply copy the code below and see the text magically appear:
< !DOCTYPE html>
<html lang="en">
<head>
<meta charset="UTF-8">
<meta name="viewport"
content="width=device-width, initial-scale=1.0">
<title>Text Reveal Animation
<style>
body {
background: green;
}
.geeks {
width: 20%;
top: 50%;
position: absolute;
left: 40%;
border-bottom: 5px solid white;
overflow: hidden;
animation: animate 2s linear forwards;
}
.geeks h1 {
color: white;
}
@keyframes animate {
0% {
width: 0px;
height: 0px;
}
30% {
width: 50px;
height: 0px;
}
60% {
width: 50px;
height: 80px;
}
}
style>
head>
<body>
<div class="geeks">
<h1>GeeksforGeeks
div>
body>
html>
Limitations of Using CSS for Text Reveal Animations
CSS can be a powerful ally for website animation, but it is not without limitations.
Those who have used CSS for text reveal and similar animations know you can’t count on it for complex projects. CSS is great for simpler animations, such as fades and rotations, but it gets more challenging to use as the projects get more complex.
Take 3D, for example. While achieving a three-dimensional text animation with CSS is possible, you must be skilled and experienced. The same goes for other complex animations, such as fluid effects or ripple effects.
Text Reveal Animations Without CSS: Wondershare Filmora
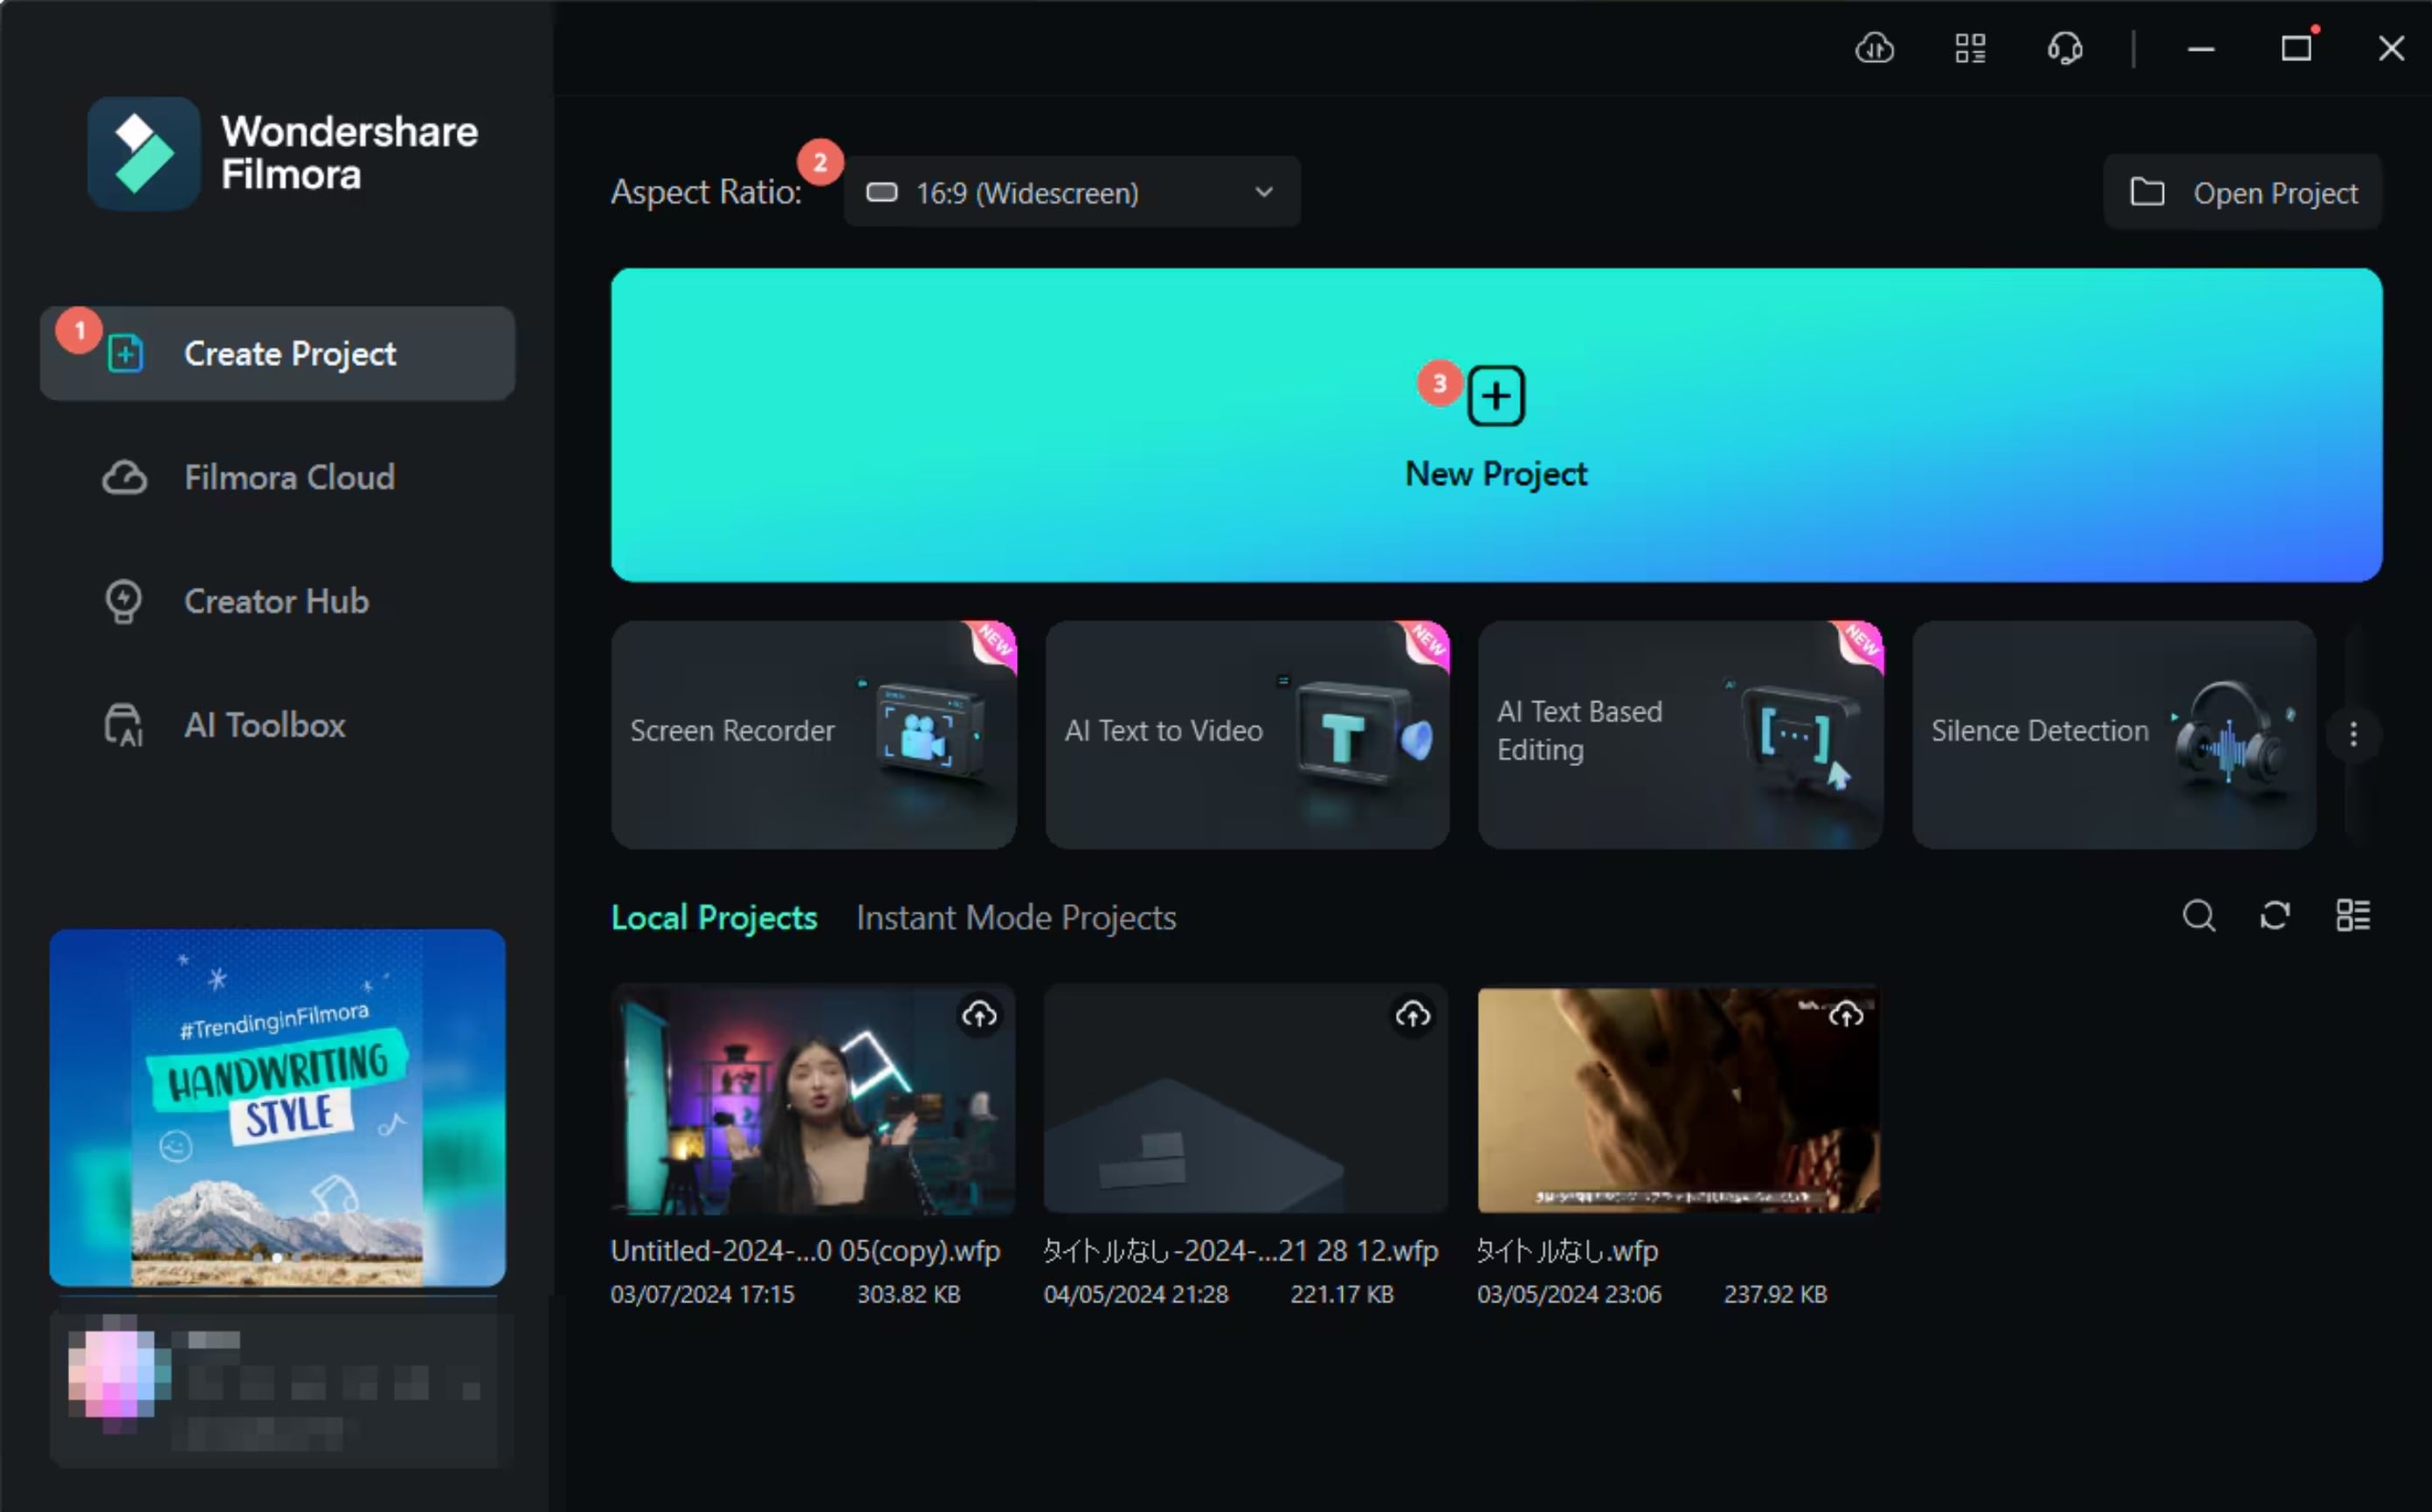
So, how can you avoid these limitations of using CSS for text reveal animations? You can replace code with video editing software. Tools like Wondershare Filmora are not only easier to master and use than CSS, but they also offer limitless possibilities for creating and editing animation. And the best thing is that you don’t have to be a developer to unlock them.
Filmora is a comprehensive video editing toolkit that enables you to achieve professional-looking results regardless of your project’s complexity, personal aesthetic, or skill. You don’t have to even know what CSS is – you only need a vision.
How to Create a Text Reveal Animation With Filmora’s Presets
Filmora is more than just a video editor. It also includes a rich library of creative assets, from stunning templates to playful stickers. Here, you can find a variety of title presets that are certain to grab the viewer’s attention.
Presets are excellent because they give you a foundation for creative work. So, instead of building your text reveal from scratch, you can choose an eye-catching template and customize it to your liking. You can play around with font style, customize animation, change the background, and much more. Here’s how to use text reveal presets in Filmora:
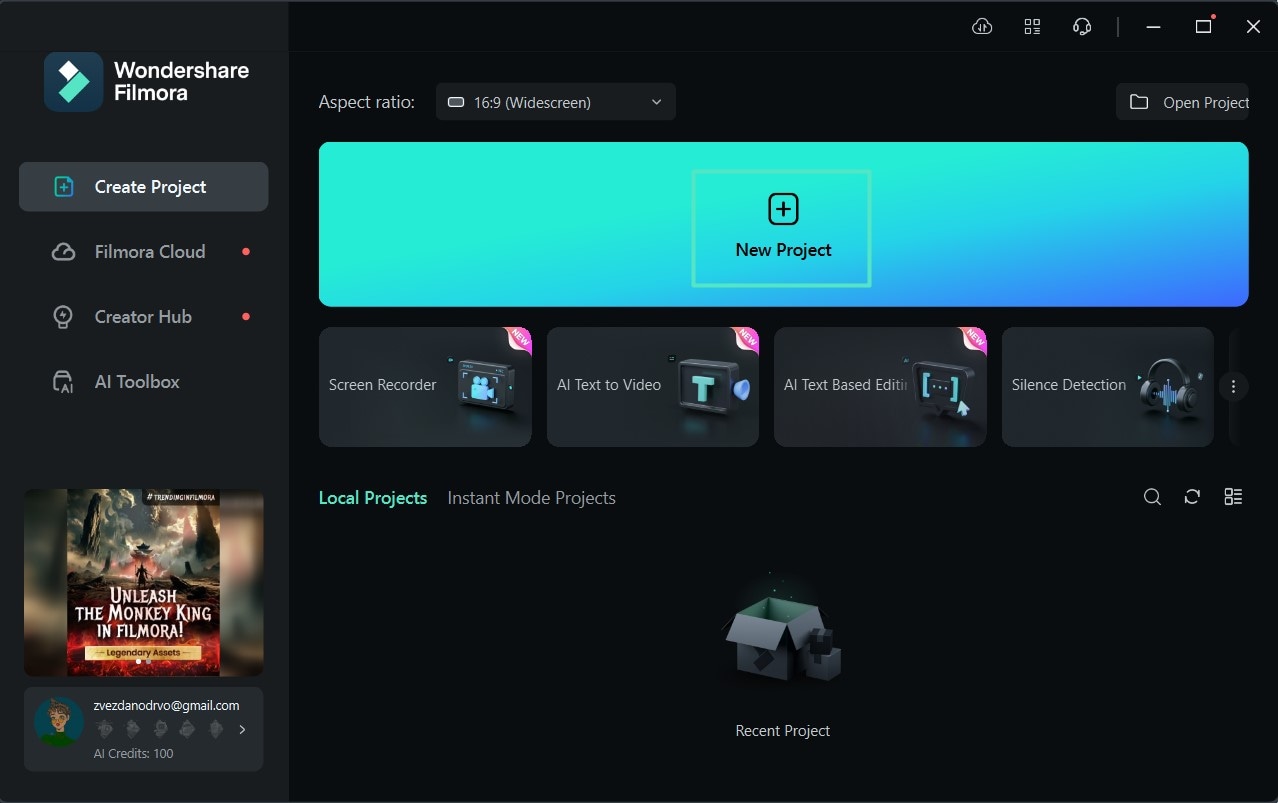
Step 1: Download and install Wondershare Filmora. Lunch the tool and start a new project.
Step 2: Navigate to Templates in the menu bar at the top. You can type ‘reveal’ in the search box or browse the library until you find something you like. To use a preset, drag and drop it to the timeline below.
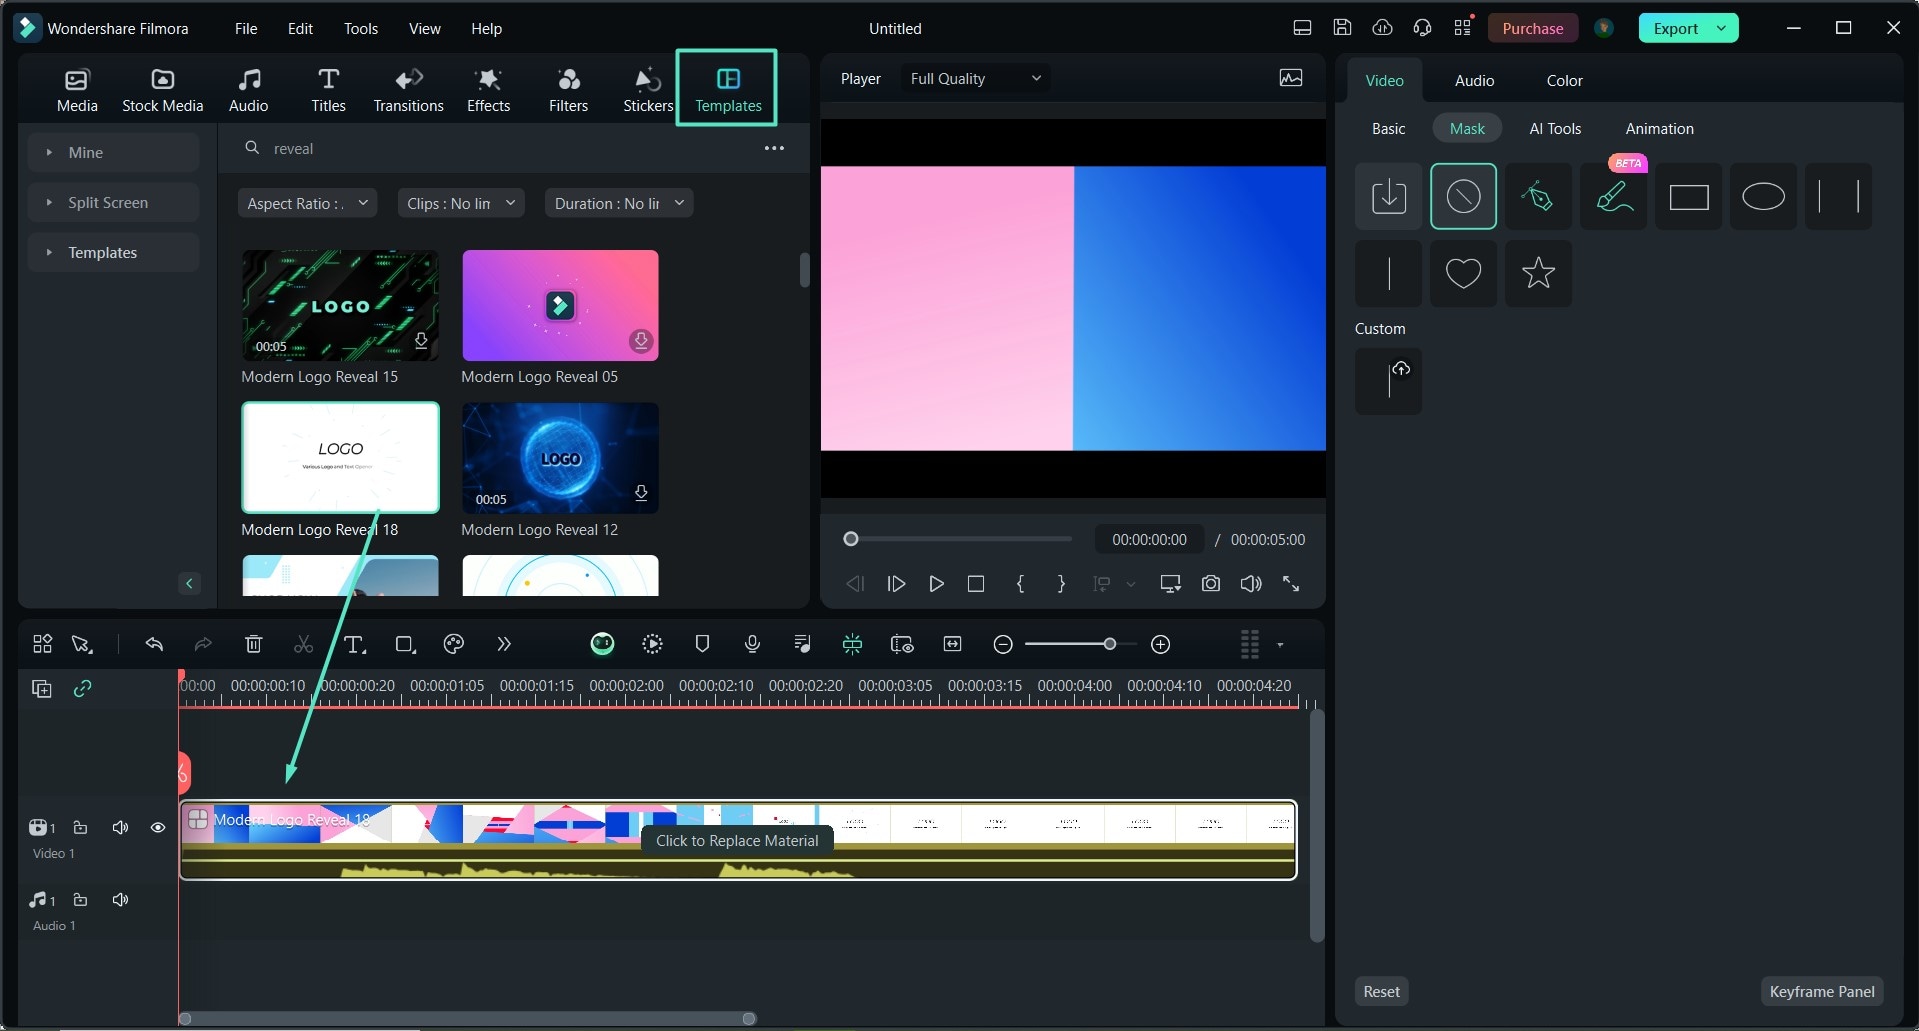
Step 3: Immediately, you can start customizing the preset using the Options Panel on your right. If you want to change preset elements (for instance, use a different background or audio, if there’s one), click on Click to Replace Material.
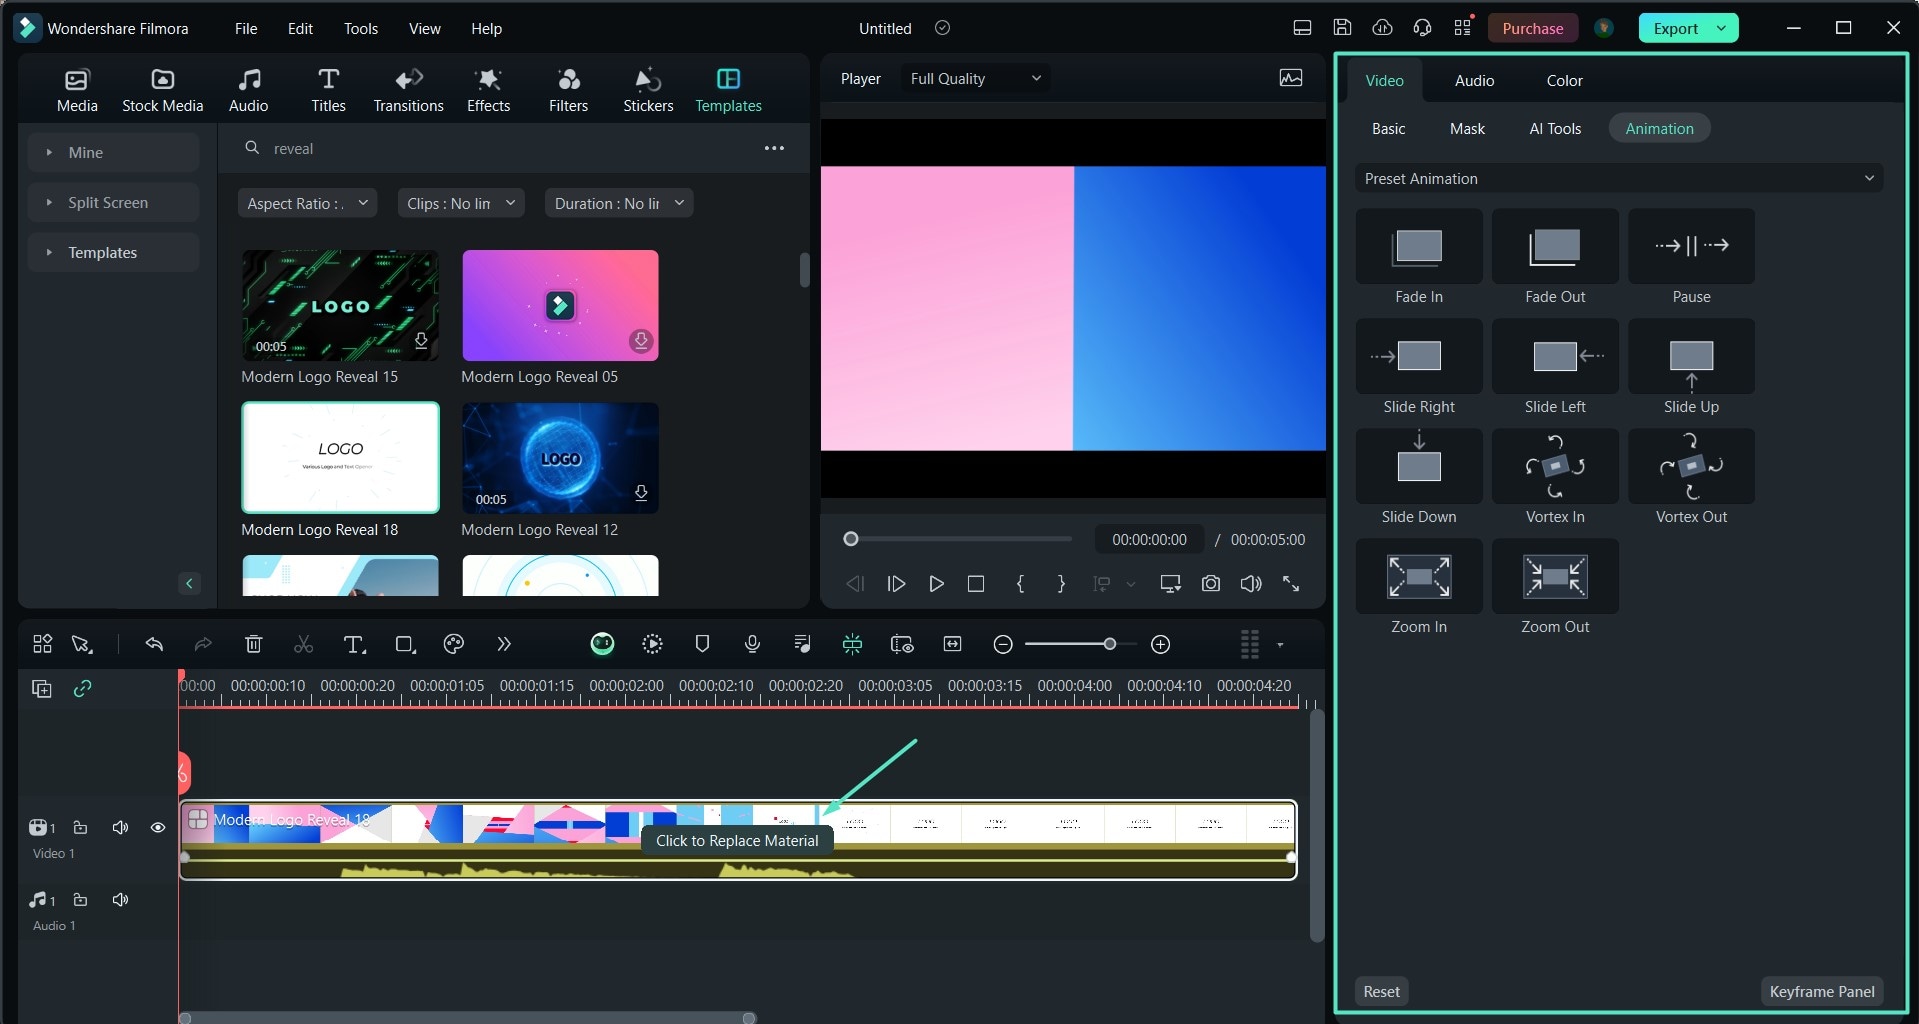
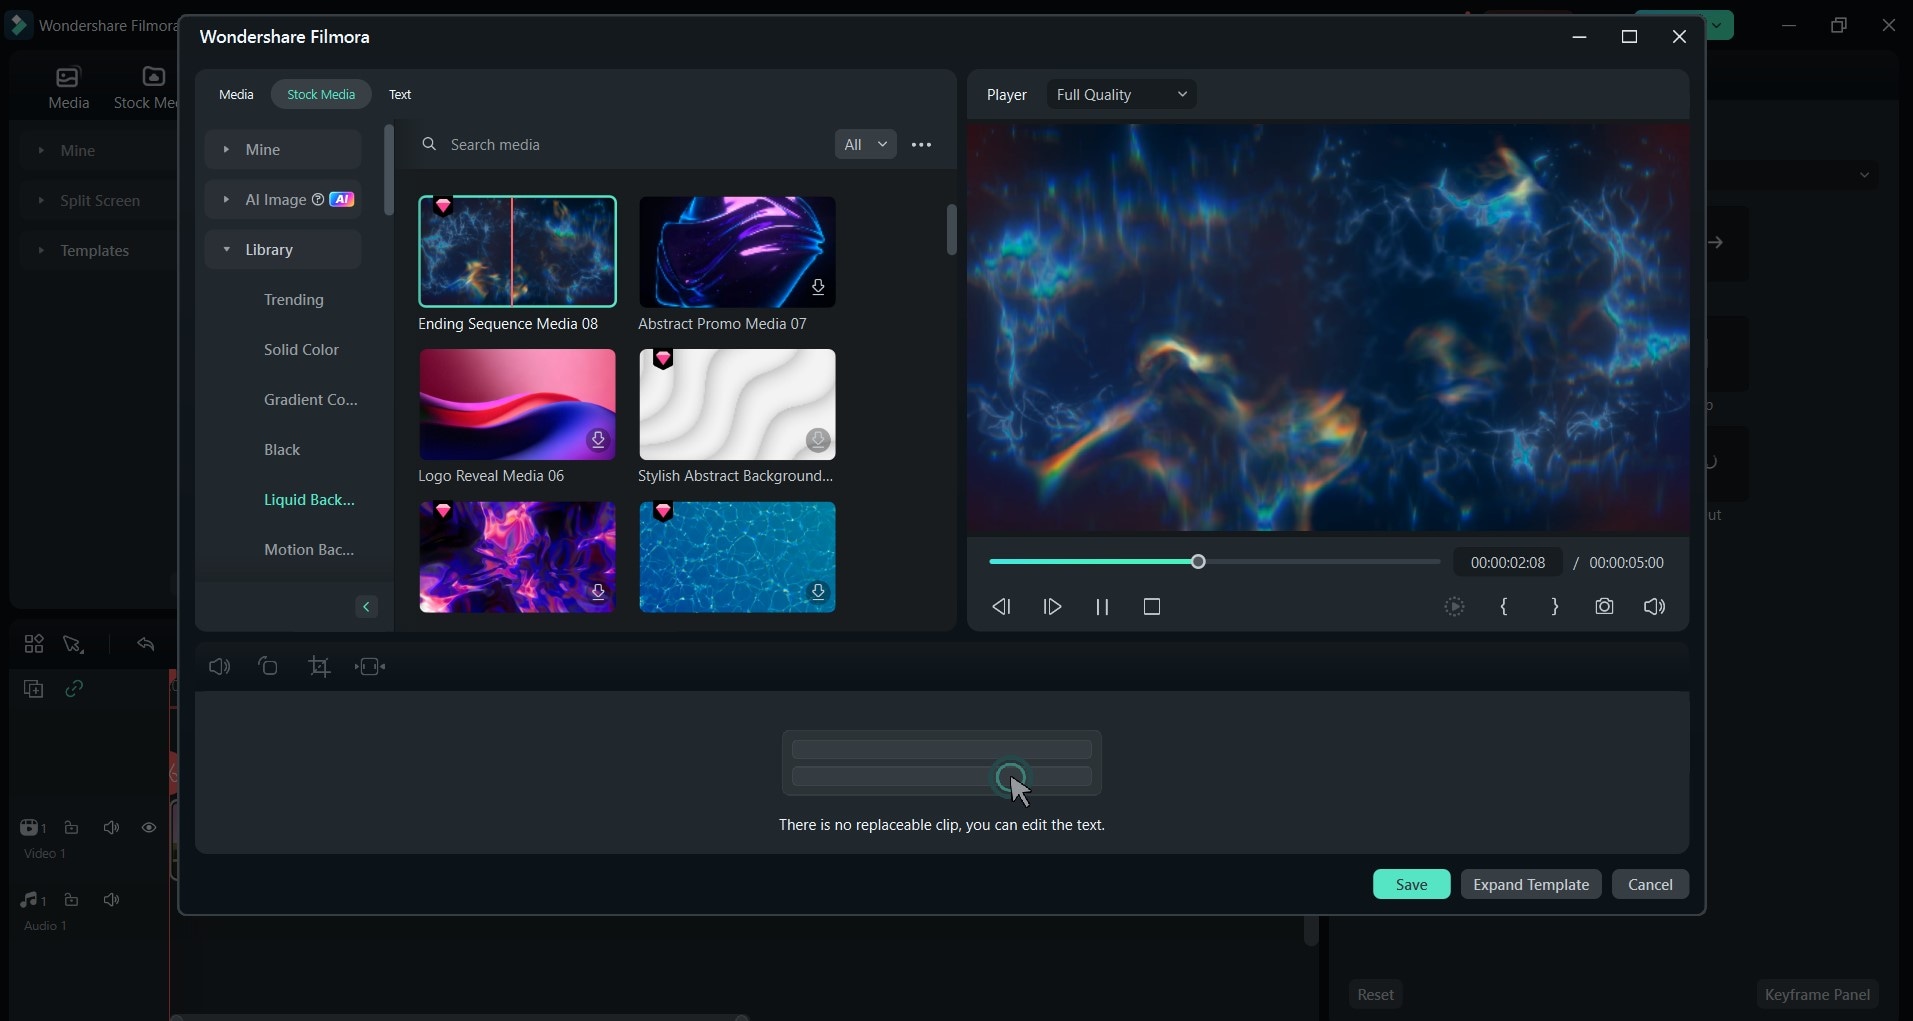
Step 4: Try out different assets from Filmora’s Stock Media library or upload your background. And there are even more options – you can create an AI image or download a new asset online. Go to Text to change it before you continue customizing the template.
How to Custom a Text Reveal Animation in Filmora
Presets are great when you’re in a hurry, but what if you want to create something authentic? Filmora can help you with that, too. A favorite text reveal effect is when the reveal follows a moving object. We’ll show you how to do that using Filmora’s masking tool:
Step 1: You’ll need a video clip of a moving object. If you already have one, click on Import or drag and drop it to Filmora. You can also visit Stock Media and find Filmora’s Partners in the left sidebar.
That’s what I did for this tutorial – I downloaded a video clip of a woman walking from Pexels directly to Filmora. Once you have your clip, drag and drop it to the timeline below (Video 1).
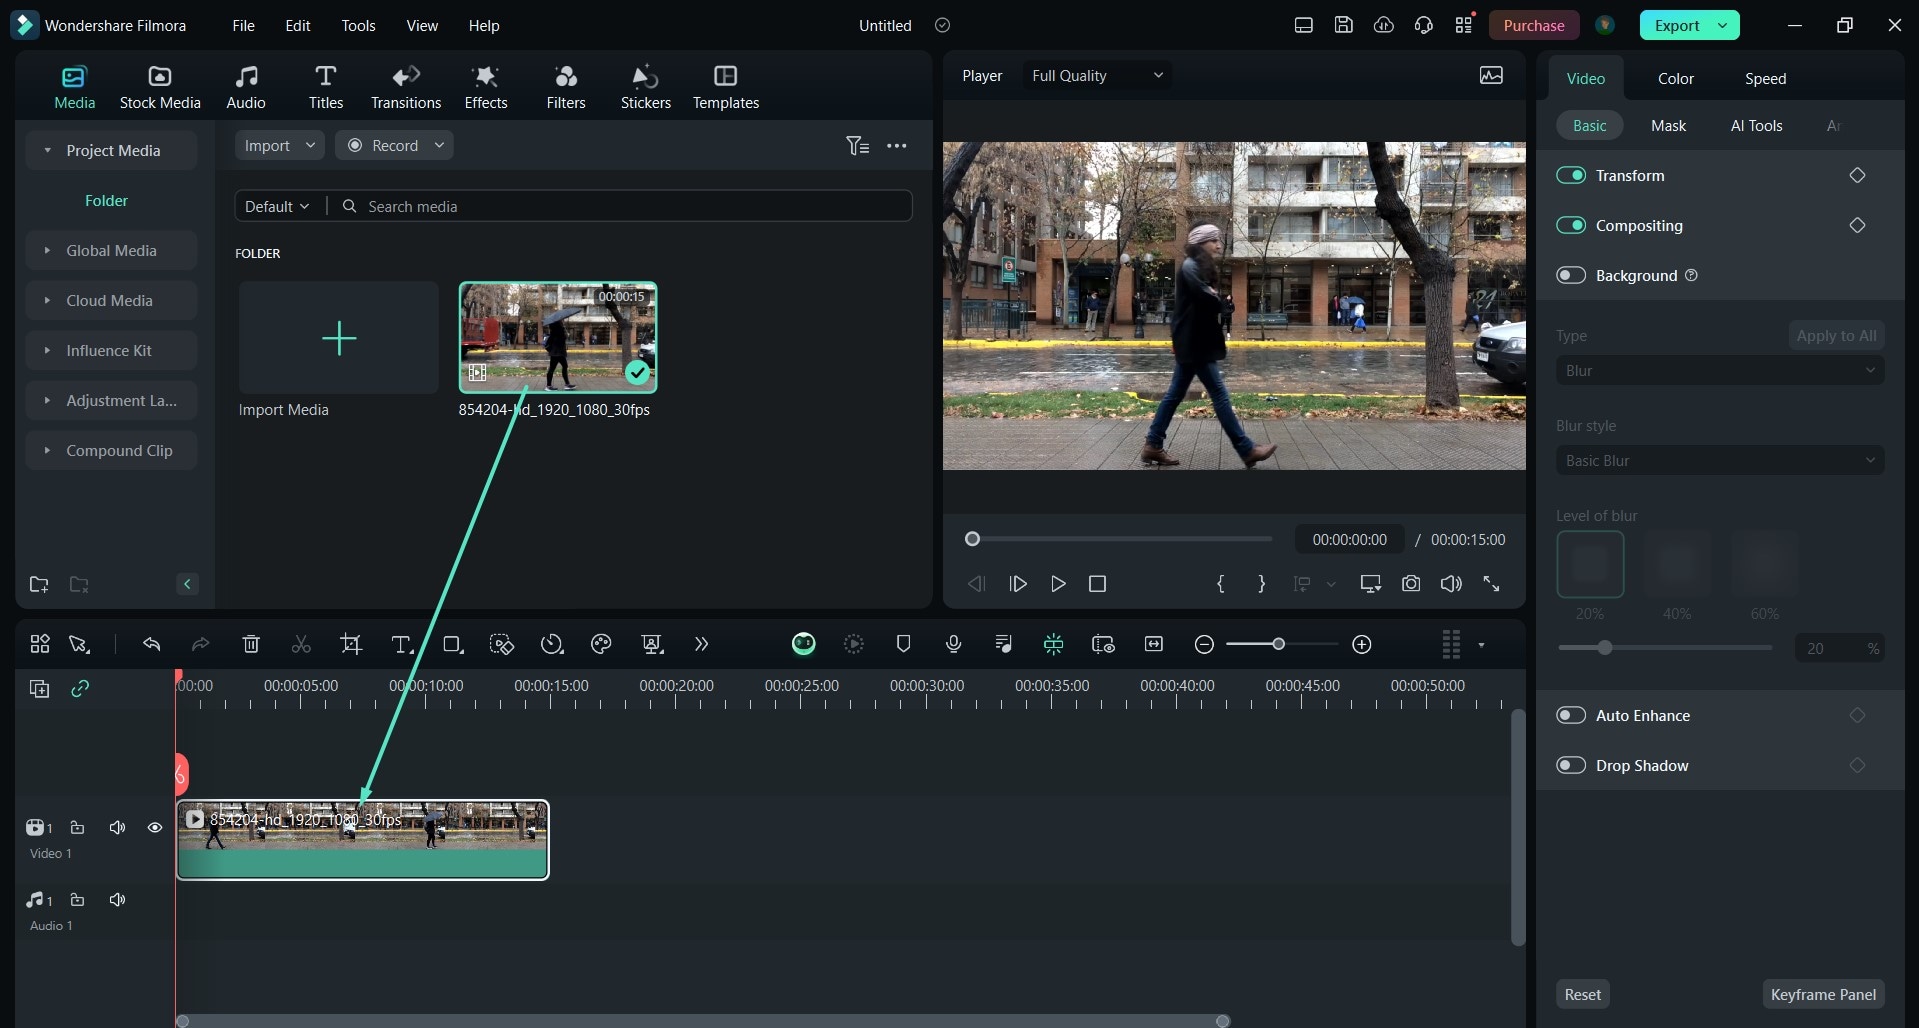
Step 2: Preview your video and decide where you want the text reveal to begin. In the timeline, mark that spot with the playhead.
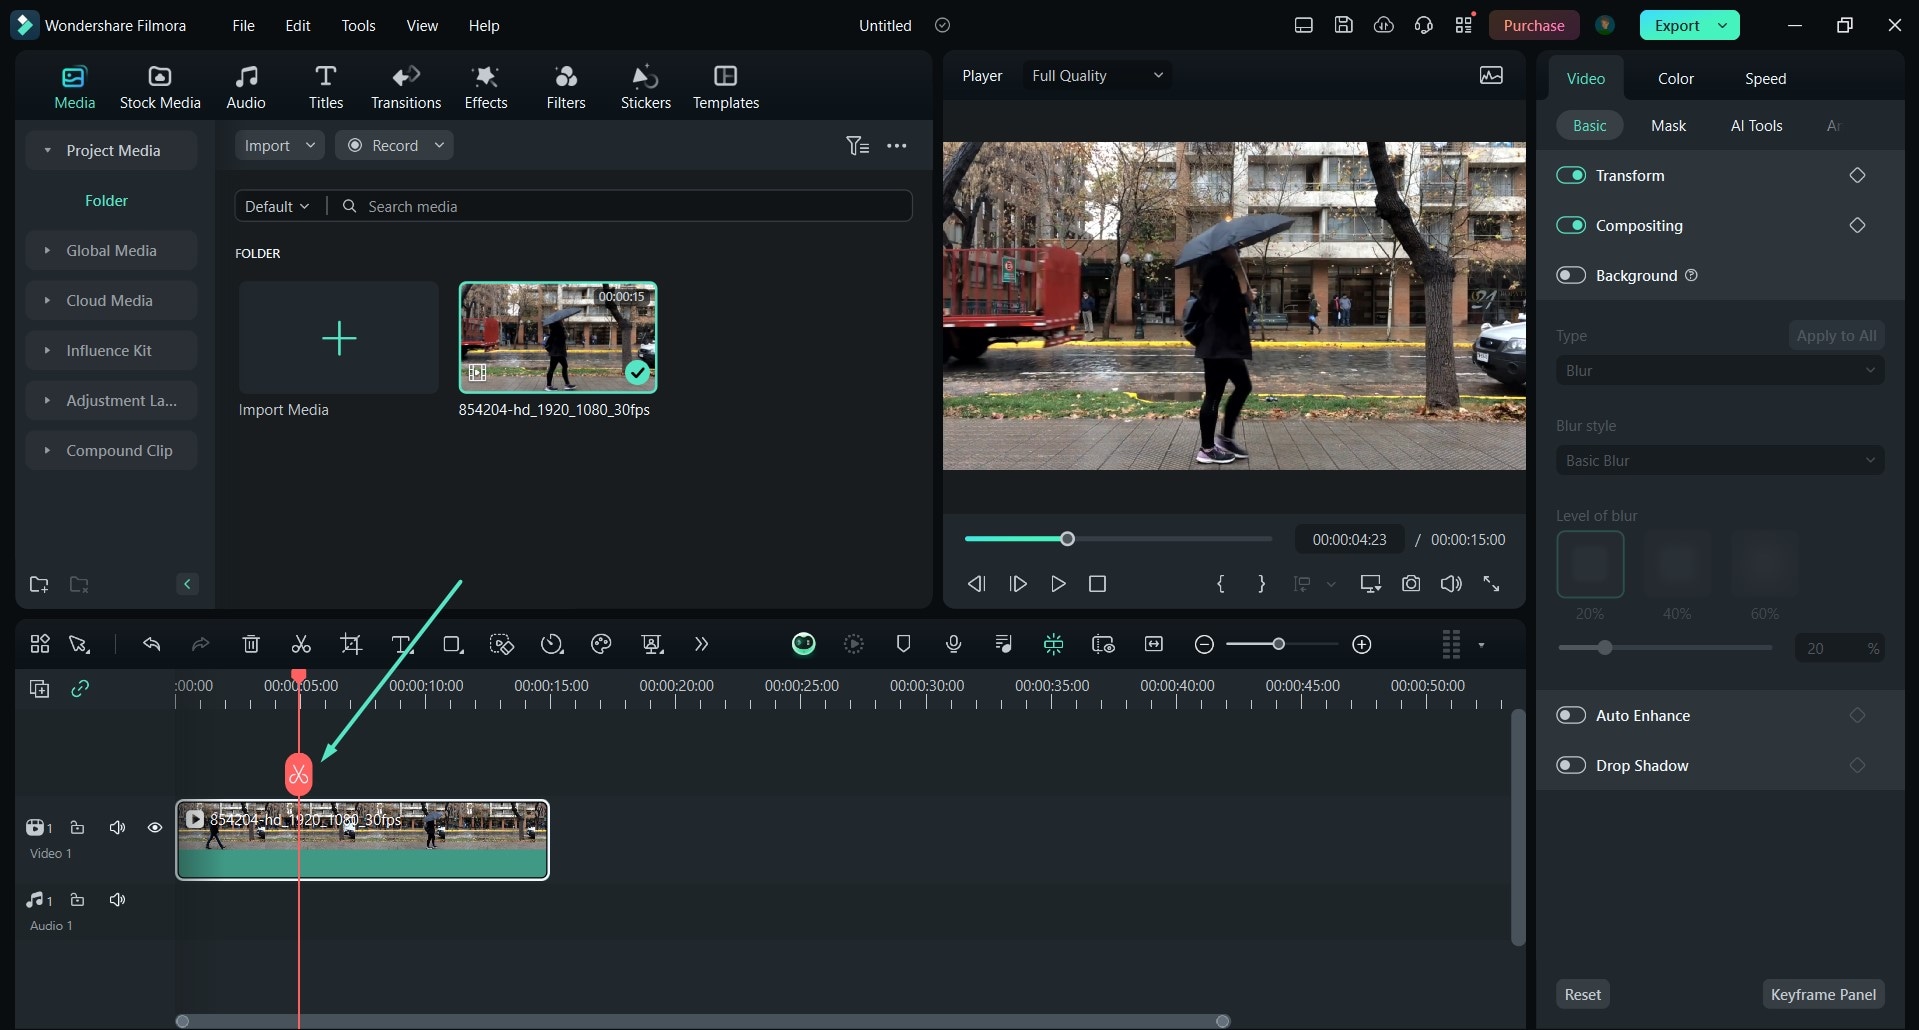
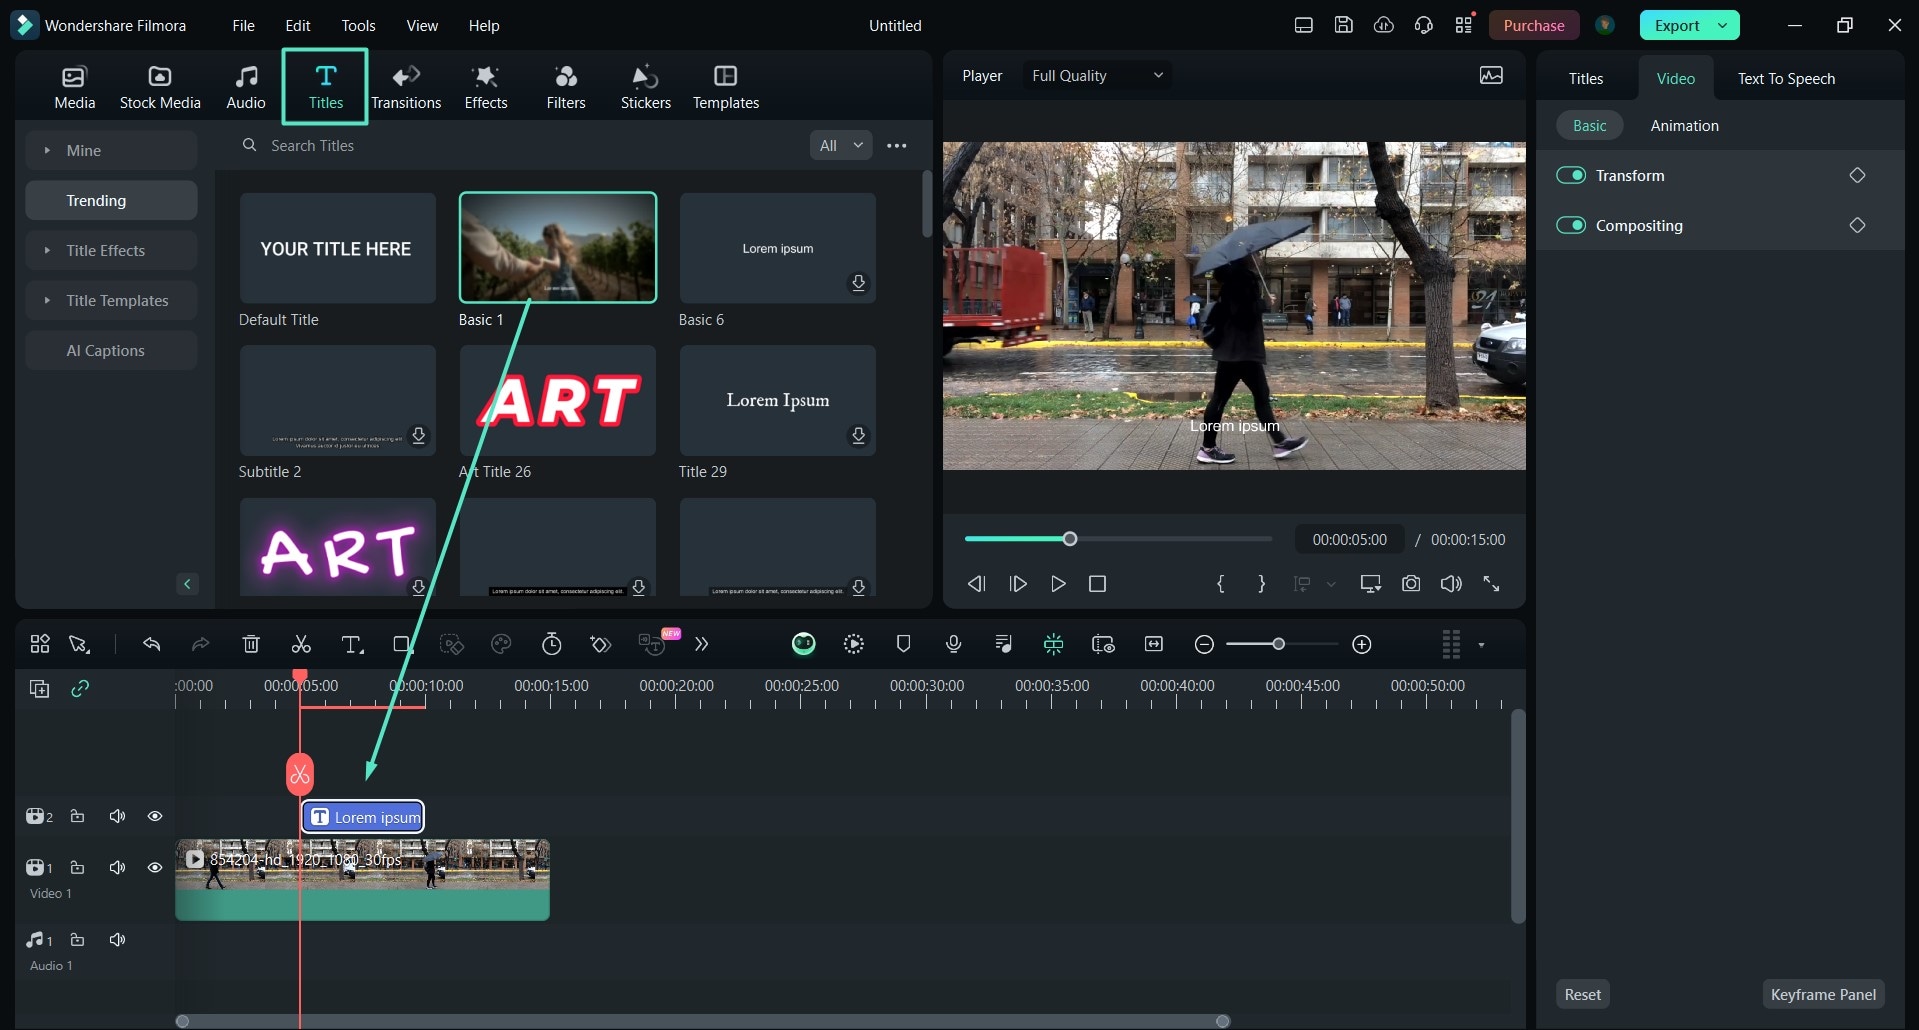
Step 3: Look for Titles in the top menu bar and select any title you like. I picked Basics because I wanted to customize it myself. Drag and drop that to the timeline, too, just above your video clip, and adjust it to the playhead (Video 2).
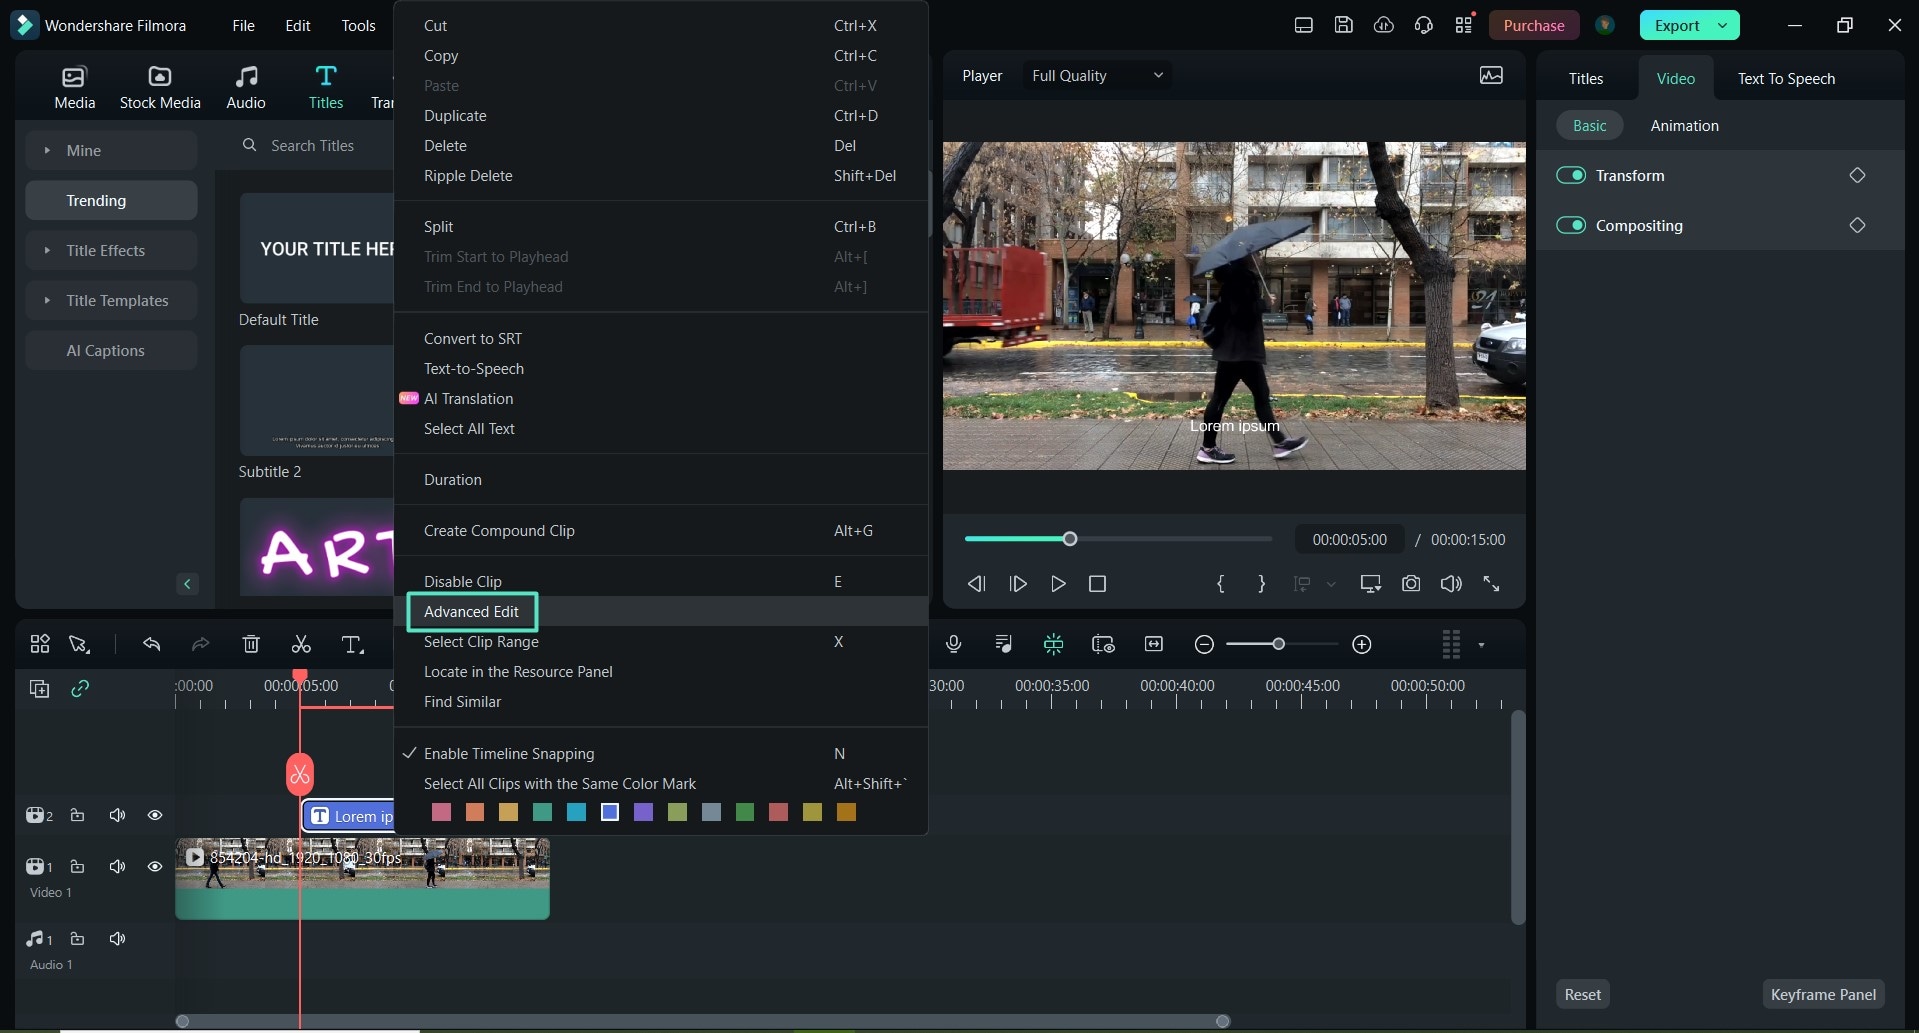
Step 4: Right-click the title (Video 2) and select Advanced Edit.
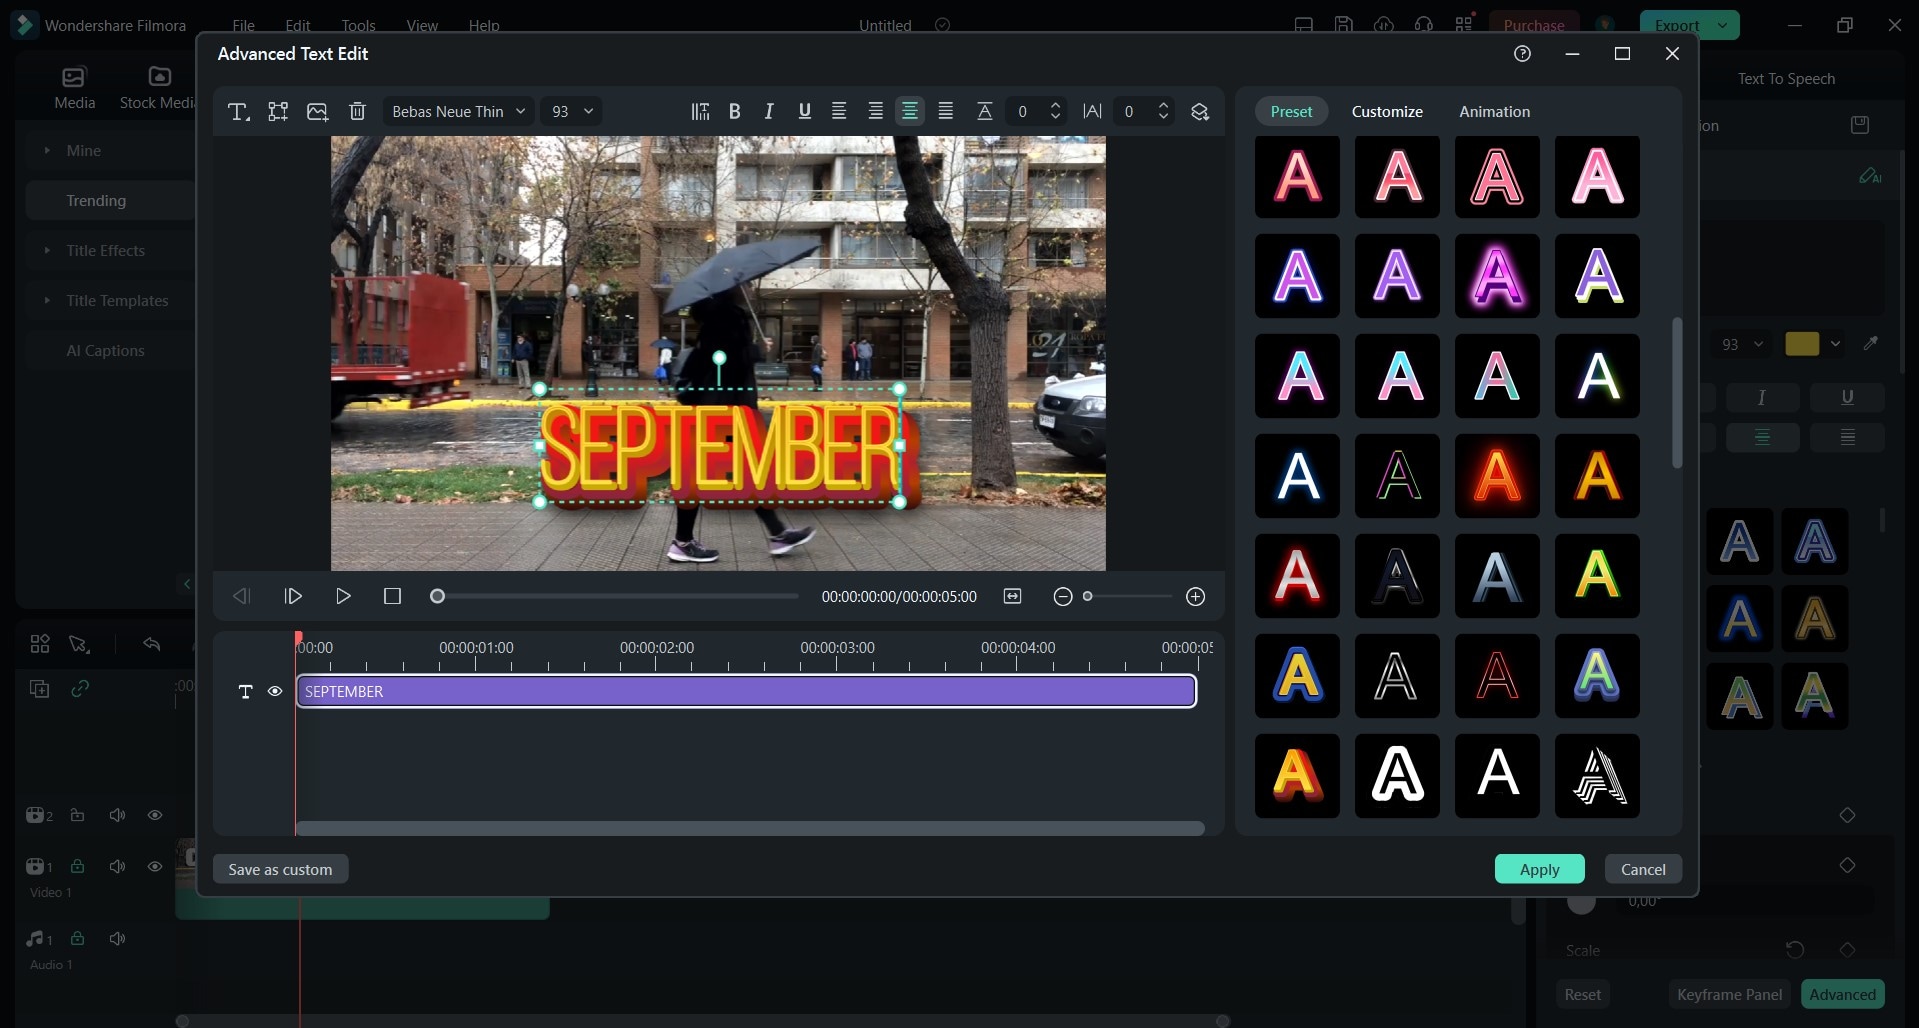
Step 5: Get creative and customize the title however you want. You’ll see that Filmora offers limitless text editing options. When you’re done styling the title, position it to fit the moving object perfectly.
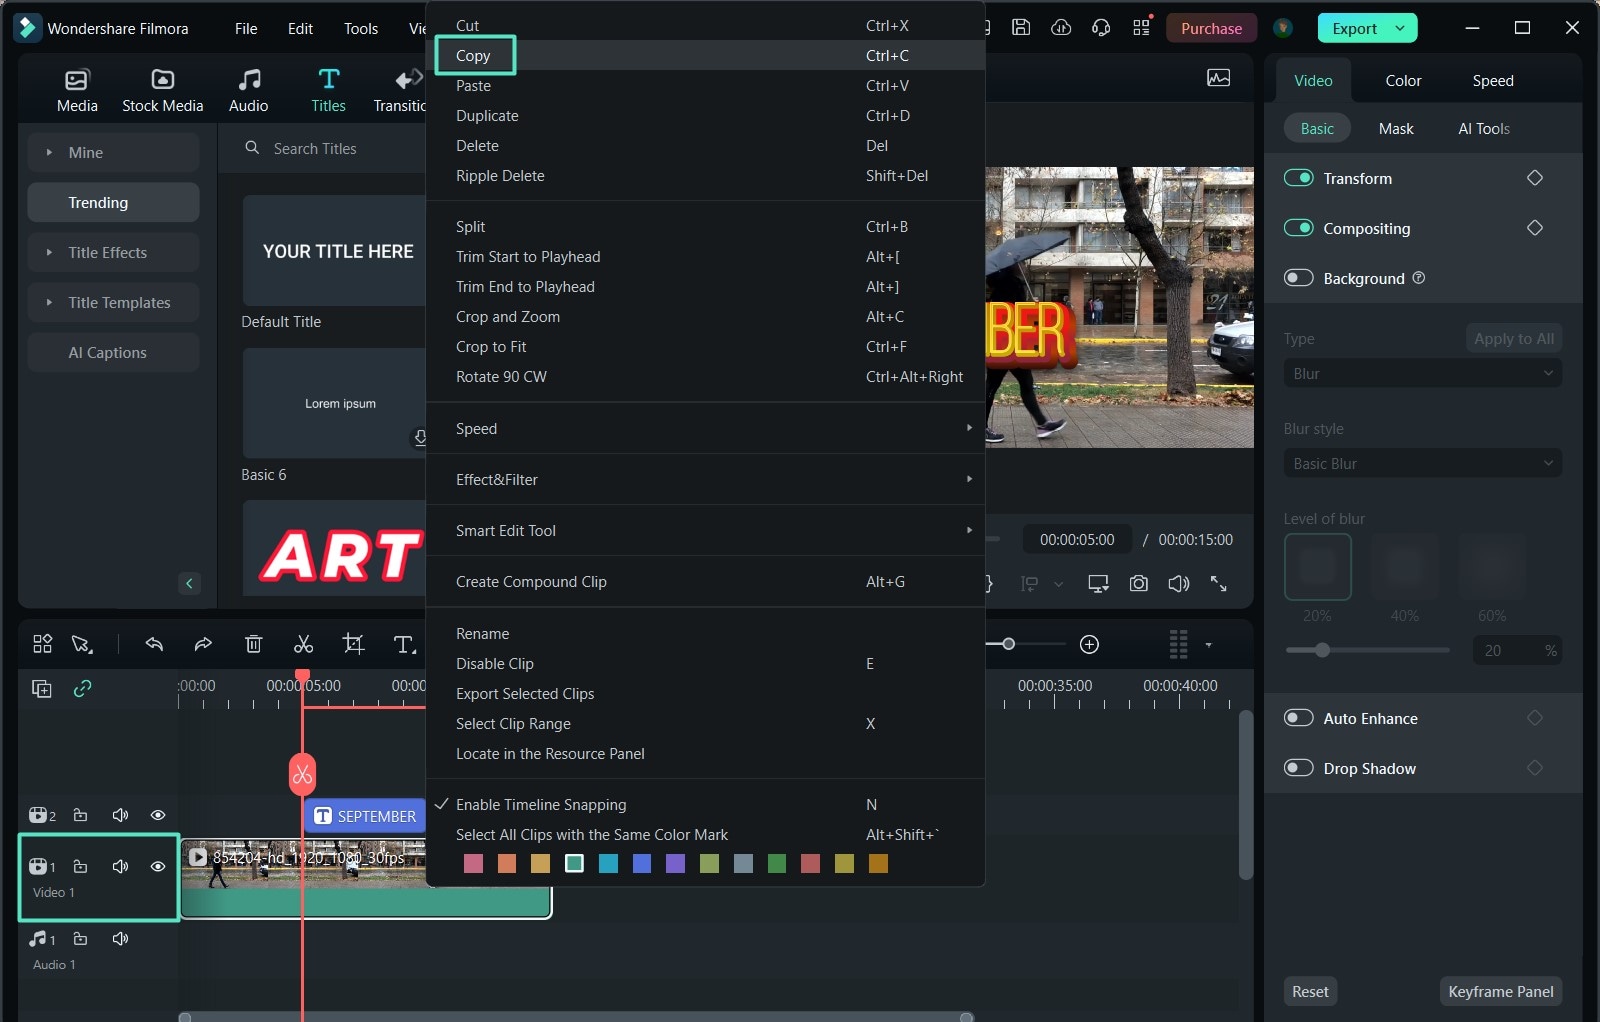
Step 6: Right-click the video clip (Video 1) and select Copy.
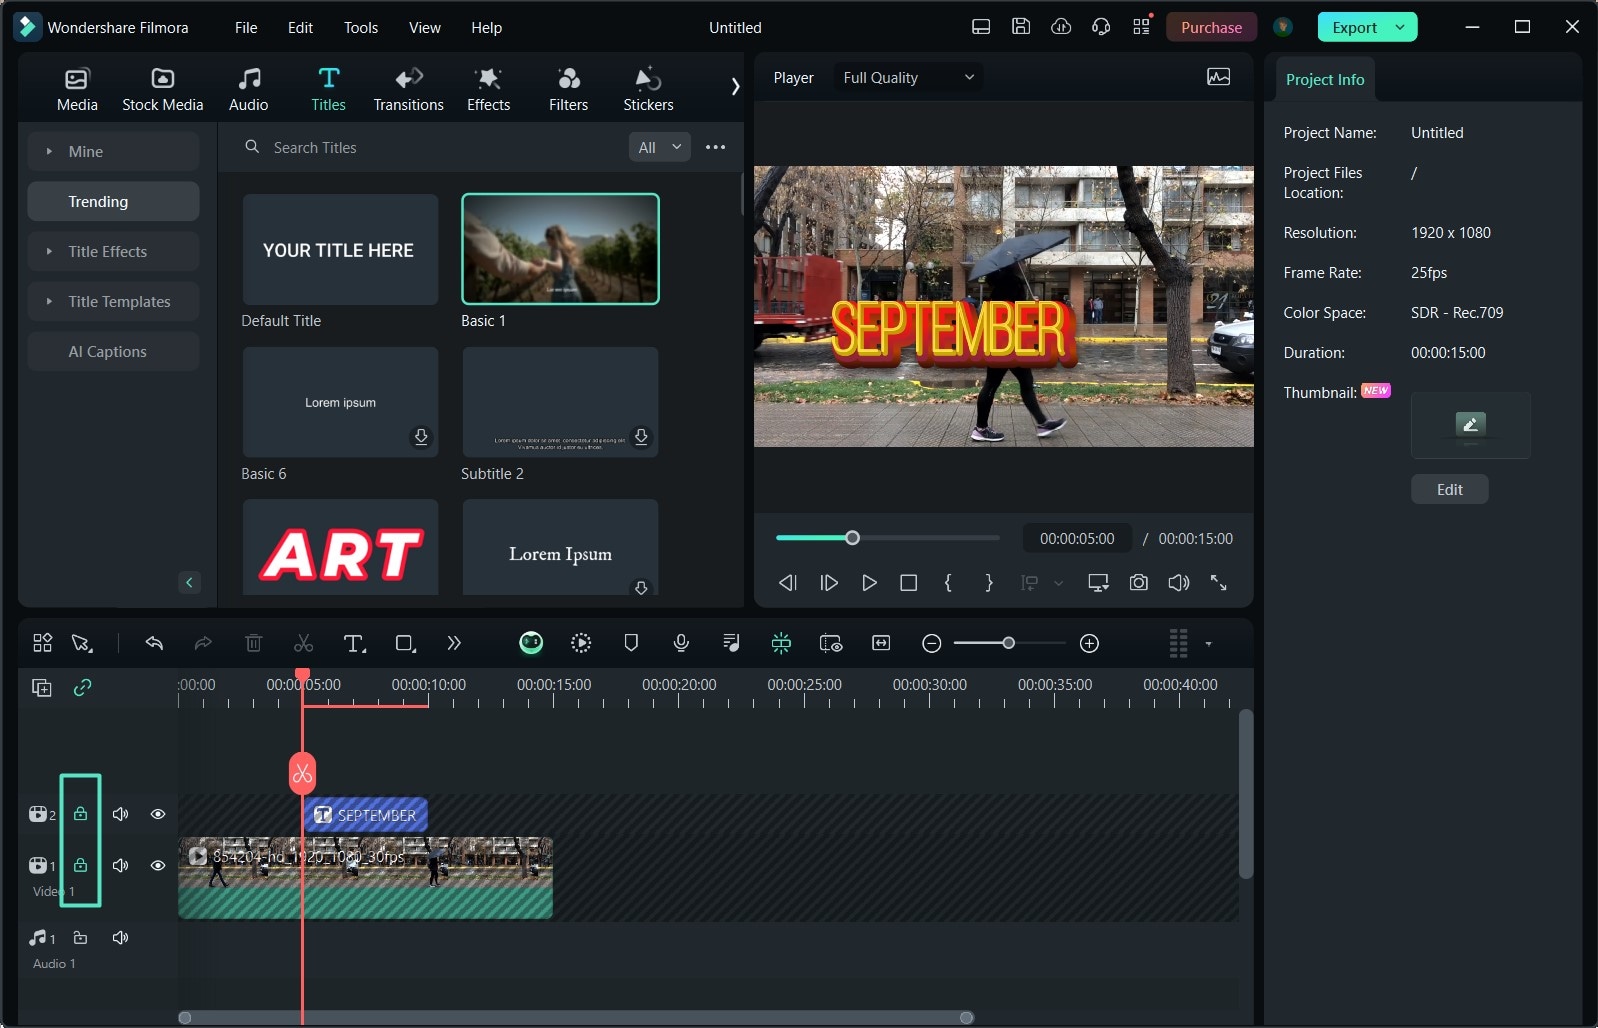
Step 7: Lock both video tracks by clicking the little keylocks on the left side of the timeline.
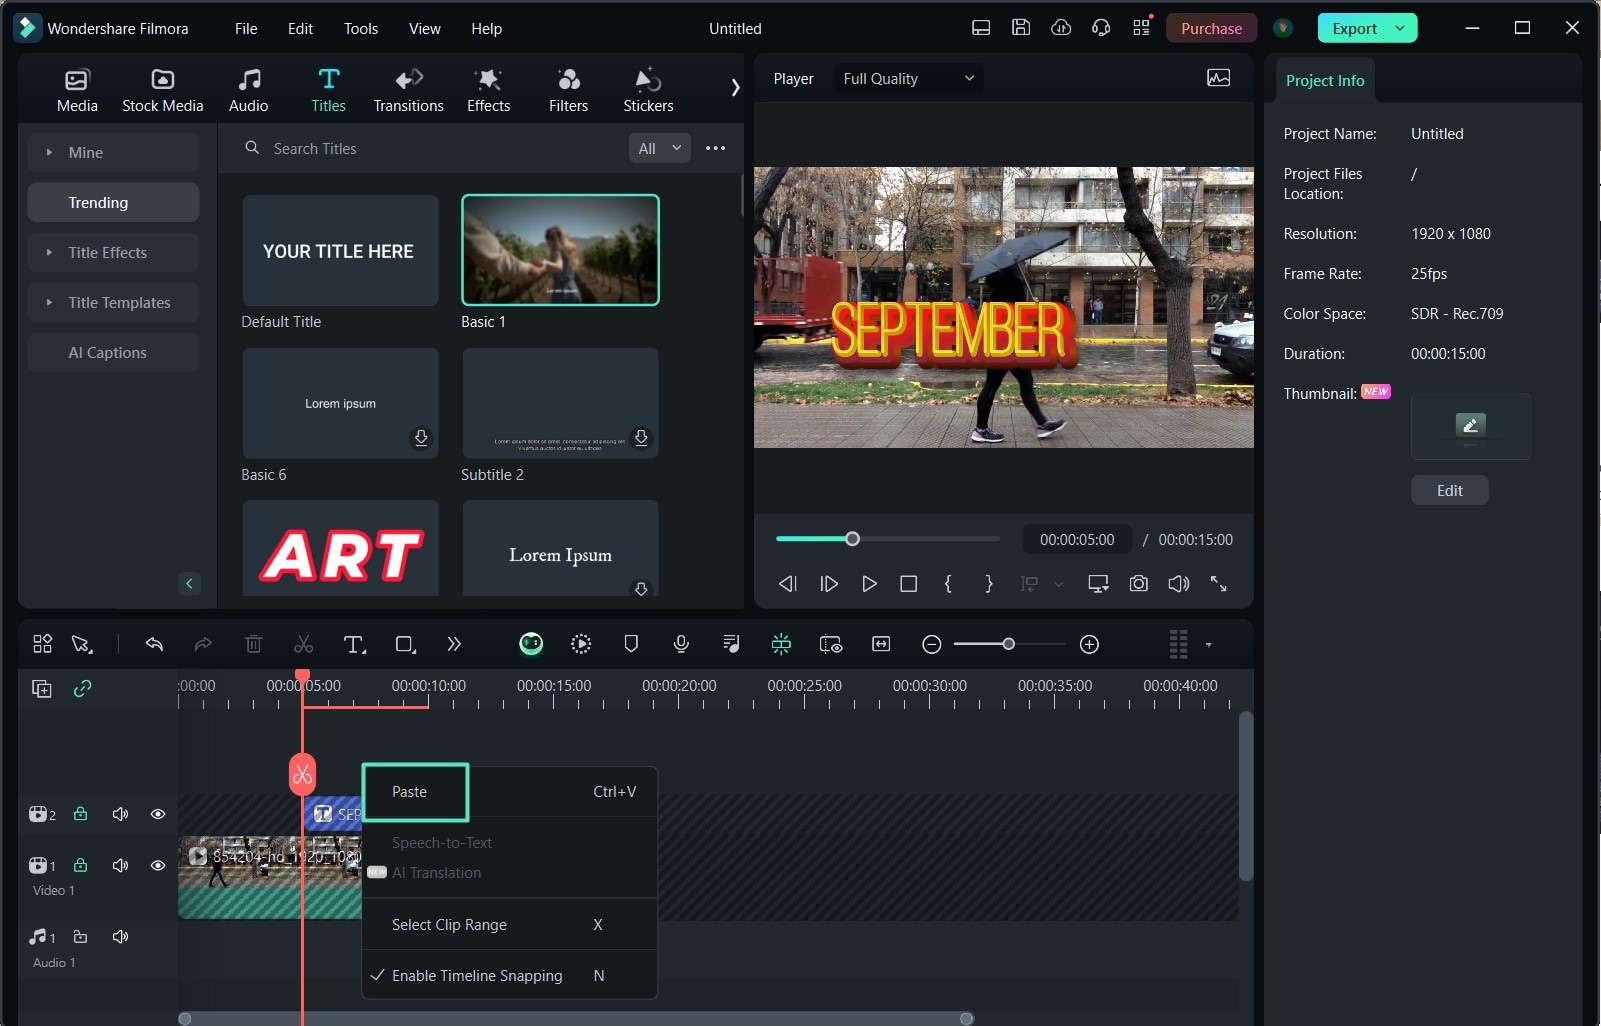
Step 8: Click anywhere above the title track (Video 2) and Paste the video clip.
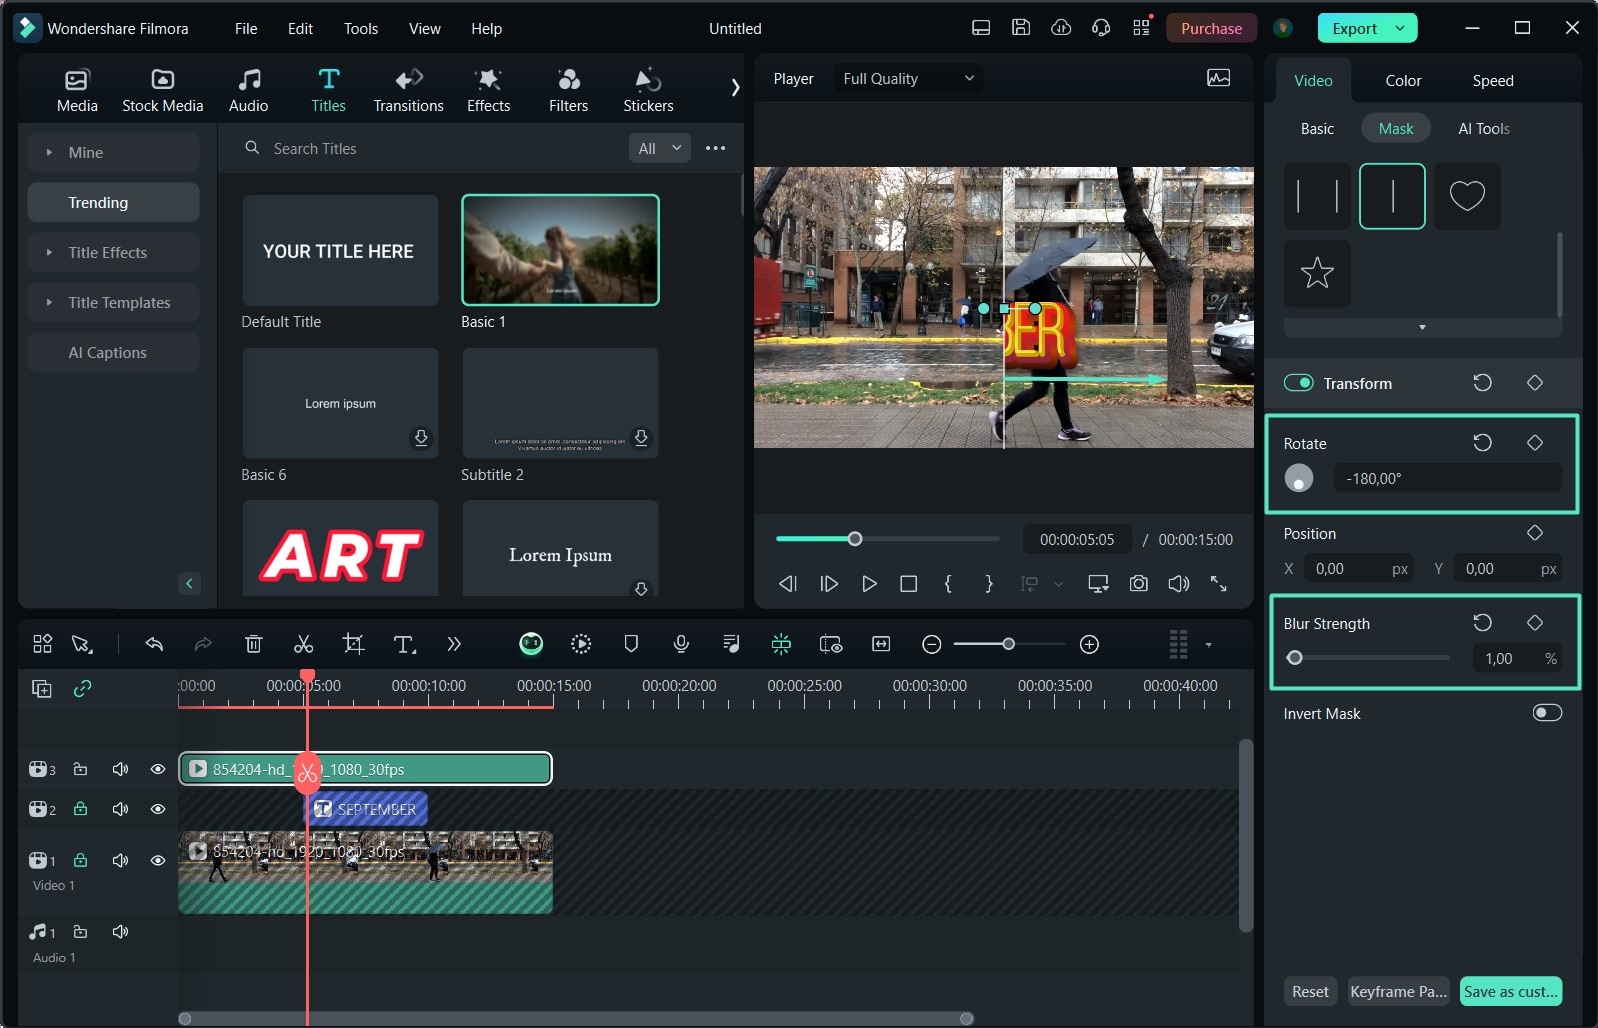
Step 9: Are you ready for the cool part? Click on the clip you’ve pasted (Video 3) and go to the Options Panel on the right. Click on Mask and select the Single Line. Below, set the Rotate value to -180° and drag the slider on the preview screen in the opposite direction of the moving object until it completely disappears. Next, set the Blur value to 1%.
Step 10: Next, click the Add button to add a keyframe. Move the playhead one frame forward and slowly drag the X-axis toward the moving object to reveal a tiny portion of the title. Repeat this frame-by-frame as many times as it takes until the full text is revealed.
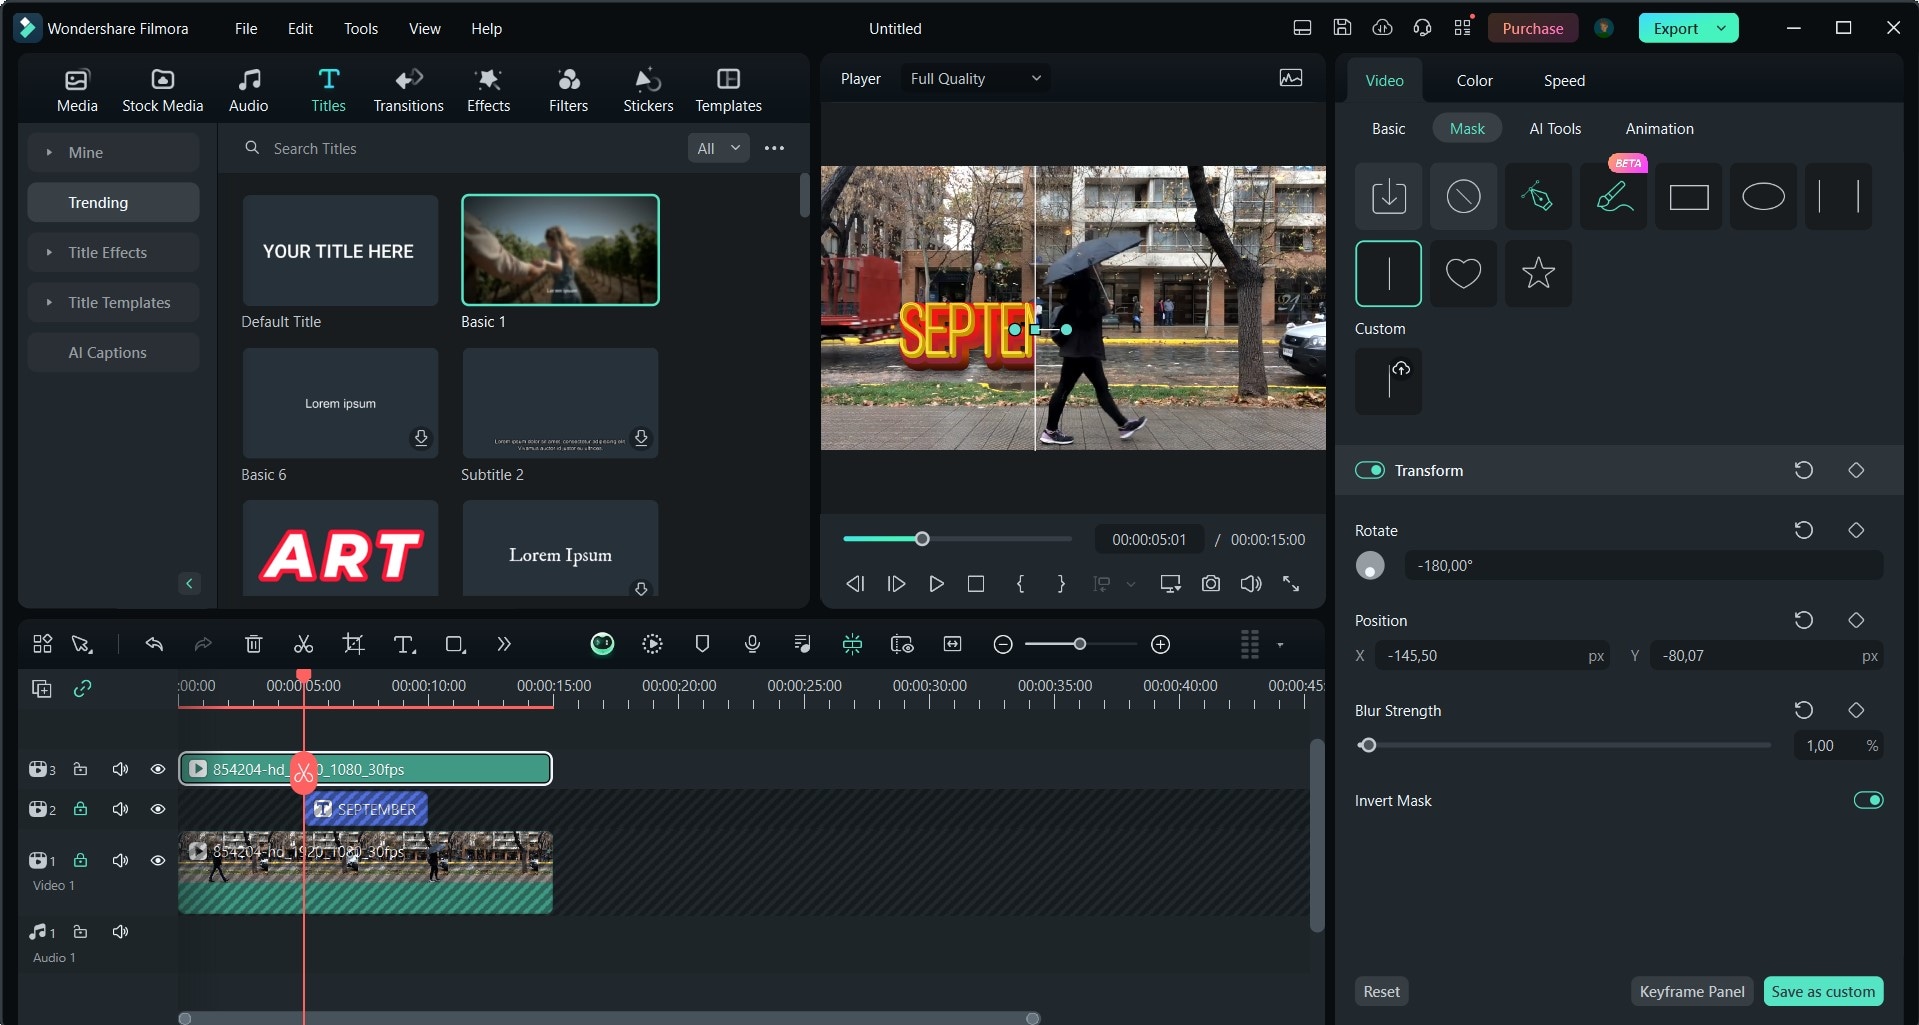
Finally, you can preview your video and see your creativity in action! If you want to use it immediately, click the Export button. Customize the settings and choose where to save the video. If you’re satisfied with the results, upload them directly to YouTube or TikTok!
Other Text Animations That You Can Create
Presets and custom creation are not the only options with Filmora; there is also text animation. This option allows you to transform plain text into an interactive reveal that is engaging and fun to look at. You can use these text animations to customize presets or to craft a brand-new text reveal. At the moment, Filmora has 80+ of these.
Here’s where to find and how to use text animations in Filmora:
Step 1: Start a new project in Filmora and go to Titles in the top menu bar.
Step 2: Select the Default Title and drag and drop it into the timeline. As soon as you do that, the Options Panel on the right will reveal customization tools, including Animation. If you want more options, click the Advanced button at the bottom right.
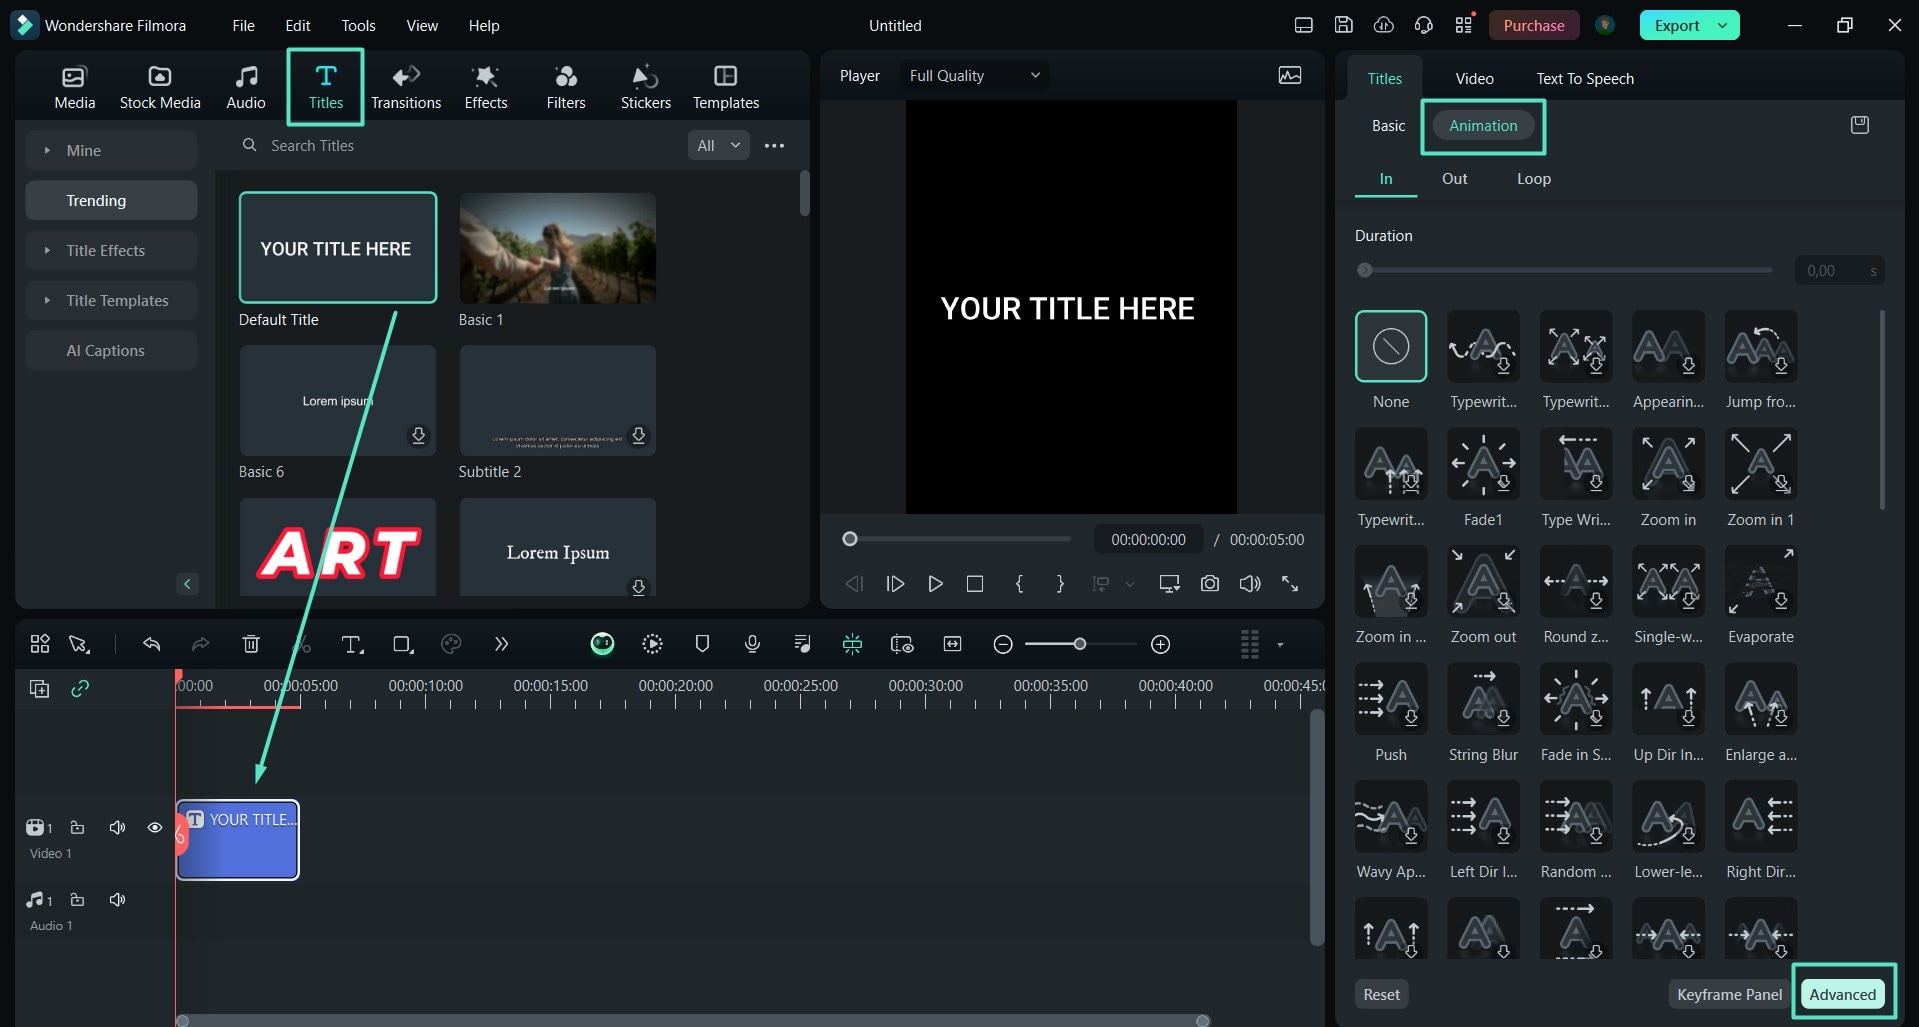
Step 3: After you type your text, you can change the font and format, use a preset to style it, or manually pick the color, gradient, opacity, and more. Finally, you can choose an Animation style. For example, you can achieve the reveal effect by picking an animation style where text appears gradually, such as Typewriter Appears or Appearing Verbatim.
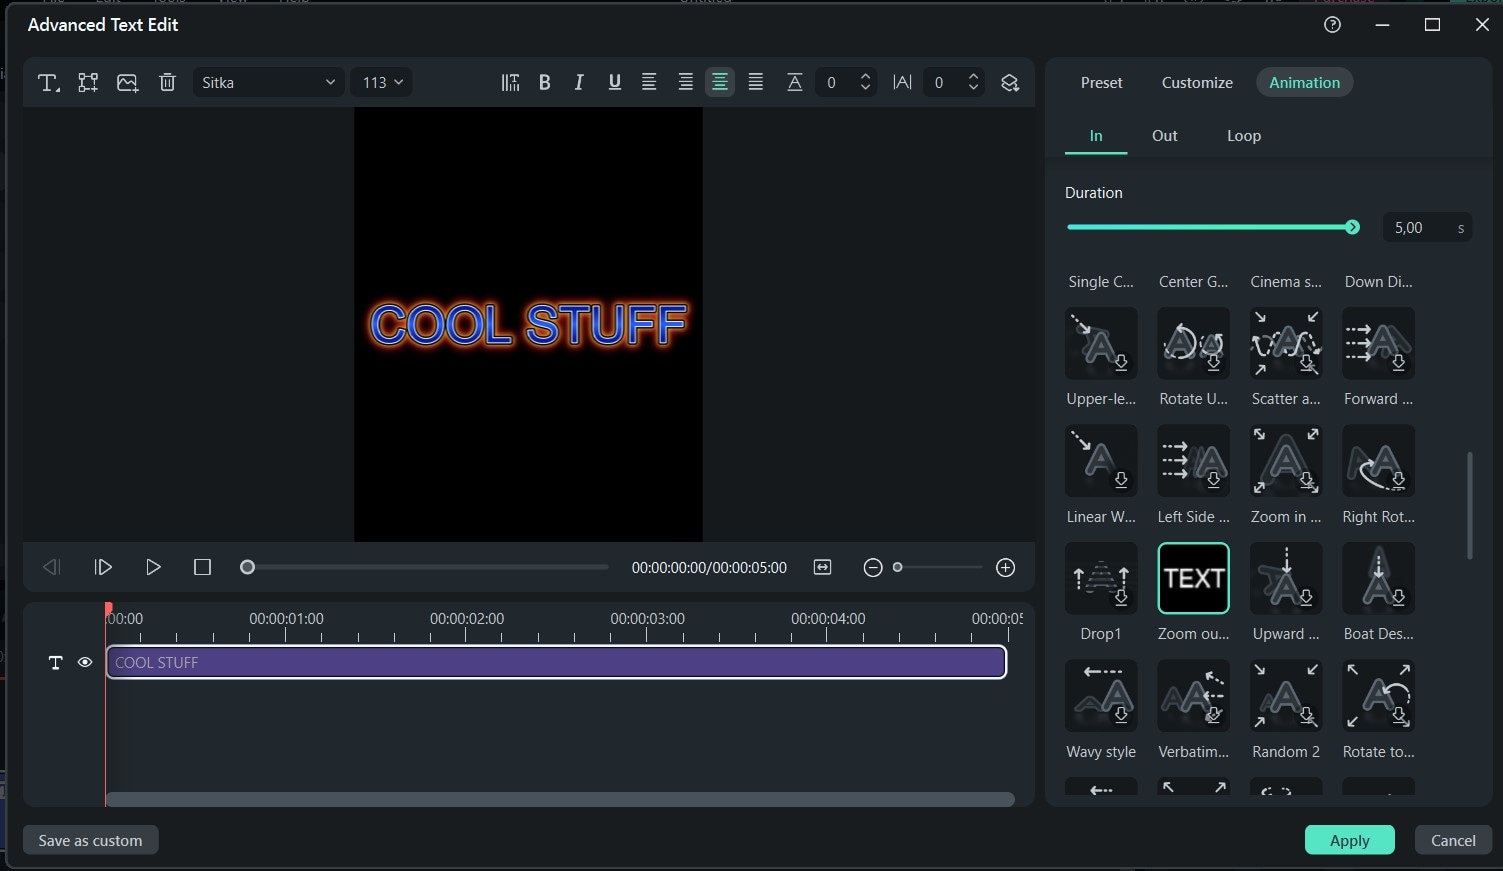
If you’re tired of text reveals and want to experiment with other animations, you can try cinema-style text, 3D animations, or go straight to Loop. Super-dynamic animations like Orange Beam, Negative Red, and Saber Fire Reflection combine basic animation with interactive elements like fire and reflection.
Conclusion
The text reveal CSS animation effect is simple to create – if you know the code. It’s one of the most effective and easiest tools in a developer’s arsenal, but that doesn’t mean it doesn’t require skill. If you don’t have the time to learn CSS, you can achieve the same with a video editor.
Wondershare Filmora packs an impressive variety of assets that can be used as a foundation for creative work (presets) or to create custom animations. Consequently, there’s no single or right way to craft an original text reveal with Filmora – it’s all a matter of your creativity.


 100% Security Verified | No Subscription Required | No Malware

