
 100% Security Verified | No Subscription Required | No Malware


 ChatGPT
 Perplexity
 Gemini
 Claude
 Grok
Grok
Animating text to appear by word, letter, or line in a video can create a visually appealing effect, giving your content a professional look. This comprehensive guide will show you how to make a text reveal in After Effects and its more intuitive alternative.
Before diving into some cool text reveals in After Effects, let’s see when to consider them to enrich your videos.
In this article
When to Use Text Reveals in Your Content
You can use text reveals in various contexts. Here are some examples:
- Social media videos – A text reveal can help you introduce yourself, add a call to action (e.g., encourage your followers to subscribe), and make your videos more eye-catching. For instance, you can align a text reveal with a moving object or make it appear behind one.
- Tutorials and online courses – Text reveals are perfect for intros in tutorial videos and for chapter overviews in e-learning videos. You can also use them to highlight crucial information within videos.
- Video presentations – You can make them more inviting by adorning them with cinematic titles with text reveal effects.
- Marketing videos – Text reveal effects can make your marketing videos stand out, helping you generate more leads and conversions. For instance, you can display a product and have its features appear line by line or reveal your brand slogan word by word.
Let’s see how to create text reveal effects in After Effects to add flair to your videos.
How to Use After Effects to Reveal Text Word by Word
You can use a text animation, masking, or a track matte in After Effects to reveal text word by word, letter by letter, or line by line. Here are the steps for each.
Reveal Text Using a Text Animation
Text animators let you reveal letters in After Effects in many ways. For instance, you can animate the position, scale, rotation, opacity, and other Transform properties.
Here’s how to make a simple text reveal in After Effects:
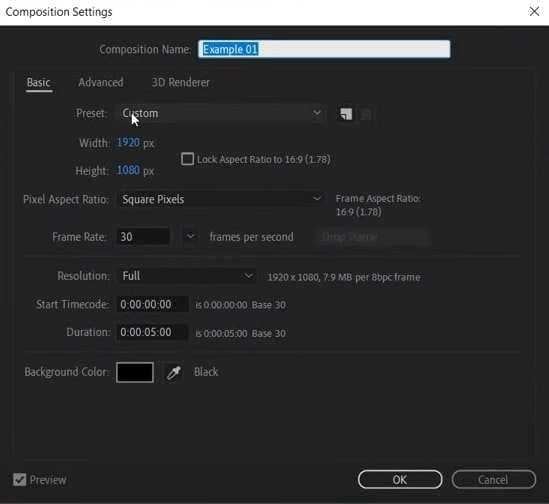
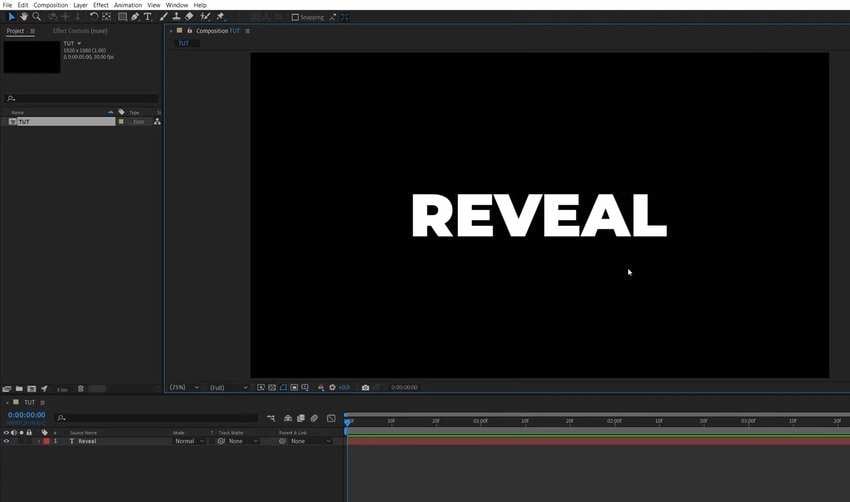
Step 1: Create a new composition with preferred settings.
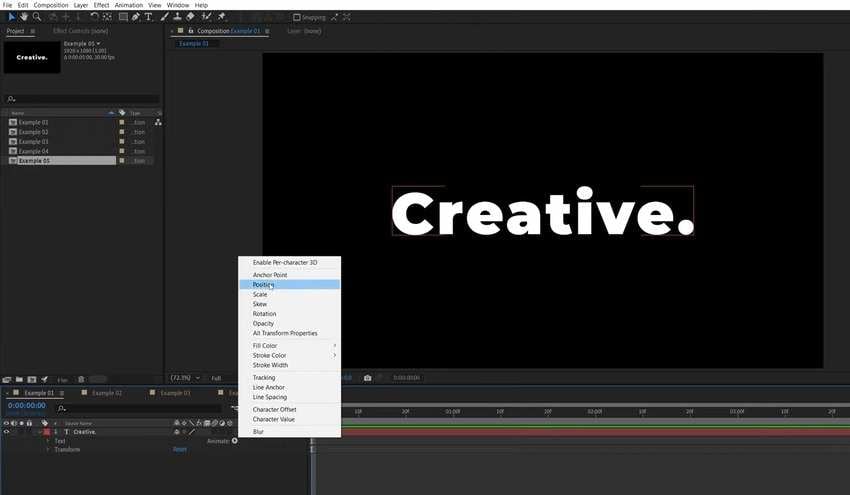
Step 2: Go to Layer > New > Text and add your text using the Type tool. Then, expand the text layer’s properties and click Animation > Position (you can choose any property).
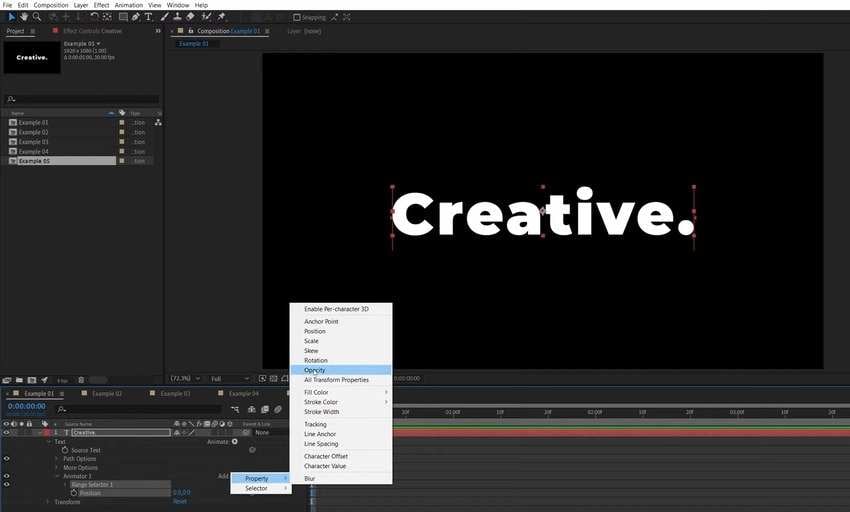
Step 3: Once the Animator 1 appears, click Add > Property > Opacity.
Step 4: Increase the second Position value (to 150, for instance) and set Opacity to 0%.
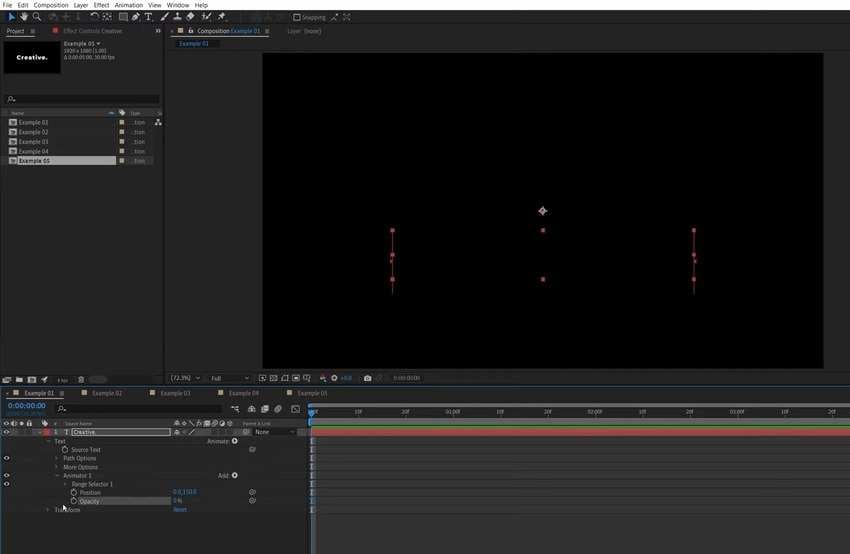
Step 5: Expand the Range Selector and click the Stopwatch button before the Offset option to add a keyframe at the beginning. Then, set the value to a negative 100%.
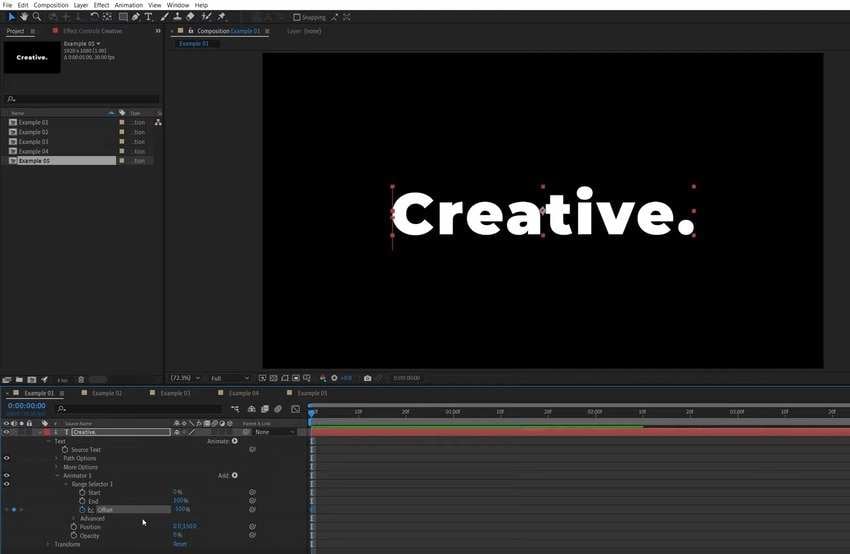
Step 6: Move the playhead one second forward and set the Offset to 100%. That will add another keyframe.
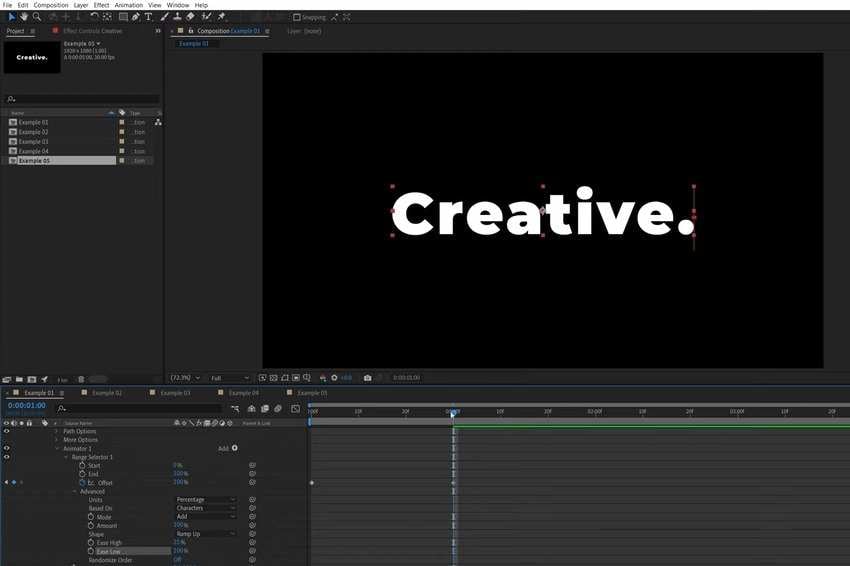
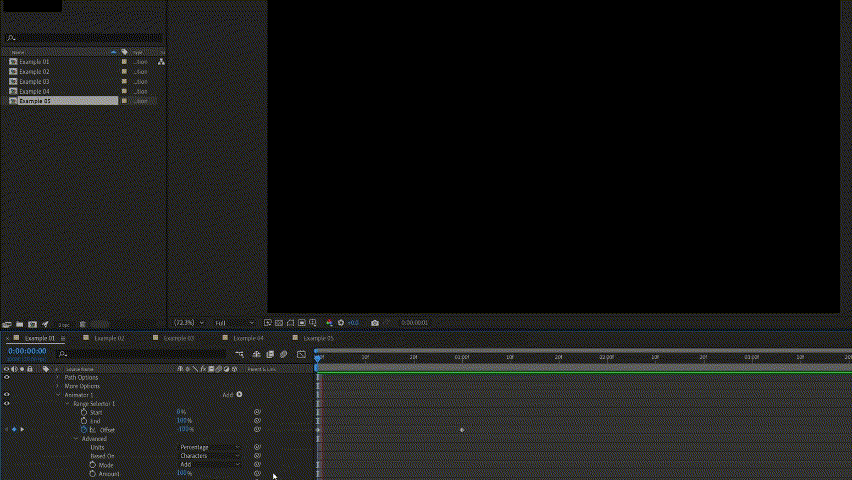
Step 7: Expand Advanced settings and change the Shape to Ramp Up.

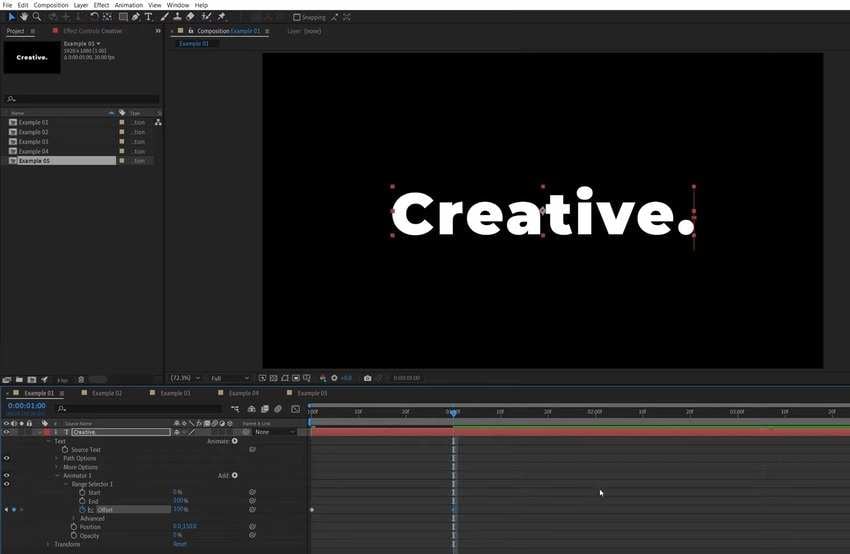
Step 8: Set the animation Ease High to 25% and Ease Low to 100%. You can also change the Based On Characters setting to Words, Lines, or Characters Excluding Spaces for a smooth After Effects letter reveal.
Step 9: Move the playhead to the beginning (or hit the Spacebar) to see your word reveal in After Effects. Our example shows one word, but you can animate entire paragraphs.
Reveal Text With Masking
Masks in After Effects and other motion graphics editors are shapes for separating specific parts of a layer (like text) for non-destructive editing. For instance, you can remove objects, change the background color, or make image composites without affecting the areas behind a mask. You can also animate masks, making them perfect for text reveals.
Here’s how to create a sliding text reveal in After Effects with masking:
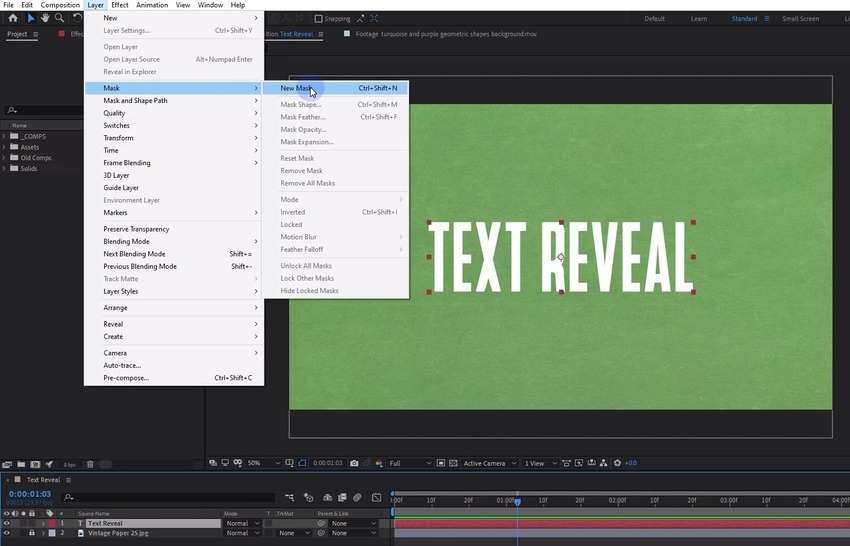
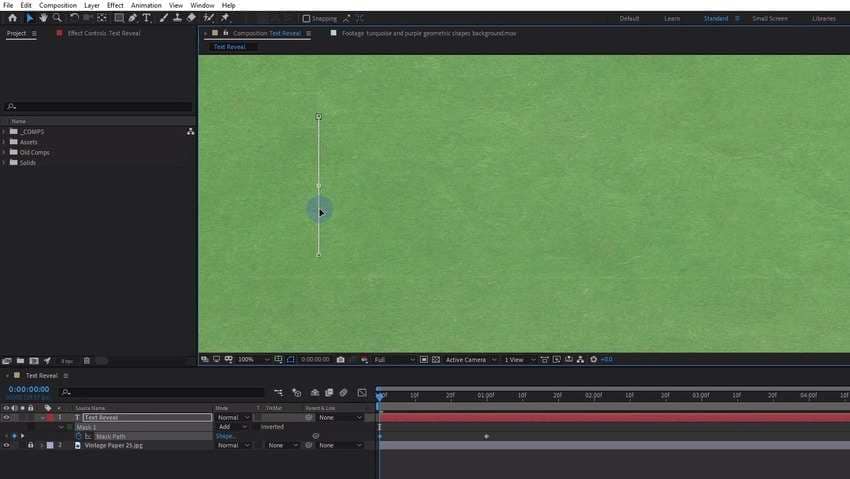
Step 1: Once you create a composition, add and select a text layer and go to Layer > Mask > New Mask.
Step 2: A mask on a text layer can sometimes slightly chop off the text (depending on the font). The difference can be subtle, but you don’t want that for logos or brand fonts. Therefore, double-click the mask in the Composition panel and slightly drag the Transform handles as you hold the Ctrl key to add padding at the top, bottom, left, and right.

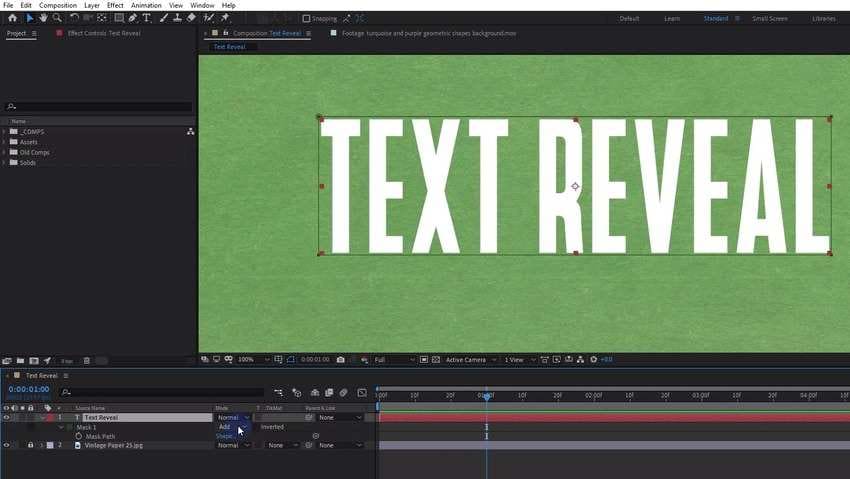
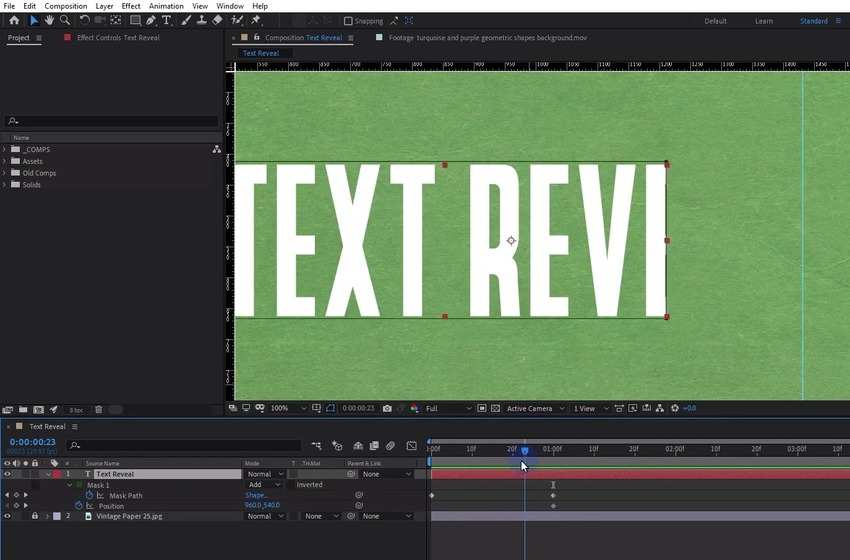
Step 3: Expand your text layer’s properties and find the Mask Path under Mask (you can reveal the path in After Effects by selecting the text layer and pressing M on your keyboard). Set the Mode to Add to make everything inside opaque while everything outside is transparent. Then, click the Stopwatch button and set a keyframe (to one second, for instance).
Step 4: Move the playhead to the beginning and double-click the mask in the Composition panel.
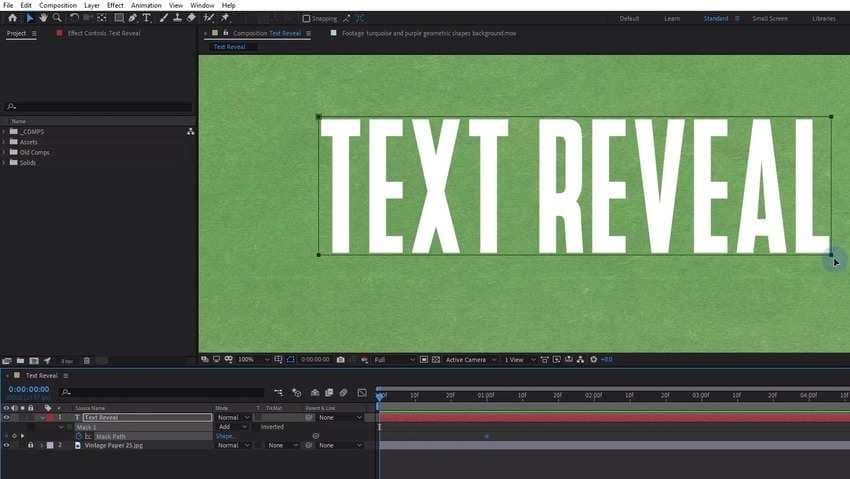
Step 5: Drag any path handle to hide the text.

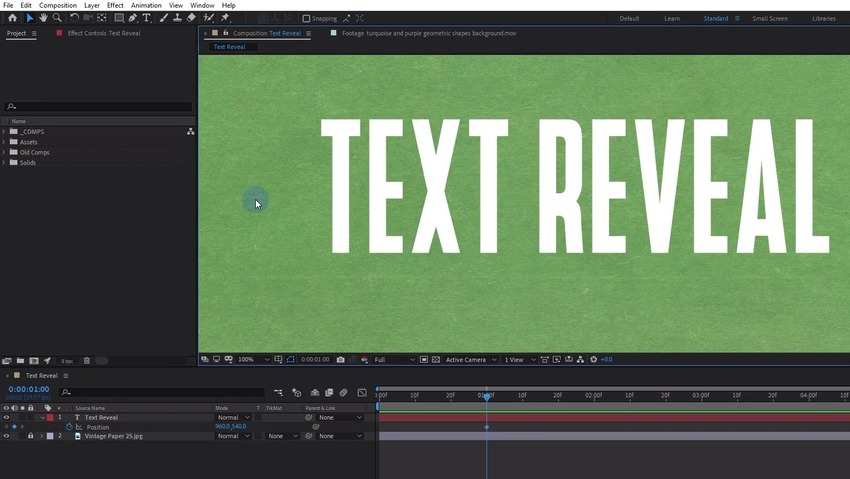
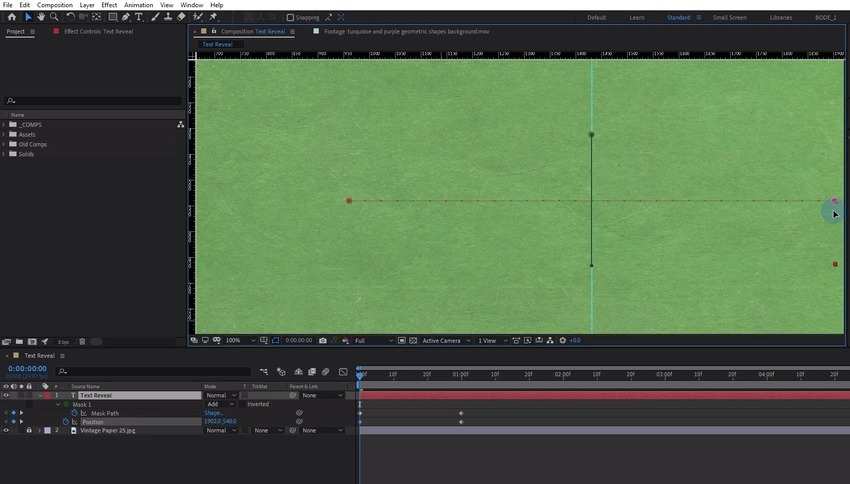
Step 6: Move it entirely to one side. Your text will reveal from that point, but let’s make it smoother.
Step 7: Expand the text layer’s properties and hit the Stopwatch before the Position.
Step 8: Switch to the Composition panel and hit Ctrl + R to display rulers.
Step 9: Drag the guide to the edge of the text.
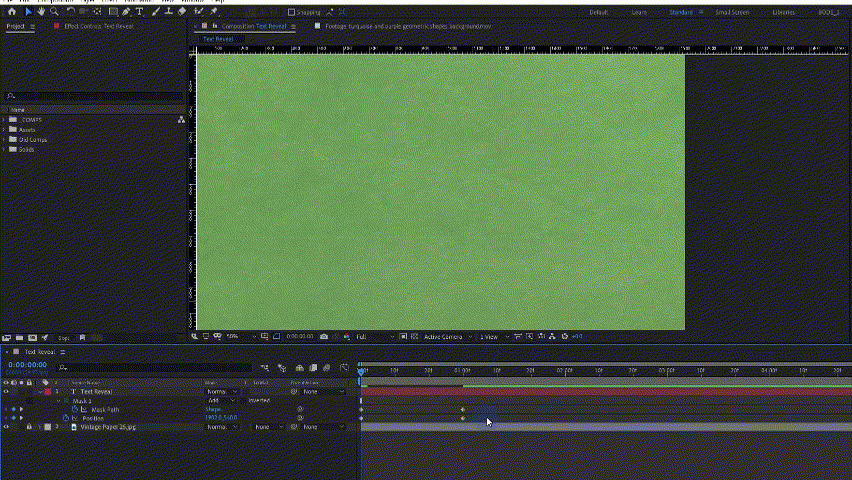
Step 10: Select your text layer and hit the U key on your keyboard. Then, drag the red handles to the beginning of your text to hide it.
Step 11: Pull the position to the right of the specified guiding line.
Step 12: Hit the Spacebar to see your text reveal.
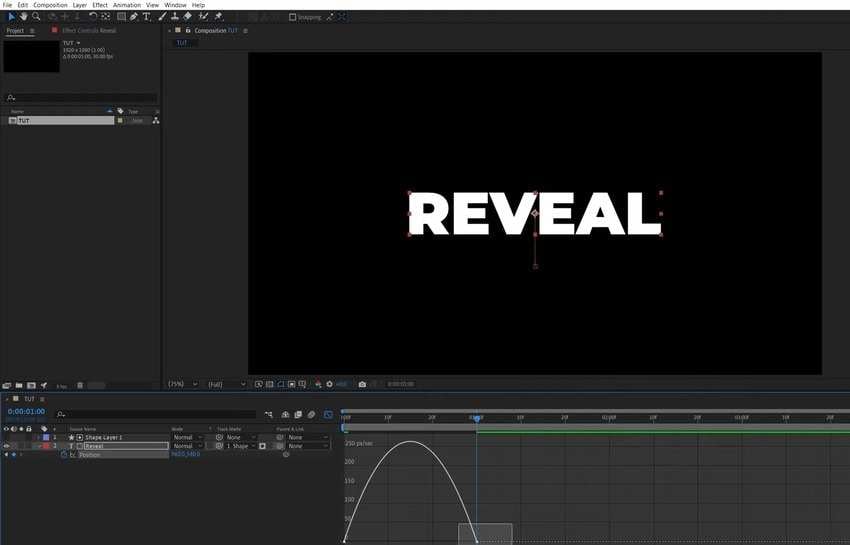
Step 13: Select all the keyframes and click the Graph Editor button (or hit F9) in the Timeline panel.
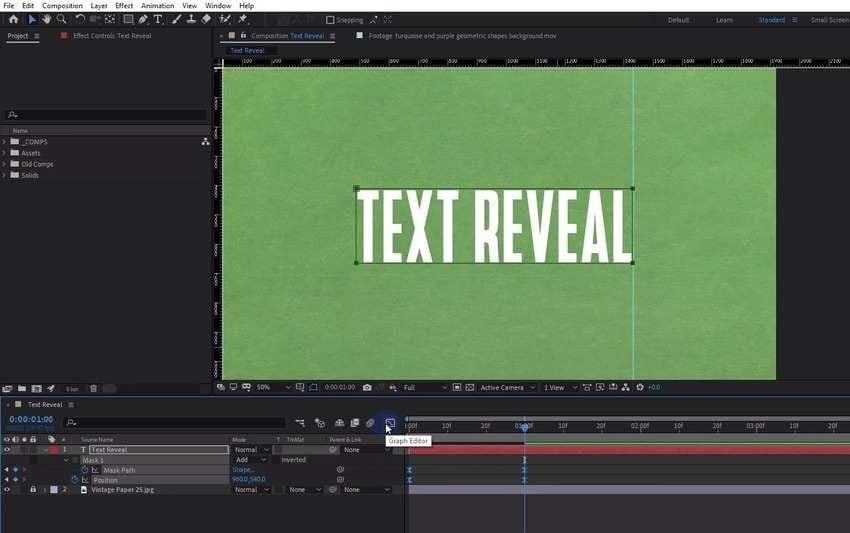
Step 14: Select the keyframes on the right.
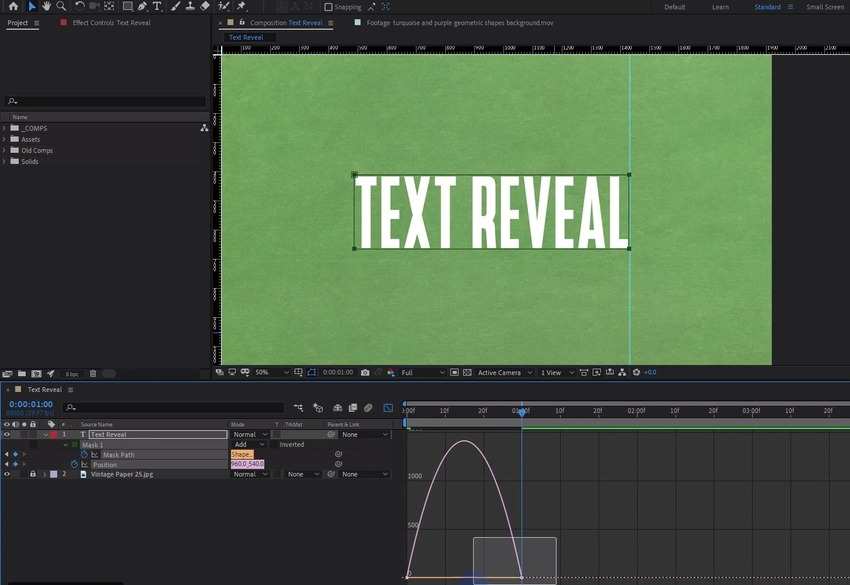
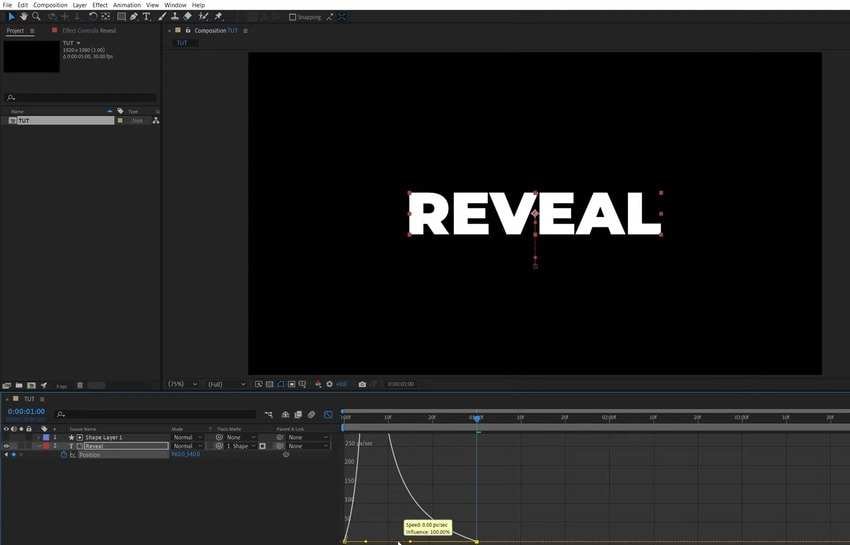
Step 15: Drag the yellow handle to the left to adjust the animation speed.
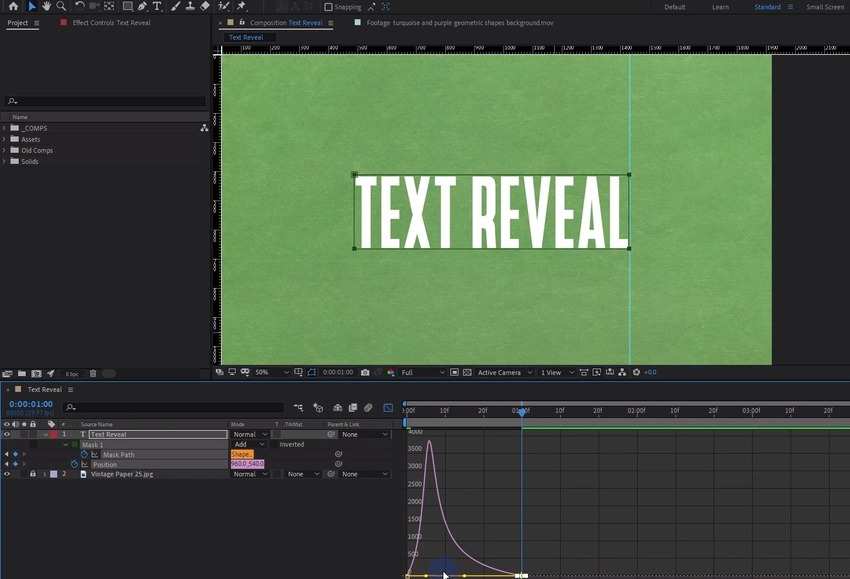
Step 16: Bring the playhead to the beginning to check the effect.
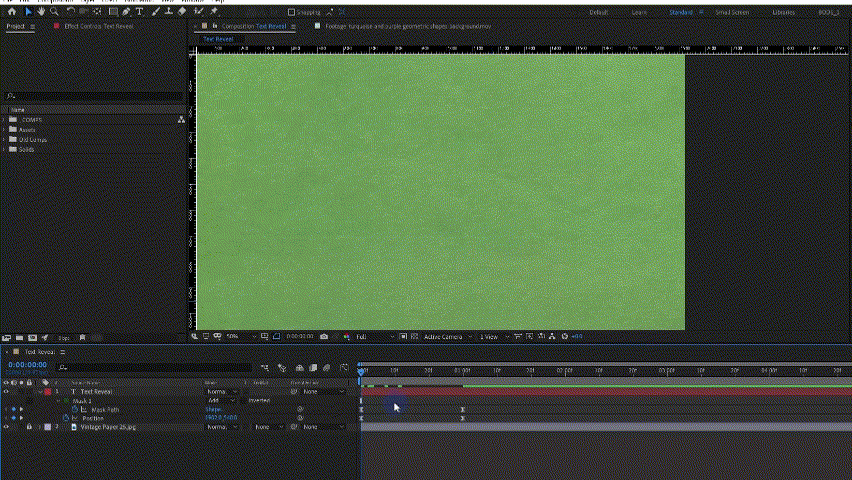
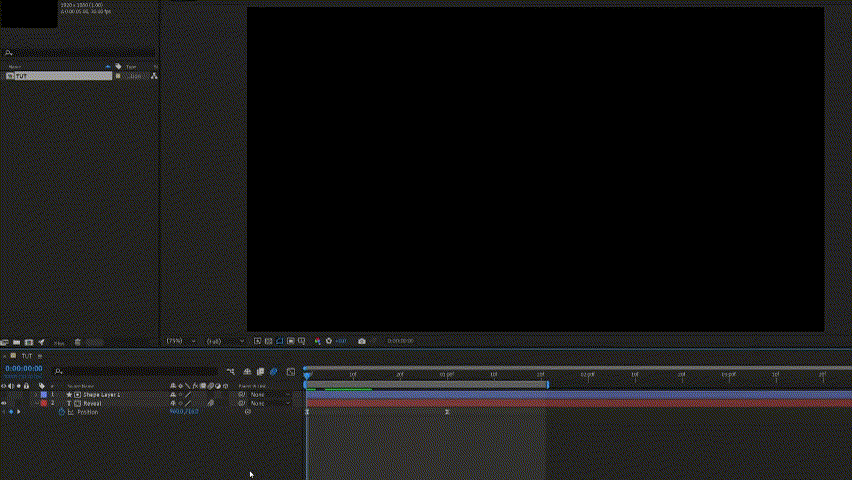
Step 17: Press F4 to display layer switches and modes and hit the Motion Blur button on your text layer.
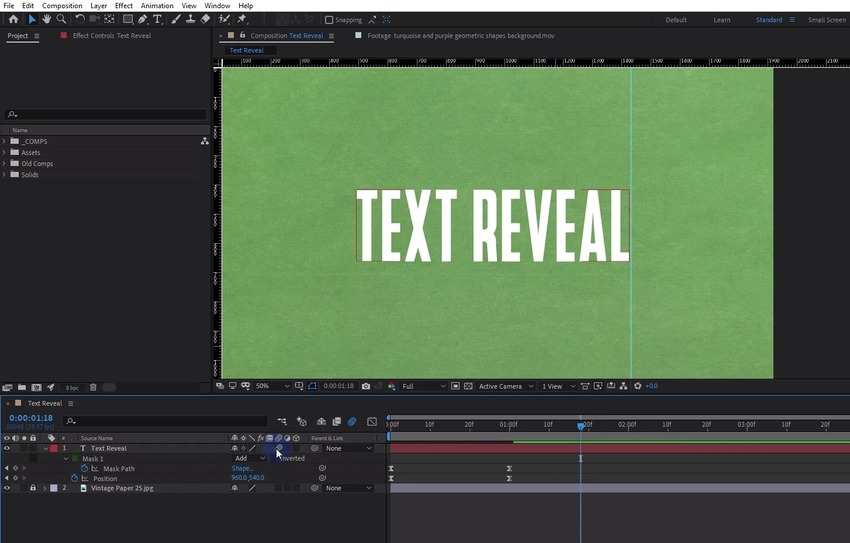
Step 18: Check the result by pressing the Spacebar.
Reveal Text Using the New Track Matte System
The new Track Matte system in After Effects lets you animate text using its layer’s Alpha or Luma channel. The former uses the top layer’s opacity to create a mask for the bottom layer, determining how transparent it will be. The latter focuses on brightness.
Why are mattes better than masking? Because they represent separate layers. When you put a mask on a layer, it becomes a part of it, moving with it as you animate it. However, you can animate a track matte without moving the affected layer (and vice versa). For instance, you can animate text while keeping the bottom layer’s design composition intact.
Here is how to make a line text reveal in After Effects using a track matte:
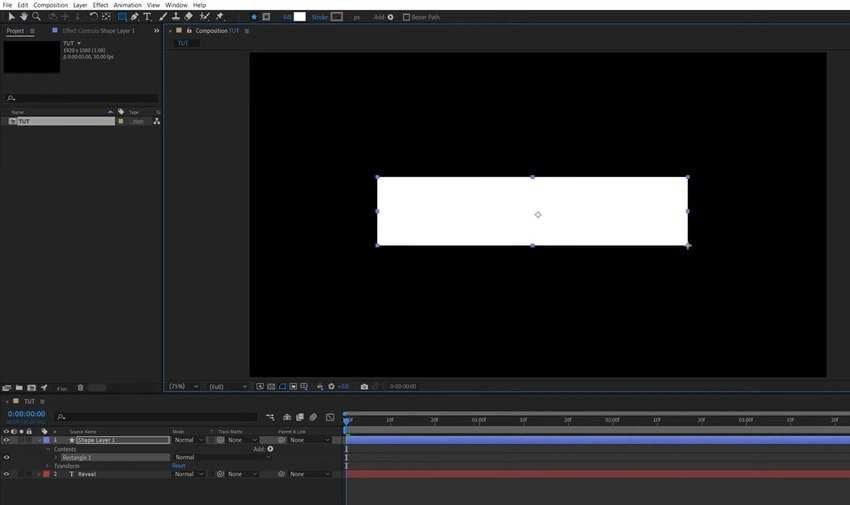
Step 1: Create a new composition and add a text layer.
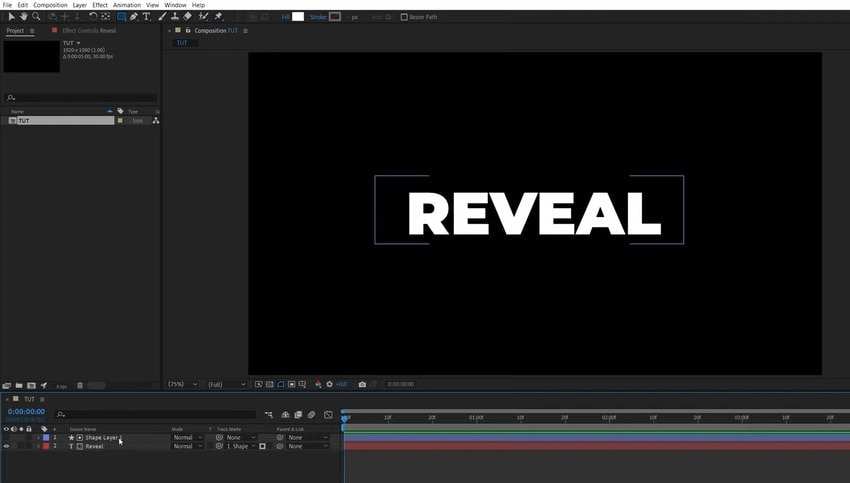
Step 2: Use the Rectangle tool to draw a rectangle over your text, setting the Fill to any solid color and the Stroke to None.
Step 3: Drag the Track Matte pick whip from the text layer to the shape layer.
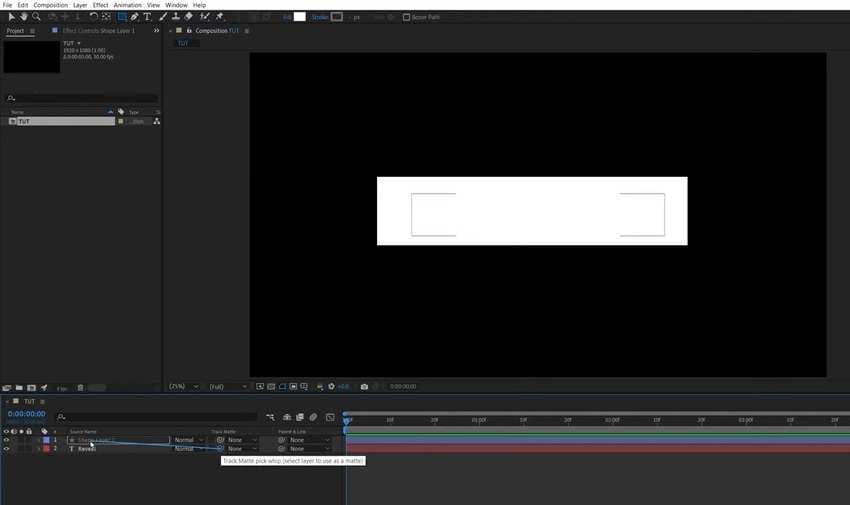
Step 4: Your text will become visible because you’ve set its layer to use the shape layer’s Alpha Matte channel, making it transparent.
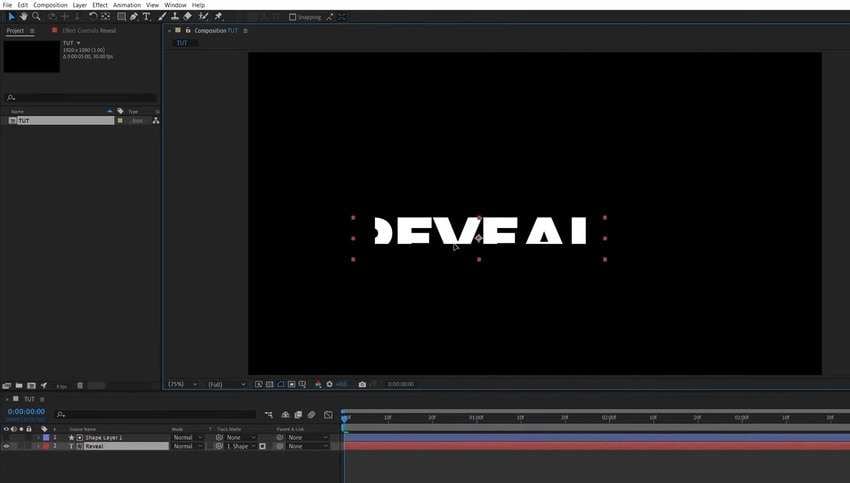
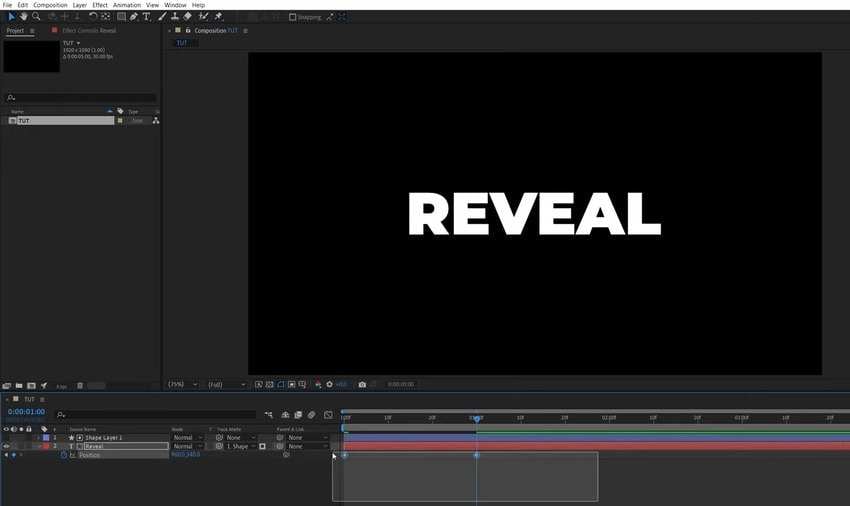
Step 5: Use the Selection tool and click your text layer. Then, drag the text to see the effect. It’s visible only within the boundaries of the shape layer.
Step 6: Select your text layer and hit the P key on your keyboard to bring the Position setting. Then, click the Stopwatch to add a keyframe (e.g., set it at one second).
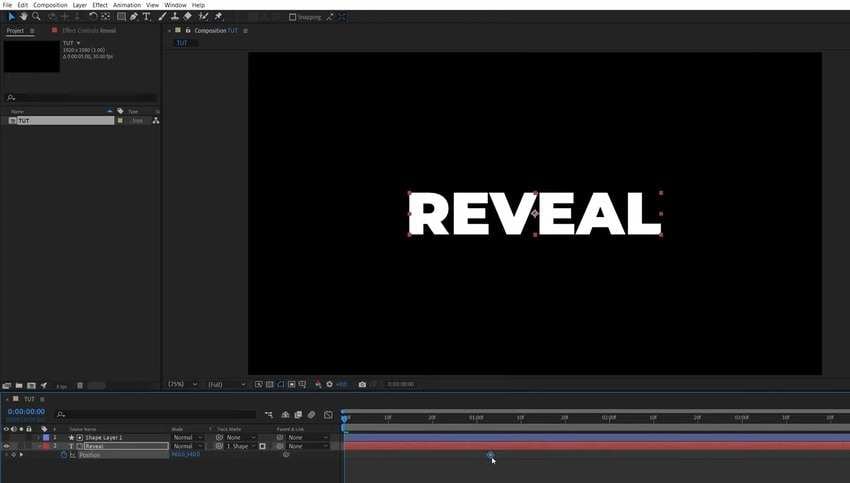
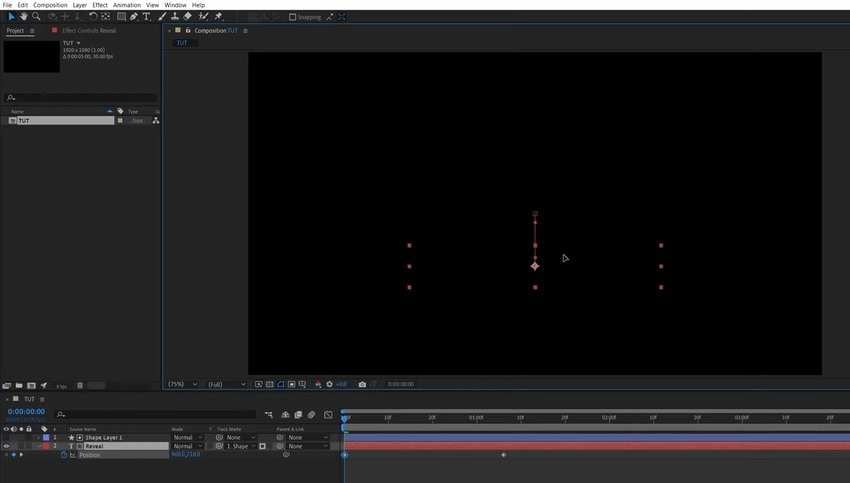
Step 7: Move the text down in the Composition panel (until it’s invisible) to add a keyframe at the beginning.
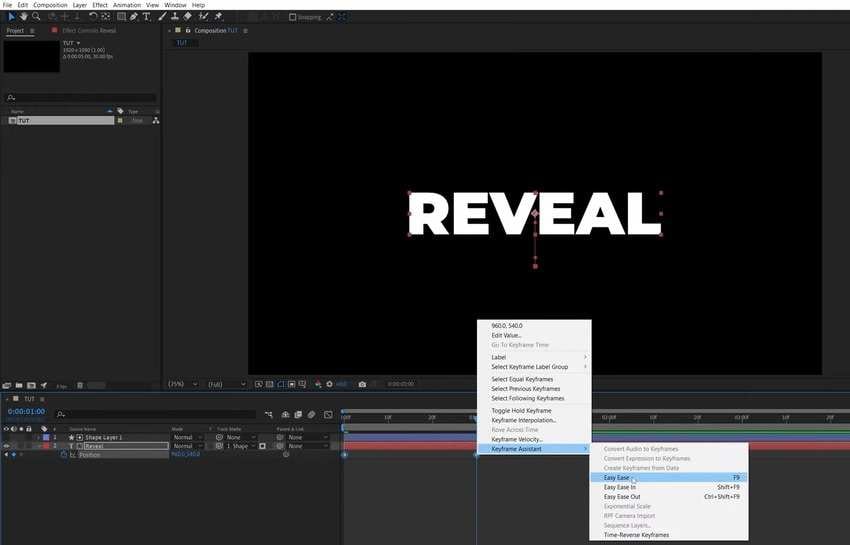
Step 8: Select both keyframes in the Timeline panel.
Step 9: Right-click any keyframe and click Keyframe Assistant > Easy Ease.
Step 10: Open the Graph Editor.
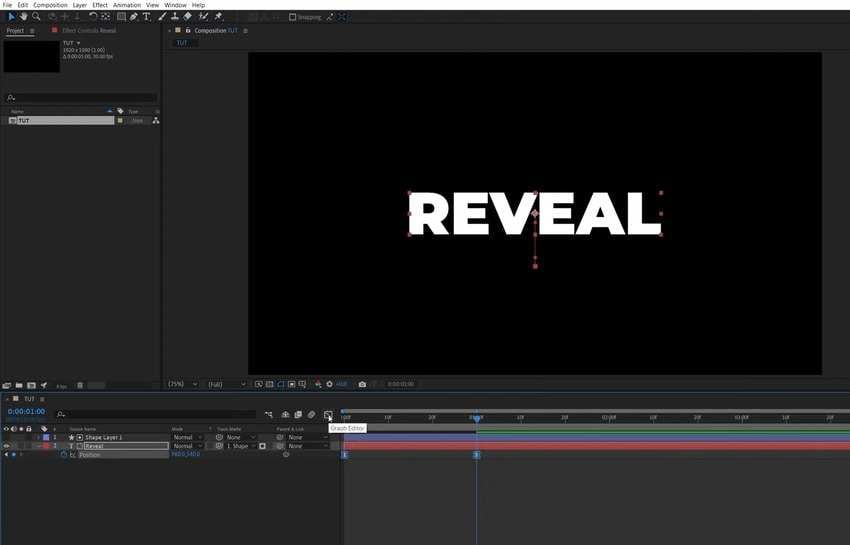
Step 11: Right-click inside the Graph Editor to enable the Edit Speed Graph (if you don’t see it).
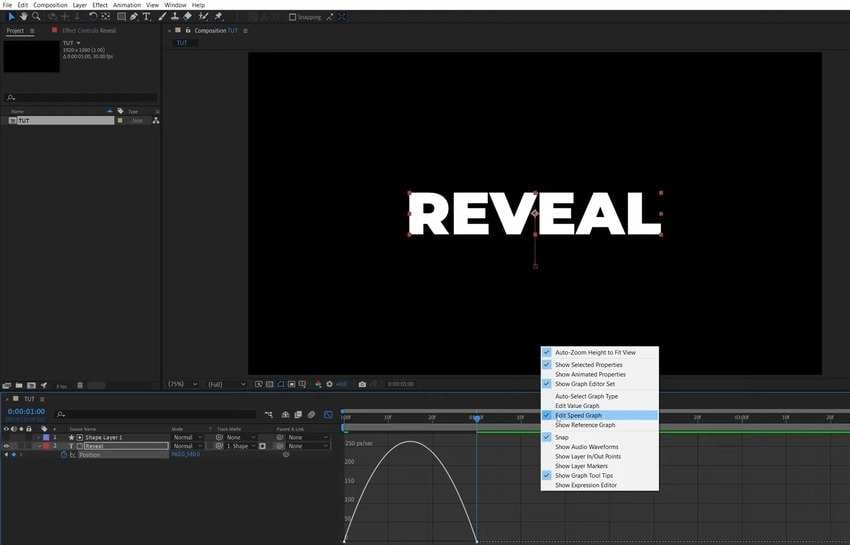
Step 12: Select the second keyframe.
Step 13: Drag the yellow handle to the left.
Step 14: Close the Graph Editor and hit the Spacebar to see your text reveal. You can also add Motion Blur and other effects for a smoother animation.
Can I Use Track Mattes to Reveal Logos in After Effects?
You can make an image or text logo reveal in After Effects with a track matte. That’s perfect because a matted layer is stationary. Unlike a mask, it doesn’t move relative to the text layer’s position.
You can create a shape layer, apply a track matte, and animate your logo without animating the matted layer. That means fewer steps and keyframes to make your animation.
What Are Some Advanced Techniques for Text Reveals in After Effects?
The most notable advanced techniques After Effects professionals use for text reveals include the following:
- Using a Luma Matte mode – The Alpha Matte is the default setting. However, if your text has transparency, switch to a Luma Matte for a smoother reveal.
- Experimenting with shape layers – Stick with the default rectangle for elegant reveals, but try circles, stars, and custom shapes for creative, more exciting reveal designs.
- Combining the text reveal with other effects – Modify properties like blur, scale, skew, and rotation for added impact.
Some examples above have shown you how adding motion blur to a text layer can make a reveal more visually appealing. Therefore, try all these techniques to see how much difference they can make.
Limitations of After Effects for Text Reveals
After Effects can help you create fantastic text reveals, but the process is extensive and requires technical know-how. It also offers less flexibility than other motion graphics tools designed specifically for text animation.
Here are the limitations of After Effects for text reveals:
- Setup complexity – The software requires jumping through hoops to achieve the desired effects.
- Few presets or templates – The built-in resources are too few and generic, requiring extensive customizations or external plugins.
- Difficulty with precise positioning – Hitting the sweet spot takes significant time and effort in After Effects.
- Limited animation options – You can choose from only several animations to make your text reveal in After Effects.
- No responsive sizing – The only way to make your After Effects text reveal designs responsive is to use expressions. That requires JavaScript knowledge.
These limitations make After Effects unsuitable for beginners and content creators seeking more creative freedom. Fortunately, you have user-friendly alternatives with more presets, templates, and animation options. Here’s one to consider.
A More Convenient Alternative to Make Text Reveal Effect – Wondershare Filmora
Wondershare Filmora is a versatile video editor that is perfect for beginners and professionals. It has many AI-powered tools and 10M+ creative assets (including titles), 10K+ customizable preset templates, 500+ AI effects, etc.
Create stunning text reveal effects in Filmora using simple masking techniques and keyframe animations for dynamic, engaging visuals.


The most prominent features for creating a text reveal in Filmora include:
- Masking – Filmora’s masking tool lets you create impressive text reveal effects. It allows precise control over how and when the text appears, enhancing the video’s visual impact.
- Versatile text customization – You can customize text styles, fonts, colors, and animations. Filmora offers various text presets and effects, giving you creative flexibility in presenting text reveals in videos.
- Creative effects integration – Filmora lets you integrate various creative effects alongside text reveals, like transitions and overlays. That enhances the overall video production quality.
- Fast rendering – Filmora quickly renders designs, meaning you can see the results of your text reveal animations without waiting forever, like in After Effects, making editing more efficient.
Are you ready to leverage these features to create a text reveal? Download Filmora to your computer and follow the guides below.
Video Guide to Creating a Text Reveal Animation in Filmora
We’ll show you how to create a text reveal effect in Filmora in the sections below, but here’s a video tutorial to see it in action.
What Are the Essential Steps to Create a Text Reveal Animation in Filmora?
Follow these steps to make a text reveal animation in Filmora:
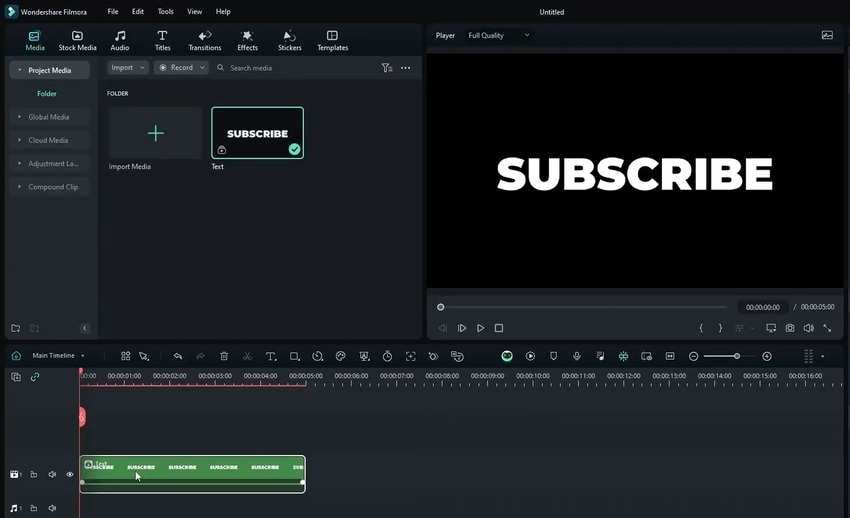
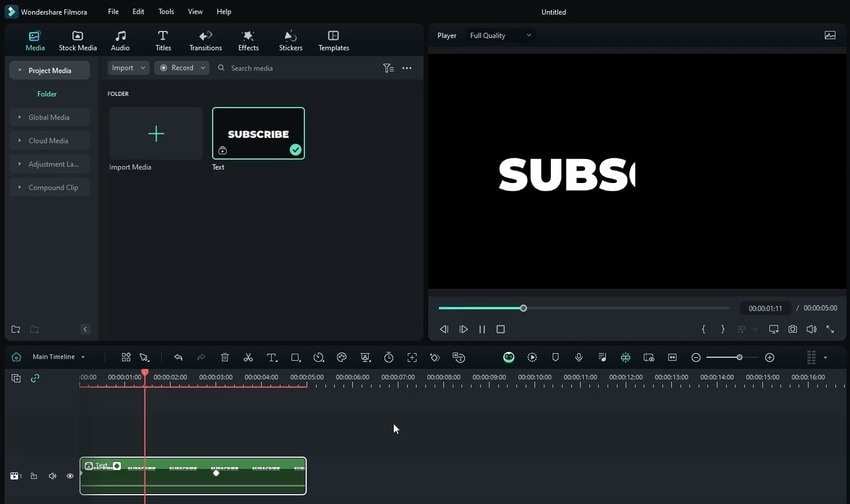
Step 1: Launch the software and create a New Project.
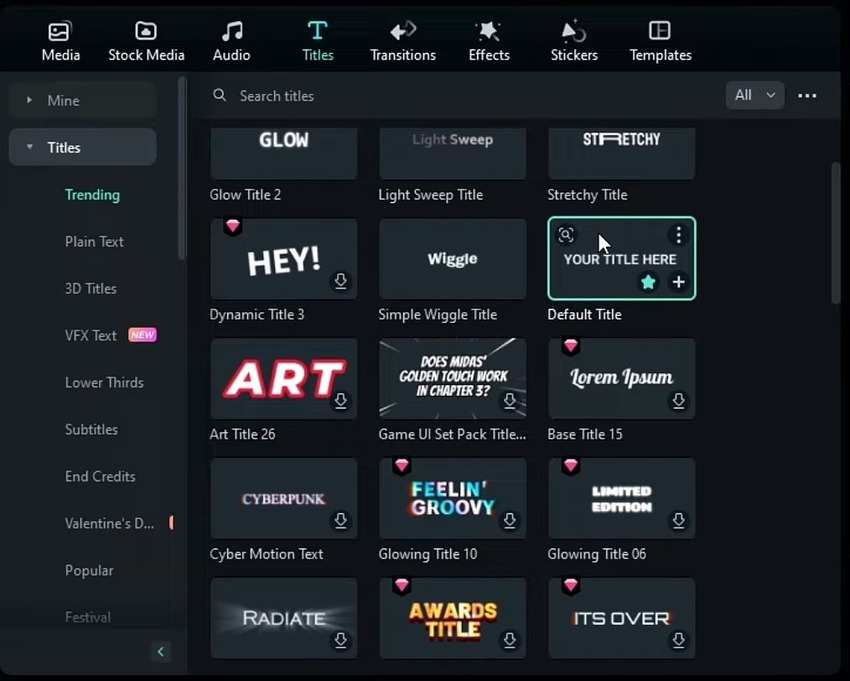
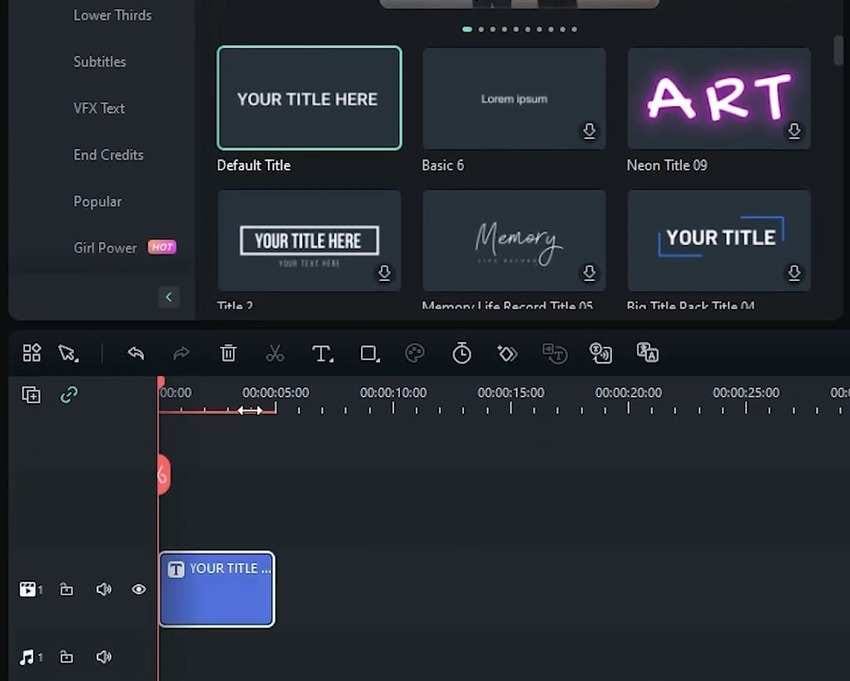
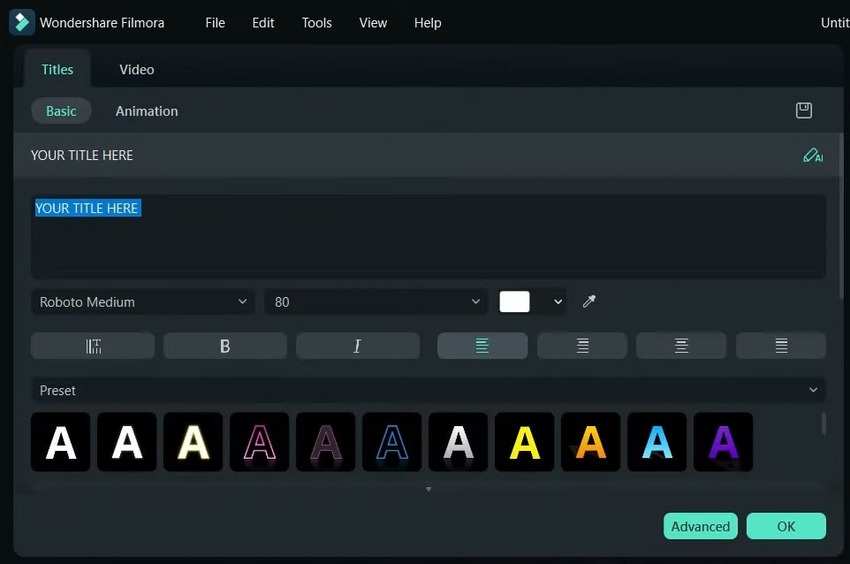
Step 2: Go to Titles and pick your favorite.
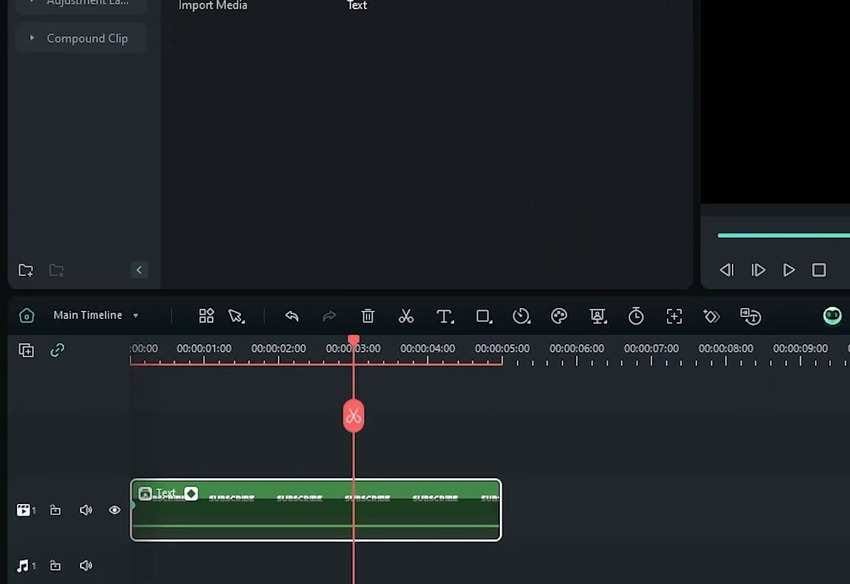
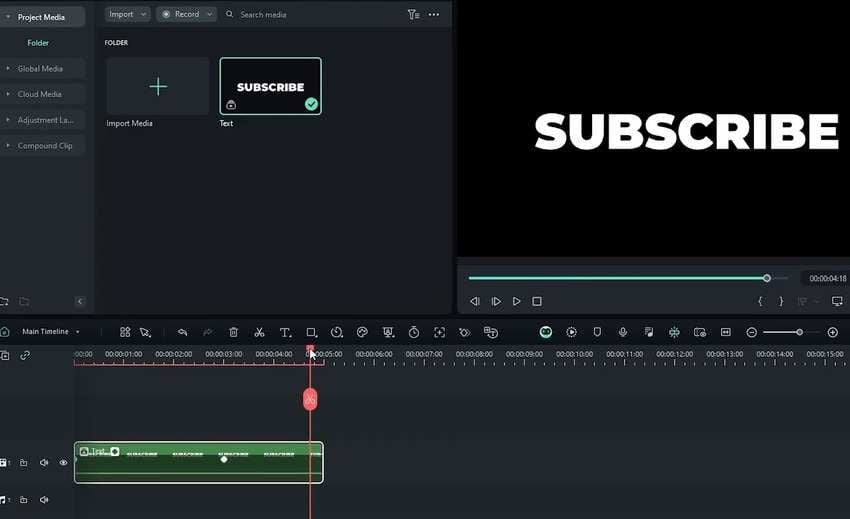
Step 3: Drag and drop your chosen title onto the timeline.
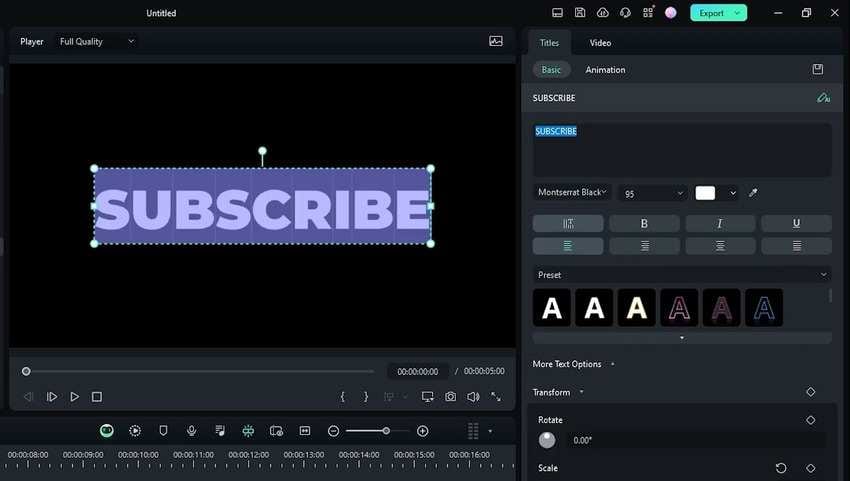
Step 4: Double-click the title to customize it. Type your text and set the font, color, size, and alignment.
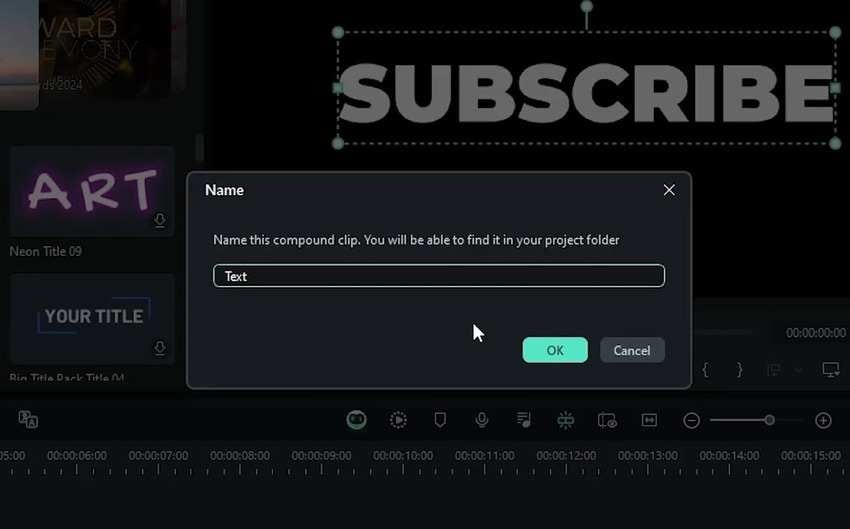
Step 5: Right-click the title on the timeline and click Create a Compound Clip.
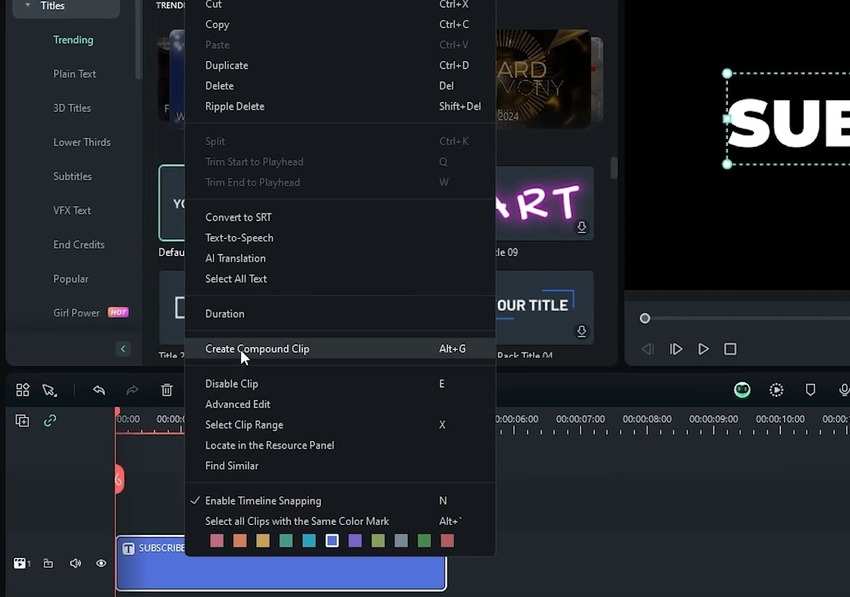
Step 6: Name the clip and hit OK.
Step 7: Click your compound clip on the timeline to select it, ensuring the playhead is at the beginning.
Step 8: Go to Video > Mask in the Properties panel and choose one. We’ll use the Linear Mask in our example.
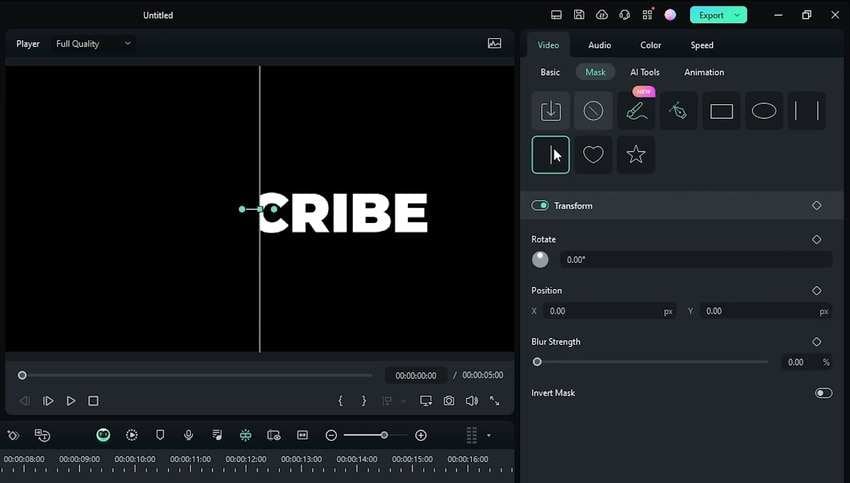
Step 9: Click Invert Mask to make your animation reveal the beginning of your text first, and add a Position keyframe.
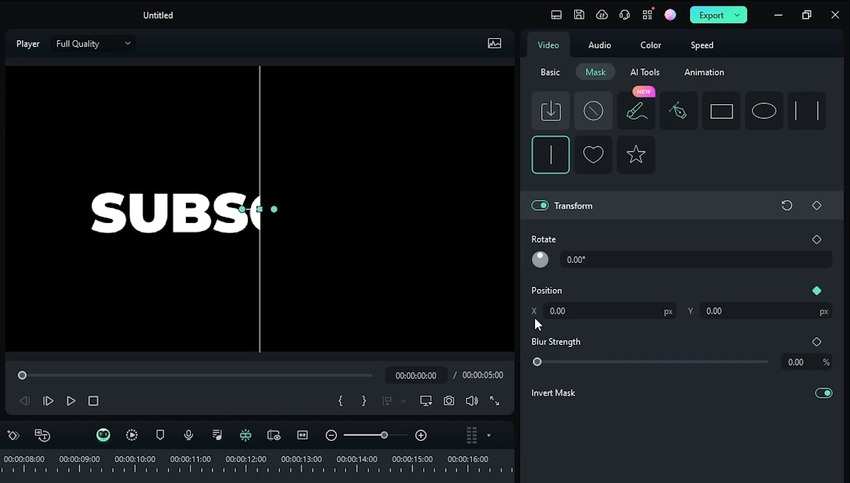
Step 10: Move your mask’s position entirely to the left.
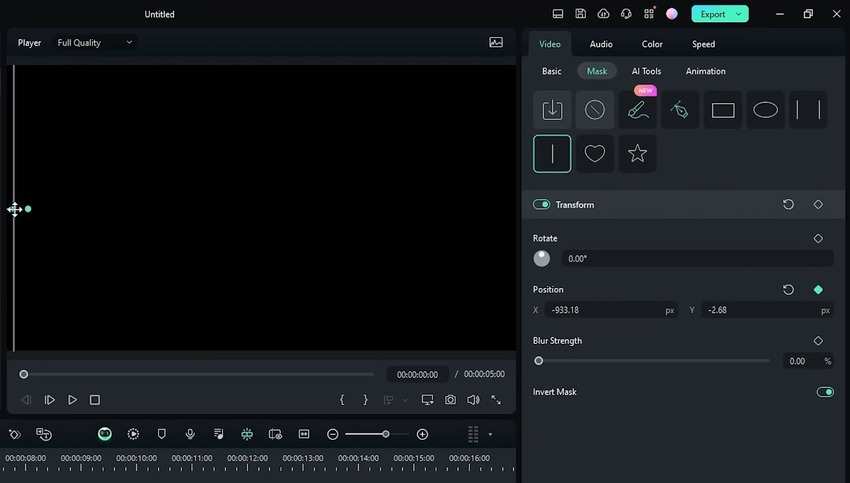
Step 11: Drag the playhead a second or two forward.
Step 12: Move the mask’s position to the right for another keyframe.
Step 13: Play the video to see the result.
Step 14: Increase the Blur Strength (for instance, to 50%) for a smoother effect.

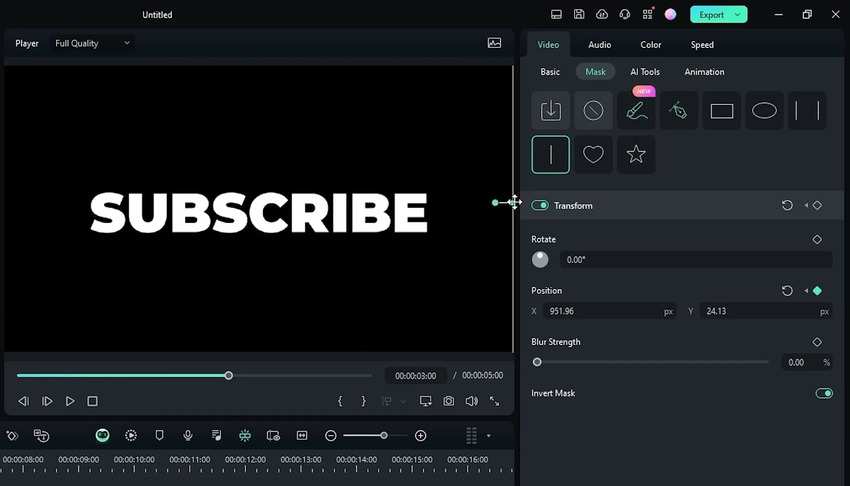
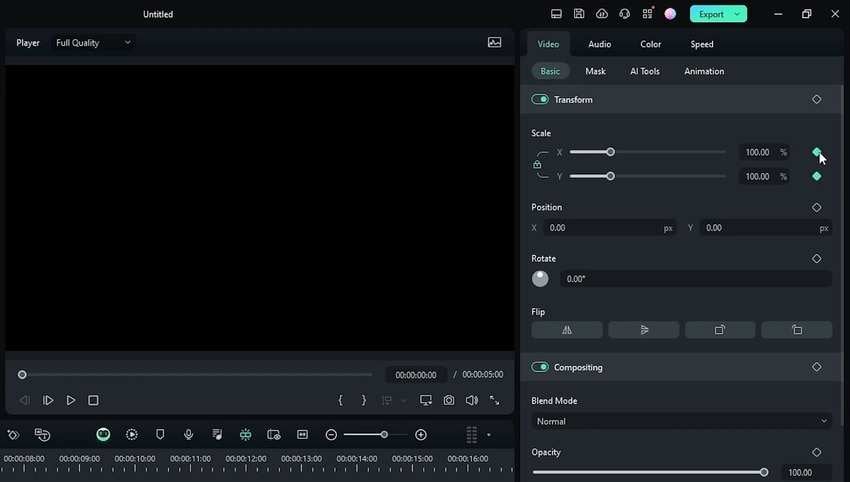
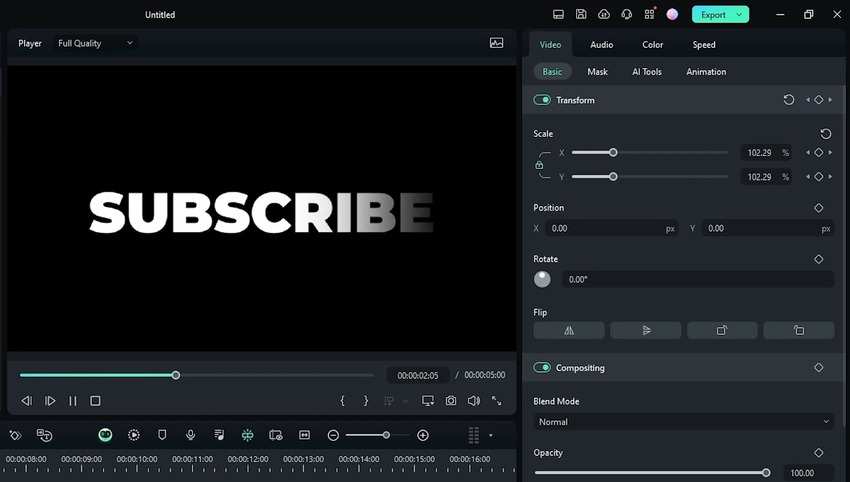
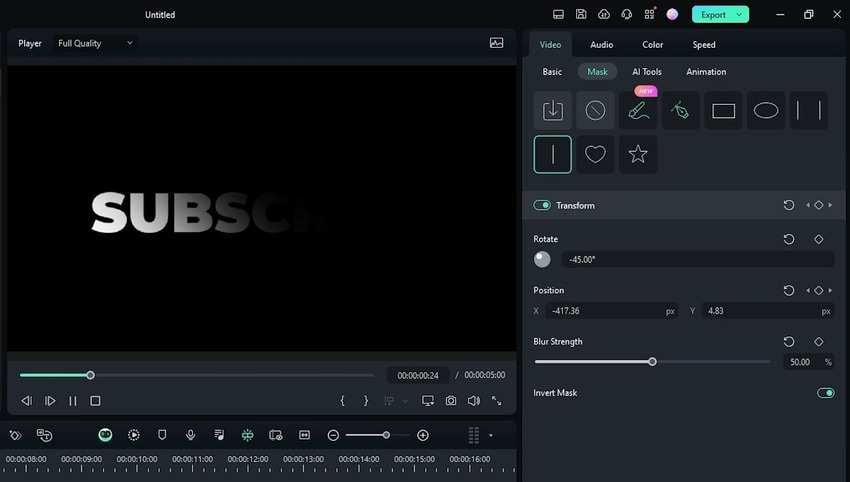
Step 15: Select your compound clip (return the playhead to the beginning) and go to Video > Basic in the Properties panel. Then, add Scale keyframes for both axes.
Step 16: Move the playhead near the end.
Step 17: Slightly increase the Scale (for instance, set it to 105%) for both axes and add keyframes.
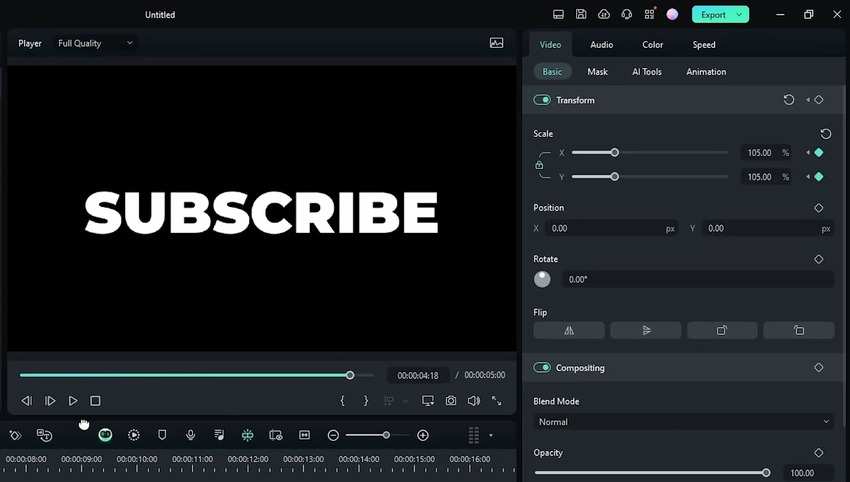
Step 18: Hit Play in the Player panel to see the result. Your text will subtly grow at the specified keyframe.
Step 19: Let’s make this text reveal animation more eye-catching. Switch to the Mask tab and adjust the Rotation. For instance, set it to a negative 45%.
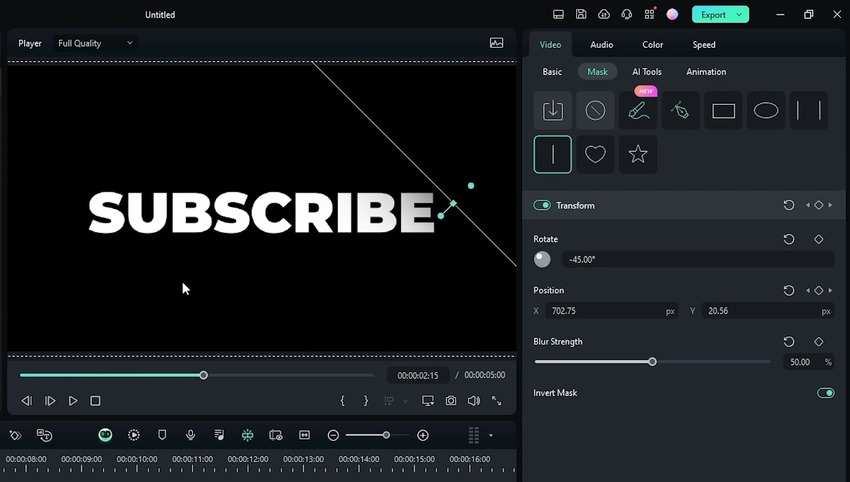
Step 20: Play the video to see how your rotated mask reveals the text.
How Do I Align Text Reveals With Moving Objects in Filmora?
You can reveal text behind a moving object in Filmora, perfectly aligning it with movement. Here’s what to do:
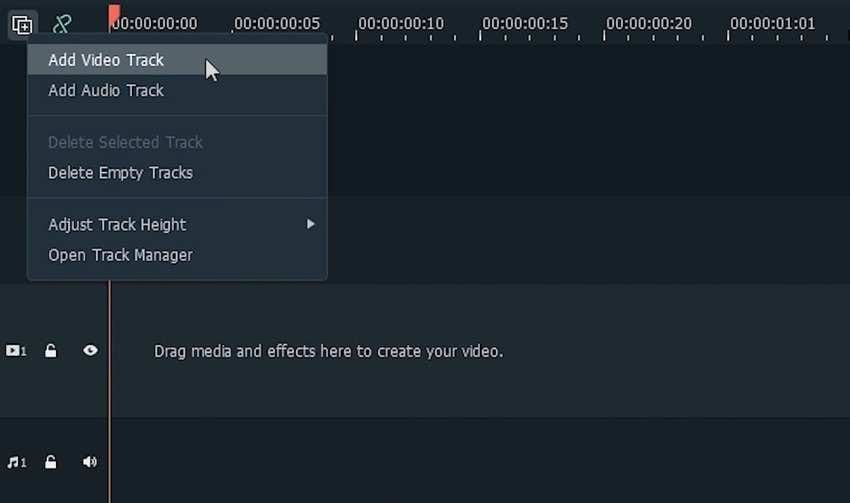
Step 1: Create a project and add two video tracks to the timeline.
Step 2: Go to File > Import Media > Import Media Files and choose a video.

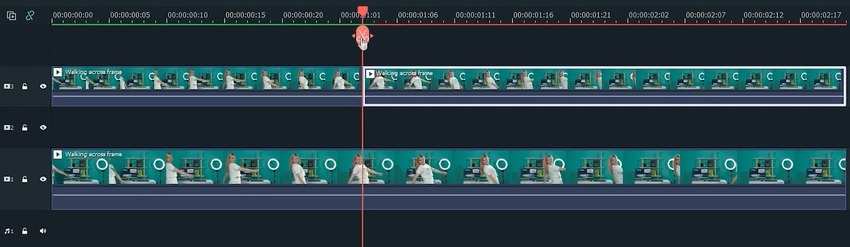
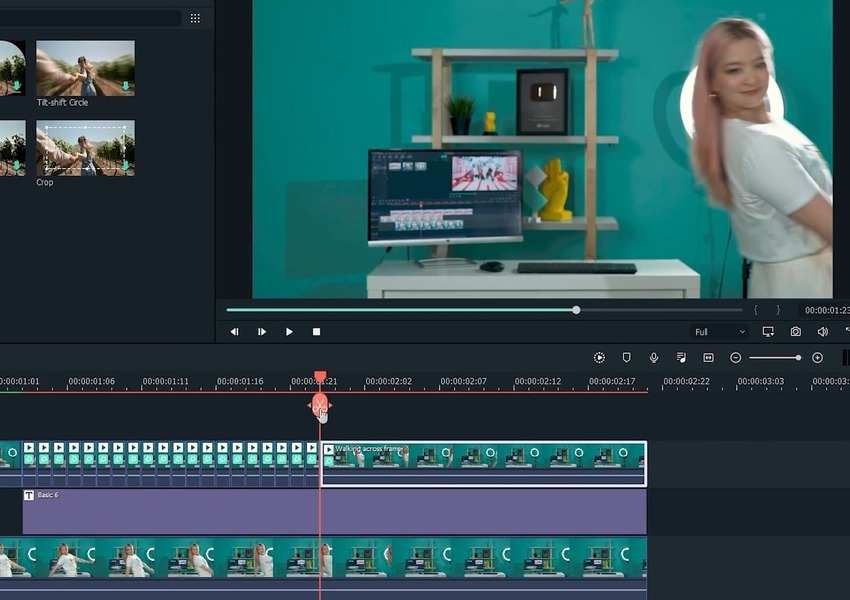
Step 3: Drag the video to the first track and copy and paste it onto the third track. Then, move the playhead to where you want the text reveal animation to start and click the Scissors button to cut the video duplicate.
Step 4: Go to Titles and drag and drop one onto the second video track. Put it at the playhead and align its end with the video clips.
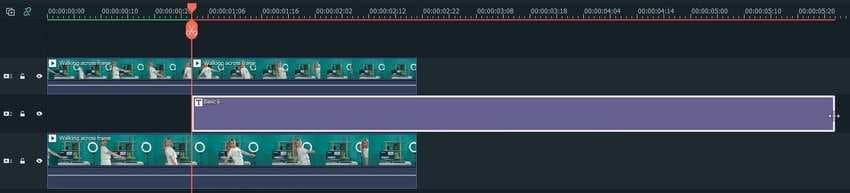
Step 5: Double-click the title to customize the text.
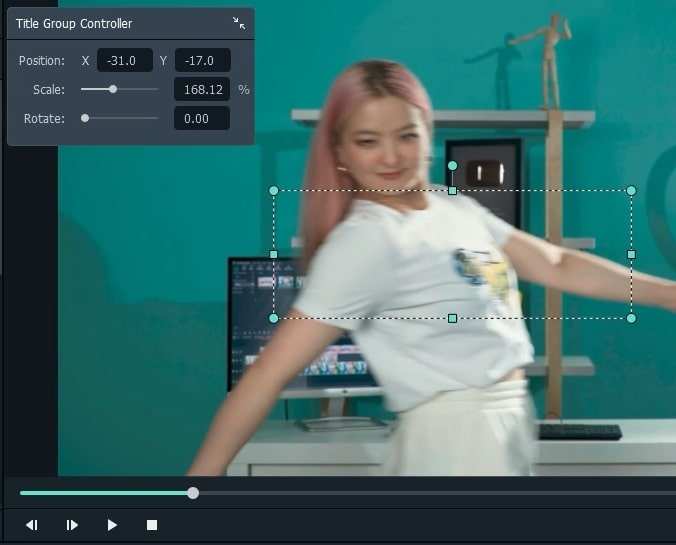
Step 6: Adjust the text’s position, scale, and rotation in the Title Group Controller.
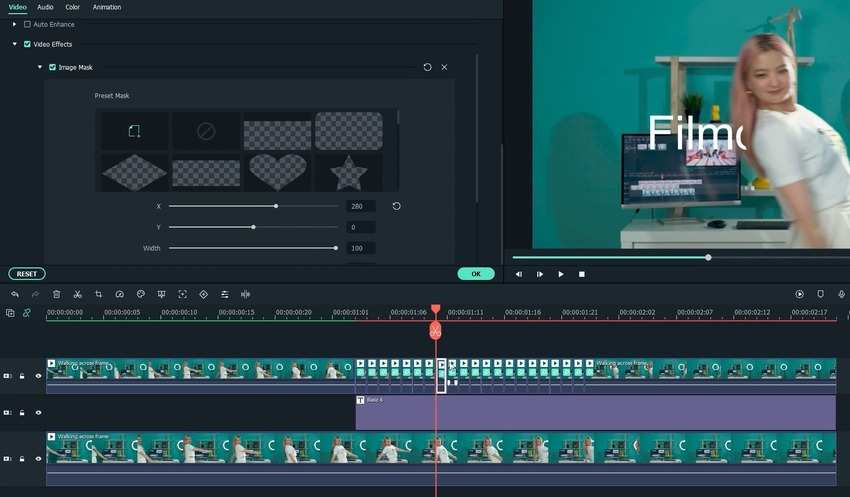
Step 7: Go to Effects and search for an Image Mask. Drag and drop it onto the second part of the duplicate video.
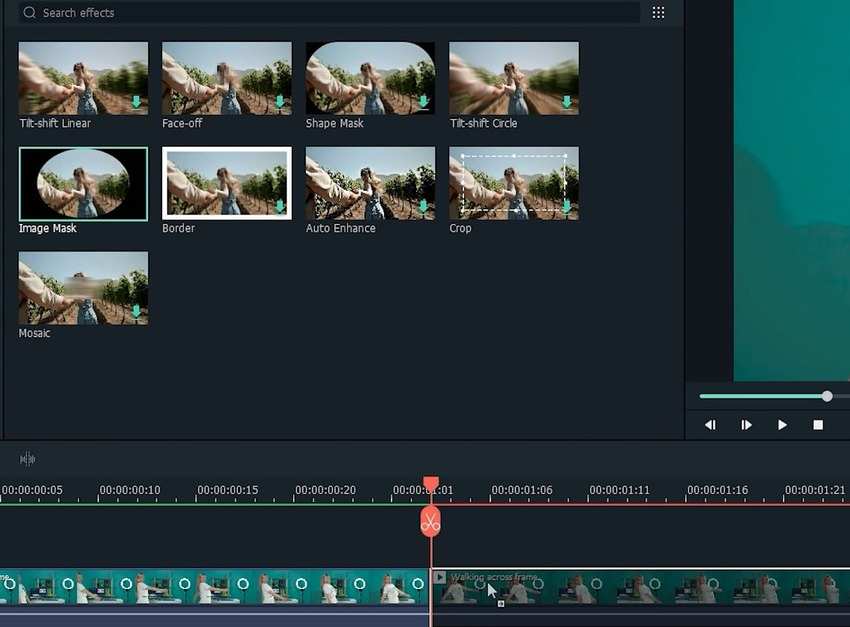
Step 8: Move the playhead frame by frame and make multiple cuts in the top video (until your moving object is at the end).
Step 9: Double-click the first cut and customize the Image Mask. Choose a preset and increase the value for the X-axis (unless your object moves along the Y-axis).
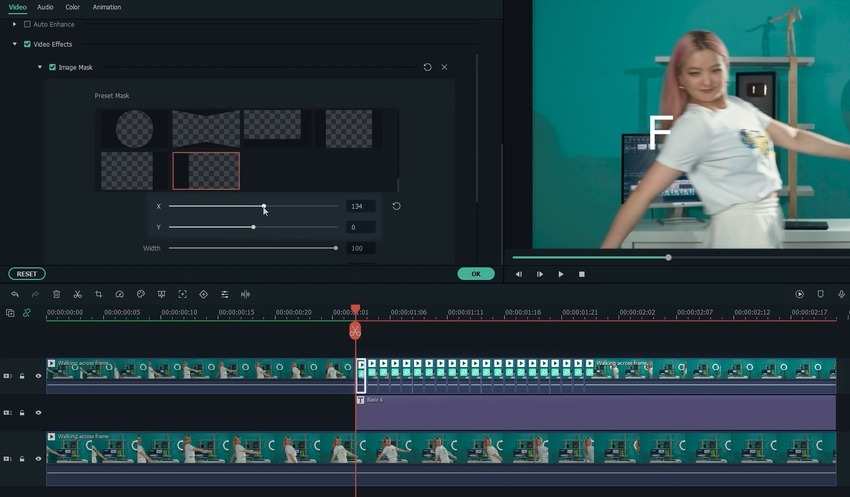
Step 10: Repeat the step for all cuts, ensuring each has a slightly higher value than the previous one. Your text will reveal as the object moves.
What Are Some Creative Ways to Use Text Reveals in Videos With Filmora?
Besides the examples above, Filmora offers excellent video masks, including a star and a heart. For instance, you can apply a heart-shaped mask and reduce its scale to 50% before increasing it to reveal your text.

Filmora also lets you import masks, making it ideal for any project. Furthermore, it offers a draw mask, letting you create a custom design for a unique text reveal.

Another creative way to make a text reveal in Filmora is to animate individual letters. You can add a title for each and apply animation loops. For instance, the first letter can roll up, the second down, the third up, etc. That way, you get a rolling animation.
To spice it up, you can duplicate the titles and remove the animation loops, making your text stop rolling after a few seconds.
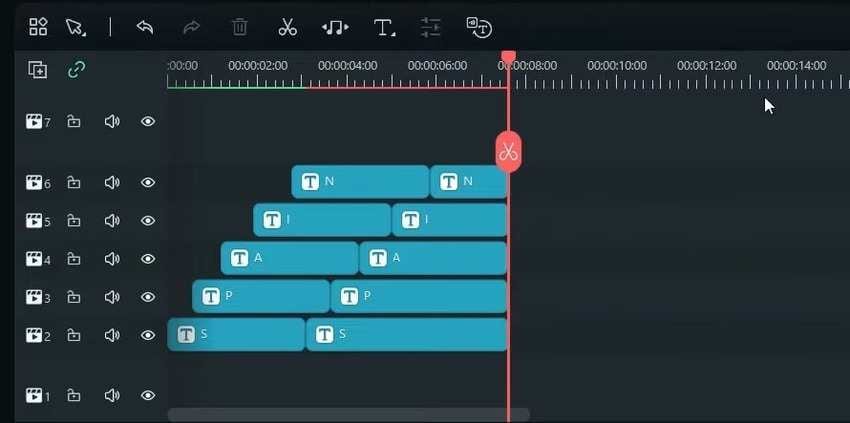
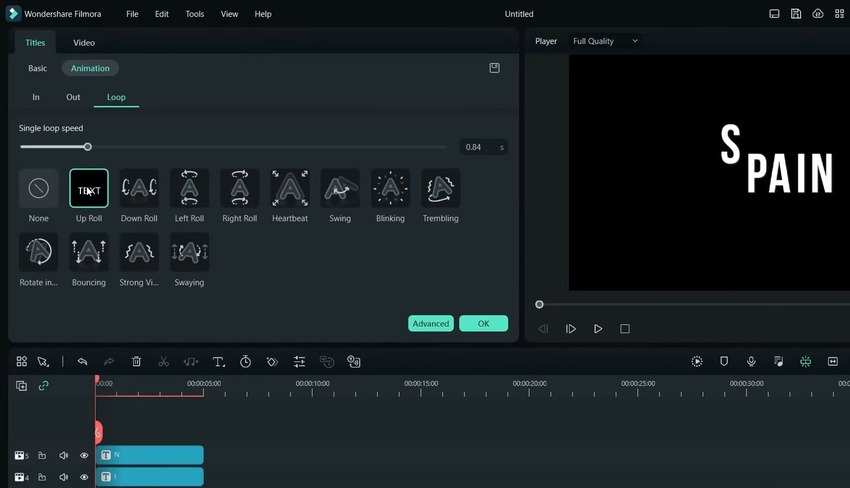
Here are only some animation loop examples in Filmora.
Here’s how this animation looks. Check out the text reveal animation tutorial on YouTube for more details.
Are There Any Plugins That Enhance Text Reveal Animations in After Effects?
Many websites offer plugins and presets to enhance text reveal animations. For instance, Motion Array offers high-quality After Effects text presets. You can choose from many free and paid After Effects text reveal templates matching your preferences, from retro and minimalistic to modern and futuristic designs.
AEJuice also offers many text reveal After Effects templates for free. However, its AE text animation bundle is worth every dime.
Of course, you can leverage Adobe Premiere text reveal effects. For instance, you can use a text reveal Premiere Pro preset and replace your design with an After Effects composition for further customization.
Conclusion
Using a text animation, track matte, or mask to reveal text in After Effects, you can create visually striking videos that glue viewers to the screen.
However, creating an AE text reveal requires extensive customizations and limits your flexibility and creativity. A cutting-edge, intuitive video editor like Filmora can streamline the process while unlocking more presets and templates for stunning text animations. Try it for free to see how it can transform your videos.
Frequently Asked Questions about Text Reveals
What are the primary methods for creating a text reveal effect in After Effects?
In After Effects, you can achieve text reveal effects primarily through three methods: using a text animation, applying masking techniques, or utilizing the new Track Matte system. Each method offers different levels of control and visual outcomes for revealing text word by word, letter by letter, or line by line.
Why might Wondershare Filmora be a preferred alternative to After Effects for text reveals?
Wondershare Filmora is often preferred for text reveals due to its user-friendliness and efficiency, especially for beginners and those seeking more creative freedom. It offers intuitive masking tools, versatile text customization options, seamless integration with various creative effects, and fast rendering, making the text animation process simpler and quicker compared to the more complex After Effects.
