
 100% Security Verified | No Subscription Required | No Malware

The eye zoom transition effect has become popular among many travel vloggers, music video creators, and short-form editors. While it may look like it takes a lot of skill and time to pull off, anyone, including you, can actually create this effect without problem.
The tool we are going to use in this tutorial is Wondershare Filmora, one of the best video editors that lets anyone create professional-looking videos like an expert. Its built-in tools and AI features make it simple to create the zoom into eyes transition.
Let’s get started!
 secure download

In this article
What Is an Eye Zoom Transition Effect?
Just like its name, an eye zoom transition is an editing trick where the camera zooms into someone’s eye to smoothly shift into the next scene. It gives the illusion that the viewer is entering a new world through the subject’s eye.
There are a few video editing techniques involved in creating this zoom into eye transition:
- Masking — to isolate the eye area and make it the focus of the zoom.
- Keyframing Animation — to control the zoom motion and timing as it moves closer into the eye.
- Transition — to polish the cut and blend both scenes smoothly
Since these techniques can be quite advanced, using an easy video editor like Filmora helps you create the same professional-looking eye zoom transition without getting lost in complicated controls.
Aside from doing it the traditional way, you can also create the eye zoom effect instantly using Filmora’s AI, which we’ll show you later.
Preparation: Record or Create a Close-Up Eye Clip
Before we start, you’ll need to prepare two clips that form the base of your transition: a close-up video of an eye and the clip you want to reveal afterward.

For the eye zoom clip, you can record it using your smartphone or camera, whichever gear you have right now. But to make sure the shot looks clean and good enough, keep these quick tips in mind:
- Lighting: Use soft, even lighting to bring out the eye’s details. If you’re shooting indoors, place a light source in front of your face to avoid shadows.
- Framing: Keep your eye centered in the frame and stay still while recording.
- Distance: Don’t get too close; leave a bit of space so you can zoom in smoothly later.
- Focus: Tap on your eye before recording to lock the focus and prevent blurriness.
Note: If you want to zoom in slightly on your eye, but your phone or camera doesn’t have a zoom lens, you can use Filmora’s Pan and Zoom or AI Image to Video template (more about this later) to create a smooth zoom-in toward your eye.

For the clip that appears after the eye zooms in, it’s up to your creative direction. It can be a new scene, a location reveal, or a certain moment. But to make the transition feel smooth, it’s best if the next clip has similar lighting or color tones to the eye shot.
Step by Step: How to Create an Eye-zoom Transition
With your eye footage ready, let’s get into the fun part. Make sure you’ve installed the latest version of Filmora for the best performance and access to all the tools you’ll need. Then, follow the steps below to create your eye zoom transition:
Step 1: Import and Prepare Your Eye Clip
After creating a new project, select Import or drag and drop your clip to the Media panel. Then, drag the clip to the timeline to start editing.
 secure download
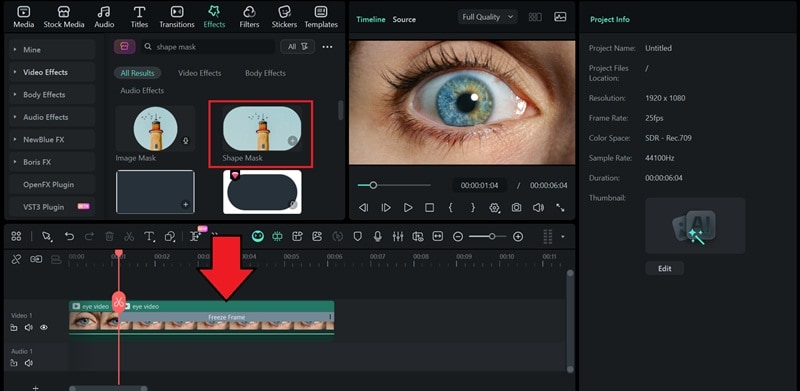
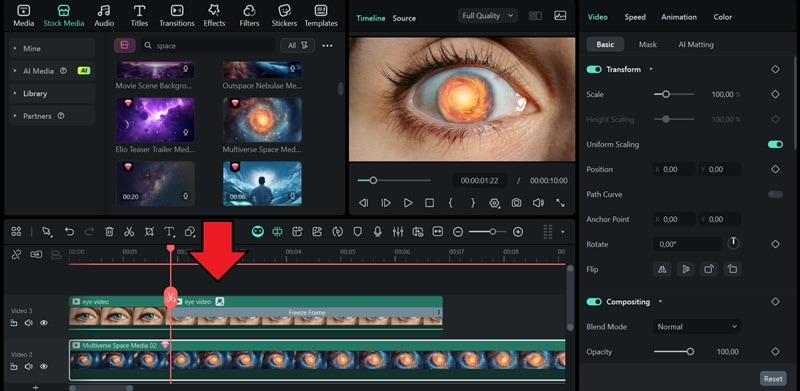
Step 2: Add a Freeze Frame at the Eye-Open Moment
- Move the playhead to the exact frame where the eye is fully open.
- Use the Split tool (scissor icon) to cut the clip at that point.
- Right-click on the segment and select Add Freeze Frame.
Adjust the duration of the still image so it’s long enough for the zoom effect and trim the end.

Step 3: Apply a Masking Effect to the Eye
Next, click the Effects tab at the top menu, then look for Shape Mask. Drag and drop this effect onto your freeze-frame clip.
After that, fine-tune the mask settings:
- Select the preview window and adjust the Shape Mask so that it perfectly fits over the eye.
- Turn on Invert Mask to make only the pupil area visible.
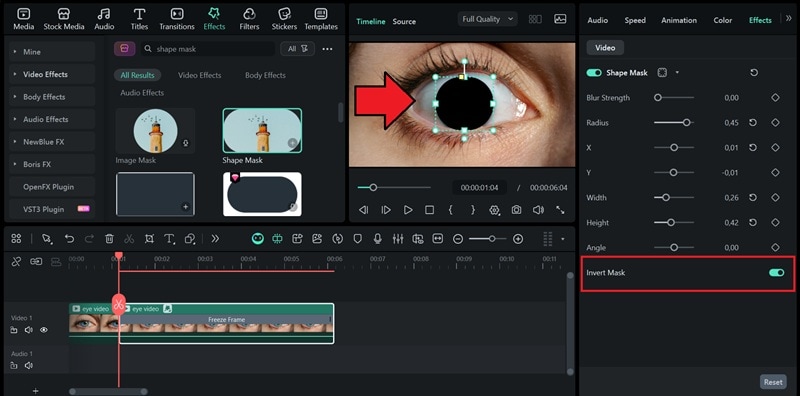
You can adjust the Blur Strength value to make the edges of the mask blend more naturally with the rest of the frame.
Step 4: Import the Second Footage
Next, bring in the second footage, the one that will appear after the zoom. In this eye zoom tutorial, we are downloading from Filmora’s Stock Media library.
Drag it onto the timeline and place it directly below the eye clip.
The second video should then play inside the masked pupil. Adjust the timing and the placement.
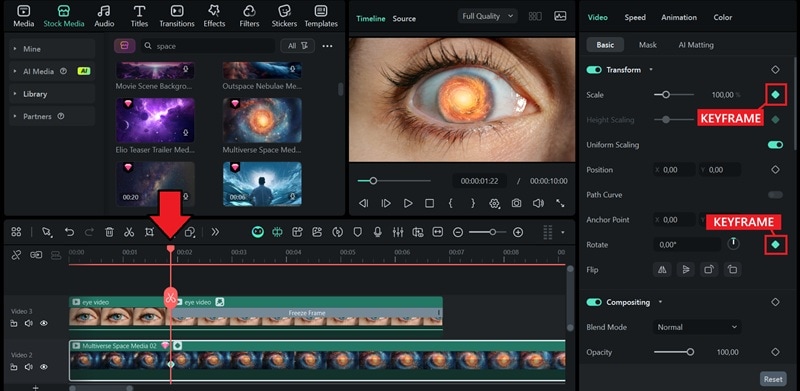
Step 5: Add a Keyframe
- Move the playhead to the beginning of the freeze-frame clip.
- Add your first keyframe at the start, both on the Scale and Rotate (if you want to add a slight rotation effect during the zoom).
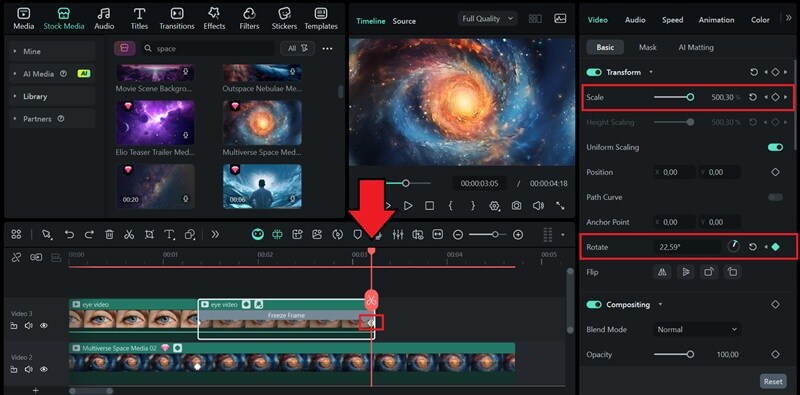
Move the playhead forward until it reaches the end of the freeze frame and add another keyframe.
- This time, increase the Scale until the eye fills the entire frame or completely disappears from view to create the illusion of zooming through it.
- You can also tweak the Rotation as you’d like, and make sure to add another keyframe to define how the motion ends.
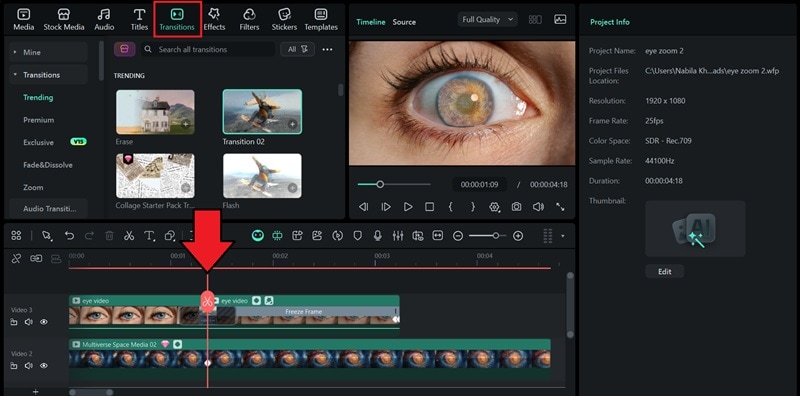
Play the video to preview your result. By now, you should already see the zoom into eye transition coming together. If it feels a bit abrupt, try adding a simple transition between the clips to make the motion flow more smoothly.
Skip the Manual Steps: Generate the Eye Zoom Effect Instantly with AI
Instead of working manually with keyframing, you can also create the eye zoom effect with AI. There might be a few free eye zoom AI tools that promise to help you create such an effect. But nothing comes close to the quality and flexibility you get from using Filmora’s AI tools.
Filmora features an AI Image to Video that has a lot of templates you can choose from, including one designed specifically for the eye zoom effect.

While the AI template focuses mainly on zooming into the eye without adding the full masking transition, you can still use it as a starting point. Once the AI generates the zoom clip, import it into your project and combine it with your main footage to build a transition.
How to Generate Eye Zoom with AI
Step 1: Access the Image to Video in Filmora
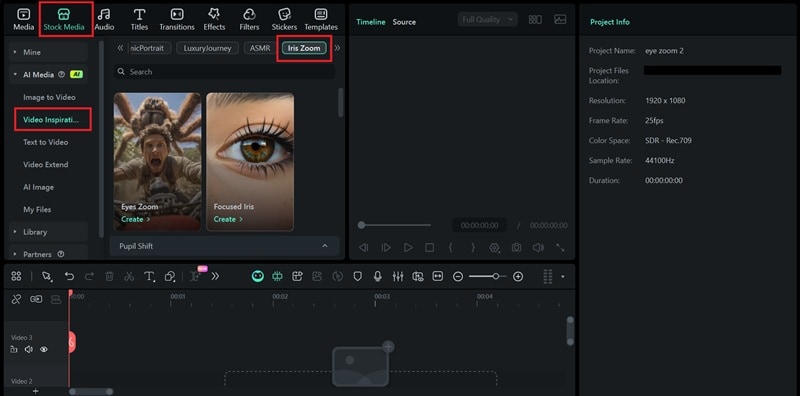
Inside the editor, head to Stock Media > AI Media > Video Inspiration. Then, select the Iris Zoom from the category tab.
 secure download
Step 2: Upload Your Photo and Start Generating
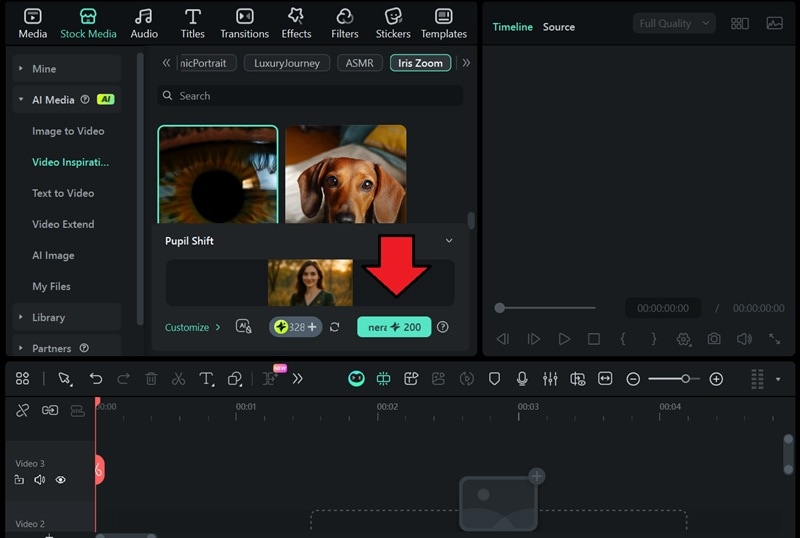
You’ll see different AI eye-zoom templates to choose from.
- Select the one that you like.
- Upload your photo and adjust the aspect ratio and frame. Make sure the eyes are clearly visible.
- Click Submit to confirm.

Click Generate to start generating the eye zoom-in AI effect.
Step 3: Edit and Export Your Results
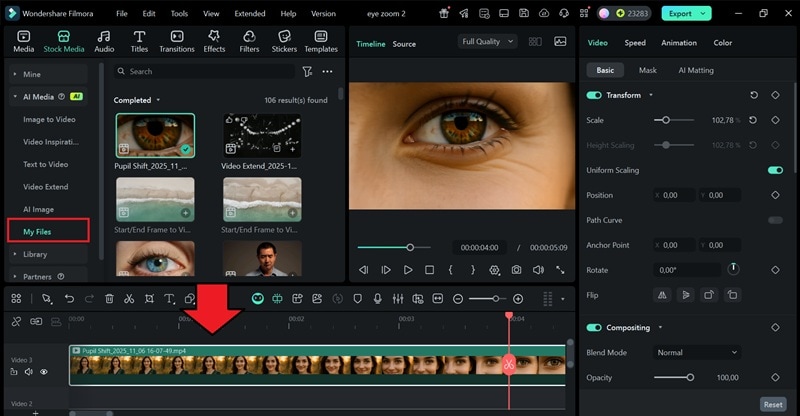
After a few moments, your generated video will appear in My Files. Drag it to the timeline to start editing.
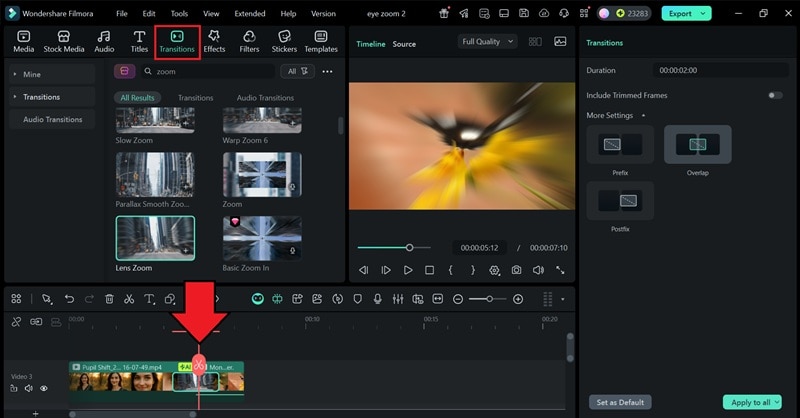
You can enhance it by adding another scene or clip after the zoom and using a zoom transition between them.
After everything looks good, click Export, choose your desired resolution and format, and save the video to your computer. Or, you can then share it directly on social media!

Summary
And there you have it! You now know how to create a stunning eye-zoom transition in Filmora. Don’t be afraid to experiment with its wide range of effects, masks, and keyframes to customize your videos and make them truly unique.
The more you play around with Filmora’s features, the more creative and professional your edits will become. Have fun, keep exploring, and let your videos stand out!
