


Sony (Magix) Vegas Pro can help you blur faces out in your videos. Whether you're dealing with sensitive content, aiming to avoid distractions, or focusing on the main subject by obscuring the surroundings, Vegas Pro is your go-to solution.
This software not only helps retain the video's aesthetics without deletions but also ensures that the time and effort invested in creating your video yield a positive return on investment, making it socially acceptable and engaging.
In this article

Part 1. How To Blur Faces/Objects in Vegas Pro
VEGAS Pro is a versatile video editing software renowned for its advanced effects, including the ability to blur faces or objects with precision.
Four simple steps can help you in blurring things that you intend to hide in videos. Vegas Pro with its specialized tools will help in achieving the perfect blur/pixelate in just few clicks. Let's explore how to harness these blur effects to enhance privacy or add a creative touch to your videos.
Step-by-step Guide on How To Blur Faces/Objects in Vegas Pro
Step1Import of video file
From the prime menu, choose the option to import the video by browsing through the location and then drag it into your timeline to start with effects!
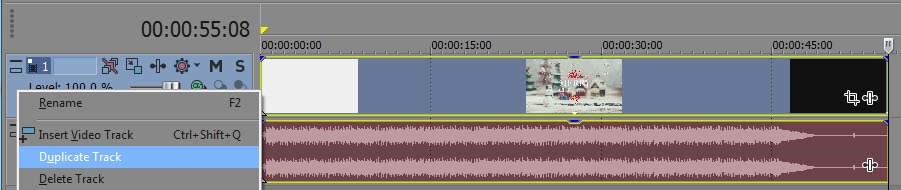
Step2Duplicate the video track
After video is imported, right click on the same and select the third option from the menu stating "Duplicate Track". This is to create the copy of the video and all the changes will be performed on this video keeping your original video intact. Now you are ready to place all of the emphasis on the desired subject!
Step3Begin with Blurring
- On the upper event you can see a button like a rectangle which reads as Event Pan/Crop button. You can also find this by right clicking on the video track. Click on this option and continue with below steps.
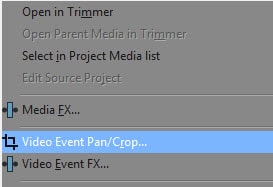
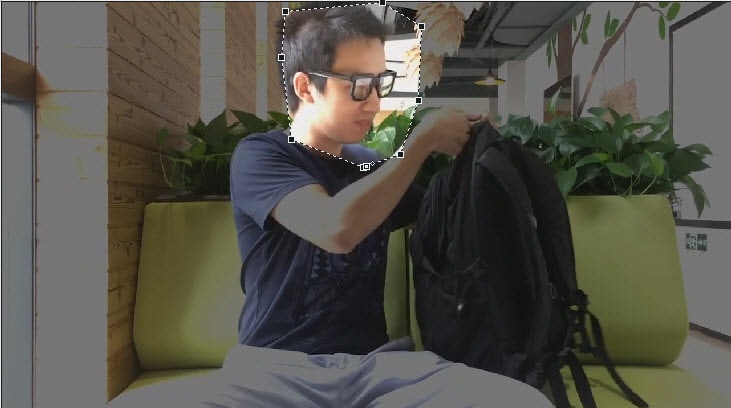
- A video Event FX Window will appear after clicking on the option as above. The cropped video footage will appear and you would be able to see little rectangle-shaped icons which will help in deciding the boundary of blurring. You can crop your images with this anchor creation tool and adjust the tangent angle to match the intricacies of the image. But for blurring and masking you have to look at the window popped up at the bottom left and select Mask.
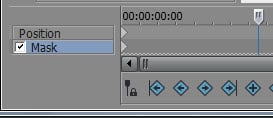
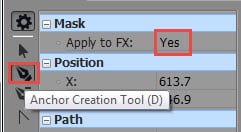
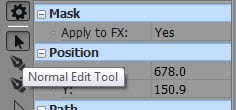
- Now select the Anchor Creation Tool which would be shaped something like a pen) and under sub-heading of Mask- switch option asking "Apply to FX" as "YES".
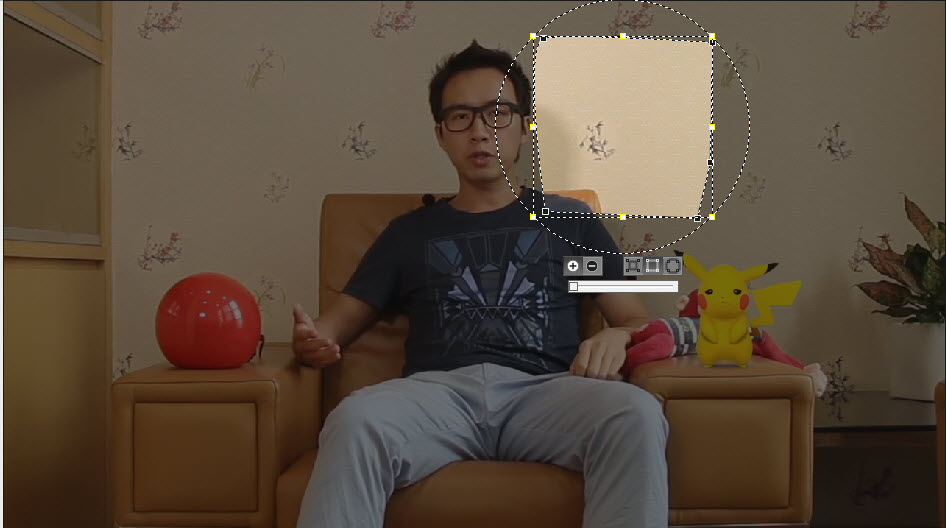
- Now with this anchor and rectangles make a boundary around the face or object or information that you want to blur. You can draw it in any shape- rectangle, circle, or anything! After you are done with selecting, this object with become highlighted and the remaining portion will be darkened a little temporarily.
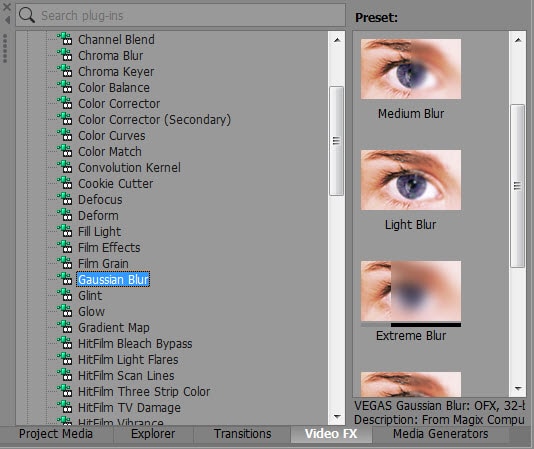
- Now on the timeline, you will see multiple tabs like Project Media, Explorer, Transitions, media generators etc. Go to the FX tab of video and search for Gaussian Blur or Pixelate effect. As soon as you will click, it will show some of the presets on the right of the window describing the levels of blurring. Select the one most feasible and drag it on to the top clip.
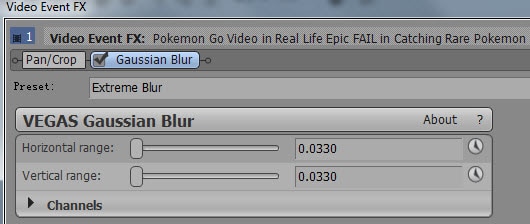
- Even if you have chosen from presets, you can customize the blurring effect through the horizontal and vertical range. You can drag or simply type into the box the numeric requirement of blurring.
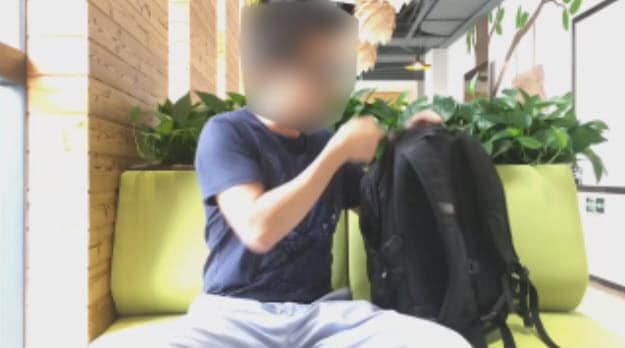
- Now You are done with blurring. Just press the space bar on your keyboard to see the preview!
Step4Preview your effects and save it
Once everything is processed, you can save and export the video.
You can also refer to the following instructional video.
Part2. Wondershare Filmora: Best Alternative Way To Blur Face in Videos
Are you looking for an easy way to blur faces in your videos? No need to worry, as Wondershare Filmora brings an intuitive and easy-to-use interface that allows you to blur the faces with few clicks. It's one of the most reliable platforms that you can come across to edit and modify your videos. It also offers preset templates and an Instant Mode that can help you create a video from scratch efficiently. Also, it provides fast rendering speed so that you can see your final results instantly.
3 Methods To Blur Faces Using Filmora
There are three major and easy ways to blur faces in videos using a desktop app. These methods include using the AI face mosaic, the face-off effect, and motion tracking. In this section, you will discover how to blur people’s faces in videos using both methods.
How To blur faces using the AI Mosaic feature
AI Face Mosaic is a new feature available in Filmora version 14 and above. It helps users quickly apply mosaic coverings to sensitive individuals who should not appear on screen, especially in scenes with multiple people. Let's take a look at the steps to use this feature.
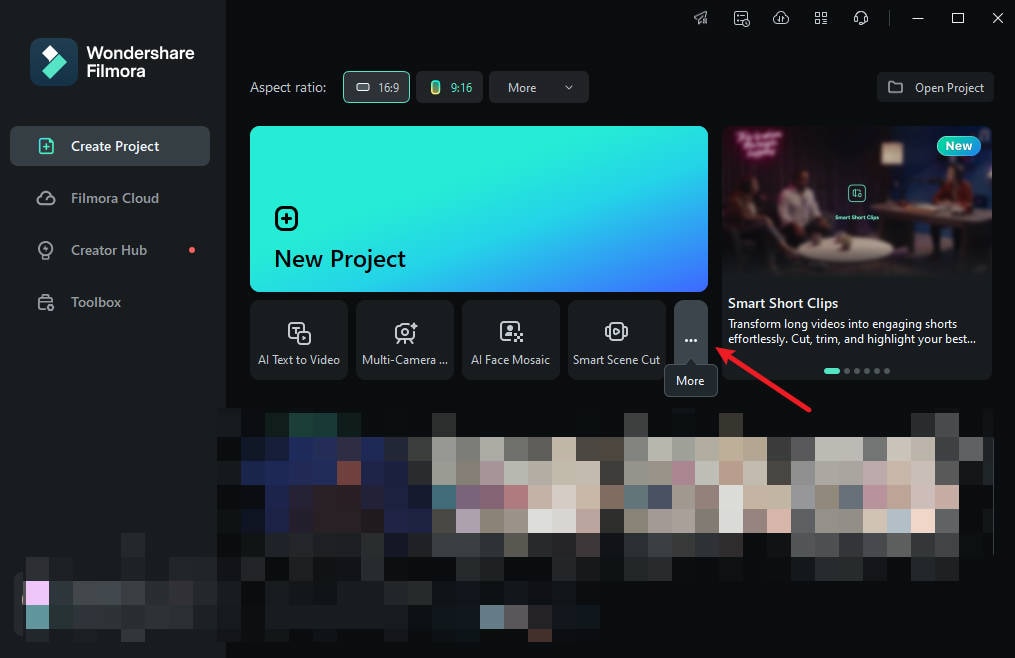
Step 1: Launch Filmora on your PC and go to "More" or select the three dots at the end of the editing options.
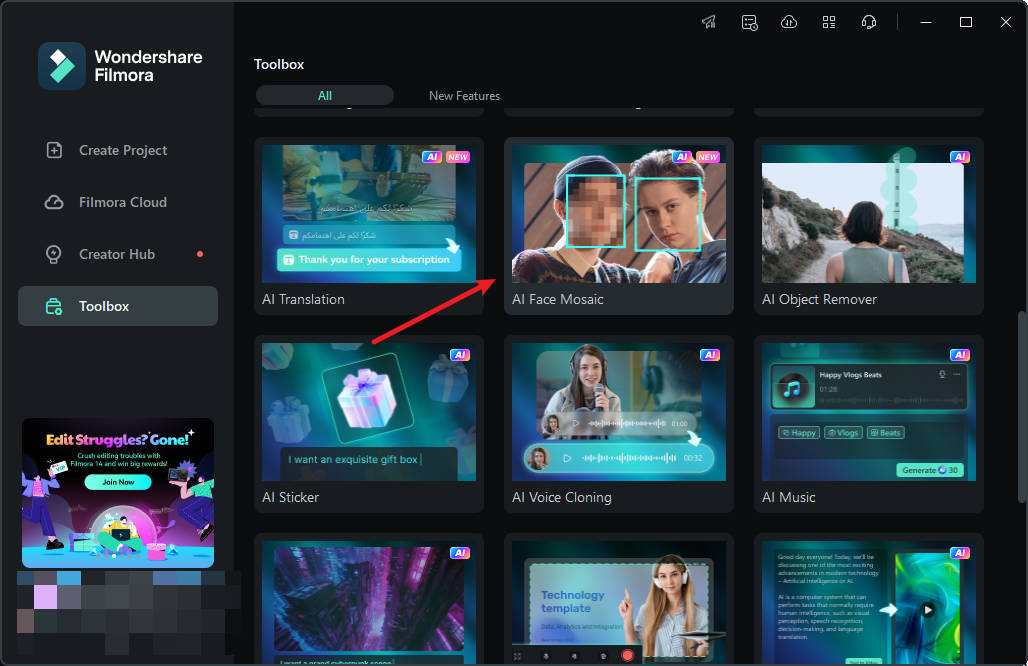
Step 2: Click on "AI Face Mosaic". Then, import your media for editing.
Step 3: Filmora will automatically analyze the video to apply the blurring effect to faces throughout the footage. Once the analysis is done, each face will have the mosaic effect.

Step 4: To choose a face to remove the mosaic effect, deselect it from the right-hand panel.
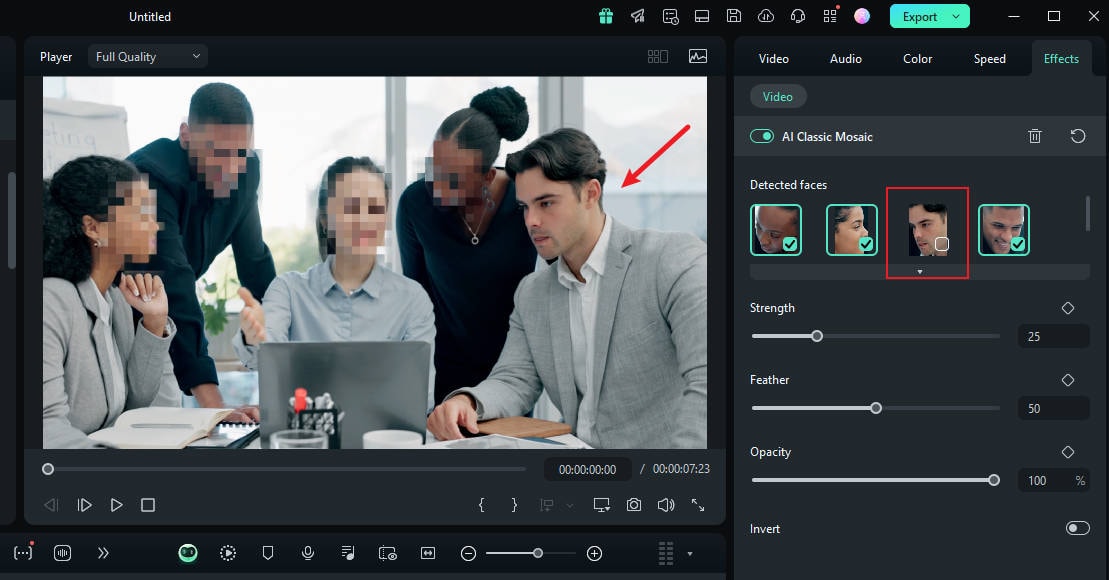
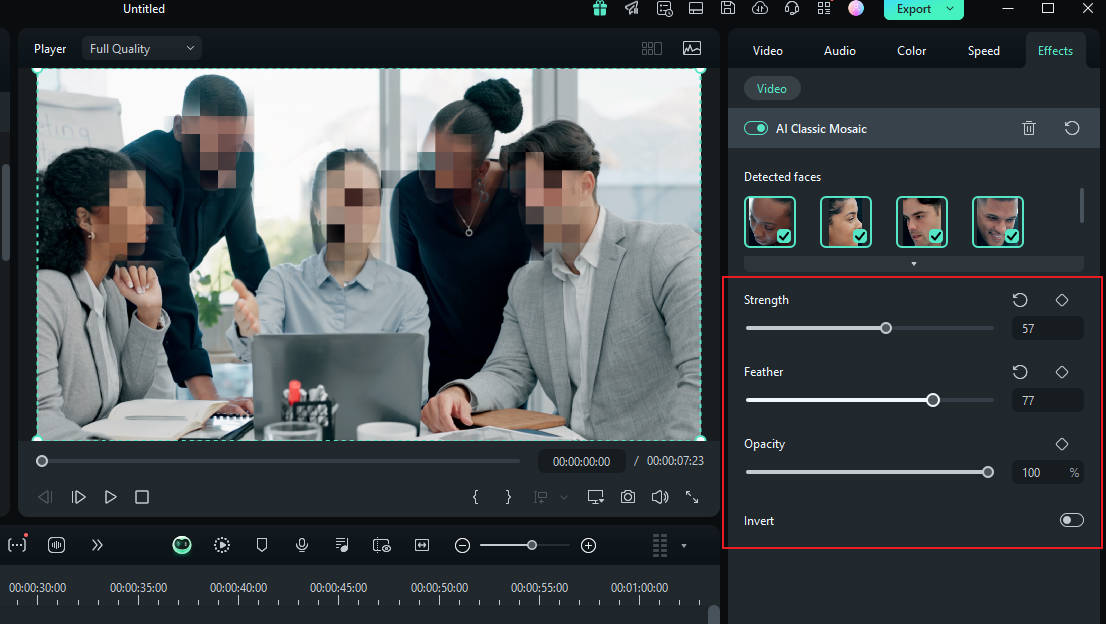
Step 5: You can also use the grader to adjust the strength, feather, and opacity of the blur.
Step 6: You can also invert the mosaic by clicking "Invert". This makes everything else, except the faces, have the mosaic effect.
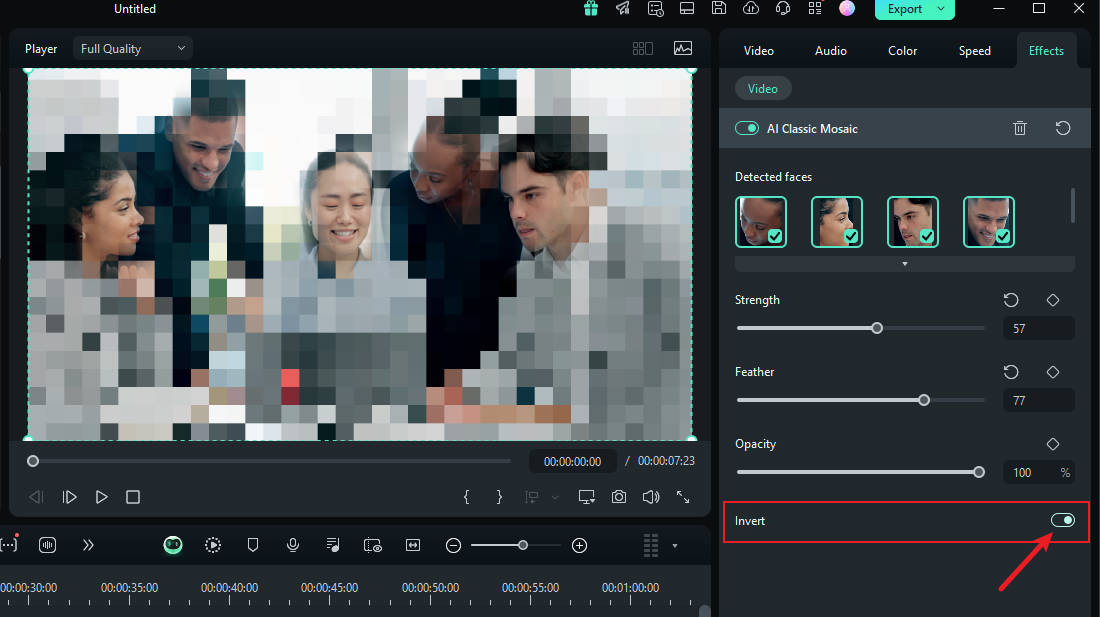
And that's it! Once you're done, preview your video and export it.
How To Blur Faces Using the Face-off Effect
Another quick and easy way to blur faces in Filmora is by using effects from the editing suite. You only need to select the face blur effect to add a mosaic to a person's face. Here is how to blur someone’s face in a video using Face-off:
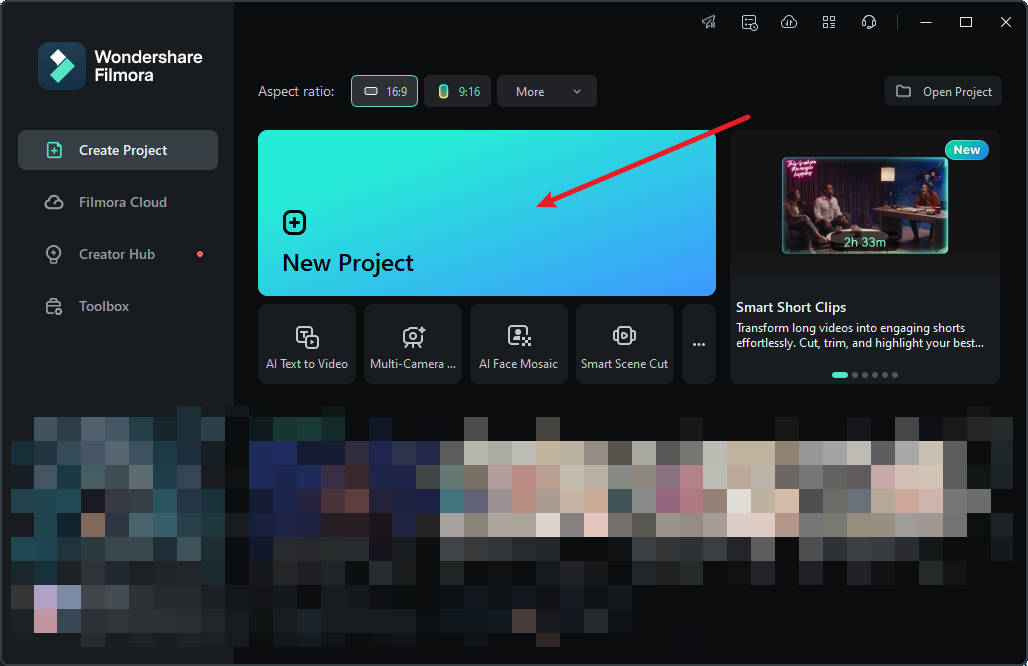
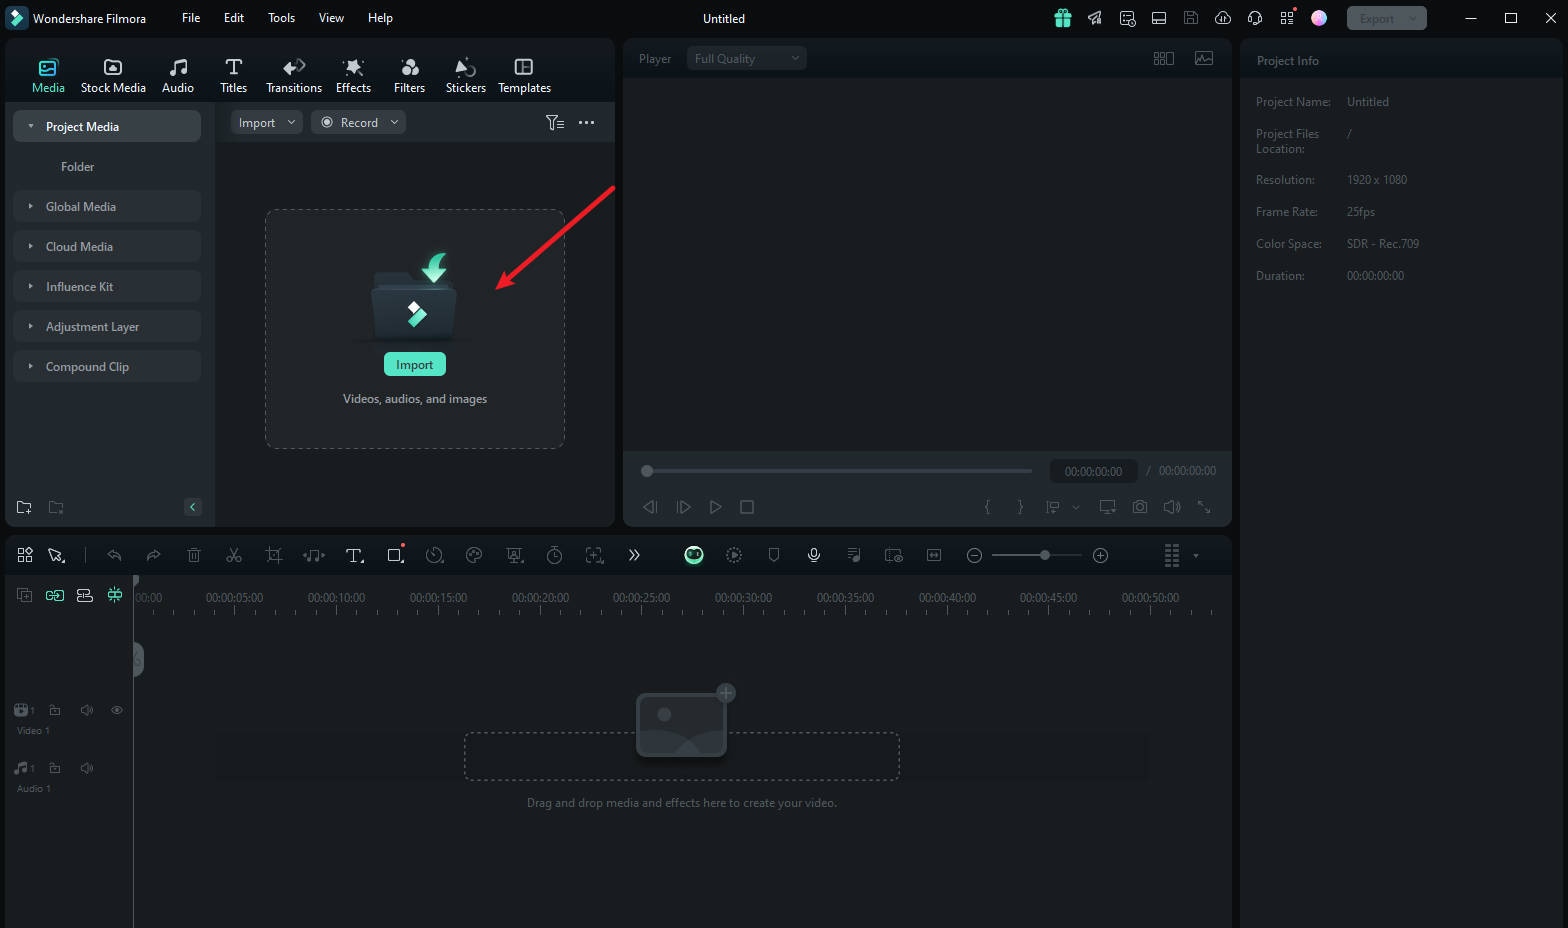
Step 1: Launch Filmora on your PC and click on "New Project".
Step 2: To import your media, drag and drop it into the editing suite or click "Import".
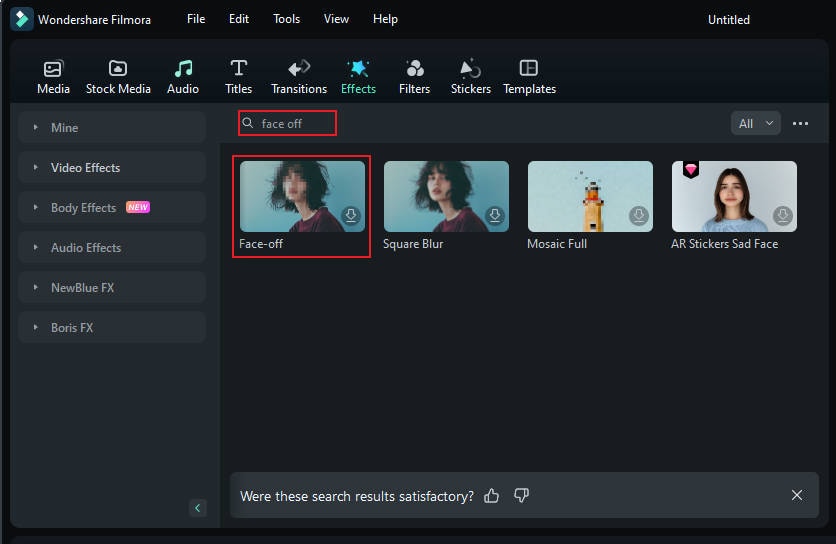
Step 3: Tap "Effects" from the main menu at the top of the suite.

Step 4: If you don't see the Face-off effect on the first effects page, search "Face-off" in the search bar.
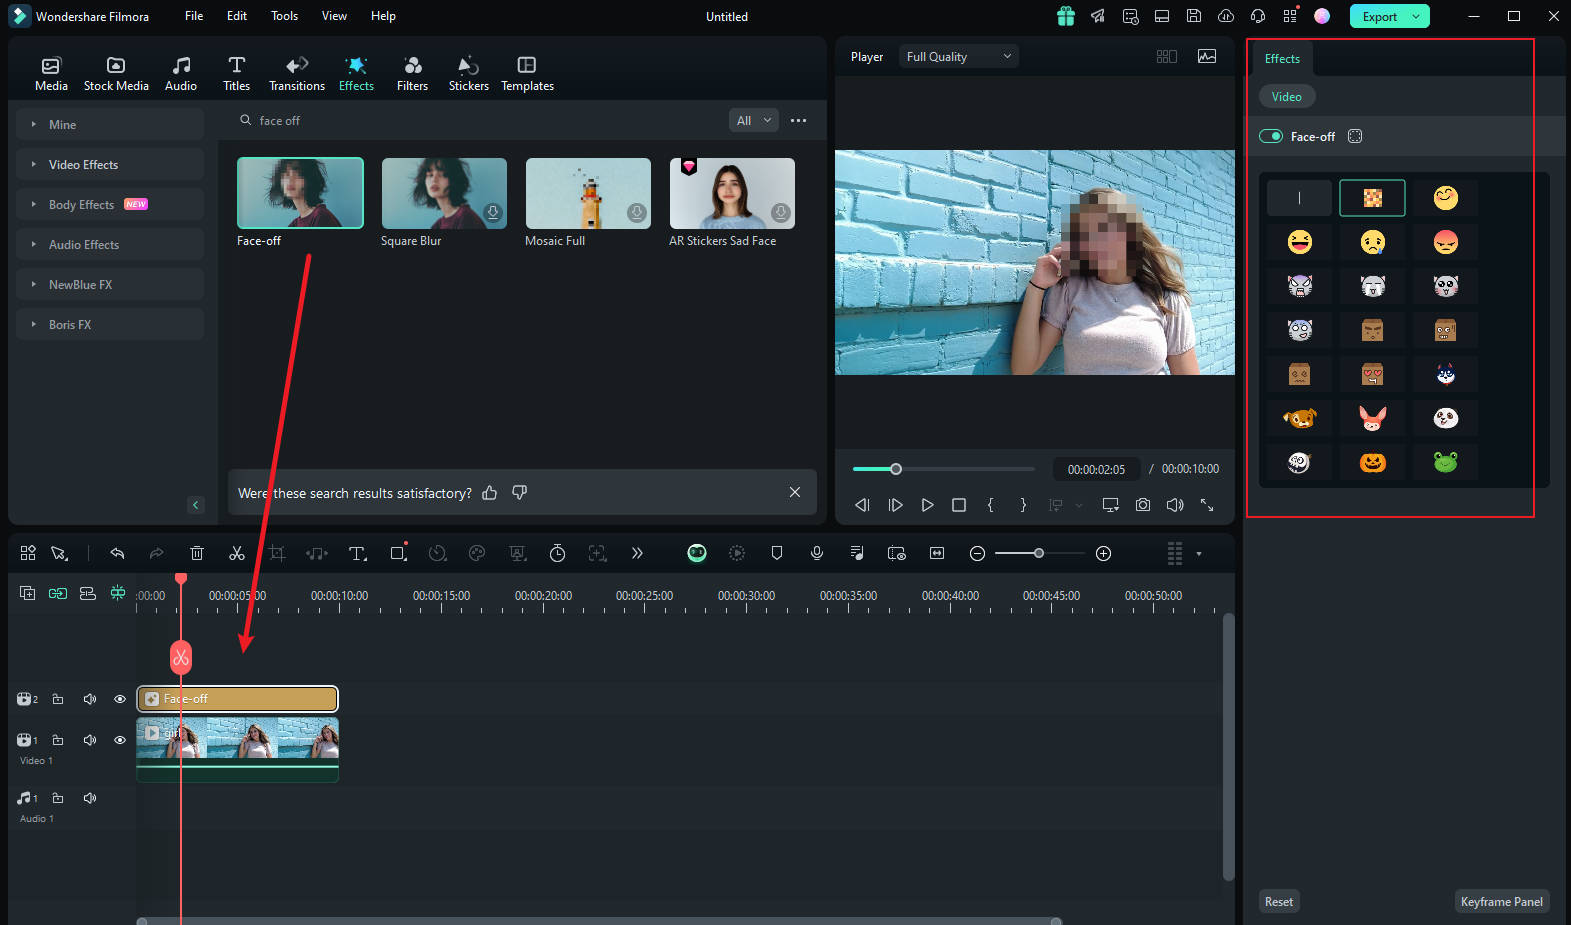
Step 5: Click on the "Face-off effect" to download it. Then, drag and drop it onto your media in the timeline. Next, preview the video to ensure the blur is in the right spot throughout it and export it.
How To Blur Faces Using the Motion Tracking
If you want to apply a mosaic to a moving person's face, the motion tracking feature in Filmora is your best choice. Let's take a look at how this feature can be used to mosaic a face.
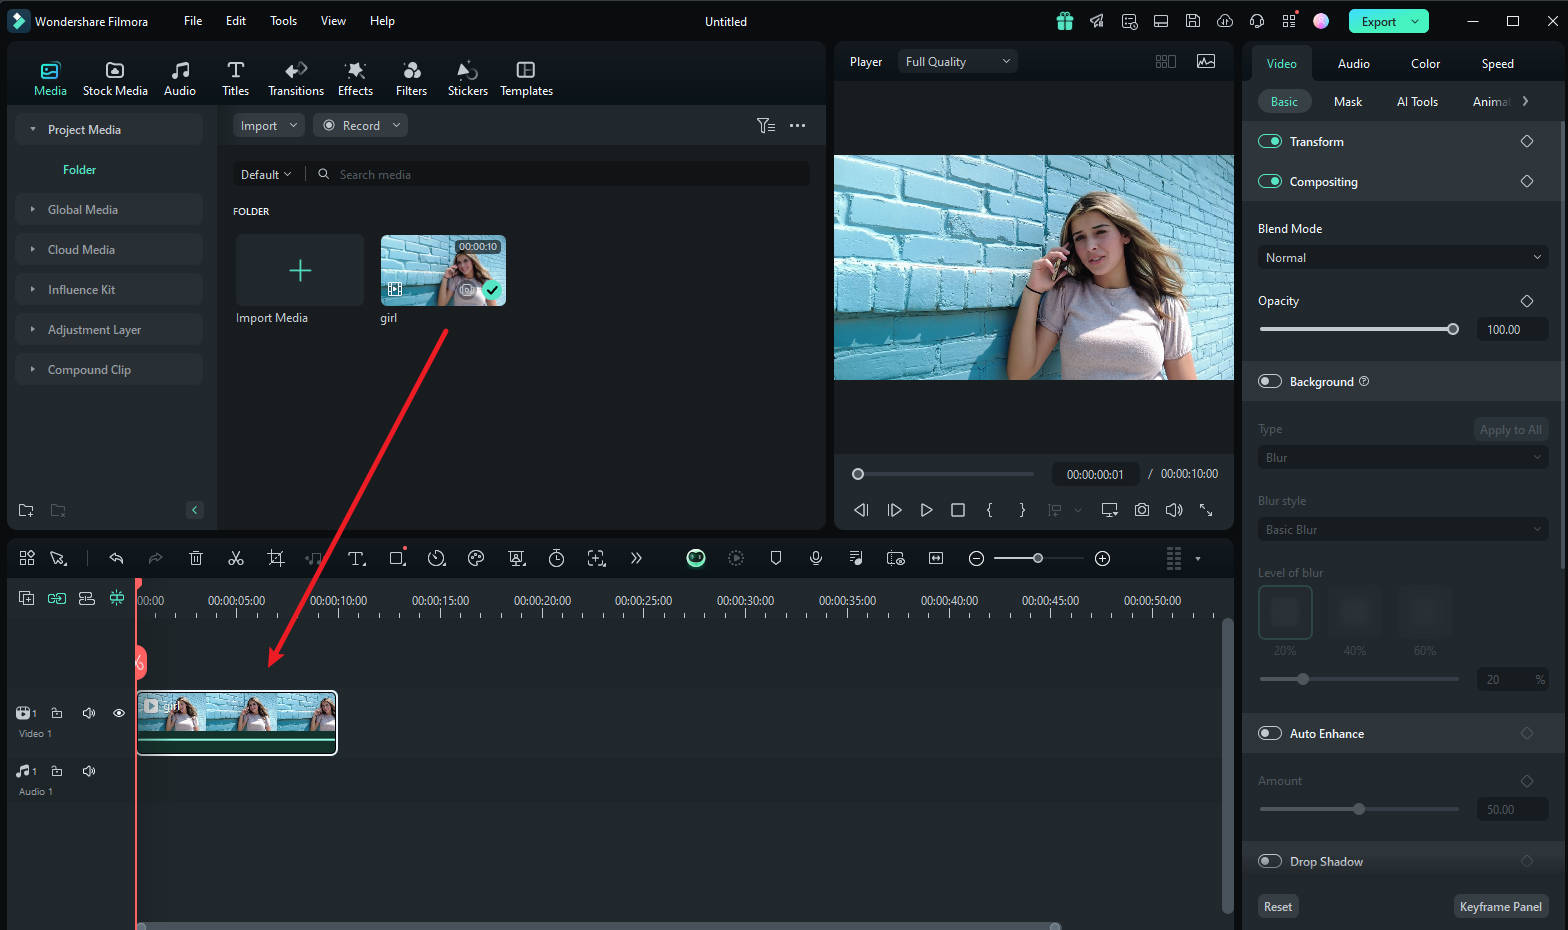
Step1 Import the Video and Drag It to the Timeline
Once you are done launching Filmora, select "Create New Project". Afterward, import and drop the video into the timeline.
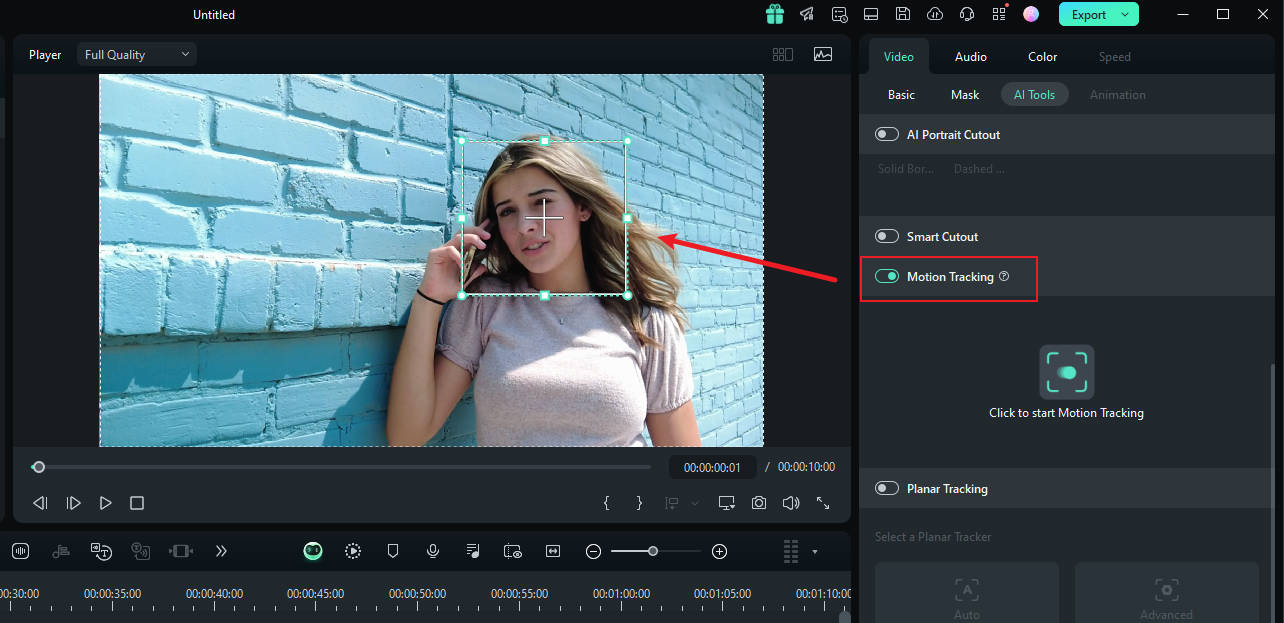
Step2 Adjust the Motion Tracking Space
Now place the play head at the start and proceed with the "Motion Tracking" tool, and adjust the motion tracking space from your preview window.
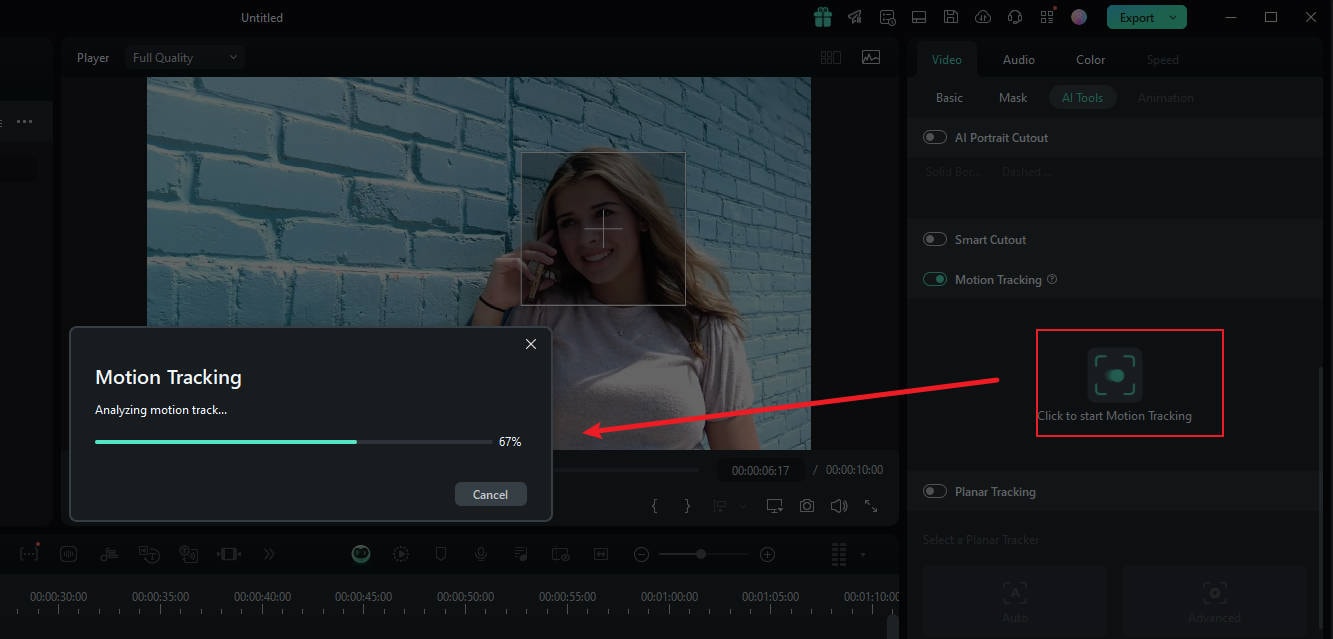
Step3 Start the Motion Tracking Process
Once done, hit the "Start Tracking" button. Within a few minutes, you will be able to finish this process.
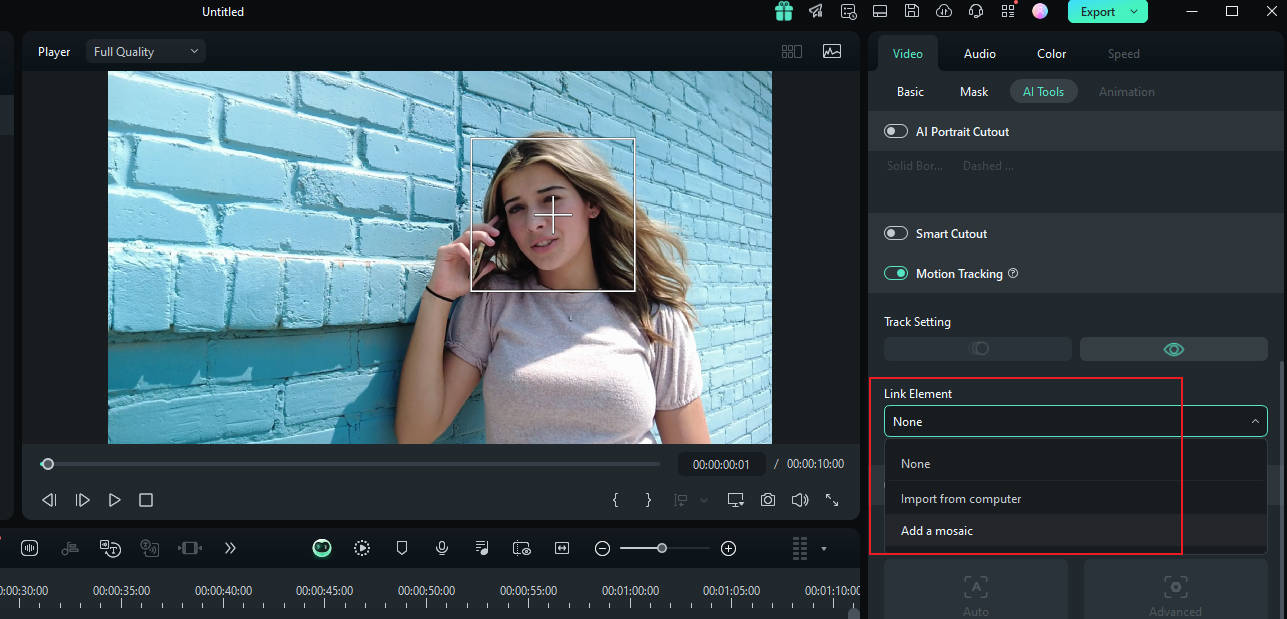
Step4 Customize the Blur Settings
Now, click the video on the timeline. In the pane on the right, under the "link element" option, you can select the overlay element you want, such as an image or mosaic.
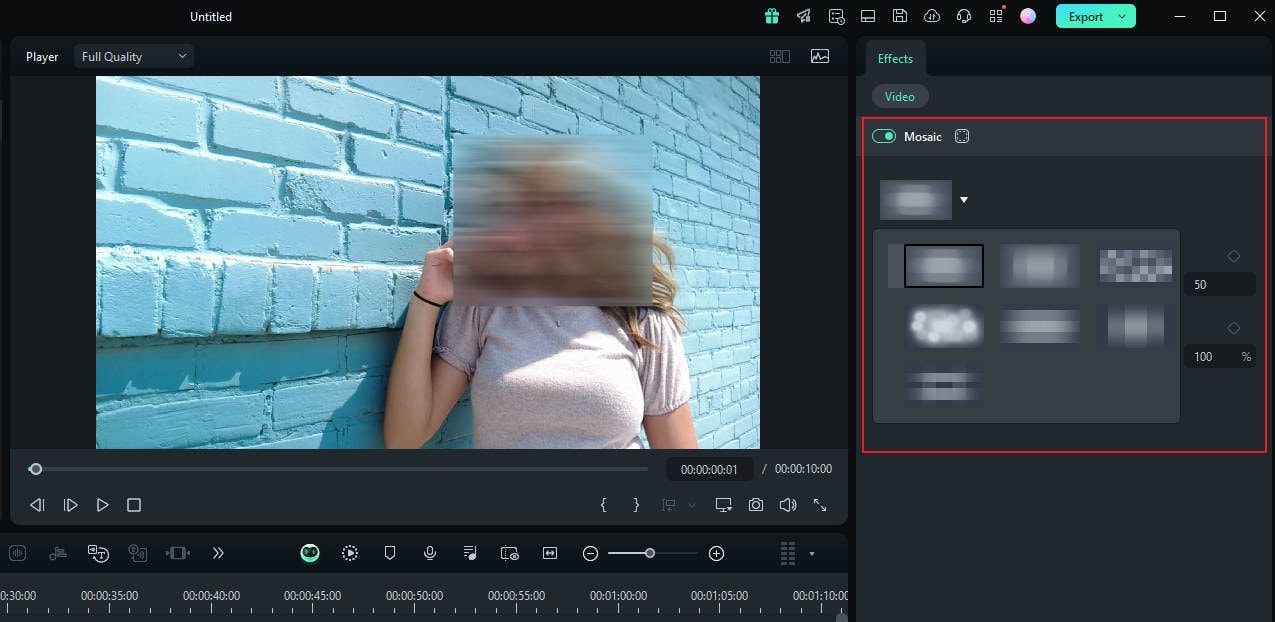
Step5 Choose Mosaic in Motion Tracking
If you choose the mosaic, a mosaic will appear over the person's face. Also, you can change the blur amount and blur opacity. Afterward, adjust the blurred space on your preview window. Once confirmed, you can export the video.
Conlusion
Through the above introduction, you should now understand how to blur faces or objects in a video. Sony (Magix) Vegas Pro and Filmora are both excellent choices for this task. Filmora, however, is your best option because it is a professional video editing software that allows you to explore various ways to master the blur effect. Additionally, it offers many AI features to enhance your editing efficiency, such as Planar Tracking, which can help you track planes in a video and overlay custom images, enabling object blurring.
