Changing the video speed of your Instagram videos is a simple yet effective way to impress your followers. You can create a timelapse video to condense long events into a brief clip or slow down your footage to highlight specific moments.
But if you're wondering how to change video speed on Instagram directly, things might not be as straightforward as you'd expect. Unfortunately, Instagram doesn't provide direct tools for changing video speed in Stories. So, what can you do?
Well, there are several handy tools—both apps and built-in features—that allow you to change video speed easily, no matter what device you're using. You'll learn exactly how to change your video's speed to create the perfect effect for your next post. Let's dive in!

In this article
🤩 Post You May Be Interested In: What is Edits? Meet the New Video Editor from Instagram
Part 1. Can I Change the Video Speed on Instagram Stories?
If you're looking to spice up your Instagram Stories with some fun speed effects, you might be disappointed to find that Instagram doesn't offer a direct way to change video speed within the Instagram Stories feature. That means if you're dreaming of creating a dramatic slow-motion moment or a rapid timelapse right in Stories, Instagram itself doesn't have the tools for that.
However, don't lose hope! While Instagram Stories might be off-limits for speed adjustments, Instagram does provide this functionality in Reels. When you create a Reel, you can easily adjust the speed of your video.
Speed up or slow down your video in one click.

How to change video speed on Instagram Reels
Reels give you several speed options (like 0.3x, 0.5x, 2x, and 3x) that you can apply even before you hit record. So, if you want that cool speed effect on your Story, here's what you can do: create your video in Reels using the speed controls, share, and save it to your device.

Alternatively, you can adjust the speed of existing videos on Instagram Reels. Simply add your video to Reels and choose the speed you want.
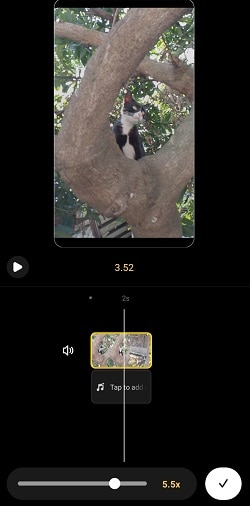
It's a bit of an extra step, but it lets you take advantage of Instagram's built-in tools and still achieve the look you're going for.
Part 2. How to Change Video Speed Using Filmora (Wins, Mac, Android, iOS)?
You might be disappointed because you can't directly change the video speed for your Instagram Stories. You have to go through Instagram Reels first before uploading the video to your Instagram Stories. Not to mention, the flexibility in editing videos is limited because Instagram Reels only offers basic editing features.
But, don't worry! We have the solution for you. If you eventually have to use supported tools, you can try using Wondershare Filmora. Filmora is a powerful, user-friendly video editor available for Windows, Mac, Android, and iOS.
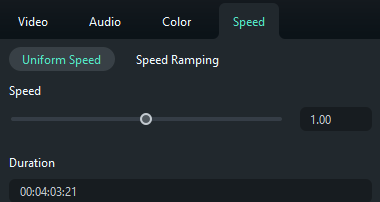
Filmora offers a range of advanced editing tools that let you change the speed of your videos quickly and easily—no matter which device you're using. Plus, you'll get much more control over your editing, so you can create the exact effect you want before sharing it on Instagram. Here's how to speed up your Instagram videos using Filmora.
Change Instagram Video Speed on Wins/Mac
When using Filmora to adjust the speed of your Instagram videos on Windows or Mac, you have multiple methods at your disposal depending on your editing needs.
Method 1: Uniform Speed
This method allows you to customize the speed of your video precisely as you like. You can set the speed anywhere from 0.01X (very slow) to 100X (super fast).
Step 1. Launch Filmora and Start a New Project
Open Filmora and click New Project. If you haven't installed Filmora yet, you can download it on your computer first.
Step 2: Video Speed with Speed Controls
Once your video is added to the timeline, click on it, and then select the Speed button (the speedometer icon) from the toolbar at the top. Choose "Uniform Speed" to start adjusting the video's playback speed.
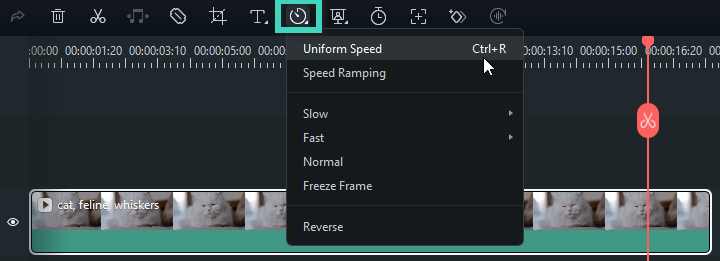
Step 3: Adjust Video Speed
To slow down your video, drag the speed slider to the left. To speed it up, drag the slider to the right. If you prefer more precision, enter a specific speed value in the Duration field.

Method 2: Speed Ramping
For advanced users, Speed Ramping allows you to vary the speed throughout your video, creating smooth transitions between fast and slow sections.
Step 1. Open Speed Ramping
With your video selected in the timeline, click on the Speed icon again and choose the "Speed Ramping" option.
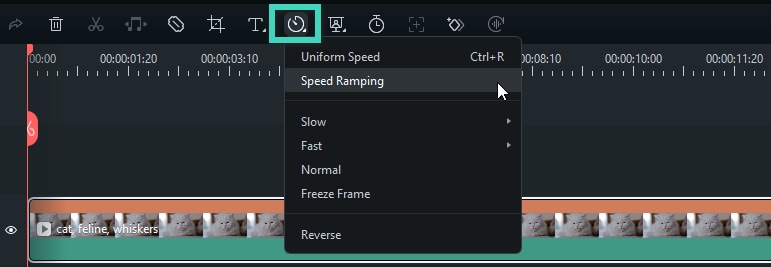
Then, under the Property Panel, go to Speed > Speed Ramping, where you'll see several preset options.
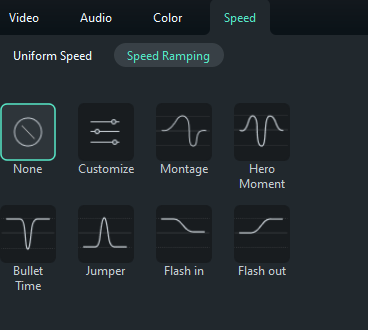
Step 2: Customize Speed Points
After selecting a preset, you can further fine-tune the speed points by dragging them up or down to increase or decrease the speed, or left and right to control where the speed change happens within the video.
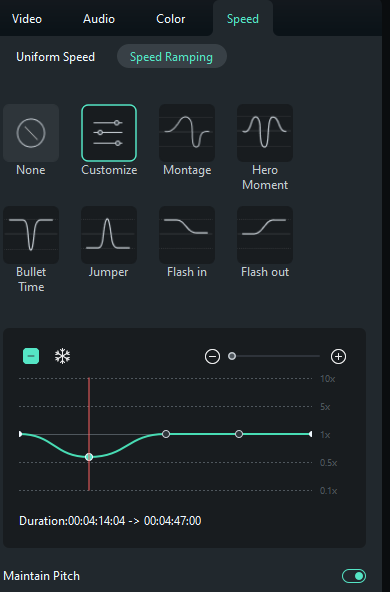
Method 3: Preset Speed Changes
If you prefer quick adjustments, you can use the preset speed options available in Filmora.
Step 1. Select Speed Preset
After placing your video on the timeline, click the Speed icon. Choose "Fast" for speeding up or "Slow" for slowing down, and select a preset speed.
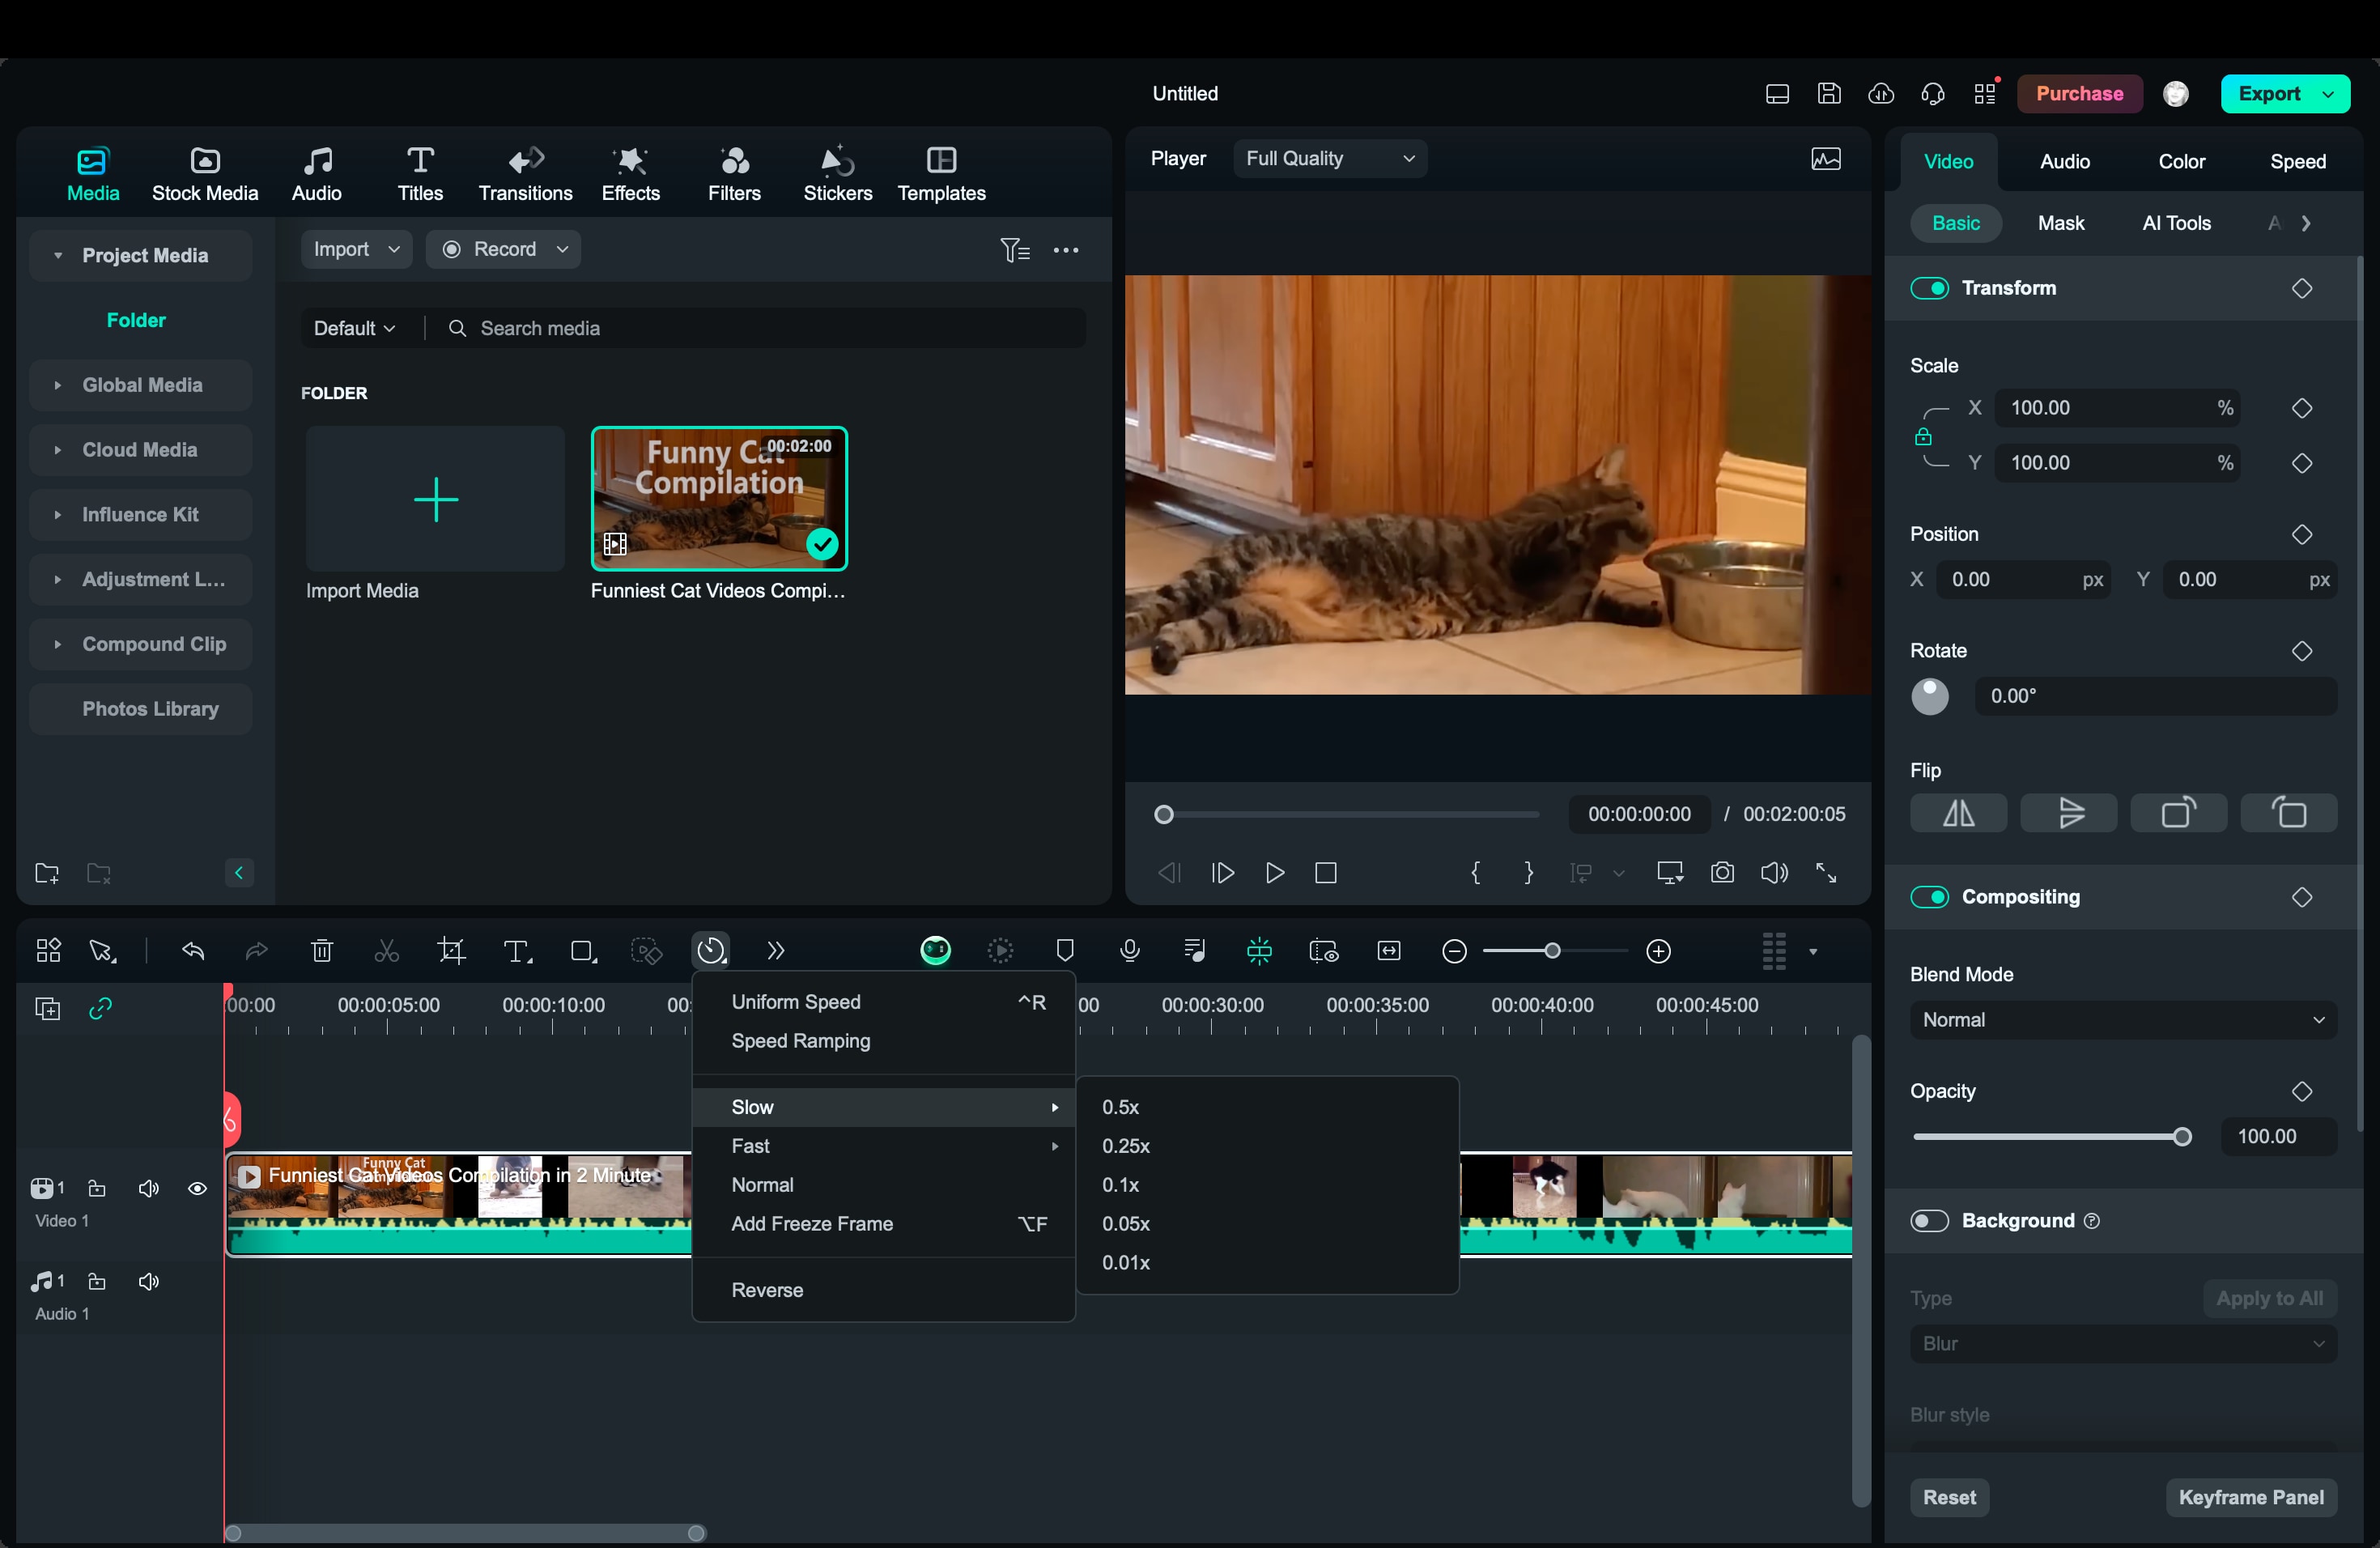
Step 2. Review and Export
Play back the video to ensure it's how you want it, then export the final product.
Change Instagram Video Speed on Android/iOS
Step 1. Download Filmora App
Start by downloading the Filmora app from the Google Play Store or the Apple App Store.
Filmora for Mobile
Edit Videos on Your Mobile Phone with 1-Click!
- • Powerful Brand New AI Features.
- • User-friendly video editing for beginners.
- • Full-featured video editing for professional.
Step 2. Import Your Video
Open the app and tap on "New Project" to import your video from your gallery.
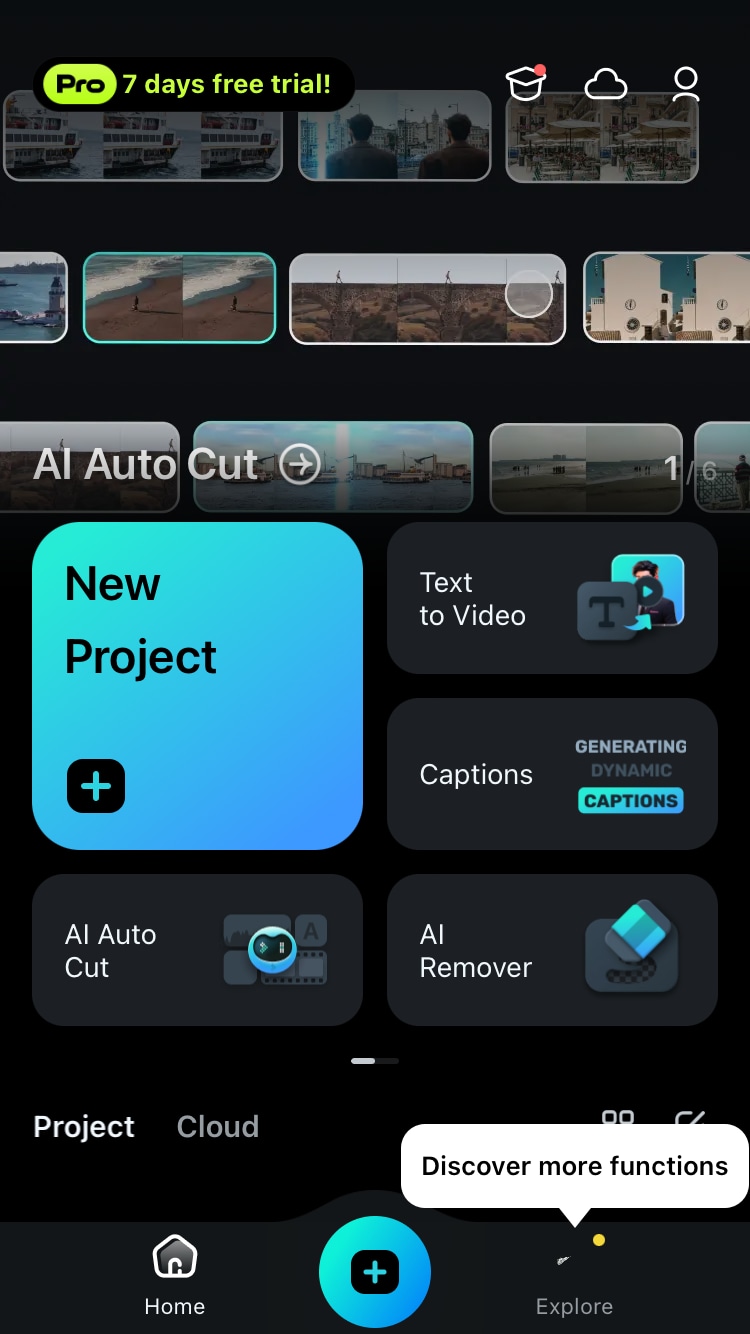
Step 3. Select the Video
Once your video is in the project, tap on it to reveal editing options. Then, choose the "Speed" option from the toolbar.
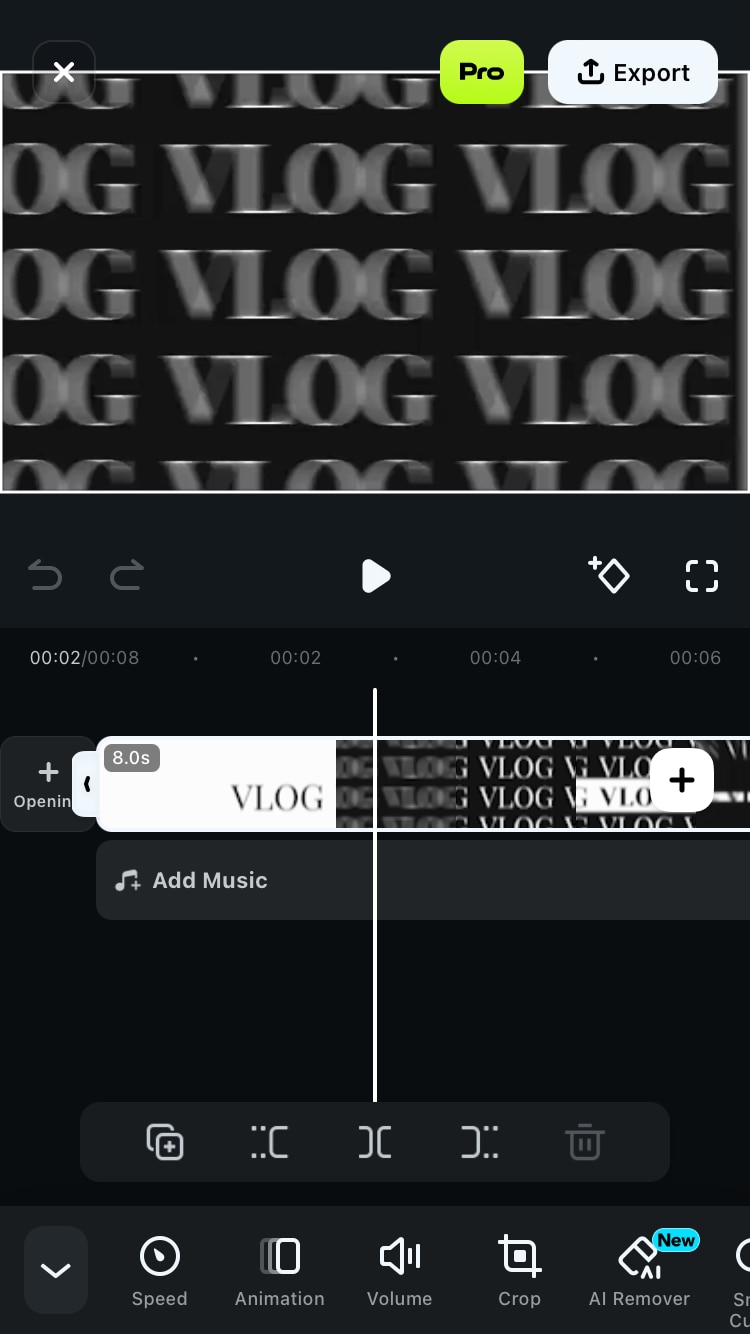
You'll see a slider that lets you change the speed of your video. Move it to the left to slow down or to the right to speed up.
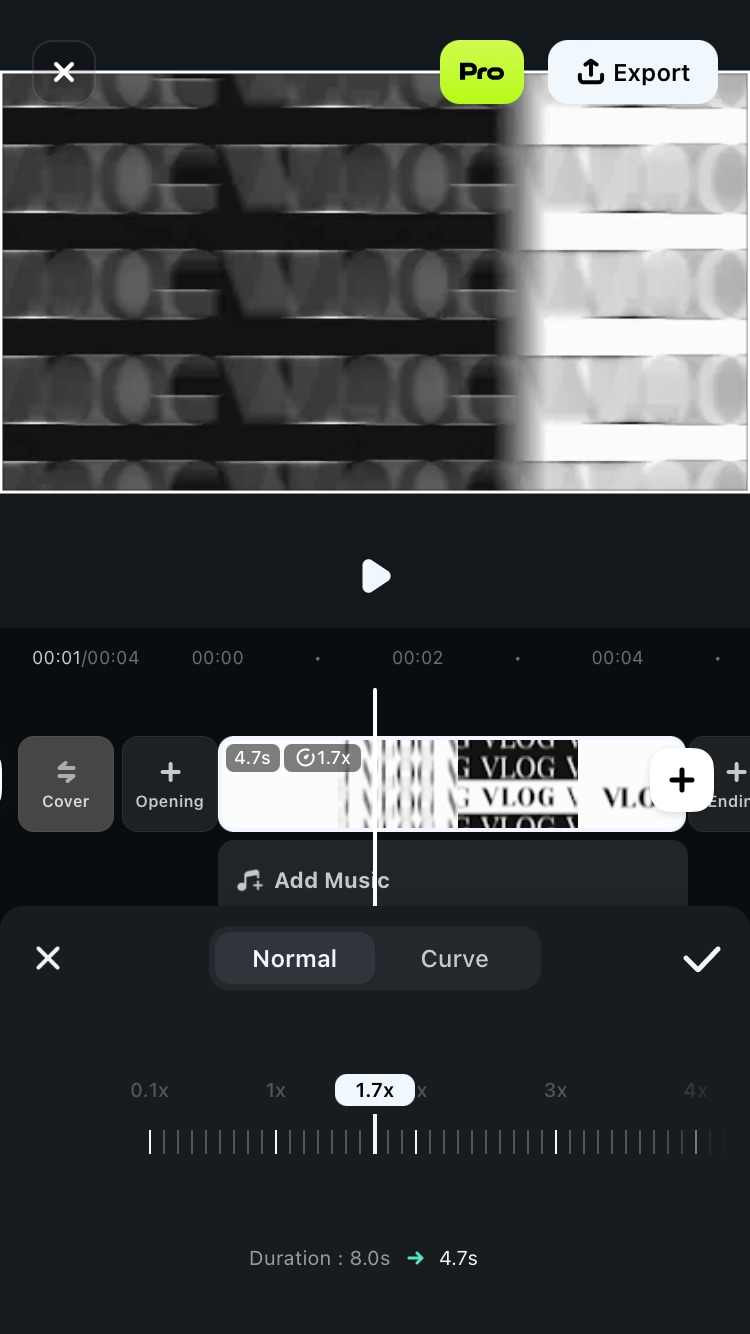
Step 4. Preview Your Changes
Play the video to see how the speed adjustments look. When you're happy with the result, tap on "Save" to export your video to your device.
Now, open Instagram, head to Stories or Reels, and upload your newly edited video!
Part 3. How to Change Video Speed on Desktop?
Filmora is a flexible tool that can be used both on Mac and Windows. However, if you want some alternatives, there are also a couple of great tools available depending on your operating system.
For Mac users, iMovie offers a simple yet powerful way to control video speed with a few clicks. Meanwhile, Windows users can rely on VLC Media Player, a free and versatile tool that allows for easy speed adjustments of your video. Let's break down how to use each tool to change the speed of your Instagram video.
Method 1. Change Video Speed with iMovie (Mac Only)
iMovie is a built-in video editing software designed exclusively for Apple devices. It's known for its ease of use and wide range of features, including video trimming, color correction, and speed adjustments. iMovie also supports 4K video editing, allowing you to create professional-quality videos.
Here's how to change video speed for Instagram using iMovie:
Step 1. Open iMovie and Import Your Video
Start by launching iMovie and dragging your video file into the timeline.
Step 2. Select the Clip
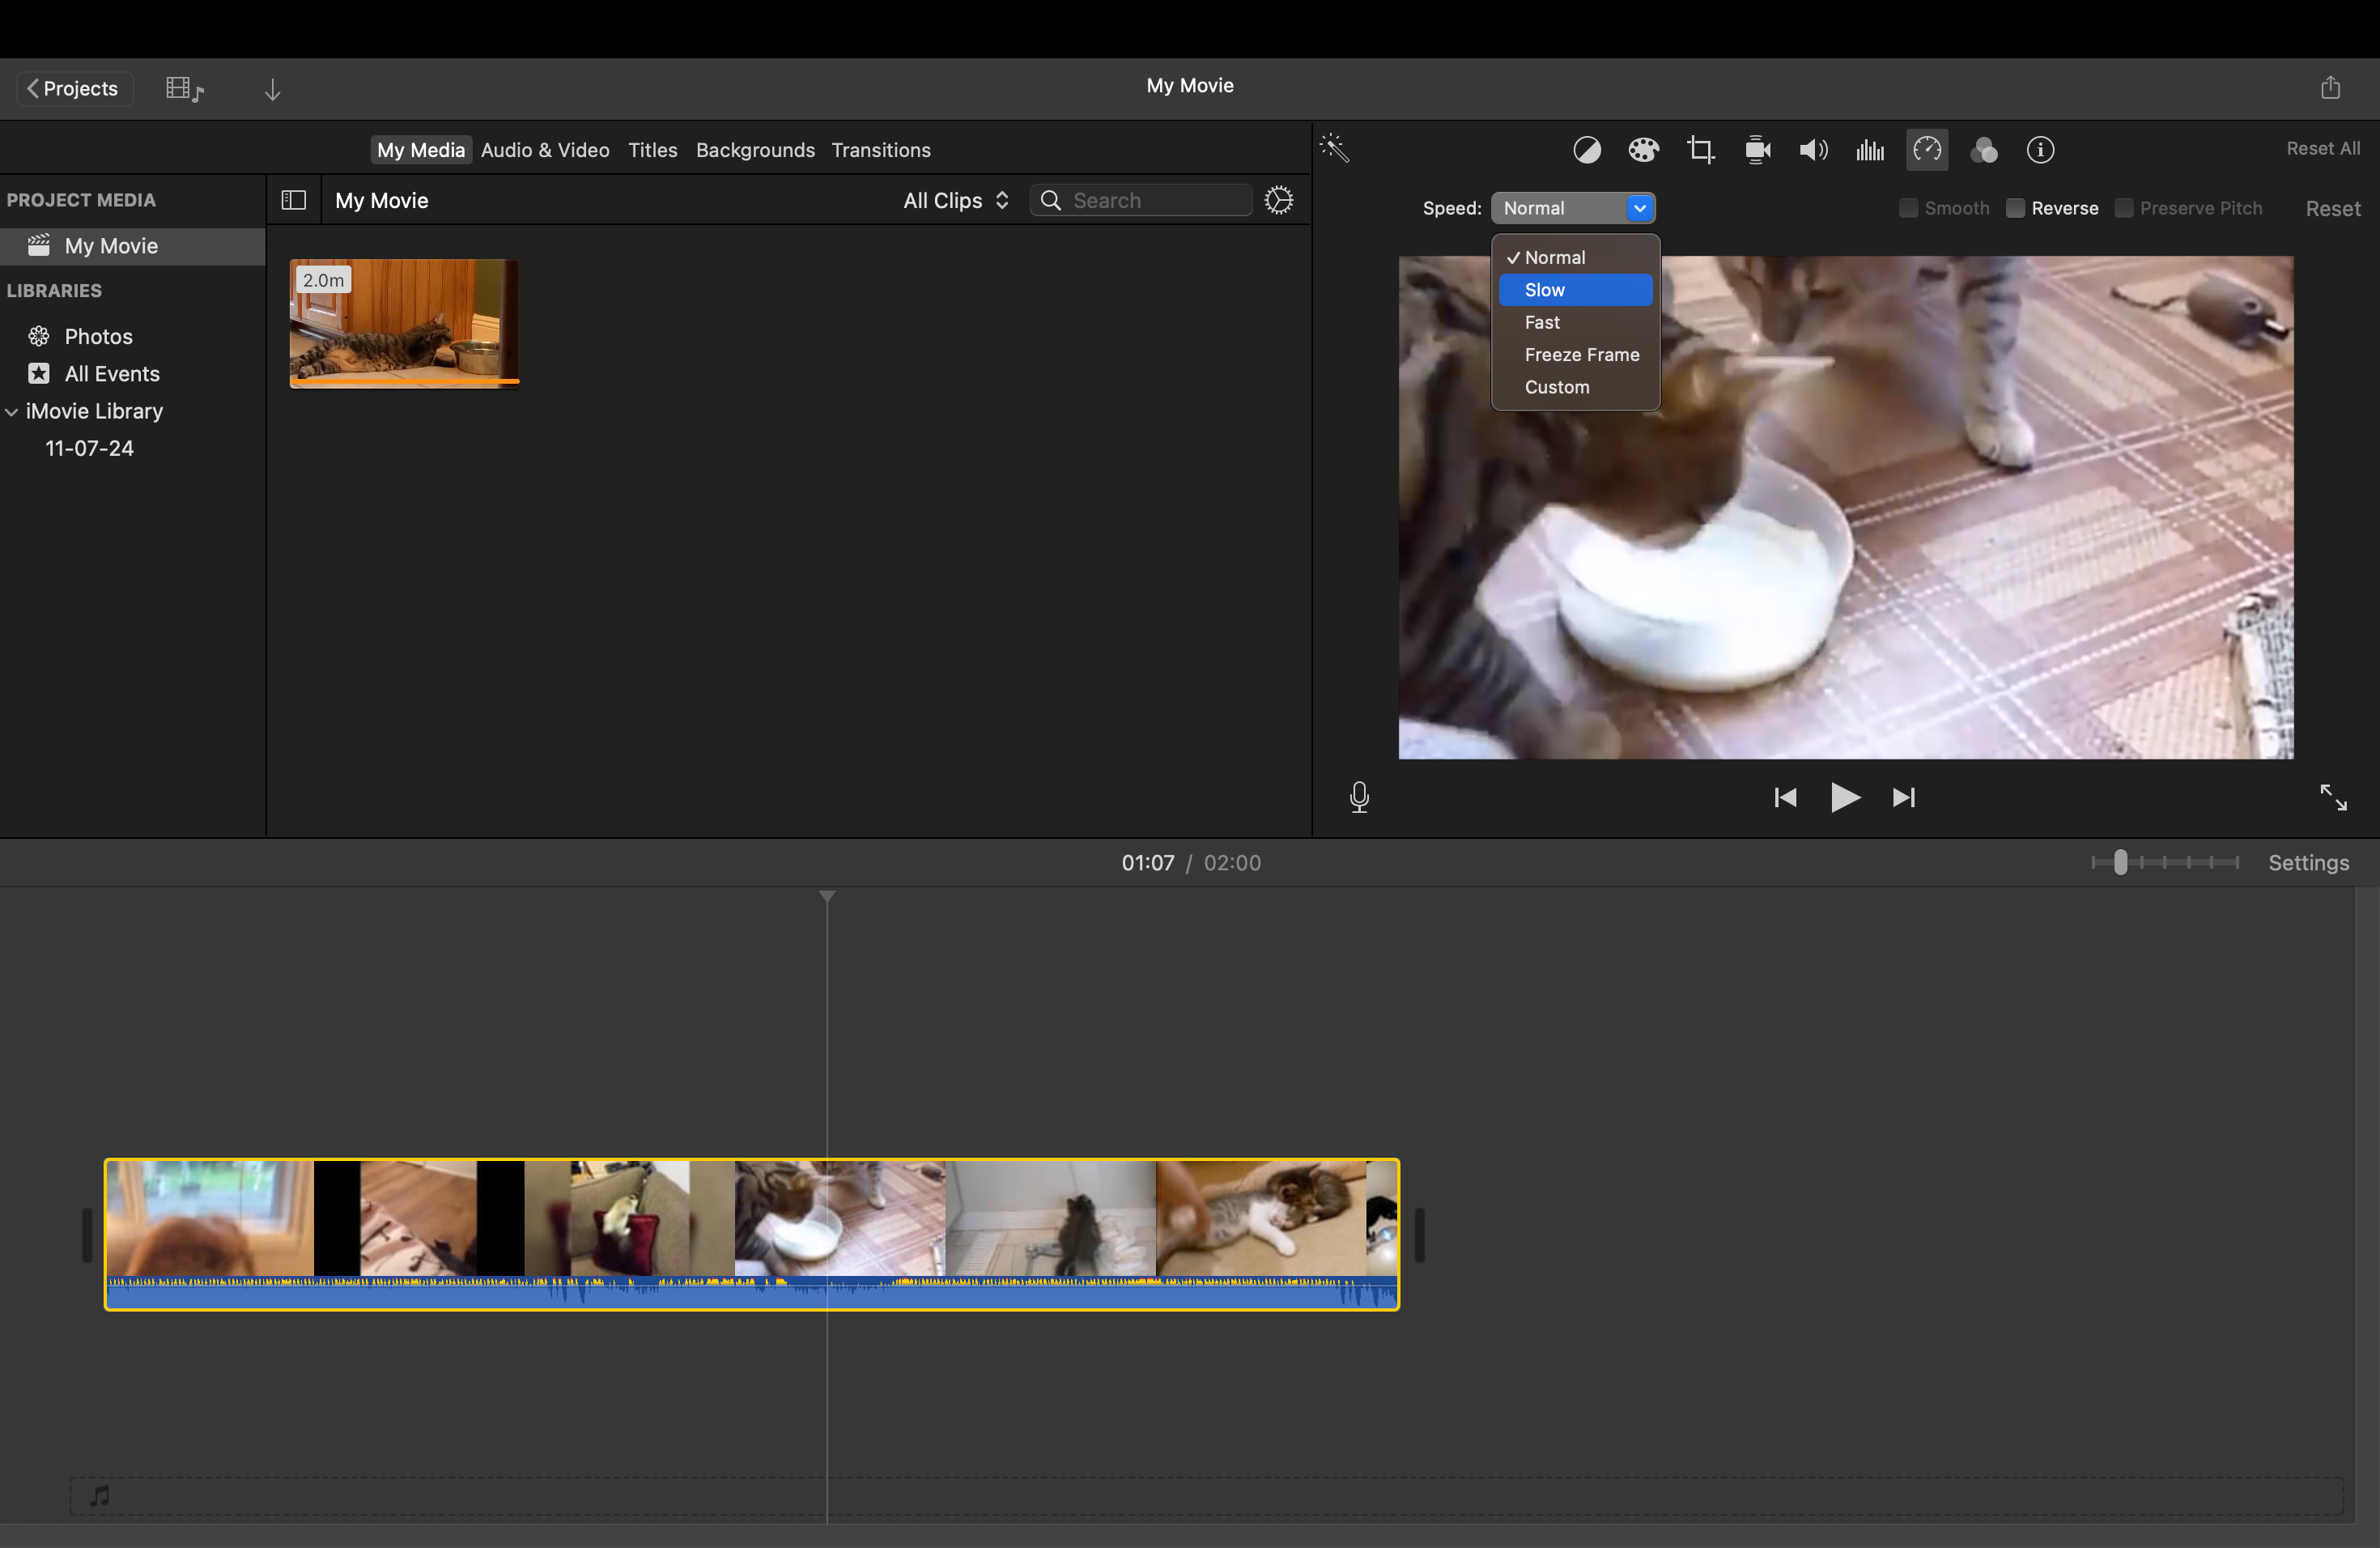
Click on the video clip you want to modify. Then, click the "Speed" button to open the speed settings.
Step 3. Adjust the Speed
Choose "Slow" or "Fast" to set your desired speed. You can also customize the speed or modify specific parts of the clip.
Step 4. Preview and Export
Review your changes. When satisfied, export the video to save it.
Method 2. Change Video Speed with VLC Media Player (Windows Only)
VLC Media Player is more than just a media player; it's a powerful tool that supports almost all audio and video formats without needing additional codecs. VLC also provides basic editing features, including the ability to adjust the video playback speed in real time.
Here's how to change video speed using VLC:
Step 1. Open VLC and Load Your Video
Open VLC and navigate to "Media" > "Open File." Select your video.
Step 2. Access Playback Speed Options
Go to the "Playback" menu, hover over "Speed," and choose to make the video play faster or slower.
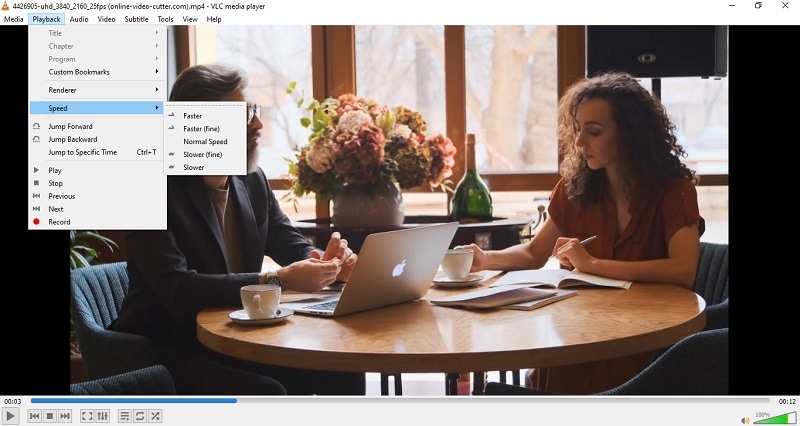
Step 3. Adjust Speed Dynamically
Pick the desired speed setting, and VLC will apply it instantly, allowing you to preview the result.
Step 4. Save Adjustments
Once you're happy with the changes, save your video with the adjusted speed settings.
Part 4. How to Change Video Speed on Mobile?
Not only on the desktop, you can also change video speed on your mobile phone. Mobile devices come with built-in tools that make changing video speed easy and accessible. These native options allow you to edit videos without downloading third-party apps. Let's look at how to do it for each platform.
Filmora for Mobile
Edit Videos on Your Mobile Phone with 1-Click!
- • Powerful Brand New AI Features.
- • User-friendly video editing for beginners.
- • Full-featured video editing for professional.
Method 1. Change Video Speed with Photo (Built-in) (iOS Only)
For iOS users, the Photos app offers a straightforward way to change video speed, particularly for videos recorded in Slo-Mo mode:
Step 1. Open the Photos App
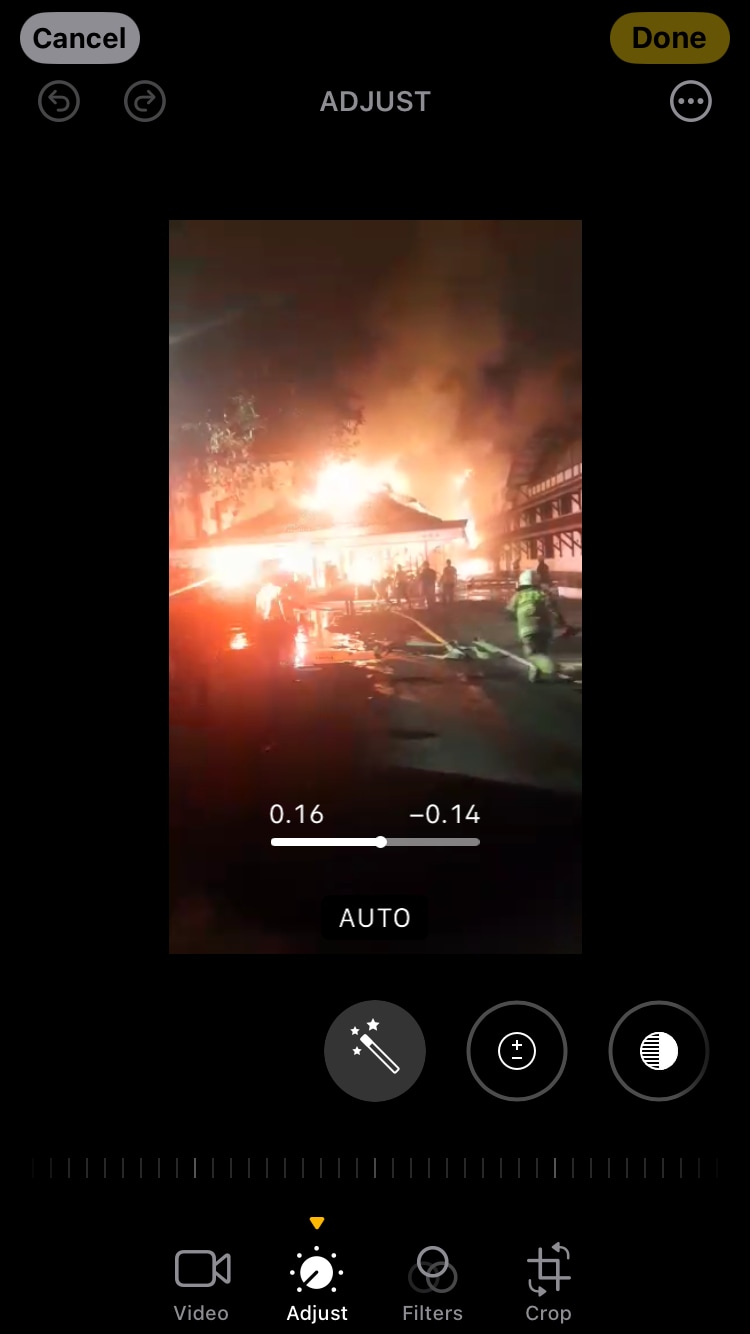
Launch Photos and locate the Slo-Mo video you want to adjust. Then, tap "Edit" in the top right corner.
Step 2. Adjust Speed
You will see a speed slider below the video frames. Drag the bars to determine which parts of the video should play in slow motion or at normal speed.
Step 3. Save the Changes
Once satisfied with the adjustments, tap "Done" to save the video.
Method 2. Change Video Speed with Built-in Method (Android Only)
On Android, different brands may offer unique editing tools, but most devices support basic speed adjustments via the Gallery or Google Photos apps:
Step 1. Open Your Gallery or Photos App
Select the video you want to modify.
Step 2. Tap Edit
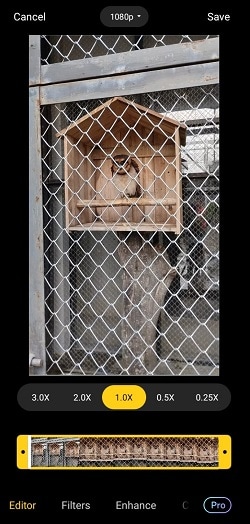
Tap the "Edit" or pencil icon to access video editing features. Then, select the Speed settings (usually symbolized by speedometer)
Step 3. Adjust the Speed
Choose from available speed settings (e.g., 0.5x for slow or 2x for fast) to alter the playback speed.
Step 4. Save Your Edits
Once you're happy with the changes, save the video to your device.
Part 5. How to Change Video Speed Online?
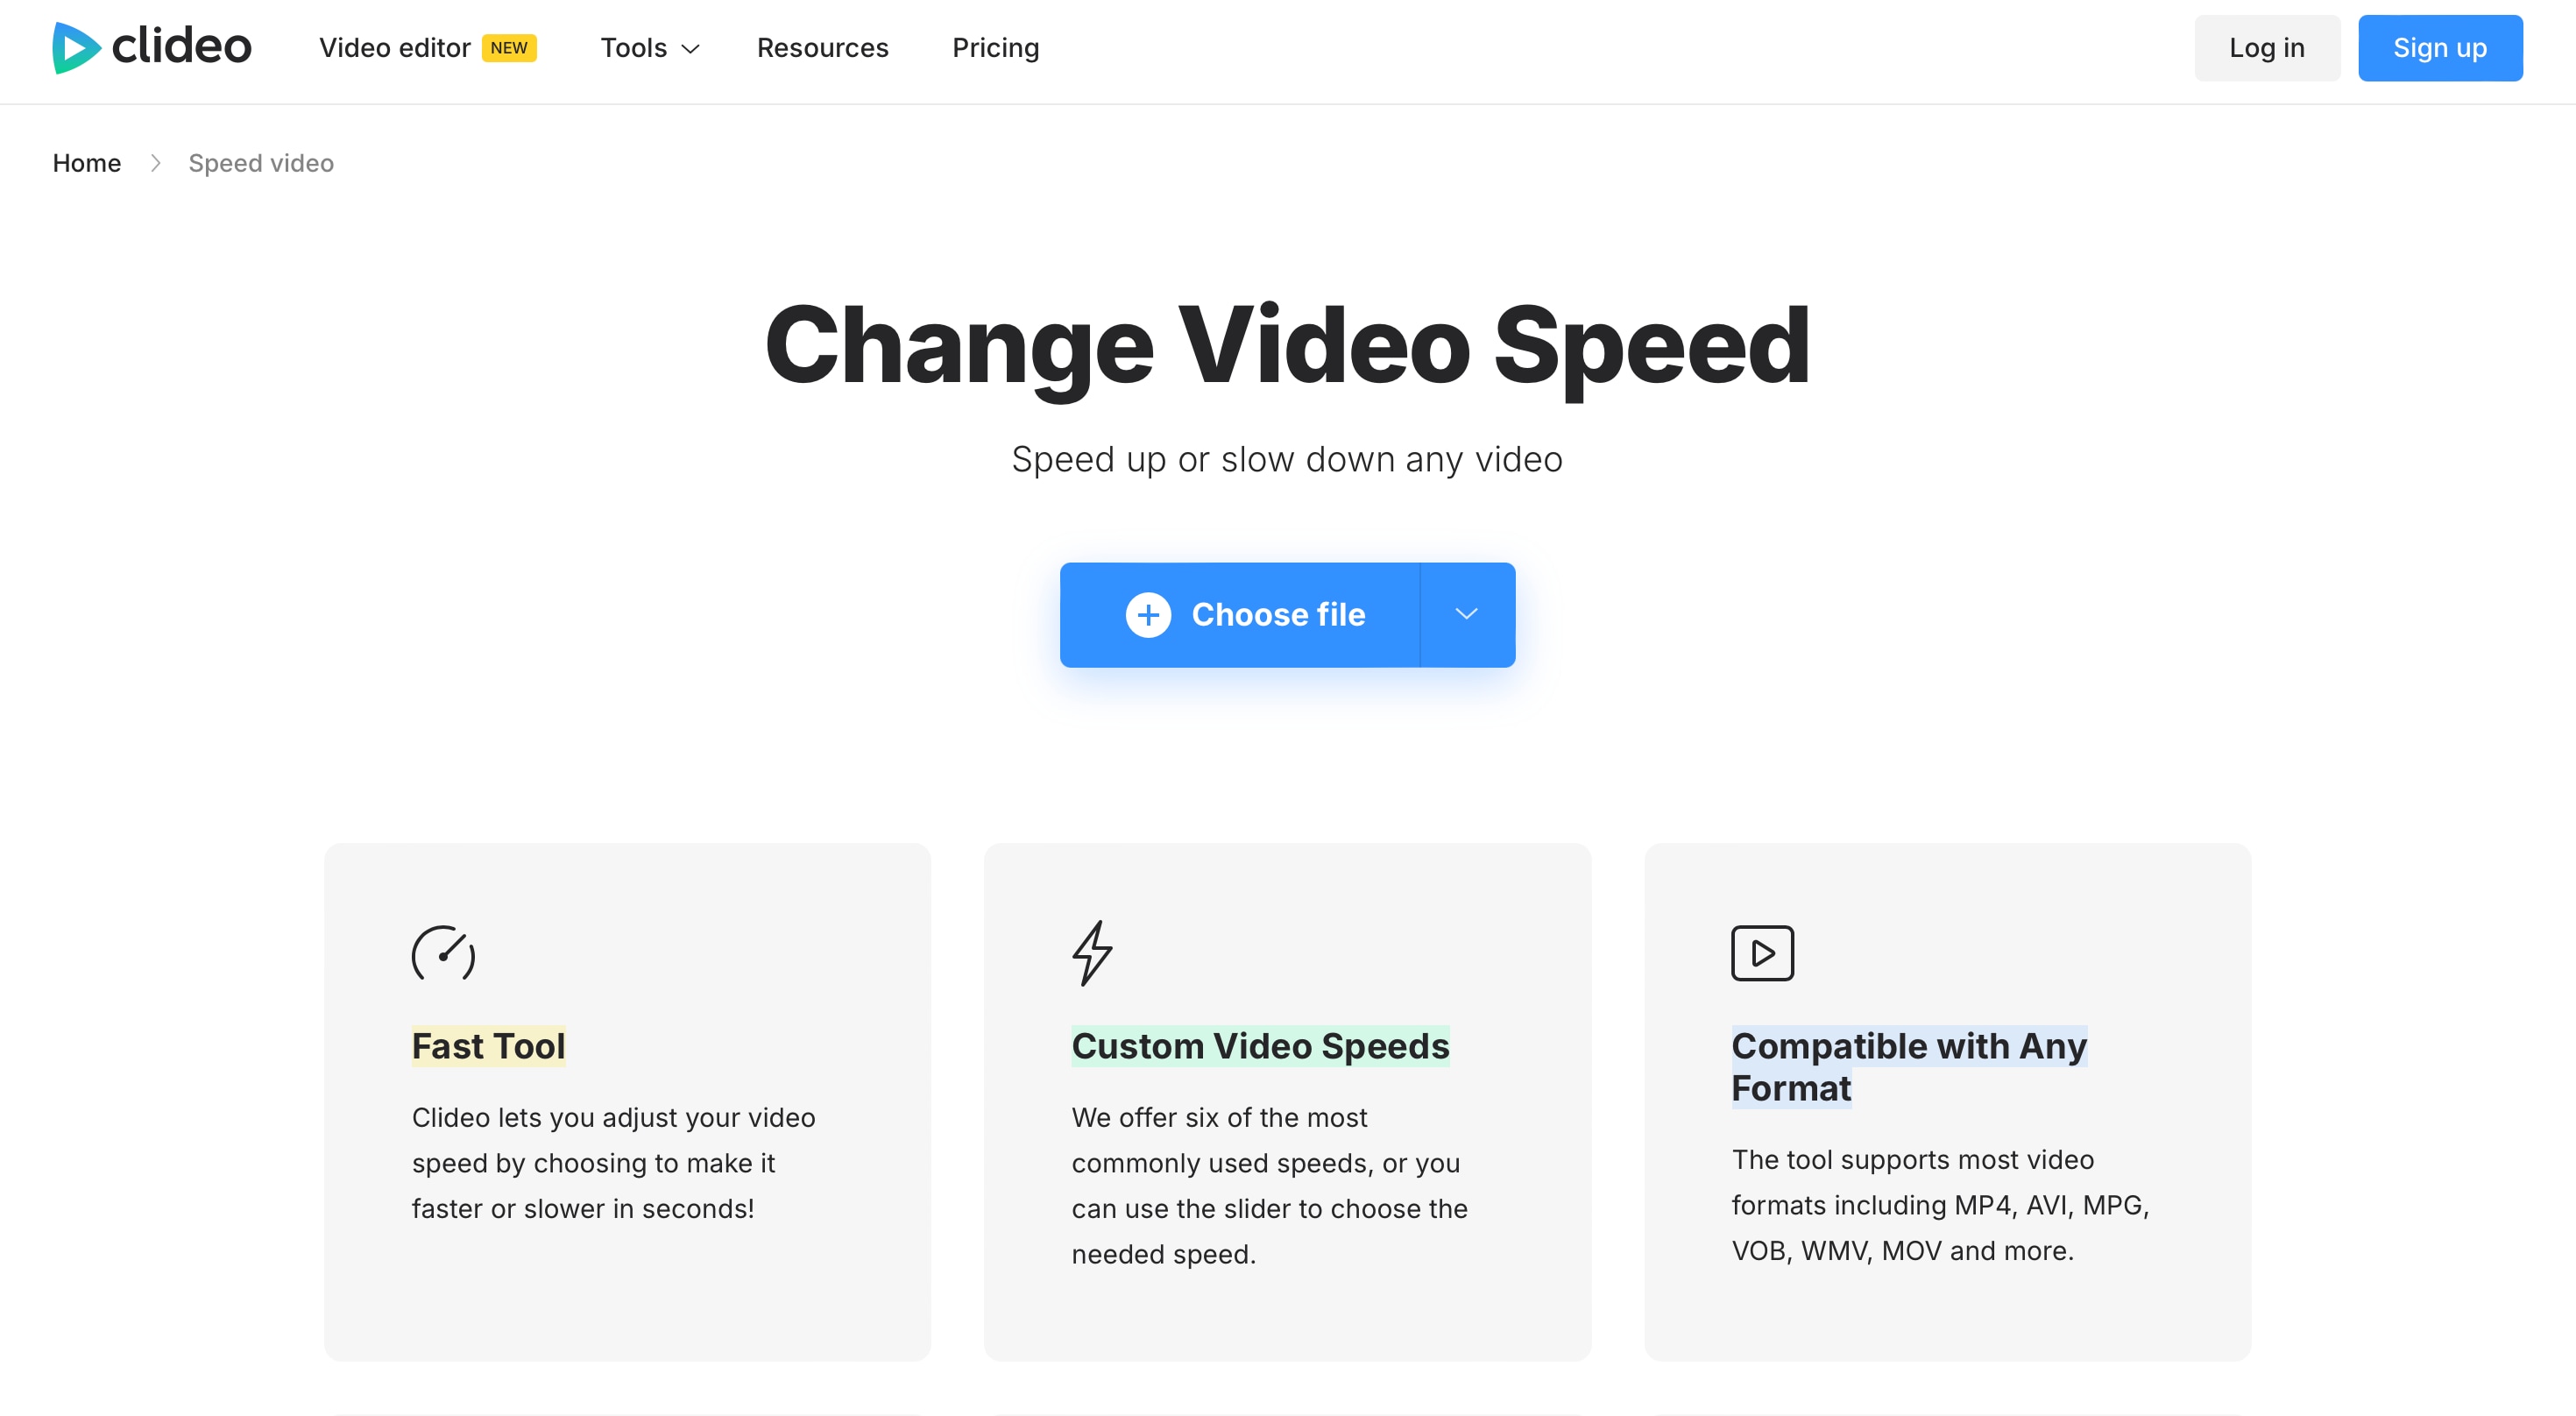
If you're looking for a quick and easy way to change the speed of your video online without downloading any software, Clideo is a great option. Clideo is a free online tool that allows you to speed up or slow down your videos directly in your web browser. It supports a wide range of video formats, including MP4, AVI, MOV, and more, making it versatile for different needs.
How to use Clideo to change video speed:
Step 1. Upload Your Video
Go to Clideo's website and upload your video file from your device, or import it directly from cloud storage services like Google Drive or Dropbox.
Step 2. Adjust the Speed
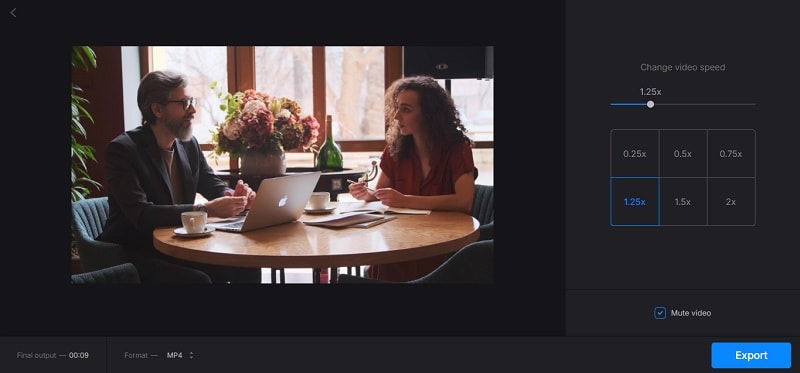
Once your video is uploaded, use the speed slider to select the desired speed. Clideo offers speeds from 0.25x (slow-motion) up to 4x (fast-motion). You can also mute the sound or change the output format if needed.
Step 3. Download the Edited Video
After adjusting the speed, preview the changes in your browser. If everything looks good, click "Download" to save the edited video to your device.
For a more advanced option, you can also try Kapwing or Flixier, which offer more customization features like adding text, transitions, and adjusting audio along with speed changes.
Conclusion
Changing video speed on Instagram can add an exciting twist to your content, making it more engaging and unique. While Instagram's native tools are limited, there are several effective ways to adjust video speed using apps, built-in features, or online tools. Among these, Wondershare Filmora stands out for its versatility and ease of use across different platforms—Windows, Mac, Android, and iOS.
With advanced editing options like uniform speed, speed ramping, and presets, Filmora gives you full control over your videos, ensuring they look exactly how you want before sharing them on Instagram. So, pick the tool that suits your needs best and start experimenting!


