Professional video creators earn billions from YouTube, Tick Tock, and such platforms today. That strongly encourages newcomers to create their video content. But is it that easy? Of course not. To create a successful video and catch people's attention, subscribe channel graphics are essential.
We have introduced how to create a simple custom subscribe button animation for beginners. We are here to give a more advanced and fully animated graphic that will provide your video with a professional look. Let's start with knowing what a Subscription channel graphic is.
In this article
What Is a Subscribe Channel Graphic?
We here give a simple explanation for those new to a subscribe channel graphic. Have you ever watched videos on a platform like YouTube? If yes, you must have noticed some unique pictures encouraging viewers to subscribe to the channel. That is exactly what a subscribe channel graphic is. It looks like as below.
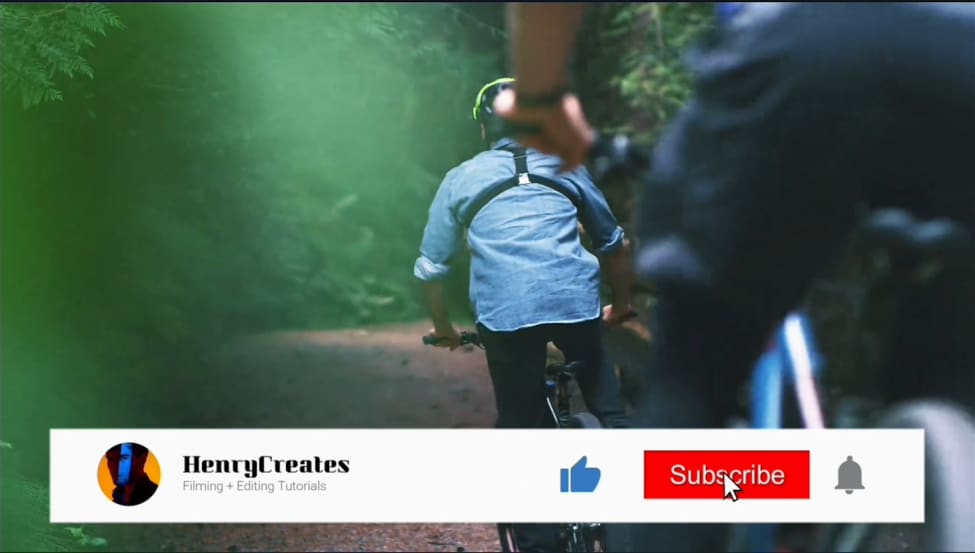
Every video crater incorporates such graphics on their videos before posting them. However, the hardest part is how to create one. We are now moving forward to see how we can make some outstanding subscribe button graphics using Wondershare Filmora.
Create Advanced Subscription Channel Graphics With Wondershare Filmora
Before we dive into our step-by-step guide, let's first have an overview of our video editor. Wondershare Filmora is an incredible video editor with robust editing features. These features will transform your video into a stunning one within minutes. It also comes with a powerful screen recorder and a large filmstock of templates.
So using these templates, icons, and other features, here are the steps you need to follow to make an advanced subscribe channel graphic.
Step1 Download and install Wondershare Filmora
First, you need to download and install the video editor, Filmora. If you've already done that, then launch the software right away. But if you haven't, then download it below. Once the download finishes, install the software on your computer.
When you launch the Filmora, click on "New Project."
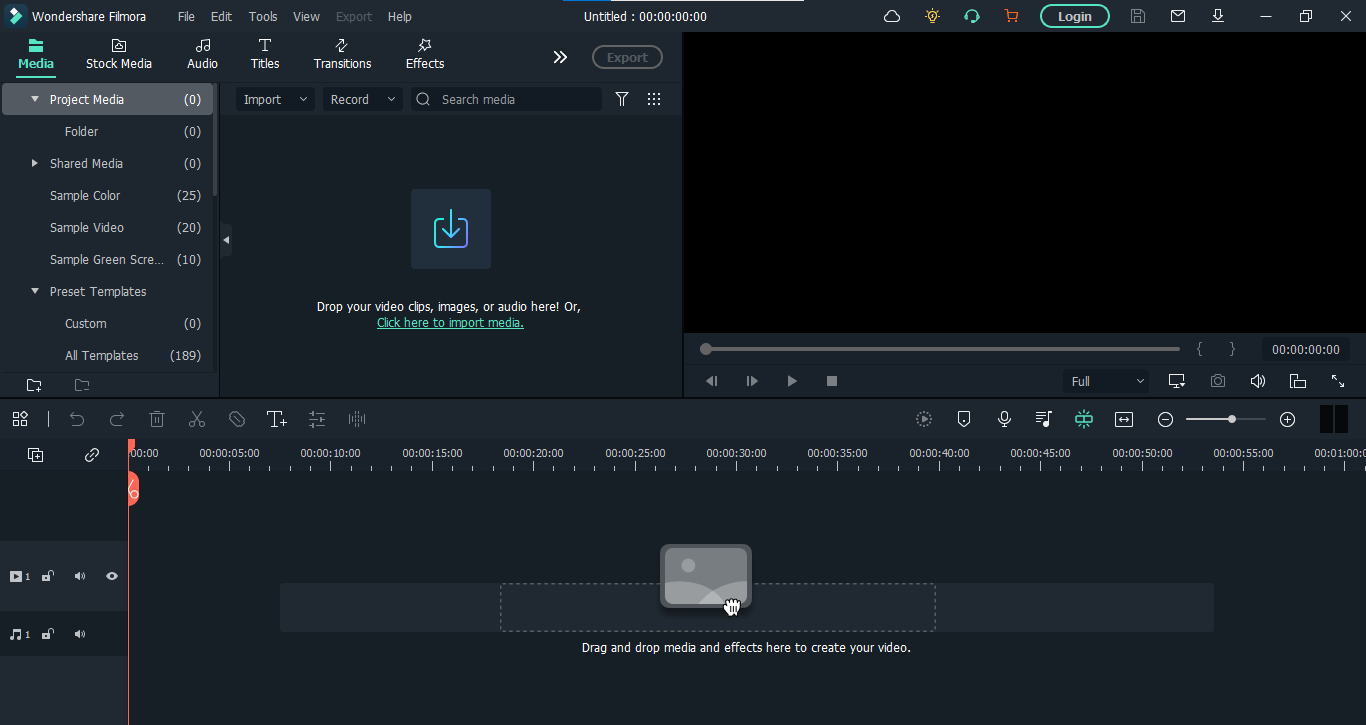
Step2 Make the structure of your graphics
For creating anything, we first need a flawless structure. Here, we can make the structure of Subscribe channel graphics using different colors, icons, texts, and channel photos. We'll start by adding color layers.
1. Add color layers
- Go to the "Media" on the top left corner of the interface and Click on "Sample Color." Here find the Green color and add it in the panel below as the first video layer by the drag-n-drop function.
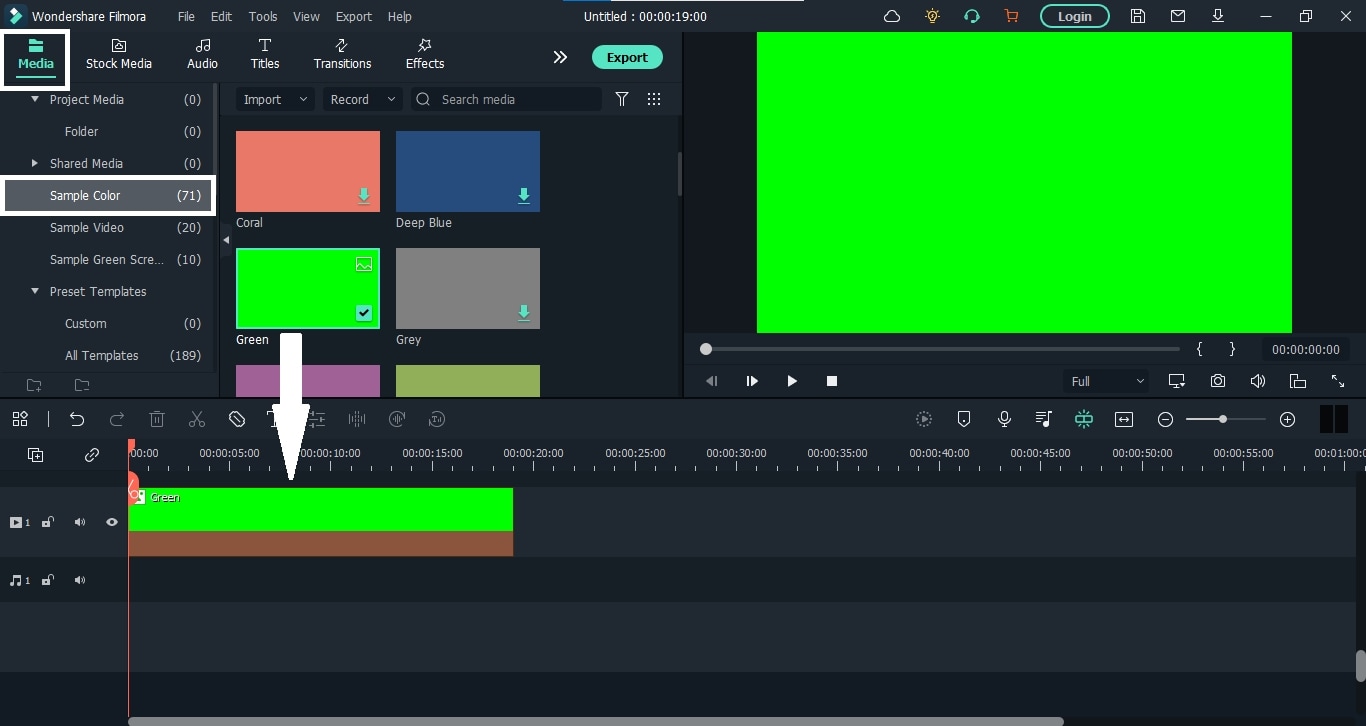
- We will key this layer at the end, so make sure not to use any other green graphics for your animation.
- Let's lock this layer because we will no longer use it. For this, click on the "Lock" icon on the layer's left side.
- Add white and red colors and stack them on top of the green color layer.
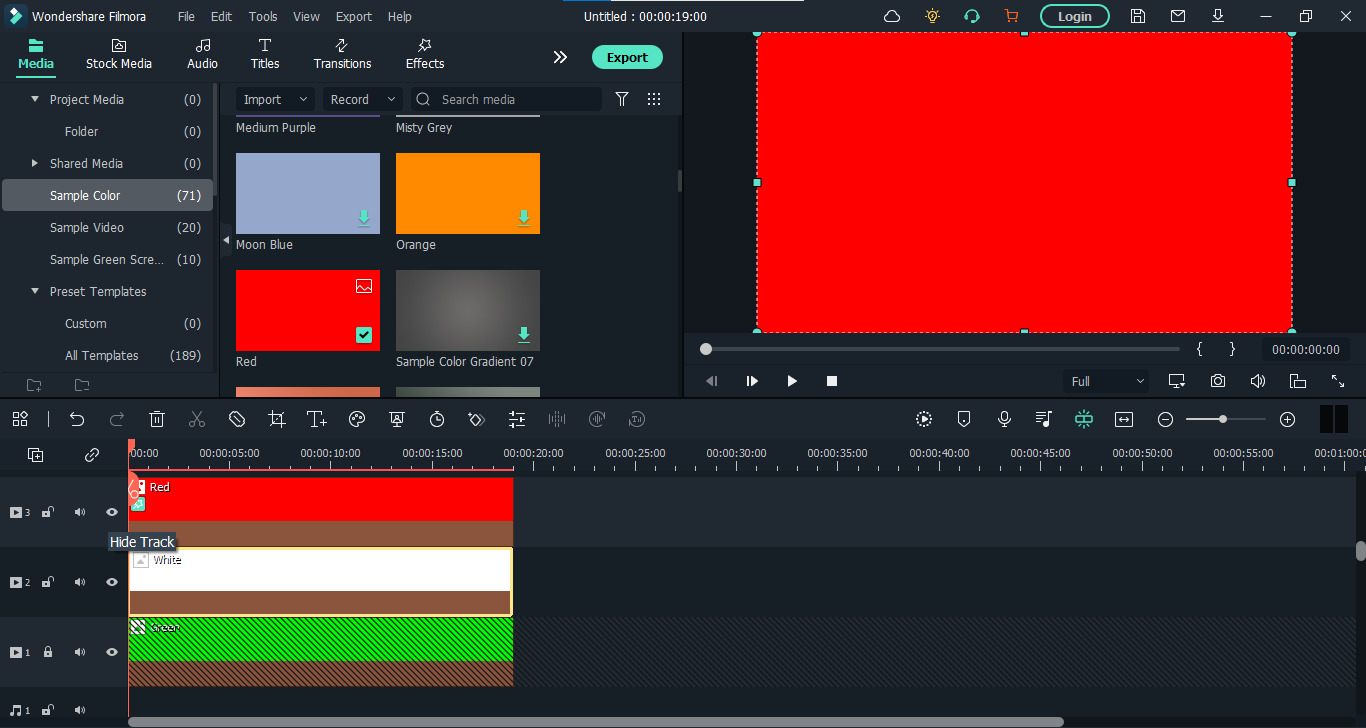
After adding all three color layers, it's time to crop these layers to make the structure of our graphic.
Crop the Color Layers
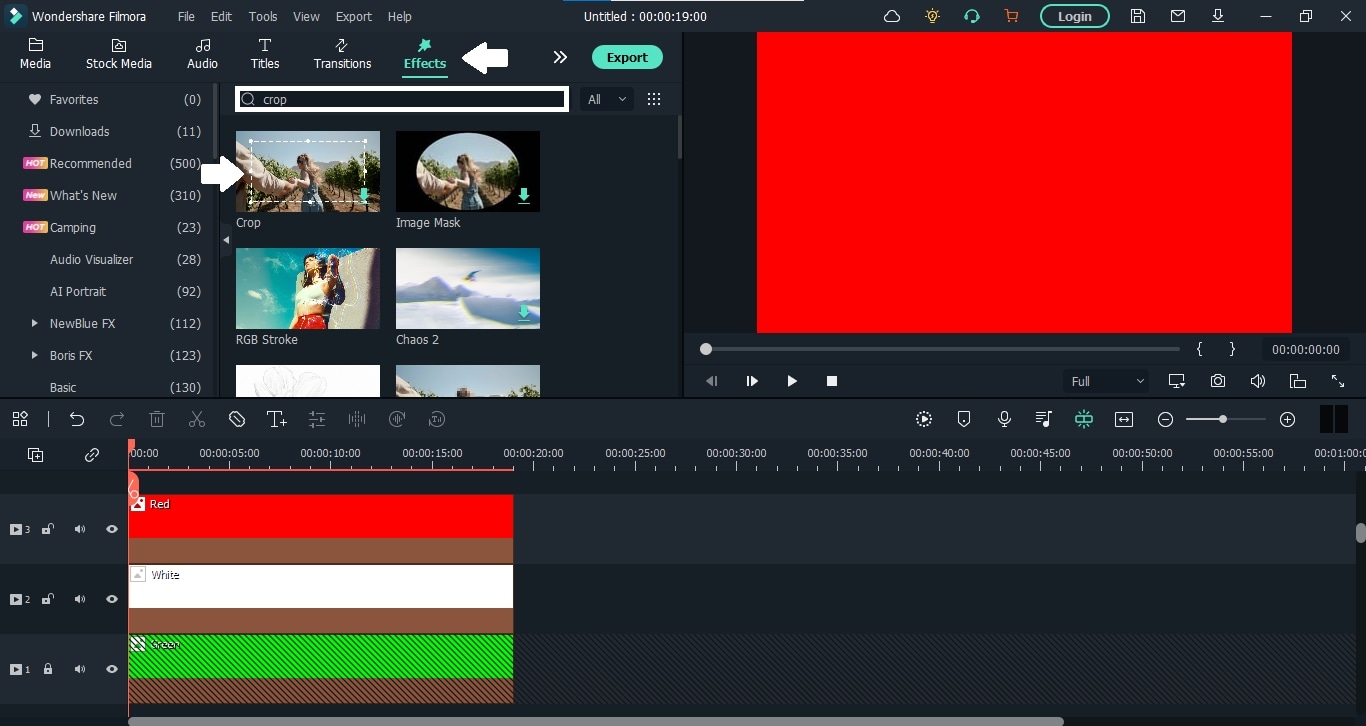
- Go to the "Effects" tab from the top bar and search for the "Crop" effect. Then drag the effect and add it to the white and red layers on the panel.
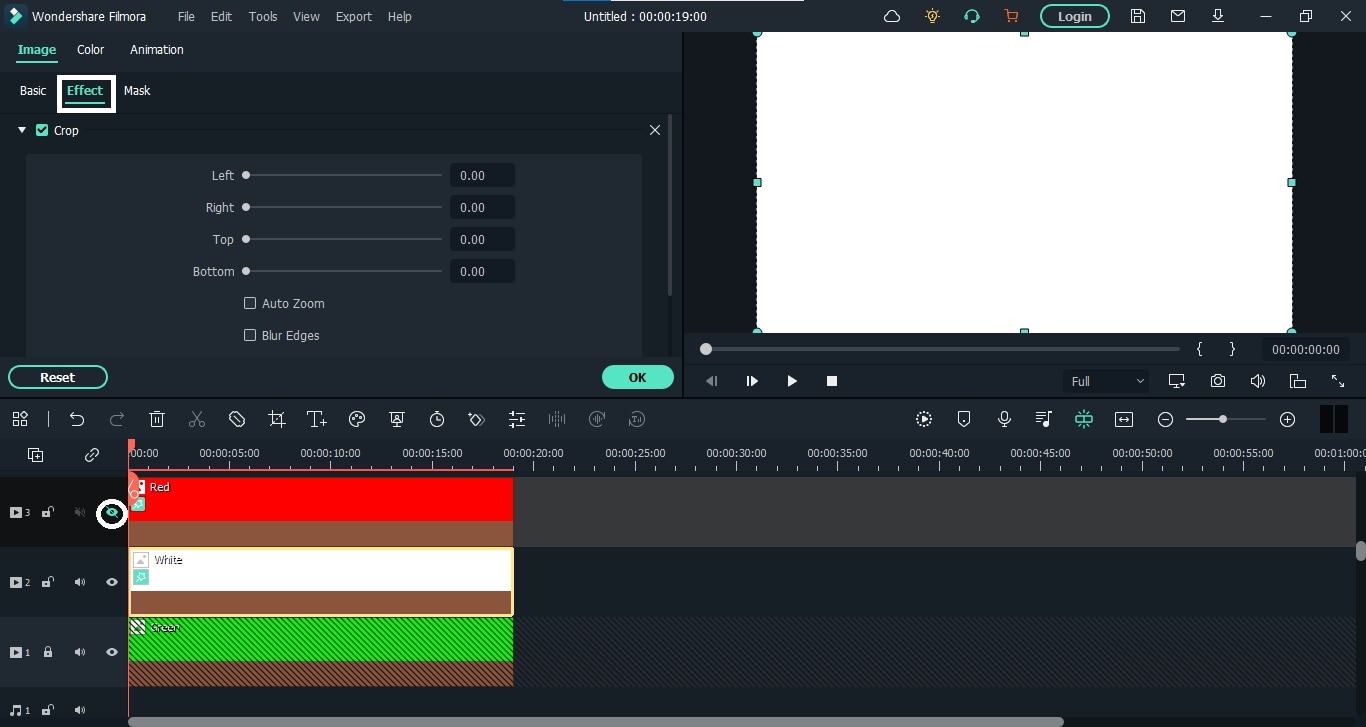
- First, click on the "Eye" icon beside the red color layer to hide it. Then double-click the white layer to see its properties. When the properties appear, select "Effects" from there.
- You can also enable the safe zones from the display settings on the right side of the panel. After that, crop the white layer first, then show the red layer and crop it too. It will look like this.
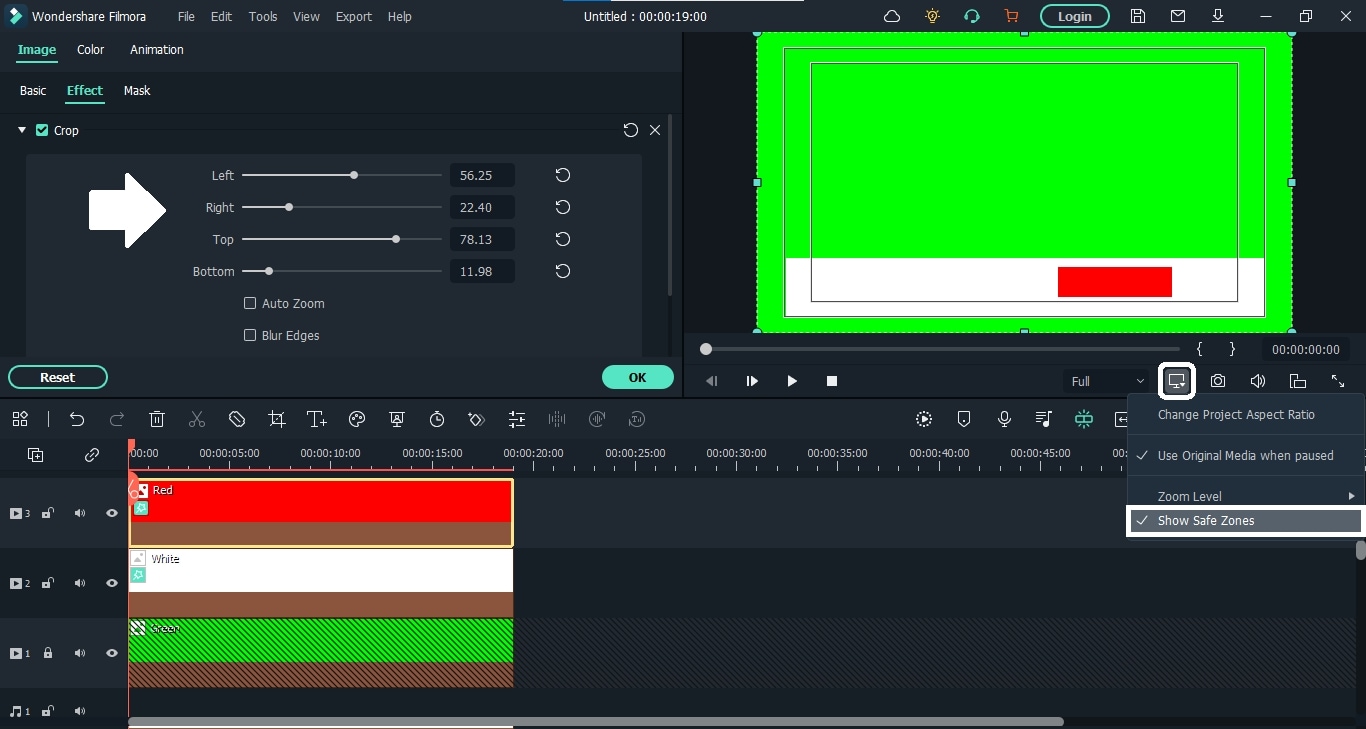
That's it, folks. Our color backgrounds are here. Now we have to add our channel photo to this. So let's move on to see how to do it.
2. Add a channel photo
- To add the channel photo, you can upload the image. Here we are going to use some images from the stock media. No matter the image, drop it down on the panel above the red color layer.
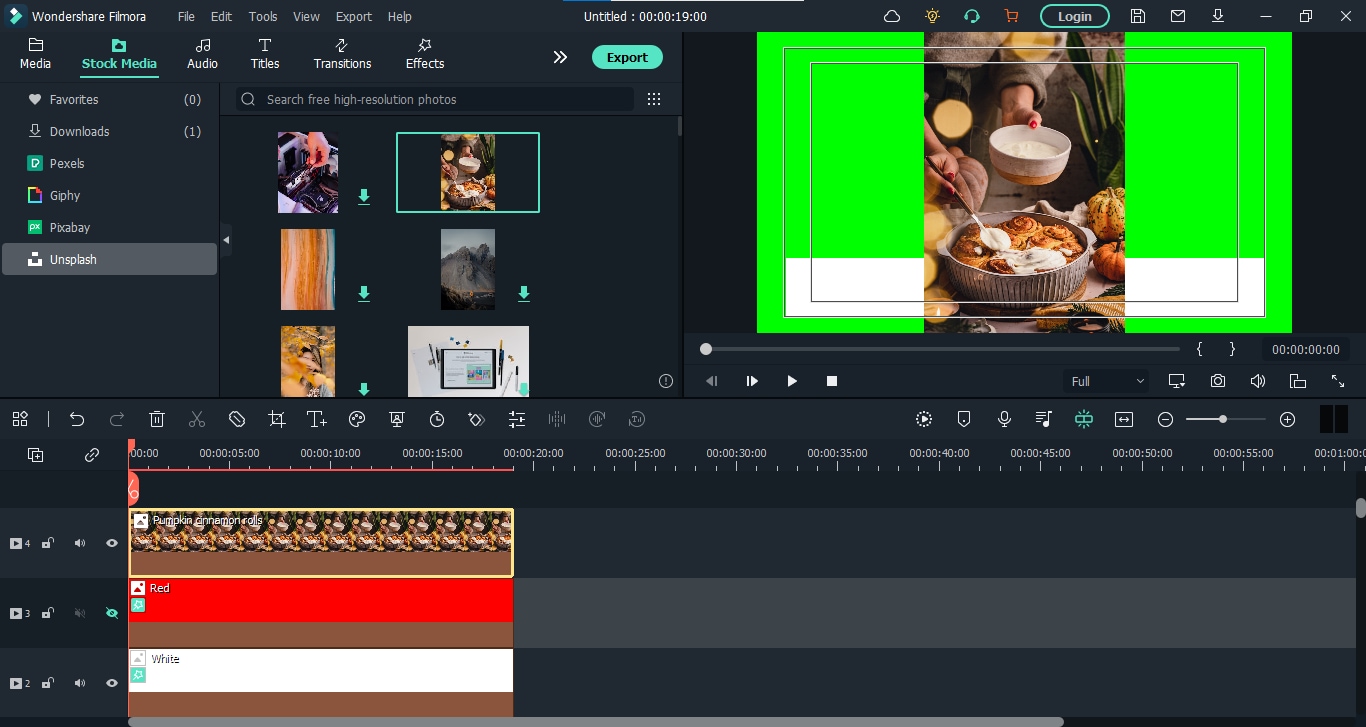
- Now double-click on the image layer, and from the properties, go to the "Mask" option and select the circle. You can also select any other shape you like.
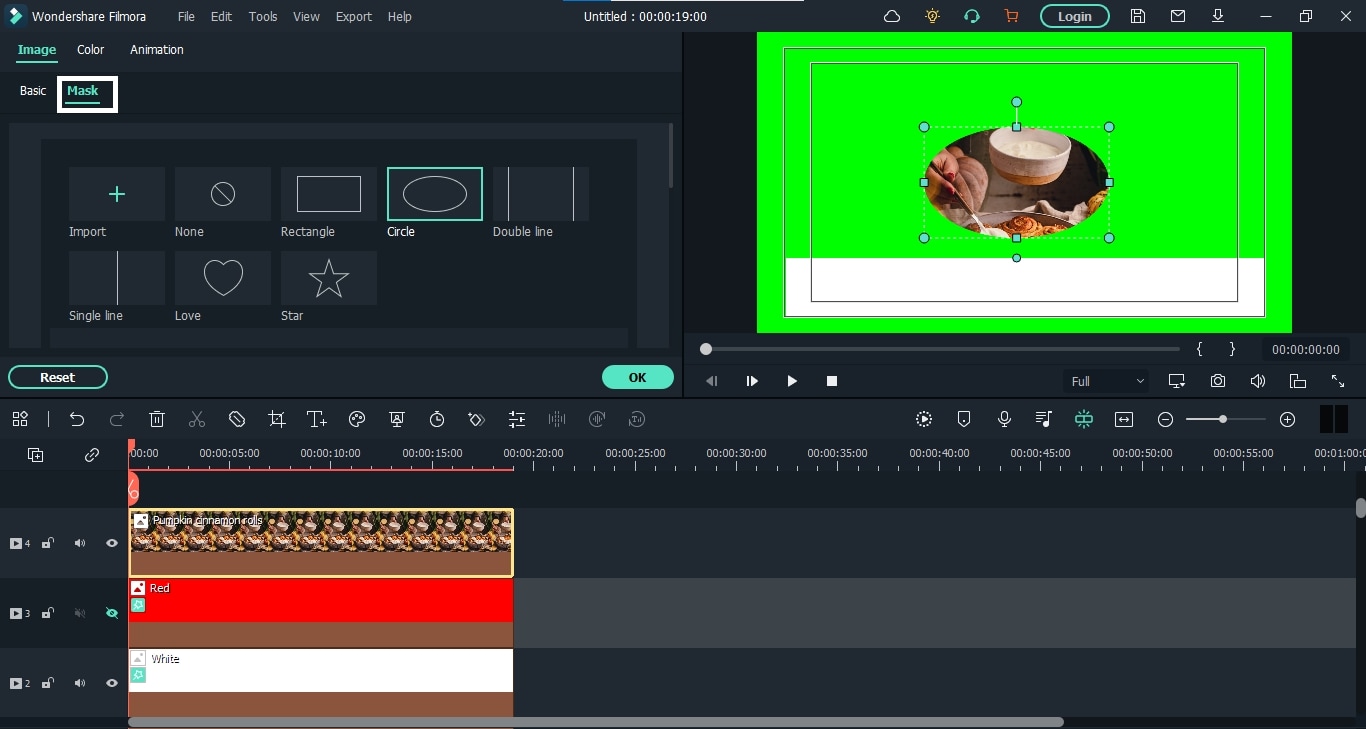
- After that, scroll down and make the circle even by matching all numbers. Then scale it down and place it on the left corner of the white layer.
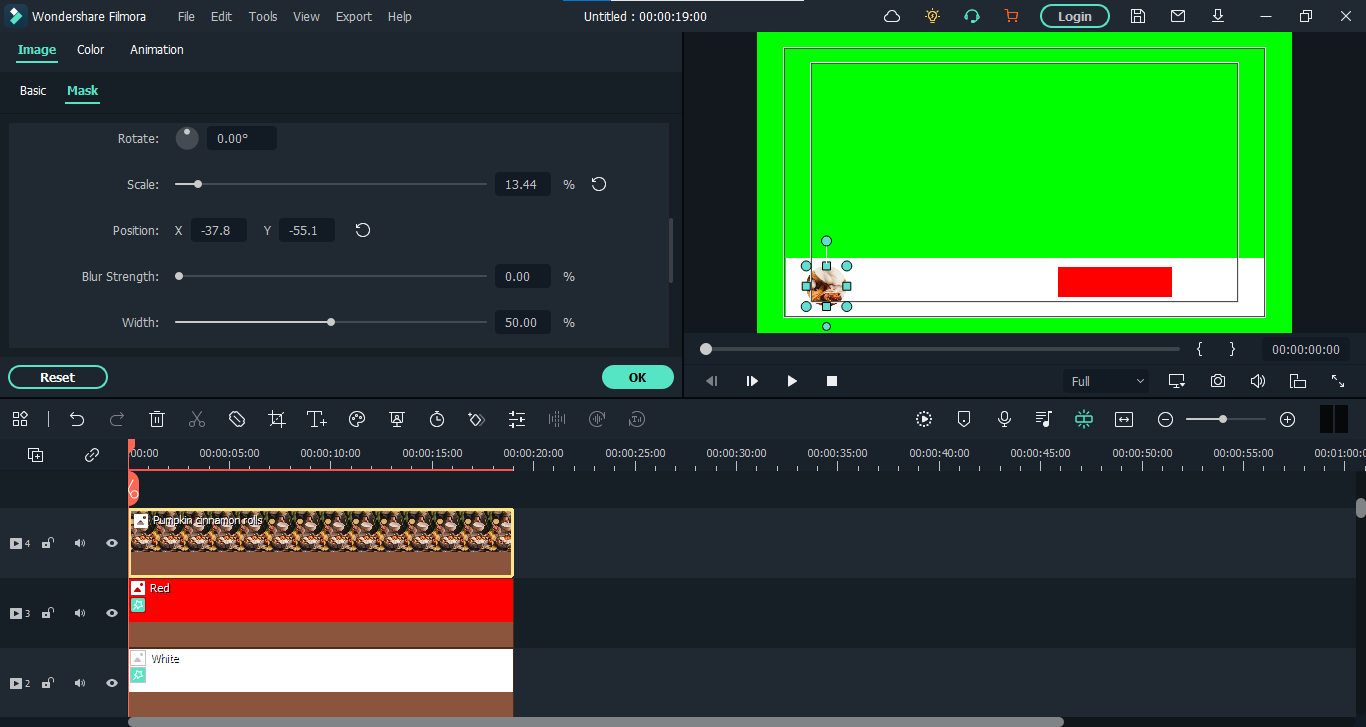
It's done. Let's add our channel text now.
3. Add texts
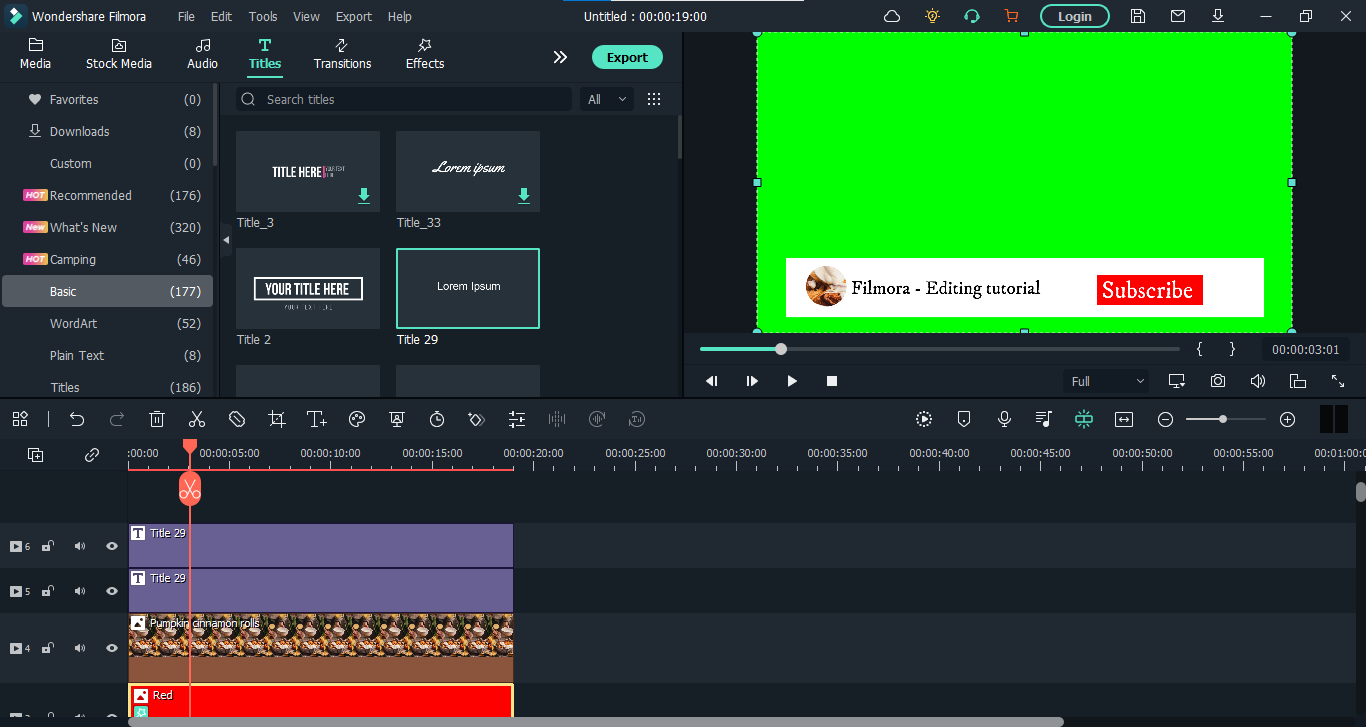
- For adding text, go to the "Titles" from the top bar and add the title you like to the panel.
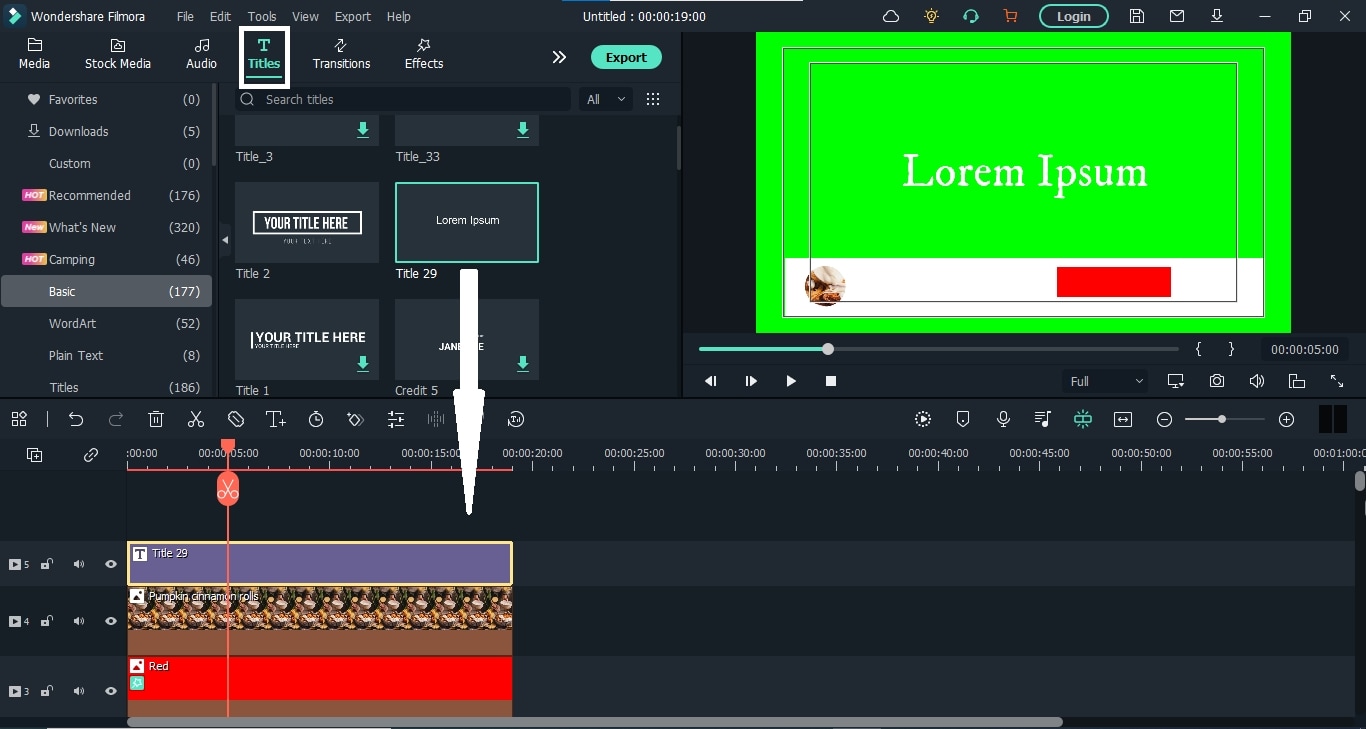
- Now double-click this layer and add the text you want. You can also change the color of the text, scale it down and place it where ever you want.
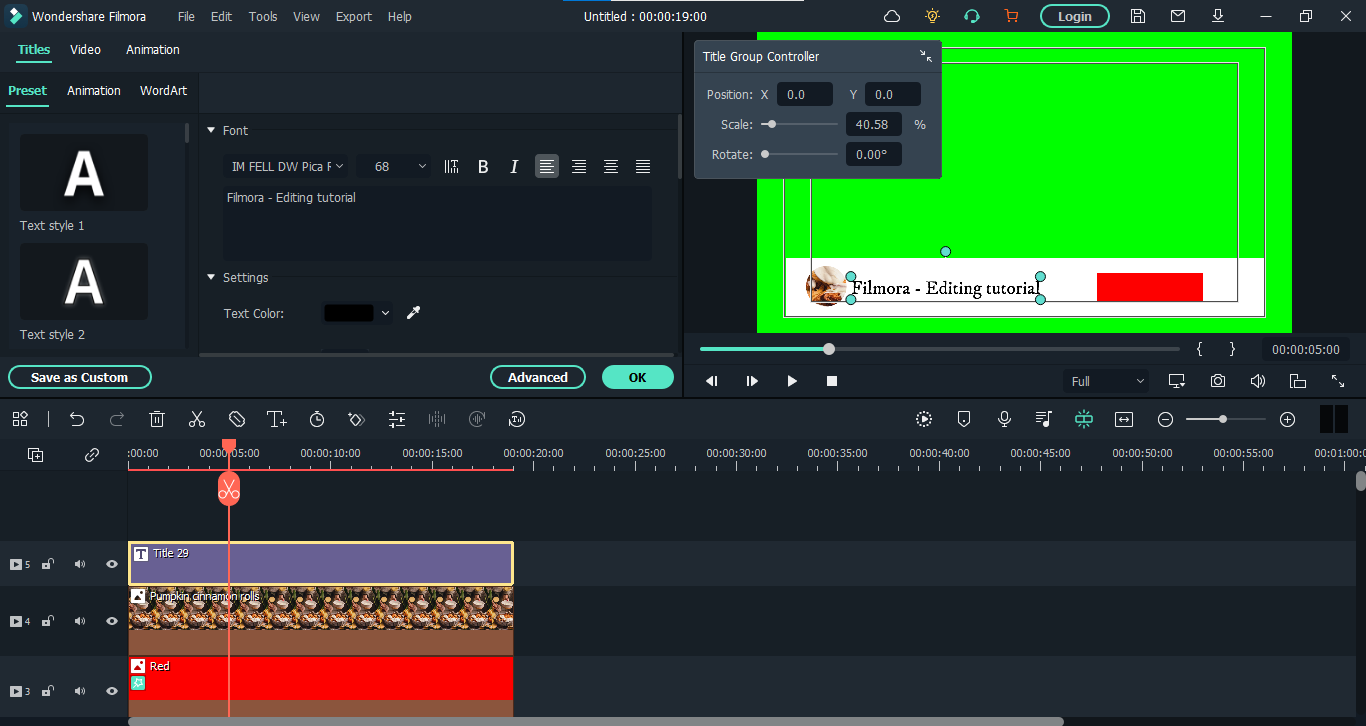
- Now, let's add another title for the subscribe button. You have to place it on the red layer.
We can't finish our structure without icons, can we? So let's move on to them.
4. Add icons
- Hit the "Element" from the top bar and search for the "Bell" icon. You will find the short animations of the bell. Add the suitable one to the panel.
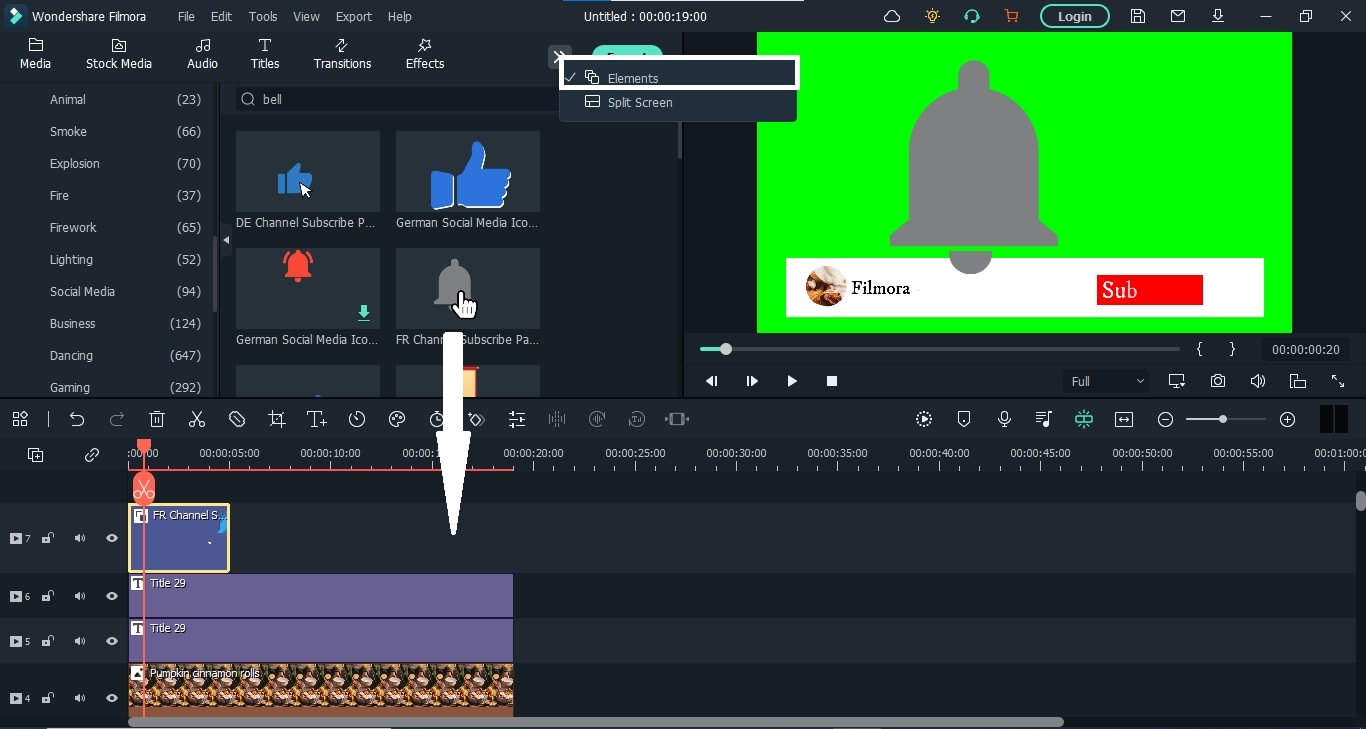
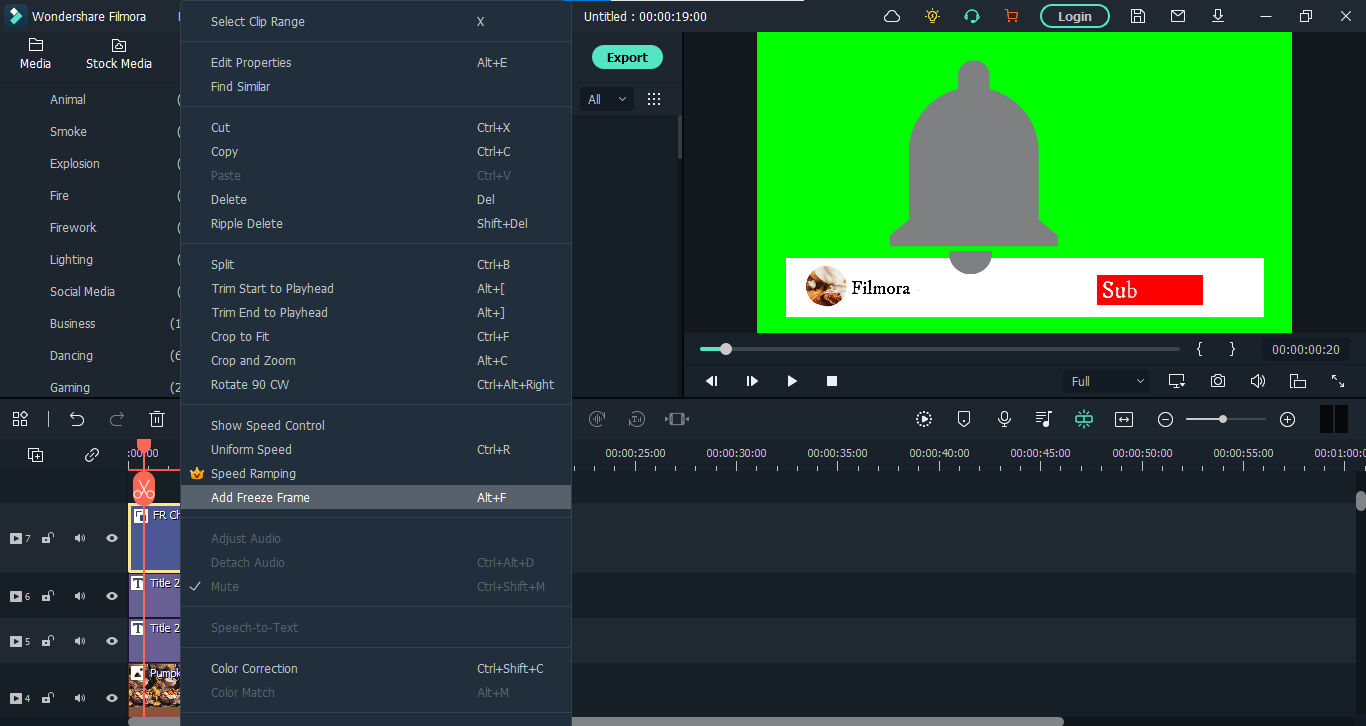
- Now find a suitable place in the animation, stop it at that point, right-click on the element layer and add a freeze frame.
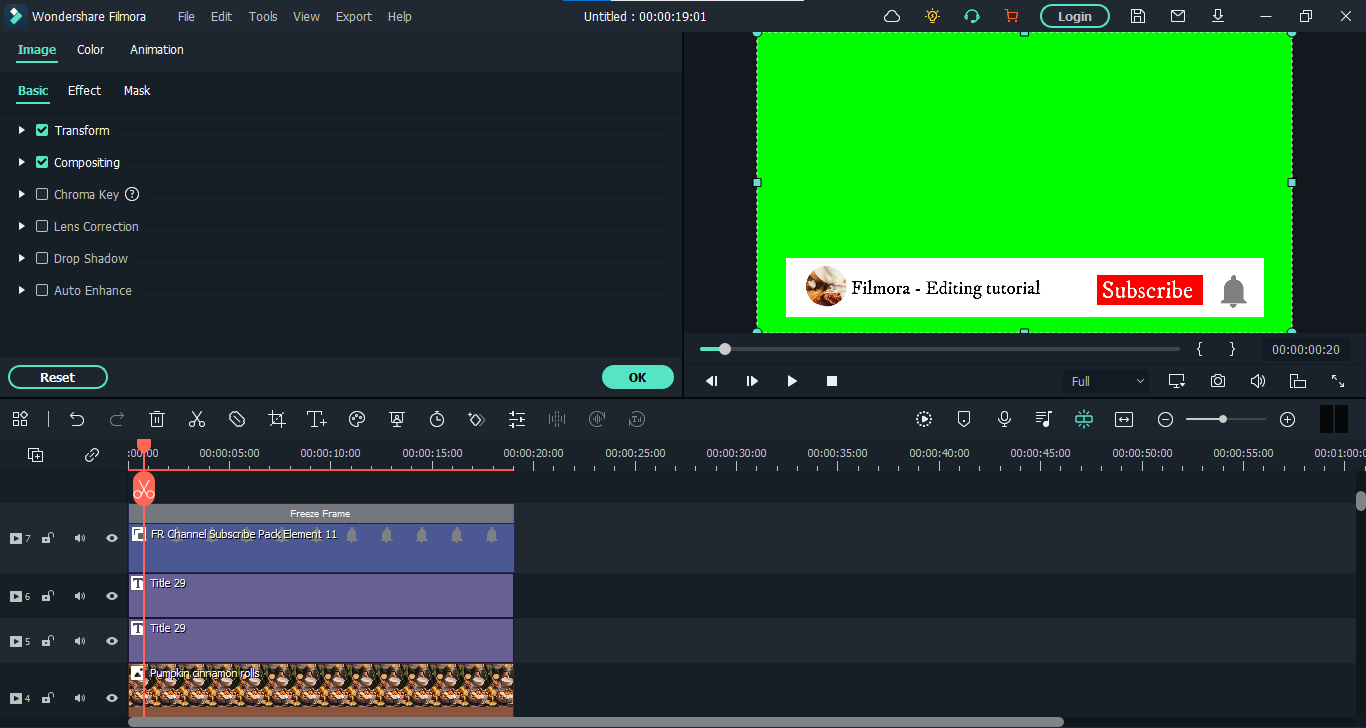
- You can also extend the freeze frame and remove the other parts. Then reduce its size and place it beside the "Subscribe" text.
- Similarly, add "Thumbs Up" and "Mouse Cursor" icons on the panel.
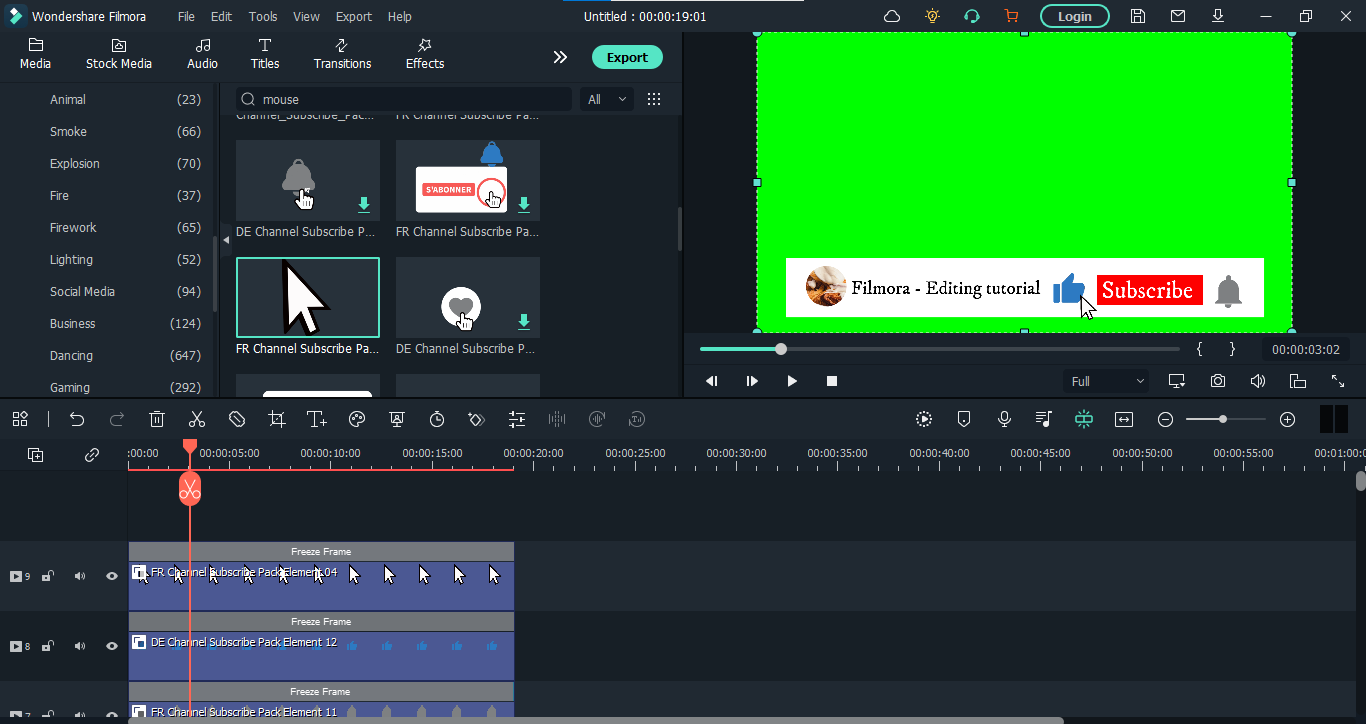
Finally, our structure is finished. Now let's start animating.
Step3 Animate the graphics
First, we'll make it so that all these graphics come in from below the view.
- Go to the white layer first and double-click on it. Then hit the "Animation" option and scroll down. Here add a new keyframe by clicking "Add." Now move the playhead to the beginning and place the white color layer out of the frame.
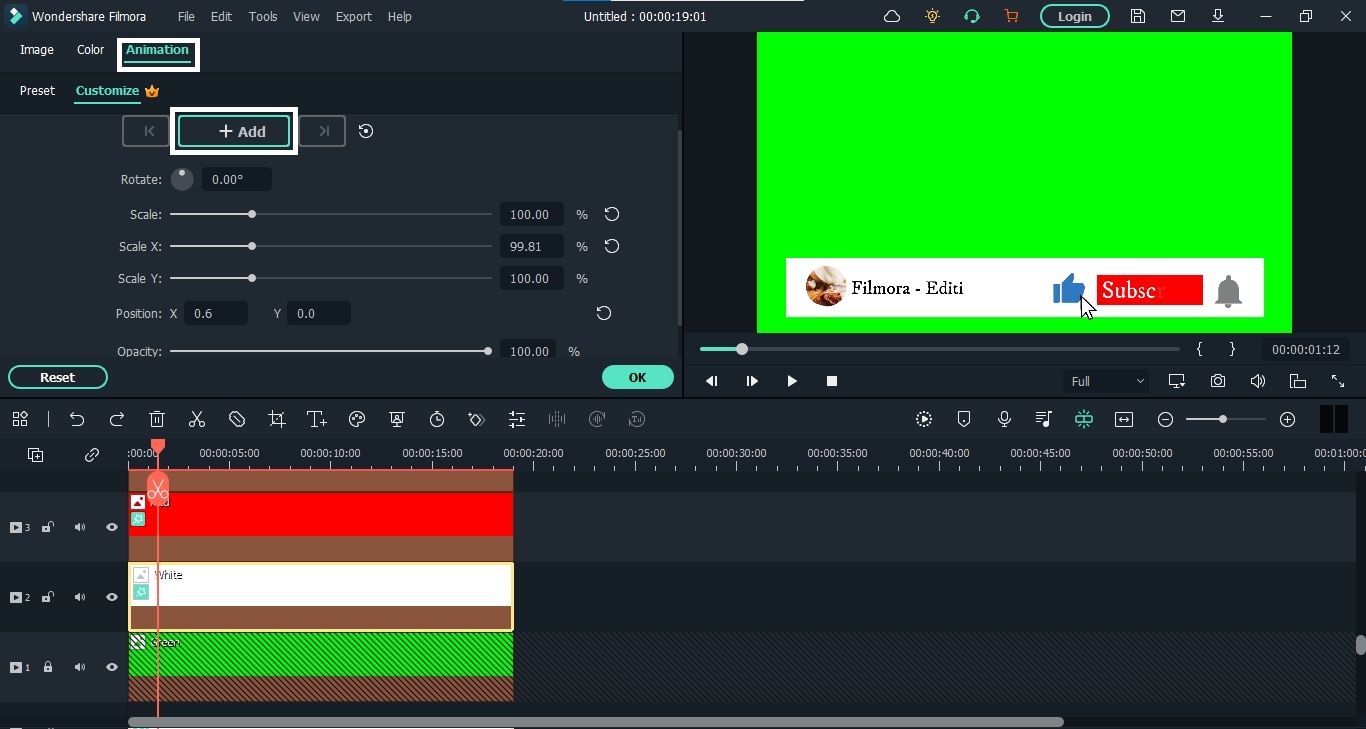
- Now, do the same for channel photos and icons. The whole animation will look like this.
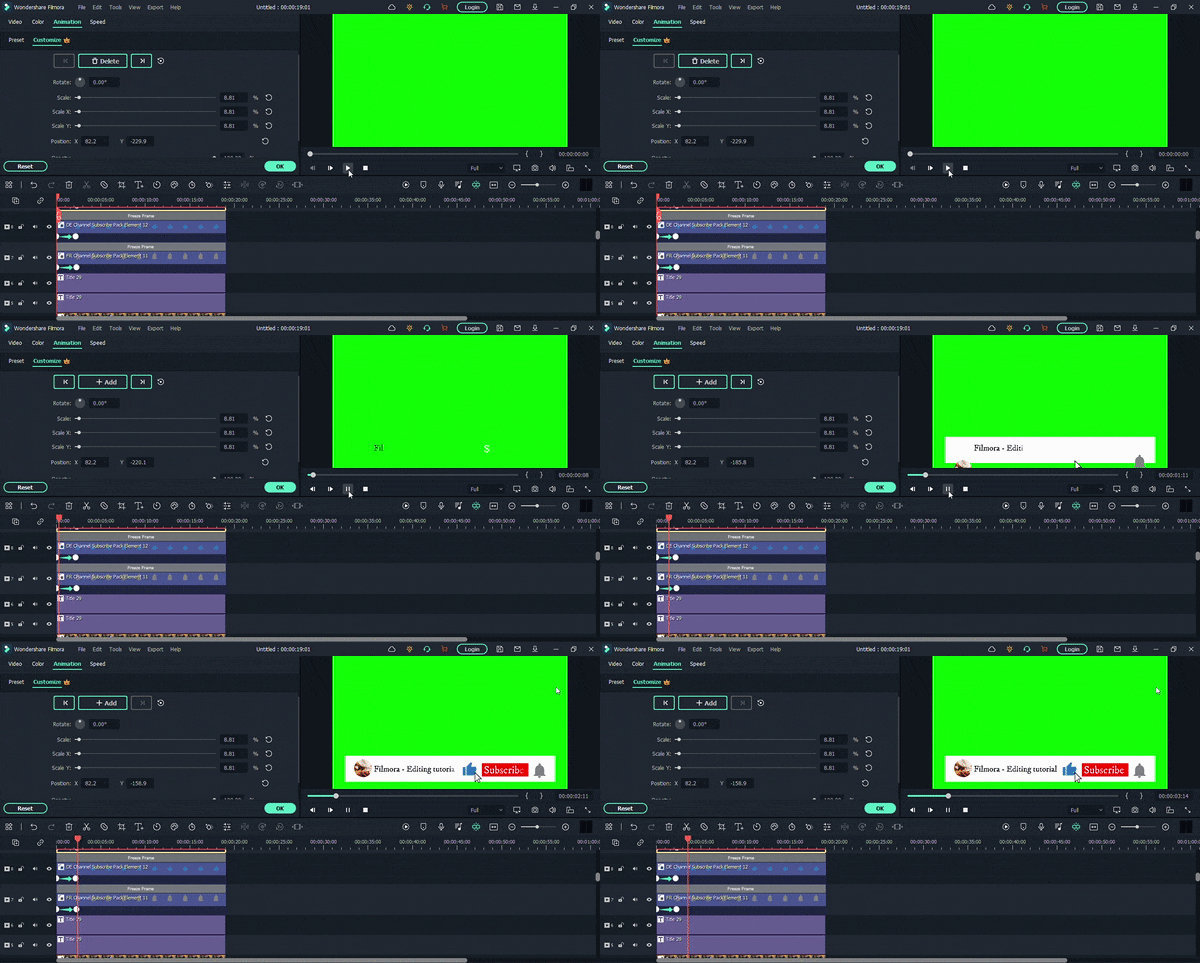
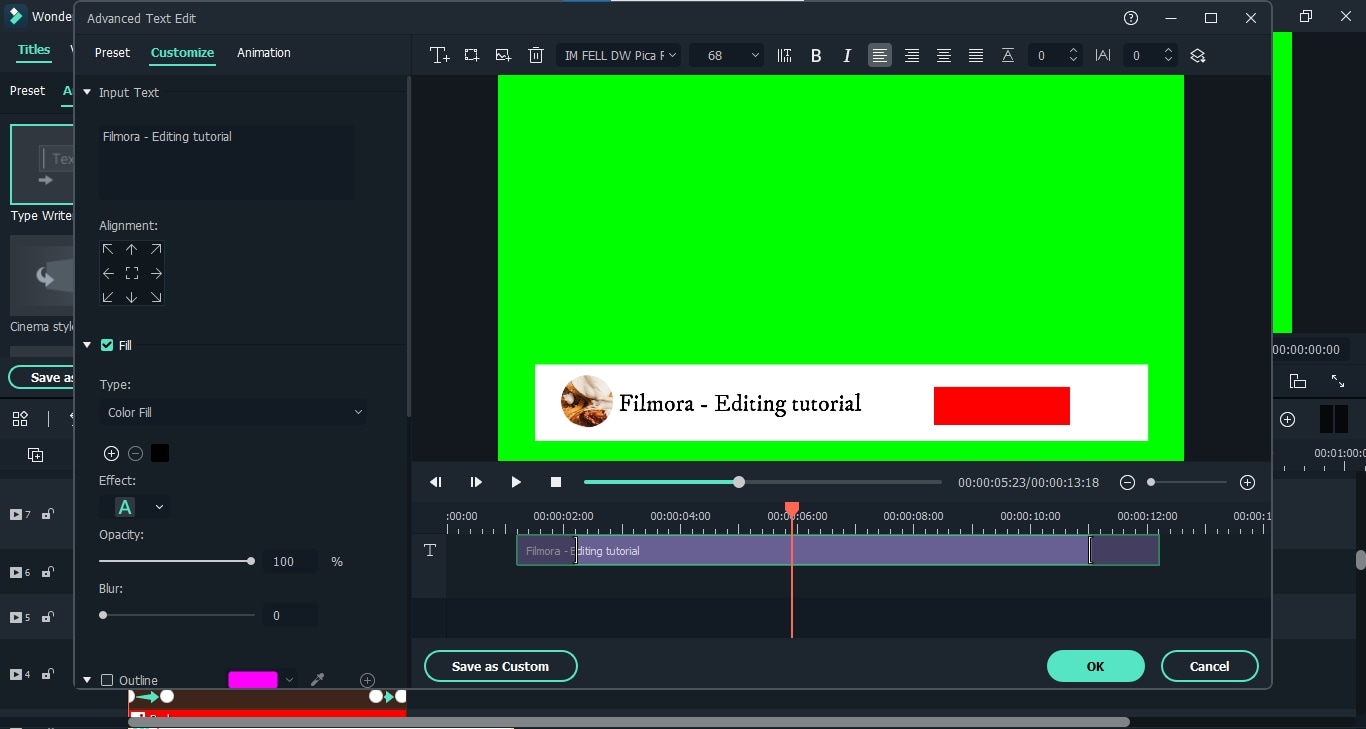
- As you can see, the text appears before the color layers. Let's correct it. Double-click the text layer. Select the" Type Writer' form and hit the "Advanced option.
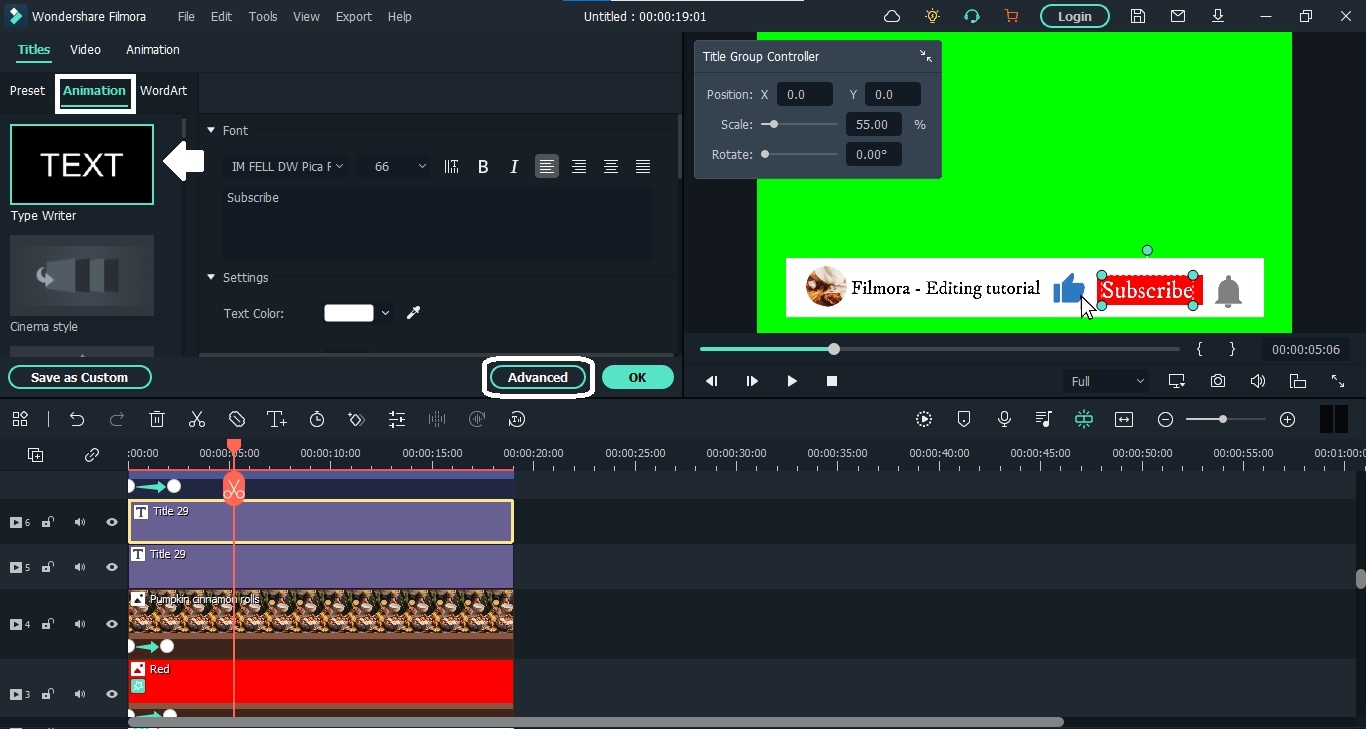
- Here, you can adjust the text with the color layers.
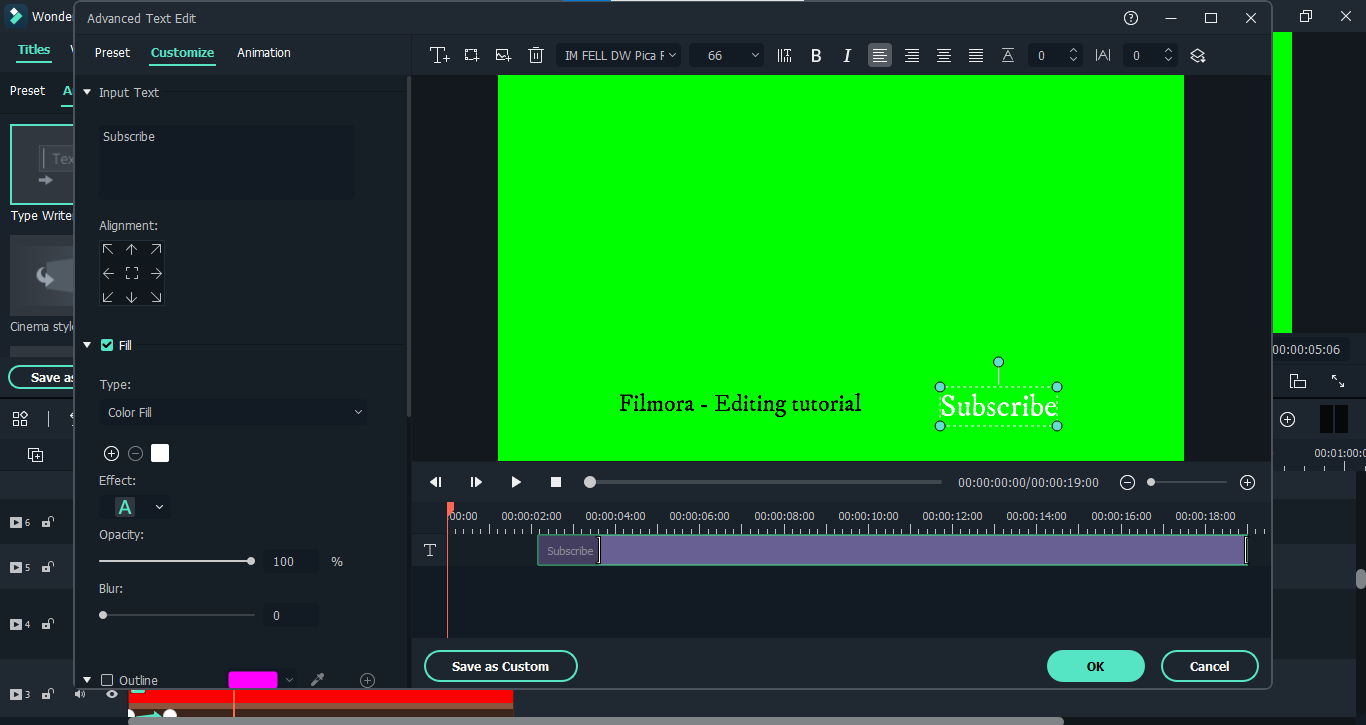
- After adjusting both the channel name and subscribe button texts, your animation will appear like this.
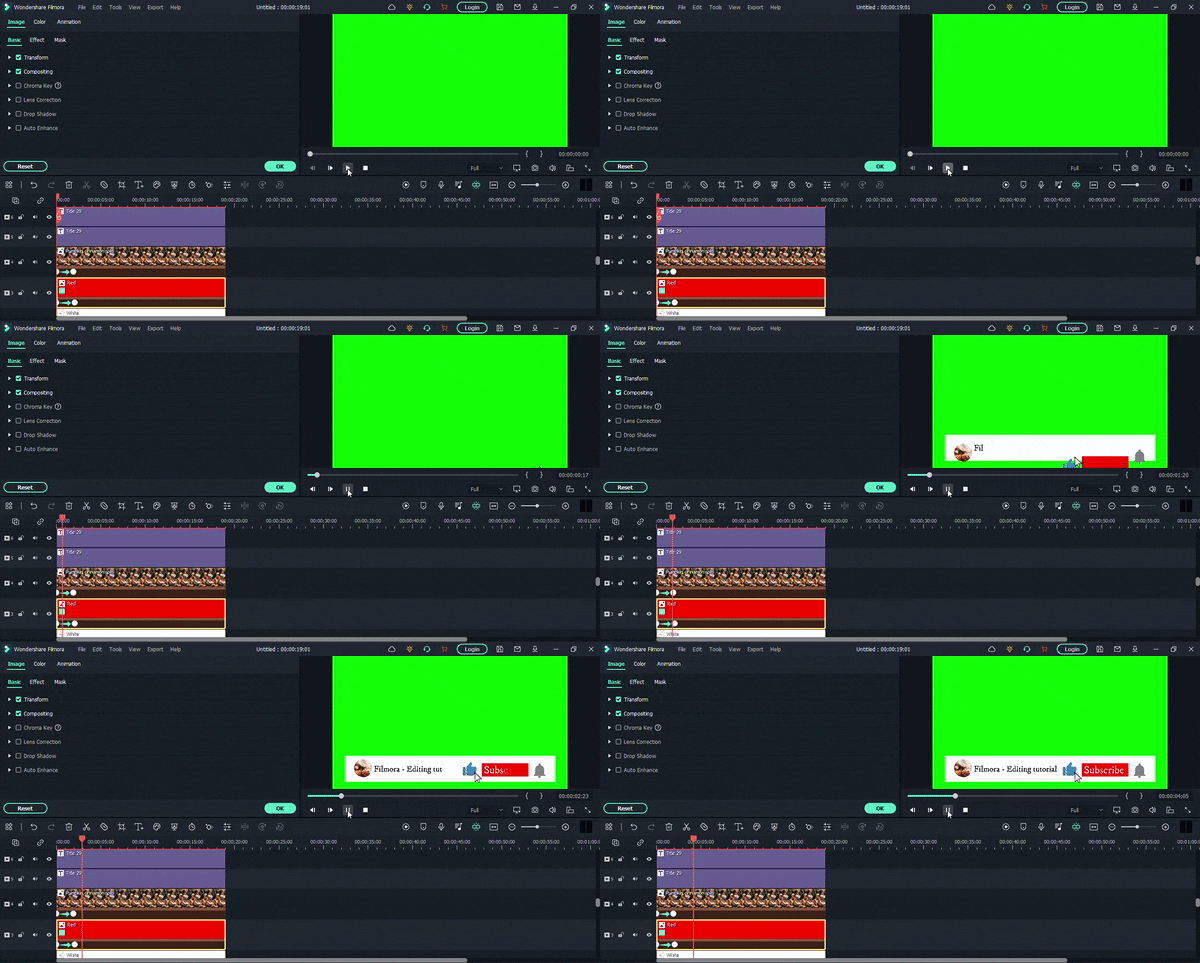
If you've managed so far, then that's great. We have done most of the work. Now we need to animate the graphics of the mouse cursor so that it clicks on the bell icon, thumb icon, and our subscribe button. The process is somewhat similar because we will need to add different keyframes. But still, let's see it in detail.
Step4 Animate the mouse cursor
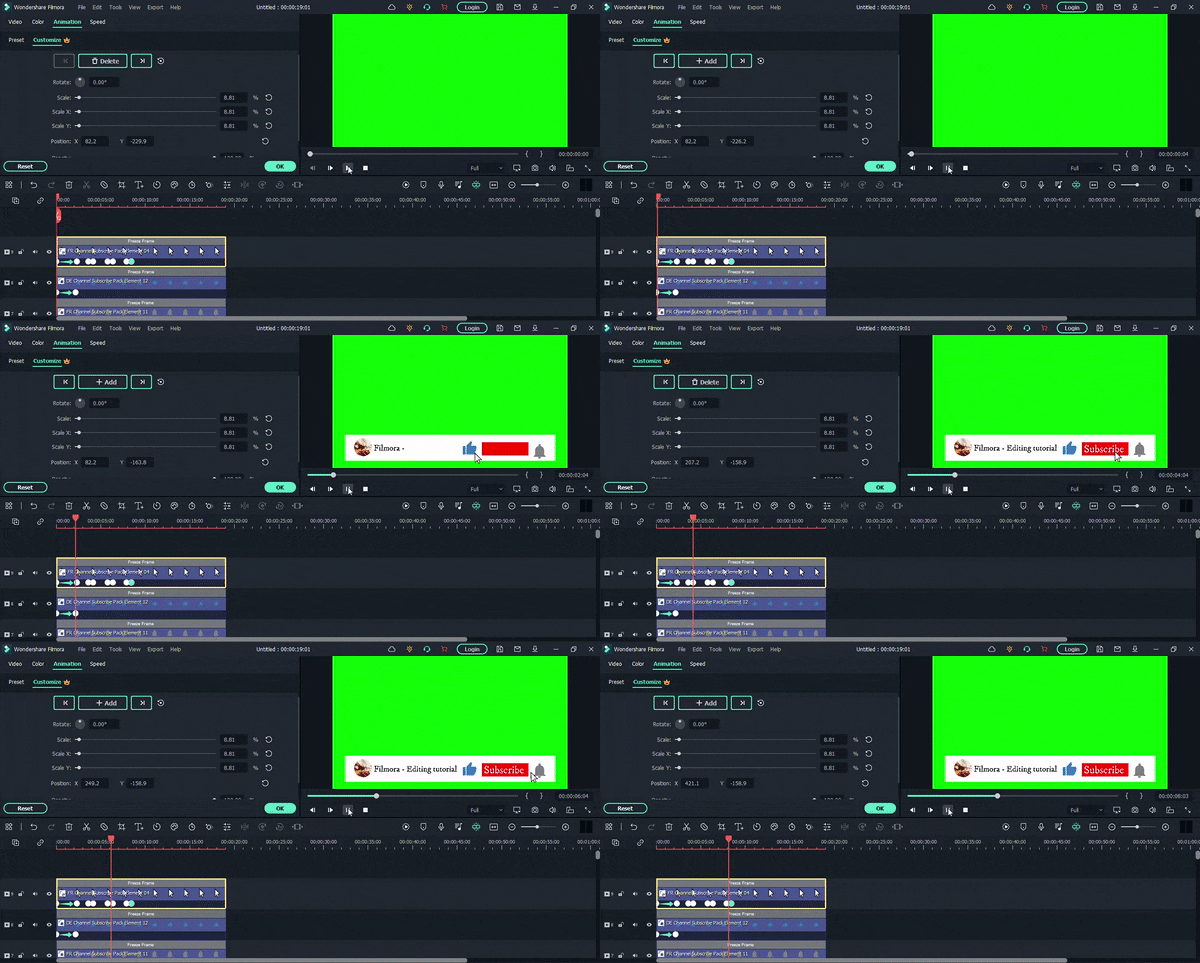
- Go to the "Mouse Cursor" icon layer and double-click on it. First, place the icon on the "Thumbs Up" so that when it animates in, it goes directly to the said icon. Then you have to add another keyframe after some time. And when you add a third one, place the "Mouse Cursor" icon on the subscribe button text.
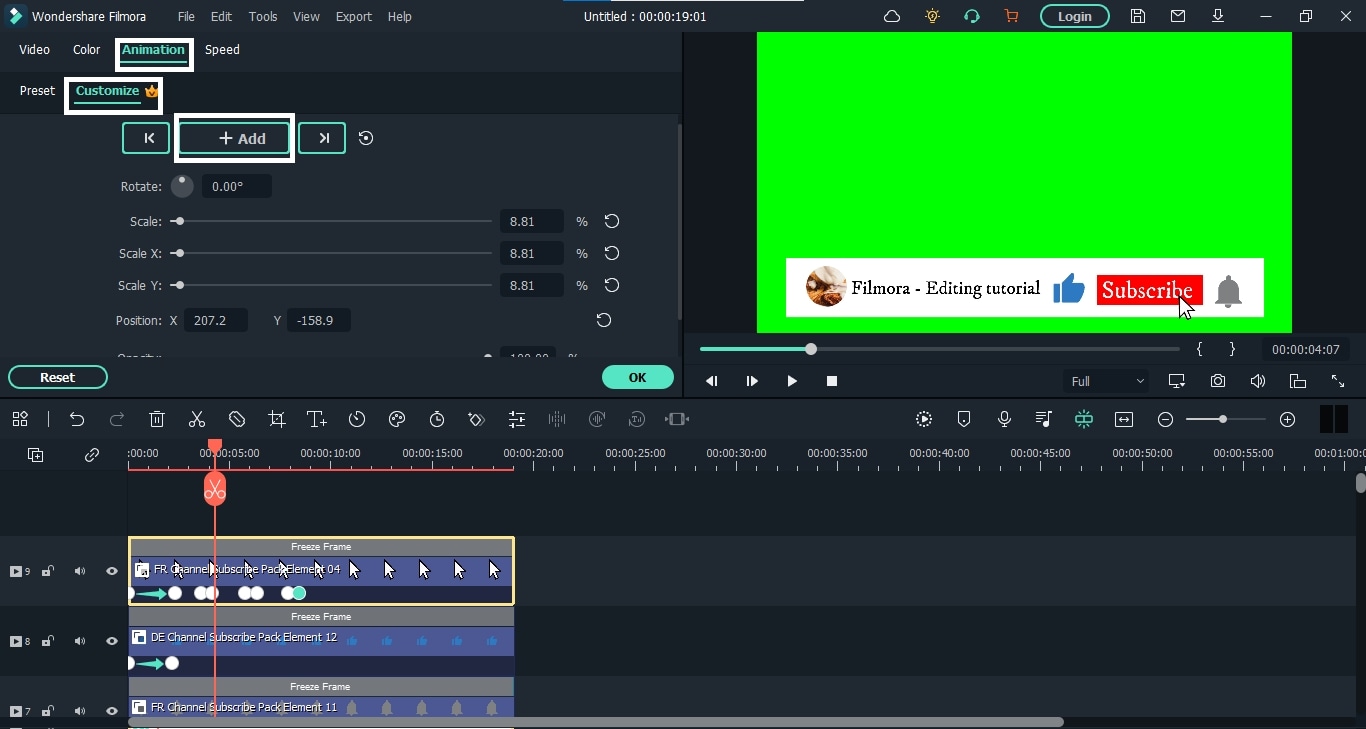
- Then add a similar pair of keyframes with some space from the last one and place the "Mouse Cursor" icon on the "Bell" icon.
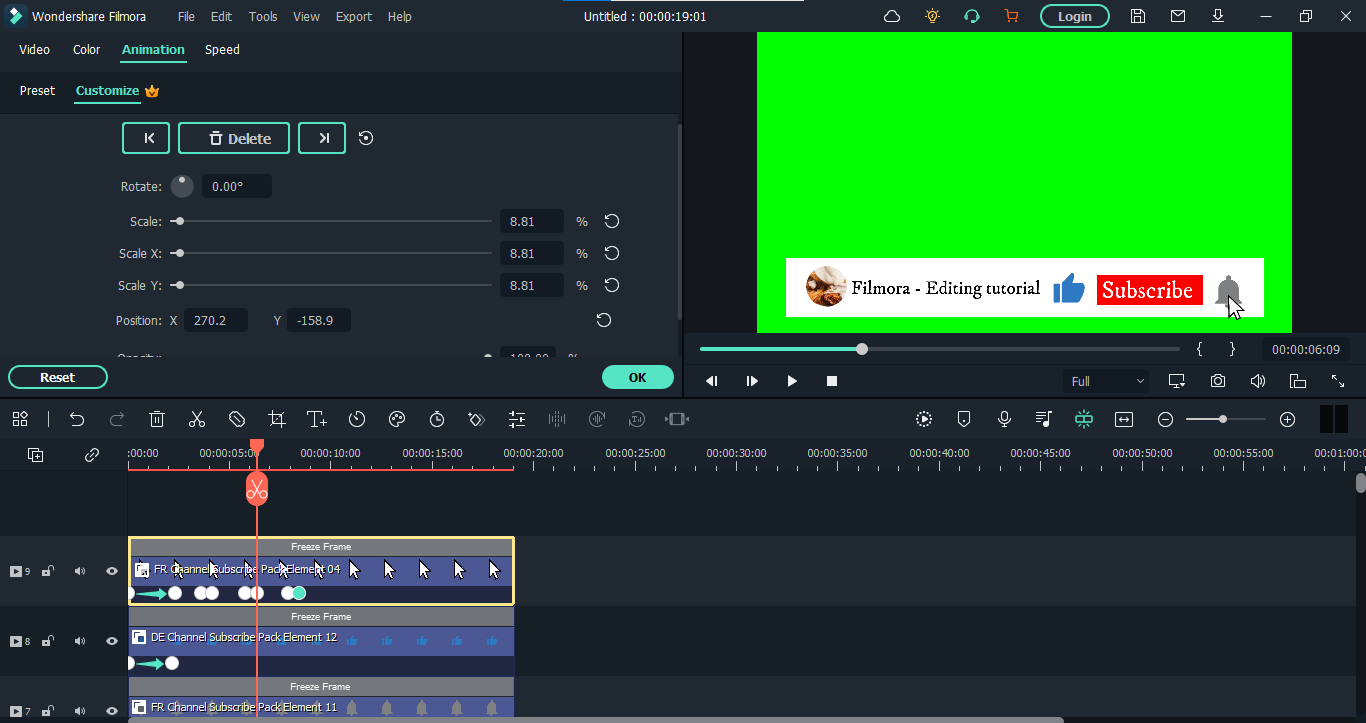
- The last keyframe we have to add will place this "Mouse Cursor" icon out of our view. After that, you need to adjust these keyframes to set the speed of the moving "Mouse Cursor' icon according to your taste.
The final product up till now will be like this.
We are nearing our end, guys. Now we just need to make the graphics animate out of our view, and our work will be done. So let's dive right into it.
Step5 Animate the graphics out
The process of animating out your graphics is like how we animated in our video. We just need to reverse those steps. So here's how it's done.
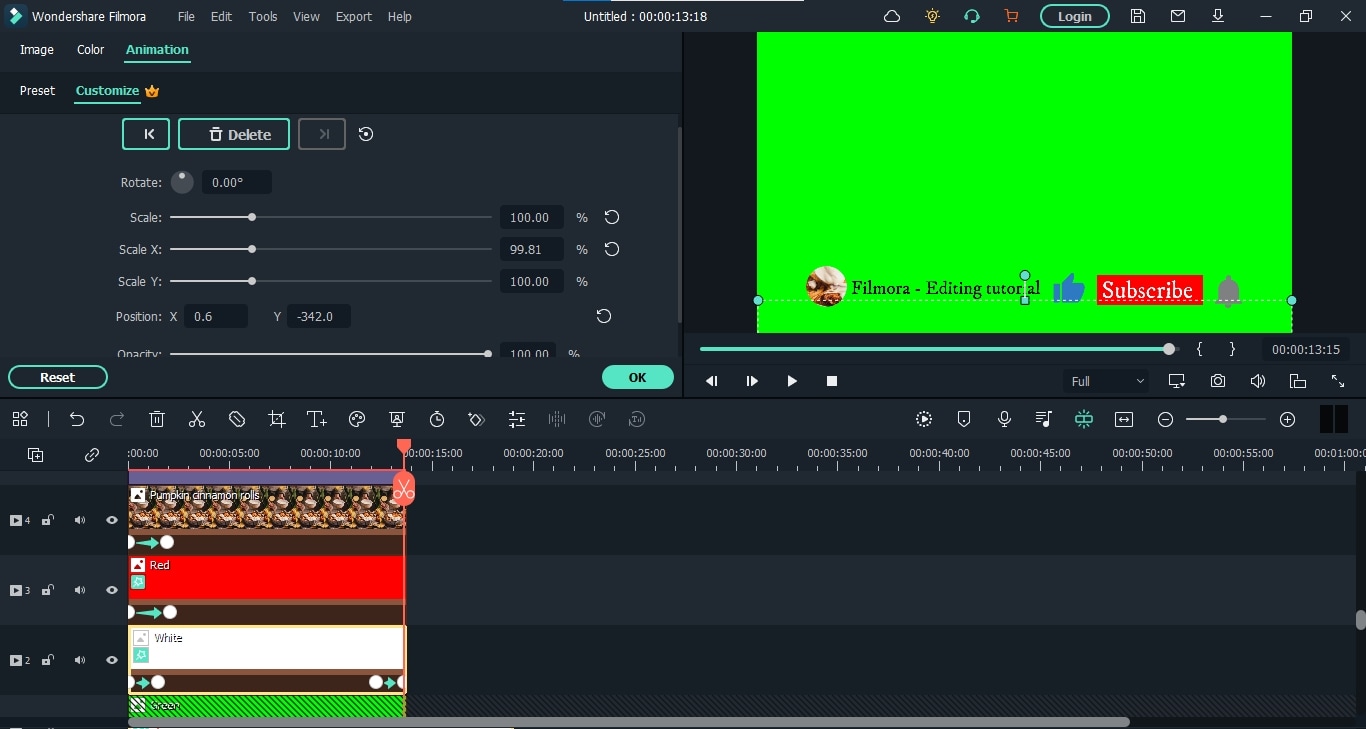
- Go to the white color layer and double-click on it to open its properties.
- Now, from the "Animation" option, add a new keyframe a little before the end of the video.
- After that, you have to add another keyframe at the end of your video. But in this keyframe, place the white color layer out of your view. Like this,
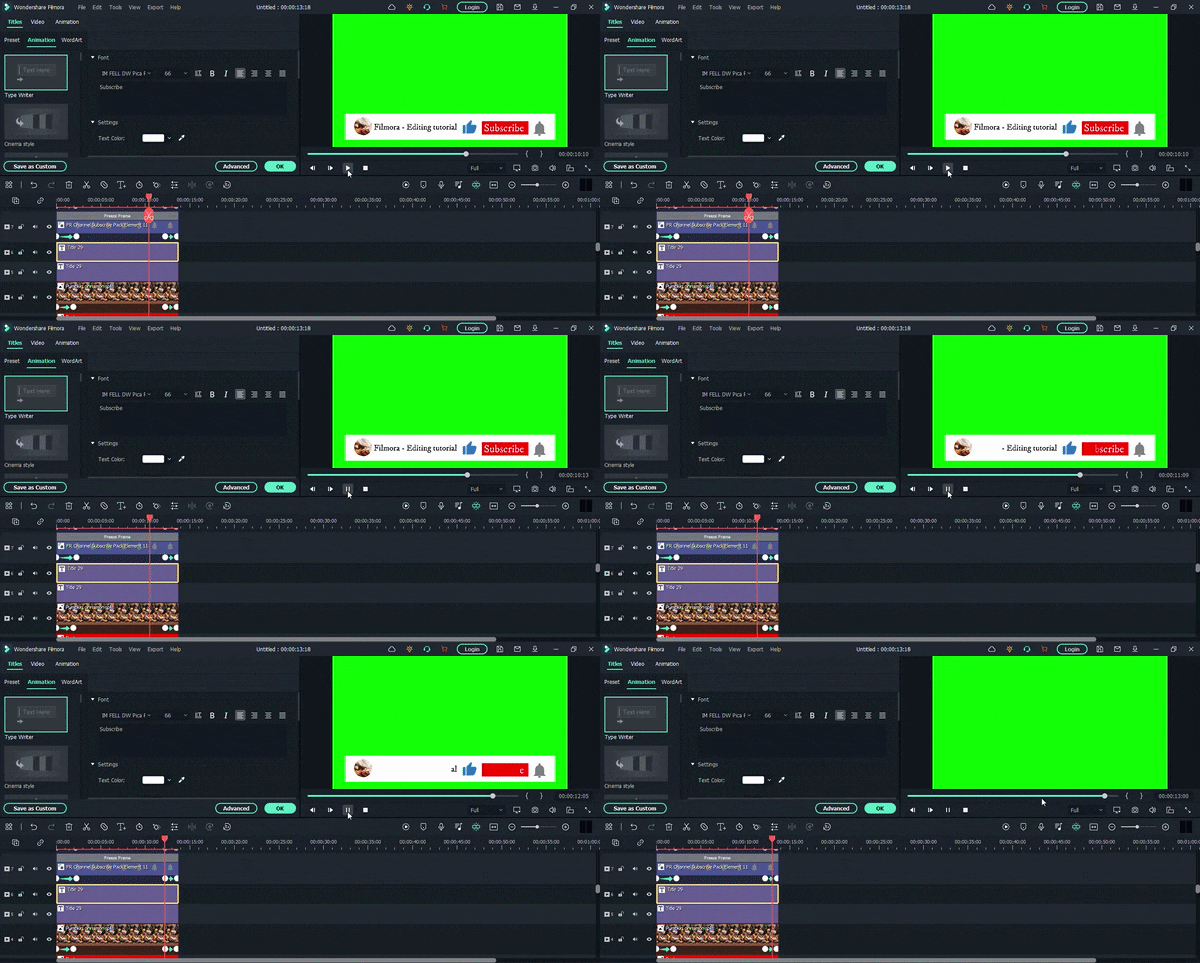
- Repeat the same steps for the red color layer, channel image layer, and icons layer.
- After it's done, the whole graphics will look like this.
- The only thing that remains is to fix the text layers. For this, double-click on the channel text layer and go to the "Advanced" settings, just like before.
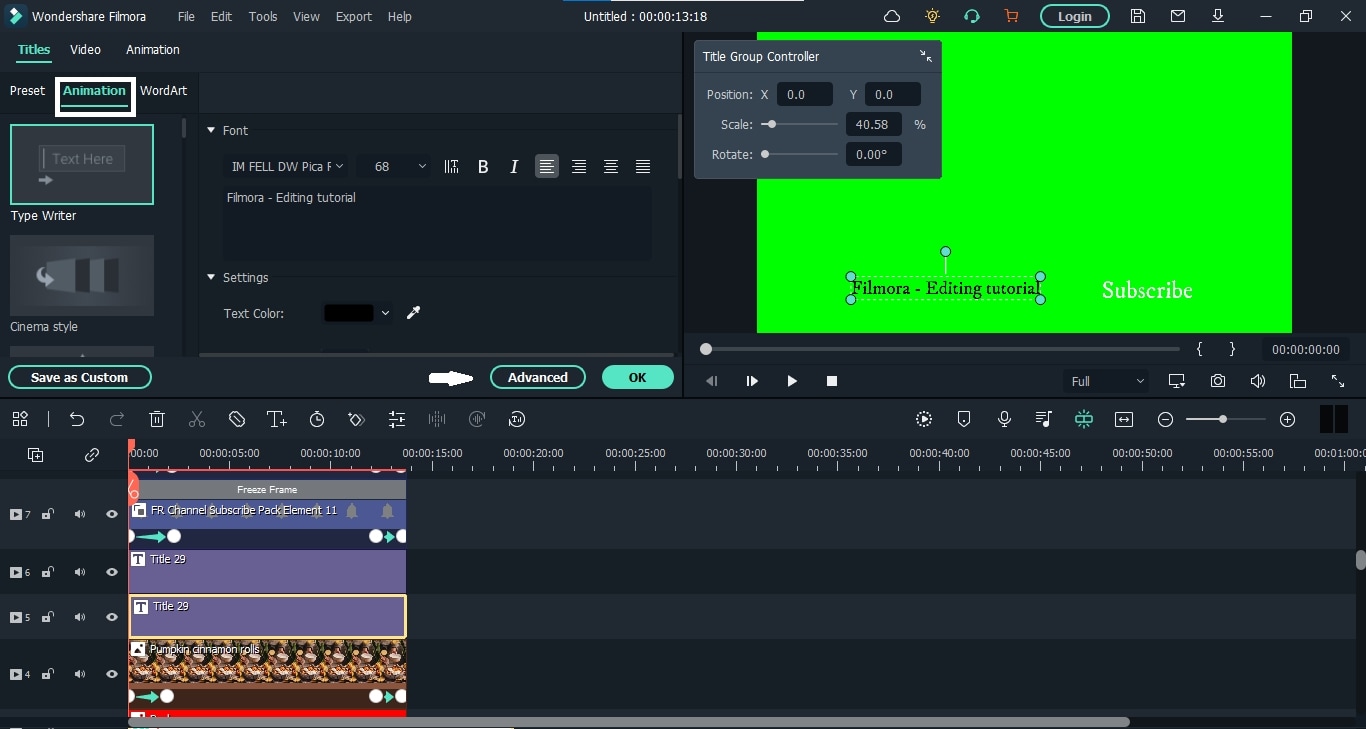
- From here, fix the text speed and end with your other graphic elements. After it's done, we will do the same for the "Subscribe" button text.
Finally, our graphic is completed. "Export" it from the software to your computer.
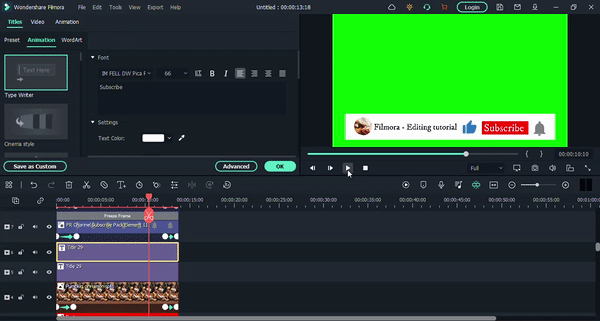
Whenever you want to use this graphic on your video, you have to import it first and enable the "Green Screen" option. It will remove the green background color. Then you can upload your video and place this graphic on it to add to the video. And that's all.
Conclusion
Creating the Subscribe channel graphics is like picking stars from the sky for any video creator, especially if you are a beginner. However, now you don't need to go for the professionals anymore. Wondershare Filmora has got you covered. So follow this detailed guide and create excellent subscribe channel graphics for your videos.


 100% Security Verified | No Subscription Required | No Malware

