


 100% Security Verified | No Subscription Required | No Malware

“I'm new to DaVinci Resolve video stabilization and could use some help finding the easiest way to stabilize a video. Can anyone recommend the best ways to stabilize video in DaVinci Resolve?” Yes, we can!
If your video content comes out shaky, don't lose your hopes just yet. DaVinci Resolve video stabilization allows you to smooth out entire sequences and stabilize your footage to calm things down and produce attention-grabbing video clips.
Today, we'll discuss the four most reliable video stabilization methods to help you learn how to use this app to stabilize your video footage. For your information, we'll recommend an alternative solution to DaVinci Resolve video stabilization.
In this article
What is the DaVinci Resolve stabilizer?
DaVinci Resolve stabilizer or video stabilization is a function that lets you minimize or eliminate the instability and shakiness in your video content. This feature is incredibly effective for stabilizing handheld footage or video clips shot in challenging conditions where keeping a steady camera is not an option.
Davinci Resolve video stabilization achieves the stabilizing effect using advanced algorithms to analyze your footage, detect motion, and then adjust the video's zoom, rotation, and position parameters to reduce unwanted movement, thus accomplishing image stabilization.
The stabilizer feature empowers DaVinci Resolve users to transform shaky video footage into professional-grade, stable video content for online streaming and social media platforms. Thanks to its fantastic video stabilization capabilities, you can fix shaky videos with a few simple clicks.
Now, let's see how you can use the four most effective video stabilization methods to stabilize a video in DaVinci Resolve.
How to stabilize videos in DaVinci Resolve
DaVinci Resolve provides access to several video stabilization modes, including translation, similarity, and perspective. Each method is designed to handle different kinds of video clips. For example, the translation video stabilization mode is ideal for adjusting position changes.
On the other hand, perspective is the most reliable method for getting complete control over three-dimensional position adjustments. In addition, you can make additional stabilization adjustments by fine-tuning specific settings to amplify and enhance the stabilization effect.
Below is our step-by-step guide to stabilizing your video footage using the top four video stabilization methods in DaVinci Resolve.
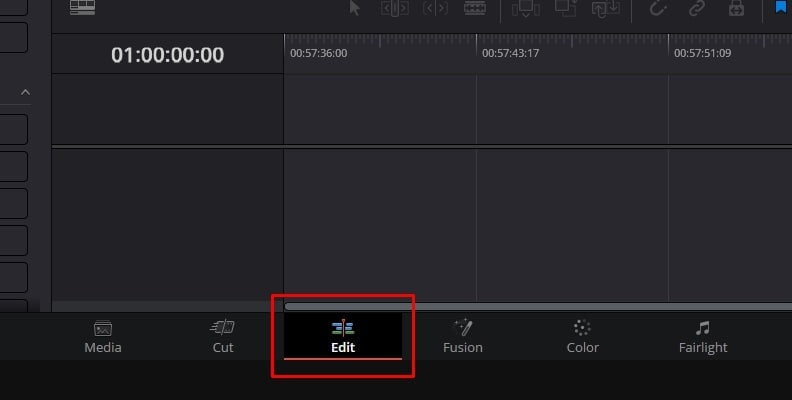
Stabilize video through the Edit tab
The Edit method is fast and intuitive, giving you a decent amount of control over your changes. However, it is somewhat limited regarding the stabilization approach and may not be a suitable solution if you're aiming for advanced stabilization.
Follow the steps below to use the Edit tab to stabilize your video footage in DaVinci Resolve.
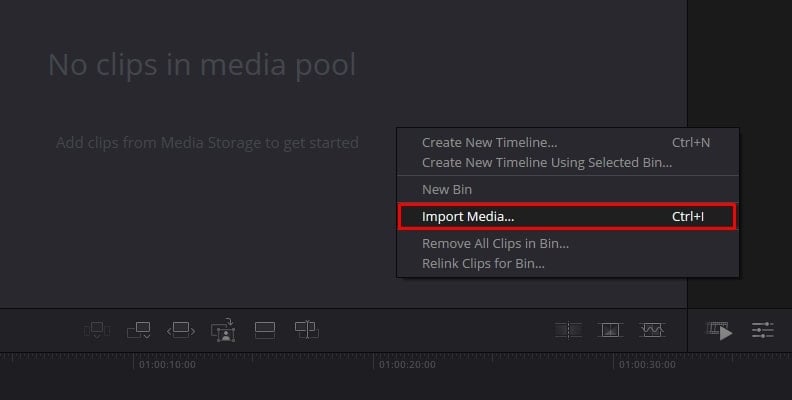
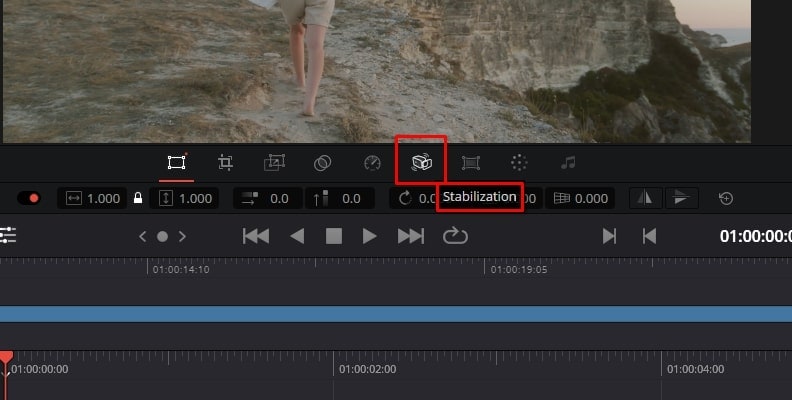
Step 1: Launch DaVinci Resolve and select New Project > Import Media to import your footage into the timeline;
Step 2: Click the clip to select it and open the Inspector window;
Step 3: Select the Edit tab and drag the shaky video clip from the media pool;
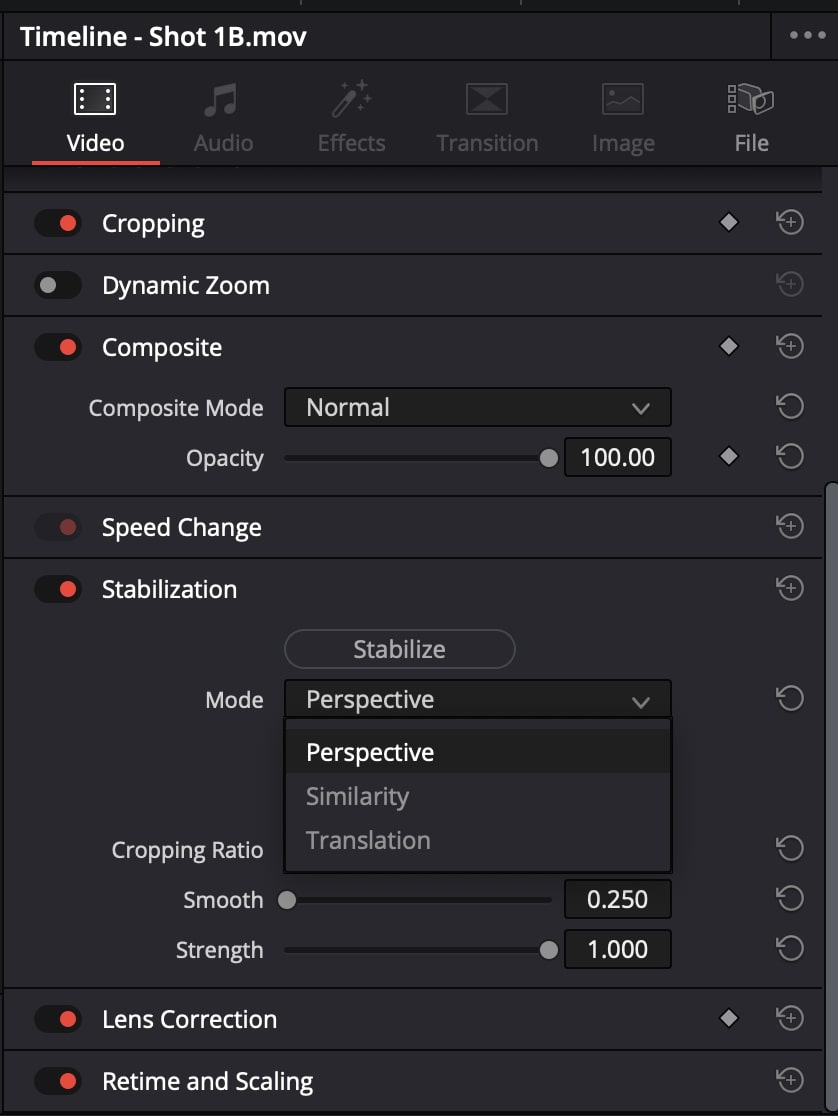
Step 4: Click the clip in the timeline and navigate to Inspector > Stabilization to access stabilization settings;
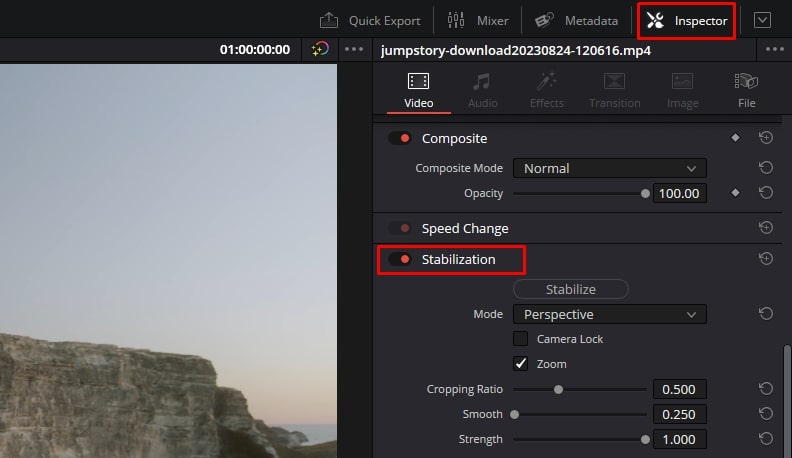
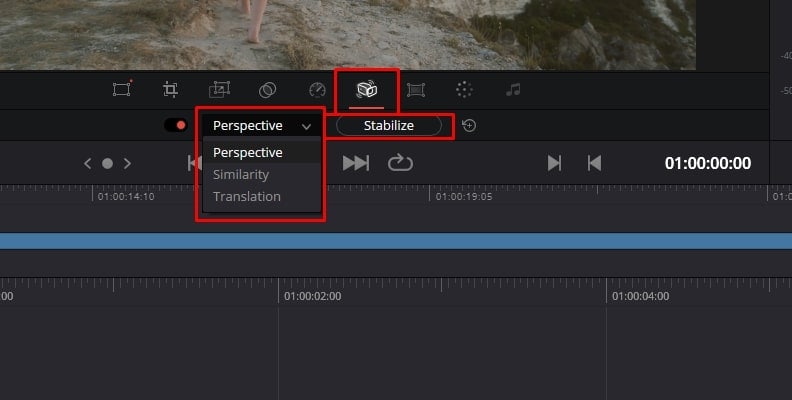
Step 5: Select the preferred Stabilization mode:
1. Perspective – maintain video perspective by using rotation, zoom, tilt, and pan to reduce jitter and stabilize your footage;
2. Similarity – uses the same settings as the Perspective mode in a more sophisticated manner;
3. Translation – make fine adjustments in your video's X and Y areas using tilt and pan analysis.
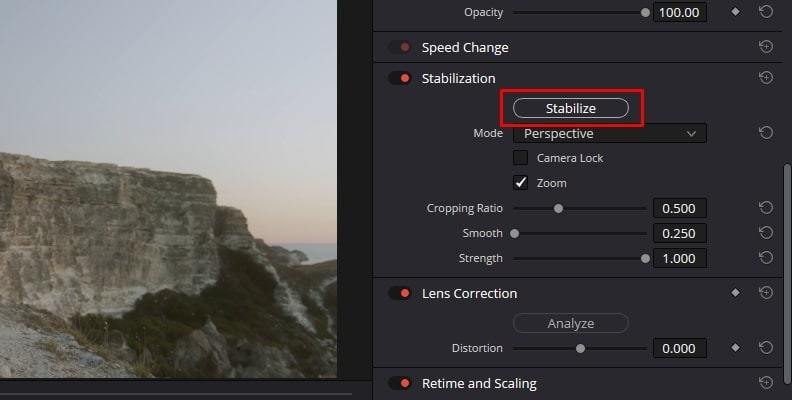
Step 6: Use Camera Look to reduce shakiness by simulating a tripod setting;
Step 7: Use Zoom to mask the artifacts caused by the stabilization effect;
Step 8: Select Stabilize to apply your changes and wait for the program to analyze and remove the shaky moments from your video.
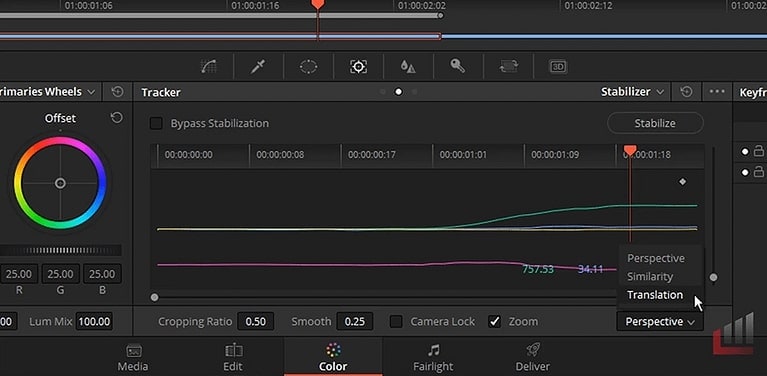
Stabilize video through the Color tab
The Color tab offers the tracker feature you can use to stabilize your video. You can find this tab right next to the Edit tab. Once you access it, you'll see many coloring tools you can use to achieve an advanced video stabilization effect.
Here are the steps:
Step 1: Import your video in DaVinci Resolve and move it to the timeline;
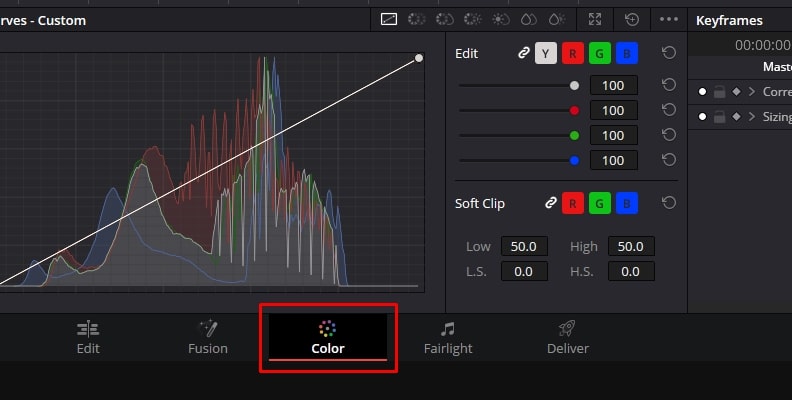
Step 2: Select it and click the Color tab;
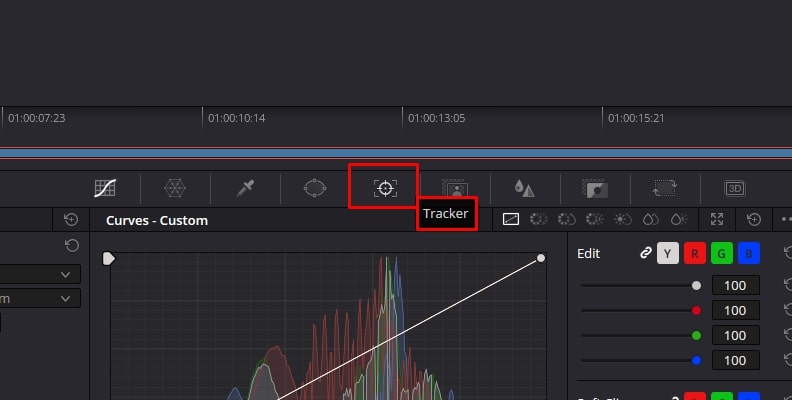
Step 3: Launch the Tracker window;
Step 4: Navigate to the Stabilizer menu and select the video stabilization mode (Perspective, Similarity, Translation);
Step 5: You can also access other settings like Smooth, Camera Lock, Zoom, etc.;
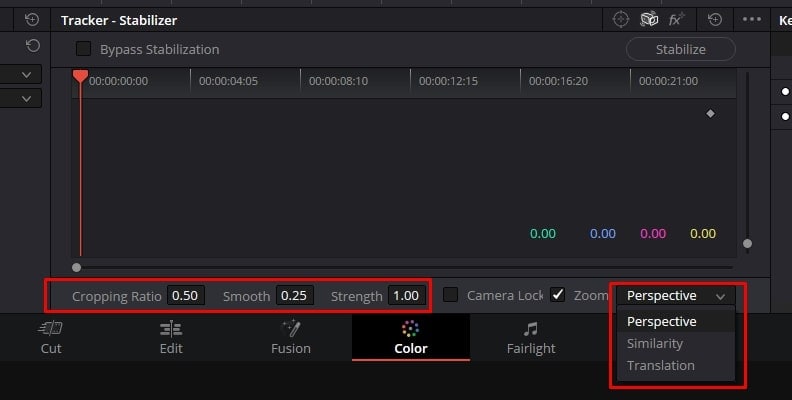
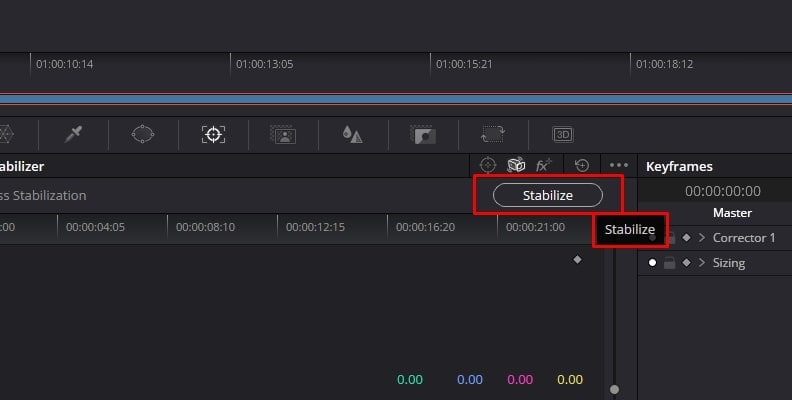
Step 6: Once you're done, click Stabilize and allow DaVinci Resolve to analyze and stabilize your footage.
Stabilize video through the Cut tab
The Cut video stabilization method may be the easiest solution, but it gives you less control over your changes.
Here's how to use it:
Step 1: Import your video in the timeline and select it;
Step 2: Navigate to the three-slider icon and access the Tools menu;
Step 3: Click the Cut tab;

Step 4: Click the Stabilization button to access the menu;
Step 5: Select the stabilization mode you wish to apply and click Stabilize.
Stabilize video using Fusion
If the stabilization options in the Edit page don't produce the desired results, you can achieve advanced stabilization using the Fusion Planar Tracker tracking tool in Davinci Resolve. The tool lets you track even surfaces and add effects on top of them.
Here's how.
Step 1: Import your video into the timeline and select it;
Step 2: Open the three-slider menu and choose Tools > Fusion;
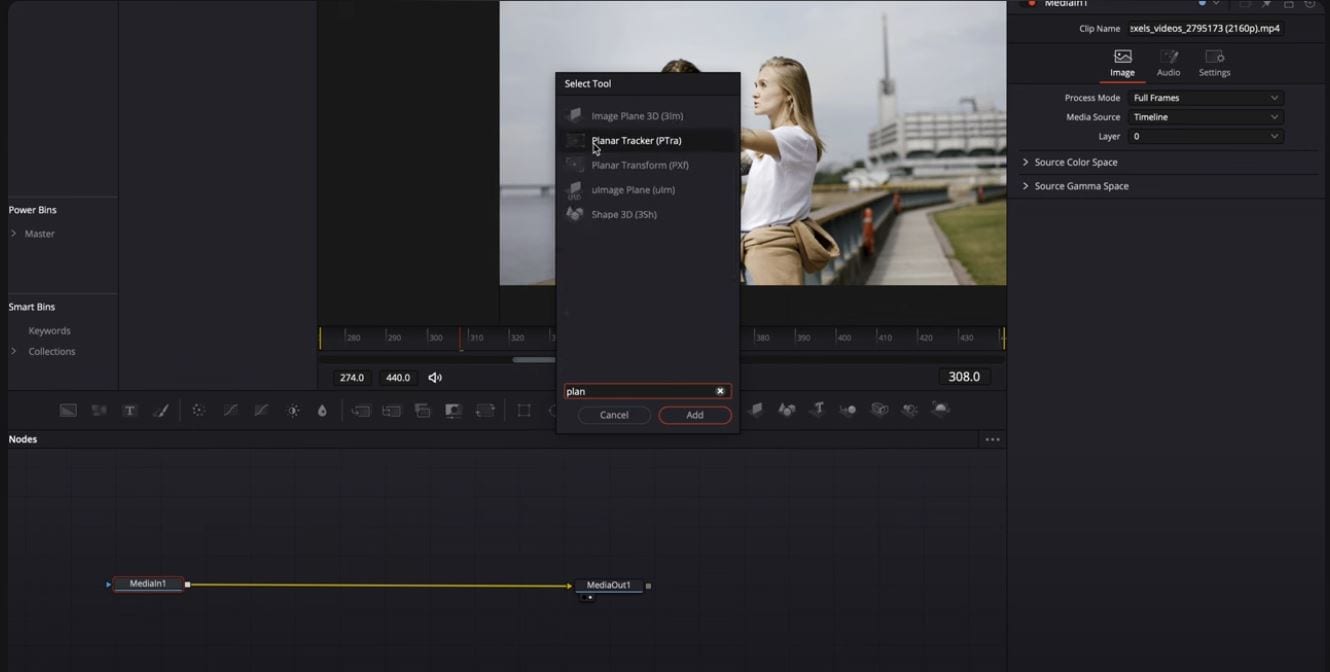
Step 3: Navigate to the Nodes section and click Median 1;
Step 4: Press Shift + Spacebar, type Planar Tracker in the search bar, and click Add;
Step 5: Navigate to the Planar Tracker window on the right side and select Translation, Rotation in the Motion Type menu;
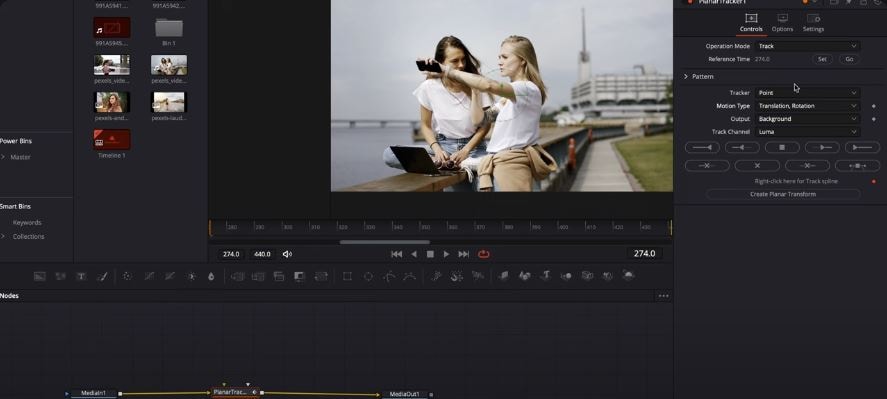
Step 6: Select the most stable-looking area in your footage by clicking on the video image in the Preview window;
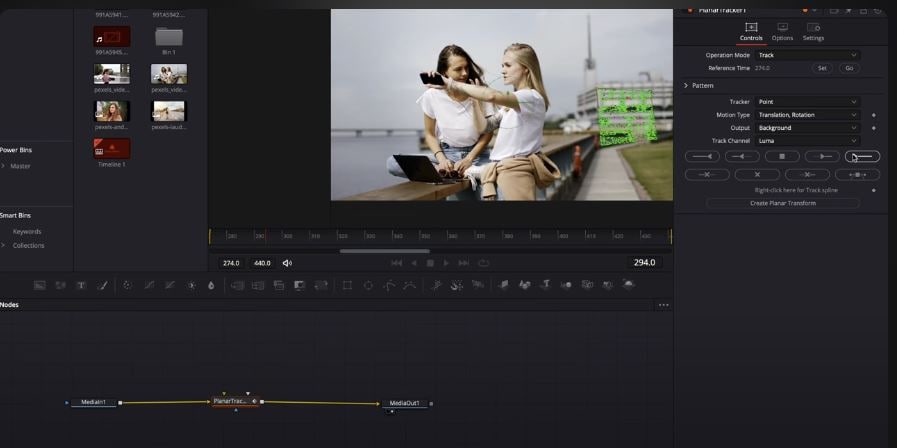
Step 7: Click the Track to end button to track the selected area;
Step 8: Now, navigate back to the Operation Mode and select Stabilize from the menu;
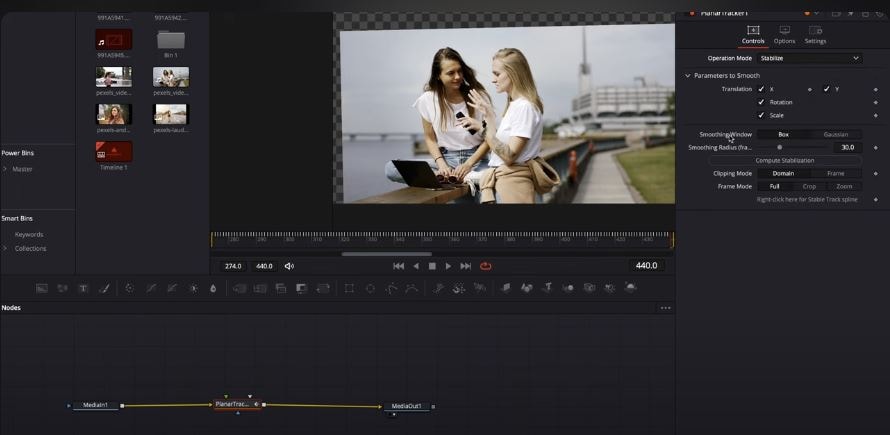
Step 9: Adjust the Smoothing Radius slider to fine-tune the stabilization effect;
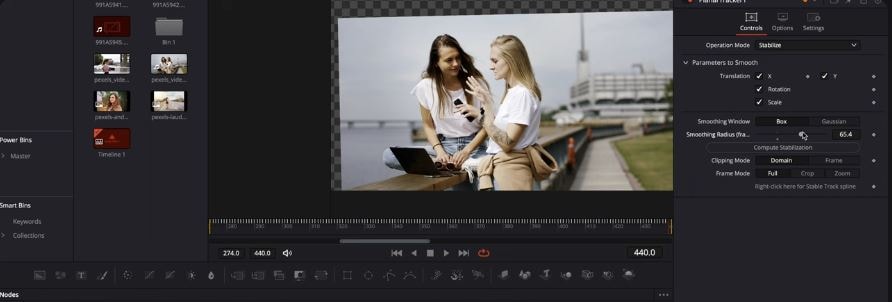
Step 10: Click Compute Stabilization to stabilize your video;
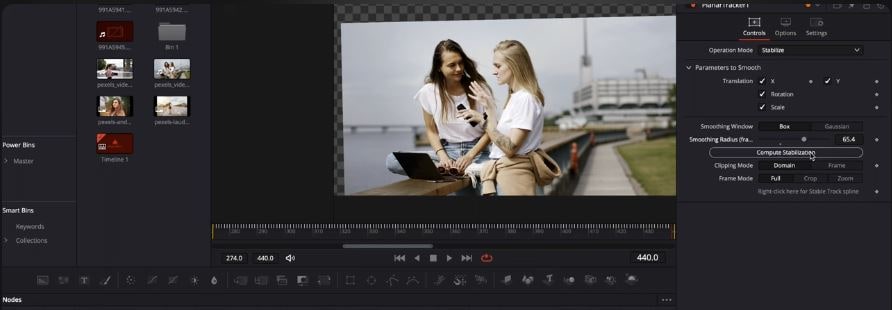
Step 11: Expand the Zoom menu and click Auto Zoom to complete the video stabilization process.

The pros and cons of using DaVinci Resolve to stabilize your videos
Though DaVinci Resolve offers multiple video stabilization modes, the tool isn't perfect. It has good and bad sides, just like all other video editing tools. With that in mind, let's quickly summarize the pros and cons of DaVinci Resolve video stabilization for your information.
Wondershare Filmora – The best DaVinci Resolve alternative for video stabilization
If you don't find DaVinci Resolve video stabilization to your liking, consider using an alternative solution like Wondershare Filmora. Filmora is an all-encompassing AI-powered video editing software platform with high-end stabilization features you can use to smooth out shaky footage.
Its intuitive interface and transparent stabilization settings let you stabilize your video footage with a few simple clicks. In addition, Filmora offers multiple AI-enabled editing tools, including the option to export the stabilized videos in any format you prefer, such as MP4, WMV, MKV, etc.
Filmora also supports direct share options for online streaming and social media platforms. If you're looking for a simple and easy video stabilizer for your footage, Filmora might be right up your alley.
How to stabilize videos with Filmora
Download and install Filmora on your computer, then follow the steps below to stabilize your video clips.
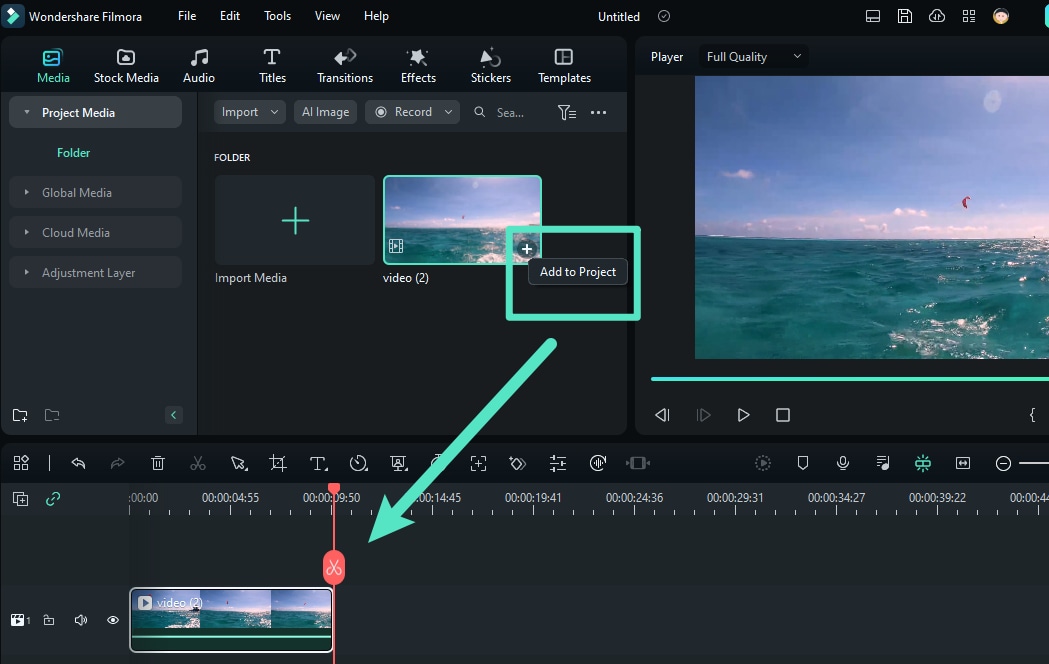
Step 1: Lunch Filmora and drag and drop your video to the timeline;
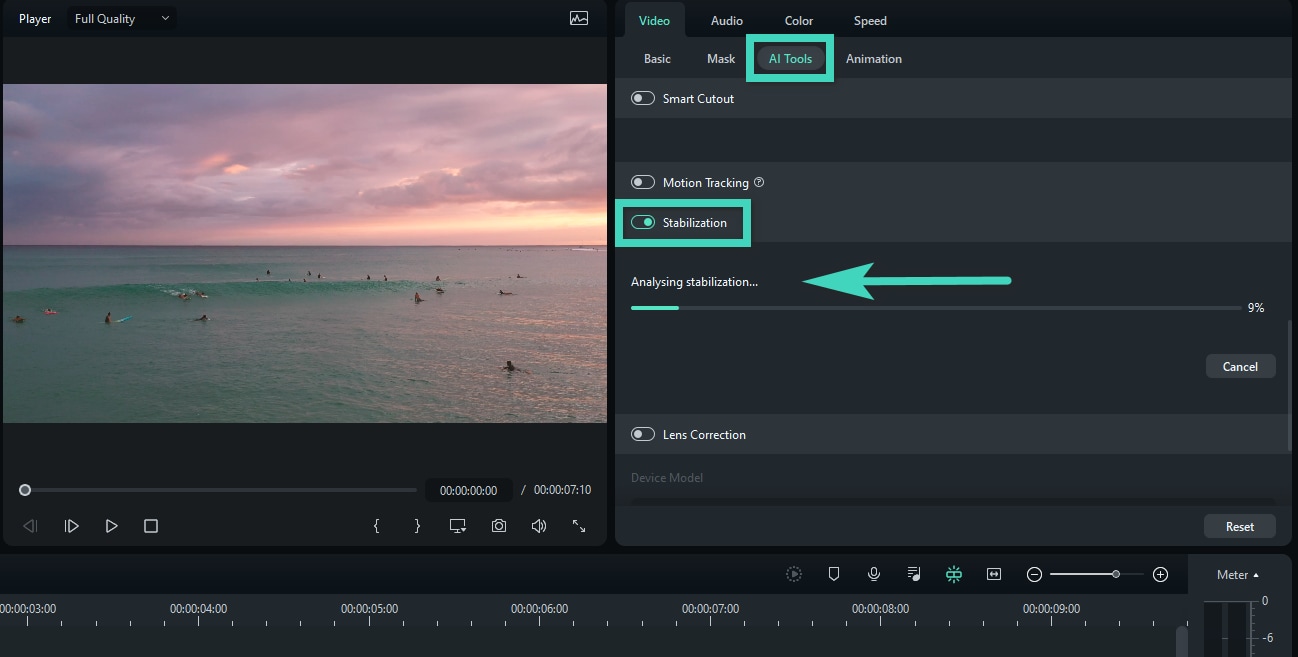
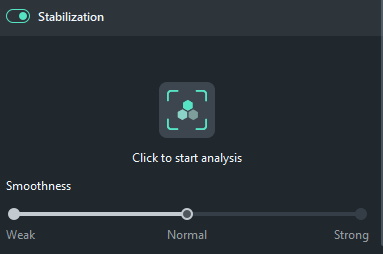
Step 2: Click the clip in the timeline and navigate to Video > AI Tools;
Step 3: Enable the Stabilization feature and allow Filmora to analyze your footage automatically;
Step 4: Adjust the Stabilization settings such as Smooth Level;
Step 5: Select the Edge Processing mode (Extend, Reflect, None, or Tile);
Step 6: Export and save the stabilized video on your computer.
How to avoid shaky footage – top tips and tricks
Remember that the quality of your video footage greatly determines the level of success of your video stabilization. You can use the best video stabilizer in the world, but it won't mean much if your original content is unusable.
So, the trick is to avoid capturing shaky footage to improve your video stabilization chances and ensure you end up with professional-grade content.
Here are a few tips to help you get there:
- Shoot your videos in a well-lit environment to streamline the video stabilization process;
- Avoid shooting videos in low-light conditions as they make the stabilization process more difficult for the software;
- Low-light videos may come out as jittery even after you apply the stabilization effect;
- Experiment with different depth of field settings to find the matching look for your video footage, making it easy to stabilize your clips according to your specific requirements (deeper settings give you a flatter look while shallow depth of field creates the cinematic look);
- Use a tripod for capturing static shots or a gimbal for dynamic shots;
- Find the right position when shooting a video to avoid getting out of balance;
- Hold the camera close to your body to keep it as stable as possible;
- If you plan to pan the camera while shooting, move your body too to capture motion naturally;
- Avoid extensive zooming when shooting freehand, as it can produce noticeable video shakes.
Conclusion
DaVinci Resolve video stabilizer is an excellent tool for transforming shaky footage into top-class, shareable content. Instead of wasting time, effort, and resources hiring expensive video editing professionals, you can use the user-friendly DaVinci Resolve stabilizer to eliminate shakes from your clips and polish your footage to perfection.
DaVinci Resolve offers four reliable video stabilization methods, each serving a unique purpose. Stabilizing video using the Edit tab is the simplest, easiest way to eliminate the annoying jitters from your footage. The Cut tab is the fastest method and most suitable for making quick changes to your content.
On the other hand, the Color and Fusion methods require a decent level of know-how but aren't overly complicated. If you're looking for a more straightforward way to stabilize your footage and get more control over the stabilization effect, we recommend opting for the AI-powered Wondershare Filmora video editor.
Filmora can do the same things as DaVinci Resolve in a simpler manner. Instead of navigating through complex menus and confusing settings, Filmora brings all video stabilization controls under one roof for a more streamlined user experience.
