


 ChatGPT
 Perplexity
 Gemini
 Claude
 Grok
Grok
Unwanted marks from dust, grains, or other background noise in your videos can be frustrating to see. Some of it can be shrugged off. However, others are visible enough that they pose a distraction to the overall look of your project. Sure, there can be preventive measures to ensure this does not happen, but when it’s already done, it’s up to the editing room to fix things. Having a clean-looking video improves your overall quality, whether you’re in business, social media, or any other content creation work in general is a must. There’s no need to worry though, as there are tools you can use to remove marks from video> effectively. These tools have advanced editing capabilities to help you create spot-free content in no time. Dive in and uncover their capabilities, features, and a bonus guide on how to use them for spot removal purposes.
In this article
Part 1. Why are Clean Videos Important?
Video marks may come from different sources. In some cases, it may have been acquired during the filming stage. Some examples are lens dirt and environmental factors like dust, leaves, bugs, or other external items that may have been captured when the video was taken. Some of these marks can be prevented, while some are unavoidable. This is why it’s important to know what to do post-shoot so you can remedy the situation.
Here are some reasons why it’s worth it to remove spots from the video:
- Create a Professional Appearance: A clean, less visually noisy video shows well-polished, sleek, expertly done content, and therefore believable.
- Improve Viewer Experience: There’s less distraction for your viewers, letting them focus on the subject you want to highlight in your video.
- Elevate Brand Image: Overall, your video’s appearance sets the tone you want to establish with your brand and the image you want your customers to associate with.
Part 2. Remove Marks from Video in Filmora [For Both Beginners and Professionals]
If you’re looking for an editor with advanced capabilities but is easy to use and navigate interface at the same time, you don’t need to look further than Wondershare Filmora. It’s the best editing software suited for beginners and professionals alike. Rarely do you see a tool that caters to both expert levels but still offers the same high-quality results. Here are other reasons why it should be at the top of your list:
- User-friendly interface: Requires a shorter learning curve than other equally advanced editing software, intuitive platform design giving you a convenient editing experience.
- Compatibility across multiple platforms, such as desktop (Windows and Mac), tablet, and mobile. This gives you the flexibility that you need for your projects.
- Advanced Editing Tools for video and audio needs, including AI Tools to boost productivity in your work
- Diverse resources of video effects, filters, stock media, graphics, stickers, audio tracks, and more to enhance your creativity.
For spot removal in the video, Filmora has an AI Object Remover tool that can instantly remove unwanted objects in your video. To see it in action, here's a detailed guide below:
Step 1. Go to Filmora’s website and click on the ‘Get Started for Free’ button to download the installation file. Follow the steps provided in the newly-opened tab to successfully install the software in your desktop.
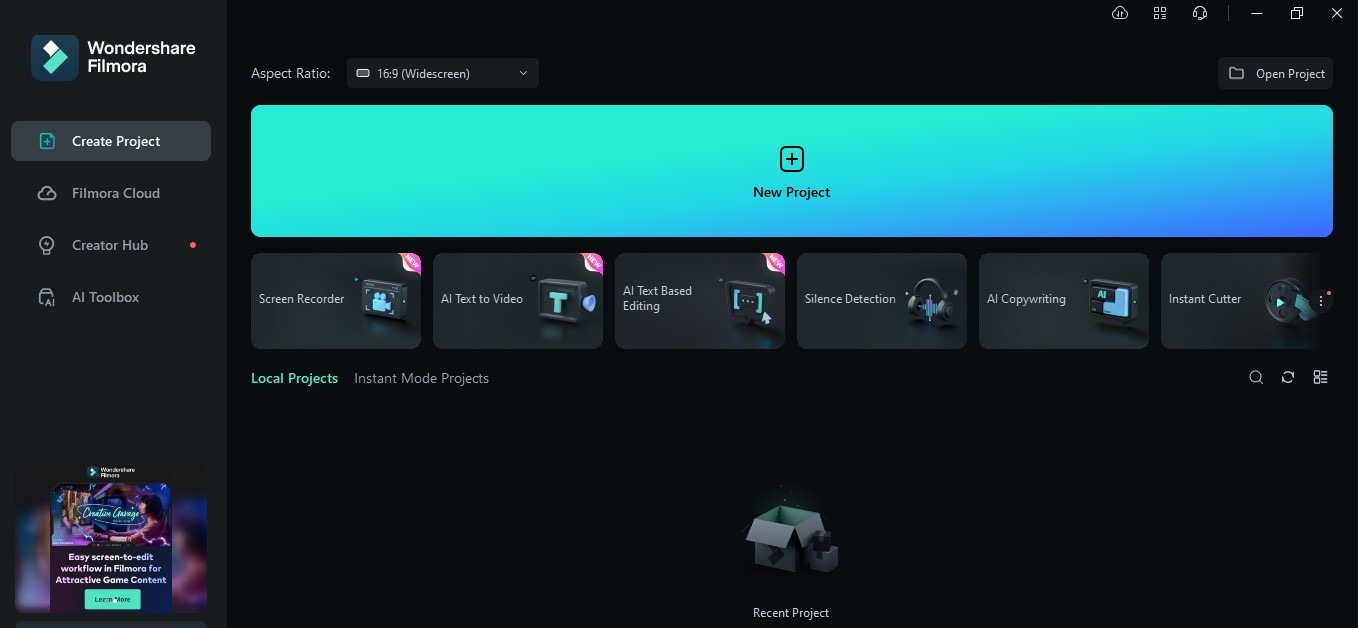
Step 2. Open your Filmora software and head over to ‘New Project’.
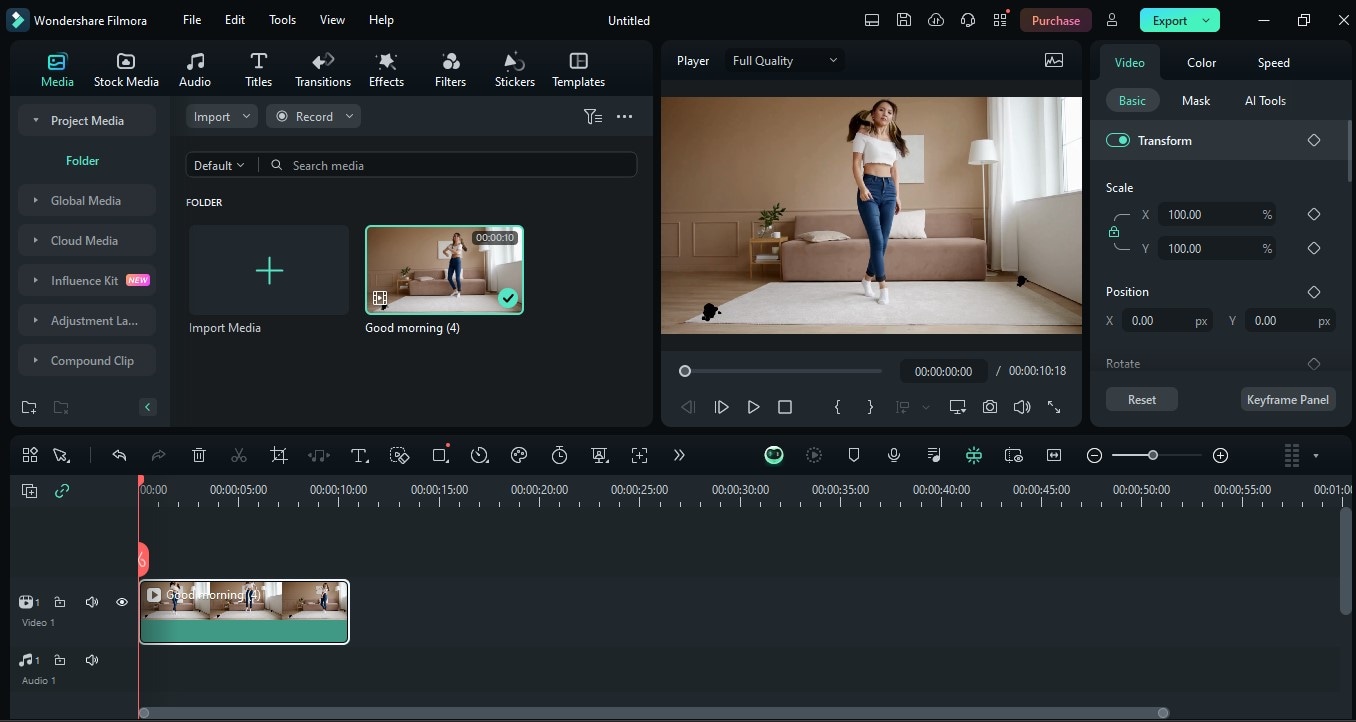
Step 3. Import the file you want to edit by going to the ‘Import’ button then choose your file. Drag the file to your timeline to start working.
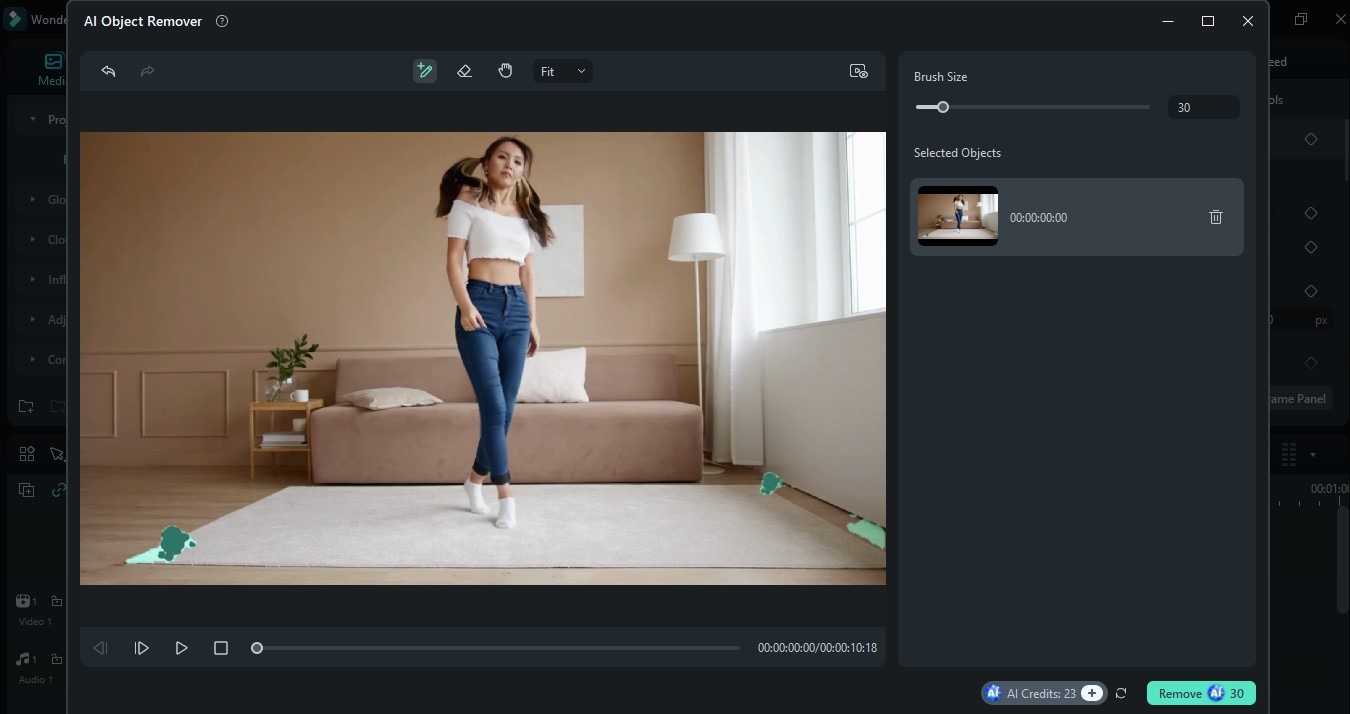
Step 4. Find and click the ‘AI Object Remover’ icon in your toolbar. This will open the ‘AI Object Remover’ window.
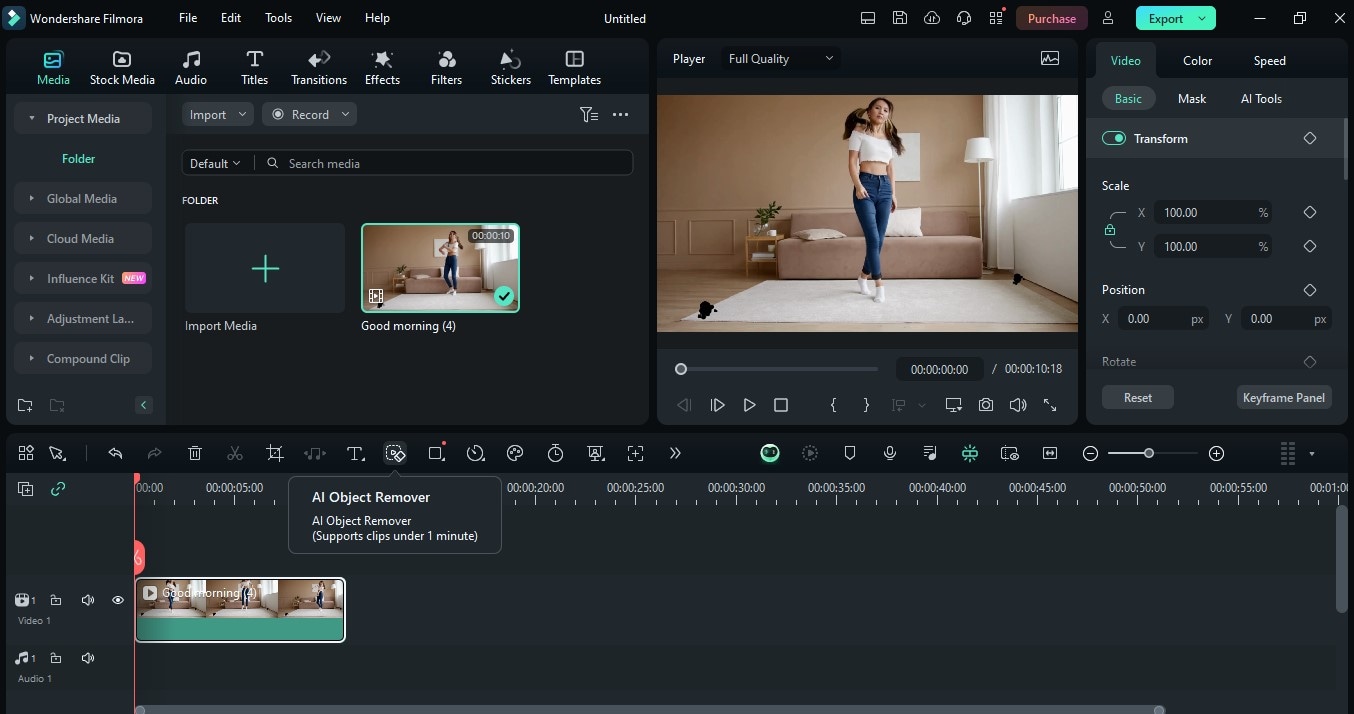
Note: If this tool is not yet in your toolbar, head over to ‘Custom Toolbar’ at the left side of the screen. Find the ‘AI Object Remover’ tool and drag it to the toolbar menu. Click ‘Save’ to implement the changes. Head back to the timeline and follow Step 3.

Step 5. In the ‘AI Object Remover’ window, select the areas you want to remove by using the ‘Smart Brush’ tool. You can also adjust the brush size according to your preference. Once your selection is done, click the ‘Remove’ button and let the tool do the rest of the work
Optional: You can continue to use other editing tools in Filmora and explore techniques. Head over to ‘Effects’ or ‘Filters’ to find unique transitions and elements that you can add to your video. Once done with your edits, go to ‘Export’, select your preferred output settings, and click the ‘Export’ button to save your project.
Part 3. Remove Marks from Video in Adobe Premier Pro [For Professionals]
When it comes to video editing, most professionals swear by Adobe Premier Pro as one of their most trusted tools. Not only does it have a powerful platform but it also has an array of sophisticated tools to fully equip your editing needs. While there are many benefits to using Premier Pro, here are some of the top ones:
- User-friendly and Customizable Platform: It has a seamlessly-designed interface, making it easy to transition from tool to the other. You can also customize your display, hide a toolbar, or enable other tools that you would mostly use and prefer to be within reach.
- Rich editing tools for advanced editing techniques which includes color correction, audio editing, and amazing video effects.
- Seamless and Convenient Integration with other Adobe Applications like After Effects
It’s also easy to remove dust from video or other elements in Premier Pro using the few steps below:
Step 1. Open your Premier Pro software and click on ‘New Project’.
Step 2. Double click on ‘Import Media to Start’ panel to import the video you want to edit. Then, drag it to the timeline to start editing.
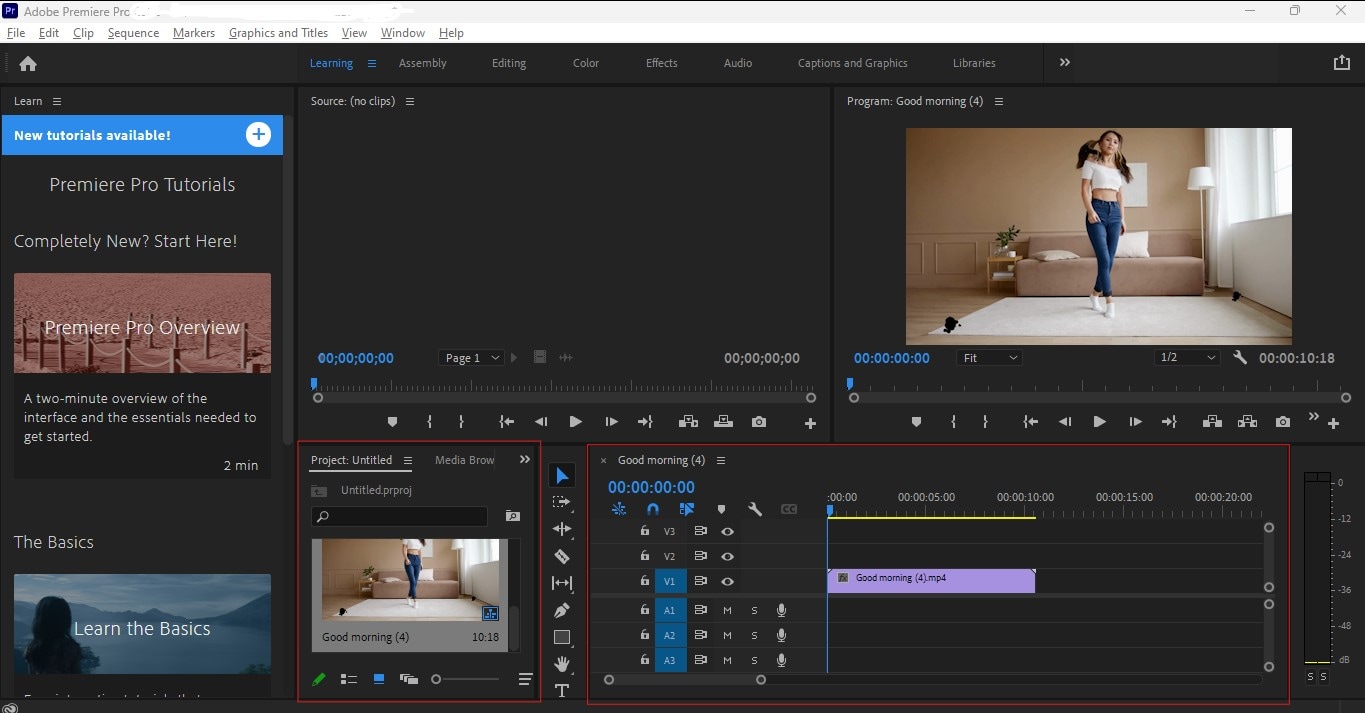
Step 3. Head over to ‘Effects’ and look for the ‘Dust & Scratches’ effect. Drag and place this on the video in your timeline.
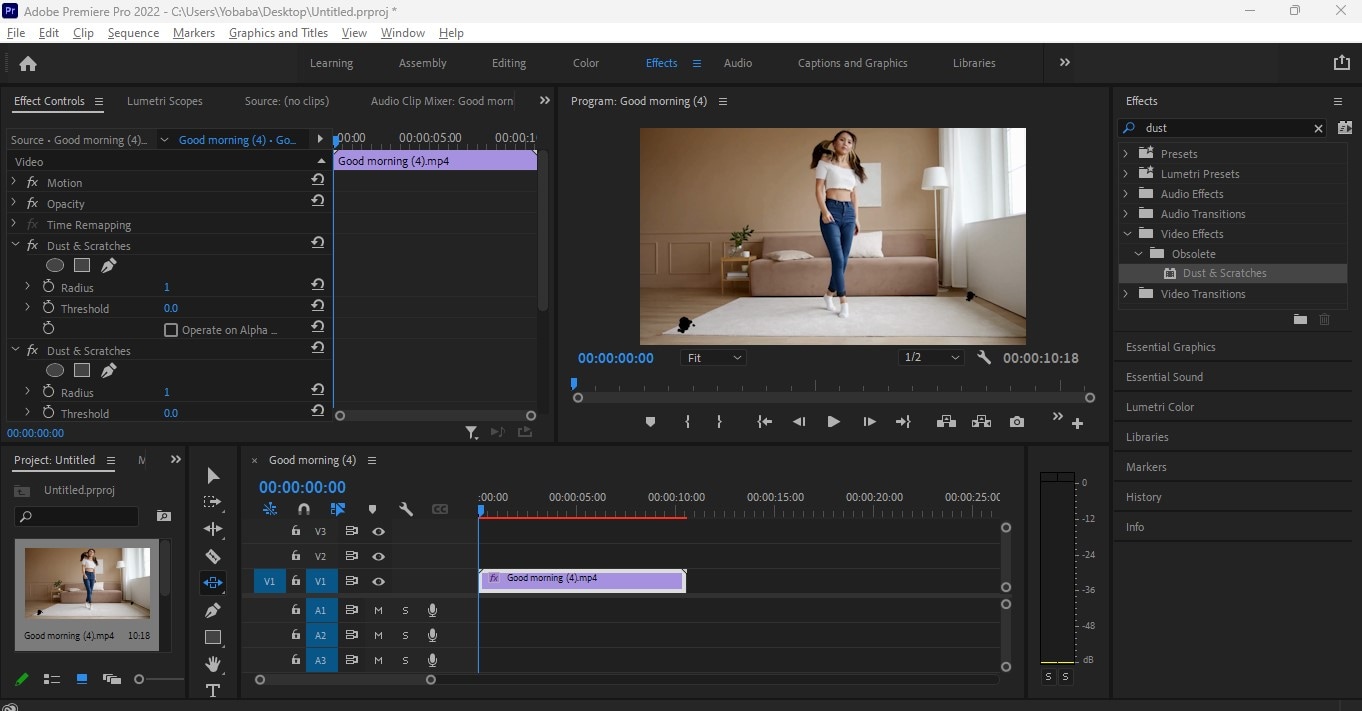
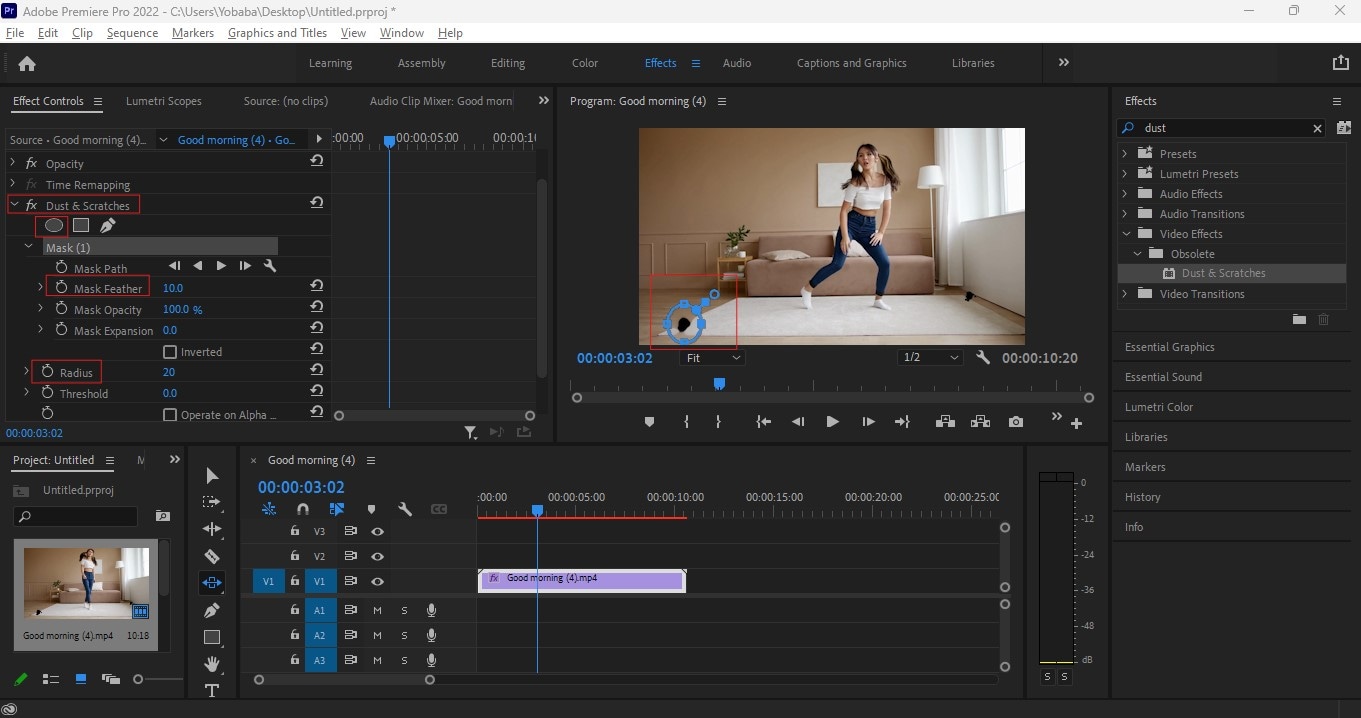
Step 4. On the ‘Effects Control’ panel, head over to ‘Dust & Scratches’ then click on ‘Create Ellipse Mask’ tool. Select the area you want to remove on the video and adjust the size of your mask. Go to ‘Radius’ to adjust the mask and blend it out with the ‘Mask Feather’. Adjust these two according to your preference until spot is removed.
You can save your file as a project if you want to work on it later on. You can also save the video by going to ‘File’ then ‘Export’.
Part 4. Tips for Preventing Marks in Future Videos
While these tools can effectively >remove marks from video>, they can still cost you additional time and effort in post-production. Ensuring you have less possibility of having unnecessary spots in your content before the editing phase is an efficient way to ensure a spot-free video. Here are some tips to achieve that:
- Do a thorough preparation and clean-up of your filming environment to minimize risks of dust and other unnecessary marks
- Conduct regular checks and maintenance on your equipment, such as:
- Cleaning your lenses and sensors
- Having a dry bag to avoid scenarios where rain, fog, or moist is present
- Storing your equipment in a designated area
- Using proper cleaning materials or enlisting help from a professional
Conclusion
Creating a professional look and eliminating distractions from your viewers are just two of the many benefits you can get from a clean, blemish-free video. Proactively, you can make this happen by conducting regular maintenance on your equipment and putting controls over your filming environment. In cases where it’s inevitable and thus necessary to remove dust from video or other unwanted elements, you can use Filmora or Adobe to do the work. While Adobe is a top-tier tool used by most professionals, Filmora also offers a wide range of comprehensive editing tools to make your video spot-free. With Filmora, you can be a beginner or a professional and still achieve the same high-quality results. Explore the rest of Filmora’s editing suite and let your creativity flourish!
