


 100% Security Verified | No Subscription Required | No Malware

Large files can slow down upload and download times. It can consume excessive storage and even create playback issues. It’s why managing video files can be a challenge. Are you looking to share videos online, save storage space, or improve streaming performance? If you’re wondering how to make a video file size smaller, you’re on the right page.
The guide introduces six effective methods for compressing videos without sacrificing quality. From adjusting the resolution to using advanced compression software, you’ll discover various techniques to suit your needs. Eager to learn how to decrease the size of a video? Let’s dive in and explore these methods in detail.

In this article
Part 1. Top 6 Methods To Reduce Video File Size
You need to reduce the size of video files for many reasons. It could be for online sharing, saving storage space, or improving streaming performance. There are two primary methods: lossy and lossless compression.
- Lossy compression reduces file size by removing some data, which can affect quality;
- Lossless compression retains all data, preserving quality.
Below are six effective methods to make a video file size smaller.
Method 1: Adjusting Resolution
Lowering the resolution of a video is one of the most straightforward ways to reduce its file size. For instance, you can change the resolution of your videos from 1080p to 720p. It can significantly decrease the file size without a noticeable drop in quality for most viewers. Many free video editing tools, such as HandBrake, allow you to adjust the resolution easily. Here’s how:
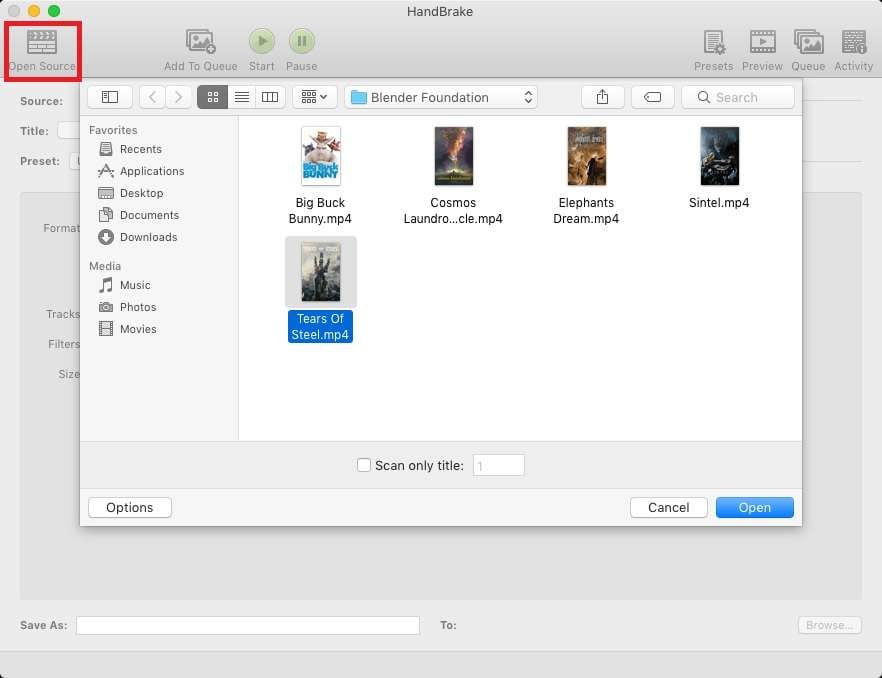
Step 1: Download and install HandBrake on your computer. Click the Open Source button to import your video file.
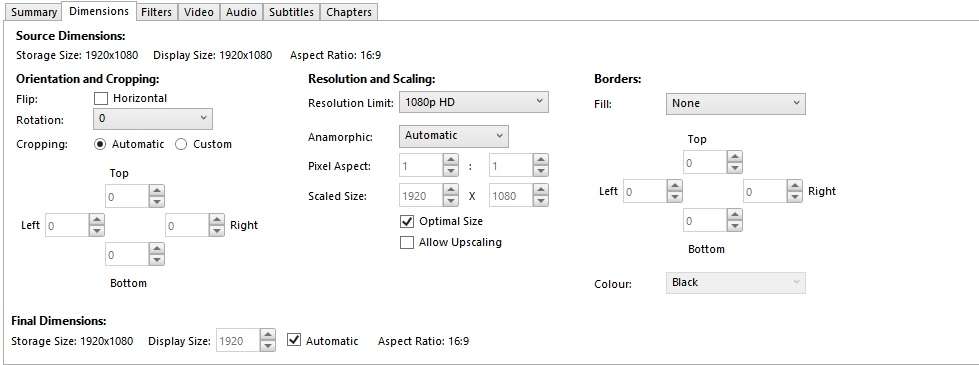
Step 2: Go to the Dimensions tab. Choose a lower resolution depending on your preferences. Adjust the Orientation and Cropping, Resolution and Scaling, and Borders.
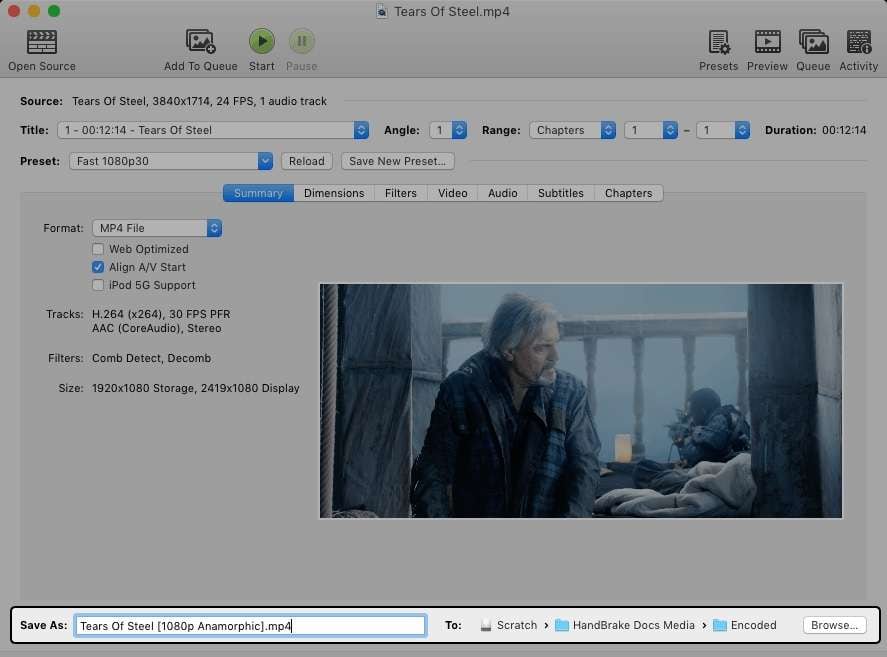
Step 3: Click Start, name your resized videos, and set a file path to save it at the bottom of the interface.
Method 2: Using Compression Software
Wondershare Filmora is an outstanding tool for video compression. It offers a robust Auto Compression feature that makes a video file smaller in seconds. It’s also an all-in-one video editor that supports various formats and resolution for social media and other platforms. Here’s a detailed look at how Filmora decreases the size of a video with ease:
- Auto compression by quality. Filmora’s new feature automatically adjusts the compression settings to maintain the best possible quality while reducing the file size.
- Auto compression by YouTube upload. This mode optimizes your video for YouTube. It ensures it meets the platform’s requirements with ease.
- All-in-one video editor. Filmora includes a wide range of editing tools, such as trimming, cutting, adding effects, and more.
- Multiple Format Support. Filmora supports various video formats. It’s perfect for different social media platforms and devices.
How To Make a Video Smaller in Size Using Filmora?
Here are the steps to decrease the size of your video automatically using the auto compression feature:
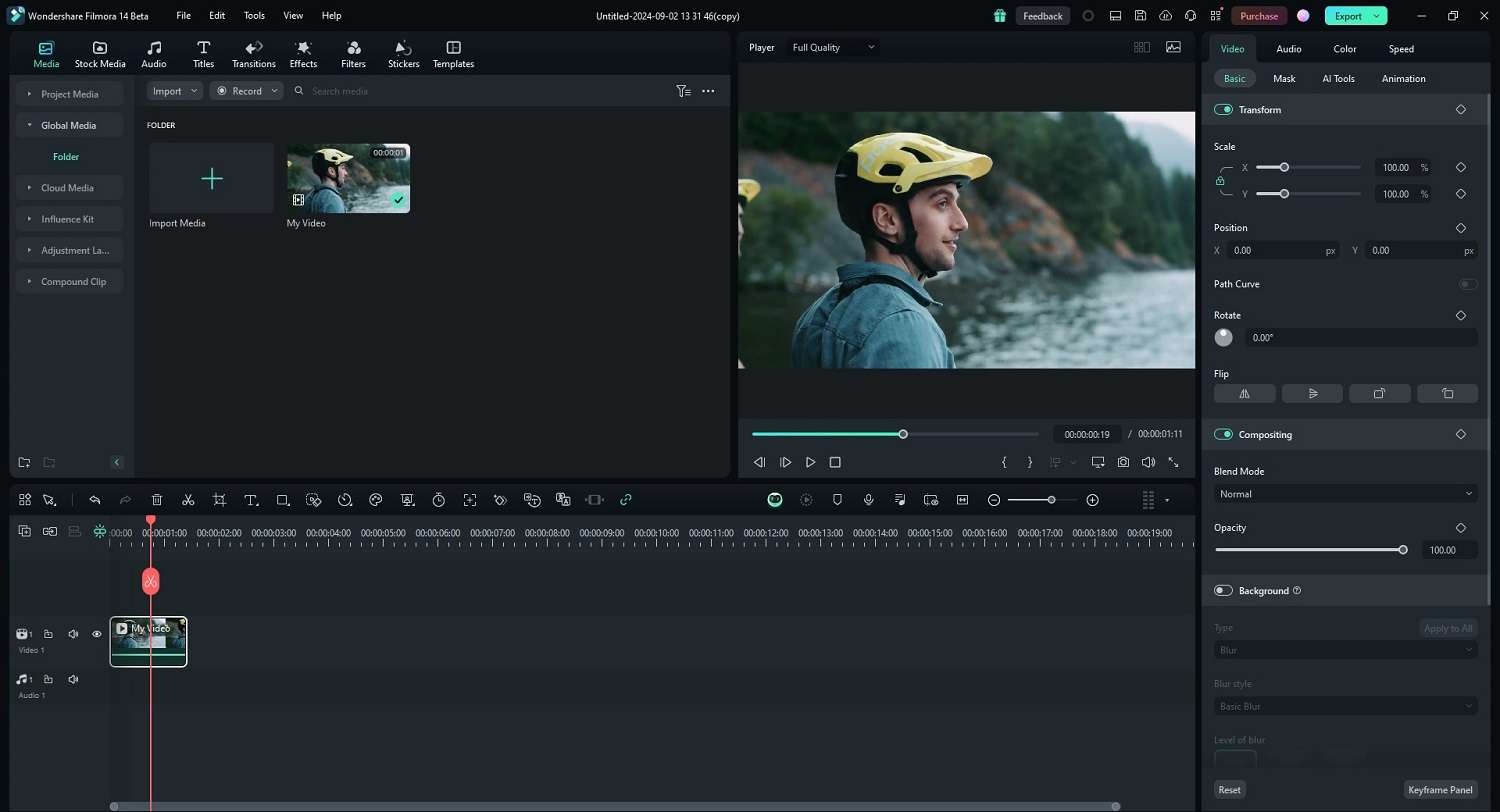
Step 1: Download and install Filmora on your computer. Next, login or register a Wondershare account. Create or open a new project. Import your video to the Media panel and drag it to the timeline.
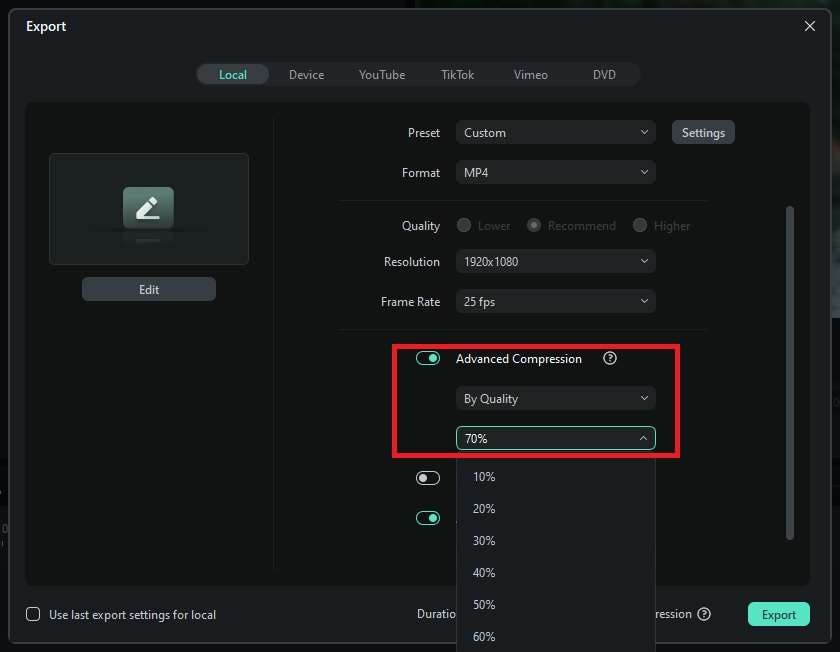
Step 2: Click the Export button and wait for the pop-up. From there, turn on Advanced Compression. If you choose By Quality, you can set the auto compression by percentage without any qualitu loss.
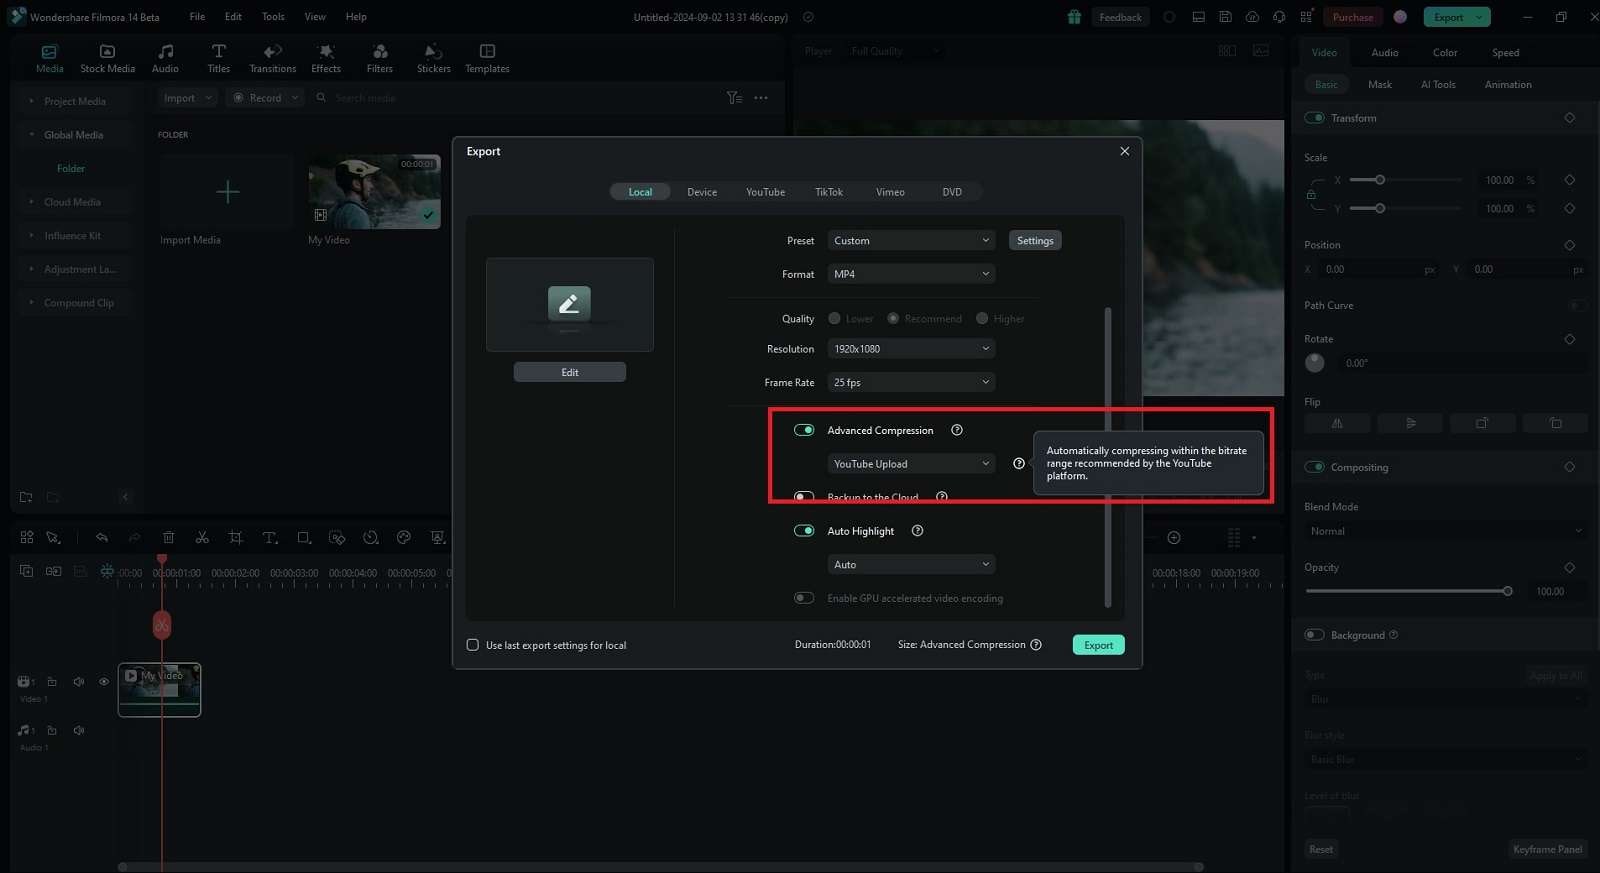
Step 3: If you choose YouTube Upload, your video will automatically compress within the bitrate range recommended by YouTube. When you’re done, click the Export button once again.
Method 3: Changing Bitrate
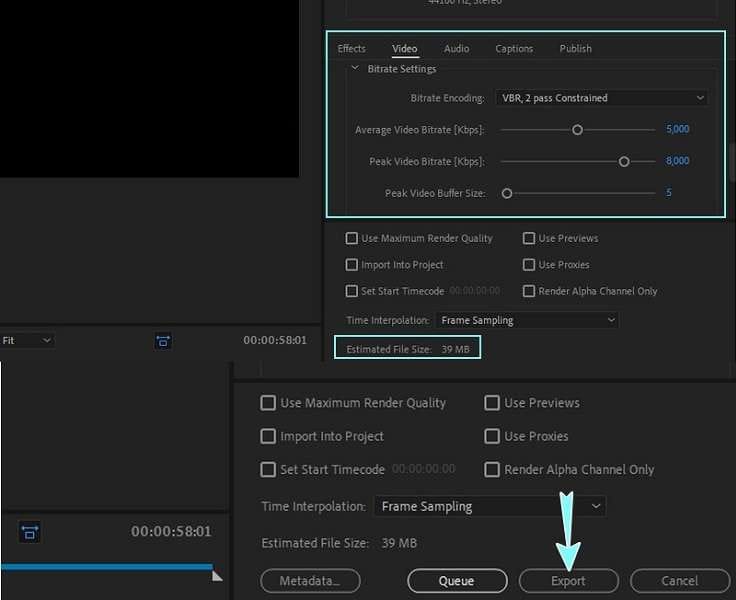
Bitrate refers to the amount of data processed per second in a video. Lowering the bitrate can reduce the file size but may impact the video quality. Tools like Adobe Premiere Pro offer options to adjust the bitrate during export. Here’s how:
Step 1: Download and install Premiere Pro on your computer. Import your video file into the project. Next, go to File > Export > Media.
Step 2: From the Export Settings window, go to the Video tab. Use the sliders to change the bitrate to lower the video size. Click the Export button once done.
Method 4: Using Efficient Codecs
Codecs are software tools that encode and decode video files. Some codecs are more efficient than others in compressing video files without compromising quality. H.264 and H.265 (HEVC) are popular codecs known for their efficient compression. Use either codec when saving your video files using your preferred editing software.
Method 5: Trimming and Cutting
Removing unnecessary parts of your video can significantly reduce its size. Trimming and cutting out unwanted sections can be done using tools like Filmora or iMovie. You can even trim and cut videos using your smartphone to make a video file size smaller. Here’s how:
Step 1: Open the video on your smartphone and go to its editing options. Choose the Cropping tool to begin.
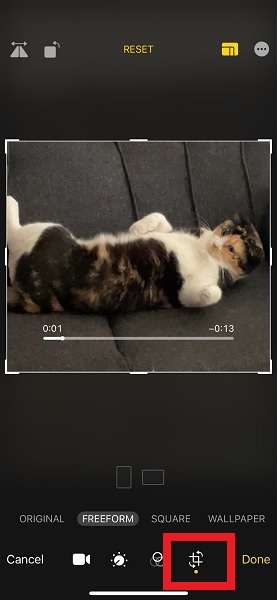
Step 2: Adjust the crop area until you’re satisfied with the result. Preview the cropped video to ensure the content is visually appealing. When done, save the cropped video.

Method 6: Converting Video Format
Some video formats are more efficient at compressing files than others. Converting your video to a format like MP4 can reduce its size without a significant loss in quality. Let’s use Filmora once again as an example:
Step 1: Launch Filmora and add your video file to the timeline.
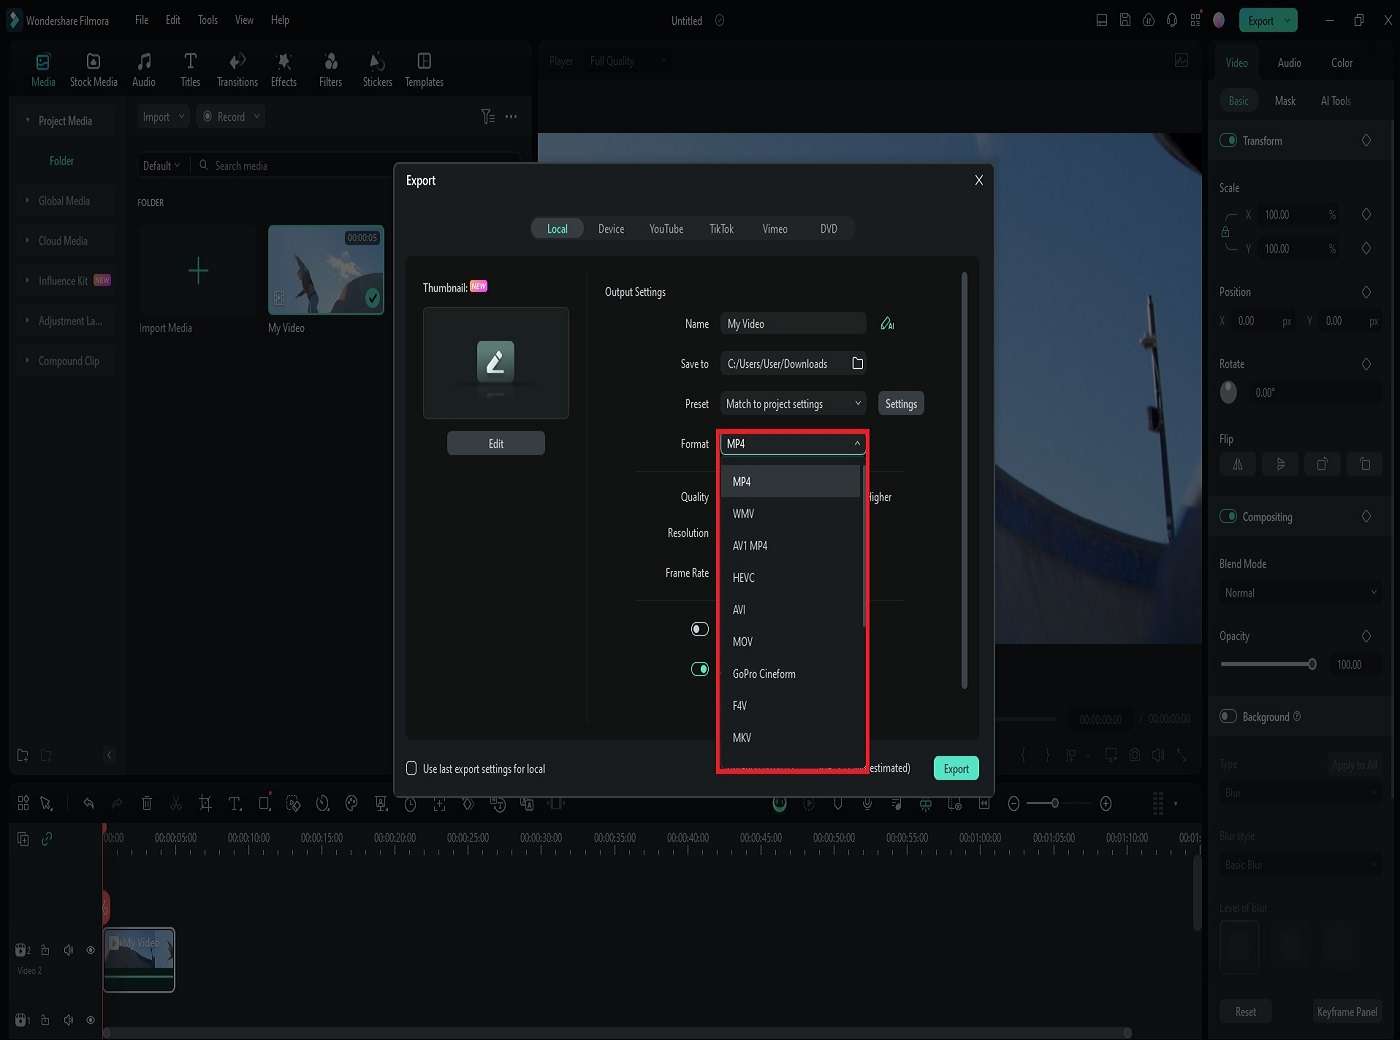
Step 2: Click the Export button and choose an output format. Save your work once done.
Pros and Cons of Each Method
Here are the pros and cons of each method:
| Method | Pros | Cons |
| Adjusting Resolution | Simple, effective, and fast | May reduce visual quality |
| Using Compression Software | Easy to use, versatile features, more editing options | May need a subscription to access full features |
| Changing Bitrate | Significant size reduction | Can affect video quality |
| Using Efficient Codecs | Highly efficient compression | May not be supported by all devices |
| Trimming and Cutting | Removes unwanted content | May remove important parts of the video |
| Converting Video Format | Often reduces size with minimal quality loss | May need extra software |
By exploring these methods, you can find the most suitable way to reduce your video file sizes. Feel free to experiment with each way to maintain the best possible quality of your videos.
Part 2. Best Practices When Decreasing the Size of Videos
When it comes to decreasing the size of your video files, there’s always the right way to do it. Following best practices can help you achieve the best possible file size and video quality. Here are some essential tips to keep in mind:
- Start with high-quality material
High-quality source material compresses more efficiently and retains better quality after reduction. Ensure your initial recordings or source files are in the highest quality possible. It allows you to get the best results after compression.
- Use the right settings
Too much compression can degrade video quality. Meanwhile, too little won’t reduce the file size significantly. Experiment with different settings to find the best quality with a smaller file size. Pay attention to resolution, bitrate, and codec choices. These factors influence the final output.
- Experiment and test
Every video is different, and what works for one may not work for another. Don’t be afraid to experiment with various compression techniques and settings.
- Backup original files
Always keep an uncompressed version of your original video files. This ensures that you have a high-quality source in the future. Backup your originals on external drives or cloud storage to safeguard against data loss.
- Use the latest tools and techniques
Video compression technology is always evolving. Stay updated with the latest tools like Filmora. It offers advanced features to provide better compression than the rest.
- Consider the final use
Think about how the compressed video will be used. Different platforms may have varying requirements for video quality and file size. For example, videos intended for social media might be fine with higher compression. Those for professional presentations, meanwhile, might need better quality. Tailor your approach to the video’s final use for the best results.
Conclusion
Reducing video file sizes is crucial for various purposes. Now that you know how to make a video file size smaller, you’re one step ahead. Use reliable compression software like Filmora. Having a powerful tool for all your editing needs can help you get optimal results. Still, each method offers unique advantages. Read their pros and cons and choose your specific needs best.
Still searching for “how do I make a video smaller in size” on the internet? Filmora’s auto-compression tool makes this process simple and effective. Explore the tool to keep your videos high-quality and manageable.
