100% Security Verified | No Subscription Required | No Malware

At present, there is no doubt that smartphones are the most powerful equipment for content creation. You can do almost anything so long as your mobile device is capable of running a wide range of applications. Can you edit and render a variety of videos using your smartphone? The short answer is absolutely yes. There are lots of mobile video editors that can help you a lot in this regard. One of which is LumaFusion. It is a fully functional mobile app that can support a variety of video editing requirements. Of course, you can also use it to add some LUTs if you want to. LumaFusion color grading is one of the best out there. Just familiarize yourself with its primary functions and dashboard navigation to get the best results.
In this article, we will provide a short guide on how to apply LumaFusion LUTs in a snap. We will also discuss some tips that can help you make the most of them. Continue reading below to learn more.
In this article
Is it Possible to Apply LumaFusion LUTs Using Wondershare Filmora?
The LumaFusion video editing app on mobile devices already offers several LUT selections. You can access them within the platform and apply your preferred option to your videos. What if you don’t have access to LumaFusion? Can you import and apply the LumaFusion LUTs using other tools? Of course, it is possible. LUT files nowadays have become a lot more universal in terms of compatibility. So long as the format is supported, you can easily apply them regardless of your software. In this regard, Wondershare Filmora can be of great help to you. This powerful video editor is designed to run various types of LUT files and render stunning outputs later on. Do you want to give it a shot? If that is so, check out the details below to learn more.

Key Features
Wondershare Filmora is packed with useful features that can help you apply LumaFusion LUTs and produce stunning outputs. To get you started, check out the list below and familiarize yourself with each of them.
- 3D LUT: It allows you to apply LUTs to your video clips. By default, Wondershare Filmora offers several LUT selections. If you find one that looks similar to LumaFusion LUTs, you can definitely use it in your project. Meanwhile, you can also import your desired LumaFusion LUTs into the platform and apply them to your videos.
- Basic and advanced video editing: It is equipped with tons of features that can help you facilitate a variety of video editing techniques in a snap.
- Numerous creative assets: It has a huge library of creative resources that you can access within the platform. Among the assets you can use from there are stock images, video clips, audio bits, effects, filters, and many others.
- Custom-tailored video templates: It offers tons of ready-made video templates in case you don’t wish to start from scratch. Just use the customization options within the platform to make your desired adjustments.
- Artificial intelligence: It provides access to a number of useful tools powered by artificial intelligence. To name a few, these are AI Image-To-Video, AI Video Denoiser, AI Video Object Remover, AI Music Generator, and more.
- Flexible Video Export Options: It allows you to render and export videos in numerous formats. Among the supported file types are MP4, WMV, AVI, MOV, F4V, MKV, 3GP, MPEG-2, WEBM, GIF, and MP3.
Step-By-Step Guide
Wondershare Filmora is not that complicated to use. Its responsive and intuitive interface can certainly help you import LumaFusion LUTs in a snap. Do you wish to try it on your end? If that is so, then check out the tutorial written below. Read the instructions very well and follow the indicated steps accordingly.
Step 1: Download the Wondershare Filmora application from its official website. Right after that, install it on your computer.
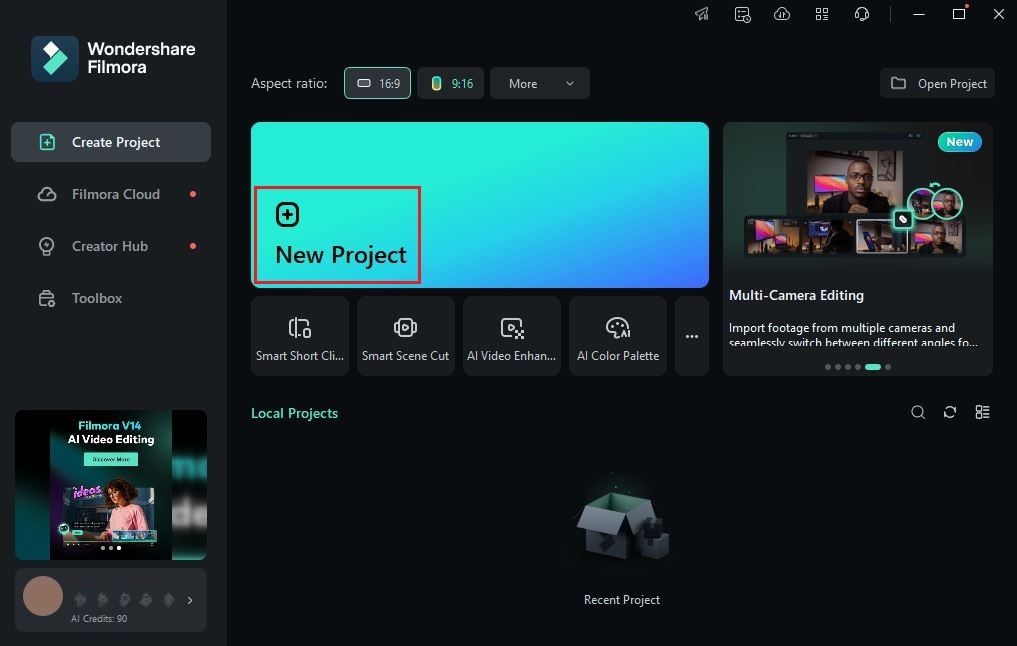
Step 2: Run the newly installed video editing software on your desktop afterward. Once it loads up completely, head over to the main dashboard and click New Project to start editing. Alternatively, scroll down to the Local Projects section and open an existing session if there is any.
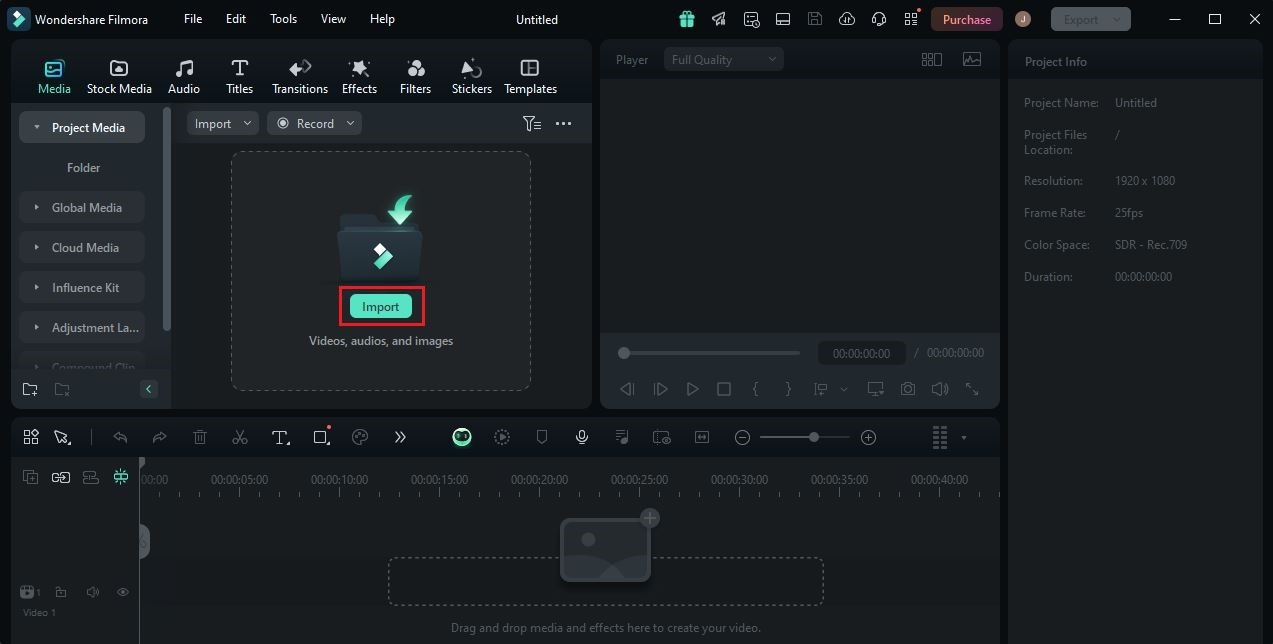
Step 3: Following that, go to the Elements Panel and tap Import under the Media tab. Select all the files you are going to use and upload them to the platform. Once completed, grab the files one by one and drag them from the Elements Panel to the Editor Timeline.
Step 4: At this point, you may now proceed with the actual video editing. Start by finalizing the sequence of the assets in the Editor Timeline. At the same time, make all the necessary adjustments to avoid unwanted inconveniences later on. For instance, you may trim unnecessary video parts, fix audio timing, add visual effects, and the like.
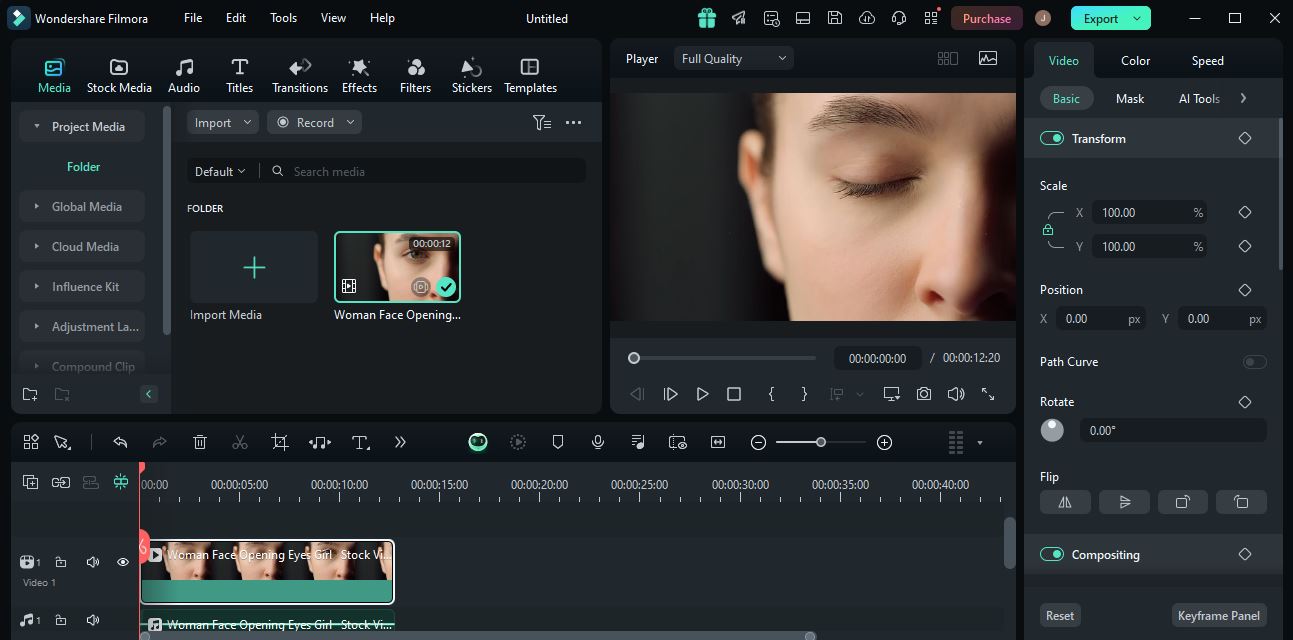
Step 5: Once done, it’s time to apply the LumaFusion LUTs to your video content. Don’t sweat it. The process is a piece of cake. To get started, head back to the Editor Timeline and select a video clip.
Step 6: A new panel will then open on the right-side corner. From there, go to the Color tab to access the video color settings. Go over the options under Basic and find LUT. Switch on the toggle button next to it to enable the LUT feature. If you wish to use the default LUT selections of Wondershare Filmora, click the LUT Preset menu and choose your preferred option. On the other hand, tap the Add button beside it if you want to import some free LumaFusion LUTs from external sources. The effect will be applied immediately as soon as you specify your final choice.
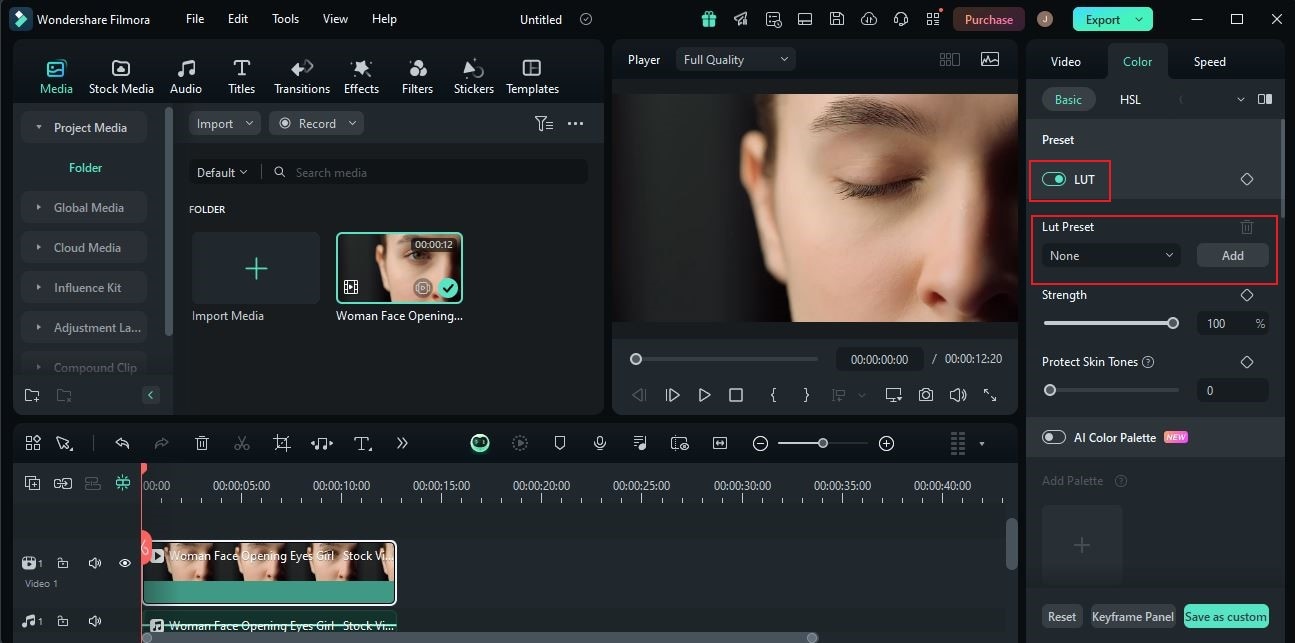
Step 7: Wondershare Filmora offers a couple of options to help you customize the LUT outputs further. To do that, all you have to do is drag the Strength and Protect Skin Tones sliders to your desired level or enter a specific percentage into their respective input fields.

Step 8: Finally, play and review the output. Check if the free LUTs for LumaFusion give the video quality you wish to achieve. If you’re satisfied with the result, click the Export button right above the Preview Panel to render the video and save a copy to your computer. Otherwise, continue making changes until you get a desirable outcome that suits your specific preferences.
How to Use and Apply LUTs in LumaFusion?
In a nutshell, LumaFusion is a professional video editor that runs on mobile devices. It is filled with tons of advanced content-creation tools that can be used to produce simple and complex videos. Don’t worry. While LumaFusion is designed for heavy video-editing tasks, its sleek and intuitive interface remains friendly for everyone. Everything is specifically arranged in a manner that makes you comfortable navigating around. For instance, there is a preview panel, timeline board, and control dashboard placed within your reach. You just have to select the option you want to use and configure it according to your liking. In terms of options, LumaFusion provides a lot that you can specifically use for color settings. Yes. LumaFusion color grading is one of the best out there. Do you want to try applying some LumaFusion LUTs on the platform? If so, you don’t have to worry a lot. It’s indeed a piece of cake. To help you get started, read the details below to learn more.
Main Features of LumaFusion
Familiarize yourself with the main features of the LumaFusion video editor. Check out the list below and read the items very well.
- Direct export options: Aside from saving your final output to your device, LumaFusion also allows you to render the video and publish it directly online. At present, this export feature supports two video-streaming apps, namely YouTube and Vimeo.
- Convenient color correction: It allows you to correct certain color issues with simple adjustments. The available color modification options can be easily adjusted in a snap by simply moving the sliders.
- LUTs: You’re given several selections of LUTs for LumaFusion. You can use any of them if you want to. Meanwhile, you may also import some free LumaFusion LUTs into the platform and apply them to your videos.
- Hands-free audio configuration: It analyzes your audio assets and automatically adjusts the volume levels. You just have to specify the Master and the Auto tracks you wish to use.
Short Tutorial
It only takes a few clicks to use LUTs in LumaFusion. To get you started, check out the tutorial below and follow the instructions accordingly.
Step 1: Launch the LumaFusion app on your mobile device. Right after, add the video clips and other assets you wish to use.
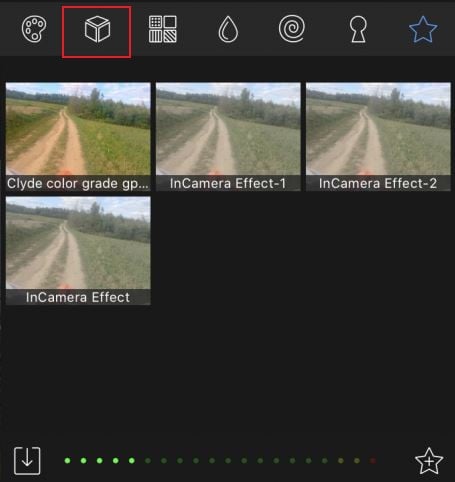
Step 2: Select a video clip afterward and then access the clip settings on the right-side corner. From there, click the LUT tab, which is represented by a cube icon. There are several LumaFusion LUTs by default. You can use any of them if you want to. As for customization, simply drag the Blend slider to make your desired adjustments.
Step 3: On the one hand, you may also import some free LumaFusion LUTs from your local storage. To do that, click the Import icon right below the LUT selections. Select the source of the free LumaFusion LUTs you wish to import. For instance, you can select Box, Dropbox, Google Drive, OneDrive, Files app, or others.
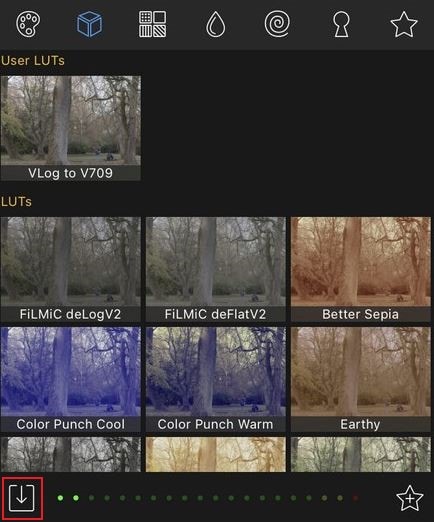
Step 4: The selected LUTs will be then imported and displayed under the User LUTs section. At this point, choose the imported LumaFusion LUTs you wish to use from the given options. The effect will be then applied immediately as soon as you specify your choice.
Important Reminders When Applying LumaFusion LUTs
Whether you’re using an imported or a default LUT for LumaFusion, the process is very easy. It will only take you a click or two to complete such configurations. However, the result may vary from one user to another. It relies heavily on your overall calibrations. That’s why you should adjust them very well. Don’t worry. There are some tips that can help you make the right configuration. Check out the list below and keep them all in mind when editing videos on LumaFusion.

- Check the white balance of your video clips and adjust them accordingly. Make sure that it perfectly blends with the color tone and temperature of your LumaFusion LUTs.
- It’s best to keep the exposure at a balanced level. Such configurations work well on all types of LumaFusion LUTs. However, you may underexpose or overexpose a little if the effect looks good on your selected LUT. Just play around it until you achieve a stunning result.
- After applying LumaFusion LUTs, don’t forget to make other adjustments. Reconfiguration might be needed to ensure that the LumaFusion LUTs fit well with your video.
Conclusion
It’s true to say that you can now do almost anything with nothing but a smartphone. These modern mobile devices are now capable of handling various types of tasks with ease and convenience. As for video editing, you just have to install apps like LumaFusion to access professional tools and produce stunning outputs. Let’s say you wish to improve the color register of your content. Well, it’s very easy with the aid of LumaFusion’s color grading features. You can either import some free LumaFusion LUTs from external sources or use its default selections. In the same way, other video editing apps also support such configurations in case you wish to explore other options. Wondershare Filmora can do that, too. It’s a powerful video editing software for mobile, desktop, and the web that provides tons of advanced tools and resources. Of course. That includes importing and applying LumaFusion LUTs. Download this application on your end and make the most of the benefits it has to offer.